9 minute read
Remote access a Raspberry Pi


Remote access your Raspberry Pi securely
Lucy Hattersley
Advertisement
Lucy is editor of The MagPi and has worked remotely for years. She has a Raspberry Pi ready to be connected to from anywhere in the world.
@lucyhattersley
Use a secure service to gain remote access to your Raspberry Pi
The small footprint and low energy demands of Raspberry Pi make it ideal for remote deployment, and accessing Raspberry Pi from another computer is a common user request.
There are many different solutions for remote access to Raspberry Pi. The most common is to use one of two techniques: SSH (magpi.cc/ssh) and VNC (magpi.cc/vnc).
SSH and VNC involve opening a port on Raspberry Pi (VNC uses port 5900+N and SSH uses port 22). This potentially exposes your Raspberry Pi. Hackers actively look for Raspberry Pi devices with these open ports and default passwords. This is why you must change your password when turning on VNC (magpi.cc/security).
Some people take things further and use a third-party service to help protect their Raspberry Pi. In this tutorial, we’re taking a look at remote.it (magpi.cc/remoteit) to set up a work network using Raspberry Pi as a remote access gateway.
With remote.it, you can access a Raspberry Pi remotely without port forwarding. You do this by accessing the remote.it server as a proxy, or by using remote.it’s software to form a peer-topeer network. Remote.it claims this is a safer way to set up a gateway than a traditional VPN (magpi.cc/vpnhackers).
01 Create an account To connect to your Raspberry Pi remotely you’ll need to set up an account. Open the web browser and head to https://remote.it. Click on ‘Sign up’ and enter your email address. You will
You’ll Need
> Raspberry Pi
> remote.it account
> Raspberry Pi OS
> VNC Viewer
magpi.cc/vncviewer
Use the http://find. remote.it webpage to locate your Raspberry Pi on the network and add it to your remote.it account
The remote.it software has formed a connection with our Raspberry Pi using VNC. The localhost:33003 address is used to point VNC Viewer to the Raspberry Pi connection
be emailed a verification code. Enter this code and pick (and confirm) a password. Make sure you choose a safe password (read this How To Geek article: magpi.cc/strongpasswd).
02 Turn on SSH and VNC To connect remotely, SSH and VNC must be activated on Raspberry Pi.
Click on the main menu and choose Preferences > Raspberry Pi Configuration. Choose the Interfaces tab and set both SSH and VNC to Enabled.
The VNC icon appears in the menu bar. Make sure you are not using the default password. (Choose the System tab in Raspberry Pi Configuration and click Change Password.) See the Raspberry Pi documentation ‘Securing your Raspberry Pi’ article for more information on keeping your computer safe: magpi.cc/security.
03 Update and install Make sure your Raspberry Pi is connected to the internet (using wireless LAN or an Ethernet cable). Open a Terminal window and enter the following commands:
sudo apt update sudo apt install remoteit
Here we are connected to Raspberry Pi using a secure peer-to-peer network. Only the connection information runs through remote.it’s service

Alert! Privacy
Remote access services act as a network transfer, and data can pass through a third-party system. Typically, services don’t inspect the data of their customers, but some reserve the right to do so. Others place limitations on the type of data that you are allowed to use on the service (usually with regards to their local law enforcement). Read the terms and conditions carefully. magpi.cc/remoteterms
When the packages are installed, the Terminal outputs the configuration information:
Continue your device configuration at http://find.remote.it or http://raspberrypi.local:29999 or http://192.168.0.41:29999
The IP (internet protocol) address will be unique to your network.
04 Register the Raspberry Pi Open the web browser on your Raspberry Pi and navigate to http://find.remote.it. The window will search for devices running remote.it software (including your Raspberry Pi). When your Raspberry Pi is found, the screen will display ‘Unregistered device’ along with the gateway details and IP address. (If this approach does not work, try one of the other two URLs listed in the configuration information in Step 3). Click on Register to add your Raspberry Pi to remote.it. You will be asked to enter the Email and Password for your remote.it account (as created in Step 1).
Register the SSH and VNC connections from Raspberry Pi OS with your remote.it account
Top Tip
Use a prepared OS image
Remote.it offers a preconfigured software image that has all the required software and settings installed.
remote.it/ downloads
The Name field displays ‘raspberrypi’ (you can change the name to something else if you prefer). The Services window displays the three default services: ssh, vnc, and remoteit Admin Panel. Click Register again to add Raspberry Pi to your remote.it account.
05 Start a connection You now connect to Raspberry Pi via remote.it. There are two approaches: via a web service, or using remote.it’s dedicated software.
First, let’s look at the web service (magpi.cc/remoteweb). This provides a link to a proxy connection, and all data passes through one of remote.it’s proxy servers.
Open a web browser on your other computer and navigate to app.remote.it (enter your remote.it login credentials).
Click Connect and choose ‘Raspberry Pi – VNC’. The ‘VNC – Connection’ window appears, displaying host and port information.
06 Connect via VNC Viewer Open your VNC software (we’re using VNC Viewer: magpi.cc/vncviewer) and choose File > New connection. Cut and paste the combined proxy and port information into the VNC server field. Ours looks like this: proxy50.rt3.io:31249.

Double-click the icon and click Continue at the alert window. Enter ‘pi’ as the username and your Raspberry Pi OS password (from Step 2). Click OK to access the Raspberry Pi OS desktop remotely.
07 Connect via app The drawback to the web service is that all your data passes through a proxy computer. For a more private connection, the remote.it app for Windows and macOS enables you to form a peerto-peer (P2P) connection.
Data does not pass through remote.it servers (only the connection information), the data throughput is faster so the screen response time is better, and the connection will stay active as long as both devices remain connected. Finally, the URL remains the same and can be bookmarked (unlike the proxy connection which needs to be re-entered into VNC Viewer whenever you start the connection).
To create the P2P connection, you need to download remote.it’s desktop software. Click on ‘Get Desktop app’ from the app.remote.it website (or visit remote.it/downloads) and click Download for Windows (or macOS, depending on your computer). Double-click the install file and follow the installation instructions. Open the remote.it software. You may see ‘We need to install or update our service in order to maintain background connections.’ Click on Install Service
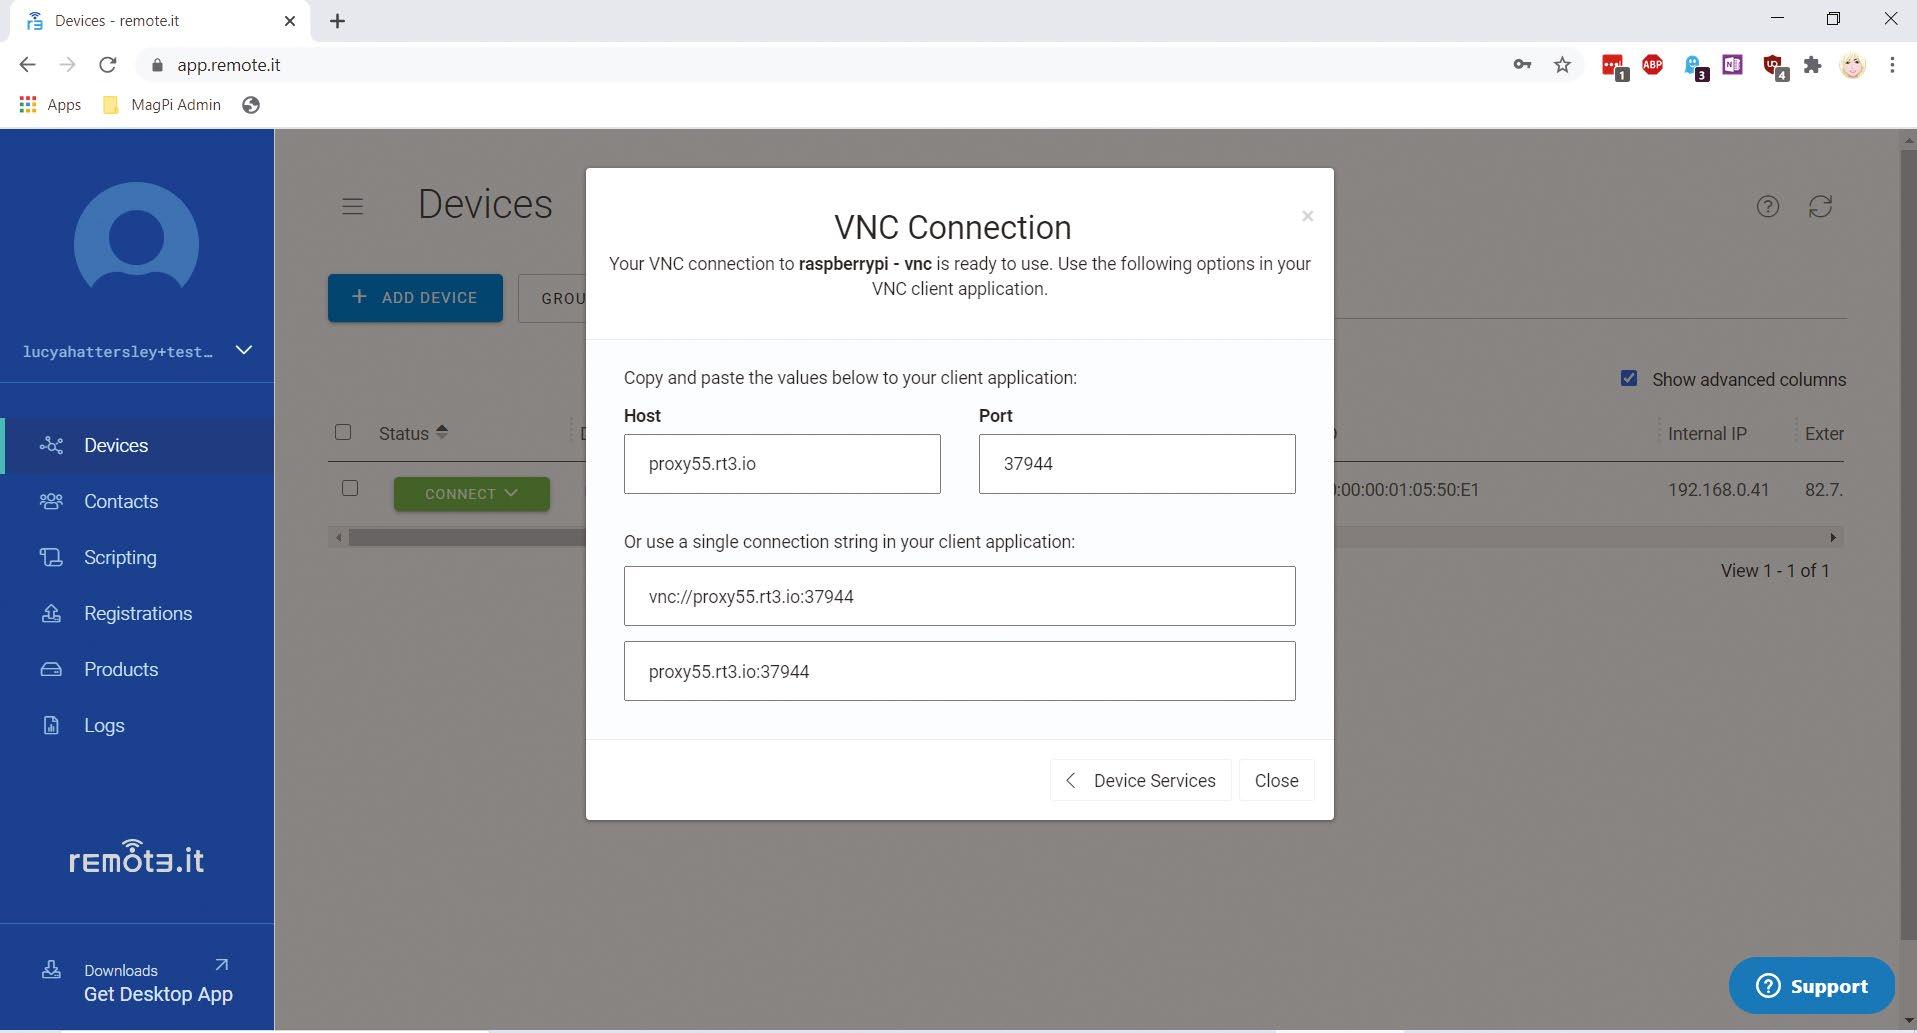
The remote.it website is used to open a proxy connection (with data routed through remote.it’s servers)
and Yes to the User Account Control alert. Enter your remote.it account credentials into the app to sign in.
Under Devices, you will see your Raspberry Pi. Click it and click Connect next to VNC. The VNC icon will turn blue once connected.
You can launch VNC Viewer directly from the app (using the launch icon) or copy and paste the connection information into VNC Viewer (as in the previous step).
08 Cloaking your port You can access Raspberry Pi remotely using remote.it. However, your VNC port is now open and listening. You can check this with the lsof (list of files) command:
sudo lsof -i -P -n | grep LISTEN
As well as the remote.it connection, it will show vncserver running on port 5900. The solution to this is to use a script, provided by remote.it, that cloaks this port. With the cloaking script active, people cannot scan your Raspberry Pi to find the open port because the port will not respond to incoming traffic. Meanwhile, remote.it can get through because remote.it software establishes the connection.
09 Upload scripts You can use script remote.it with any language that runs on your Raspberry Pi. It’s best to practise with a test script. Head to the Uploading a Device Script page on remote.it’s website (magpi.cc/remotescripting) and click show-device-info.sh to download the file.
In the app.remote.it web interface, choose Scripting and click Upload. Change the option to ‘Executable script or program’ and click ‘Choose file’. Use the File Explorer window to find the file and click Upload.
10 Running the script Scripts are run from the Devices window. Place a tick in the checkbox next to your Raspberry
Top Tip
Create scripts
The remote.it service supports scripts in any language your Raspberry Pi system supports. The script is run just like any other executable on your machine.
magpi.cc/ remotescripting
The cloaking script prevents VNC and SSH ports responding to requests (other than from remote.it)
Top Tip
Proxy vs peerto-peer
Remote.it explains the difference between its proxy and peer-to-peer connections in this document:
magpi.cc/ remotep2p

Pi and put a check next to ‘Show advanced columns’. (This will display the StatusA, StatusB, StatusC, and extra columns used by the test script). Click Actions > Execute Script; highlight show-device-info.sh and click Next.
Highlight the ‘Check to allow all devices to update the status columns during Job execution’ box. (This option displays information in the columns as the script runs.)
11 The cloaking script Now download the cloak-vnc.sh script from remote.it’s GitHub page (magpi.cc/remotecloak). Upload it in the same manner as the show-deviceinfo.sh script. And run it from the Devices window.
This time you’ll get two options in the Bulk Execution window: ‘Cloak Service’ and ‘Uncloak Service’. Highlight ‘Cloak Service’ and click Finish and Submit. Scripts can take some while to run. Choose Scripting in the sidebar and you will see the script progress. You can also cancel and delete scripts from this window.
On average it takes three minutes for the job status to update. So your script may actually complete and update the cells before the Job Status catches up. It should respond within three to four minutes.
12 Cloaked and connected Now connect to your Raspberry Pi via the remote.it app for a secure connection. Your port will be cloaked on Raspberry Pi and because you’re connecting via remote.it’s service, you will not be sharing your IP and port information publicly. And the P2P service ensures that your data is not flowing through remote.it’s service.