

Northern Lights Photography Guide
© Pete RamsdenNorthern Lights Photography Guide

The northern lights are some of the most captivating photographic subjects on the planet. Well, technically, they’re not on this planet at all—perhaps that’s why they’re so mesmerizing and enthralling to both look at and photograph!
For most photographers, getting a chance to capture the northern lights is a life goal, and Churchill, Manitoba, is a premier destination for aurora photography. Our photo adventures to this remote subarctic outpost produce some of the absolute highest chances of seeing and photographing the northern lights.
This guide is meant to be a complete reference for all aurora photography, particularly in Churchill’s unique environment, and I hope it helps you photograph the sensational northern lights photos you’ve always dreamt of.
Inside, You’ll Learn
• Everything you need to know to ensure you return with wallworthy photos of this spectacular natural phenomenon
• Shutter speed and lighting considerations
• Pro tips on how to compose the perfect northern lights shot
• What gear to pack
2 nathab.com/northernlights • 800-543-8917 CONTENTS
© Court Whelan
 Author: Court Whelan, Ph.D.
Spending much of his youth outdoors fostering a strong love and appreciation for wildlife, Court got his bachelor’s, master’s and Ph.D. degrees in conservation biology, entomology, and ecotourism.
Today, Court continues to guide the world’s best nature expeditions with Natural Habitat Adventures and World Wildlife Fund, while also leading Nat Hab’s sustainability efforts, elevating it to become one of the most sustainable and eco-conscious travel enterprises in the world. From ensuring complete carbon neutrality to guiding the world’s first zero waste adventure, saving the world via travel is at the center of Court’s career, as well as day-to-day purview.
He is also a professional nature and wildlife photographer, continuing to guide photo expeditions across the globe. With a preference for bold, dramatic colors, and highlighting wildlife in their natural habitat, Court thrives on capturing the extraordinary. The only thing he enjoys more than taking these photos is teaching his techniques to others in order to perpetuate, preserve and protect nature’s beauty for all to enjoy.
How to Use
This e-book:
• The Contents listed above are live links. Click to jump to the desired page.
• Click “CONTENTS” in the lower right corner to return to this Contents page.
• Other links throughout the e-book are shown in blue, underlined text.
4 CHAPTER 1 Camera Settings 14 CHAPTER 2 Focusing and Foreground 22 CHAPTER 3 What Camera to Use 28 CHAPTER
What Lenses to Use 36 CHAPTER
Prevent
Cold
What’s
Photography
Contents
4
5
Camera Fog in
Environments 42 CHAPTER 6
in My Camera Bag? 52 APPENDIX
Cheat Sheet
3 nathab.com/northernlights • 800-543-8917 CONTENTS

CAMERA SETTINGS
CHAPTER
1
4 nathab.com/northernlights • 800-543-8917 CONTENTS
© Eddy Savage
Before departing on a Northern Lights Photo Adventure, it’s worth brushing up on your basic camera settings and techniques and creating a plan for photographing the aurora. This way, when that magic moment happens, it’s just a matter of sticking with the plan. This will help you capture a variety of photos once the light show starts!
Find the Exposure Sweet Spot
To capture the color and light of the aurora borealis in otherwise relative darkness, you need to have the shutter on your camera open for a decent length of time. If you are already familiar with long-exposure photography, this won’t come as a surprise. However, what may be surprising is that you don’t always need to stretch the limit of long exposures like you do for astrophotography.
For aurora photography, you’re generally looking for an exposure between 5 and 20 seconds. The reason is that the northern lights actually move during these auroral substorms, and the longer you have your shutter open, the more diffuse the lights will be.
It’s your job as the photographer to find the sweet spot where the lights are colorful and bright but also clearly delineated as ribbons of color in the sky.
1 • CAMERA SETTINGS 5 nathab.com/northernlights • 800-543-8917 CONTENTS
Use a Wide Aperture
Aperture terminology is admittedly confusing, and it can turn people off from manual-exposure photography pretty quickly. That’s why I’m going to keep it simple and just advise you to use a “small f-stop number” when it comes to aperture settings. Don’t worry about any other aperture terminology for now!
Generally, for aurora photography, you want something like f/2.8 to f/4. If you have a lens that’s capable of a smaller number than f/2.8, that’s nice, but not necessary. You’ll be just fine at f/2.8, f/3.5 or f/4. Plus, you’ll get the added benefit of more focus if you use those bigger numbers, which translate to a wider depth of field.
I’ve personally photographed the northern lights at a 24mm f/1.4 and found that the f/1.4 just makes the slice of focus too small, and the added light in the scene didn’t merit the lack of focus. But don’t go beyond f/4, as you still need to let in a good bit of light (i.e., f/5.6 gives you more focus, but it also slashes the amount of light in half).
If you’re considering investing in a lens specifically for northern lights photography, there is a chapter later in this book about the best lens to use, so stay tuned for more on that subject!
Technically,
the aperture is the size of the lens opening, so you may also hear advice to use “a wide aperture,” which corresponds to a small f-stop number.

1 • CAMERA SETTINGS 6 nathab.com/northernlights • 800-543-8917 CONTENTS
© Court Whelan

Choose a Higher ISO
The latest cameras offer such high ISOs that the book is being completely rewritten on what’s considered “high” or not. So, I’ll spell it out for you here!
For photographing the northern lights, choose something between ISO 800 and ISO 3200. Occasionally I’ll shoot at ISO 6400, but that’s usually just for my test shots. Where you land between 800 and 3200 comes down to a couple things: 1) how well your camera handles higher ISOs, and 2) how bright the lights are the night you’re shooting.
Generally speaking, newer, more-expensive cameras will be able to give you a great
photo at ISO 3200 (and maybe even at ISO 6400), while older cameras or more introductory models could make your photo look rather grainy at these ranges and detract from the quality of the shot. It also comes down to your own tolerance for such “grain” or “noise” in your shots. For some folks, the noise isn’t an issue, while to others it renders photos unusable.
It’s also worth mentioning that noisereduction software like Topaz and Photoshop’s Denoise are becoming extremely good. I still don’t think it’s worth shooting at ISO 6400 or ISO 12800 just to then use a software to try and correct it, mainly because you usually don’t need
© Court Whelan1 • CAMERA SETTINGS 7 nathab.com/northernlights • 800-543-8917 CONTENTS

to shoot that high. Lower ISOs can work just fine, and you’ll find that de-noising applications work best when not trying to overcompensate by a mile.
Smaller adjustments are less noticeable and work better.
When it comes to the brightness of the lights, things get quite variable. The northern lights can brighten and darken within a matter of seconds. During such episodes, I’m actively evaluating and changing my ISO.
I usually won’t touch the aperture from shot to shot, but I will try and use the lowest ISO possible. If the lights are starting slowly, I might start at ISO 3200, but then if they brighten, I may steadily take the next few shots at ISO 2000, then ISO 1600, then ISO 1000, finally ending up at ISO 800.
Remember: The higher the ISO, the more light the camera picks up. And every time you double your ISO, you’re letting in twice as much light. Conversely, if you halve the ISO, you’re letting in half as much light. So, you’ve got to really read your environment and adjust accordingly.
© Eddy Savage• CAMERA SETTINGS 8 nathab.com/northernlights • 800-543-8917 CONTENTS
1

Set Up Your Shutter Release
The risk of not doing any sort of remote button or delay is that the slight bit of pressure you impart by pressing the shutter may move the camera a little, such that the photo could be slightly blurry. Best to play it safe!
There are several different tools for taking photos remotely, including cables, infrared and even your smartphone via an app. However, I’ve found the easiest and best way to take a night photo is to set my camera’s timer on a 2-second delay. That way, when I hit the shutter, the camera will wait 2 seconds before taking the photo, giving it time to stabilize after I depress the button.
© Court Whelan1 • CAMERA SETTINGS 9 nathab.com/northernlights • 800-543-8917 CONTENTS
Putting It All Together
Once I’ve chosen my settings, I don’t usually change them much throughout a night of taking photos of the aurora borealis. Instead, I focus on my positioning, foreground elements and other creative techniques, which I’ll cover more in a separate chapter. That said, as the aurora’s intensity changes, I will adjust my ISO, knowing that the lower the ISO, the better the photo quality will be. But at the same time, I must give my camera enough light-sensing ability, so I don’t want to go too low.
The other thing I’ll play around with when it comes to really active auroras is the shutter speed. While I want to give my camera a proper exposure, sometimes when the northern lights are moving a lot, you need to freeze the motion. Otherwise, you’ll miss the opportunity to capture those brilliant ribbons of green, pink and purple and end up with a big blur of color instead.
To do this, I will shoot somewhere around 5 seconds of shutter speed. Active auroras are also very bright auroras, so we have more light to work with. To compensate for
such a fast shutter speed, I may also need to increase my ISO to let in more light. (Remember: To let in more light, you can increase ISO or increase shutter speed.)
I know what you’re thinking. “Didn’t you just tell me to drop my ISO when possible? Why are you now telling me to increase it?” This is entirely because, in certain instances, you need a faster shutter speed to capture your vision of the scene.
Thus, with active auroras, you have to strike a constant balance between ISO and shutter speed to A) properly expose the image, B) get enough definition in the aurora, and C) shoot at the lowest ISO possible given the other parameters.
1 • CAMERA SETTINGS 10 nathab.com/northernlights • 800-543-8917 CONTENTS
1
Final Thoughts on Camera settings
Aurora photography is both complex and straightforward at the same time. While the settings are straightforward and don’t vary all that much, minute changes can make a meaningful difference in the quality of your photos.
My advice is to begin on full manual mode with a shutter speed around 15 to 20 seconds, an aperture of f/2.8 or f/4, and ISO 3200.
Your next move will depend on how bright and active the aurora is in your test shots. If it’s stationary to the eye, plan on dropping your ISO to 1600 or maybe even to 800 if you still get a good exposure (part of this will depend on how good your lens is). If the aurora begins to move and “dance,” you want to switch your attention to your shutter speed and aim to get that down to 15, 10—maybe even 5 seconds. As you do that, you may find that you simultaneously need to increase your ISO to let in enough light.
This balance between ISO and shutter speed is going to be the main game you play with your camera settings when photographing the northern lights. Once it’s set, you likely won’t touch your aperture the entire time!
Use a shutter release timer or remote to prevent camera shake.
QUICK RECAP
Use shutter speeds ranging from 5 to 20 seconds to capture the dynamic nature of the lights.
Maintain a wide aperture to allow more light in.
• CAMERA SETTINGS
11 nathab.com/northernlights • 800-543-8917 CONTENTS

CHAPTER 2
FOCUSING AND FOREGROUND
12 nathab.com/northernlights • 800-543-8917 CONTENTS
© Pete Ramsden
Photographing “Lady Aurora” is thrilling beyond imagination. It’s probably one of the most rewarding types of landscape photography on the planet. However, just aiming at the sky and snapping a long-exposure photo won’t cut it if you’re looking for extraordinary images of the northern lights.
What makes a foreground element “great” depends on a variety of factors. Maybe it’s sensational on its own and gets a boost from the shining northern lights above. Or perhaps there’s a synergistic effect where the foreground by itself isn’t all that exciting, but when coupled with the aurora, it creates a perfect pairing.
Foreground as Focus
You may already know that foreground elements are a key part of any landscape photography. That is, having something closer to the camera to focus on—both for the photographer and the viewer—adds context, interest and sharpness to your photo. For northern lights photography, foreground elements are even more crucial as areas of focus.
One of the most critical considerations for aurora photography is finding a great foreground element.
2 • FOCUSING AND FOREGROUND 13 nathab.com/northernlights • 800-543-8917 CONTENTS
If you’ve done any sort of night photography previously, you probably know how tricky it can be to focus your camera in the dark. The autofocus doesn’t work easily without light, and because of the darkness, your manual focus is difficult, too.
One of the best ways I’ve found over the years to nail focus in low light is to use a foreground element. We’ll get to exactly what to look for in a foreground element next, but first, let’s talk about how to use foreground elements to achieve tack-sharp focus.
Because you will need your foreground in focus, the idea of setting your camera to “infinity focus” isn’t really on the table.
Plus, if you’ve ever tried to do that with astrophotography, you’ll notice that it’s not as easy as you’d think.
Instead, use this easy autofocus technique:
Begin by setting up your tripod with an interesting landscape element in the foreground. This can be a building, a stand of trees or your fellow travelers. Once you find it, try and align your autofocus on the edge of the outline of that subject.
For example, with figure 1 on the next page, you’d first try and use your autofocus to lock onto the tree. You will find that if you can place your focus square on an area of high contrast (i.e., the dark of the tree and the light of the sky), autofocus works quite well.
If you can’t get this to work, use a flashlight to illuminate the subject (the one on your camera will work in a pinch). Focus, then turn your light off. Just be mindful when using this technique, as the sudden bright light could ruin photos for others around you if they are in the middle of a long exposure!
Of course, if your subject is lit from the inside like the cabin in figure 2, you’ll have it much easier. Simply autofocus on the light to lock the focus in.
Now, here is where the magic happens…
Once your focus is locked via autofocus, switch your camera over to manual focus. Your focus will remain locked, setting you free to recompose your shot without having to re-focus each and every time. Just be sure not to drastically move your camera/ tripod closer or farther from the subject, as that can change the focus. A couple of feet is fine, but anything more and you’ll need to go through the autofocus process again from the start.
© Court Whelan2 • FOCUSING AND FOREGROUND 14 nathab.com/northernlights • 800-543-8917 CONTENTS

 © Court Whelan
Figure 1
Figure 2
© Court Whelan
© Court Whelan
Figure 1
Figure 2
© Court Whelan
2 • FOCUSING AND FOREGROUND 15 nathab.com/northernlights • 800-543-8917 CONTENTS
© Court Whelan

Landscape Foreground Elements
Finding different foreground elements is one of the hallmarks of great northern lights photography. And the way you want to shoot each type of element can be quite different. There are, of course, many similarities, but there are also key differences.
One of my favorite places to shoot in Churchill is at the edge of town, on Hudson Bay’s shore. The inukshuk there is a beautiful stone structure from Inuit culture that stands proudly as a symbol of Arctic and northern culture (figure 3).
Not only is this structure spectacular, but it allows you to face north while composing and waiting for your photos. This is key, as the aurora often starts in the north and works its way south at Churchill’s latitude.
Because you want to feature as much of the sky as possible in your aurora photos, an ultra-wideangle lens is usually best.
Figure 32 • FOCUSING AND FOREGROUND 16 nathab.com/northernlights • 800-543-8917 CONTENTS
© Court Whelan

When using this type of lens, you have the choice to either go for a standard composition, placing the inukshuk in the rule-of-thirds grid, or you can exaggerate the composition by placing it very low in the frame, emphasizing the grandeur of the sky. With a large man-made object like that, both compositions work quite well.
The boreal forest outside of town is a magical place on its own (figure 4). But when you add the northern lights above it, you add
some excellent context to the scene, not to mention a brilliant foreground element.
Often when I’m in the boreal forest photographing the northern lights, I look for a patch of trees that complements the shape and size of the aurora. Finding that perfect match isn’t always easy to do, but if the aurora presents itself in a way that you can fit the outline of the trees with the vibe of the aurora, you’ll be rewarded with a stunning image.
Figure 42 • FOCUSING AND FOREGROUND 17 nathab.com/northernlights • 800-543-8917 CONTENTS
© Lianne Thompson

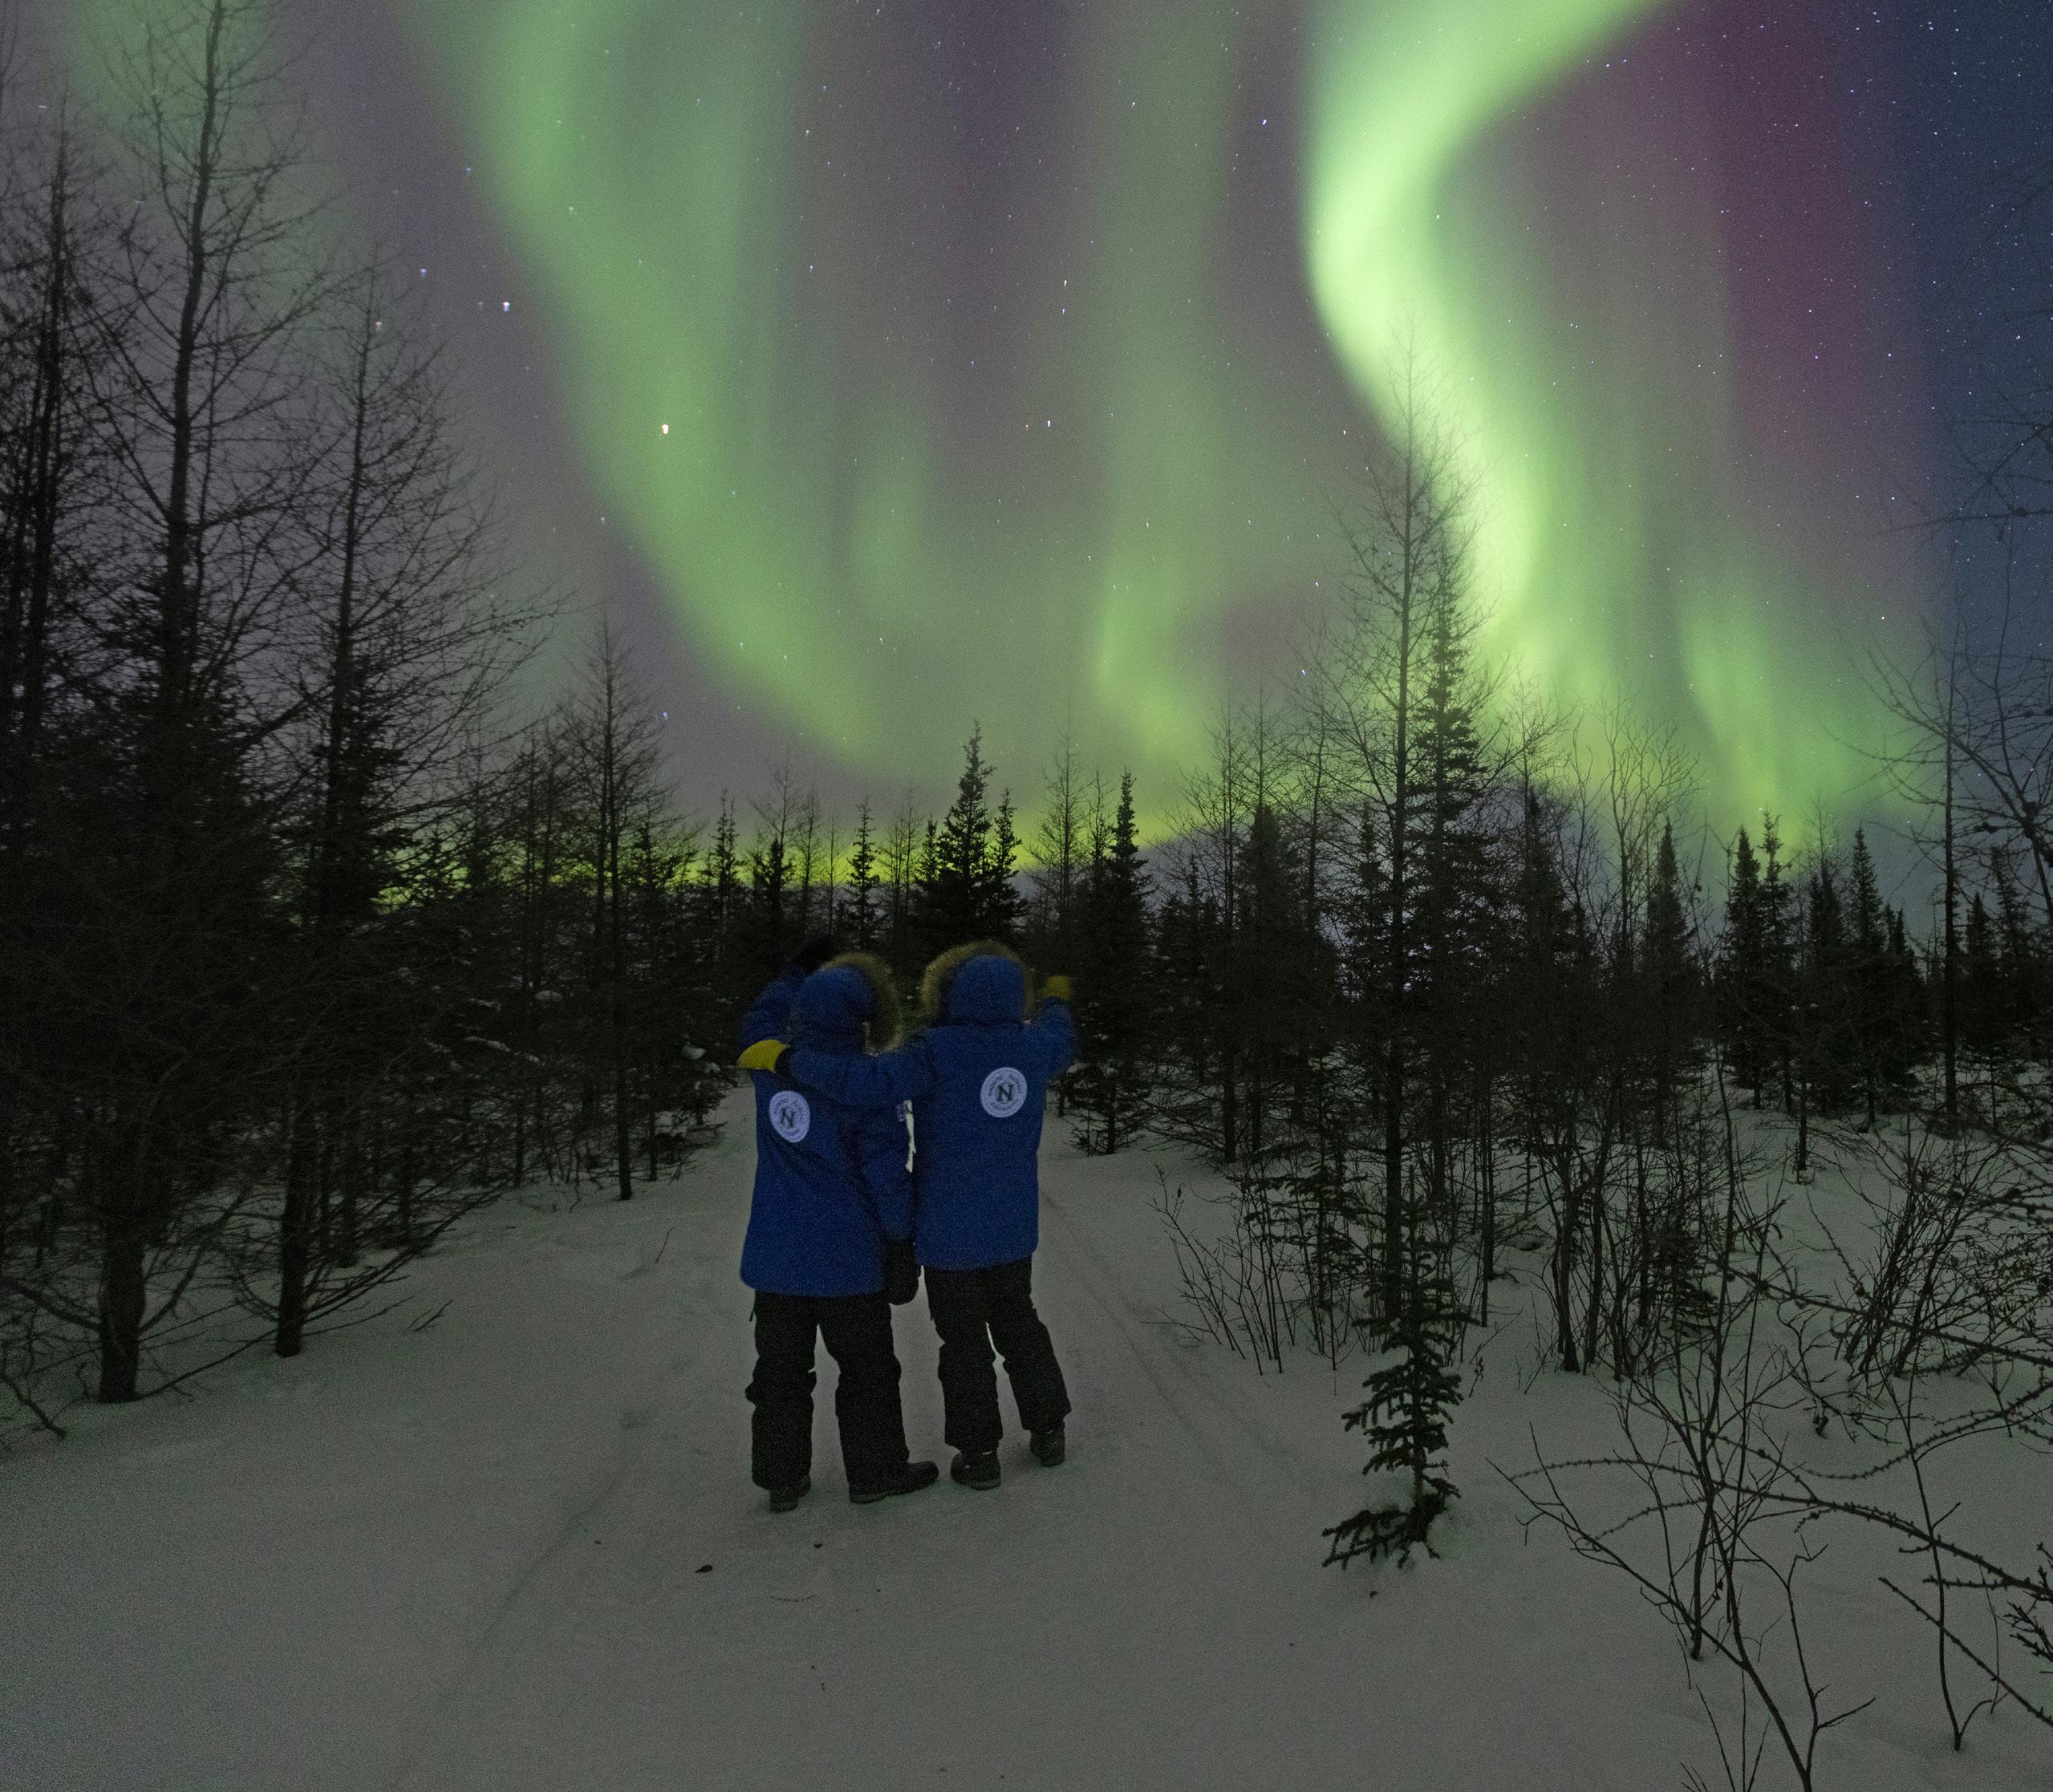
People as Foreground Elements
I’m also a big fan of using people as foreground elements. In most cases, they offer fantastic context that is familiar to the viewer and provide that “picture yourself here” vibe.
However, keep in mind that for northern lights photos, you will be shooting at very slow shutter speeds. This can make it difficult to get photos with people in them without being rehearsed and staged. If you take a candid shot, most likely there
will be some movement in the 10–20 seconds your shutter is open, resulting in a photo like figure 5. This isn’t necessarily a bad shot, but the motion blur can be distracting.
This doesn’t mean that you shouldn’t take photos of people with the northern lights in the background. In fact, I think it’s one of the most captivating ways to showcase the lights!
Figure 52 • FOCUSING AND FOREGROUND 18 nathab.com/northernlights • 800-543-8917 CONTENTS
Nat Hab’s Aurora Pod® | © Eddy Savage

The trick is that you want to prioritize a fast shutter speed, even at the expense of other settings.
“Fast” is all relative, of course, but it’s a lot easier for people to remain perfectly motionless for 5 seconds than for 15. Do everything you can to place people in a comfortable position that they can hold for 5 seconds, set your ISO accordingly, and shoot away. It’s usually best if you have people stay still for a few shots in a row, since slightest movement can affect the photo.
Another option is to try to set up a selfportrait, like in figure 6. Since you’ll already have a tripod, try setting your camera on a 10-second delay and standing near your foreground subject so that you are part of the same plane of focus. Count to yourself to make sure you remain motionless during the open shutter, then repeat the process a few times to really nail it.
Figure 62 • FOCUSING AND FOREGROUND 19 nathab.com/northernlights • 800-543-8917 CONTENTS
© Court Whelan
 Nat Hab’s Aurora Pod® | © Megan Koelemay
2 • FOCUSING AND FOREGROUND 20 nathab.com/northernlights • 800-543-8917 CONTENTS
Figure 7

Lighting Your Foreground Elements
Whether or not your foreground is illuminated can make a big difference. There’s not a clear best choice here, as both illuminated and non-illuminated elements have their merits.
When you do choose an illuminated foreground element, you’ll usually be dealing with artificial lighting. The easiest choice is some subtle illumination from, say, the inside of our own Aurora Pod®, like in figure 7.
But be careful when shooting illuminated elements, as the long exposures sometimes result in blown out highlights, where the window illumination is just too strong for the otherwise dimly lit photo. You also need to be quite cognizant of your white balance, as lights tend to cast strong yellow hues, like in figure 8.
Perhaps the best type of lighting is a culturally significant foreground structure that can be illuminated from within.
© Brad Josephs2 • FOCUSING AND FOREGROUND 21 nathab.com/northernlights • 800-543-8917 CONTENTS
Figure 8


Churchill has a few of these opportunities that make photographers drool, including traditional Metis tipis and Inuit igloos (figure 9).
The Metis tipi can be illuminated via a small fire ring inside (with a cozy seating area to warm up in between shots). Meanwhile, the igloo must be lit by a candle. Although you might not think a single candle can do much, it often provides just enough light to get that soft glow without being too bright or outshining the northern lights themselves.
Finally, I often get asked whether the moon phase plays a major role in northern lights photography. The short answer is yes, it definitely can!
When photographing the aurora, people usually gravitate toward the new moon phase, when the sky is at its darkest. However, a key benefit of shooting during the full moon phase is that it provides that soft, natural lighting we photographers strive for. There’s just no better foreground-illuminating light source than a distant moonglow (figure 10)!
Figure 9 © Court Whelan Figure 102 • FOCUSING AND FOREGROUND 22 nathab.com/northernlights • 800-543-8917 CONTENTS
© Court Whelan
Final Thoughts on Focusing and Foreground
Foreground elements can be a surprisingly important (and beautiful) component in your northern lights photography. Obviously the lights themselves are the stars of the show, but the additional focus, context and aesthetic dimension that foreground elements provide really can’t be overstated.
Use my autofocus and lock technique to maintain perfect focus on your foreground elements. And be sure to spend some time—even amid the flurry of excitement the northern lights always evoke—to thoroughly analyze the area around you to ensure you end up with the most compelling and diverse photos. Those few extra moments can make all the difference when it comes to taking your aurora borealis photos from good to great to absolutely superb! 2
Experiment with diverse foreground elements to enhance your compositions.
Analyze your surroundings and choose compelling elements. Consider different lighting sources to illuminate your foreground and add depth.
Prioritize a faster (e.g., 5 seconds) shutter speed when including people in your photos.
• FOCUSING AND FOREGROUND
23 nathab.com/northernlights • 800-543-8917 CONTENTS
QUICK RECAP

CHAPTER 3
WHAT CAMERA TO USE
24 nathab.com/northernlights • 800-543-8917 CONTENTS
© Court Whelan
Cameras have improved considerably in their low-light capabilities. However, there are still limitations in certain cameras that can prevent you from getting the combo of settings necessary for great northern lights photography.
Getting the perfect northern lights photo can be challenging, but determining whether your camera is capable of photographing them isn’t difficult at all.
As a guide for Northern Lights Photo Expeditions, I’ve unfortunately seen some guests show up with cameras that could shoot long exposures up to 30 seconds and that could also get up to high ISO like 1600 and even 3200. However, the camera couldn’t do both at the same time. This is a deal breaker for aurora photography!
Be sure to do some test shots at home (and at night) when evaluating whether your camera is cut out for the job. Simply review the first chapter in this book about camera settings and ensure that it can be set to Manual at f/4 or f/2.8, 20 seconds of exposure, and an ISO of at least 800 all at the same time.
It all comes down to your camera’s ability to shoot long exposures while set to a high ISO.
3 • WHAT CAMERA TO USE 25 nathab.com/northernlights • 800-543-8917 CONTENTS

The “Best” Camera
Okay, so plenty of cameras can do the job, but what’s the best camera for photographing the northern lights? To start, let me say that virtually any DSLR or mirrorless camera body is great, and you’ll likely come home with stunning shots.
However, if you really want to shoot with the best, you might want to consider purchasing a full-frame camera. They are definitely a financial investment, but they are specialists at photographing in dim or dark conditions. They have a larger sensor, which means you can get dramatically better shots in suboptimal lighting conditions.

 Full Frame
APS-C
Full Frame
APS-C
3 • WHAT CAMERA TO USE 26 nathab.com/northernlights • 800-543-8917 CONTENTS
© Lianne Thompson

Do some test shots at home (and at night) to ensure your camera can be set to Manual at f/4 or f/2.8, 20 seconds of exposure, and an ISO of at least 800—all at the same time.
Nat Hab guest in the Aurora Dome | © Alexander de Vries3 • WHAT CAMERA TO USE 27 nathab.com/northernlights • 800-543-8917 CONTENTS

A Note on Smartphone Cameras
What about shooting with your smartphone?
These handy little devices are getting better and better at night photography. In the past couple of years, I’ve seen great shots from all brands of smartphones, and it’s such a pleasure to see! The exact quality can vary, but they are usually very “share worthy.” That is, they produce great images for posting online, sending to friends and family, and storing in your phone to look back fondly on.
It’s important to note that smartphone photos may not print out well, nor can you
edit them heavily. But if that’s not important to you, then snap away!
If you do plan on shooting with your smartphone, I recommend doing a little experimentation and reading an article or two about your specific make and model. For instance, some smartphone models have a specific “night mode,” while others simply require that you line up two cross hairs and hold steady for a second after you press the shutter.
3 • WHAT CAMERA TO USE 28 nathab.com/northernlights • 800-543-8917 CONTENTS
Nat Hab’s Aurora Pod® | © Alexander de Vries
Final Thoughts on What Camera to Use
There are many options for cameras, with DSLRs and their mirrorless equivalents being the go-to choice for most northern lights photographers. Those with full-frame versions will enjoy the maximum quality and lowlight sensitivity of their larger sensors. However, other camera systems will work, too, including smartphones. But for those with point-and-shoot cameras and smartphones, I recommend that you do some testing ahead of time to make sure you have the right gear and the necessary steps for success when you’re in front of Lady Aurora.
Your camera must handle long exposures and high ISO settings simultaneously to capture stunning aurora shots.
Full-frame cameras with larger sensors are ideal for high-quality shots of the Northern Lights.
Smartphones have improved in night photography and can produce great images for online use.
Test and get familiar with your camera or smartphone to maximize your success when capturing the Northern Lights.
3 • WHAT CAMERA TO USE
29 nathab.com/northernlights • 800-543-8917 CONTENTS
QUICK RECAP
CHAPTER 4
WHAT LENSES TO USE
30 nathab.com/northernlights • 800-543-8917 CONTENTS
© Court Whelan
There are few things I enjoy more than photographing a streaming, brilliant aurora across the night sky. It’s hard to explain, but it’s a combination of the rarity, the beauty and the variability of each unique light show. And to capture it with your camera to preserve that moment for an eternity? Well, that’s the essence of great photography, isn’t it?! But to photograph the northern lights in all their glory, you’re going to want to bring the right gear.
Although a fancier camera will handle the low light better, any DSLR or mirrorless camera will do just fine. But when it comes to which lens to choose, I always advocate for an ultra-wide-angle lens.
Simply put, you get more sky and therefore more aurora when shooting with a 16–35mm lens (10–22mm on cropframe, or 7–14mm on OM sensors).
In fact, I prefer an ultra-wide lens vs. a fast lens, even if that ultra-wide lens means I only get f/4. I used to shoot with Canon’s 17–40mm f/4, and I have taken some of my favorite aurora shots with it.
So, the first big reason to choose an ultrawide lens is to get more sky and more aurora in your photo.
Surprisingly, the camera itself isn’t nearly as important as the lens you choose.
4 • WHAT LENSES TO USE 31 nathab.com/northernlights • 800-543-8917 CONTENTS

But the second reason is just as important. You also want to get more foreground in your photo!
This goes for astrophotography as well as northern lights photography. Without the context of something familiar, like a tree, sculpture, building, person, etc., the mystical swath of green across the dark night sky is just a little too otherworldly. It’s hard to instantly know what you are looking at.
Foreground elements are extremely important for any sort of sky photography.Nat Hab’s private cabin in the boreal forest | © Lianne Thompson
4 • WHAT LENSES TO USE 32 nathab.com/northernlights • 800-543-8917 CONTENTS

To illustrate this, take a look at figure 11. It’s fine, but it doesn’t pack the same punch as the other photos you’ve seen in this book.
Figure 12, on the next page, may not may not look all that “ultra wide,” but that’s the beauty of using this type of lens for northern lights photography. Because you want to feature so much of the sky, you really don’t see any distortion. Nor do you feel the effects of any lack of sharpness at the corners that you often get with extremely wide-angle lenses.
When you include something interesting in the foreground of the photo—that’s when the magic happens!Figure 11 © Court Whelan
• WHAT LENSES TO USE 33 nathab.com/northernlights • 800-543-8917 CONTENTS
4

Another benefit of ultra-wide lenses is that you can shoot wider than you normally would, with the intention to crop the image later. The reason is simple: It’s tough to get your photo perfectly composed in-camera when you’re shooting in extreme cold with arctic gear and gloves on—especially while the most dazzling display you’ve ever seen streams across the sky in front of you! Often the horizon is slightly off kilter, or you wish you had the foreground element better aligned to the rule of thirds, etc.
If you photograph a tad wider than you actually want the final image, you have some extra room to straighten, crop or even re-compose in post processing. This is a golden ticket!
© Eddy Savage4 • WHAT LENSES TO USE 34 nathab.com/northernlights • 800-543-8917 CONTENTS
Figure 12
Final Thoughts on What Lenses to Use
Although a standard “kit lens” will do the job, a specialty lens can take your aurora photography from good to great, or from great to exceptional. Rather than prioritize a fast lens, which might be ideal for astrophotography, go for an ultra-wide-angle lens. If you can get an ultra-wide lens that is reasonably fast, like an f/2.8, you’ll combining the best of both worlds. But remember: ultra-wide first, fast second.
An ultrawide angle is essential: 10–22mm on a crop-frame sensor or a 16–35mm on a full-frame sensor.
Ultra-wide lens captures more of the expansive night sky and the aurora.
Ultra-wide lenses offer flexibility for postprocessing adjustments. Incorporating foreground elements is essential for providing context and making aurora photos more captivating.
4 • WHAT LENSES TO USE
35 nathab.com/northernlights • 800-543-8917 CONTENTS
QUICK RECAP

CHAPTER 5 PREVENT CAMERA FOG IN COLD ENVIRONMENTS
36 nathab.com/northernlights • 800-543-8917 CONTENTS
© Court Whelan
Winter is usually the best time of year to photograph the northern lights. But with winter comes cold temperatures and the risk of your camera lens fogging up each time you go indoors. This chapter will tell you why that happens and how to prevent it, so that you don’t miss a single second out photographing the aurora borealis.
Why the Fog?
To start, let’s examine why your lens gets foggy in these situations. This is key to knowing how to best abate it.
Basically, very cold weather turns your camera into a frozen metal/plastic block. When you take that frozen block out of the cold and into a warm, humid environment (such as the inside a building, which has warmer air, people breathing and humidity pumped in through the furnace…not uncommon in dry, perpetually cold areas like Churchill), it instantly cools the gaseous water (humidity) in the air immediately around the camera to form liquid water. Remember back to 10th grade chemistry: When you cool a gas, it turns into its liquid state. That liquid state is condensation.
Think about taking a cold soda out of your refrigerator or cooler on a hot summer day. You know how it begins to “sweat”? It’s the same principle.
When
it comes to your camera, a digital instrument that relies on impeccable visibility and optics, anything that accumulates on the end of your lens is bad.
5 • PREVENT CAMERA FOG IN COLD ENVIRONMENTS 37 nathab.com/northernlights • 800-543-8917 CONTENTS

When it comes to your camera, a digital instrument that relies on impeccable visibility and optics, anything that accumulates on the end of your lens is bad. This goes for dust as well as water, by way of condensation.
Now, if it were just a splash of water, no biggie—take a lens cloth and wipe it off. However, the colder it is, the more supercooled your camera becomes in just a short amount of time. That also means that it takes a long time for the camera to warm up when it’s brought inside. In the meantime, it’s going to continue turning humid air into water, over and over again, no matter how
much you wipe it off. (Well, kind of. There’s a trick to this! More on that later.)
The worst case scenario is that you get condensation on your lens, and then it refreezes when you return outside for more great northern lights photography. I’ve personally had this happen when I take a break from outside photography, bring my camera inside, and then return outside in a few minutes. The condensation can actually freeze, making it even harder to remove.
So, the best thing is to not let it happen in the first place.
5 • PREVENT CAMERA FOG IN COLD ENVIRONMENTS 38 nathab.com/northernlights • 800-543-8917 CONTENTS
© Court Whelan
How to Avoid Camera Fog
Here are a few techniques for preventing condensation or camera fog.
Keep your Camera Outside
The easiest way to avoid lens fog is to not bring your camera into warm, humid inside areas in the first place. This is especially useful for northern lights photography, as you can simply keep your tripod set up as you’re waiting for the lights to come back out.
But I recognize that there are times when this is tough to do. Maybe you’re trying to conserve your battery life. Maybe you need to change lenses and find it easier to do so inside without wearing thick gloves. Or perhaps you simply want to protect your camera from the elements while you take a break to warm up.
Keeping your camera outside isn’t always the most practical thing, but, if it’s at all possible, it is a great route to take to avoid lens fog.
More Practical Solutions
Before bringing your camera inside, put it in its case and zip it up outside, so that it’s totally protected from the ambient air.
Then, do your very best to not open the bag until your camera has had a chance to gradually warm up. How long is gradually? Well, this is entirely dependent on how cold it was outside and how warm it is inside! Fortunately, for most northern lights adventures, we’re talking only a matter of minutes, even if temps get down into the low teens.
A Quicker Solution for Most Northern Lights Trip Conditions
Let’s say there’s a situation where you must bring your camera immediately from the outside to an inside area that is conducive to giving you the dreaded fog (i.e, warm, humid, you know the drill). At the very least, if you do nothing else, be sure to put your lens cap on your camera while still outside, and do not take it off when inside. After it has acclimated roughly 5 to 10 minutes you can remove it, but only if it’s truly necessary. The longer the acclimation period the better.
This isn’t a perfect solution, because in extreme temperature differentials, air will still sneak in and condense through the small openings in your lens cap. However, it will save you most of the trouble, and is a very easy solution.
5 • PREVENT CAMERA FOG IN COLD ENVIRONMENTS 39 nathab.com/northernlights • 800-543-8917 CONTENTS

How to De-Fog Your Camera
We forget, we’re in a rush, it happens to the best of us. My technique when I slip up is to warm my camera lens up through friction by wiping it continuously with a clean lens cloth for a couple minutes.
This isn’t the most ideal solution, but when you’re in the field and you need to be prepared to go back out with a ready-to-shoot lens, this does work. I’m sure this isn’t the best thing for my UV filter (which I always have on every lens), but sometimes it’s the only thing you can do to backtrack and fix the problem once it’s already happened.
5 • PREVENT CAMERA FOG IN COLD ENVIRONMENTS 40 nathab.com/northernlights • 800-543-8917 CONTENTS
© Pete Ramsden
Final Thoughts on Camera Fog
When photographing in cold environments, you often run into the problem of lens-fogging. This has everything to do with the temperature and humidity differential between cold, dry outside air and significantly warmer, more humid inside air. The best way to beat fog is to avoid it altogether by either leaving your camera outside, placing your camera in its bag before bringing it inside, or at least putting your lens cap on outside and keeping it on while inside. If you do encounter fogging, wipe your lens in a circular motion with a clean cloth for a couple minutes to let the friction warm it up.
When possible, keep the camera outside. If bringing the camera indoors, put it in the case before entering the room and refrain from opening the bag until the camera has a chance to warm up.
QUICK
RECAP
Keep the lens cap on the camera while inside and remove it only after a short acclimation period.
If fogging occurs, warm the camera lens through friction by continuously wiping it with a clean lens cloth for a couple of minutes.
5 • PREVENT CAMERA FOG IN COLD ENVIRONMENTS
41 nathab.com/northernlights • 800-543-8917 CONTENTS

WHAT’S IN MY CAMERA BAG
CHAPTER 6
42 nathab.com/northernlights • 800-543-8917 CONTENTS
© Lianne Thompson
We’ve talked about the right camera body and lens, but what about other lens and gear considerations? This chapter is designed to give you a complete list of gear to bring with you on your Northern Lights Photo Adventure. Please note, photographic styles vary, as do conditions on the ground. While this is meant to be a guide for choosing your camera gear, you should consider your own photographic interests first and foremost.
No matter where in the world you go to view the northern lights, you’ll likely be doing so in winter for the long, clear nights. Thus, it’s actually about much more than simply photographing the aurora borealis—it’s an entire winter photography dream!
When
packing to photograph the northern lights, be sure to bring your widest lens with you. But don’t leave all your other lenses at home!

6 • WHAT’S IN MY CAMERA BAG 43 nathab.com/northernlights • 800-543-8917 CONTENTS
© Court Whelan
Ultra-Wide-Angle Lens
These are some of the most helpful lenses, not just for photographing the aurora, but also for sweeping landscape photos of winter scenes in the polar regions. When I say “ultra-wide,” I’m talking about a 10–22mm or 12–24mm on a crop-frame sensor or 16–35mm or 17–40mm on a full-frame sensor. Although these aren’t necessarily in every photographer’s kit, they are very useful when capturing the northern lights for a few reasons.
First, ultra-wide lenses allow you to get lots of sky in your shot, which is good for getting the most aurora you can—a major goal of northern lights photography!
Second, with an ultra-wide-angle lens (bordering on fisheye, but rectilinear) you can easily incorporate interesting foreground elements like snowbanks, spruce trees, tipis, igloos, etc., while at the same time capturing the beautifully lit sky.
Finally, having an ultra-wide-angle lens allows a certain margin of error if you don’t compose your shot perfectly. That is, if it’s tilted and not in line with the horizon, which is surprisingly common when you’re photographing in the dark. The beauty of these lenses is that you can straighten and crop your shot as needed in Photoshop or Lightroom while still getting a lot in your scene.
Wide-Angle Zoom Lens
These are also very helpful lenses, and while they can be used to capture the aurora, I primarily use them as all-purpose “other stuff” lenses. Whether photographing landscapes on the tundra or taking alluring travel shots in and around town, a general wide-angle zoom lens like an 18–55mm on crop sensors or 24–105mm on full frames is extremely useful.
Zoom Telephoto Lens
These are your 70–200mm, 70–300mm and 100–400mm varieties. To be frank, these are not useful for northern lights photos, but they can yield some lovely landscape photos during your time in aurora country. I find that these lenses help dissect the landscape into smaller units, which helps showcase some of the lesser-known facets of arctic life. Whether it’s a small stand of spruce trees in the distance, a softly colored sunset over the ice, or a compressed shot of the moon as it rises, a zoom telephoto lens is an excellent choice to have for “the rest” of northern lights photography.
6 • WHAT’S IN MY CAMERA BAG 44 nathab.com/northernlights • 800-543-8917 CONTENTS
X-Factor Lenses
An x-factor lens is one that you may only use for a fraction of the time but might result in some of your favorite photos of the trip. For arctic photography, I love bringing my nifty-fifty lens, a 50mm f/1.4, for the travel photography opportunities. There’s no landscape quite as unique and iconic as the Arctic (in my opinion, at least), and having that extremely shallow depth of field can turn these scenes into pure art. One might think that a 50mm f/1.4 could also be useful for the aurora since it’s such a fast lens. But remember, fast is secondary to having a wide focal length. The nifty-fifty is simply for the “other” photos during any foray into the Arctic.
The other lens I would consider is a fisheye, as they can be quite fun when photographing the northern lights. It takes “ultra-wide” to another level, such that you can get nearly the entire sky and foreground in the same shot. These lenses do distort the corners of your photo, but sky photography tends to be rather forgiving of these distortions.
Ultra-Wide lens
To capture the most aurora possible
Wide-Angle lens
For landscape and alluring travel shots
Zoom Telephoto
To single out unique landscape features
X-Factor lens
Like a 50mm f/1.4 for artistic landscape shots of the Arctic or a fisheye, to make northern lights shots even wider
6 • WHAT’S IN MY CAMERA BAG 45 nathab.com/northernlights • 800-543-8917 CONTENTS

Flashes
No need to worry about packing a flash, as you’re better off “lightpainting” with a flashlight rather than using a punctuated single flash.
6 • WHAT’S IN MY CAMERA BAG 46 nathab.com/northernlights • 800-543-8917 CONTENTS
© Court Whelan

Tripods
Tripods are an absolute necessity when photographing the northern lights and an essential piece of gear. When photographing the aurora, you’ll primarily be shooting at shutter speeds between 5 and 20 seconds, and there is just no way to hand hold at those slow speeds.
If you don’t already have a go-to tripod, you’ll be best served if you pick up a decent one that you can grow with and easily use in challenging conditions (e.g., dark, cold, with mittens). Practice using the tripod you’re
considering before you purchase it if you can. If it’s challenging in the store, it will be even more challenging when in the field, in the dark, in -20F weather.
If you must buy your tripod sight unseen, make sure you do your research and read the reviews to make sure you’ll be happy with its functionality. For instance, some tripods have “snap-locking” legs, while others have “twist-locking” legs. Know which one you prefer before buying!
© Court Whelan6 • WHAT’S IN MY CAMERA BAG 47 nathab.com/northernlights • 800-543-8917 CONTENTS
Other Accessories
A headlamp-style flashlight isn’t technically photo equipment, but it is perhaps one of the most helpful pieces of gear when photographing the lights. In fact, I consider it essential so that you can adjust your settings and tripod with both hands and not have to worry about holding a flashlight.
If possible, try and find a headlamp that allows you to switch it to red light in addition to the normal white light. Red helps preserve your night vision so that once you turn the light off, you can resume aurora watching without having to wait for your eyes to readjust.
Batteries & Memory
Because of the intense cold of the Arctic in the winter, batteries don’t last as long as they do other places and times of year. Bring several extra batteries and even more if you’re planning to do any timelapse photography.
For memory, I always recommend bringing more than you think you’ll need. But keep in mind that aurora photography, while extraordinarily rewarding, generally doesn’t yield as many photos as, say, an African safari. The exception to this is if you are doing timelapse photography, which might yield dramatically more photos than other photo trips. Plan on taking 200 or so photos a day without timelapse, and 500–1000 photos
a day if you plan on setting up a couple timelapses each night.
Cold Weather Photo Gear
Speaking of cold, are there any pieces of cold weather gear especially suited for photographers? Yes!
The first question is what to do about your hands. Should you bring gloves, mittens, a combo of both? What about those new photo gloves that allow you to pull back the fingertips to adjust your camera settings?
To me, the main consideration is that you want to be able to have something on your hands at all times. The combo that’s worked best for me throughout the years is a pair of big, warm mittens with thin glove liners underneath. This way, when I’m manipulating the camera, I take off the mittens and just use my liners. Then, as soon as I take the shot, the mittens go back on. Same thing with relocating for new shots: I’ll keep the mittens on to grab the tripod, but when I’m fine-tuning my camera, I’m down to the thinner gloves.
Another piece of helpful gear is a pair of clear ski goggles. These are essentially just normal ski goggles, but without any dark tint. Goggles will help you stay out longer when photographing the northern lights, and, of course, the longer you can stay out, the more shots you’re going to get!
6 • WHAT’S IN MY CAMERA BAG 48 nathab.com/northernlights • 800-543-8917 CONTENTS
My Recommended Camera Gear Packing List
☑ Ultra-wide-angle lens
10–22mm or 12–24mm on a crop-frame sensor. 16–35mm or 17–40mm on a full-frame sensor.
☑ Wide-angle zoom lens
These are your 70–200mm, 70–300mmand 100–400mm varieties. .
☑ Zoom telephoto lens
70–200mm, 100–400mm varieties. Not essential for northern lights, but nice to have for landscapes and wildlife.
☑ X-factor lens
A 50mm f/1.4 or a fisheye lens.
☑ Tripod
Bring one that you can easily use in challenging conditions (e.g., dark, cold, with mittens).
☑ Batteries and memory cards
Bring plenty!
☑ Headlamp
So you can adjust your camera settings and tripod. If possible, bring one that has a red light.
☑ Cold weather photo gear
A combination of thinner gloves and heavier mittens, and clear ski goggles.
6 • WHAT’S IN MY CAMERA BAG
49 nathab.com/northernlights • 800-543-8917 CONTENTS
CHEAT SHEET
SETUP

Ultra-wide-angle lens
SETTINGS

Smallest f/number f/4 or f/2.8

Tripod

Clear sky Interesting foreground +


Shutter speed 5 to 20 seconds
COMPOSITION
Interesting foreground
FOCUSING

Start with autofocus

Rule of-thirds

ISO auto or between 800 – 3200

Focus on foreground

2-Second shutter release (to stabilize)

Shoot at widest angle possible (lots of sky)

Focus on foreground


Switch to manual focus (focus is now locked)
Recompose for different shots (without moving tripod)
+
+ +
+
+
+ + + S NORTHERN LIGHTS PHOTOGRAPHY
50 nathab.com/northernlights • 800-543-8917 CONTENTS

Final Thoughts
Northern lights photography poses a unique challenge. It’s truly an art form! However, with the list of challenges comes an even longer list of opportunities.
Simply put, photographing the aurora is going to be a highlight of your photographic career. To make the most of it, I advise doing your homework ahead of time, practicing with long exposures and, heck, maybe even doing so while wearing gloves and a headlamp! The more familiar you are with the settings and adjustments you’re likely to need to make, the more photos, better photos, and greater time you’ll have photographing the northern lights.
I wish you the best on your adventure to see and photograph nature’s most aweinspiring light show!
Go forward and give it a shot,
 Court Whelan, Ph.D.
51 nathab.com/northernlights • 800-543-8917 CONTENTS
