MORE DAILY WORKOUTS
FOUNDATION TO YEAR 6
BUILDING VISUALISATION SKILLS IN MEASUREMENT, GEOMETRY AND SPACE
Oxford University Press is a department of the University of Oxford. It furthers the University’s objective of excellence in research, scholarship, and education by publishing worldwide. Oxford is a registered trademark of Oxford University Press in the UK and in certain other countries.
Published in Australia by Oxford University Press

Level 8, 737 Bourke Street, Docklands, Victoria 3008, Australia.
© Ed Lewis 2023
The moral rights of the author/s have been asserted
First published 2023
All rights reserved. No part of this publication may be reproduced, stored in a retrieval system, or transmitted, in any form or by any means, without the prior permission in writing of Oxford University Press, or as expressly permitted by law, by licence, or under terms agreed with the reprographics rights organisation. Enquiries concerning reproduction outside the scope of the above should be sent to the Rights Department, Oxford University Press, at the address above.
You must not circulate this work in any other form and you must impose this same condition on any acquirer.
ISBN 978 0 19 033855 8
Reproduction and communication for educational purposes
The Australian Copyright Act 1968 (the Act) allows educational institutions that are covered by remuneration arrangements with Copyright Agency to reproduce and communicate certain material for educational purposes. For more information, see copyright.com.au.
Editing consultancy by Clare Way
Illustrated by Marty Schneider, Martian Studio
Produced by Newgen KnowledgeWorks Pvt. Ltd.
Printed in China by Leo Paper Products Ltd.
Links to third party websites are provided by Oxford in good faith and for information only. Oxford disclaims any responsibility for the materials contained in any third party website referenced in this work.
iii OXFORD UNIVERSITY PRESS CONTENTS Contents Introduction v How to use this book vi Lower – Years F to 2 2 Using units of measurement 2 Length 2 Year F 2 Year 1 4 Year 2 5 Area 8 Year F 8 Year 1 9 Year 2 10 Volume and capacity 14 Year F 14 Year 1 16 Year 2 19 Mass 21 Year F 21 Year 1 23 Year 2 25 Time 27 Year F 27 Year 1 29 Year 2 31 Shape 34 Three-dimensional objects 34 Year F 34 Year 1 37 Year 2 39 Two-dimensional shapes 43 Year F 43 Year 1 47 Year 2 51 Location and transformation 55 Year F 55 Year 1 58 Year 2 60 Middle – Years 3 and 4 63 Using units of measurement 63 Length 63 Year 3 63 Year 4 66 Area 70 Year 3 70 Year 4 72 Volume and capacity 75 Year 3 75 Year 4 78 Mass 82 Year 3 82 Year 4 86 Time 89 Year 3 89 Year 4 92 Shape 95 Three-dimensional objects 95 Year 3 95 Year 4 100 Two-dimensional shapes 105 Year 3 105 Year 4 110 Location and transformation 115 Year 3 115 Year 4 117 Angles 119 Year 3 119 Year 4 122
MORE DAILY WORKOUTS iv OXFORD UNIVERSITY PRESS Upper – Years 5 and 6 124 Using units of measurement 124 Length 124 Year 5 124 Year 6 128 Area 133 Year 5 133 Year 6 138 Volume and capacity 143 Year 5 143 Year 6 147 Mass 150 Year 5 150 Year 6 153 Time 157 Year 5 157 Year 6 160 Shape 165 Three-dimensional objects 165 Year 5 165 Year 6 170 Two-dimensional shape 173 Year 5 173 Year 6 181 Location and transformation 186 Year 5 186 Year 6 190 Angles 194 Year 5 194 Year 6 196
Introduction
About More Daily Workouts
More Daily Workouts is a primary mathematics resource that supports the development of measurement and geometry skills, concepts and understandings. As a companion publication to the second edition of Daily Workouts, it offers a comprehensive range of daily activities that foster visual thinking and mental imagery. It is also aligned with the Australian Curriculum: Mathematics, Measurement and Space strand, incorporating the proficiencies of understanding, fluency, problem-solving and reasoning.
What is mental imagery?
Mental imagery, or spatial/visual thinking, includes the ability to form and retain mental images of objects and their location, as well as to manipulate them by imagined movement, rotation or transformation. Thinking in images is a crucial technique in providing a strong foundation for future success in mathematics, science, technology and engineering.
Why teach visual thinking?
In the primary years, visualisation is crucial when estimating, measuring and learning geometry, so that students’ mathematical skills, concepts and understandings are fully developed. Visualisation techniques such as imagining, sketching and drawing, and working with maps need to be explicitly taught using materials and equipment.
How do I use More Daily Workouts to foster visual thinking?
Activities in More Daily Workouts have been designed as teacher-led discussions to promote critical thinking and verbal communication among students in learning measurement and geometry. Activities have been designed primarily to function as lesson warm-ups, in which the teacher and students discuss and develop their mathematical ideas and understandings. The activities in More Daily Workouts may also be used flexibly during lesson breaks or to revise previous concepts. They are laid out in inquiry style, with suggested teacher scripts, so that teachers can help students focus on concepts during discussion of various questions and problems. At the beginning of activities, students are often given a short time to investigate the idea concerned, before considering a variety of solution methods in classroom discussion and debriefing. The most efficient strategies are thus investigated and highlighted.
How do teachers assess students’ use of mental imagery?
By allowing students sufficient time to develop their mental imagery and thinking, and by not intervening too soon, teachers can observe and note students’ responses, which often provide a window on their thoughts. Asking students to explain their strategies by posing questions such as “Why?”, “How do you know?”, “Can you imagine that?” or “What would that look like?”, can elicit further rich discussion.
Skills in mental imagery are thus best developed by students constructing their own knowledge from physical and mental activities related to their experience of measurement and geometry tasks. The classroom emphasis should be on investigation, imagination and discussion, so that the formation of visual images and their manipulation in the mind can be fostered.
v OXFORD UNIVERSITY PRESS INTRODUCTION
How to use this book
More Daily Workouts is designed to offer teachers a curated collection of activities to support the teaching of mental imagery and visual thinking. The activities are intended as 5- to 10-minute introductions or warm-ups in which the teacher and students are engaged in discussion and explanation. Often the warm-ups may lead to more complete investigation of various topics by means of extension or variation activities.
Activities
Activities are organised by primary year group, strand, concept, topic and year level. A handy thumb tab helps to identify each section – Lower, Middle and Upper. Supplementary activities that support many of the print activities in More Daily Workouts can also be found at www.oxfordowl.com.au.
Instructions
Each activity in More Daily Workouts includes simple instructions and a script featuring teacher dialogue that can lead to more class discussion and consideration of the question or problem. (Sometimes the answer is also provided for quick reference.) Suggestions on how to extend or adapt activities are included where relevant.
MORE DAILY WORKOUTS vi OXFORD UNIVERSITY PRESS
Double L
Materials
• Multilink cubes
• isometric dot paper
Can you make a double L shape with 12 cubes?
• pencils
• paper
Students make the letter L with six cubes and sketch it. The double shape can be made by joining two single L shapes together, one on top of the other
Variation
Extend the investigations using online isometric drawing tools
Materials
The effective teaching of measurement and geometry cannot take place without extensive use of concrete materials. Lists of materials accompany each activity in More Daily Workouts to allow teachers to prepare in advance. Certain classroom materials, such as paper, pencils, pens, 30 cm rulers, tape measures, metre rules, clocks, balances and masses, stopwatches, Multilink cubes, balls, grid paper, isometric dot paper and Pattern blocks, will need to be available. In addition, teachers will need to collect a large bank of resources for use during teaching or learning activities. Some commercial resources will need to be purchased, but everyday materials can be collected in co-operation with the students and stored in the classroom. Two mobile cabinets or trolleys, one storing geometry materials and the other storing measurement materials, are a useful means of having readily accessible and transportable resources.
Online resources
The following websites offer learning experiences in digital format, and provide extension and enrichment.
• NRICH – a University of Cambridge website that provides a large variety of mathematics games and puzzles.
• Wild Maths – a rich source of games, activities and stories, also from the University of Cambridge.
• FUSE Victoria – a Department of Education and Training site that provides online activities in topics such as symmetry, tessellations, isometric drawing, non-standard measurement and telling the time.
• MAV – the Victorian mathematics association website lists many activities to support the learning of measurement and geometry.
• Wikimapia.com – an online editable map resource for investigations of location and movement.
Online searches are a feature of selected activities in More Daily Workouts. Search terms such as ‘interactive clocks’, ‘domes’, Australian road signs’, ‘maps of the world’, ‘learning tools for the geoboard’ and ‘isometric drawing tools’ direct activities for teachers, provide interest and foster students’ learning.
vii OXFORD UNIVERSITY PRESS HOW TO USE THIS BOOK
Title List of materials needed Instructions Variation activity
Teacher dialogue and possible student responses
Diagram
LOWER – YEARS F TO 2 Measurement
USING UNITS OF MEASUREMENT LENGTH
Year F
Roads
Materials
• long wooden blocks or off-cuts
• Multilink or Unifix cubes
Choose a pair of students to start the activity. Ask each student to use the materials to make a road.
Is your road long or short? Is it wide or narrow? Which of the two roads is longer?
Discuss the students’ efforts with the class. Invite the students to work in pairs and repeat the activity.
What can you tell me about the roads that you made?
Walls
Materials
• Long wooden blocks or off-cuts
• Multilink cubes
Choose a pair of students. Ask one student to use the materials to make a high wall. Ask the other students to make a long, low wall.
Discuss the students’ efforts with the class.
Invite the students to work in pairs and repeat the activity.
What can you tell me about the walls that you made?
Variation
Ask the students to build a tall thin building and a small, wide building. Discuss.
2 OXFORD UNIVERSITY PRESS
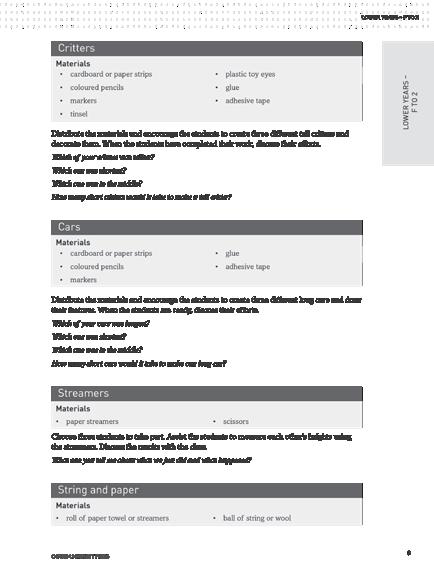
Critters
Materials
• cardboard or paper strips
• coloured pencils
• markers
• tinsel
• plastic toy eyes
• glue
• adhesive tape
Distribute the materials and encourage the students to create three different tall critters and decorate them. When the students have completed their work, discuss their efforts.
Which of your critters was tallest?
Which one was shortest?
Which one was in the middle?
How many short critters would it take to make a tall critter?
Cars
Materials
• cardboard or paper strips
• coloured pencils
• markers
• glue
• adhesive tape
Distribute the materials and encourage the students to create three different long cars and draw their features. When the students are ready, discuss their efforts.
Which of your cars was longest?
Which one was shortest?
Which one was in the middle?
How many short cars would it take to make one long car?
Streamers
Materials
• paper streamers
• scissors
Choose three students to take part. Assist the students to measure each other’s heights using the streamers. Discuss the results with the class.
What can you tell me about what we just did and what happened?
LOWER – YEARS F TO 2 3 OXFORD UNIVERSITY PRESS LOWER –YEARS F TO 2
Year 1
Sorting lengths
Materials
• classroom objects
• relationship cards: ‘is longer than’, ‘is shorter than’, ‘is the same length as’
• paper
• pencils
• coloured pencils
• markers
Choose a student and have them nominate an object in the classroom. Ask another student to select a relationship card and find another object that makes the statement true. Repeat several times and discuss the results.
Ask the students to draw and label some of the objects that they identified and discussed.
Extension
Repeat the activity using cards showing different length attributes such as: taller/shorter, thicker/thinner, higher/lower, deeper/shallower.
Door widths
Materials
• 2 doorways of differing widths
• string
• streamers or cardboard strips
Which is wider, the classroom doorway or the storeroom doorway? How could you find out which one?
Ask the students to suggest answers and then test their predictions. Discuss findings. Select other doorways nearby and compare their widths.
Variation
Ask the students to compare the heights of their desks and the teachers’ desk.
Longer or shorter?
Materials
• pairs of objects of similar size: a pencil and a pen, a book and pencil case, a knife and a fork, pencil sharpener and an eraser, a ruler and a schoolbag
Which of these pairs of objects is longer? Which is shorter?
Are any of them the same length?
Display the objects to the students. Select students to compare the lengths of the objects by direct comparison. Explain the need for the same starting point. Discuss the findings.
MORE DAILY WORKOUTS 4 OXFORD UNIVERSITY PRESS
Standing tall
Materials
• string
• ribbon or streamers
• scissors
• paper
• pencils
Can you find a partner who is about the same height as you?
How could we check that you are about the same height?
Discuss the different ways that the height could be measured, either by direct comparison back to back or measuring with a streamer.
Select pairs of students and measure their heights using both methods.
Discuss the results.
Make a display of the streamers, ordering them by height and labelling them with the students’ names.
Year 2
Guess and step
Materials
• paper
• pencils
What is your best guess about the number of steps you would take from your chair to the classroom door? Take a good look at the distance and write down your estimate.
Select students and ask them to count the steps.
Were your estimates accurate?
Repeat the activity. Have the students estimate the numbers of steps to the whiteboard, the back wall of the room and the teachers’ desk. Discuss the results. Ask the students to draw and write about what they found out.
Shortest to the longest
Materials
• string or wool
• scissors
• classroom objects
Ask the students to focus on the height of a student’s chair, the width of a schoolbag, the length of a student’s desk and length of the leg of a student’s desk.
Which of these items will be the longest? Which will be the shortest?
Discuss the students’ predictions. Invite pairs of students to measure each item using string or wool, cutting the various lengths with the scissors. Arrange the pieces of string or wool in order. Label and display them.
LOWER – YEARS F TO 2 5 OXFORD UNIVERSITY PRESS LOWER –YEARS F TO 2
Arm lengths
Materials
• string or wool
• scissors
• classroom objects
Choose a pair of students. Ask one student using the string or wool to measure the length of the other’s arm from shoulder to fingertips.
Divide the class into teams and ask team members in turn to identify objects in the classroom that are shorter than the length of the arm. Check by using the string to measure the object. Each correct answer scores a point for the team.
Repeat the process for objects that are longer than the length of the arm. Total the scores and declare the winning team.
Hands and feet
Materials
• a whiteboard
• markers
• paper clips
Tell the students that they are going to investigate the lengths of their hands and feet using joined paper clips.
What is your estimate of the number of paper clips used to measure:
• the length of your index (or pointer) finger
• the distance across your palm
• the length of your hand
• the distance around your wrist
• the length of your foot?
Choose a pair of students in turn to measure each length. Record the results in a table on the whiteboard.
Length of index finger
Distance across palm
Length of hand
Distance around wrist
Length of foot
Did anything unexpected happen?
Discuss the results with the students.
MORE DAILY WORKOUTS 6 OXFORD UNIVERSITY PRESS
Estimate Measure
Item
Desk top measures
Materials
• teachers’ desk
• craft sticks
• straws
How long is the teachers’ desk?
• paper
• pencils
Choose a pair of students to investigate the length of the desk using craft sticks, estimating before measuring. Select other pairs to repeat the process using straws and pencils.
How accurate were your measurements?
Which units were best for measuring? Why?
Discuss the students’ responses.
Pencil count
Materials
• a set of pencils
• a set of markers
• student desks
How many pencils will fit along the length of your desk? Estimate the number and then measure your desk.
Discuss students’ answers.
Now use the markers and repeat the activity.
Did you get the same result or a different result? Why were the answers different?
Discuss the difficulties of measuring with informal units, as answers vary because there is no common standard unit used.
Estimate and count
Materials
• a table
• 1 m pieces of string or 1 m cardboard strips
• pencils
• blocks
• tiles
• straws
• rulers
• school shoes
• craft sticks
If you use the same type of object, how many will fit along a 1 metre length?
Ask the students to work in pairs to estimate how many of each identical item will fit along the length.
LOWER – YEARS F TO 2 7 OXFORD UNIVERSITY PRESS LOWER –YEARS F TO 2
Students record their estimates and check by measuring with the chosen items. Discuss the students’ answers and compare the results.
Extension
Measure the width of the room using metre strips as a standard measuring unit.
AREA Year F
Comparing shapes 1
Materials
• square tiles
Select three students and ask them to each arrange eight tiles to make different shapes. In which way are these tile patterns the same? In which way are they different?
Discuss the fact that although the arrangements are different, the number of tiles and their surface space (area) are still the same.
Comparing shapes 2
Materials
• a whiteboard
• markers
Draw the below shapes on the whiteboard.
• triangular pattern blocks
Select two pairs of students and ask each pair to copy one of the arrangements using the blocks.
In which way are these tile patterns different? In which way are they the same?
Discuss the fact that although the arrangements are different, the number of tiles and their surface space (area) is still the same.
MORE DAILY WORKOUTS 8 OXFORD UNIVERSITY PRESS
Year 1
Open and closed Materials
• a computer
• screen
• a whiteboard
• markers
• paper
• pencils
• coloured pencils
Draw some shapes like the ones below on the whiteboard or screen.
Discuss the nature of the shapes with the students.
What can you tell me about these shapes?
Ask the students to talk to the person next to them before starting a class discussion.
Focus on how the shapes can be grouped as closed and open shapes. Explain how closed shapes involve a boundary and an enclosed space within, called its area.
Encourage the students to draw open and closed shapes and colour the closed shapes.
Guess and check
Materials
• pairs of objects: an exercise book and a sheet of note paper; an A4 page and a sheet of art paper; a sheet of newspaper and a small mat
Display a pair of objects to the class.
What is the easiest way to compare the areas of these objects?
Discuss the students’ suggestions. Select students to superimpose the objects, one on top of the other.
Which one has the larger area? Which one has the smaller area?
Repeat the activity for the other pairs of objects.
Did any of the objects have about the same area?
Ask the students to draw and write about what they did.
LOWER – YEARS F TO 2 9 OXFORD UNIVERSITY PRESS LOWER –YEARS F TO 2
Trace and cut
Materials
• grocery packets and tins
• plates
• saucers
• saucepans
• paper
• markers
Display the collection of objects to the class. Ask the students to select two objects and trace their outlines on sheets of paper. Have them cut out the outlines, label them and directly compare them by superimposing one on top of the other.
Which outline has the larger area? Which outline has the smaller area?
Do any of the outlines have the same area? How do you know?
Variation
Ask the students to trace objects of about the same area and compare them.
Sorting areas
Materials
• classroom objects
• relationship cards: ‘has a larger area than’, ‘has a smaller area than’
• paper
• pencils
• coloured pencils
• markers
Choose a student and have them nominate an object in the classroom. Ask another student to select a relationship card and find another object that makes the statement true. Repeat several times and discuss the results.
Ask the students to draw and label some of the objects with large and small areas.
Year 2
Cover up Materials
• 2 student desks
• sheets of paper
• container lids or paper circles
Select a pair of adjoining desks and a number of students to assist.
Can you cover the top of the first desk with paper?
Can you cover the top of the second desk with circle shapes?
How many of each type of shape did you use?
Was all the top of the desk covered?
MORE DAILY WORKOUTS 10 OXFORD UNIVERSITY PRESS
Which things are best for covering, the paper or circle shapes? Why?
Discuss the students’ responses.
Cover the mat
Materials
• a mat or rug
• sheets of paper
Select a number of students to help with this activity.
How many sheets of paper do you think will cover the mat?
What is your best guess?
Call for students’ estimates before asking the students to complete the activity.
Were your best guesses about right?
Were there any gaps or overlaps? Why?
Discuss the results.
Crafty areas
• craft sticks
• blocks
• tiles or counters
How many different closed shapes can you make with eight craft sticks? Discuss the students’ efforts, encouraging both regular and irregular shapes.
Which of your closed shapes has the largest area?
How could you find out?
Encourage the students to use blocks, tiles or counters to determine the areas of the shapes.
What did you discover?
Ask the students to draw and write about what they found out.
Cover ups 1
Materials
• container lids
• square tiles
• counters
• paper plates
• A4 pages or paper squares
• a sheet of newspaper
• an exercise book
• paper
• pencils
Divide the class into six groups and ask them to investigate the following activities. Ask them to record their estimates and measures.
How many counters do you need to cover an exercise book?
LOWER – YEARS F TO 2 11 OXFORD UNIVERSITY PRESS LOWER –YEARS F TO 2
How many square tiles do you need to cover an exercise book?
How many paper plates or round lids do you need to cover a desktop?
How many A4 pages or paper squares do you need to cover a desktop?
How many paper plates or round lids do you need to cover a sheet of newspaper?
How many A4 pages or paper squares do you need to cover a sheet of newspaper?
Have the groups report their findings to the class and discuss their responses.
Cover ups 2
Materials
• pattern blocks
• classroom objects
Can you find five objects in the classroom that can be covered by between five and ten pattern block shapes?
Select pairs of students to suggest various surfaces and check their areas using either the squares, triangles, rhombuses, trapeziums or hexagons.
Did you discover anything surprising?
Which shapes were best for measuring? Why?
Extension
Ask the students to draw irregular and regular shapes on paper and repeat the activity.
Footprints
Materials
• square tiles
• counters
• blocks
• craft sticks
• paper
• pencils
• markers
Choose a group of three students of differing heights to demonstrate this activity.
Does the tallest person in this group have the largest footprint?
How could we find out the answer to this question?
Encourage the students’ responses, including direct comparison or by measuring with objects and counting them.
Ask the students to first compare the lengths of their feet from the same starting point, trace them and cover the areas with selected objects. Have them report their findings.
Was your answer true or false, or is it too early to tell?
Discuss the students’ opinions.
Extension
Ask the students to investigate whether the shortest person in a group has the smallest foot.
MORE DAILY WORKOUTS 12 OXFORD UNIVERSITY PRESS
Handprints
• a sheet of newspaper or butcher paper
• markers
How many handprints will cover this large sheet of paper?
Select pairs of students to fill the page with handprints. The first student places their hand flat on the paper, while the second student traces around it. Repeat the process until the page is covered.
What did you find out?
Was all the sheet covered?
Are there any gaps? Are there any overlaps?
Discuss the students’ findings.
Handy shapes
Materials
• Paper
• scissors
• pencils
• markers
• counters or coins
Ask the students, working in pairs, to trace the outline of each other’s hands on paper.
Have them carefully cut out the hand shapes and retain them.
Can you imagine how many counters will cover your hand shape?
Ask the students to investigate the question and report their findings.
How many hand shapes will cover a desktop?
How many hand shapes will cover a sheet of newspaper?
Ask the students to join together and investigate the questions. Discuss the results.
Handy areas
Materials
• paper
• 1 cm grid paper
• pencils
• markers
Tell the students that we are going to investigate another way to find the area of their hands. Ask the students, working in pairs, to trace the outline of each other’s hands on the grid paper.
Have the students first count the whole squares to determine the area. They then can add the number of squares that are more than half a unit, also.
What did you find out? What was the area that you calculated?
Which method of measuring the area of hands was best, using counters or counting squares? Why?
Discuss the students’ opinions.
LOWER – YEARS F TO 2 13 OXFORD UNIVERSITY PRESS LOWER –YEARS F TO 2
VOLUME AND CAPACITY
Year F
Pack a box
Materials
• a shoe box or similar
• oranges
• tennis balls
• potatoes
• empty tins
How many oranges will fill the box? Call for answers. Select a pair of students to fill the box. Repeat the activity using balls, potatoes or tins. Discuss the results.
Extension
Ask the students to fill small boxes with other selected items such as cubes that will pack more tightly.
Build a house
Materials
• about 30 building blocks
Choose three pairs of students. Ask the first pair to take 10 blocks and build a tall house. Ask the second pair to build a long house. Ask the third pair to build an unusual house. Which house is tallest? Which house is longest?
Which house takes up the most space?
Which house did you like the most? Why?
Discuss the students’ responses.
Check and tell
Materials
• 3 plastic glasses
• jug
• water
Display three glasses to the students: one full, one half-empty and one empty. How could you describe these glasses and what is inside them?
Discuss the students’ answers. Highlight the everyday language used to describe capacity, the amount that can be held by a container.
MORE DAILY WORKOUTS 14 OXFORD UNIVERSITY PRESS
How many glasses?
Materials
• a wet area
• a small jug
• plastic glasses
Fill the jug and place the glasses in a line.
• cups
• mugs
• water
Ask the students to examine the amount of water in the jug very carefully.
How many glasses do you think this jug will fill?
What is your best guess?
Invite the students to fill the glasses and count the number.
Were you surprised? Did you guess correctly?
Repeat the activity for other containers.
Which holds more?
• a wet area
• a selection of containers
Choose two similar containers and display them.
Which of these containers will hold more water?
How could we find out?
• a jug
• water
Discuss the students’ suggestions. Check the results by pouring from one container to another.
Can you choose two containers that will hold about the same quantity of water?
Ask the students to talk to a classmate and suggest some possibilities.
Check some of the suggestions by using a jug to fill the containers, counting the number of jugs required to fill each container. Discuss the results.
Comparing sizes
Materials
• a large ball
• 2 smaller balls
• paper
• pencils
Display the balls to the students and ask them to carefully examine them. Draw the students’ attention to their size and the amount of space that they occupy.
Which ball takes up the most amount of space?
Which ball takes up the least amount of space?
Discuss the students’ responses.
Ask the students to draw the balls in order of size.
LOWER – YEARS F TO 2 15 OXFORD UNIVERSITY PRESS LOWER –YEARS F TO 2
Make a difference
Materials
• Multilink cubes or other cubes
Choose four or five students and give them 10 cubes each.
Can you make a shape using all 10 cubes?
Discuss the students’ designs.
Repeat the activity to identify as many different arrangements as possible.
What is the same about all these different shapes you have made?
Discuss the students’ answers, emphasising that the different shapes take up the same amount of space.
Year 1
Which holds the most?
Materials
• a wet area
• a selection of containers
• a jug
Choose three similar containers and display them.
Which of these containers will hold the most water?
What is the best way we could find out?
• water
• paper
• pencils
Discuss the students’ suggestions. Check the results by using a jug to fill the containers, counting the number of jugs required to fill each container. Ask the students to draw the containers in order of their volume.
Jellybean jars
Materials
• 3 small jars of differing sizes
Display the empty jars to the students.
Which of these jars will hold the most jellybeans?
Identify the jar and fill it with jellybeans.
• jellybeans
How many jellybeans is this jar holding? What is your best guess?
Ask the students to estimate the number of jellybeans. Choose students to help count the number.
What did you find out about your estimates?
Discuss the results with the students.
MORE DAILY WORKOUTS 16 OXFORD UNIVERSITY PRESS
Fill the gaps
Materials
• 5 plastic drink cups or beakers
• dry sand
• marbles
• water
• a wet area
Select five pairs of students. Tell the students that they are going to investigate packing and filling the containers and will need to make some predictions.
Ask the first pair of students to half-fill a cup with sand.
What will happen if you now add half a cup of water? Tell the class.
Ask the second pair to half-fill a cup with marbles.
What will happen if you add half a cup of sand? Tell the class.
Ask the third pair to half-fill a cup with sand.
What will happen if you add half a cup of marbles? Tell the class.
Ask the fourth pair to half-fill a cup with water.
What will happen if you add half a cup of sand? Tell the class.
Ask the final pair to half-fill a cup with marbles.
What will happen if you add half a cup of water?
Discuss the results with the students. Develop the idea that spaces between objects can be filled by other materials, both solid and liquid.
Pack and count
Materials
• 3 small cardboard boxes of different sizes
• Multilink cubes or similar
Select three pairs of students. Tell the students that they are going to investigate packing and filling the containers and will need to make some predictions.
Will a group of 10 cubes fit into your boxes? Try it.
Is there any space left in your box?
If there is space, how many more cubes do you think will fill the box to the top?
Pack them in and check.
How many cubes altogether are now in your box?
Why do you think cubes pack together very well?
Discuss the students’ answers.
LOWER – YEARS F TO 2 17 OXFORD UNIVERSITY PRESS LOWER –YEARS F TO 2
In for the count
Materials
• wooden bricks or similar
• shoe box
• matchbox
• eggcup
• plastic drink cup
• marbles
• counters
• paper
• pencils
Select four pairs of students. Tell the students that they are going to investigate packing and filling the containers and will need to make some predictions.
Ask the first pair of students to take a shoebox. How many wooden bricks will pack into the shoebox?
Make your best guess and then count the bricks.
Ask the second pair to take an eggcup. How many counters will the eggcup hold?
Make your best guess and then count the counters.
Ask the third pair to take a matchbox. How many counters will it hold?
Make your best guess and then count the counters.
Ask the last pair to take a drink cup. How many marbles will the drink cup hold?
Make your best guess and then count the marbles. Discuss the students’ answers and the accuracy of their predictions. Ask them to draw and write about what they have done, as an assessment tool.
Which one?
Materials
• an empty cream container
• plastic drink cup
• mug
• empty tin
• empty 600 mL drink container
Display the empty containers to the students. Ask the class to consider the volume of the containers.
How could we find out which of these containers holds the most?
Encourage the students to discuss the question with a partner. If necessary, suggest that the quickest solution is by pouring the contents of one container into the other.
What did you find out? Which container held the most? Which container held the least?
Can you now order the containers from the one that holds most to the one that holds least?
Draw the containers in order from the one that holds the most to the one that holds the least.
MORE DAILY WORKOUTS 18 OXFORD UNIVERSITY PRESS
Year 2 Modelling cubes
Materials
• Multilink cubes
• paper
• pencils
Choose a pair of students and ask them to each take a large handful of Multilink cubes. Can you build a model with your cubes?
When the building is complete, ask the class to compare and talk about the models. Which model takes up the most space?
How could we find out?
Encourage the students to count the cubes to check the model that has the larger volume. Ask the students to record the results.
’s model used cubes.
’s model used cubes.
’s model took up the most space.
Drawing cubes
Materials
• Multilink cubes
• isometric dot paper
Display a single cube to the students. How could we draw this cube on the dot paper?
• pencils
Demonstrate the correct way of drawing the cube with its front faces orientated at 300-degree angles. Check the students’ drawings.
Extension
When the students are ready, ask them to draw two cubes joined together and finally three cubes. Discuss the different arrangements with the students. Display the students’ work.
LOWER – YEARS F TO 2 19 OXFORD UNIVERSITY PRESS LOWER –YEARS F TO 2
Tetracubes
Materials
• Multilink cubes
• isometric dot paper
• pencils
How many ways can you join four Multilink cubes together? Display a single tetracube and invite the students to work alone or in pairs to investigate other tetracubes. There are eight possible combinations.
What is the same about each model?
Do they each take up the same amount of space?
How many different tetracubes did you discover?
Discuss the different arrangements with the students.
Variation
Use Base 10 minis or other cubes to make tetracubes.
Drawing tetracubes
Materials
• tetracube models from previous activity
• isometric dot paper
• pencils
• coloured pencils
Can you draw your favourite tetracube on isometric dot paper?
Discuss the students’ efforts and display the students’ drawings.
Extension
Encourage the students to draw other selected tetracubes.
Volume quiz
Ask the students the following questions to assess their understandings. Discuss their responses. Answers may vary.
Which object has a greater volume?
A balloon or a watermelon?
A tennis ball or golf ball?
A soccer ball or a softball?
A tennis ball or a cricket ball?
A pillow or a cushion?
A can of drink or a carton of juice?
A Duplo block or a matchbox?
A glue sticker or a marker?
A matchbox or an eraser?
MORE DAILY WORKOUTS 20 OXFORD UNIVERSITY PRESS
MASS Year F
Eyes wide shut
Materials
• a tennis ball
• a full pencil case
• an orange
• an eye mask
Call for a volunteer. Wearing a blindfold, ask them to feel the objects one by one. Which of these objects is heavy? Which object is light?
Discuss the students’ findings with the class.
Can you put the objects in order from lightest mass to heaviest mass?
Extension
Repeat the activity with other sets of objects.
Drag it along
Materials
• ball of string
• a thick library book
• backpack
• a box of blocks
• a medicine ball
Select a group of three or four students. Help them tie a string around each of the objects. Ask the students to take turns pulling the object along the floor.
Which object is heaviest? Which object is lightest? How do you know?
Discuss the students’ findings and the reasons for their judgements.
Extension
Repeat the activity for other objects.
Pass the parcel
Materials
• a selection of 4 or 5 wrapped parcels: some small and heavy, others large and light
Display the parcels to the students.
Which parcel do you think will be the heaviest?
Which one will be the lightest?
LOWER – YEARS F TO 2 21 OXFORD UNIVERSITY PRESS LOWER –YEARS F TO 2
Discuss the answers with the students and arrange the parcels in an agreed order from heaviest to lightest. Invite the students to handle the parcels and check the class estimates.
What did you discover about your estimates?
If you wish, allow the students to unwrap the parcels and check their contents. Develop the idea that the volume of an object does not necessarily predict its mass.
Heavy or light?
Materials
• 2 hoops or 2 sheets of butcher paper
• label cards: ‘heavy’ and ‘light’
• assorted classroom objects
Indicate a selection of classroom objects. Which things are heavy? Which things are light?
• paper
• pencils
• coloured pencils
Ask the students to suggest answers. Invite the students to place the objects in two hoops or on two sheets of butcher paper labelled heavy or light. Check their selections.
Can you draw your favourite heavy objects?
Can you draw your favourite light objects?
Display the students’ work.
Heavy rock
Materials
• a whiteboard
• markers
• a rock or large pebble
• classroom objects
Can you name objects in the classroom that are lighter than this rock?
Call for answers. Invite selected students to test the students’ suggestions by hefting.
To do this, the students hold one object in each hand, raise them up and down and decide which is lighter and which is heavier. Make sure the students understand that this is ‘hefting’ and become familiar with the word.
Record the results on the whiteboard. found that the is lighter than the rock.
MORE DAILY WORKOUTS 22 OXFORD UNIVERSITY PRESS
Order of rocks
Materials
• 5 rocks or large pebbles
Which of the rocks is the heaviest? Which of the rocks is the lightest?
Can you find two rocks that have similar mass?
Select students to investigate the questions by hefting. Discuss the findings.
Variation
Use assorted library books instead of rocks.
Year 1
See-saw
Materials
• a metre stick
• block of wood
• book
• rock
• a full pencil case
• stapler
• calculator
Can you make a see-saw with the block and the metre stick?
Can you predict which is the heaviest object using the see-saw? Discuss the students’ choices and the reasons behind them. Select some students to test their predictions.
Can you arrange the objects in order from lightest to heaviest? Discuss.
Balance it up
Materials
• a bucket balance or equal-arm balance
• pairs of classroom objects: a rock and ball, a pencil and an eraser, a paintbrush and a cup, a calculator and a stapler, a marble and a Multilink cube
Which of the two objects feels heavier? How could you check your answer?
Select students to investigate the mass of each pair of objects using the balance. Ask them to predict the heavier of the two objects before measuring them.
What did you find out about your estimates?
Talk about the students’ findings.
LOWER – YEARS F TO 2 23 OXFORD UNIVERSITY PRESS LOWER –YEARS F TO 2
Levelling out
Materials
• a bucket balance or equal-arm balance
• classroom objects
Can you name some things that will balance each other exactly?
Ask the students for their suggestions. Invite them to check their choices by using the balance. Discuss the results.
Equal masses
Materials
• a bucket balance or equal-arm balance
• coins
• Multilink cubes
• marbles
• a stapler
• paper clips
• counters
• craft sticks
• an eraser
Invite a pair of students to investigate each of the following questions.
How many coins will balance five Multilink cubes?
How many marbles will balance a stapler?
How many paper clips will balance five counters?
How many counters will balance a Multilink cube?
How many craft sticks will balance an eraser?
Did you find anything unusual or surprising?
Discuss the results with the class.
Extension
Provide opportunities for the students to investigate equal masses during play.
Balancing crayons
Materials
• a bucket balance or equal-arm balance
• a packet of markers or crayons
• Multilink cubes
• coins
• craft sticks
• pencils
• marbles
How many of these small objects will balance a packet of markers?
Ask the students for their suggestions. Invite them to check their choices by using the balance. Discuss the results.
MORE DAILY WORKOUTS 24 OXFORD UNIVERSITY PRESS
Measure then estimate
Materials
• a bucket balance or equal-arm balance
• a pencil
• a marker
• an eraser
• counters
• a tennis ball
How many counters do you think it will take to balance: a pencil, a marker and an eraser? Select students to investigate the answers for each of the objects. Record the results and discuss them with the students.
What do you think would be the mass of a tennis ball measured using counters?
Ask the students for their estimates before selecting students to determine the answer.
Year 2
Conserving mass
• a bucket balance or equal-arm balance, playdough or plasticine, several pebbles
Make a ball of playdough that weighs the same as several pebbles. Confirm with the students that the masses are equal.
If we change the ball of playdough into a sausage shape, will it still balance the pebbles?
Ask the students to make their predictions. Check the result by measuring. Discuss the result. If we divide the playdough into two pieces, will it still balance the pebbles?
Invite a student to divide the playdough in half and carry out the activity. Discuss the results.
Highlight the fact that although the shape of the playdough has changed, its mass, or amount of substance, remains the same.
Match an object
Materials
• a bucket balance or equal-arm balance
• Multilink cubes
• classroom objects
• paper
• pencils
Can you name some things that will have about the same mass as 10 Multilink cubes?
Ask students for their suggestions. Invite them to check their choices by using the balance. Discuss the results. Record the results.
Ten cubes have the same mass as one .
Extension
Use 10 pebbles, marbles, nuts, bolts or washers and repeat the activity.
LOWER – YEARS F TO 2 25 OXFORD UNIVERSITY PRESS LOWER –YEARS F TO 2
Compare the two
• a bucket balance or equal-arm balance, Multilink cubes, craft sticks
Which weighs more: 20 craft sticks or 20 Multilink cubes?
Call for estimates from the students. Discuss their responses. Invite a pair of students to investigate the answer by measuring.
Which weighed more?
How accurate were your estimates?
Discuss.
Extension
Repeat the activity for other numbers of objects suggested by the students.
Cube balance
• a bucket balance or equal-arm balance, Multilink cubes, full pencil case, whiteboard eraser, softball, drink bottle, cup, mug
Display the objects to the class.
How many cubes will balance each of these objects?
Call for estimates from the students. Discuss their responses. Invite the students to investigate the answer by measuring.
What did you discover about your estimates?
Which object is the heaviest?
Which object is the lightest?
How many more?
Materials
• a bucket balance or equal-arm balance
• a roll of tape
• a calculator
• Multilink cubes
Place a roll of tape on one balance pan and a calculator on the other.
How many cubes do you think have to be added to one pan to balance the roll of tape and the calculator?
Call for answers. Discuss the students’ responses. Ask the students to suggest other pairs of objects in the room whose mass can be investigated.
MORE DAILY WORKOUTS 26 OXFORD UNIVERSITY PRESS
Needing a standard
Materials
• an apple or orange
• Multilink cubes
• coins
• pencils
Select students to measure the mass of the apple using the different materials. Are the results the same? Why not?
Can you think of any way to make the results the same?
Discuss the students’ suggestions. Introduce the idea, if necessary, that accurate measurement is only possible if standard units are used.
TIME Year F
Long or short?
Materials
• paper
• pencils
• coloured pencils
During the day, which activities take a long amount of time? Which activities take a short amount of time? Which activities go on forever?
Ask the students to draw the different activities. Discuss and display their work.
Follow the bouncing balls
Materials
• a tennis ball
• rubber ball
• a basketball
Select three students and give them each a ball. If you drop the balls at the same time, which ball will bounce for the longest time? Invite the students to predict the answer. Carry out the activity and discuss the results.
LOWER – YEARS F TO 2 27 OXFORD UNIVERSITY PRESS LOWER –YEARS F TO 2
Days of the week
Materials
• days of the week flashcards
• paper
• pencils
• coloured pencils
• markers
Ask a pair of students to arrange the cards in weekly order. Select students to choose cards representing today, yesterday and tomorrow.
Can you draw something that you did today?
Can you draw something that you did yesterday?
Can you draw something that you will do tomorrow? Discuss the students’ efforts and display them.
Paper chains
Materials
• 5 paper strips of a single colour labelled Monday–Friday
• 2 paper strips of another colour labelled Saturday and Sunday
• stapler or glue stick
• marker
Make a paper chain of the days of the week. Invite the students to answer some questions, referring to the chain.
What day is it today?
What day is it tomorrow?
What day was it yesterday?
What day comes before ?
What day comes after ?
Why are two loops a different colour?
How many days are there until the weekend?
How many days till ?
How many days are there in 1 week?
How many days are there in 2 weeks?
What is another name for a period of 2 weeks?
Encourage the students to make their own paper chains.
MORE DAILY WORKOUTS 28 OXFORD UNIVERSITY PRESS
Special times
Materials
• paper chains from previous activity
• paper
• pencils
• coloured pencils
Talk about special times during the week, such as a training session or match for a sport, or a music lesson, a regular walk with family or a play session with a friend.
Can you draw a picture to show a special thing that you do on each day of the week?
Display the students’ drawings.
Draw the clock
Materials
• classroom clock or clock model
• pencils
Close your eyes. Imagine a clock face.
• paper
What does it look like? Can you draw it from memory?
Ask the students to draw a clock face and its hands. Discuss the different features of their drawings. Compare the students’ drawings with a classroom clock or clock model.
Were your drawings accurate? Were the numerals in the correct positions?
Where did you place the hands?
Are the hands different lengths? Why?
Can you make your clock show a time?
What time is it?
Discuss the students’ responses.
Year 1
Colour the clock
Materials
• a whiteboard
• markers
• a worksheet showing 12 30-degree segments
• pencils
• coloured pencils
Draw a clock face on the whiteboard showing 12 30-degree segments. Invite a student to suggest a particular hour.
Where do I draw the hour hand?
LOWER – YEARS F TO 2 29 OXFORD UNIVERSITY PRESS LOWER –YEARS F TO 2
Where do I draw the minute hand?
Is this correct?
Colour in the segment between the hour hand and minute hand, representing the hour. Ask the students to select an hour and repeat the activity using their worksheets. Discuss the results.
Hands on hours
Materials
• a computer
• screen
• a whiteboard
• markers
• worksheets showing multiple blank analogue clock faces
• pencils
• paper
Download an interactive clock from the Internet or draw a blank analogue clock face on the whiteboard.
Today we’re going to tell the time on the hour.
What is the position of the hands at 11 o’clock?
Encourage the students’ responses and check their answers.
Point out that the hour hand should be exactly on 11 and the minute hand should be on 12. (Try to avoid saying ‘big hand’ and ‘little hand’, as they do not convey precise meaning). Distribute the pages showing a blank analogue clock face.
Can you choose another hour and draw the hands on the clock face?
Discuss the students’ selections with the class.
Match the times Materials
• a model clock or paper plate clock
Select different students to use the clock to model the hour that they wake up, go to school, eat lunch, have dinner and go to bed.
Ask the students to select other activities during the day and model their times.
MORE DAILY WORKOUTS 30 OXFORD UNIVERSITY PRESS
The seasons
Materials
• photographs or illustrations of different seasons
• pattern blocks
Develop a picture and talk about the seasons and the changes in the natural environment that occur. Ask the students to use the pattern blocks to create designs representing events or items associated with different seasons such as:
• a sandcastle at the beach in summer
• a fallen leaf in autumn
• a scarf in winter
• and a flower in spring.
Photograph and display the students’ designs.
Extension
Encourage the students to represent other events or items using various media.
Year 2
Hands on half hours
Materials
• a computer
• screen
• a whiteboard
• markers
• worksheets showing multiple blank analogue clock faces
• pencils
• paper
Download an interactive clock from the Internet or draw a blank analogue clock face on the whiteboard.
Today we’re going to tell the time on the half hour.
What is the position of the hands at half past 11 o’clock??
Encourage the students’ responses and check their answers.
Point out that the hour hand should be exactly halfway between 11 and 12 and the minute hand should be on 6. Distribute the pages showing a blank analogue clock face.
Can you choose another half past the hour and draw the hands on the clock face?
Discuss the students’ selections with the class.
Check answers. Ensure that the students have drawn the minute hand so that it divides the clock face in half and that the hour hand is exactly halfway between the 2 hours in question. Accept the description of 30 minutes past the hour.
LOWER – YEARS F TO 2 31 OXFORD UNIVERSITY PRESS LOWER –YEARS F TO 2
Birthday graph Materials
• 12 balls of plasticine or playdough
• label cards for the months of the year
• toothpicks or stick counters
Arrange the 12 balls of plasticine in a row. Label each ball to show a month of the year. Invite the students to place toothpicks or sticks in their birthday months.
Which month had the most birthdays?
Which month had the least birthdays?
Did any month have the same number of birthdays?
Were there any months with no birthdays?
How many students had birthdays in spring?
How many students had birthdays in summer?
How many students had birthdays in autumn?
How many students had birthdays in winter?
Discuss the results with the students.
Calendar counting
Materials
• a calendar
• paper
• pencils
Use a calendar and ask the students to assist with answering the following questions.
How many days are there in each month?
How many weekends are there in this month?
How many days are there in this month?
What is the date of the first Saturday of this month?
How many school days are there in this month?
How many school days until the school holidays?
How many weeks of school in Term 2?
How many school days in Term 2?
What are the dates of Easter?
What are the dates of Ramadan?
What are the dates of Chinese New Year?
Discuss the answers. Encourage the students to make up questions of their own and answer them.
MORE DAILY WORKOUTS 32 OXFORD UNIVERSITY PRESS
Calendar days
Materials
• multiple copies of a particular calendar month
• pencils
Provide the students with a copy of the calendar month. Encourage the students to say the days of the week as you point to them. Point to the numbers and count them.
Can you see any repeating patterns in your month?
Discuss horizontal, vertical and diagonal patterns discovered by the students.
What is the pattern formed by Mondays?
On which day is the first day of the month? On which day is the last day?
How many Wednesdays and Fridays are there in your month?
What day of the week will it be on the 2nd, 9th, 16th and 28th?
What date is the second Tuesday? How many weekdays are there?
How many weekends are there?
Discuss the answers. Encourage the students to make up some questions of their own and answer them.
LOWER – YEARS F TO 2 33 OXFORD UNIVERSITY PRESS LOWER –YEARS F TO 2
LOWER – YEARS F TO 2 Shape
SHAPE
THREE-DIMENSIONAL OBJECTS
Year F
Coloured towers
Materials
• Multilink cubes or similar
• a small box or towel
Invite four students to construct four short towers with the cubes, with each tower made up of a different colour. Display the towers to the class and then cover them.
Can you remember the colour of each tower in order?
Call for answers. Discuss the students’ suggestions. Rearrange the order and repeat the activity several times.
Extension
Increase the number of different-coloured towers used.
What is missing?
Materials
• tennis ball
• eraser
• sharpener
• block
• marker
• 2 L ice cream container with lid
Display the items to the students. Select a pair of students and ask the first student to close their eyes. The second student then selects an object, places it in the container and seals it. The first student then guesses what is missing from the group of objects, that is, what is in the container. The second student then takes their turn. Repeat the activity with other pairs of students.
34 OXFORD UNIVERSITY PRESS
Copy my model
Materials
• Multilink cubes or similar
Select a pair of students and ask them to build a model using a small number of cubes. Ask the remaining students to work in pairs and build copies of the first model.
Extension
Repeat the activity over time, increasing the number of cubes used.
Variation
Students work in pairs. The first student builds a model, and the partner then copies it.
Crash it
Materials
• Multilink cubes or similar
Build a small tower using a selection of coloured cubes. Pull the tower apart quickly and ask the students to help you reconstruct the tower from memory.
Ask the class to work in pairs and repeat the activity.
Extension
Repeat the activity over time, increasing the number of cubes used.
Copy from memory
Materials
• Multilink cubes or similar
• towel
Ask the students to work with a partner. The first student makes a model with a small number of cubes and then covers it up.
Do you remember what the model looks like?
Can you make it again with the blocks?
Students then uncover the second model and compare the two. What did you find out when you compared the two models?
Discuss the students’ findings.
LOWER – YEARS F TO 2 35 OXFORD UNIVERSITY PRESS LOWER –YEARS F TO 2
Block walls
Materials
• Multilink cubes or similar
• paper
Can you build a long wall with the cubes?
• pencils
Ask the students to work in pairs to make their models.
Is your wall straight or curved?
How many blocks high is your wall? How many blocks long is it?
Are there any doors or windows in your wall?
Ask the students to draw their walls. Discuss and display the students’ drawings.
Staircases
Materials
• Multilink cubes or similar
• paper
Can you build a staircase with the cubes?
• pencils
Ask the students to work in pairs to make their models.
How many blocks high is your staircase? How many blocks wide is it?
How many steps are there in your staircase?
Ask the students to draw their staircases. Discuss and display the students’ drawings.
Mystery objects
Materials
• a shopping bag or cardboard box
• a selection of objects such as a tennis ball, a block, timber offcut, a tin, plastic bottle, an eraser, a pencil sharpener, a cup
Place the objects in the bag, out of sight of the students. Invite a student to reach inside the bag, select one of the objects and manipulate it.
Ask the other students to pose a series of questions that can only be responded to by answering yes or no, such as:
Is it rough? Is it smooth? Is there a hole in it? Has it got an inside and an outside? Does it have a flat surface? Can you feel its sides? Is it curved? Does it have corners?
Invite the students in turn to ask a series of questions, as they gradually form a mental image of the shape and attempt to discover it, step by step, instead of quickly guessing it. Repeat with other objects.
MORE DAILY WORKOUTS 36 OXFORD UNIVERSITY PRESS
Year 1
Toothpick designs
Materials
• toothpicks
• Blu Tack or playdough
• paper
• pencils
How many different structures can you make with toothpicks?
Encourage the students to create three-dimensional (3D) frameworks using toothpicks joined by small pieces of Blu Tack. Discuss the different designs made by the students.
Which is your favourite design? What does it look like?
Discuss the students’ ideas. Ask the students to copy their designs on paper. Display their work.
Toothpick shapes
Materials
• toothpicks
• Blu Tack or playdough
Can you make some boxes with toothpicks?
• paper
• pencils
Encourage the students to make a range of shapes. Ask the students to copy their designs on paper. Display their work.
Magnetic 3D shapes
Materials
• Geomag magnetic shapes
• camera
Can you make some different 3D shapes with the Geomag shapes?
Encourage the students to make a range of shapes. Take photographs of the students’ models and display them.
Inside shape hunt
Materials
• 3 hoops
• cardboard labels
• a collection of everyday objects such as balls, boxes, packets, tins, cartons, bottles, tubes, blocks and wooden offcuts
Ask the students to identify everyday items whose shape resembles the basic geometric shapes. Can you find objects that are shaped like prisms, cylinders and spheres?
LOWER – YEARS F TO 2 37 OXFORD UNIVERSITY PRESS LOWER –YEARS F TO 2
Ask the students to place each item in a different hoop. Place labels next to the different hoops: ‘shapes that look like prisms’, ‘shapes that look like cylinders’ and ‘shapes that look like spheres’. Discuss the results with the students.
Outside shape hunt
Materials
•
Take the students outside the classroom to investigate the design of some of the school buildings. Ask the students to describe the basic geometric shapes they see.
What kind of shapes can you see when you look at this building?
The students will be first inclined to offer suggestions based on their perceptions of twodimensional (2D) shapes such as triangles, rectangles and circles. This should be discussed before drawing their attention to the idea of shape in three dimensions also.
Can you find objects that are shaped like prisms, cylinders and spheres?
Photograph the shapes pointed out by the students and make a classroom display of the different groups.
Moving shapes Materials
• a collection of everyday objects such as balls, boxes, packets, tins, cartons, bottles, tubes, blocks and wooden offcuts, paper, pencils
Display the objects to the students.
Which shapes roll? Which shapes slide? Which shapes stack?
Ask the students to draw an example of each type of shape.
Pull it apart
Materials
• empty toothpaste, cereal, tissue or other grocery boxes
• a letter opener
Can you describe how these boxes are made?
Discuss the students’ suggestions.
What would this box look like if it was unfolded and carefully opened out?
What shapes would you see?
Use the letter opener to release the sides of the box.
Were your ideas accurate?
Ask the students to draw the shape of the unfolded box.
MORE DAILY WORKOUTS 38 OXFORD UNIVERSITY PRESS
outdoor environment • cameras
Playground models
Materials
• Multilink cubes or similar
• paper
• pencils
Take the students for a walk in the school grounds. Ask them to sketch one of the buildings. Return to the classroom.
Can you use the blocks to make a model of the building, using your sketch to help?
Take photos of the models made by the children and display them.
Town models
Materials
• Multilink cubes or similar
• paper
• pencils
Select small groups of students to investigate this activity.
Can you build a model of a town?
Allow time for the students to complete their designs before discussing their features.
Imagine you are a bird flying over the town and looking down.
Can you draw a plan of what you would see?
Discuss the students’ plans.
Now imagine yourself as a bug looking straight ahead at the town.
Can you draw a plan of what you would see?
Display the students’ drawings.
Year 2
Faces, edges and corners 1
Materials
• a collection of wooden offcuts or large blocks
• grocery packets
• pencils
• paper
Select small groups of students to investigate this activity.
Ask the students to select an item and run their fingers over the faces.
What does this object feel like? Is it smooth, rough, cold or flat?
What are the shapes of its faces?
LOWER – YEARS F TO 2 39 OXFORD UNIVERSITY PRESS LOWER –YEARS F TO 2
Discuss the students’ answers.
Indicate the edge of the block to the students.
What are the parts of the block called where these two faces meet?
Introduce the term ‘edges’ to describe those parts of the block. Indicate the corner of the block to the students.
What are the parts of the block called where three faces meet?
Introduce the term ‘corners’ to describe those parts of the block.
The term ‘vertices’ (singular ‘vertex’) may also be used.
Ask the students to draw a picture of their object. Have them investigate and record how many faces, edges and corners it has.
Faces, edges and corners 2
Materials
• cans
• tubes
• Cornetto wrappers
• balls
Select small groups of students to investigate this activity. Ask the students to select an item and run their fingers over the faces.
What does this object feel like?
What are the shapes of its faces?
Discuss the students’ answers.
Indicate a cylinder-shaped object to the students.
What is different about the faces of this object?
Discuss the fact that objects may have curved and flat faces. Repeat the activity for a cone-shaped object.
What is different about the curved shape of this object?
Indicate and name the vertex of the cone-shaped object.
What about this ball? What is special about its shape?
Review the shapes and their different characteristics. Ask the students to draw a picture of the objects. Have them investigate and record how many faces, edges and corners they have.
Hunting faces, edges and corners
Materials
• outdoor environment
• paper
• pencils
Take the students outside the classroom to investigate the design of some of the school buildings.
MORE DAILY WORKOUTS 40 OXFORD UNIVERSITY PRESS
Can you identify faces on parts of this building? Can you point out any edges? What about corners?
Discuss the students’ suggestions. Ask the students to draw some of the examples of faces, edges and corners that they identified.
Imagine and cut 1
Materials
• a cube made from modelling clay or playdough
• fishing line or strong thread
Select a pair of students for this activity.
Look at this cube.
Can you imagine how you could cut it to show a square face?
Encourage the students to discuss their ideas.
Try it and see. Were your predictions correct?
Can you cut the cube to show a rectangular face? A triangular face?
Discuss the results with the students.
Imagine and cut 2
Materials
• a cylinder made from modelling clay or playdough
• fishing line or strong thread
Select a pair of students for this activity.
Look at this cylinder.
Can you imagine how you could cut it to make a circular face?
Encourage the students to discuss their ideas.
Try it and see. Were your predictions correct?
Can you cut the cube to make an oval face? A rectangular face?
Discuss the results with the students.
Imagine and cut 3
Materials
• a cone made from modelling clay or playdough
• fishing line or strong thread
Select a pair of students for this activity.
Look at this cone.
LOWER – YEARS F TO 2 41 OXFORD UNIVERSITY PRESS LOWER –YEARS F TO 2
Can you imagine how you could cut it to make a circle?
Encourage the students to discuss their ideas. Try it and see. Were your predictions correct?
Can you cut the cube to make an oval? A rectangle? Discuss the results with the students.
Mystery models
Materials
• geometric models of prisms, pyramids, cylinders, cones and spheres
Display the various geometric models to the students. Do you know the names given to these shapes?
Review the various names given to the shapes, including cube, prism, pyramid, cylinder, cone and sphere. Hold up a particular model and point out its faces, edges and corners.
Place the objects in the bag, out of sight of the students. Invite a student to reach inside the bag, select one of the objects and manipulate it.
Ask the other students to ask successive yes/no questions in order to identify it. Does it have flat surfaces? Does it have a lot of faces? Is it curved? Is it pointy? Does it have any corners? Does it have a flat face and a curved face?
Encourage the students to pose their questions and work out their answers gradually, without the need for guessing.
Frame it
Materials
• toothpicks
• Blu Tack or playdough
Can you design a frame for a small tent?
• paper
• pencils
Encourage the students to use the materials to investigate different frame designs.
How many edges are there on your frame?
How many corners are there?
Can you draw the shape of the floor of your tent?
Discuss the students’ efforts. Encourage them to make frameworks of other geometric shapes.
MORE DAILY WORKOUTS 42 OXFORD UNIVERSITY PRESS
Domes
Materials
• a computer
• screen
Search the term ‘domes’ online.
• online search tools
Display the images to the students and discuss the meaning of the term and how domes have been utilised by different cultures throughout history.
Focus on the images of the dome-building kits and explain to the students how a small-scale dome can be constructed.
What is the main shape used by the dome kit?
Which geometric shape does the finished dome remind you of?
Discuss the term ‘hemisphere’ with the students.
TWO-DIMENSIONAL SHAPES
Year F
Trace it
Materials
• boxes
• blocks
• timber offcuts
• cups
• books
• butcher paper
Ask the students to work in pairs for this activity. The first student chooses an object, and the second student holds it tightly on top of the paper as the first student traces around it. Repeat the activity several times.
What did you find? Are the shapes the same or different?
What are the names you could give to the shapes you made?
Develop the idea that 2D shapes originate as the faces of 3D objects.
Sort it
Materials
• pattern blocks
Set out a collection of pattern blocks on the table.
How could we sort these blocks?
Choose individual students to sort the blocks by colour, shape or other criteria suggested by the students. Discuss the different arrangements.
Who can make the tallest tower with the blocks?
LOWER – YEARS F TO 2 43 OXFORD UNIVERSITY PRESS LOWER –YEARS F TO 2
Shape designs
Materials
• pattern blocks
• paper
• pencils
• coloured pencils
• markers
Display a collection of pattern blocks to the students.
Can you make a house? A flower? A snake? A dog? A bird? A person? A fish?
Discuss the students’ efforts. Ask them to draw their favourite design.
Extension
Encourage the students to create designs of their own.
Make a pattern
Materials
• pattern blocks
• camera
Display a collection of pattern blocks to the students.
Can you name the shapes of the different pattern blocks?
Discuss the different shapes, squares, triangles, trapeziums, hexagons and two different diamonds or rhombuses.
What do you think is special about these blocks?
Discuss the way the blocks fit together without creating any gaps or overlaps.
Can you make pattern with the blocks?
What does it look like? Is it an animal? A person? A flower?
Discuss the students’ patterns. Photograph and display them.
Extension
Allow the students to play freely with the blocks outside of normal lesson time.
Variation
Prepare pattern block shape templates and encourage the students to cover them with blocks.
Shape patterns
Materials
• pattern blocks
• camera
Display a collection of pattern blocks to the students.
How many patterns can you make with one type of block?
MORE DAILY WORKOUTS 44 OXFORD UNIVERSITY PRESS
How many patterns can you make with two types of blocks?
How many patterns can you make with three types of blocks?
Discuss the students’ patterns. Photograph and display them.
Block copies
Materials
• pattern blocks
• paper
• pencils
Ask the students to choose three different blocks and join them together to make a shape. Can you draw a picture of your shape?
When the students have completed their drawings, ask them to exchange their drawings with each other and build one another’s shapes.
Extension
Encourage the students to make more complex shapes with the blocks and copy them onto paper.
Upside down
Materials
• pattern blocks or similar
Select a pair of students. Ask the first student to make a simple design with the blocks. Ask the second student to copy the design upside down. Discuss the designs.
Ask the remaining students to work in pairs and repeat the activity.
Road signs
Materials
• a computer
• screen
• online search tools
Search the term ‘Australian road signs’ online. Display the images to the students.
Ask the students to describe the different shapes that the signs are based on.
Which shapes are triangular? Rectangular? Circular?
Is the diamond road shape really a diamond, or is it a square standing on its corner?
Talk with the students about the meanings that the shapes signify.
LOWER – YEARS F TO 2 45 OXFORD UNIVERSITY PRESS LOWER –YEARS F TO 2
Human shapes
Materials
• a large group of students
• camera
Find an open space outside the classroom. Ask the students to hold hands with the people in their group.
Can you arrange yourselves to make a square? A triangle? A rectangle?
What other shapes can you make?
Take photos of the shapes made by the children and display them.
Rope shapes
Materials
• a small group of students
• a rope of about 10 m length joined at each end
Find an open space outside the classroom.
Can you step inside the rope and make some shapes?
Can you make a square? A triangle? A rectangle? A circle? A diamond? A hexagon?
What other shapes can you make?
Take photos of the shapes made by the children and display them.
Board copies
Materials
• a whiteboard
• markers
Draw the following designs on the whiteboard.
• paper
• pencils
Ask the students to study the designs and copy them on paper. Discuss their efforts. How many different shapes can you see? What kind of shapes are they?
MORE DAILY WORKOUTS 46 OXFORD UNIVERSITY PRESS
Cut the toast
Materials
• paper
• pencils
What is the best shape to cut a square of toast or sandwiches into?
Call for answers and discuss the students’ suggestions.
Do you prefer triangles, squares or rectangles?
Ask the students to draw the various shapes discussed.
Year 1
Numbers upside down
Materials
• a whiteboard
• markers
Write the following numbers on the whiteboard: 11, 16, 19, 66, 99, 101, 116, 161, 191
Can you imagine what these numbers would look like if they were turned upside down?
Demonstrate the answers to the students and discuss them.
Variation
Ask the students to enter the numbers into a calculator, imagine what they would look like and then turn the calculator upside down.
Imagine this
Materials
• a whiteboard
• markers
Copy this diagram onto the whiteboard.
• paper
• pencils
This is a sheet of paper that has been folded in half and pieces have been cut out of it.
Can you imagine what it would look like when it is unfolded?
How would you describe the shape when it is unfolded?
Talk about the shapes predicted by the students. Ask them to draw the unfolded shape. Discuss the students’ drawings. Cut out the shape and reveal it to the students.
Did your drawings look like the cut-out shape?
LOWER – YEARS F TO 2 47 OXFORD UNIVERSITY PRESS LOWER –YEARS F TO 2
Craft stick shapes 1
Materials
• craft sticks
• paper
• pencils
How many different flat shapes can you make with craft sticks?
Are your flat shapes open shapes or closed shapes?
Discuss the different shapes made by the students. Ask the students to copy their designs onto the paper.
How many different sides do your shapes have?
Can you point out their angles?
How many different angles do your shapes have?
Discuss the students’ responses.
Geostrip shapes 1
Materials
• geostrips or identical cardboard strips
• split pin paper fasteners
Invite four students to investigate this activity.
Give 3 strips to the first student, 4 strips to the second, 5 strips to the third and 6 strips to the fourth student. Ask them to join their strips with the paper fasteners.
What is the name given to this three-sided shape? This four-sided shape? This five-sided shape? This six-sided shape?
Ask the students to manipulate their shapes.
What happens when you move the sides of these shapes?
Which shape does not change when you push its sides?
How could you make four-sided shapes more rigid?
Craft stick shapes 2
Materials
• a large amount of craft sticks
• glue
Select two students to commence this activity.
Can you make a triangle with craft sticks?
• paper or cardboard
Can you make a diamond (rhombus) with four craft sticks?
Display the students’ efforts. Distribute the craft sticks to the rest of the class.
Can you make your own shape with a large number of craft sticks?
Can you see small triangles in your shape?
MORE DAILY WORKOUTS 48 OXFORD UNIVERSITY PRESS
What about larger triangles?
Are there any diamonds (rhombuses)?
Can you see a trapezium or a hexagon?
Glue a selection of craft stick shapes to a sheet of paper or cardboard to make a display. Label the shapes produced by the students.
Geostrip shapes 2
Materials
• geostrips or thin cardboard strips
• split pins or paper fasteners
Select a group of students to demonstrate this activity.
Use the strips to make a triangle, a square, a rectangle and a diamond.
Can you make a hexagon?
Can you change your hexagon into a triangle? A rectangle? A shape with five sides?
Do you know the name for a five-sided shape?
Ask the students to draw a picture of what they did.
Magnetic 2D shapes
Materials
• Geomag magnetic shapes
• camera
Can you make some 2D shapes with the Geomag shapes?
Encourage the students to make a range of shapes.
Ask them to count their sides and angles.
Take photographs of the students’ models and display them.
Geoboard shapes
Materials
• geoboards
• coloured rubber bands
• square dot paper
• pencils
• coloured pencils
• markers
Ask the students to make some shapes with the geoboards and coloured rubber bands.
How many different triangles can you make on your geoboard?
Monitor the different triangles made by the students, including equilateral, isosceles and scalene triangles, so that a broad range is considered.
How many different four-sided shapes (quadrilaterals) can you make on your geoboard?
Review the squares, trapeziums, parallelograms, diamonds or rhombuses constructed by the students. Ask them to copy their favourite shape onto the square dot paper.
LOWER – YEARS F TO 2 49 OXFORD UNIVERSITY PRESS LOWER –YEARS F TO 2
Dotty shapes
Materials
• square dot paper
• pencils
Give each student a sheet of square dot paper.
• rulers
Can you join any three dots with straight lines? What shape did you make?
What about four dots? What shape did you make?
Discuss the students’ efforts. Review triangles, squares, trapeziums, parallelograms, diamonds or rhombuses drawn by the students.
What shape can you make by joining six dots?
Encourage the students to draw a range of hexagons, having sides of different lengths rather than just the regular shape.
City shapes
Materials
• a computer
• screen
• online search tools
Search the term ‘City Skyline Silhouette Images’ online. Select an image and display it to the students.
Ask the students to describe the different shapes that they see.
Do you see both straight-sided shapes and curved shapes?
Which type of shape is more common?
Discuss the students’ answers.
Coloured shapes
Materials
• square dot paper
• pencils
• rulers
Give each student a sheet of square dot paper.
• coloured pencils
• markers
Can you draw a green square? A thin blue rectangle? A red hexagon? A yellow star?
Which other shapes can you make? Colour them.
Talk about the students’ designs.
MORE DAILY WORKOUTS 50 OXFORD UNIVERSITY PRESS
Punching holes
Materials
• a hole punch
• A4 paper sheets
If we use the hole punch on a single sheet of paper, how many holes will it make?
Call for answers. Ask a student to carry out the activity and check the result.
What if we fold the paper in half, how many holes will there be then?
Discuss the students’ predictions. Ask a student to carry out the activity and check the result.
Were your predictions correct?
What about we fold the paper in quarters? What would happen then?
Discuss the students’ predictions. Ask a student to carry out the activity and check the result.
What happened? Can you see a pattern forming here?
Discuss the results with the students.
Year 2
Imagine this
Materials
• a whiteboard
• markers
Copy this diagram onto the whiteboard.
• paper
• pencils
This is a sheet of paper that has been folded in half and pieces have been cut out of it.
Can you imagine what it would look like when it is unfolded?
How would you describe the shape when it is unfolded?
Talk about the shapes predicted by the students. Ask them to draw the unfolded shape. Discuss the students’ drawings. Cut out the shape and reveal it to the students.
Did your drawings look like the cut-out shape?
On the line
Materials
• pattern blocks
• ruler
Lay a ruler vertically on the table. Invite a student to use the blocks to create a design along its side. Ask another student to copy the design on the other side of the ruler. Display the arrangement to the class.
LOWER – YEARS F TO 2 51 OXFORD UNIVERSITY PRESS LOWER –YEARS F TO 2
What can you tell me about these designs?
What do they look like?
What do you think looks the same about them?
Do the shapes match on each side of the ruler?
Choose another pair of students and repeat the activity. Discuss the students’ efforts. Introduce the terms ‘mirror image’ and ‘symmetry’ to describe the patterns.
Block symmetry 1
Materials
• a whiteboard or computer
• screen
Copy the following block arrangement on the whiteboard or screen.
Challenge the students to complete the pattern.
• pattern blocks
Can you complete the pattern to show its mirror image?
Does it have symmetry?
Block symmetry 2
Materials
• a whiteboard or computer
• screen
Copy the following block arrangement on the whiteboard or screen.
Challenge the students to complete the pattern.
Can you complete the pattern to show its mirror image?
Does it have symmetry?
Flip the block Materials
• plastic or wooden blocks
• pattern blocks
Ask the students to work in pairs for this activity.
• pattern blocks
• paper
• pencils
Can you make a pattern by flipping and tracing a block?
Encourage the students to make a tessellated pattern by repeated flipping and tracing, with one student holding the block while the other traces it.
MORE DAILY WORKOUTS 52 OXFORD UNIVERSITY PRESS
Slide the block
Materials
• plastic or wooden blocks
• pattern blocks
Ask the students to work in pairs for this activity.
• paper
• pencils
Can you make a pattern by sliding and tracing a block?
Encourage the students to make a tessellated pattern by repeated sliding and tracing, with one student holding the block while the other traces it.
Turn the block
Materials
• plastic or wooden blocks
• pattern blocks
Ask the students to work in pairs for this activity.
• paper
• pencils
Can you make a pattern by turning and tracing a block?
Encourage the students to make a tessellated pattern by repeated flipping and turning, with one student holding the block while the other traces it.
Line them up
Materials
• a computer
• screen
• paper
• pencils
Search the term ‘grid images’ online and select an image of a grid.
What is the name of this shape shown on the screen?
What are the names of the different kinds of lines that form this grid?
Call for answers. If necessary, point out the different vertical, horizontal and parallel lines to the students. Ask them to record the different types of lines.
Hunting lines
Materials
• notebooks
• pencils
• paper
Revise the different kinds of lines from the previous activity.
Can you see vertical, horizontal and parallel lines inside our classroom?
LOWER – YEARS F TO 2 53 OXFORD UNIVERSITY PRESS LOWER –YEARS F TO 2
Discuss the examples that the students suggest. Take the students for a walk around the school and investigate examples of vertical, horizontal and parallel lines.
Ask the students to sketch examples in their notebooks and label them.
Hunting angles
Materials
• outdoor environment
• paper
• pencils
Take the students outside the classroom to investigate angles contained in the school buildings. An angle is where two lines meet.
Can you identify angles when you look at this building?
Tell someone where they are.
Discuss the students’ responses. Ask the students to draw some of the examples of angles that they identified.
Hunting tessellations
Materials
• a computer
• screen
• outdoor environment
• paper
• pencils
Search the term ‘tessellation images’ online. Discuss the various images on the screen. Explain that the term ‘tessellation’ describes shapes fitting together without any gaps or overlaps.
Take the students outside the classroom to investigate tessellations in the school environment.
Can you identify any tessellations here?
Where are they? What do they look like?
Discuss the students’ ideas. Ask them to draw some of the examples of tessellations that they identified.
Paper puzzles
Materials
• coloured paper squares or circles
• scissors
Ask each student to cut a paper square or circle into five pieces to make a puzzle. They then exchange their puzzle with a classmate who must reconstruct it. The students can then rearrange their own puzzles to create a range of different shapes and figures.
MORE DAILY WORKOUTS 54 OXFORD UNIVERSITY PRESS
Stick squares
Materials
• a whiteboard
• markers
• craft sticks or matchsticks
Copy this shape onto the whiteboard and display it to the students.
Ask the students to copy the shape with their sticks.
Allow time for the students to answer the following questions.
Can you take away two craft sticks so that only three squares are left?
Can you take away two craft sticks so that only two squares are left?
Can you take away eight craft sticks and leave only one square?
How many craft sticks do you need to take away to make a rectangle?
Encourage the students to make up questions of their own.
Stick triangles
Materials
• a whiteboard
• markers
Copy this shape onto the whiteboard and display it to the students.
Ask the students to copy the shape with their sticks.
Allow time for the students to answer the following questions.
Can you take away six craft sticks so that only one triangle is left?
Can you take away three craft sticks so that only one triangle is left?
Can you take away two craft sticks so that only two triangles are left?
Can you take away three craft sticks so that only two triangles are left?
How many craft sticks do you need to take away to make a diamond?
Encourage the students to make up questions of their own.
LOCATION AND TRANSFORMATION
Year F
Space cities
Materials
• Lego materials or similar
Can you build an outer space city with the Lego?
• craft sticks or matchsticks
When it is finished, take one of your Lego people for a walk around your city.
LOWER – YEARS F TO 2 55 OXFORD UNIVERSITY PRESS LOWER –YEARS F TO 2
Can you describe the position of your Lego person as it walks around?
Discuss the students’ observations.
Left and right
Materials
• paper streamers
• ribbons
• beanbags
• balls
• pairs of gloves
• paper
• pencils
Tell the students that today is a ‘Left and Right Day’. Invite the students to:
• tie a ribbon around their left hand
• throw a beanbag with their right hand and catch it with their left hand
• hop on their right foot and then on their left foot
• put on a left glove and then a right glove
• trace each other’s right hand and then their left hand. Take the opportunity to focus on left and right situations throughout the day.
Lift the barrier
Materials
• eye mask
• a wooden board or screen
• wooden blocks
• Multilink cubes or similar
Call for a pair of students to volunteer for this activity. The students sit opposite one another with a barrier in between. Place an eye mask on one of the students or ask them to close their eyes tightly.
The first student then builds a model with about 20 blocks or cubes, out of sight of the second student. The second student then removes the eye mask.
The first student then gives instructions to the second student, so they can copy the model on their side of the barrier. When the construction is complete the students remove the barrier and compare their models.
Were the models the same or different?
What was the same about them?
What was different about them?
Discuss the students’ efforts.
MORE DAILY WORKOUTS 56 OXFORD UNIVERSITY PRESS
Draw me
Materials
• paper
• pencils
Can you draw a picture of yourself:
• on top of a box
• underneath a table
• beside a chair
• outside a door
• inside a car
• coloured pencils
• markers
• between two desks
• below a desk
• next to your friend
• at the top of the steps
• at the bottom of the steps?
Discuss the students’ drawings, emphasising positional language.
At the park
Materials
• paper
• pencils
• coloured pencils
• markers
Can you draw a picture of your favourite park and some of the things in it?
Ask the students to include items such as a tree, a swing, a slippery dip, a climbing frame and a bench.
Can you draw:
• a person sitting under a tree
• a bird on the lowest branch of the tree
• a koala high up in the tree
• a person on the swing
• a person on the climbing frame
• a person sitting on a bench
• a dog beside the bench
• a person sliding down the slippery dip?
Discuss the students’ drawings, emphasising positional language.
LOWER – YEARS F TO 2 57 OXFORD UNIVERSITY PRESS LOWER –YEARS F TO 2
The school bus
Materials
• paper
• pencils
What does your school bus look like?
Can you draw a picture of it?
Can you include:
• the driver inside the bus
• a teacher standing to the left of the bus
• a road sign to the right of the bus
• a line of students near the bus
• a boy already on the bus
• a car parked beside the bus?
Is there anything else you would like to include?
Can you describe its position?
• coloured pencils
• markers
Discuss the students’ drawings, emphasising positional language.
Year 1
Tell me where Materials
• a 4 × 4 grid
• plastic figures
• coloured counters
• coins
• Multilink cubes
• a tea towel or cover sheet
Place three or four objects on the grid and display it to the students. Allow time for the students to view the objects and then cover them.
Can you remember the position of the objects?
How would you describe their position?
Remove the cover and check the position of the objects. Discuss the students’ responses and the techniques that they used.
Extension
Increase the grid size and the number of objects used.
Variation
Ask the students to draw the objects from memory before revealing them.
MORE DAILY WORKOUTS 58 OXFORD UNIVERSITY PRESS
Tote trays
Materials
• tote trays
• tote tray cabinet
• everyday objects
Select a student to undertake this activity. Ask the other students to place their heads on their desks and close their eyes. Ask the student to hide an object inside one of the tote trays in the cabinet.
Sit up now. Where do you think the object is hiding?
Ask the other students to locate the position of the object by questioning, using positional language.
Is it on the left or the right? What is your object next to?
What is above your object? What is below your object?
Is it on the top shelf or the bottom shelf?
What is it next to? What is it in between?
Invite other students to repeat the activity.
Variation
Use books placed along the shelves of a small bookcase instead of tote trays.
Get over it
Materials
• plastic figures
• wooden blocks
• Multilink cubes
• classroom objects
Ask the students to work in small groups in order to create an obstacle course.
Can you move your figure around the course and describe its position?
In which direction does it turn?
Does it go under or over anything?
Does it go around anything?
Does it go between any blocks?
Was it able to get through any gaps?
Ask the students to pose questions to each other.
Take the opportunity during this activity to revise positional terms such as in, on, under, on top, above, below, beside, over, next to, inside, outside, beneath, between, right and left.
Extension
Read stories such as Rosie’s Walk, Where’s Spot and Bear Hunt that emphasise positional language.
LOWER – YEARS F TO 2 59 OXFORD UNIVERSITY PRESS LOWER –YEARS F TO 2
Variation
Build a full-size obstacle course outside the classroom using items of furniture and sports equipment and ask the students to negotiate it.
Walk the maze Materials
• duct tape or masking tape
• paper
• pencils
Plan and construct a large maze using tape attached to the flooring. Can you write a series of directions to travel through the maze?
Encourage the students to use shorthand to describe the directions such as F1, B2, LT and RT.
Draw a maze Materials
• paper
• pencil ruler
Ask the students to draw a maze. Tell them that there is a bone in the middle of it and a dog on the outside. Have them design a pathway that will lead the dog to the bone.
Year 2
Be a robot Materials
• a pair of students
Select a pair of students for this activity.
Nominate one student as the robot and the other student as the director. The director gives commands like ‘forward two steps’, ‘backward one step’, ‘right turn’, ‘left turn’, ‘stop’.
Ask other pairs of students to join in the activity. Discuss the paths taken and any shapes made by the different movements.
MORE DAILY WORKOUTS 60 OXFORD UNIVERSITY PRESS
Robot cards
Materials
• 12 robot cards
Make a set of robot cards. Select a pair of students. Shuffle the deck of cards and ask the first student to select a card. The second student then follows the directions as given. The students then exchange roles. Discuss the paths taken and any shapes made by the different movements.
Repeat the activity for other pairs of students.
Extension
Use a programmable robot or toy and enter a series of commands to direct it to follow a path.
Bedroom map
Materials
• pencils
forward 1
forward 2
forward 3
forward 4
back 1
back 2
back 3
back 4
right turn
right turn
left turn
left turn
• paper or square dot paper
Can you imagine the position of things in your bedroom?
Can you draw a map of your bedroom to show them?
Suggest to the students that a bird’s-eye view is the most appropriate way to visualise the objects and their position. Ensure that they label the positions of the door, window, bed, dressing table, desk, wardrobe and lights. Discuss and display the students’ efforts.
Classroom plan
Materials
• pencil
• paper or square dot paper
Can you draw a map of your classroom and the objects in it?
Allow sufficient time for the students to observe and record their efforts. Display and discuss their work in terms of the position of objects and people.
LOWER – YEARS F TO 2 61 OXFORD UNIVERSITY PRESS LOWER –YEARS F TO 2
Classroom path
• paper
Look across the classroom to where a friend is sitting.
• pencils
Can you draw a map of how to get from your desk to your friend’s desk?
Can you write some instructions about how to get there?
Discuss the students’ efforts.
Secret place
Materials
• paper
• pencils
Imagine that you have hidden a secret object somewhere in your classroom.
Can you write some instructions for a friend to find it?
What is your secret object?
Variation
Allow the students to draw a map of their path, if they wish.
Spin arounds
Materials
• pairs of students
• paper
• pencils
Select five or six students and ask them to face the class.
Are you ready for this activity?
Can you spin around and complete a full turn? Which way are you now facing?
Can you complete a half turn? Which way are you facing?
What about a quarter turn? Which way are you facing?
Discuss the various orientations with the students. Ask them to represent full, half and quarter turns using pencils and paper.
MORE DAILY WORKOUTS OXFORD UNIVERSITY PRESS 62
MIDDLE – YEARS 3 AND 4 Measurement
USING UNITS OF MEASUREMENT
LENGTH
Year 3
How long is it?
Material
• a 1 m ruler
Close your eyes and imagine your teacher’s desk. Do you think it is 1 m long, more than 1 m long, or less than 1 m long?
Allow sufficient time for the students to visualise the length of the desk. Encourage the students to talk about their visualisation strategies. Select a student to investigate the answer. Discuss.
More than a metre long
Materials
• metre rulers or 1 m cardboard strips
• classroom objects
Which of these objects is more than 1 m long?
A ruler
A whiteboard
A student desk
Invite the students to estimate and then measure objects inside and outside the classroom that are more than 1 m long. List the students’ answers on the whiteboard and discuss.
Less than a metre long
Materials
• a whiteboard
• markers
Which of these objects is less than 1 m long?
A cupboard
A schoolbag
• metre rulers or 1 m cardboard strips
• classroom objects
A whiteboard
OXFORD UNIVERSITY PRESS MIDDLE –YEARS 3 AND 4 63
Invite the students to estimate and then measure objects inside and outside the classroom that are less than 1 m long. List the students’ answers on the whiteboard and discuss.
One metre long
Materials
• metre rulers or 1 m cardboard strips
• classroom objects
• notebooks and pencils
Can you find classroom objects that are about 1 m in length?
Invite the students to estimate and then measure objects inside and outside the classroom that are 1 m long. List the students’ answers on the whiteboard and discuss.
How wide is it?
Material
• a metre rule or 1 m cardboard strip
Close your eyes and imagine the classroom doorway. Do you think it is 1 m wide, more than 1 m wide or less than 1 m wide?
Allow sufficient time for the students to visualise the width of the doorway. Encourage the students to talk about their visualisation strategies. Choose a pair of students to measure the width of the doorway. Discuss the answer.
More than a metre wide
Materials
• a whiteboard
• markers
• metre rulers or 1 m cardboard strips
Which of these objects is more than 1 m wide?
A student desk
A cupboard
• classroom objects
• notebooks and pencils
A wastepaper bin
Discuss the difference between length and width. Invite the students to estimate and then measure objects inside and outside the classroom that are more than 1 m wide. List the students’ answers on the whiteboard and discuss.
MORE DAILY WORKOUTS OXFORD UNIVERSITY PRESS 64
Less than a metre wide
Materials
• a whiteboard
• markers
Which of these is less than 1 m wide?
• metre rulers or 1 m cardboard strips
• classroom objects
A whiteboard A teacher’s desk A wastepaper bin
Discuss the students’ responses. Invite the students to estimate and then measure objects inside and outside the classroom that are less than 1 m wide. List the students’ answers on the whiteboard and discuss.
One metre wide
Materials
• metre rulers or 1 m cardboard strips
• classroom objects
• notebooks and pencils
Can you find classroom objects that are about 1 m in width? Invite the students to investigate the question by estimating and measuring. Share and discuss the answers.
Extension
Ask the students to identify objects outside of their classroom that are more than 1 m, less than 1 m or about 1 m in height. Ask them to record their answers.
Our space
Materials
• metre rulers or 1 m cardboard strips
• measuring tapes
How could we measure the size of our classroom?
What do you think the dimensions would be in metres?
Ask teams of students to estimate and measure the length and width. Record and discuss the answers.
Court dimensions
Materials
• a sports court
• metre rulers or 1 m cardboard strips
• measuring tapes
How could we measure the size of a netball or basketball court?
What do you think the dimensions would be in metres?
MIDDLE – YEARS 3 AND 4 OXFORD UNIVERSITY PRESS MIDDLE –YEARS 3 AND 4 65
Ask teams of students to estimate and measure the length and width. Record and discuss the answers.
Extension
Both types of courts may be measured and differences may be discussed. The dimensions of the courts may also be compared to those of the classroom.
Year 4 Hop it
Materials
• a whiteboard
• markers
• chalk or tape
• metre rulers or 1 m cardboard strips
• a timer
How many metres do you think you could hop in 3 seconds?
Discuss the students’ responses. Select several students to assist with the activity. Mark a starting line and choose a timekeeper. Allow the students to take turns. Record the results in a table on the whiteboard and discuss the results.
Extension
Choose teams of students to repeat the activity.
Handspans
Materials
• student desks
What is a handspan?
Discuss the idea of a handspan, measured on an outstretched hand from the tip of the thumb to the tip of the little finger. Tell the students that this was a readily accessible unit of informal measurement used in ancient times, which is still used today.
What would be your estimate of the length of your desk in handspans?
Ask students to record their estimates and then measure their desks using handspans.
What did you discover?
Were your results different? Why?
Discuss the difficulties of measuring with informal units, as the results are different because no common standard unit is used.
Extension
Research parts of the body that were used as informal measures throughout history, such as the handspan, the palm, the foot, the digit, the cubit and the pace.
MORE DAILY WORKOUTS OXFORD UNIVERSITY PRESS 66
Less than 30 cm
Materials
• a whiteboard
• markers
• 30 cm rulers
• classroom objects
• notebooks and pencils
Can you identify five classroom objects that are less than 30 cm long? Call for answers. Ask the students to estimate their possible lengths in centimetres. Students can then measure the objects. Record the estimates and lengths of the objects in a table on the whiteboard. Discuss the findings with the students.
In between
Materials
• whiteboard
• markers
• metre rulers
• classroom objects
• notebooks and pencils
In pairs, can you go and find something in the classroom that is between 30 cm and 1 m in length? Select pairs of students to demonstrate their answers. Ask them to estimate and then measure their lengths in centimetres. Use the whiteboard to record the estimates and lengths of the objects in a table. Discuss the findings with the students and have them record the results.
Leafy gums
Materials
• a large collection of gum leaves
Show the students a gum leaf.
• 30 cm rulers
What would be your estimate of the length of this leaf in centimetres?
Discuss the students’ responses. Select a pair of students to measure the leaf. Discuss the result.
Follow up with group or partner work, estimating and measuring a selection of leaves that the students have collected. Ask each student to record their estimate and measurement of the leaves. Call the class together.
Which of your leaves was longest? Which of your leaves was shortest? How close were your estimates?
Discuss the students’ responses.
MIDDLE – YEARS 3 AND 4 OXFORD UNIVERSITY PRESS MIDDLE –YEARS 3 AND 4 67
Lengths, widths and heights
Materials
• metre rulers
Can you measure these objects in centimetres?
• measuring tapes
Write the following list on the whiteboard and ask the students to measure the items.
• The length of a desk
• The width of a desk
• The height of a desk
• The depth of a wastepaper bin
• The diameter of a wastepaper bin
Did you discover anything that surprised you? Discuss.
Variation
Record the objects in centimetres and millimetres.
Standing long jump
Materials
• chalk or tape
• The circumference of a wastepaper bin
• The width of a door
• The thickness of a door
• The width of a dictionary
• The thickness of a dictionary
• metre rulers or measuring tapes
How far can you travel when you make a standing long jump? Select three or four students to demonstrate the process. Measure each student’s jump in centimetres.
What was the length of the longest jump?
What was the difference in centimetres between the longest jump and the shortest jump?
Extension
Students can work in pairs and complete three jumps each. They then can find the longest jump, the shortest jump and the difference between the two distances.
Size it up
Materials
• a whiteboard and markers
• a collection of Australian coins
Can you name each type of Australian coin? How many are there?
• a 30 cm ruler
MORE DAILY WORKOUTS OXFORD UNIVERSITY PRESS 68
What is the smallest denomination of Australian coin?
What is the largest denomination of Australian coin?
Call for answers. List the different denominations on the whiteboard.
What would be your estimate of the diameter of the different coins?
What would be the best tool to measure the diameter?
Select students to investigate the different coin diameters.
Which coin had the smallest diameter?
Which coin had the largest diameter?
Does the largest diameter coin have the greatest value?
Does the smallest diameter coin have the least value?
List the diameters of the coins from smallest to largest.
Extension
Estimate and measure the mass of each Australian coin.
Tall and long
Materials
• a whiteboard
• markers
Does the tallest person in your group have the longest arms?
Select a group of four or five students to perform the activity.
• a tape measure
Ask the students to measure each other’s heights and arm distances from shoulder to fingertips. Record their answers on the whiteboard in decimal form and discuss them.
Geoboard perimeters
Materials
• 30 cm rulers
• 5 × 5 or 10 × 10 geoboards and coloured rubber bands or computer software
Make a shape on a geoboard and demonstrate it to the students.
How could we calculate the perimeter of this shape? Discuss the students’ answers.
MIDDLE – YEARS 3 AND 4 OXFORD UNIVERSITY PRESS MIDDLE –YEARS 3 AND 4 69
Name Height (cm) Length of arms (cm)
Is there a way to calculate the answer without using the ruler?
Reinforce the idea of counting the side lengths.
Ask the students to create and investigate the perimeters of different shapes on geoboards or screens.
Variation
Given the perimeter, ask the students to create different shapes.
AREA Year 3
Cover the space
Materials
• a desktop
• exercise books
• square tiles
• coloured paper circles or container lids
Some shapes fit together without any gaps. We say that these shapes ‘tessellate’. Select two students to cover the surface of a student desk, using exercise books. Discuss the answer.
How many books do you think would be needed to cover the teacher’s desk?
How many circles or lids would be needed?
How many tiles would it take?
Investigate the activity and discuss the results.
Which objects are best for covering? Why?
Develop the idea that tessellated shapes are best for covering.
Variation
Students use lids, square tiles or blocks, playing cards or pattern blocks to investigate areas.
More tessellations
Materials
• square tiles
• pattern blocks
How many square tiles will cover an exercise book?
Investigate the activity and discuss the results.
Extension
Students repeat the activity using different types of pattern blocks.
• exercise books
MORE DAILY WORKOUTS OXFORD UNIVERSITY PRESS 70
Different shapes, same area
Materials
• a whiteboard
Display a diagram of 6 × 4 array on the white board.
What is the area of this shape?
Can you create other shapes that have an area of 24 square units?
• markers
• square tiles
Encourage the students to present a range of answers. Record the solutions on the whiteboard. Include regular and irregular shapes.
Variation
Photograph the students’ solutions and make a class display. Discuss the definition of area as the amount of space inside a 2D shape or boundary.
Geoboard areas
Materials
• 5 × 5 or 10 × 10 geoboards and coloured rubber bands or computer software
Make a shape on a geoboard and demonstrate it to the students. How could we calculate the area of this shape?
Discuss the students’ answers.
Ask the students to create and investigate the areas of different shapes on geoboards or screens. Focus on shapes that contain right angles.
Shaded shapes
Materials
• grid paper
• pencils
Show the students a large irregular shape that you have coloured in using the squares on the grid paper or a screen image.
About how many squares do you think are coloured?
Survey the students’ responses. Count the squares to calculate the result.
Encourage the students to create coloured shapes of their own and calculate their areas.
Which of your shapes had the largest area?
Which of your shapes had the smallest area?
Did you make any shapes with equal areas?
MIDDLE – YEARS 3 AND 4 OXFORD UNIVERSITY PRESS MIDDLE –YEARS 3 AND 4 71
Extension
Repeat the activity using triangular or hexagonal grids.
Footprints
Materials
• pencils
• A4 paper
How would we find the area of a footprint?
• transparent grid overlays
Select two students. One student removes a shoe and places their foot on a sheet of paper. The other student traces around it.
The students then place a transparent grid overlay on top of the tracing and count the whole squares to determine the area. Add the number of squares that are more than half a unit also.
Variation
Students can trace their feet on grid paper, if transparent overlays are not available. Thongs or flip flops may also be used.
Hands and feet
Materials
• pencils
• A4 paper
Is it your foot or your hand that has the larger surface area?
How could you find out?
• transparent grid overlays
Select two students. One student traces around the foot and hand of the other student. The students then place a transparent grid overlay on top of the tracing and count the squares to determine the area.
What did you discover? Were they the same, or was one bigger than the other?
Extension
Repeat the activity in pairs.
Year 4
Different rectangles
Materials
• pencils
• rulers
• grid paper
How many different rectangles can you make with an area of 24 square units?
Students work alone or in pairs to investigate the question. Ask the students to label each of the rectangles constructed with four statements: e.g., six rows of four equals 24, four rows of six equals 24, 6 × 4 = 24 and 4 × 6 = 24. Include statements also for 8 × 3, 12 × 2 and 24 × 1 rectangles.
MORE DAILY WORKOUTS OXFORD UNIVERSITY PRESS 72
Variation
Make a class display of the students’ work.
The square metre
Materials
• metre rulers
• a square metre made from newspaper and adhesive tape
What is a square metre?
• sheets of A4 paper
• coloured paper squares
• exercise books
Explain that a square metre is a square with sides that are each 1 m long. How many exercise books will cover that square?
How could we find out?
Choose three students to investigate the activity. Ask them to estimate the number of books before counting them.
What did you find out? What was the nearest estimate that you made? Discuss the students’ responses. Repeat the activity using different objects.
What is the area?
Material
• a 1 m2 paper square
Close your eyes and imagine your teacher’s desk.
Do you think it is 1 m2 in area, more than 1 m2 in area or less than 1 m2 in area? Allow sufficient time for the students to visualise the area of the desk. Encourage the students to talk about their visualisation strategies. Select two or three students to investigate the answer. Discuss.
More than 1 m2
Materials
• a whiteboard
• markers
• 1 m2 paper squares
Which of these objects is more than 1 m2 in area?
A ruler
A whiteboard
• classroom objects
• sections of a classroom floor
A student desk
Call for answers. Select students to check one of the possibilities. Discuss the result. Invite the students to estimate and then measure objects in the classroom that are more than 1 m2 in area. List the students’ answers on the whiteboard and discuss.
MIDDLE – YEARS 3 AND 4 OXFORD UNIVERSITY PRESS MIDDLE –YEARS 3 AND 4 73
Less than 1 m2
Materials
• a whiteboard
• markers
Which of these objects has an area of less than 1 m2?
• 1 m2 paper squares
• classroom objects
A doormat A student desk A whiteboard
Call for answers. Select students to check one of the possibilities. Discuss the result. Invite the students to estimate and then measure objects in the classroom that are less than 1 m2 in area. List the students’ answers on the whiteboard and discuss.
About 1 m2
Materials
• 1 m2 paper squares
• classroom objects
• notebooks and pencils
Can you find any classroom objects that are about 1 m2 in area?
Call for answers. Select students to check one of the possibilities. Discuss the result.
Invite the students to investigate other possibilities by estimating and measuring. Ask them to record their answers. Share and discuss the answers.
In between
Materials
• 1 m2 paper squares
• classroom objects
• notebooks and pencils
Can you find any classroom objects that are between 1 and 2 m2 in area?
Invite the students to investigate the question by estimating and measuring. Ask them to record their answers. Share and discuss the answers.
Extension
Investigate areas that are between 2 and 3 m2 in area.
MORE DAILY WORKOUTS OXFORD UNIVERSITY PRESS 74
Half court
Materials
• netball court
• large numbers of 1 m2 paper squares
What would be your estimate of the area of half of a netball court?
What could we use to measure it?
Ensure that sufficient paper squares are available before commencing. Count the squares and discuss the results.
Which of your estimates was closest?
How could you find out the area of a full court without measuring?
Extension
Estimate and then measure the area of a classroom floor, a walkway and a classroom wet area.
Fill the square
Materials
• measuring tape
• cardboard or timber strips
Construct the 1 m2 frame and place it on the floor.
• duct tape
How many students do you think will fit inside the 1 m2 frame?
Ask the class to predict their answers and write down their predictions. Select students and carry out the activity. Discuss the results.
VOLUME AND CAPACITY Year 3
Fill the bucket
Materials
• a 2 L ice cream container
• a small plastic jug
• a bucket of water
What would be the best thing to measure how much water this bucket is holding?
A cup
An ice cream container
A margarine container
Encourage the students to estimate the number of containers required. Select two students to carry out the activity. Count the number of containers used to fill the bucket and discuss the results.
MIDDLE – YEARS 3 AND 4 OXFORD UNIVERSITY PRESS MIDDLE –YEARS 3 AND 4 75
Fill the tub Materials
• a 2 L ice cream container
• plastic or paper cups
• bucket of water
What would be the best thing to measure how much water is needed to fill this ice cream container?
A bucket A tablespoon A cup
Encourage the students to estimate the number of cups required. Select two students to carry out the activity. Count the number of cups and discuss the results.
Variation
Fill the container using a drink bottle, a can or a margarine or butter container.
Fill the cup
Materials
• plastic or paper cups
• Unifix or Multilink blocks
• Base 10 materials
About how many blocks will this cup hold? Discuss the students’ estimates. Count the number of blocks and discuss the results.
Filling containers
Materials
• empty butter or margarine containers
• 2 L ice cream containers
• Multilink cubes
How many Multilink cubes will fill this butter container?
Estimate and then measure the result. Discuss the students’ responses. Repeat the activity for the ice cream container and other containers.
Variation
Investigate the capacity of containers using counters, marbles or pebbles. Compare the results.
MORE DAILY WORKOUTS OXFORD UNIVERSITY PRESS 76
Tablespoons
Materials
• plastic or paper cups
• tablespoon measures
• container of water
About how many tablespoons of water will this cup hold?
Discuss the students’ estimates. Count the number of tablespoons and discuss the results.
Variation
Investigate the capacity of other cups and bowls using tablespoons of water.
On the level
Materials
• a medium-sized rock or pebble
• marbles
Half fill the jug and note the level of the water. What will happen if I place this rock in the jug?
• a graduated kitchen jug
• water
Ask the students to predict what will happen. Place the rock in the jug and observe the result. Discuss.
How many marbles do you think it will need to raise it to the same level?
Determine how many marbles are equal in volume to a rock.
Rock it
Materials
• 3 rocks or pebbles of similar size
• a graduated kitchen jug
• water
Which of these rocks is the biggest? How could we prove it?
Select two students and ask them to arrange the rocks in the order of their size. Half fill the jug and note the level of the water. Place the first rock in the jug.
What happened? How far did the water level rise?
Repeat the activity with each of the other two rocks.
Which rock produced the largest change in water level? So which rock had the largest volume? Which rock had the smallest volume?
Discuss the students’ responses.
Review the term ‘volume’ as the amount of space that an object occupies.
Extension
Read the story Mr Archimedes Bath to the students and discuss.
MIDDLE – YEARS 3 AND 4 OXFORD UNIVERSITY PRESS MIDDLE –YEARS 3 AND 4 77
Measuring cylinder
Materials
• a measuring cylinder
• an empty can
• water bottle or plastic bottle
Display the materials to the students.
• a margarine container
• water
Which container do you think will have the largest capacity?
Which container do you think will have the smallest capacity?
Which containers do you think will have the same capacity?
How can we find out?
Review the term ‘capacity’ as the ability of a container to hold a certain quantity of liquid. Encourage the students to predict the answers to the questions.
Select two or three students and ask them to investigate by pouring.
What did you find out?
Discuss the students’ responses.
Year 4
Conservation of volume Materials
• plasticine or playdough
• a graduated kitchen jug
• water
Roll the plasticine into a small ball. Place it into the partially filled jug and measure the rise in the water level. Remove the ball and roll it into a sausage shape.
What do you think will be the volume of the sausage? Will the volume of the sausage be the same as the volume of the ball, or will one be bigger than the other?
Variation
Repeat the activity using 10 Multilink cubes that are unjoined and then joined.
MORE DAILY WORKOUTS OXFORD UNIVERSITY PRESS 78
Take your medicine
Materials
• a medicine glass
• a coffee cup
• an egg cup
• a small glass
• a large glass
• a mug
• water
Which of these empty containers will hold the smallest quantity of water?
Arrange the containers in an order that the students suggest. Select students to investigate the capacities of the containers by pouring with the medicine glass.
Were your estimates correct?
Ensure that the containers are in the correct order.
Which container has the smallest capacity?
Which container has the largest capacity?
Filling a litre
Materials
• a 1 L ice cream container or similar
• a plastic cup
• mug
• water
How many cups will it take to fill the ice cream container?
Ask the students for their estimates. Select students to investigate the answer to the question.
How many cups did you count?
If we used a mug to fill the container, would we need more mugs or fewer mugs?
Check the results and discuss the students’ responses.
Extension
Repeat the activity using an egg cup and a tablespoon.
More or less
Materials
• 1 and 2 L ice cream containers
• a tote tray
• a bucket
• water
Which do you think will hold more water: the tote tray or the bucket?
Call for answers. Select two students to investigate the question. Discuss the result.
Extension
Repeat the activity using other pairs of objects.
MIDDLE – YEARS 3 AND 4 OXFORD UNIVERSITY PRESS MIDDLE –YEARS 3 AND 4 79
Measuring in litres
Materials
• a whiteboard
• markers
• 1, 2 and 4 L ice cream containers
• a baking tray
• a large plastic storage container
• a tote tray
• a bucket
• water
What do you think is the capacity of these containers in litres?
Ask the students to make estimates. Record their estimates in a table on the whiteboard. Select students to measure the capacities to the nearest litre using a 1 L ice cream container or similar. Record the results and discuss.
Litre hunt
Materials
• a whiteboard
• markers
How many everyday products can you think of that come in 1 L packages?
Which products come in packages that hold more than 1 L?
Which products come in packages that hold less than 1 L?
List the results in a table under headings of less than 1 L, 1 L, 2 L, 3 L and more than 3 L.
Everyday containers
Materials
• a whiteboard
• markers
• a collection of everyday containers brought in by the students
Which containers will hold more than 500 mL?
Which containers will hold less than 500 mL?
Ask the students to predict their answers.
• a measuring cylinder or graduated jug
• water
Investigate the questions and discuss the students’ responses. Record the results in a table.
MORE DAILY WORKOUTS OXFORD UNIVERSITY PRESS 80
Squeeze it
Materials
• oranges
• a juicer
• a knife
• 2 glasses
• a measuring cylinder or graduated jug
How much juice do you think we could squeeze from two oranges?
What would be the best way to measure it?
Ask the students to estimate the quantity of juice and identify a suitable measuring tool.
Cut the oranges and squeeze them. Pour the juice into the jug or measuring cylinder and ask a student to read the quantity.
Discuss the results with the students.
About how much juice do you think you could squeeze from 10 oranges?
Discuss the students’ answers.
Extension
Compare the juiciness of individual oranges or different groups of two oranges.
Block count
Materials
• Base 10 minis
Revise the term ‘volume’ as the amount of space that an object occupies. Explain that each mini block has sides of 1 cm and a volume of 1 cm3.
How many different 3D shapes can you make with 24 minis?
Encourage the students to create block models.
What is the same about each one of your shapes?
Investigate the idea that different shapes can have the same volume.
Variation
Use Multilink cubes or similar instead of Base 10 minis.
MIDDLE – YEARS 3 AND 4 OXFORD UNIVERSITY PRESS MIDDLE –YEARS 3 AND 4 81
Box designs Materials
• Multilink cubes
• 1 or 2 cm grid paper
Can you make a prism using 12 cubes?
• scissors
• adhesive tape
Using the grid paper, can you now design an open box that will hold your prism? Distribute the materials and allow the students to complete their designs. Discuss.
The cube family Materials
• Multilink cubes
• Base 10 minis or other similar cubes
Show a single cube to the class.
• isometric dot paper
• pencils
If this is the smallest cube possible, what would be the size of the next two biggest cubes you could make with the blocks?
Call for answers. Select students to construct a 2 × 2 × 2 cube and a 3 × 3 × 3 cube. How many cubes were used to make them?
Ask the students to sketch the cubes on isometric dot paper.
MASS Year 3 More mass Materials
• an equal-arm balance
• an orange
Which is heavier: the orange or the potato? Ask the students to predict the answer.
• a potato
Select a student to heft the orange and the potato. To do this, hold one object in each hand, raise them up and down and decide which is lighter and which is heavier.
Place the orange and the potato in separate balance pans. What happened? Which was lighter? Which was heavier?
Discuss the result.
Variation
Substitute other fruits and vegetables and investigate the results.
MORE DAILY WORKOUTS OXFORD UNIVERSITY PRESS 82
Equal balance
Materials
• an equal-arm balance
• an orange
About how many pebbles will balance an orange?
• a collection of pebbles
Ask the students to estimate a number. Select students to determine the result. What would happen if we changed the size of the pebbles?
Discuss the students’ responses.
Find the difference
Materials
• a whiteboard
• markers
• an equal-arm balance
• an orange
• an apple
• a collection of pebbles
Can you use pebbles to find the difference in mass between the orange and the apple?
Allow the students time to consider their answers and deduce that each can be weighed separately using the pebbles.
Was the orange heavier, or was the apple heavier, or did they have the same mass?
By how much was the difference?
Discuss the students’ responses. Record on the whiteboard:
The difference in mass between the orange and the apple was pebbles.
Variation
Repeat for other pairs of objects.
Package it up
Materials
• an equal-arm balance
• a small plastic bag filled with sand or rice
• pebbles
• blocks
• pasta
How many of each kind of object will balance the plastic bag?
Ask the students to estimate before measuring. Record the students’ estimates in a table and then select two or three students to measure the bag using different kinds of objects.
Which of the objects were best for measuring? Why?
MIDDLE – YEARS 3 AND 4 OXFORD UNIVERSITY PRESS MIDDLE –YEARS 3 AND 4 83
How many more?
Materials
• an equal-arm balance
• a calculator
• a roll of masking tape
• Multilink cubes or similar
Which will weigh more, the calculator or the roll of masking tape?
How will you know which one is heavier?
Place each object on a separate balance pan. Invite the students to use cubes to make the pans level.
Which of the objects had the larger mass?
Which of the objects had the smaller mass?
Call for answers to complete. Record on the whiteboard:
The difference in mass between the calculator and the masking tape is cubes. Repeat for other pairs of classroom objects.
Everyday measures
Materials
• a whiteboard
I weigh about 1 kg. What am I?
• A dictionary
• A letter
• markers
Ask the students how they arrived at their answers.
Think of items in your kitchen or at the supermarket.
Which everyday items are packaged in amounts of 1 kg?
• An exercise book
List the students’ responses on the whiteboard. Discuss their answers.
Weighing more
Materials
• a whiteboard
I weigh more than 1 kg. What am I?
• A football
Discuss the students’ responses.
• markers
• A bag of potatoes
Which items come in packages of more than 1 kg?
Think of items in your kitchen or at the supermarket.
List the students’ responses on the whiteboard and discuss.
• An empty school backpack
MORE DAILY WORKOUTS OXFORD UNIVERSITY PRESS 84
Weighing less
Materials
• a whiteboard
I weigh less than 1 kg. What am I?
• A loaf of bread
• markers
• A bag of oranges
Which items come in packages of less than 1 kg?
Think of items in your kitchen or at the supermarket. List the students’ responses on the whiteboard and discuss.
Kilogram hunt
Materials
• an equal-arm balance
• standard masses
• A chair
• classroom objects
Which objects can we find in our classroom that weigh about 1 kg?
Invite the students to make suggestions. Select students to test the estimates by using the equal-arm balance and standard masses.
What did you discover?
Which objects weighed more than 1 kg?
Which objects weighed less than 1 kg?
Record the results.
Count how many
Materials
• kitchen scales
• marbles
• exercise books
How many of each of these objects will weigh 1 kg?
How much is 1 kg, measured in grams?
• saucers
• cups
• oranges
Select an object to be measured. Ask the class to estimate its mass. Select students to weigh the objects.
Students record the results in a table showing each type of object, the estimate and the count.
MIDDLE – YEARS 3 AND 4 OXFORD UNIVERSITY PRESS MIDDLE –YEARS 3 AND 4 85
Year 4
Half a kilogram
Materials
• kitchen scales
• blocks
• plastic cubes
• pebbles
How many of each of these objects will weigh half of 1 kg?
How much is half of 1 kg, measured in grams?
Select an object to be measured. Ask the class to estimate its mass. Select students to weigh the objects.
Students record the results in a table showing each type of object, the estimate and the count.
Less than 500 grams
Materials
• a whiteboard
• markers
• kitchen scales
• classroom objects
Can you find any classroom objects that weigh less than 500 g?
Invite the students to make suggestions. Select students to test the estimates by using the kitchen scales.
What did you discover?
Which objects weighed less than 500 g?
List the results on the whiteboard.
In between
Materials
• a whiteboard
• markers
• kitchen scales
• classroom objects
Can you find any classroom objects that are between 500 g and 1 kg in weight?
Invite the students to make suggestions. Select students to test the estimates by using the kitchen scales.
What did you discover?
Which objects weighed between 500 g and 1 kg?
List the results on the whiteboard.
MORE DAILY WORKOUTS OXFORD UNIVERSITY PRESS 86
Everything in order
Materials
• a whiteboard
• markers
• kitchen scales
• a kitchen cup
• small plastic bags containing a cupful of items such as rice, pasta, flour, sand, blocks, beads, marbles or bark chips
Select two or three students and ask each to choose two bags. Compare the bags by hefting. Which bag is heavier and which bag is lighter?
Students check their estimates using kitchen scales.
Can you order the bags from heaviest to lightest?
Were there any surprises?
Record the results in a table on the whiteboard.
100 g Materials
• kitchen scales
• a collection of small objects such as blocks, pencils, textas, cubes
How many of each of these objects is equal to a mass of 100 g? Select students to investigate the question. Estimate before measuring. Discuss the students’ answers.
Extension
Repeat the activity for other set amounts less than 1 kg.
Choose three Materials
• kitchen scales
• a collection of small objects such as blocks, pencils, textas, cubes
If I choose 5 Multilink cubes, how much do you think they will weigh altogether?
Call for answers and discuss the students’ estimates.
Use the kitchen scales to determine the result. Discuss the findings.
How many cubes will weigh 200 g? How many cubes will weigh 500 g?
How many cubes will weigh 1 kg?
What is the quickest way to find the answer?
Extension
Repeat the activity using a number of other small objects.
MIDDLE – YEARS 3 AND 4 OXFORD UNIVERSITY PRESS MIDDLE –YEARS 3 AND 4 87
Conservation of mass Materials
• kitchen scales
• plasticine or playdough
Select two students to roll a piece of plasticine into a small ball.
Weigh the ball using the scales.
How much did the ball weigh?
Record the result. Now ask the students to roll the ball into a sausage shape.
What do you think will be the mass of the sausage?
Will the mass of the sausage be the same as the mass of the ball?
Will the sausage weigh more or will the ball weigh more?
Ask the students to weigh the sausage. Record the result and discuss the findings.
Model masses Materials
• a whiteboard
• markers
• kitchen scales
• Multilink cubes or similar
Show the students a model you have made using 20 Multilink cubes.
What would be the mass of this model?
Invite the students to write down their estimates. Select a student to measure the mass of the model in grams.
Was your estimate close to the result?
Add blocks to the model so that it has 50 cubes.
What would be the mass of this model?
Invite the students to again write down their estimates. Select a student to measure the mass of the model in grams.
Was your estimate close to the result?
Can you think of a quicker way to measure the mass of 100 cubes?
Record the results in a table on the whiteboard.
MORE DAILY WORKOUTS OXFORD UNIVERSITY PRESS 88
TIME Year 3 Time of day
Materials
• a whiteboard
• markers
Write the following events on the whiteboard: first light, sunrise, mid-morning, midday, early afternoon, afternoon, sunset, twilight, night and middle of the night.
What do you think is the time of day when these events occur?
Call for answers and discuss the students’ responses.
Daily routine
Materials
• pencils
• paper
At what time do you wake up in the morning of a school day?
Ask the students to record the time when they get up, eat breakfast, arrive at school, do maths work, eat lunch, go to assembly, play a sport, leave school, arrive home, watch television, do homework, play video games, eat dinner and go to bed.
Day and night
Materials
• a whiteboard
• markers
• pencils
• paper
During the day, which activity do you spend the most time doing?
Ask the students to list how much time they spend at school, playing at home, playing sport, watching TV, playing video games, eating meals, sleeping and reading. Discuss the students’ responses. Use the whiteboard to graph the findings.
Follow the bouncing ball
Materials
• a stopwatch
• a tennis ball
• a basketball
• a calculator
How many times can you bounce a tennis ball in 1 minute? What about a basketball?
Which ball will give the greatest number of bounces?
MIDDLE – YEARS 3 AND 4 OXFORD UNIVERSITY PRESS MIDDLE –YEARS 3 AND 4 89
Ask the students to make predictions and justify their estimates. Choose students to carry out the activity. Discuss what happened.
How many bounces would each ball make in 1 hour?
Use the calculator to help find the answer.
Join the cubes
Materials
• a stopwatch
• a collection of Multilink cubes
• a calculator
How many cubes can you join to make a tower in 2 minutes?
Select three students to perform the activity and another student as timekeeper. Decide the average number of blocks that were joined.
Can you predict how many blocks you could join in 10 minutes? Half an hour? One hour? Use the calculator to help find the answer.
Estimate 1 minute
Materials
• a stopwatch
Can you estimate a time period of 1 minute?
Ask the students to place their heads on their desks and close their eyes. Tell them to raise a hand when they estimate that 1 minute has elapsed. Who made the best estimate? How did you do it?
Introduce the technique of counting seconds by saying ‘one and two and three and four…’ to give a more accurate estimate.
Extension
Repeat the activity for other time periods.
How long?
Materials
• a stopwatch
• paper
Select a group of three or four volunteers. How long does it take to write down your spelling list?
• pencils
MORE DAILY WORKOUTS OXFORD UNIVERSITY PRESS 90
Ask the class to record an estimate, before each student carries out the task in turn. What did you discover? Were your estimates accurate?
Extension
Ask the students to select and investigate different activities that can be carried out in certain periods of time, e.g., reading a page from a library book.
What can you do?
Materials
• a whiteboard
• markers
• pencils
• paper
Can you think of any activity that you can complete in 1 minute, at home or school?
Discuss the students’ responses. Then ask them to consider activities that could be completed in 1 second, 1 hour, 1 day, 1 week, 1 month and 1 year. Record the results in a table on the whiteboard.
Quarter hours
Materials
• a computer
• screen
• worksheets showing multiple blank analogue clock faces
• pencils
• paper
Download an interactive clock from the Internet or draw a blank analogue clock face on the whiteboard. Revise telling the time on the hour and half hour.
Today we are going to tell the time on the quarter hour.
What is the position of the hands at quarter past 11 o’clock?
Can you draw the hands on your clock face?
Do you know another way to tell the time at quarter past?
Check the answers. Ensure that students have drawn the minute hand opposite the numeral 3 and that the hour hand is one quarter of the way between 11 and 12. Accept the description of 11:15.
Suggest some other times and ask the students to represent them on their clock faces. Repeat the activity to introduce the concept of quarter to the hour. According to common practice today, the idea of ‘quarter to’ can also be referred to as ‘45 minutes past the hour’.
MIDDLE – YEARS 3 AND 4 OXFORD UNIVERSITY PRESS MIDDLE –YEARS 3 AND 4 91
Fives and tens Materials
• a computer
• screen
• whiteboard
• markers
Download an interactive clock from the Internet or draw a blank analogue clock face on the whiteboard.
Ask the students to help you complete the markings of 5-minute intervals around the clock. Mark 0 at position 12, 5 at position 1 and so on.
Which number comes next?
How many minutes are there around the clock face?
How many minutes are there in 1 hour?
Is there a pattern to the numbers on the clock face?
Can you count by fives to 60? What about tens?
Encourage the students to count around the clock by fives and tens. Point to a particular number on the clock face at random and have the students count around to it.
Year 4
Fives, tens and ones
Materials
• laminated blank analogue clock faces
• toy clock or wall clock
• felt pens
• paper
Distribute a laminated clock face to each pair of students.
Can you make your clock show a time of 12 minutes past 1? How do you do it?
Call for answers. Discuss the students’ strategies.
Invite the students to work in pairs. Students take turns, with one student marking a time and the other student reading it.
Sequencing times
Materials
• markers Write
• a whiteboard
Can you place these times in their correct order?
Call for answers. Discuss the correct sequence and write it on the whiteboard.
MORE DAILY WORKOUTS OXFORD UNIVERSITY PRESS 92
the following times on the whiteboard: 5:00 a.m. 7:30 p.m. 11:15 a.m. 4:51 a.m. 5:14 p.m. 12 noon
Variation
Repeat the activity using a list of digital times.
Digital times
Materials
• a whiteboard
• markers
• pencils
• paper
On the whiteboard, write the time of 12 minutes past 9 in digital form: 9:12.
Can you write the time: 5 minutes before 9:12?
Call for answers. Give the following examples orally or write some or all questions on the whiteboard, if preferred: 3 minutes after 9:12; 12 minutes before 9:12; 13 minutes before 9:12; 18 minutes after 9:12; 1 hour after 9:12; 1 hour before 9:12; 30 minutes after 9:12; 30 minutes before 9:12.
Discuss the mental strategies used by the students to obtain their answers. List the times established in order, starting with the earliest time.
Extension
Repeat the activity for different times of the day. Encourage the students to make up questions of their own and quiz one another.
Variation
Search for an interactive clock online and use it to repeat the activity.
Clock faces
Materials
• worksheets showing multiple blank analogue clock faces
• cards displaying various digital times
• pencils
• paper
Invite two students to the front of the class. Ask each student to select a digital timecard. Hand out the clock face worksheets.
Can you convert the digital times on the cards to analogue time on your worksheet?
Ask the students to select other cards so that the class can practice other time conversions.
MIDDLE – YEARS 3 AND 4 OXFORD UNIVERSITY PRESS MIDDLE –YEARS 3 AND 4 93
Digital versus analogue
Materials
• 5 or 6 sets of matching digital and analogue timecards
Choose a number of matching pairs from one of the prepared sets. Place them face up on the desk.
Select two students to match pairs of cards.
How many matching pairs can you find here?
Display the results and discuss. Invite the class to work in groups, placing the cards face down and taking turns to match them.
a.m. and p.m.
Materials
• a whiteboard or computer
• screen
Draw two columns labelled ‘Time of day’ and ‘Activity’.
List the times of the day at hourly intervals, starting at 6:00 a.m. and ending the next day at 5:00 a.m.
Choose a student and ask them what they might be doing at each of the times listed.
Discuss the results. Ask the class to each complete a similar table.
How many hours do you spend at school, eating meals, watching television, playing games, playing video games or sleeping?
Which activity do you spend the most time doing?
Discuss the students’ findings.
Extension
Ask the students to construct a column graph showing the number of hours spent on the different activities during a 24-hour period.
School planner
Materials
• a whiteboard
• markers
• pencils
Can you draw up a timetable of a school day?
• paper
• rulers
Allocate a different day of the week to groups of students and have them create a timetable for the day. Use the whiteboard to summarise their responses and create a weekly timetable.
Will this weekly timetable be the same next week? Why? Why not?
MORE DAILY WORKOUTS OXFORD UNIVERSITY PRESS 94
MIDDLE – YEARS 3 AND 4 Shape
SHAPE
THREE-DIMENSIONAL OBJECTS
Year 3
Tracing prisms
Materials
• geometric models of square, rectangular, triangular and hexagonal prisms
• pencils
• paper
Display the model of a square prism to the students. If we traced around the surfaces of these models, what shapes would be formed? Select two students to carry out the activity and discuss the results. Choose other pairs of students and repeat the activity for the other types of prisms.
What shapes can you see?
What type of shapes are they?
Display the results to the class. Develop the idea that 2D shapes may be derived from the faces of 3D objects. Discuss the students’ responses.
Investigating prisms
Materials
• geometric models of square, rectangular, triangular and hexagonal prisms
Display a square prism to the students.
Tell me all you can about this model.
Allow the students sufficient time to develop their ideas.
Ask them to share their ideas with a partner, before you initiate a class discussion.
Talk about the shape of the faces, the position of faces, edges and corners and the consistency in horizontal cross-sections of prisms.
Do you know the name of this prism?
OXFORD UNIVERSITY PRESS MIDDLE –YEARS 3 AND 4 95
Introduce the idea that prisms are named according to the shape of their base, the base being defined as the surface that has the smallest area.
Repeat the activity using other prisms.
Building prisms
Materials
• Polydrons
• Multilink cubes
• straws
• plasticine
Can you imagine what a prism looks like?
• pencils
• isometric dot paper
Encourage the students to close their eyes and form images of prisms. How many kinds of prisms can you make?
Encourage the students to construct the shapes with Polydrons or Multilink cubes. They could also make skeleton shapes with straws and plasticine or lengths of spaghetti and mini-marshmallows. Label the students’ models and place them on display or photograph them and create a screen display.
Extension
Ask the students to sketch models of prisms on isometric dot paper.
Prism nets
Materials
• empty grocery packets or small boxes
What would this box look like if we opened it up and laid it out flat?
Discuss the students’ answers and review the responses.
Carefully pull apart a packet or box and display it to the students. Discuss.
How are the boxes put together? Why do the boxes have tabs?
Do you think the boxes are printed when they are flat, or after they have been made?
Introduce the term ‘net’ to describe how a 3D shape may be constructed from a flat shape.
Mystery bag 1
Materials
• a shopping bag or cardboard box
• geometric models of square, rectangular, triangular and hexagonal prisms
What does a prism feel like?
Place one of the prisms in the bag, out of the sight of students. Invite a student to reach inside the bag and carefully feel the prism.
What do you feel? Which prism do you think it is?
MORE DAILY WORKOUTS OXFORD UNIVERSITY PRESS 96
Variation
Place all prisms in the bag and ask the students to identify them one by one.
Prism search
Materials
• a computer
• pencils
Have you seen objects shaped like prisms in our everyday world?
• paper
Discuss the students’ responses. Enter the search term ‘shaped like a prism’ in the computer and search for the images online. Discuss the images of various structures with the students. Ask the students to draw some of them.
Tracing pyramids
Materials
• geometric models of square, triangular and hexagonal pyramids
• pencils
• paper
Display the model of a square pyramid to the students. If we traced around the surfaces of these models, what shapes would be formed? Select two students to carry out the activity and discuss the results. Choose other pairs of students and repeat the activity for the other types of pyramids.
What shapes can you see?
What type of shapes are they?
Display the results to the class and discuss the students’ ideas.
Investigating pyramids
Materials
• geometric models of square, triangular and hexagonal pyramids
Show the pyramid models in turn to the students.
What can you tell me about each of these models?
Allow the students sufficient time to develop their ideas. Ask them to then share their ideas with a partner, before you initiate a class discussion.
Do you know the names of these pyramids?
Hold up and confirm the name of each pyramid in turn. Indicate the position of faces, edges and corners. Introduce the idea of naming pyramids according to the shape of their base.
MIDDLE – YEARS 3 AND 4 OXFORD UNIVERSITY PRESS MIDDLE –YEARS 3 AND 4 97
Building pyramids
Materials
• Polydrons
• straws
• plasticine
Can you imagine what a pyramid looks like?
• pencils
• isometric dot paper
Encourage the students to close their eyes and form images of pyramids.
Ask the students to construct pyramids with Polydrons or make skeleton shapes with the straws and plasticine. Label the models and place them on display or photograph them and create a screen display.
Extension
Ask the students to sketch models of pyramids on isometric dot paper.
Pyramid nets
Materials
• geometric models of pyramids
• Polydrons
Display a pyramid model to the students.
• pencils
• paper
Revise the term ‘net’ to describe how a 3D shape may be constructed from a flat shape.
Can you imagine what would the net of a pyramid look like?
Ask the students to sketch their ideas. Choose students to create the net using Polydrons.
Mystery bag 2
Materials
• a shopping bag or cardboard box
• geometric models of square, triangular and hexagonal pyramids
What does a pyramid feel like?
Place one of the pyramids in the bag, out of the sight of students. Invite a student to reach in and carefully feel the pyramid.
What do you feel? Which pyramid do you think it is?
Variation
Place all the pyramids in the bag and ask the students to identify them one by one.
MORE DAILY WORKOUTS OXFORD UNIVERSITY PRESS 98
Pyramid search
Materials
• a computer
• pencils
• paper
Have you seen objects shaped like pyramids in our everyday world?
Discuss the students’ responses. Enter the search term ‘shaped like a pyramid’ in the computer and search for images online. Discuss the images of various structures with the students. Ask the students to draw some of them.
Variation
Research the use and purpose of pyramid structures by different societies throughout history.
Mixed bag
Materials
• a shopping bag or cardboard box
• geometric models of all prisms and pyramids
Place the prisms and pyramids in the bag in full view of the students. Select a student to participate.
Can you reach in and find a prism? Can you find a pyramid? What do they feel like? How is a prism different from a pyramid?
Choose other students and repeat the activity. Develop and demonstrate the idea that a prism has a consistent cross-section from its base upwards, whereas a pyramid has increasingly smaller cross-sections rising to its point (apex).
Investigating curved shapes
Materials
• geometric models of cylinders, cones and spheres
• pencils
Show the models in turn to the students.
What can you tell me about each of these models?
How are they different from prisms and pyramids?
• paper
Allow the students sufficient time to develop their ideas. Ask them to then share their ideas with a partner, before you initiate a class discussion. Outline the features of the sphere as having a single curved surface and cylinders and cones as having both flat and curved surfaces.
Do you know the names of these shapes?
How many curved surfaces does each shape have?
MIDDLE – YEARS 3 AND 4 OXFORD UNIVERSITY PRESS MIDDLE –YEARS 3 AND 4 99
How many flat surfaces does each shape have?
Hold up and confirm the name of each shape in turn.
Ask the students to draw each of the shapes. Display the students’ drawings.
Year 4 Nets from memory
Materials
• a whiteboard
• markers
• pencils
• paper
Draw a number of nets of prisms and pyramids on the whiteboard. Indicate each net in turn. What shape would you get if this net is folded up?
Discuss the students’ responses.
Extension
Ask the students to investigate combinations of six squares that will not produce a cube when folded up. Discuss this idea with the students.
Prism properties
Materials
• geometric models of a cube and square, triangular and hexagonal prisms
Display the geometric models to the students. Hold up a model and outline the definitions of face, edge and corner to the students as follows:
A face is a single flat surface on the shape.
An edge is the line segment where two faces meet.
A corner is where several edges meet.
Can we count how many faces, edges and corners these prisms have?
Create the following table on a whiteboard or screen.
Cube
Square prism
Rectangular prism
Triangular prism
Hexagonal prism
Encourage the students to help you complete the table.
MORE DAILY WORKOUTS OXFORD UNIVERSITY PRESS 100
of
Prism Number of faces Shape
faces Number of edges Number of corners
Pyramid properties
Materials
• geometric models of square, triangular and hexagonal pyramids
Can we count how many faces, edges and corners these pyramids have?
Distribute the models to the class and select students to participate. Create the following table on a whiteboard or screen.
Square pyramid
Triangular pyramid
Hexagonal pyramid
Encourage the students to help you complete the table.
Visualise it
Without displaying a geometric model, ask:
How many faces are there on a cube?
How many corners are there on a cube?
How many edges are there on a cube?
Display a model of a cube or a box, if necessary, and check the answers.
Variation
Repeat this activity from time to time, covering all the prism and pyramid families.
What am I?
Play a guessing game with the students.
I have six faces and eight corners. What am I?
Repeat the game with different questions to establish the properties of different 3D solids.
Isometric dots
Materials
• isometric dot paper
Can you sketch a single cube on the dot paper?
Distribute the paper and encourage the students to represent the cube. The correct orientation of the drawing should show the edges at 30 degrees from the horizontal, matching the orientation of the dots provided. (Need a diagram here I think.)
MIDDLE – YEARS 3 AND 4 OXFORD UNIVERSITY PRESS MIDDLE –YEARS 3 AND 4 101
Pyramid Number of faces Shape of faces Number of edges Number of corners
Repeat the activity using two, three and four cubes. Display the students’ efforts.
Variation
Investigate the activity using online isometric drawing tools.
Letter T
Materials
• Multilink cubes
• isometric dot paper
Can you use 5 Multilink cubes and make the letter T?
Can you sketch your shape on the dot paper?
Display the students’ sketches and discuss them.
Letter L
Materials
• Multilink cubes
• isometric dot paper
Can you use 6 Multilink cubes and make the letter L?
Can you sketch your shape on the dot paper?
Display the students’ drawings.
Extension
• pencils
• paper
• pencils
• paper
Ask the students to create other letter shapes using blocks and sketch them on the dot paper.
Double L
Materials
• Multilink cubes
• isometric dot paper
Can you make a double L shape with 12 cubes?
• pencils
• paper
MORE DAILY WORKOUTS OXFORD UNIVERSITY PRESS 102
Students make the letter L with six cubes and sketch it. The double shape can be made by joining two single L shapes together, one on top of the other.
Variation
Extend the investigations using online isometric drawing tools.
Make and sketch
Materials
• Multilink cubes • grid or square dot paper • pencils
Can you build a prism using 24 cubes? How many different prisms are possible?
Display the models constructed by the students, including a 6 × 4 ×1 prism, a 4 × 3 × 2 prism, a 6 × 2 × 2 prism, a 12 × 2 × 1 prism and a 24 × 1 × 1prism.
Extension
Repeat the activity using 36 cubes.
Ask the students to draw a top view and a front view of the prism they have built. Display the students’ drawings.
Hidden cubes
Materials
• Multilink cubes
Select two or three students and ask them to construct 3 × 3 × 3 cube. Display the cube to the class.
Do you think all the small cubes that make up this large cube can be seen?
Are there some small cubes inside the large cube?
Can you imagine how many small cubes are hidden inside the large cube?
Ask the students to make predictions. Choose a student to dismantle the cube and reveal the single hidden cube inside.
Extension
Have the students build larger models and investigate hidden cubes.
MIDDLE – YEARS 3 AND 4 OXFORD UNIVERSITY PRESS MIDDLE –YEARS 3 AND 4 103
Staircases
Materials
• Multilink cubes
• isometric dot paper
Can you build a staircase using 18 cubes, in rows of three?
Invite two or three students to carry out the activity. Ask them to arrange the 18 cubes in rows of three and join them to make the staircase.
Display the model to the class. Ask the students to draw the staircase on dot paper. Display the students’ sketches and discuss them.
Cross-sections
Materials
• a cube
• pencils
• paper
• a square pyramid and a triangular pyramid made from modelling clay
• fishing line
Select two or three students to carry out the activities.
Can you cut a cube to make a square? A triangle?
Can you cut a square pyramid to make a square? A triangle?
Can you cut a triangular pyramid to make a triangle?
Encourage the students to draw and write about what happened.
Extension
Continue to investigate cross-sections of other prisms and pyramids.
Mixed bag
Materials
• geometric models of a prism, a pyramid and a cylinder
Place the models in the bag, out of the sight of students. Invite a student to reach in and carefully select one shape. Ask the class to pose successive questions about the nature of the shape such as: Does it have corners? Is it curved? Is it pointy? How many faces can you feel?
Encourage the students to determine the nature of the shape from the descriptions given by the student handling the shape. Discourage guessing at the start of the activity.
MORE DAILY WORKOUTS OXFORD UNIVERSITY PRESS 104
Different views
Materials
• pencils
• paper
Close your eyes and imagine what your family car looks like.
Imagine, in turn, that you are looking at it front on, side on and from above.
Can you draw a front view of your car? Can you draw a side view of it?
What about a top (bird’s-eye) view?
Discuss the students’ drawings and put them on display.
Draw the carton
Materials
• an empty cardboard juice or milk carton
• pencils
Display the carton to the students.
Can you draw a front view of this carton?
Can you draw a side view of it?
What about a top (bird’s-eye) view?
• paper
Discuss the students’ drawings and put them on display.
TWO-DIMENSIONAL SHAPES
Year 3
Imagine this Materials
• a whiteboard
Copy this diagram on the whiteboard.
• markers
This is a sheet of paper that has been folded in half and a piece has been cut out of it.
Can you imagine what it would look like when it is unfolded?
How would you describe the shape when it is unfolded?
Talk about the shapes predicted by the students. Ask them to draw the unfolded shape. Discuss the students’ drawings.
Cut out the shape and reveal it to the students.
Did your drawings look like the cut-out shape?
MIDDLE – YEARS 3 AND 4 OXFORD UNIVERSITY PRESS MIDDLE –YEARS 3 AND 4 105
Extension
Encourage the students to make their own cut-outs with folded paper, predicting and describing the shapes that they think will be formed. Ask them to draw the predicted shapes before unfolding the paper.
3 × 3 challenge Materials
• a whiteboard
Draw a 3 × 3 grid on the whiteboard or screen.
How many squares can you see in this grid?
• markers or computer drawing tools
Ask the students to discuss their answer with the person next to them. Allow sufficient time for their discussions.
How many of you think there are nine squares? How many of you think there are more than nine?
Discuss the students’ responses. Remind them that they need to consider not just the single squares, but the single 3 × 3 square overall and the smaller 2 × 2 squares and ones that overlap.
What is your total of all the squares now?
The 3 × 3 grid has 14 squares altogether.
Geoboard triangles
Materials
• geoboards
• coloured rubber bands
Select three students to investigate this activity.
• square dot paper
• pencils
Ask the first student to make a triangle with three equal sides (equilateral).
Ask the second student to make a triangle with two equal sides (isosceles).
Ask the third student to make a triangle with no equal sides (scalene).
Display the students’ work to the class and discuss.
Extension
Encourage the students to further investigate different triangles using geoboards or online learning tools for the geoboard.
Geoboard quadrilaterals
Materials
• geoboards
• coloured rubber bands
Select four students to investigate this activity.
• square dot paper
• pencils
Can you make different quadrilaterals on your geoboard?
MORE DAILY WORKOUTS OXFORD UNIVERSITY PRESS 106
What are their names? Did you include a parallelogram, a trapezium and a kite?
Discuss the various parallelograms with the students.
Display the students’ designs or photographs.
Variation
Ask the students to use square dot paper to copy the shapes or create them with online learning tools for the geoboard.
Shapes within shapes
Materials
• a computer
• computer drawing tools
• a whiteboard
• markers
• square dot paper
• pencils
Draw a series of overlapping quadrilaterals on the whiteboard or screen. Look at the shapes inside the shapes I have drawn.
How would you describe them?
Discuss the students’ efforts with the class. Distribute the square dot paper.
Can you create some overlapping shapes of your own?
Which inside shapes did you create?
Encourage the students to talk about their designs.
Geoboard changes
Materials
• a computer
• online learning tools for the geoboard
Download an online learning tool for the geoboard. Select two or three students to undertake the activities on the screen.
Can you make a large square on the screen?
Can you change your square into a rectangle?
Discuss the students’ efforts with the class.
Can you change your rectangle into a triangle?
Can you change your triangle into a hexagon?
MIDDLE – YEARS 3 AND 4 OXFORD UNIVERSITY PRESS MIDDLE –YEARS 3 AND 4 107
More geoboard shapes
Materials
• a computer
• online learning tools for the geoboard
Download an online learning tool for the geoboard. Select two or three students to undertake the activities on screen.
Can you make different five-sided shapes on the screen?
What are five-sided shapes called?
Can you make different six-sided shapes on the screen?
What are six-sided shapes called?
Discuss the students’ efforts with the class.
Extension
Ask the students to investigate other multi-sided polygons such heptagons and octagons online or with geoboards.
Hexagons 1
Materials
• pattern blocks
• isometric dot paper
• pencils
• rulers
Select two or three students to undertake the activity. Show them a single hexagon.
Can you use smaller pattern blocks to make a similar hexagon?
Which shapes did you use?
How is each hexagon different?
Discuss the students’ efforts. Ask the class to copy the shapes made onto isometric dot paper and label them.
Extension
Encourage the students to further investigate shape combinations using online learning tools for pattern blocks.
Hexagons 2
Materials
• a set of coloured pattern blocks
• isometric dot paper
• pencils
How many large hexagons can you make with pattern blocks?
Point out a hexagon is any six-sided shape. Encourage the students to use combinations of pattern blocks to provide multiple examples of different six-sided shapes.
MORE DAILY WORKOUTS OXFORD UNIVERSITY PRESS 108
Join the dots
Materials
• isometric dot paper
Can you use the dot paper to make:
• three different triangles?
• three different quadrilaterals?
• three different hexagons?
• pencils
Observe the students’ efforts and discuss the results with the class.
Variation
Repeat the activity using online isometric drawing tools.
Inside shape hunt
Materials
• a whiteboard
• markers
• pencils
• paper
Which kinds of 2D shapes can you see in our classroom?
Ask the students to list the shapes that they observe, including different types of triangles, quadrilaterals and other shapes. Discuss the students’ responses.
Which type of shape is most common? Why do you think that is so?
Discuss the fact that shapes containing right angles are most common in the built environment. Summarise the students’ findings using the whiteboard.
Outside shape hunt
Materials
• a whiteboard
• markers
• pencils
• paper
Which kinds of 2D shapes can you see in the natural environment?
Ask the students to list the shapes that they observe, including different types of triangles, quadrilaterals and other shapes. Discuss the students’ responses.
Which type of shape is most common? Is this a different result to your classroom findings?
Summarise the students’ findings using the whiteboard.
MIDDLE – YEARS 3 AND 4 OXFORD UNIVERSITY PRESS MIDDLE –YEARS 3 AND 4 109
Year 4
Bathroom floors
Materials
• a computer
• online learning tools for pattern blocks
• isometric dot paper
• pencils
Show the students a tessellated pattern that you have created online. What is special about this shape pattern?
Do you know the name used to describe shapes that fit together without any gaps?
Introduce the term to the students. Discuss the features of the pattern created.
Ask the students to create tessellated patterns on isometric dot paper for each of the different pattern block shapes.
Extension
Ask the students to design a tessellated pattern for a bathroom floor using combinations on isometric dot paper. Encourage them to display and talk about their designs.
Curvy shapes
Materials
• round counters or coins
• a computer
Display a collection of round counters to the students.
Can curved shapes tessellate?
Discuss the students’ responses. Search the term ‘curved tessellations’ and display the images to the students.
Can you think of any examples of curved tessellations that you have seen elsewhere?
Discuss paving tiles that have curved outlines, or curved tile patterns that have circles with another curved tile filling the gaps.
What is symmetry?
Materials
• a computer
• online learning tools
• grid paper or square dot paper
• pencils
• scissors
Create a simple symmetrical design onscreen using the representations of grid or dot paper. Discuss the design with the students.
Can you see the line of symmetry for this shape?
Can you imagine this shape folding along the line of symmetry?
MORE DAILY WORKOUTS OXFORD UNIVERSITY PRESS 110
Explain the idea of symmetry as mentally folding a shape in half so that each half matches exactly along a line, called the line of symmetry. The term ‘reflection’ may also be used.
Follow up by creating half of a symmetrical design.
Can you complete this shape so that it shows symmetry?
Ask the students to design shapes on grid or square dot paper that show symmetry.
Ask them to cut their shapes in half and investigate whether they match when they are folded. Discuss the results.
Extension
Have the students investigate symmetrical shapes using mirrors.
Block symmetry
Materials
• pattern blocks
• pencils
Ask the students to trace around the various pattern blocks.
Can you draw the lines of symmetry for each type of pattern block?
How many lines of symmetry did you find?
Variation
Repeat the activity using online representations of pattern blocks.
• paper
Draw a line of symmetry and create a mirror image pattern on each side, showing symmetry.
Geoboard symmetry
Materials
• geoboards
• coloured rubber bands
Ask the students to create some symmetrical shapes on the geoboards.
Can you make a design that has:
• one line of symmetry
• two lines of symmetry
• more than two lines of symmetry?
Display the students’ designs and have them discuss their thinking.
Variation
Repeat the activity using online representations of pattern blocks or fold paper shapes to investigate symmetry.
MIDDLE – YEARS 3 AND 4 OXFORD UNIVERSITY PRESS MIDDLE –YEARS 3 AND 4 111
Letter symmetry
•
Write the following letters in large print on the whiteboard:
M T E X H F
Can you imagine lines of symmetry for these letters?
Do any letters have more than one line of symmetry?
Is there a letter that does not have line symmetry?
Allow time for the students to investigate each example. Call for answers. Invite the students to investigate the line symmetry of other uppercase letters. Record the results in a table.
Letter
Number of lines of symmetry
Triangle symmetry
Materials
•
Draw an equilateral, isosceles and scalene triangle on the whiteboard.
Do you know the names of these triangles?
How many lines of symmetry does each triangle have?
Ask the students to suggest answers and choose students to indicate their ideas at the whiteboard.
Which triangle had three lines of symmetry?
Which triangle had one line of symmetry?
Which triangle had no lines of symmetry?
Ask the students to draw the different triangles showing lines of symmetry.
MORE DAILY WORKOUTS OXFORD UNIVERSITY PRESS 112
Materials
a whiteboard • markers • pencils • paper
a whiteboard • markers • pencils • paper
Tangrams
Materials
• a computer
• online learning tool for tangrams
• cardboard
• scissors
Search the term ‘tangrams’ and display the images to the students.
What is the shape of the original puzzle?
What are the names of each piece of the tangram puzzle?
How many triangles are there in the puzzle?
How many quadrilaterals are there in the puzzle?
Select students to answer your questions and discuss the students’ responses.
Search the NRICH site online for details of how to construct a tangram puzzle.
Encourage the students to construct their own tangram puzzles.
Tangram shapes 1
Materials
• a computer
• tangram puzzles
• paper
• pencils
Download a tangram building tool and ask two students to assist. Using any four tangram shapes can you make: a square, a triangle, a parallelogram, a trapezium?
Ask the students to sketch the shapes that were formed.
Extension
Ask the students to use all seven tangram pieces to create a square, a triangle, a rectangle, a parallelogram and a trapezium.
Tangram shapes 2
Materials
• a computer
• tangram puzzles
Display an image of a tangram to the students.
What shapes are made when you combine:
• two large triangles
• the square and the smallest triangle
• the parallelogram and a small triangle?
• pencils
• paper
Encourage the students to visualise the answers to your questions before you discuss them. Ask the students to investigate their ideas with their tangram pieces.
MIDDLE – YEARS 3 AND 4 OXFORD UNIVERSITY PRESS MIDDLE –YEARS 3 AND 4 113
Extension
Ask the students to sketch answers to the tangram questions.
Pattern shapes 1
Materials
• a computer
• pattern blocks or online learning tools for pattern blocks
Select two students to undertake the activity using the computer.
Can you make:
• a larger square from four small squares
• a rectangle using six squares
• a trapezium using three triangles
• a parallelogram using two trapeziums
• a parallelogram using four rhombuses?
Ask the students to create the above shapes using pattern blocks. Display and discuss their designs.
Extension
Encourage the students to make larger quadrilaterals using pattern blocks.
Pattern shapes 2
Materials
• a computer • online learning tools for pattern blocks
Select two students to undertake the activity using the computer. What shape can you make from:
• two or three or four or six triangles
• two or three or four squares
• three rhombuses
• two trapeziums?
Ask the students to create the above shapes using pattern blocks. Encourage further investigations. Display and discuss their designs.
MORE DAILY WORKOUTS OXFORD UNIVERSITY PRESS 114
LOCATION AND TRANSFORMATION
Year 3
Remember where
Materials
• a chess board
• chess pieces
• a tea towel or cover sheet
• pencils
• paper
Place three or four pieces on the grid and display it to the students. Allow time for the students to view the objects and then cover them.
Can you remember the position of the objects?
How would you describe their position?
Remove the cover and check the position of the objects. Discuss the students’ responses and the techniques that they used.
Variation
Ask the students to draw the objects from memory before revealing them.
Other items may also be used.
Giving directions
Materials
• classroom plan
• pencil
• paper
Imagine that you are walking a path from the doorway of our classroom to another point in the room. Select a student to demonstrate a path, counting paces and describing directions as forwards, turn left or turn right. For example, forward six paces, left turn, forward seven paces, right turn and so on.
Ask the students to mark a route on their classroom maps and record instructions for it.
School models
Materials
• paper
• pencils
Take the students for a walk around the school playground. Encourage them to look at the different buildings and features very carefully and memorise their position.
On return to the classroom, ask the students to sketch a map of their path, showing the position of buildings and features that they encountered. Ask them to describe their path. Discuss the students’ efforts.
MIDDLE – YEARS 3 AND 4 OXFORD UNIVERSITY PRESS MIDDLE –YEARS 3 AND 4 115
Extension
Have the students create a model of the buildings based on their sketch maps.
Toy maps
Materials
• pencils
• paper or square dot paper
Close your eyes. Can you imagine the position of your favourite toy in your house?
On a floor plan of your house, can you draw a path from the front door to your toy?
Discuss and display the students’ efforts.
Running messages
Materials
• pencils
• paper
Imagine that you have been asked to take messages to each classroom in your school.
What is the best path to follow?
Ask the students to draw a map of the classrooms and work out the shortest path possible. Invite the students to discuss their proposed paths with a classmate before recording it.
Variation
If necessary, this activity can be simplified by using smaller number of classrooms.
Paper runs
Materials
• 1 cm grid paper or square dot paper
• a whiteboard
• markers
• computer drawing tools
• notebooks
• pencils
Draw an 8 × 8 grid on the whiteboard or create one on a screen.
Mark six crosses on grid points that represent different houses. Tell the students that they need to map out a paper run to include all of the houses.
Distribute the grid or dot paper and allow time for the students to consider their solutions.
Discuss their findings.
Did you take the most direct path?
Why would you want to do that?
Discuss the students’ responses.
MORE DAILY WORKOUTS OXFORD UNIVERSITY PRESS 116
Year 4 Board grids
Materials
• a chessboard
• 1 cm grid paper or square dot paper
• pencils
Do you know how many squares are there on a chessboard?
In how many ways can you count them?
Which way is easiest?
Discuss counting by ones, eights or multiplying 8 × 8.
Ask the students to draw an 8 × 8 grid on their grid or square dot paper.
Use the terms ‘columns’ and ‘rows’ to describe the grid more fully.
Label the rows and columns from 1 to 8.
Can you place a cross:
• in the second square of the second column
• in the fifth square of the third column
• in the fourth square of the fourth column
What shape did you make?
Extension
• in the first square of the third column
• in the second square of the fourth column
• in the fourth square of the second column?
Encourage the students to create shapes of their own using coordinates.
Estimating north
Materials
• analogue watches
• pencils
Would you like to know a quick way to estimate the direction of north?
Take the students outside the classroom first thing in the morning.
• paper
Have the students turn towards the sun, look down and point the numeral 12 on their watches towards the position of the sun.
Ask the students to note the position of the hour hand on their watch.
Locate the position halfway between 12 and the hour hand.
Turn in that direction. You are now facing approximately north.
Extension
Display a compass to the students and explain the four main points of the compass and how to determine north.
MIDDLE – YEARS 3 AND 4 OXFORD UNIVERSITY PRESS MIDDLE –YEARS 3 AND 4 117
Halfway
Materials
• a whiteboard
Draw a diagram of a compass on the whiteboard.
• markers
Indicate the main compass points of N, S, E and W and mark the mid points in between.
What do we call the directions that are halfway between: north and west, north and east, south and west and south and east?
Label the halfway positions on the whiteboard diagram and discuss.
Treasure maps
Materials
• paper or 1 cm square dot paper
• pencils
Imagine that you have hidden buried treasure somewhere in the playground of your school.
Can you draw a map of how you would get to it from our classroom?
Can you show the main features of the school on your map?
Indicate the orientation of the classroom to the students.
Ask the students to write directions using N, S, E, W and NE, SE, SW, NW and show their paths. Discuss the directions and paths the students have provided.
Ask the students to exchange their maps and directions with a partner and investigate each other’s efforts.
Variation
Ask the students to include estimated distances on their maps.
Turn arounds
Can you imagine this?
In which direction is a girl now looking if she walked south, turned fully to the left, turned left again and then looked back directly over her shoulder?
Repeat the question if necessary.
Encourage the students to imagine the answer without sketching. They can then confirm the answer using paper or square dot paper.
Extension
Have the students create and investigate similar turning problems of their own.
MORE DAILY WORKOUTS OXFORD UNIVERSITY PRESS 118
Where are they?
Materials
• 1 cm grid paper or square dot paper
Here is a brainteaser about some friends.
Henry, Theo and Josie all live in the same street.
It is six blocks from Henry’s house to Theo’s house. It is four blocks from Theo’s house to Josie’s house.
How far is it from Henry’s house to Josie’s house?
Encourage the students to sketch their solutions.
Is there more than one answer to this question?
Discuss the students’ responses.
ANGLES Year 3
Hunting lines
Materials
• notebooks
• pencils
• pencils
• paper
Talk about different kinds of lines with the students.
Can you imagine different types of lines inside our classroom?
Discuss examples that the students suggest. Develop the discussion to include straight, curved, vertical, horizontal, diagonal, zig zag, parallel lines and perpendicular lines.
Take the students for a walk around the school and investigate examples of lines. Ask the students to sketch examples in their notebooks and label them.
Extension
Download images from the Internet and discuss different types of lines.
Spirals
Materials
• pencils
• coloured pencils or markers
Do you know what a spiral shape looks like?
Can you trace it in the air with your finger?
• paper
Encourage the students to create spirals and discuss their characteristics.
MIDDLE – YEARS 3 AND 4 OXFORD UNIVERSITY PRESS MIDDLE –YEARS 3 AND 4 119
Did your curves become larger as you moved your fingers?
Distribute the materials and encourage the students to create their own spiral designs. Make a display of the students’ work.
Extension
Research the historical use of spirals by different peoples and cultures.
Line segments
Materials
• craft sticks or toothpicks
• glue
Select two students to investigate this activity.
• paper or cardboard
Ask each student to choose a capital letter of the alphabet and make it with the sticks. They then glue their letter to the paper or cardboard and display it to the class.
How many line segments are there in your letter?
Which letters have the largest number of segments?
Which letters have the smallest number of segments?
Discuss the students’ responses. Ask the class members to choose a letter and further investigate the activity.
Extension
Investigate the number of line segments in numerals shown on the calculator.
Parallel lines
Materials
• a computer
• online learning tools for the geoboard
• geoboards
• coloured rubber bands
Download an online learning tool for the geoboard. Select two or three students to undertake the activities on screen.
How many different groups of parallel lines can you make on the geoboard?
Can you make a group of parallel lines: that are of different lengths? that are of the same length? that are diagonal?
Ask the class to repeat the activity using geoboards and coloured rubber bands. Display and discuss the students’ efforts.
MORE DAILY WORKOUTS OXFORD UNIVERSITY PRESS 120
Intersections
Materials
• two sheets of plastic film
• markers
• pencils
• paper
What is formed when a pair of lines cross one another?
Draw a long line on each sheet of plastic film. Place the sheets together so that the lines intersect. Rotate the sheets to demonstrate angles as an amount of turn between two lines.
Can you imagine how many intersections are formed when a pair of parallel lines cut another pair of parallel lines?
Ask the students to imagine the lines and work in pairs to investigate the problem, drawing the lines to prove their answers.
What if three parallel lines intersected another three parallel lines?
Allow sufficient time for full consideration of the answers before discussion.
Angle wheels
Materials
• coloured paper circles
• scissors
• pencils
• paper
Demonstrate to the students how to make an angle wheel. Take two different coloured paper circles and cut a slit to the centre of each paper circle. Line up the slits and then carefully fit the circles together to make a wheel.
Using your wheel, can you make an angle with a small amount of turn?
Can you make an angle with a large amount of turn?
Can you make a right angle?
Make a display of the angles made by the students. Label the different types of angles.
Geostrip angles
Materials
• geostrips or thin cardboard strips
• split pin paper fasteners
• pencils
• paper
• rulers
Join two strips with paper fasteners. Select two students to demonstrate different angles with them. Using the strip, can you make an angle with a small amount of turn?
Can you make an angle with a large amount of turn?
Can you make a right angle?
Ask the students to draw and label the different angles that they have created.
MIDDLE – YEARS 3 AND 4 OXFORD UNIVERSITY PRESS MIDDLE –YEARS 3 AND 4 121
Geoboard angles
Materials
• geoboards
• coloured rubber bands
• computer drawing tools
How many different angles can you make on the geoboard? Select two or three students to demonstrate different angles.
Can you make a narrow angle?
Can you make a wide angle?
Can you make a right angle?
Can you make two identical angles, one with short arms and the other with long arms? Discuss the students’ examples.
Encourage the class to use their own geoboards to copy the angles created.
Year 4
Testing angles
Materials
• A4 paper
• a whiteboard
• markers
Fold sheets of A4 paper in advance to make angles of various sizes, including a right angle. Select two or three students to undertake the activity.
Can you use these angle testers to measure angles in the classroom?
Which type of angle is most common?
On the whiteboard, make a list of right angles that the students have identified.
Variation
An angle tester can also be made by using geostrips or by placing a pipe cleaner inside a drinking straw.
Hunting angles
Materials
• A4 paper
• pencils
• angle testers (see previous activity)
Tell the students that they are going outside in order to further investigate angles.
Can you write a question about angles that is possible to investigate?
Ensure that the students consider the natural as well as the built environment. On return to the classroom, discuss the students’ questions and their findings.
MORE DAILY WORKOUTS OXFORD UNIVERSITY PRESS 122
Naming angles
Materials
• angle wheels (see activity on page 144)
Using your wheel, make an angle with a small amount of turn. Now make an angle with a large amount of turn.
Introduce the terms ‘acute’ and ‘obtuse’ to describe these angles. Now make some larger angles with your wheel.
Introduce the terms ‘straight’, ‘reflex’ and ‘full-turn’ angles to describe these angles.
Highlight the fact that angles involve the amount of turn between two lines and not the common misconception involving the distance between the arms.
Make a display of the angles made by the students. Have them label the different types of sangles.
Clock face angles
Materials
• toy clock or wall clock
• worksheets each showing multiple blank analogue clock faces
Select two students to demonstrate this activity.
Can you make a right angle on the clock face? What time is it?
Which other right angles can you make? What is the time for each angle?
Discuss the students’ findings.
Ask the class to demonstrate acute, obtuse, straight, reflex and full-turn angles using their worksheets. Write the time for each angle.
Extension
Highlight the terms ‘revolution and half-turn’, ‘full-turn’ and ‘quarter-turn’ angles using the clock face. Revise the terms ‘clockwise’ and ‘anticlockwise’.
MIDDLE – YEARS 3 AND 4 OXFORD UNIVERSITY PRESS MIDDLE –YEARS 3 AND 4 123
UPPER – YEARS 5 AND 6 Measurement
USING UNITS OF MEASUREMENT
LENGTH
Year 5
Polygon perimeters
Materials
• rulers
• grid paper or square dot paper
• pencils/pens
Ask the students to draw four or five rectangles and calculate their perimeters. How did you get you answer? Did you add the side lengths?
Discuss the results with the students. Develop the idea that the result can be calculated by doubling the length and doubling the width of the rectangle and then adding.
Can you draw different rectangles that each has a perimeter of 24 cm?
Discuss the different possibilities with the students.
Variation
Include examples that include decimal lengths.
Find it
Materials
• a whiteboard
• markers
• measuring tapes
• rulers
• paper
• pencils/pens
Can you find objects outside our classroom that are between 4 and 8 m in length?
Then ask them to convert the measurements to centimetres.
Encourage the students to suggest some objects before leaving the classroom.
List the students’ suggestions on the whiteboard. Divide the class into small groups and investigate the activity. Have the students measure and record their findings.
On return to the classroom, ask the students to draw and write about their investigations.
OXFORD UNIVERSITY PRESS 124
Classroom search
Materials
• a whiteboard
• markers
• 5–10 classroom objects
• ruler or tape measure
• paper
• pens/pencils
Can you name objects in our classroom that are between 5 and 10 cm in length?
Ask the class members to nominate some objects. Collect them and display them to the class.
Display the first object.
What is your estimate of the length of this object?
Call for a show of hands. Decide on an agreed length with the class. Select two students to measure the object.
How accurate were your estimates?
Repeat the activity using other classroom objects and record the results in a table.
Object
Estimate
Measurement
Variation
Have the students collect objects that are less than 5 cm and more than 10 cm and repeat the activity. Then ask them to convert the measurements to millimetres.
Longest to shortest Materials
• 10 small classroom objects
• a ruler
• paper
• pencils/pens
Ask the students to collect 10 small objects in the classroom and estimate and then measure their lengths in millimetres. Have them record their results in a table.
What was the longest object that you measured?
What was the shortest object that you measured?
How accurate were your estimates?
Discuss the students’ findings.
UPPER – YEARS 5 AND 6 OXFORD UNIVERSITY PRESS UPPER –YEARS 5 AND 6 125
Thickest to thinnest
Materials
• 10 small everyday objects
• a ruler
• paper
• pencils/pens
• calculator
Ask the students to collect 10 small objects in the classroom and estimate and then measure their thicknesses in millimetres. Have them record their results in a table.
What was the thickest object that you measured?
What was the thinnest object that you measured?
Discuss the students’ findings.
Thick as a book
Materials
• 5 library books
• a ruler
• paper
• pencils/pens
• calculator
Ask the students to collect five library books and estimate and then measure their thicknesses in millimetres. Have them record their results in a table.
What was the thickest book that you measured?
What was the thinnest book that you measured?
Discuss the students’ findings.
How could we calculate the thickness of a single page in these books?
Discuss the students’ ideas and suggestions. Develop the idea that if the thickness is divided by the number of pages, the thickness of individual pages may be calculated. Discuss the decimal number resulting.
Body measures Materials
• string
What is a cubit?
• scissors
• rulers
Revise the fact that the cubit is an historical measurement, comprising the distance from the tip of the index finger to the elbow, when the arm is outstretched.
Choose two students and ask them to measure each other’s cubits using lengths of string, which can then be placed along the ruler, to give results in millimetres.
What did you find out?
Which person had the longer cubit?
MORE DAILY WORKOUTS OXFORD UNIVERSITY PRESS 126
Ask all class members to work in pairs, determine the lengths of the following and record their results in a table.
Cubit
Width of handspan
Palm width
Length of index finger
Length of thumb
Length of little finger
Width of little finger
Length of shoe
Discuss the results with the class.
Did any results surprise you?
Variation
Use a tape measure instead of string, scissors and rulers.
Are you a square?
Materials
• a whiteboard
• markers
• measuring tape
• paper
• pencils/pens
• a calculator
Choose a group of three students. Ask them to measure each of their heights and the span of their outstretched arms in millimetres. Record the results on the whiteboard.
Demonstrate to the students how the ratio between height and arm span may be calculated, by dividing the height by the arm span.
If the ratio of the two quantities is approximately one, the imaginary shape formed is roughly a square. Demonstrate the results to the students.
Using paces
Materials
• student desks
What is a pace?
Discuss the idea of a pace, measured by stepping. Tell the students that this was a readily accessible unit of informal measurement used in ancient times, which is still used today.
What would be your estimate of the width of our classroom in paces?
Ask students to record their estimates. Choose three or four students to measure the width of the classroom using paces.
UPPER – YEARS 5 AND 6 OXFORD UNIVERSITY PRESS UPPER –YEARS 5 AND 6 127
Estimate Measure
Body part
(mm)
What did you discover?
Were your results different? Why?
Discuss the difficulties of measuring with informal units, as the results are different because no common standard unit is used.
Year 6
Trundling along
Materials
• trundle wheel • measuring tape
How far does a trundle wheel travel between clicks? How could we work it out?
• chalk
Discuss the students’ responses. Ask them to mark the start of the wheel using a chalk line, rotate the wheel one click and mark the end point. The distance then measured is the circumference of the wheel which is exactly 1 m.
Extension
Ask the students to investigate the distance travelled by one rotation of a bike wheel.
Jogging along
Materials
• trundle wheel
• stopwatch
• paper
How long would it take for you to jog 400 m?
Use a trundle wheel to measure a 400 m track.
• pencils/pens
• stopwatch
• calculator
Ask for four or five volunteers to carry out the activity.
Record their estimated times before they start.
Start the activity and record their times using a stopwatch.
What was the average time taken to jog the distance?
What would your time be if you jogged 800 m?
Ask the same students to jog 800 m and compare their results.
Variation
Use local athletics track to determine the time taken by the students.
MORE DAILY WORKOUTS OXFORD UNIVERSITY PRESS 128
School perimeters
• trundle wheels, paper, pencils/pens
Divide the class into small groups and ask them to use trundle wheels to measure the perimeters of selected items in the school playground such as paved areas, courts, fields and buildings.
After the activities are completed, call the class together and discuss the findings.
Does measuring with the trundle wheel give the most accurate results?
Why? Why not? How do you know?
Boxed in
Materials
• a whiteboard
• markers
• grocery packets or boxes brought to school by the students
• 30 cm rulers
• tape measures
• pencils
• paper
Provide groups of students with a collection of five packets or boxes.
What are the dimensions of these packets in millimetres?
Students measure and record their answers in a table.
Packet 1 Packet 2
Packet 3
Packet 4
Packet 5
Height (mm) Estimate Measure
Length (mm) Estimate Measure
Width (mm) Estimate Measure
Which packet was the tallest? Which packet was the widest? Which packet was the longest?
Discuss the students’ answers.
Classroom furnishings
Materials
• a whiteboard
• markers
• classroom furniture
• measuring tapes
• paper
• pencils/pens
Tell the students that today’s activity involves estimating the height in millimetres of objects in the classroom. Select pairs of students to estimate and measure one item each.
UPPER – YEARS 5 AND 6 OXFORD UNIVERSITY PRESS UPPER –YEARS 5 AND 6 129
Can you make estimates of the height of objects in the table?
Item Estimation (mm)
Student chair
Teacher’s chair
Cupboard
Teacher’s table
Other
Discuss the results and the accuracy of students’ estimates.
Extension
Ask the students to investigate the length and width of the same objects.
Measure the curve
Materials
• a whiteboard
• markers
• paper
Draw a curved line on the whiteboard.
• pencils/pens
• string or wool
• rulers
How could we measure the length of this line in millimetres?
Measure (mm)
Discuss the students’ suggestions. Demonstrate the technique involved using string or wool.
Ask the students to draw three of four curved lines on their paper.
Can you estimate the length of these lines in millimetres, before you measure them?
Record your estimates and results. Were your estimates accurate?
Then ask the students to convert their measurements to centimetres.
Perimeter and area
Materials
• 1 cm grid paper
• pencils
• a computer
• computer drawing tools
Do you know the difference between perimeter and area?
Talk about the definitions with the students.
Do you think that rectangles that have the same perimeter have the same area?
Discuss the student’s responses.
Ask the students to draw three different rectangles that each have a perimeter of 24 cm and then calculate their areas.
What are the areas of your rectangles?
MORE DAILY WORKOUTS OXFORD UNIVERSITY PRESS 130
Were the areas of the rectangles the same as the perimeters?
Discuss the students’ responses and clarify the question.
Extension
Use the online tool called ‘Area Perimeter Explorer’ and further investigate the relationship between area and perimeter.
Check the can
Materials
• a soft drink can
• a tape measure or piece of string
• a 30 cm ruler
Display a can to the students.
Which do you think will be larger: the height of the can or the distance around the can?
Allow sufficient time for the students to visualise their answers.
Ask the class for their predictions via a show of hands. Select two students to measure with the string and ruler and determine the length in millimetres. Discuss the students’ responses.
Were you surprised? What is the word we use for the distance around an object?
Explain the term ‘circumference’ to the students as the distance around the boundary of a circle, or, as in common everyday use, the distance around curved objects. Discuss.
Circumferences
Materials
• string
• rulers
Ask the students to estimate and then measure the circumference in millimetres of a selection of everyday objects, such as a tennis ball, a football, a softball bat, a table leg, a wastepaper basket or the nearest small tree trunk. Have them record their results in a table.
Extension
Estimate and then measure the circumference of body parts, such as the fingers, thumb, wrist, the forearm or the ankle.
How far?
Materials
• a computer
• screen image of local area
• multiple copies of map
• paper
• pencils/pens
How far in kilometres is it from your school to the nearest following locations: a park; some shops; a shopping centre; a sports field; a cinema; a church; a service station; a railway station?
UPPER – YEARS 5 AND 6 OXFORD UNIVERSITY PRESS
–YEARS 5 AND 6 131
UPPER
• tape measures
Work together with the students to estimate the distances and record the results. Then ask the students to convert the kilometres to metres.
Best length units
Which unit would be best to measure:
• the width of a pencil
• the width of an eraser
• the height of a person
• the height of a tall building
• the length of a swimming pool
• the depth of a swimming pool
• the distance from Melbourne to Sydney?
Call for answers and discuss the students’ responses.
Indicate to the students that measuring in millimetres would be appropriate for the width of a pencil and an eraser; the height of people is measured in centimetres; metres are used to describe the height of buildings; the length and depth of swimming pools are measured in metres; and very large distances are measured in kilometres.
Ask the students to name some objects and identify the best length units to measure each object. Discuss the students’ suggestions. Encourage them to draw and write about what they found out.
Best length devices
Materials
• trundle wheels
• metre stick
• ruler
• tape measure
• 20 m measuring tape
• paper
• pencils/pens
Display the measuring devices to the students. Ask the following questions and have the students write their answers.
Which measuring device would be best to measure:
• the length of a bench in the playground
• the length of a cross-country track
• the width of a basketball court
• the width of a school corridor
• the height of a desk
• the height of a mug
• the distance around a person’s waist?
MORE DAILY WORKOUTS OXFORD UNIVERSITY PRESS 132
Call for answers and discuss the students’ responses. Answers may vary.
Indicate to the students that the length of a bench would be best measured using a measuring tape; a trundle wheel would be best for setting out a cross-country track; a 20 m measuring tape would be best to measure the width of a basketball court and a school corridor; the height of a desk could be measured with a metre stick or a tape measure; a ruler or tape measure could measure the height of a mug; and a tape measure would be best for waist measurements.
Ask the students to name some objects and identify the best measuring devices to use in measuring each object. Discuss the students’ suggestions. Encourage them to draw and write about what they found out.
Extension
Ask the students for suggestions on how to measure very large distances, such as the distance between Sydney and Brisbane. An online map, printed map or car odometer could be used.
AREA Year 5
What is area?
Ask the students for their definition of the concept of area. Encourage them to talk about it with a classmate before calling for explanations. Area may be defined as the size of a surface, or more precisely as the space inside the boundary of a 2D shape. A common response from the students at this level is that area is length times width, which may reflect a limited understanding of the concept.
Area and perimeter
Materials
• 1 cm grid paper
• pencils/pens
• ruler
• a computer
• computer drawing tools
Do you know the difference between area and perimeter?
Talk about the definitions with the students.
Do you think that rectangles that have the same area have the same perimeter?
Discuss the student’s responses. Ask the students to draw three different rectangles that each have an area of 36 cm and then calculate their areas.
What is the perimeter of your rectangles?
Were the perimeters of the rectangles the same as the areas?
Discuss the students’ responses and clarify the question.
UPPER – YEARS 5 AND 6 OXFORD UNIVERSITY PRESS UPPER –YEARS 5 AND 6 133
Extension
Use the online tool called ‘Area Perimeter Explorer’ and further investigate the relationship between area and perimeter.
Demonstrating the difference
Materials
• a whiteboard
• markers
• 4 geostrips or cardboard strips of equal lengths
• split pins
• 1 cm grid paper
• pencils/pens
Join four geostrips to make a square. Select two students to measure the area of the square with grid paper. Record the results on the whiteboard. Push the square out of shape to make a rhombus and display it to the class.
Do you think that the area of the rhombus will be greater than, less than or the same as the square?
Discuss the students’ ideas. Ask the students to compare the area of the square and rhombus by tracing on grid paper to confirm that the areas are different. Encourage the students to complete the following sentence: ‘Shapes that have the same perimeter do not necessarily have the same ’.
Got it covered
Materials
• a whiteboard
• markers
• 1 cm grid paper
• scissors
• an exercise book
• 3 other books of differing sizes
• paper
• pencils/pens
Choose a pair of students and display an exercise book to the class.
What do you think is the area in square centimetres of the front cover of this book?
Call for answers. Record the students’ suggestions. Ask the pair of students to measure the area of the front cover using grid paper. Discuss the results.
How accurate were your estimates?
Encourage the students to investigate the areas of other book covers and record their results. Discuss their findings.
Can you think of a more accurate way to find the area of the cover?
Discuss the students’ suggestions.
Variation
Use a transparent plastic grid overlay to determine the area of the books.
MORE DAILY WORKOUTS OXFORD UNIVERSITY PRESS 134
Work it out
Materials
• an exercise book
• 3 other books of differing sizes
• rulers
• paper
• pencils/pens
• calculators
Choose the exercise book from the previous activity and display it to the class. How can we calculate the area in square centimetres of the front cover of this book?
Call for answers. Discuss the students’ suggestions. Ask a pair of students to measure the length and width of the front cover using a ruler. Have the students calculate the area in square centimetres. Calculators may be used. Encourage the students to calculate the areas of other book covers by measuring with the ruler. Ask them to record their results and discuss their findings.
How did you answers compare with the results of the previous activity when you used grid paper? Which of the two methods of finding the area was more accurate?
Scale up
Materials
• a whiteboard
Draw a 2 × 2 square grid on the whiteboard.
• markers
If I drew a twice-scale diagram of this grid, what would it look like?
Can you predict how many small squares it would have?
Do you think the grid would have eight squares or more than eight squares?
Discuss all answers that the students provide. Record their suggestions.
Explain to the students that the term ‘twice scale’ relates to the dimensions of the grid and not the total number of squares in the grid. Therefore, a twice scale diagram would be 4 × 4 squares in size and contain 16 small squares.
Extension
Ask the students to draw grids of their own and construct grids that are twice the scale.
Scale down
Materials
• a whiteboard
Draw a 6 × 4 rectangular grid on the whiteboard.
• markers
If I drew a half-scale diagram of this grid, what would it look like?
UPPER – YEARS 5 AND 6 OXFORD UNIVERSITY PRESS UPPER –YEARS
AND 6 135
5
Can you predict how many small squares it would have?
Do you think the grid would have 12 squares or less than 12 squares?
Discuss all answers that the students provide. Record their suggestions. Draw a 3 × 2 grid and ask the students to count the squares.
Were your predictions correct?
Reinforce the idea that the term ‘half scale’ relates to the dimensions of the grid and not the total number of squares in the grid.
Extension
Ask the students to draw grids of their own and construct grids that are half the scale.
Packets and cans
Materials
• a whiteboard
• markers
• 5 or 6 rectangular grocery packets
• a 250 mL Tetra Brik
• an aluminium can
• 1 cm grid paper
• scissors
• pencils/pens
How could we find the total surface area of each of these containers?
Discuss the students’ responses. Point out that each face of the containers needs to be measured. Divide the class into five or six groups and give each group a container to measure using grid paper.
Allow sufficient time for the students to complete the activity. Ask the students to estimate their result before using the grid paper. List their findings on the whiteboard.
Which container had the largest surface area? How accurate were your estimates?
Extension
Have the students measure the length and the width of each face of the rectangular containers and calculate their areas. Compare the results with those obtained by using grid paper.
Which of the methods you used was more accurate? Why?
Inside estimates
Materials
• rulers or tape measures
• paper
• pencils/pens
• calculators
Ask the students to identify four small rectangular surfaces inside the classroom. Can you estimate the area of your rectangles in square centimetres?
MORE DAILY WORKOUTS OXFORD UNIVERSITY PRESS 136
Have the students measure the length and width of the rectangles and calculate their areas in decimal form.
What did you find out? Which rectangle was the largest? Which was the smallest?
Can you record your results in decimal form?
Draw and write about what you did.
Count it up
Materials
• a whiteboard and markers, or computer and screen
• 1 cm grid paper
Draw the shapes shown and ask the students to copy them on a 1 cm grid paper.
What is the area in square centimetres of each of your shapes?
Which methods did you use to count the squares that were less than a full square?
Discuss the students’ results and the strategies they used.
Extension
Encourage the students to construct triangles on grid paper and repeat the activity.
Squares within squares
Materials
• a whiteboard
Copy this diagram on the whiteboard.
• rulers
• pens/pencils
• markers
How many different size squares can you find in this large square?
Talk about your ideas with a partner.
Discuss the students’ ideas. Ensure they consider 1 × 1, 2 × 2, 3 × 3 and 4 × 4 squares.
Can you find 30 squares altogether?
Draw this table on the whiteboard and ask the students to help you complete it.
UPPER – YEARS 5 AND 6 OXFORD UNIVERSITY PRESS UPPER –YEARS 5 AND 6 137
What patterns do you notice in the table?
Highlight the square number pattern of the areas of the shapes involved.
What is the sum of the areas of the first four squares?
What would be the difference in area of a 5 cm square?
Discuss the students’ answers.
Extension
Have the students calculate and record the area of squares with sides up to 10 cm.
Year 6
On the grid
Materials
• small classroom objects such as erasers, pencils/pens, paper or notebooks, markers, pencil sharpeners, pattern blocks, 1 cm grid paper or transparent grid overlays
Choose a pair of students and display a hexagonal pattern block.
What do you think is the area of this block in square centimetres?
Call for answers and ask the class to record their estimates. Have the pair of students trace the block and count the squares.
What did you find? How accurate were your estimates?
Invite the class to repeat the activity using the other pattern blocks, recording estimates and results in a table. Discuss the students’ results.
Leafy areas
Materials
• a large collection of leaves
• 1 cm grid paper or transparent grid overlays
Show the students a large leaf.
• paper
• pencils/pens
What would be your estimate of the area of this leaf in square centimetres?
Call for answers. Select a pair of students to measure the leaf. Discuss the result.
Follow up with group or partner work, estimating and measuring a selection of leaves that the students have collected. Ask each student to record their estimate and measurement of the area of each leaf. After sufficient time call the class together.
MORE DAILY WORKOUTS OXFORD UNIVERSITY PRESS 138 Sides of square (cm) 1 × 1 2 × 2 3 × 3 4 × 4 Area (cm2) Difference in area (cm2)
Which of your leaves had the largest area? Which of your leaves had the smallest area?
How close were your estimates?
Observe the accuracy of the students’ estimates in order to assess their understandings. Discuss the students’ responses.
Hands and feet
Materials
• 1 cm grid paper
• pencils/pens
Is the area of your foot greater than the area of your hand, or are they the same?
How could you find out?
Ask the students to work in pairs, taking it in turns to do the tracing on grid paper. Discuss the results after the students have counted the squares and reached their conclusions.
Extension
Investigate whether the student with the largest foot also has the largest hand.
Outside estimates
Materials
• 20 m measuring tapes
• paper
• pencils/pens
• calculators
Ask the students to identify four z × z rectangular surfaces outside the classroom. Ensure that the vertical and inclined surfaces are considered.
Can you estimate the area of your rectangles in square metres?
Have the students measure the length and width of the rectangles and calculate their areas in decimal form.
What did you find out? Which rectangle was the largest? Which was the smallest?
Draw and write about what you did.
Creating a hectare
Materials
• a whiteboard
• markers
• calculators
How many square metres are there in 1 hectare?
• a trundle wheel or 50 m measuring tape
• a large flat area
• ‘witches’ hat’ cones
What are some possible lengths and breadths of a rectangle that is 1 hectare in area?
Encourage the children to investigate answers using their calculators.
UPPER – YEARS 5 AND 6 OXFORD UNIVERSITY PRESS UPPER –YEARS 5 AND 6 139
List their suggestions and discuss them. Remind the students that a hectare does not necessarily need to be square in shape.
Find an open, flat area such as a park or a playing field and ask the students to measure its length using trundle wheels or measuring tapes. Use witches’ hats to mark the corners of the rectangle.
Look at the hectare that you have created. Close your eyes and imagine its size. Remember the amount of space that it takes up.
Fencing problem 1
Ask the students to imagine the following situation.
Let us pretend that you are a farmer about to fence some paddocks. You have 800 m of fencing materials. What is the largest area that can be enclosed with 800 m of fencing?
Ask the students to work in pairs and consider the possibilities. Which shape provided the maximum possible amount of space?
Discuss the students’ results.
Fencing problem 2
MORE DAILY WORKOUTS OXFORD UNIVERSITY PRESS 140
Materials
calculators
• paper • pencils • pens •
Materials
a whiteboard
markers
paper
pencils
pens • calculators 100 m ×100 m 400 m × 25 m 50 m × 200 m
•
•
•
•
•
Draw and label each of the rectangles on the whiteboard and ask the students to copy them. Can you calculate the areas of these rectangles?
What did you find out?
Check the students’ answers and confirm the fact that each of these paddocks has an area of 1 hectare. Imagine that you were a farmer again and the rectangles were your paddocks.
Which of the paddocks would be cheapest to fence? Why?
Talk about the students’ ideas and suggestions.
Roll out the carpet
Materials
• 10 or 20 m measuring tape
• pencils/pens
• calculators
Can you estimate how much carpet we would need to carpet our classroom?
Ask the students to record their estimates and discuss their ideas.
How will we calculate the amount of carpet needed?
Select a pair of students to measure the length and width of the room in decimal form.
Have the students calculate the answer and compare the accuracy of their estimates.
Extension
If carpet comes in long rolls that are 4 m wide, how much carpet would need to be cut off the roll to carpet the room? Investigate the problem by drawing a diagram.
Paint the walls
Materials
• a wall
• 10 or 20 m measuring tape
Imagine that you need to paint a wall.
What is its area?
How much paint will you need?
• pencils/pens
• calculator
Choose a suitable wall and select some students to measure it in decimal form.
Have the students calculate the area of the wall and record the result.
If 1 L of paint covers about 16 m2, how many litres of paint will be needed to give the wall two coats of paint?
If 4 L of paint costs $80 and 10 L costs $190, which would be the better buy?
Discuss the students’ findings.
UPPER – YEARS 5 AND 6 OXFORD UNIVERSITY PRESS UPPER –YEARS 5 AND 6 141
Extension
Calculate the amount of paint needed to paint the entire classroom.
Best area units
Which unit would be best to measure:
• the area of a farm
• the floor area of a house or apartment
• the area of a book cover
• the area of a stamp or sticker
• the area of a small town
• the area of a country?
Call for answers and discuss the students’ responses. Answers may vary.
Indicate to the students that measuring in hectares would be appropriate for the area of a farm; floor areas are measured in square metres; a book cover can be measured in square centimetres; a stamp or sticker can be measured in square millimetres; a small town in hectares and a country in square kilometres.
Ask the students to name some surfaces and identify the best units to measure the area of each surface. Include vertical and inclined surfaces. Discuss the students’ suggestions. Encourage them to draw and write about what they found out.
Best area devices
Materials
• trundle wheels
• metre stick
• ruler
• tape measure
• 20 m measuring tape
• a 50 m measuring tape
• paper
• pencils/pens
Display the measuring devices to the students. Ask the following questions and have the students write their answers.
Which measuring device would be best to measure the area of:
An assembly area? A football field? A stamp or sticker? A backyard swimming pool? A doormat? A book cover?
Call for answers and discuss the students’ responses. Answers may vary.
Indicate to the students that the area of an assembly hall and a football field would be best measured using a 50 m measuring tape; a stamp or sticker with a ruler or tape measure; a backyard swimming pool with a 20 m tape; a doormat with a metre stick or tape measure and a book cover with a ruler.
MORE DAILY WORKOUTS OXFORD UNIVERSITY PRESS 142
VOLUME AND CAPACITY
Year 5
Filling boxes
Materials
• a collection of small open boxes
• Multilink cubes or Base 10 minis
Choose a pair of students to begin the activity. Have them select an open box.
Can you estimate how many cubes will fill your box?
Ask the class to write down their estimates.
Have the students fill the box and count the number of cubes. Select other pairs of students and repeat the activity.
What did you find out?
How accurate were your estimates?
Discuss the results with the students.
Building layers
Materials
• 1 cm grid paper
• scissors
• Base 10 minis or similar cubes
Cut out a small rectangular grid from a sheet of grid paper and display it to the class. Invite a pair of students to help with the activity.
How many cubes do you think will cover this grid?
If we add two more layers how many more cubes will we need to add?
How many cubes will there be altogether?
What is the name of the shape that we have made?
What is its volume?
Investigating prisms
Materials
• a computer
• paper
• pencils/pens
Search the term ‘Playing with Rectangular Prisms – GeoGebra’ online. Demonstrate the construction of different prisms to the students.
UPPER – YEARS 5 AND 6 OXFORD UNIVERSITY PRESS UPPER –YEARS 5 AND 6 143
Construct three different prisms in turn and ask the students to record the length, width and height of each prism in a table.
In how many ways could we find the volume of these prisms?
Discuss the methods of determining the volume of the prisms such as counting individual cubes or counting the layers.
How could we calculate the volume of each prism without counting the cubes?
Discuss the formula for calculating the volume of prisms. Ask the students to record the volume of each prism.
Variation
Encourage the students to undertake their own investigations of different prisms online.
Building prisms
Materials
• Multilink cubes
• Base 10 minis or similar cubes
• isometric dot paper
• pencils/pens
Can you build some prisms that have the following dimensions?
• A volume of 36 cm3, with a length of 3 cm and a height of 4 cm
• A volume of 24 cm3, with a width of 1 cm and a height of 2 cm
• A volume of 30 cm3, with a width of 2 cm and a height of 3 cm
• A volume of 40 cm3, with a length of 4 cm and a width of 2 cm
Draw some of your prisms using isometric dot paper.
Build a box
Materials
• cardboard
• 1 cm grid paper
• scissors
• adhesive tape
• Base 10 minis or similar cubes
Can you explain the difference between volume and capacity?
Revise the terms. Volume may be described as the amount of space that an object occupies, whereas capacity relates to the amount of material filling containers.
How would you make an open box that has a capacity of 18 cm3?
What would be its dimensions?
MORE DAILY WORKOUTS OXFORD UNIVERSITY PRESS 144
Prism Length Width Height Volume (cm3)
Discuss the students’ suggestions. Encourage them to build the box using grid paper and adhesive tape.
Does your open box measure 3 × 3 × 2 cm or 9 × 2 × 1 cm?
What is the capacity of your box?
How could you check the capacity?
Have the students pack their boxes using Base 10 minis.
Were your predictions correct?
Variation
Glue the grid paper rectangles to cardboard to provide a more rigid result.
Measuring capacity
Materials
• calculators
• a measuring cylinder
• ruler
• dry sand
• a matchbox
• 2 or 3 small rectangular containers
Select two or three students to demonstrate this activity.
Have them first measure the length, width and height of the matchbox in millimetres and calculate the volume of the container. Record the result.
Fill the matchbox with sand and level it off. Pour the sand into the measuring cylinder and read the amount.
Were the amounts the same? Why? Why not?
Discuss the students’ responses. Repeat the activity for the remaining containers.
Variation
Rice or grain may be substituted for dry sand.
Frame it
Materials
• 12 1 m lengths of dowel
• timber
• plastic pipe or thick cardboard
• glue or masking tape
• paper
• pencils/pens
Can you construct a cube with edges that are 1 m in length?
What would be its volume?
Have a group of students build the cube.
How many students do you think can stand inside the cubic metre frame?
UPPER – YEARS 5 AND 6 OXFORD UNIVERSITY PRESS UPPER –YEARS 5
6 145
AND
Ask the students to record their estimates. Count the number of students inside the frame.
How accurate were your estimates?
Discuss the results.
Imagine it
Materials
• 1 m3 framework
• plastic chairs
Show the students a single plastic chair.
• paper
• pencils/pens
How many chairs do you think will fit inside the cubic metre frame?
Ask the students to record their estimates. Choose two or three students to pack the frame with chairs. Count the number of chairs.
How accurate were your estimates?
Discuss the results.
Investigate the space
Materials
• 1 m3 framework
• paper
• pens/pencils
Can you imagine some objects that have volumes:
• greater than a cubic metre
• less than a cubic metre
• about the same size as a cubic metre?
Record your estimates in a table.
Greater than 1 m3
• classroom
• school environment
Less than I m3
About the same as 1 m3
Select groups of two or three students in turn to test the students’ estimates, using the frame. Ask the students to draw and write about what they found out.
Cubic metres
Materials
• 1 m3 framework, paper, pens/pencils, classroom, school environment
Encourage the students to use visualisation to make estimates of the following volumes before using the cubic metre frame as a follow up.
MORE DAILY WORKOUTS OXFORD UNIVERSITY PRESS 146
What do you think is the approximate volume in cubic metres of:
• a classroom
• a corridor
• a covered area
• an assembly hall?
Record your estimates in a table.
Classroom Corridor
Covered area Hall
Discuss the results of the investigations.
Extension
Check the students’ estimates by measuring the spaces with 20 or 50 m tapes and calculating the volumes.
Year 6
Everyday capacities 1
Materials
• 5–10 everyday containers
• a measuring jug
• paper
• pencils/pens
Let us investigate the capacities of some everyday containers.
Ask the students to sort the containers into three groups. The containers should hold:
• 1 L
• less than 1 L
• more than 1 L.
Have the students check the capacities of the containers by filling them with the measuring jug, recording their results in a table.
Discuss the students’ findings.
UPPER – YEARS 5 AND 6 OXFORD UNIVERSITY PRESS UPPER –YEARS
6 147
5 AND
Item First estimate (m3) Estimate with frame (m3)
1 L Less than 1 L More than 1 L
Everyday capacities 2
Materials
• everyday containers
• paper
• pencils/pens
Let us investigate some more capacities. Ask the students to help you complete the following table from their previous experience and knowledge.
Less than 100 mL
Between 100 and 200 mL
Between 200 and 300 mL
Between 300 and 400 mL
Encourage the students to search for additional containers at home and record their capacities in order to complete the list.
Extension
Ask the students to list products that are sold in 250 mL, 375 mL, 1 L and 2 L containers.
Kitchen measures
Materials
• kitchen measuring cups
• kitchen measuring spoons
• a measuring cylinder or jug
What is the capacity of these cups and spoons?
• water
• paper
• pens/pencils
Ask the students to estimate the capacity of each cup and spoon, before filling them with water and pouring the contents into a measuring cylinder or jug. Discuss the students’ findings and ask them to draw and write about what they found out.
MORE DAILY WORKOUTS OXFORD UNIVERSITY PRESS 148
Surface areas 1
Materials
• Multilink cubes or similar
Select three students to demonstrate this activity. Give them eight cubes each.
Can you each make a different shape using the cubes?
Allow time for the students to build their shapes.
What is the volume of these shapes?
Is it the same in each case?
Discuss the students’ answers.
How could we calculate the surface areas of these shapes?
Will it be the same in each case?
Have each student calculate the surface area of their shape.
What did you find out?
Reinforce the finding that shapes having the same volume can have different surface areas.
Volume displacement
• a Base 10 large block, ruler, a 4 L ice cream container or large saucepan, a large oven tray, a measuring cylinder or jug, water
What are the dimensions of the large Base 10 block?
If necessary, measure the cube.
What is its volume in cubic centimetres?
Call for answers and discuss the responses.
What volume of water will the block displace?
• Fill the saucepan or ice cream container to its brim and place it in the tray.
• Carefully place the cube in the water so that the entire block is below water and the top face is level with the surface of the water.
• Allow the water to overflow into the tray.
• Measure the amount of water that has been displaced by pouring the water from the tray into the measuring cylinder.
How much water overflowed into the tray?
What can you say about the relationship between 1000 cm3 and 1 L?
Discuss the result with the students.
UPPER – YEARS 5 AND 6 OXFORD UNIVERSITY PRESS UPPER –YEARS 5 AND 6 149
MASS Year 5
What is mass?
Ask the students for their definition of the concept of mass. Encourage them to talk about it with a classmate before calling for explanations. Mass may be defined as the amount of matter in an object, or put more simply for the students, how heavy an object is.
The term ‘weight’ is used much more commonly in everyday life.
Mass of a bat
Materials
• a whiteboard
• markers
• a spring balance
• a cricket bat
Which bat do you think will be the heaviest?
• a softball or T-ball bat
• a hockey stick
• tennis racket
• adhesive tape
Choose a pair of students and ask them to select a bat. Ask them to estimate its mass by hefting (lifting it up and down in the hands). Record the students’ estimates in a table on the whiteboard. Ask the pair to weigh the bat using the spring balance, attaching it with adhesive tape, if necessary. Record the result in the table.
Choose a new pair of students for each of the other bats and repeat the process. Discuss the findings and list the masses of the bats in order from the heaviest to the lightest.
What did you find out? Was the result expected?
Fruity masses
Materials
• kitchen scales
• various fruits such as an apple, an orange, a banana, avocado, tomato
Select two or three students and ask them to place the pieces of fruit in order of their estimated mass. Discuss the students’ choices with the class and allow them to revise the order if they wish. Measure the masses and record the results on the whiteboard.
How good were your estimates? Was the order correct?
Discuss the results with the students.
MORE DAILY WORKOUTS OXFORD UNIVERSITY PRESS 150
Estimating mass
Materials
• 5 or 6 everyday objects up to 500 g
• kitchen scales
How well can you estimate mass?
• paper
• pencils/pens
Choose a pair of students and have them select one of the objects. Ask them to estimate its mass by hefting. Record their estimate in a table.
Have them measure the mass of the object, using the scales. Record the result. Ask other pairs of students to select other objects and repeat the process, in turn. Ask the class to calculate the difference in grams between their estimates and the final measure.
How accurate were your estimates?
Extension
Repeat the activity for objects having an estimated mass of approximately 250 g.
Cupfuls
Materials
• a cup
• kitchen scales
• rice
• flour
• sugar
• breakfast cereal
How much does a cupful of rice weigh?
• water
• paper
• pencils/pens
Call for answers and ask the students to record their estimates. Choose two students to weigh the rice using the balance.
How close were your estimates?
UPPER – YEARS 5 AND 6 OXFORD UNIVERSITY PRESS UPPER –YEARS 5 AND 6 151
Object Estimate
Measure (g) Difference (g)
(g)
Repeat the process. Invite other pairs of students to investigate the mass of the other materials. Ask the class to record the results in a table.
Material
Rice
Flour
Sugar
Breakfast cereal
Water
Ask the students to draw and write about what they found out.
Lunchbox masses
Materials
• a whiteboard
• markers
• a student’s lunchbox
• kitchen scales
• paper
• pencils/pens
• a calculator
Ask for a volunteer to provide their lunchbox for this activity. Open the box and reveal the contents. Display them to the students.
What do you think will be the mass of this lunchbox?
Ask the students to record their estimates.
Select a student to weigh the items individually and weigh the container. Record the results on the whiteboard. Select a pair of students to total the mass using a calculator. Record the result in decimal form.
What was the total mass?
Were your estimations accurate?
Discuss the results with the students.
Variation
Repeat the activity using several lunch boxes and calculate the average mass of a lunchbox.
100 g
Materials
• Base 10 longs and minis
• Multilink cubes
• pasta shells
• wrapped sweets
• kitchen scales
• paper
• pencils/pens
Can you estimate how many of each object is needed to equal a mass of 100 g?
MORE DAILY WORKOUTS OXFORD UNIVERSITY PRESS 152
Estimate (g)
Mass (g)
Ask the students to record their estimates in a table.
How many of each object would equal a mass of 1 kg? Discuss the students’ answers.
Extension
Ask the students to select objects of their own and repeat the activity.
Year 6
Crafty masses
Materials
• craft sticks
• kitchen scales
• paper
• pencils/pens
• calculators
How many craft sticks do you think would weigh 100 g?
Call for answers and ask the students to record their estimates. Select two or three students to carry out the investigation.
What did you discover?
Were your estimates accurate?
How could you calculate the mass of a single craft stick?
Encourage the students to use calculators to find the answer. Discuss.
Coin masses
• a collection of Australian coins, kitchen scales, paper, pencils/pens
Choose a pair of students.
Can you estimate how many 10 c coins are needed to have a mass of approximately 50 g?
Ask the class to record their estimates. Choose a pair of students to investigate the number of 10c coins. Repeat the activity for the other types of coins.
What did you discover? How accurate were your estimates?
UPPER – YEARS 5 AND 6 OXFORD UNIVERSITY PRESS UPPER –YEARS 5 AND 6 153
Object Estimate (g) Measure (g) Difference (g)
Base 10 masses
Materials
• Base 10 material
• kitchen scales
• paper
• pencils/pens
What do you think would be the mass of one Base 10 long?
Choose a pair of students to investigate the question using the kitchen scales. Estimate before measuring.
What did you discover?
Have the students repeat the activity for 2 longs, 4 longs, 6 longs, 8 longs and 1 flat.
Ask the class to record the results in a table.
2 longs 4 longs 6 longs 8 longs 1 flat
Using the results in the table, how could you calculate the mass of a single mini? Discuss the answer and methods used by the students.
Net and gross mass
Materials
• a whiteboard
• markers
• 2 different cans of food
• 2 bowls or jugs
• kitchen scales
Select a group of three or four students to investigate this activity.
Ask them to identify the mass stated on the label of each can. Record the masses in a table on the whiteboard.
Now ask the students to use the scales to check the mass of each can. Record the masses and discuss any differences found. Have the students open a can and use the scales to measure the mass of the contents.
Ask the class to calculate the mass of the container and have the students check the actual mass of the container with the scales.
What did you find out?
MORE DAILY WORKOUTS OXFORD UNIVERSITY PRESS 154
Block Estimate Measure
Mass on label Mass unopened Mass of contents Calculated mass of container Actual mass of container Can 1 Can 2
Discuss the students’ observations. Introduce the terms ‘net mass’ to describe the mass of the contents of the container and ‘gross mass’ to describe the mass of the containers and its contents.
Watery masses
Materials
• a plastic or metal container
• a measuring cylinder or measuring jug
• kitchen scales
• water
• paper
• pencils/pens
Can you use the idea of net mass and gross mass to measure the mass of 1 L of water?
How would you do it?
Discuss the students’ ideas and select a group of three or four students to investigate the activity.
What did you find out?
Draw and write about what you did.
Tonnes
Materials
• a computer
• paper
• pencils/pens
• a class set of calculators
Search the term ‘Heaviest and lightest AFL players’ online.
Reveal the lists to the students and discuss the data.
Ask each student to select a ‘Dream Team’ from the data and record the mass of each of the players selected.
What do you think will the combined mass of the players in your team?
What units can we use to measure the combined mass?
Have the students use calculators to total the combined masses of their teams.
Introduce the unit ‘tonne’, used to describe very large measures, and have the students record their results in tonnes in decimal form.
What is the average mass of players in your team?
How many players would be needed to make a mass of exactly 1 t?
Discuss the students’ selections and findings.
UPPER – YEARS 5 AND 6 OXFORD UNIVERSITY PRESS UPPER –YEARS 5 AND 6 155
Tare weights
Materials
• a whiteboard
Copy the table on the whiteboard.
What do you think these numbers mean?
What is the meaning of tare weight?
• markers
Ask the students to work in pairs and discuss their ideas before calling the class together for a full discussion. Explain to the students that tare weight, sometimes called unladen weight, is the weight of an empty container or vehicle, in this case a shipping container.
Where else might you have seen a table of numbers like the numbers on this container?
Discuss the students’ suggestions. Remind them, if necessary, that some heavy trucks are required to display such information.
Extension
Ask the students to investigate the tare weights of family vehicles, printed on registration papers. Have them report their findings to the class.
Best mass units
Which unit would be best to measure the mass of: a person; a pencil case; a calculator; a ring; a cup of rice; an orange; a whole pumpkin; a table; a pebble; a large rock; a car; a truck; an ocean liner?
Call for answers and discuss the students’ responses. Answers may vary.
Indicate to the students that a person’s mass is measured in kilograms; a pencil case, a calculator, a ring and an orange are measured in grams; a whole pumpkin and a table are measured in kilograms; a pebble is measured in grams; a large rock is measured in kilograms; and a car, truck and ocean liner are measured in tonnes.
Ask the students to name some objects and identify the best units to measure their mass. Discuss the students’ suggestions. Encourage them to draw and write about their findings.
Best mass devices
Materials
• equal-arm balance
• kitchen scales
• spring balance
• bathroom scales
Display the measuring devices to the students. Ask the following questions orally and have the students write their answers.
MORE DAILY WORKOUTS OXFORD UNIVERSITY PRESS 156
TARE KG
WORLDWIDE SHIPPING COMPANY MAX. GROSS KG 20 320
2127 NET KG 18 197
Which measuring device would be best to measure the mass of: a person; half a kilo of rice; an apple; a litre of water; some butter for cooking; a packed suitcase? Call for answers and discuss the students’ responses. Answers may vary.
Indicate to the students that the mass of a person can be measured using bathroom scales; half a kilo of rice, an apple, a litre of water and some butter would be measured with kitchen scales; and a spring balance would be most useful to measure a packed suitcase.
Ask the students to name some objects and identify the best measuring devices to use in measuring each object. Discuss the students’ suggestions. Encourage them to draw and write about what they found out.
TIME Year 5 Stop it
Materials
• a stopwatch
How well can you judge a time period of 10 seconds?
Choose a pair of students. The first student acts as the timer, starting the stopwatch until the second students calls time after an estimated period of 10 seconds has elapsed. Allow three attempts to encourage improvement.
Choose a second and a third pair of students and repeat the activity.
Did your estimates improve with practice? How close to 10 seconds did you get?
Extension
Repeat the activity for periods of 20 and 30 seconds.
How long?
Materials
• a stopwatch
• paper
• pencils/pens
How long does it take you to walk around the classroom and return to your starting point?
Select a group of three or four students, one student acting as timer.
Ask the class to record their estimates before each student carries out the task in turn.
What did you discover? Were your estimates accurate? About how far did you travel?
UPPER – YEARS 5 AND 6 OXFORD UNIVERSITY PRESS UPPER –YEARS 5 AND 6 157
How far?
Materials
• trundle wheels
• a stopwatch
• paper
How far can you walk at a steady pace around the playground in 2 minutes?
• pencils/pens
Ask the class to record their estimate before the selected students carry out the task in turn. Appoint a timekeeper, a student to operate the trundle wheel and another to count the clicks. Carry out the activity and discuss the results.
How accurate were your estimates?
Were the results the same? Why? Why not?
Discuss the students’ ideas.
Feel the pulse
Materials
• stopwatches
• calculators
• paper
How many times do you think your pulse beats in 30 seconds?
• pencils/pens
Demonstrate the method of using the two middle fingers of the right hand to find the pulse in the left wrist. Ask the students to count and record the number of beats in 30 seconds.
Was everyone’s pulse beat the same?
Discuss the results with the students.
How many times does your pulse beat in 1 minute? 10 minutes?
Use your calculator to help you find the number of beats in 1 month, 1 year and since you were born.
Birthday surprises
Materials
• a whiteboard and markers or computer and screen
• a class set of calculators
When is your birthday?
Do you know your age in years, months and days?
Call for five volunteers to help with this activity. Draw a table like the one below and ask the students to help you complete it.
Name Years Months Days
MORE DAILY WORKOUTS OXFORD UNIVERSITY PRESS 158
Record the name of each student and help them identify how many years, months and days have passed since their birth.
Ask the students to help you list the names of the students from the youngest to the oldest. Can you calculate how many days old you are? Use a calculator to help.
Extension
Encourage each student in the class to calculate their age in days.
School calendar Materials
• a whiteboard and markers or a computer and screen
What are the important events that are happening next month at our school?
Ask the students to interview people and collect information regarding excursions, meetings, debates and sporting fixtures. Prepare a calendar and ask the students to help you complete it.
Variation
Prepare a calendar listing the events of the term.
Personal timelines
Materials
• long cardboard strips
• paper
• rulers
• coloured pencils or markers
• pencils/pens
Ask the students to design a personal timeline showing important events in their life. Have them first draw a scale showing years and months before they begin. The school website may be helpful in this case also. Discuss the final products with the students before asking them to write about one of their important events.
Personal timetables
Materials
• paper
• pencils/pens
Ask the students to create their own personal timetables for the coming week. Have them mark in times, types of lessons, activities and recesses, lunchtimes and afterschool activities.
Variation
Encourage the students to create their timetable in 24-hour time.
UPPER – YEARS 5 AND 6 OXFORD UNIVERSITY PRESS UPPER –YEARS 5 AND 6 159
Year 6
Clock faces Materials
• 24-hour clock or clock face diagram
• worksheets showing combined blank analogue
Display the clock face to the students. What is the time shown in normal time format on the clock face? What is the time in 24-hour time format?
Suggest some other time examples and ask the students to represent them on the clock faces on their worksheets.
Extension
Ask the students to research the use of 24-hour time by different organisations and why it is used.
Mixed times Materials
• 24-hour clock or clock face diagram
• worksheets showing different blank formats, including analogue, digital and 24-hour clock faces
Ask the students to record the following times on their worksheets: 9 o’clock in the morning; 2 o’clock in the afternoon; 8 o’clock at night; half past 6 at night; quarter to 7 in the morning; 10 past 5 in the morning; 20 to 4 in the afternoon; noon; midnight. Encourage the students to work in pairs, with one student naming a time and the other writing it in different forms.
MORE DAILY WORKOUTS OXFORD UNIVERSITY PRESS 160
Take the bus
Materials
• a whiteboard
Copy the following timetable on the whiteboard.
Ask the students to study the timetable and answer the following questions.
How long does it take the bus to travel:
• from Dixon Rd to Virginia Ave
• from the bus station to Russell St
• from Rapp St to Smith St
• from Henry St to the bus station
• from William St to Ross St
• from Rapp St to Dixon Rd
• the completed route back to the bus station?
• markers
Metro
Departs:
Bus station
Rapp St
William St
Henry St
Russell St
Smith St
Dixon Rd
Virginia Ave
Ross St
Encourage the students to create some timetables of their own and pose questions for their friends to answer.
Aboriginal and Torres Strait Islander calendars
Materials
•
Search the term ‘Aboriginal and Torres Strait Islander seasonal calendars’ online. Choose an appropriate calendar and display it to the students. Explain that instead of following a monthly calendar to determine the seasons, for millennia traditional Aboriginal and Torres Strait Islander people have developed a deep knowledge of the country, generally recognising six seasons in the weather cycle of each year.
The seasons are identified according to the signs in the environment that show the weather is changing. These changes involve certain plants coming into flower or fruiting, animals appearing or winds, storms and rain occurring.
Analyse and discuss the selected calendar with the students.
How many seasons can you identify? What are their names?
Which flowers or fruit identify a certain time of year?
What do people do at certain times of year?
Discuss the students’ responses. Encourage them to create some questions of their own for their classmates to answer.
UPPER – YEARS 5 AND 6 OXFORD UNIVERSITY PRESS UPPER –YEARS
161
5 AND 6
a computer • screen • paper • pencils/pens
Arrives bus station Bus Lines 7:30 a.m. 7:38 a.m. 7:52 a.m. 8:05 a.m. 8:10 a.m. 8:14 a.m. 8:23 a.m. 8:32 a.m. 8:39 a.m. 8:50 a.m.
Time zones
Materials
•
Does all of Australia have the same time?
Discuss this question with the students before researching it online.
Ask some follow-up questions:
How many major time zones is Australia divided into?
What do the initials E.S.T., C.S.T., W.S.T. and D.S.T. stand for?
What is the time difference between Sydney/Melbourne and Adelaide?
What is the time difference between Sydney/Melbourne and Perth?
If it is 11:00 a.m. in Sydney, what time is it in Perth?
If it is 11:00 a.m. in Melbourne, what time is it in Adelaide?
Extension
Ask the students to research the nature of daylight saving and which states use it. Discuss its advantages and disadvantages.
World time zones
Materials
•
Search the term ‘world time zones’ online and select an appropriate link.
Discuss with the students how the world is divided into 24 time zones that are 1 hour apart, based on meridians of longitude.
Time is measured from the Greenwich meridian in London. Locations to the east of London are ahead of London time, while locations to the west are behind London time.
Investigate the selected map and help the students answer questions such as the following:
If it is 9:00 p.m. in Sydney, what time is it in London?
If it is 4:00 p.m. in Tokyo, what time is it in Melbourne?
If it is 10:00 a.m. in Sydney, what time is it in New York?
If it is noon in Brisbane, what time is it in Los Angeles?
If it is 1:00 p.m. in Washington, what time is it in Paris?
Discuss the students’ responses and how they calculated the time differences.
Ask the students to devise and answer questions of their own.
Variation
Use the World Clock feature on a smartphone to check world times.
MORE DAILY WORKOUTS OXFORD UNIVERSITY PRESS 162
a computer • screen • paper • pencils/pens
a computer • screen • paper • pencils/pens
What is speed?
Materials
• paper
• pencils/pens
• coloured pencils
• markers
What is your definition of speed?
Ask the students to consider their definition of the concept. Encourage them to talk about it with a classmate before calling for explanations. Discuss the students’ ideas. Reinforce the fact that speed is measure of a distance travelled during a certain interval of time.
Which units are used to measure speed?
Call for answers. Confirm the fact that, on land, speed is usually measured in kilometres or miles travelled in 1 hour.
What is a speedometer?
Where do you often see one?
What are the different designs that car speedometers can have?
Discuss the students’ responses and the different designs. Ask the students to design a new look speedometer for a family car. Display their designs.
Variation
Pose questions such as if a car is travelling at 120 km/hour, how far does it travel in 1 minute?
Speed signs
Materials
• a computer
• screen
Search the term ‘road signs in Australia’ online. Discuss the various signs and their use.
Why is it necessary to have speed limits?
• paper
• pencils/pens
What is the speed limit: In a residential area? Near a school? In a city? In a car park? On minor country roads? On a highway? On a motorway?
Answers may vary in some states.
Extension
Start a discussion whether speed limits should be raised or lowered in some areas. Ask the students to explain their reasons why.
UPPER – YEARS 5 AND 6 OXFORD UNIVERSITY PRESS UPPER –YEARS
163
5 AND 6
Best time units
Which unit would be best to measure:
• a school term
• a person’s age
• the speed of a car
• a 100 m sprint
• the time to boil an egg
• the time to write your name
• a plane flight from Melbourne to London
• the time between local bus stops?
Call for answers and discuss the students’ responses. Answers may vary.
Indicate to the students that school terms are measured in weeks; a person’s age is measured in years; the speed of a car is measured in kilometres per hour; boiling an egg is usually timed in minutes; writing your name would be timed in seconds; long haul flights are generally measured in hours and minutes; and the time between local bus stops is measured in minutes.
Best time devices
Materials
• a watch
• a stopwatch
• a clock
• a 24-hour clock
• a calendar
Display the measuring devices to the students. Ask the following questions and have the students write their answers.
Which measuring device would be best to measure:
• the time taken to walk home from school
• the departure time for an international flight
• the time taken to run 100 m
• the time taken to read a novel
• the date it will be next Tuesday
• the time taken for a person to hop 30 m
• how many Saturdays there are in next month
• how many days are there before a person’s next birthday?
Call for answers and discuss the students’ responses. Answers may vary.
Indicate to the students that the walk home from school would be measured in minutes; international flight times use 24-hour time; the time taken to run 100 m is measured in seconds and hundredths of a second; a novel would usually be read in hours; the time taken to hop 30 m would be measured in seconds; and a calendar could be consulted for the number of Saturdays in a month or the number of days until a birthday.
MORE DAILY WORKOUTS OXFORD UNIVERSITY PRESS 164
UPPER – YEARS 5 AND 6 Shape
SHAPE
THREE-DIMENSIONAL OBJECTS
Year 5
Opposite faces
Materials
• a container of dice • paper
Distribute the dice to the students.
Which number is opposite 2?
Which number is opposite 1?
Which number is opposite 3?
What do you notice about the pairs of numbers on opposite faces?
• pencils
Allow time for the students to realise that the sum of the numbers on opposite faces is always seven.
Ask the students to draw and write about what they found out.
Cut it out
Materials
• a conical ice-cream wrapper from a Drumstick or Cornetto
• a section of cardboard tube
What does the net of a cone look like?
Ask the students to close their eyes and imagine the shape of the net.
Carefully cut and open out the ice-cream wrapper and display it.
Which 2D shapes do you see?
Were your predictions correct?
Repeat the activity using the cardboard tube.
OXFORD UNIVERSITY PRESS UPPER –YEARS 5 AND 6 165
Supermarket shapes
Materials
• a whiteboard
• markers
• a computer
• pencils/pens
• paper
Which items sold at the shops come in containers shaped like prisms? What about containers shaped like cylinders?
Discuss the students’ responses and list five examples of each item on the whiteboard. Use the search term ‘supermarket items’ and discuss the shape of the containers seen. Which items do you think will pack best into boxes for transport? Why?
Discuss the fact that shapes based on rectangular prisms pack without leaving any gaps, allowing containers to be filled to the maximum.
Ask the students to draw and label a selection of containers, emphasising the shapes they resemble. Display the students’ efforts.
Curved shape properties
Materials
• a whiteboard or computer screen
• geometric models of cylinders, cones and spheres
Can we count how many faces, edges and corners there are on the cylinders, cones and spheres? Create the following table on a whiteboard or screen.
Sphere
Encourage the students to help you complete the table.
Which object has the greatest number of faces?
Which object has the greatest number of edges?
Which objects have no corners?
How is the sphere different from the other two objects?
MORE DAILY WORKOUTS OXFORD UNIVERSITY PRESS 166
Object Number of faces Shape of faces Number of edges Number of corners Cylinder
Cone
Different cuts
Materials
• cylinders
• cones and spheres made from modelling clay
• fishing line
• pencils/pens
Select two or three students to carry out the activities. Ask the students to make predictions based on your questions.
Today we are going to cut some models with the fishing line.
Can you imagine which shapes will be formed?
Which shapes are formed when you cut a sphere?
Which shapes are formed when you cut a cylinder?
What about when you cut a cone?
Ask the students to further investigate the cross-sections formed by cutting the shapes at various angles. Encourage the students to draw and write about what happened.
The shape of the city
Materials
• a computer
• screen
• paper
Search the term ‘the shape of buildings’ online.
• pencils
• coloured pencils
Discuss the images viewed in terms of structures that are based on 3D shapes.
Which shapes can you identify that make up the buildings?
Are the outsides of the buildings straight or curved, or both?
Which building designs are your favourites?
Invite the students to sketch the design of their favourite building. Display their work.
Extension
Take the students on a 3D shape walk in the school environment.
Bigger cubes
Materials
• a whiteboard
• markers
What are the dimensions of each of the cube in the cube family?
How many small cubes are there in 2 × 2 × 2 cube? A 3 × 3 × 3 cube?
What about a 4 × 4 × 4 cube and a 5 × 5 × 5 cube?
• Multilink cubes
UPPER – YEARS 5 AND 6 OXFORD UNIVERSITY PRESS UPPER –YEARS
AND 6 167
5
Ask the students to build the models and check the number of small cubes. Record the dimensions of the cube models and the number of blocks in each model in a table.
Cube volume No. of small cubes
1 × 1 × 1 1
2 × 2 × 2 8
3 × 3 × 3 27
4 × 4 × 4 64
5 × 5 × 5 125
Discuss the cubic number pattern produced with the students.
Tetracubes online
Materials
• Multilink cubes
• a computer
• isometric drawing tools
• isometric dot paper
• pencils/pens
How many different arrangements can you discover using four cubes joined together?
Encourage the students to first construct tetracubes using Multilink cubes. There are eight possible arrangements.
Search the term ‘Isometric Drawing Tool’ online. Encourage the students to create all possible arrangements on screen.
Extension
Draw the cubes on isometric dot paper.
Painted faces
Materials
• Multilink cubes
Close your eyes and imagine this.
I have a cube that is 3 small blocks long, by 3 small blocks wide by 3 small blocks high.
How many small cubes are there in the larger cube?
Call for answers.
Now imagine that I paint all faces of the larger cube in white.
How many of the smaller cubes will have only one of their faces painted white?
Demonstrate and discuss the answer with the help of a Multilink cube model.
MORE DAILY WORKOUTS OXFORD UNIVERSITY PRESS 168
Odd nets
Materials
• grid paper or square dot paper
• pencils/pens
• scissors
Can you join six squares that will not fold up to make a cube?
Encourage the students to work in pairs to investigate the question.
Ask them to cut out the shapes that will not fold up to make the net of a cube.
Extension
Investigate nets that will not fold up to make various prisms and pyramids.
Twice scale
Materials
• Multilink cubes
• a whiteboard
• markers
Select two students for this activity. Ask them to make a 2 × 2 × 2 cube.
How many small cubes are there in this model?
If I built a twice-scale model of this cube, what would it look like?
Can you predict how many small cubes it would have?
Accept and discuss all answers that the students provide. Record their suggestions.
Ask the two students to build a 4 × 4 × 4 cube, which is twice the scale of the first cube.
How many small cubes are there in this model?
Were you surprised?
Explain to the students that the term ‘twice scale’ relates to the dimensions of the cube and not the total number of cubes in the model.
Half scale
Materials
• Multilink cubes
Select two students for this activity. Ask them to make a 6 × 6 × 6 cube.
How many small cubes are there in this model? How did you work out your answer?
Discuss the strategies used by the students in obtaining their answers.
If I built a half-scale model of this cube, what would it look like?
Can you predict how many small cubes it would have?
Accept and discuss all answers that the students provide.
Ask the two students to build a 3 × 3 × 3 cube, which is half the scale of the first cube.
UPPER – YEARS 5 AND 6 OXFORD UNIVERSITY PRESS UPPER –YEARS 5 AND 6 169
How many small cubes are there in this model?
Reinforce the idea that the term ‘half scale’ relates to the dimensions of the cube and not the total number of cubes in the model.
Year 6
What am I?
• Play a guessing game with the students.
I am a solid shape with two flat faces and a curved face. What am I? Include further questions such as:
I am a rectangular prism with a volume of 45 cm3. If my height is 3 cm and my length 5 cm, how wide am I?
I am a rectangular prism with a volume of 36 cm3. What are my dimensions? Is there another answer? Encourage the students to write their own questions on cards to revise the properties of 3D solids.
Pentacubes online
Materials
• Multilink cubes
• a computer
• isometric drawing tools
• isometric dot paper
• pencils/pens
How many different arrangements can you make using five cubes joined together?
Encourage the students to first construct as many pentacubes as possible using Multilink cubes. There 29 possible arrangements of five cubes.
Search the term ‘Isometric Drawing Tool’ online. Allow sufficient time for the students to create a number of different pentacubes on screen. Discuss the students’ efforts.
Extension
Research the Soma Cube, a 3D puzzle that can be arranged to make a cube and other block models.
Drawing pentacubes
Materials
• 3 or 4 pentacube models
• isometric dot paper
• pencils/pens
• coloured pencils
Can you draw some of your favourite pentacubes on isometric dot paper? Discuss the students’ efforts and make a display of the students’ drawings.
MORE DAILY WORKOUTS OXFORD UNIVERSITY PRESS 170
Point of view
Materials
• geometric models of prisms, pyramids, cones, cylinders and spheres
• paper
• pencils/pens
Display the models at the front of the class. Which of these models has:
• a top view that looks like a circle
• a top view that looks like a triangle
• a front view that looks like a rectangle
• a front view that looks like a triangle?
Hold up the models and indicate the shapes of the faces. Ask the students to draw the different views and label them.
Prism views
Materials
• geometric models of prisms
• paper
• pencils/pens
Display the geometric models of prisms to the class.
Can you draw a front view of your model?
Can you draw a side view of it?
What about a top (bird’s-eye) view?
Discuss the students’ drawings and put them on display.
Variation
Encourage the students to create designs on 1 cm grid paper by arranging and stacking 10 or 12 Base 10 minis. Ask the students to then sketch front, top and side views on another sheet of grid paper.
Pyramid views
Materials
• geometric models of pyramids
• paper
• pencils/pens
Display the geometric models of pyramids to the class.
UPPER – YEARS 5 AND 6 OXFORD UNIVERSITY PRESS UPPER –YEARS 5 AND 6 171
Can you draw a front view of your model?
Can you draw a side view of it?
What about a top (bird’s-eye) view?
Discuss the students’ drawings and put them on display.
Curved views
Materials
• geometric models of cylinders, cones and spheres
• paper
• pencils/pens
Display the geometric models to the class.
Can you draw a front view of your model?
Can you draw a side view of it?
What about a top (bird’s-eye) view?
Discuss the students’ drawings and put them on display.
Platonic solids
Materials
• class sets of Polydrons or magnetic building sets
Which solids can you build using:
• 6 squares as faces
• 4 triangles as faces
• 8 triangles as faces
• 12 pentagons as faces
• 20 triangles as faces?
Encourage the students to build and display the five solids. Point out that each member of this group of solids is unique in that its faces are identical regular polygons.
Extension
Search online to find the names of individual Platonic solids that the students have constructed. Research the term ‘Archimedean solids’ and encourage the students to build and name some of them.
MORE DAILY WORKOUTS OXFORD UNIVERSITY PRESS 172
Invisible edges
Materials
• geometric models of prisms and pyramids
• paper
• pencils/pens
Choose a model and sketch it.
Allow time for the students to complete their drawings.
How can we show the edges that are not seen in your drawings?
Introduce the idea of using dotted lines to show hidden edges in the drawings. Place the students’ drawings on display.
Block views
Materials
• Multilink cubes
• grid or square dot paper • pencils/pens
Ask the students to construct a model using 10 or 12 blocks.
Can you draw a front view of your model?
Can you draw a side view of it?
What about a top (bird’s-eye) view?
Discuss the students’ drawings and put them on display.
TWO-DIMENSIONAL SHAPE
Year 5
Regular and irregular
Materials
• a whiteboard
• markers
5 AND 6
• exercise books
• pencils/pens
Draw a variety of polygons on the whiteboard. Include an isosceles triangle, an equilateral triangle, a scalene triangle, a square, a rectangle, a parallelogram, rhombus and trapezium.
Discuss the properties of each shape with the class.
Which of these polygons has sides that are all the same length and angles that are identical?
UPPER – YEARS 5 AND 6 OXFORD UNIVERSITY PRESS UPPER
YEARS
173
–
Discuss the students’ responses. Identify the equilateral triangle and the square as the two examples.
Do you know the name we give to shapes that have sides that are all of the same length and all angles that are equal in size?
Introduce the term ‘regular’ to describe these shapes. Point out that the shapes that do not conform are called ‘irregular’. Ask the students to record the definitions and examples.
Variation
Use pattern block shapes instead of whiteboard diagrams.
Regular or irregular?
Materials
• pattern blocks
• paper
Display the hexagonal pattern block to the class. Is this a regular or irregular shape?
How do you know?
What would an irregular hexagon look like?
Can you draw some irregular hexagons? Select some of the students’ drawings and discuss the results. Include examples that show concave features.
Extension
• pencils/pens
Develop the discussion to consider pentagons, heptagons and octagons.
Road signs
Materials
• a computer
• screen
Can you imagine the road sign nearest to our school?
What shape is it?
Does it have numbers on it? Does it have words?
Does it have numbers and words?
• paper
• pencils/pens
Search the term ‘world road signs’ online. Display the images and discuss the shapes, numbers and words and their purpose.
What was the most unusual road sign that you observed?
Ask the students to copy two or three of their favourite signs.
MORE DAILY WORKOUTS OXFORD UNIVERSITY PRESS 174
Spirals
Materials
• a computer
• screen images of spirals
• paper
• markers
• scissors
• string
• adhesive tape
Search the term ‘spirals’ online. Discuss some of the images displayed.
Encourage the students to create their own large spirals on paper using markers.
Ask the students to carefully cut out their spirals from the paper.
Hang the spirals from a horizontal string to create a display.
Variation
Use coloured cellophane for better contrast.
Extension
Research the history of the use of spirals in art and culture.
Stick puzzles 1
Materials
• matchsticks or craft sticks
Ask the students to copy the design shown and answer the following question.
Can you remove eight sticks so that only two squares remain?
Allow sufficient time for investigation. If necessary, reveal the following answer.
UPPER – YEARS 5 AND 6 OXFORD UNIVERSITY PRESS UPPER –YEARS 5 AND 6 175
Stick puzzles 2
Materials
• matchsticks or craft sticks
Ask the students to copy the design shown and answer the following question.
Can you remove eight sticks so that four squares remain? Allow sufficient time for investigation.
If necessary, reveal the following answer.
Can you discover other solutions?
Stick puzzles 3
Materials
• matchsticks or craft sticks
Ask the students to copy the design shown and answer the following question.
Can you remove five matches to make five small triangles? Allow sufficient time for investigation.
If necessary, reveal the following answer.
Extension
Search ‘Matchstick Puzzles’ online for further challenges that the students can investigate in class time and in their free time.
Variation
Encourage the students to create their own stick puzzles.
MORE DAILY WORKOUTS OXFORD UNIVERSITY PRESS 176
Our flag
Materials
• a computer
• images of the Australian flag
Show the images of our national flag to the students.
What are the different shapes you can see on the Australian flag?
Which parts of the flag show symmetry?
Extension
Research the history of the Australian flag and what its different shapes represent.
Flag symmetry
Materials
• a computer
• screen images of national flags
• paper
Show a number of national flags to the students.
Can you identify which flags have symmetry?
Which flags have more than one line of symmetry?
Discuss the students’ findings.
• pencils/pens
• coloured pencils
Ask the students to draw and colour their favourite symmetrical flag.
Tetrominoes
Materials
• grid paper or square dot paper
• scissors
Have you played the game called Tetris?
• pencils/pens
• rulers
How many different arrangements can you make using four squares, joined together along their sides?
Invite the students to work alone or in pairs to investigate the question.
Explain that the shapes must have common sides and not be joined at corners. When rotations and reflections are not considered, there are five possible combinations.
Were you able to discover the five possible arrangements?
Ask the students to cut out and arrange their shapes. Display the students’ efforts.
5 AND 6
UPPER – YEARS 5 AND 6 OXFORD UNIVERSITY PRESS UPPER
YEARS
177
–
Flip it
Materials
• a whiteboard
• pencils
Copy the design shown and challenge the students to complete the pattern by visualising the shape, filling the spaces by flipping. Use coloured pencils to complete the design.
Display the students’ work.
Variation
Create and complete the design using online learning tools.
Slide it
Materials
• a whiteboard
• pencils
Copy the design shown and challenge the students to complete the pattern by visualising the shape, filling the spaces by sliding. Use coloured pencils to complete the design.
Display the students’ work.
• rulers
• coloured pencils
• rulers
• coloured pencils
MORE DAILY WORKOUTS OXFORD UNIVERSITY PRESS 178
Turn it
Materials
• a whiteboard
• pencils
Copy the design shown and challenge the students to complete the pattern by visualising the shape, filling the spaces by turning. Use coloured pencils to complete the design. Display the students’ work.
Extension
Search the term ‘Shapes: Flips, Slides and Turns’ online. Encourage the students to create and complete their own designs.
The correct mathematical terms of reflection, translation and rotation may be introduced at this stage.
Tetriamonds
Materials
• grid paper or square dot paper
• scissors
• rulers
• coloured pencils
• pencils/pens
• rulers
How many different arrangements can you make using four triangles, joined together along their sides?
Invite the students to work alone or in pairs to investigate the question. Explain that the shapes must have common sides and not be joined at corners. When rotations and reflections are not considered, there are three possible combinations.
Were you able to discover the three possible arrangements?
Ask the students to draw and write about what they found out.
Fold and cut Materials
• paper squares
• scissors
Can you imagine this?
• notebooks
• pencils/pens
I have paper squares. I fold it in half to make right angle, then in half again. I now make a straight cut across the corner near the fold.
5 AND 6
UPPER – YEARS 5 AND 6 OXFORD UNIVERSITY PRESS
YEARS
179
UPPER –
What shape will be formed by the cut?
Distribute the materials and ask the students to carry out the activity.
What shape was formed?
Did you predict it correctly?
Ask the students to repeat the activity for three folds of paper, predicting the result before cutting.
Were you surprised by the result?
Did you predict it correctly?
Ask the students to draw and write about their findings.
Paper layers
Materials
• paper squares
Can you imagine this? (Diagrams needed)
I have a square sheet of paper. I fold it in half to make a right angle, then in half again, and then in half again. How many layers of paper are formed?
Punching holes
Materials
• paper squares • a hole punch
Can you imagine this?
I have a square sheet of paper.
I fold it in half diagonally, then in half again and then in half again.
Now imagine I punch two holes through the paper with a hole punch. I now open it out. How many holes will be in the sheet of paper?
Discuss the students’ predictions. Select two students to carry out the activity and discuss the results.
Were your predictions accurate?
MORE DAILY WORKOUTS OXFORD UNIVERSITY PRESS 180
Year 6
Pentiamonds
Materials
• grid paper or square dot paper
• scissors
• pencils/pens
• rulers
How many different arrangements can you make using five triangles, joined together along their sides?
Invite the students to work alone or in pairs to investigate the question.
Explain that the shapes must have common sides and not be joined at corners. When rotations and reflections are not considered, there are four possible combinations.
Were you able to discover the four possible arrangements?
Ask the students to draw and write about what they found out.
Pancake cuts
Materials
• a whiteboard
• markers
• paper
• pencils/pens
If I cut a pancake with two intersecting cuts, how many pieces will be formed?
Call for answers. Demonstrate that there will always be four pieces with intersecting cuts, whether the cuts go through the centre or not.
How many pieces will there be if the cuts do not intersect?
Demonstrate different examples that show the three pieces formed.
What if I make three cuts, how many pieces will be formed?
Can you form four pieces? Five pieces? Seven pieces?
Explain to the students that the cuts do not have to go through the centre of the pancake or be of the same size.
Pentominoes
Materials
• grid paper or square dot paper
• scissors
• pencils/pens
How many different arrangements can you make using five squares, joined together along their sides?
Allow sufficient time for the students to investigate the possibilities.
Explain that the shapes must have common sides and not be joined at corners. When rotations and reflections are not considered, there are 12 possible combinations.
UPPER – YEARS 5 AND 6 OXFORD UNIVERSITY PRESS UPPER –YEARS 5 AND 6 181
Were you able to discover the 12 possible arrangements?
Ask the students to cut out and arrange their shapes and give each of their shapes a name. Letters of the alphabet may be used. Ensure that the students store their sets for followup work.
Extension
Encourage the students to use pentominoes to create designs of their own, such as a house, a person, a fish or a flower.
Pentomino puzzles
Materials
• sets of pentominoes
Encourage the students to investigate pentomino puzzles in class time or free time.
Can you use three different pentominoes to make a rectangle that is 15 square units in area?
Can you use four different pentominoes to make a rectangle that is 20 square units in area?
Encourage the students to create pentomino puzzles of their own.
Pentomino symmetry
Materials
• sets of pentominoes
• paper
• pencils/pens
Encourage the students to investigate the symmetry of the pentomino pieces.
Which pentominoes have line symmetry?
Which pentominoes have rotational symmetry?
Draw and write about what you found out.
Triangle challenge
Materials
• a whiteboard
• markers or computer drawing tools
Draw the triangle as shown here on the whiteboard or screen.
How many triangles can you see in this shape?
Ask the students to discuss their answer with the person next to them. Allow sufficient time for their discussions.
How many of you think there are 13 triangles?
How many of you think there are more than 13?
There are 13 triangles altogether: 8 small triangles, 4 triangles made from 4 small triangles and 1 large triangle.
MORE DAILY WORKOUTS OXFORD UNIVERSITY PRESS 182
Extension
Add another layer of triangle to the base of the shape and calculate the total number of triangles.
4 × 4 challenge
Materials
• a whiteboard
Draw a 4 × 4 grid on the whiteboard or screen.
How many squares can you see in this grid?
• markers or computer drawing tools
Ask the students to discuss their answer with the person next to them. Allow sufficient time for their discussions.
How many of you think there are 16 squares?
How many of you think there are more than 16?
Discuss the students’ responses. Remind them that they need to consider not just the single squares, but the single 4 × 4 square overall and the smaller 3 × 3 and 2 × 2 squares and squares that that overlap.
What is your total of all the squares now?
The 4 × 4 grid has 30 squares altogether.
Chessboard challenge
Materials
• a whiteboard
• markers or computer drawing tools
How many squares do you think there are on a standard chessboard?
Draw an 8 × 8 grid on the whiteboard or screen.
How many squares can you see in this grid?
Ask the students to discuss their answer with the person next to them. Allow sufficient time for their discussions.
How many of you think there are 64 squares?
How many of you think there are more than 64?
Discuss the students’ responses. Remind them that, as in earlier exercises, they need to systematically consider squares of all sizes from 1 × 1 up to 8 × 8. Provide help where needed.
What is your total of all the squares now?
The 4 × 4 grid has 204 squares altogether. There are:
64 1 × 1 squares; 49 2 × 2 squares; 36 3 × 3 squares; 25 4 × 4 squares; 16 5 × 5 squares; 9 6 × 6 squares; 4 7 × 7 squares and 1 8 × 8 square.
List all the combinations on the whiteboard in a vertical form.
UPPER – YEARS 5 AND 6 OXFORD UNIVERSITY PRESS UPPER –YEARS 5 AND 6 183
Can you see any pattern formed by these numbers?
Discuss the square number pattern formed.
Polygon diagonals
Materials
• geostrips or thin cardboard strips
• split pins
• a whiteboard
Choose four students to help with this activity.
• markers
• a computer, screen
Ask the students to create a triangle, a quadrilateral, a pentagon and a hexagon with the geostrips. Copy large versions of the shapes created by the students on the whiteboard.
What is a diagonal?
How many diagonals does each of these shapes have?
Invite individual students to draw in diagonals on the whiteboard. Create the following table on a whiteboard or screen and record the results.
Pentagon
Hexagon
Ask the students to help you complete the table.
Rotational symmetry
Materials
• 50 c coins
paper • pencils/pens
Ask the students to trace around a 50 c coin. Then place the coin on top of the tracing.
When you made a full turn of the coin, did it match its outline as it rotated?
How many times did it match?
Discuss the idea of a shape having rotational symmetry when its outline matches more than once in a full turn.
Extension
Research the term ‘rotational symmetry’ online. Discuss the ideas involved with the students. Images of automotive alloy wheels are also very useful in the conversations with the students.
MORE DAILY WORKOUTS OXFORD UNIVERSITY PRESS 184
Shape Number of angles Number of sides Number of diagonals
Triangle Quadrilateral
•
Rotating blocks
Materials
• pattern blocks
• paper
• pencils/pens
Ask the students to trace around the various pattern blocks. Let us investigate some more rotational symmetry by turning pattern blocks. When you make a full turn of each block, does it match its outline as it is rotated?
How many times did it match?
Did some blocks only match once?
Did any blocks not match as they rotated?
Which blocks have rotational symmetry?
Which blocks do not have rotational symmetry?
Ask the students to draw and write about their findings.
Extension
Revise the line symmetry of pattern blocks and explain the differences between the two types of symmetry.
Rotating letters
Materials
• a whiteboard
• markers
Write the following letters in large print on the whiteboard:
• sheet of plastic
Which of these letters have rotational symmetry?
Do some of these letters not have rotational symmetry?
Allow time for the students to investigate each example. Call for answers.
Test their responses by placing a sheet of plastic over the letter, tracing it and investigating matches by rotating it.
Invite the students to investigate the rotational symmetry of other uppercase letters.
UPPER – YEARS 5 AND 6 OXFORD UNIVERSITY PRESS
–YEARS
185
UPPER
5 AND 6
H F S
Z
X
L
Amazing mazes
Materials
• a computer
• grid paper
• paper
Have you ever seen a maze? Where was it?
Did you walk through it? What happened?
Would you like to investigate some other mazes?
Discuss the students’ responses.
Search the term ‘mazes and labyrinths’ online.
• pencils
• coloured pencils
• markers
Discuss the features of the images on the screen. What is the difference between a maze and a labyrinth?
Explain to the students that a maze is a kind of puzzle in which there a choice of paths that a person can take to get to its centre. By contrast, a labyrinth has a single path to its centre, with no junctions or alternative paths offered.
Encourage the students to draw and colour some mazes of their own. Ensure that they create some dead ends. Ask the students to write instructions on how to negotiate their mazes.
Variation
Build mazes using craft sticks, paper and glue or modelling clay.
Extension
Research the history of why mazes were built throughout history and by whom.
LOCATION AND TRANSFORMATION
Year 5
Mental pictures
Materials
• a chessboard or 8 × 8 grid
• chess pieces
• a tea towel or cover sheet
• 2 cm grid paper
• pencils/pens
Place a king, queen, bishop, knight and a castle on the grid and display it to the students. Allow time for the students to view the chess pieces and then cover them.
Can you remember the position of the objects?
Can you draw the position of each one from memory?
Distribute the grid paper and allow time for the students to sketch the position of the pieces.
MORE DAILY WORKOUTS OXFORD UNIVERSITY PRESS 186
Remove the cover and check the positions. Discuss the students’ responses and the techniques that they used.
Can you suggest how we could more accurately describe the position of the pieces?
Discuss the students’ ideas. Introduce the convention of labelling the columns using letters and the rows using numbers. Demonstrate and discuss a number of examples to the students.
Extension
Repeat the activity using increasing numbers of chess pieces.
Variation
Replace the chess pieces with everyday classroom objects.
Mental picture game
Materials
• 2 cm grid paper
• Base 10 minis or counters
• cardboard screens
• pencils/pens
Distribute a sheet of 2 cm grid paper to each pair of students. Ask them to label the columns using letters and the rows using numbers.
Ask the students to place a screen on their desk between each other. The first student in the pair then places 10 counters on the grid, out of sight of the other student. Using coordinates, the other student is given 10 attempts to guess the location of the counters. Each successful attempt scores one point.
The students exchange roles and the one with the highest score is the winner.
Classroom grid plan
Materials
• a whiteboard
• ruler
• markers
• paper
• pencils/pens
Draw a 10 × 10 grid on the whiteboard. Label the columns using the letters from A to J and the rows from numbers 1 to 10.
Invite the students to help you make a simple plan of the classroom, showing different objects and major items of equipment. Ask the students to write down the grid references for the objects shown on the grid.
What are the coordinates of your desk?
Discuss the students’ responses. Choose different coordinates and ask the students to identify the corresponding objects on their plans.
Extension
Search the term ‘Battleship Game’ online and have the students practise using coordinates.
UPPER – YEARS 5 AND 6 OXFORD UNIVERSITY PRESS UPPER –YEARS 5 AND 6 187
Take your seat Materials
• a whiteboard • ruler
Draw a 12 × 8 grid on the whiteboard. Ask the students to imagine that you have created a cinema seating plan.
How can we identify the location of each seat?
Discuss the students’ responses.
Label the columns using the letters from A to H and the rows from numbers 1 to 12.
Ask the students to imagine that they are booking seats online for a movie.
Invite each student in the class to make a reservation. Up to six seats each may be reserved.
Which seats will you book? Why?
Do you prefer to sit in the middle or at the end of the aisle?
Do you like the front rows or the back rows?
After each student has taken a turn, discuss the students’ responses.
Were there any difficulties in booking?
Were you able to book the seats of your first choice?
What was the total number of seats that were booked?
How many seats were not booked?
My dream backyard Materials
• 1 cm grid or square dot paper
• paper
• pencils/pens
Ask the students to draw a simple grid on a sheet of grid or dot paper and mark the coordinates. Use letters for the horizontal axis and numbers for the vertical axis.
Imagine that you are designing your dream backyard.
What do you think it would include?
Will your dream backyard have a paved BBQ area, a lawn, a vegetable garden, pot plants, a swimming pool, a pool deck, a spa, fences, a trampoline, a basketball ring, a clothesline or anything else?
Discuss the students’ responses.
When the maps are complete, question the students concerning the coordinates of the various items on their backyard maps. Retain their work for the next activity.
MORE DAILY WORKOUTS OXFORD UNIVERSITY PRESS 188
• markers
Using scale
Materials
• copies of dream backyard plan from previous activity
• pencils/pens
Indicate to the students that they are now going to apply a scale of 1 cm to 1 m to their backyard design.
Can you choose a feature of your backyard and calculate its area?
Which item has the largest area? Which has the smallest area?
How many square metres does the lawn cover?
How many square metres does the swimming pool cover?
Discuss and display the students’ efforts.
Encourage the students to devise some questions of their own and have their classmates answer them.
Street directory
Materials
• a computer
• screen image of local area
• multiple copies of map
Enter the link ‘street-directory.com.au’ online.
• paper
• pencils/pens
Enter the name of your school and discuss its position on the screen image. Discuss various landmarks, such as parks, shops, churches, football fields and netball courts.
Ask the students to choose two or more landmarks and mark them on their own maps.
Can you write some directions to get from one landmark to another?
Encourage the students to use directional language and compass directions to describe their route. Remind them of the convention that north is positioned at the top of the map.
Discuss the students’ efforts. Retain their work for the next activity.
Extension
Ask the students to plan and record a route between multiple locations on the map.
Variation
Introduce the idea of scale found on the map and encourage the students to calculate the distances involved.
UPPER – YEARS 5 AND 6 OXFORD UNIVERSITY PRESS UPPER –YEARS 5 AND 6 189
On the grid
Materials
• copies of local map from previous activity
• paper
• pencils/pens
Ask the students to draw a simple grid on their maps and mark the coordinates. Use letters for the horizontal axis and numbers for the vertical axis. Ensure that in this case the students mark the lines on the grid, rather than the spaces between the lines. Using coordinates, can you identify the approximate position of: your school, a shop, a park, your house, a friend’s house?
Select a student and ask them to choose a coordinate. Ask the class to identify the nearest street for that coordinate. Select other students and repeat the activity. Discuss the results and retain the students’ maps for the next activity.
Grid routes
Materials
• copies of local map from previous activity
• paper
• pencils/pens
Imagine that you are a parcel delivery driver, making stops along the way.
Can you plan a route that has six or more stops?
At which locations will you stop?
Remember that your aim is to cover the route in the smallest possible distance. Discuss the students’ choice of routes. Choose individual students to explain their choices.
Can you now describe your route using the coordinates of the delivery stops?
Extension
Apply a scale to the students’ maps and have them calculate the distances involved.
Year 6
Plot the shape
Display an 8 × 8 grid on the whiteboard or screen.
Label the points on the horizontal axis using the letters from A to H.
Label the points on the vertical axis using the numbers from 1 to 8.
MORE DAILY WORKOUTS OXFORD UNIVERSITY PRESS 190
Materials
a computer
screen
whiteboard
markers
1 cm grid paper
pencils/pens
ruler
•
•
•
•
•
•
•
Select individual students to help you plot coordinates as follows:
B2, B3, A4, B5, B6, C6, D7, E6, F6, F5, G4, F3, F2, E2, D1, C2, B2
Before joining the dots, ask the students to predict the shape that will be formed. Encourage each student to draw a shape of their own and write the coordinates to describe it. Students can then swap their details with a classmate and ask them to create the shape.
Variation
Ask the students to sketch pictures on a sheet of grid paper and repeat the activity.
Quadrant plot
Materials
• a computer
• screen
• whiteboard
• markers
• 1 cm grid paper
• pencils/pens
• ruler
Display the quadrant diagram on the whiteboard or screen. Explain to the students that coordinates may be plotted using positive and negative values along the x and y axes in all four quadrants. Point out that:
• if both values are positive, then the point lies in the first quadrant (1)
• if the x value is negative and the y value is positive, then the point lies in the second quadrant (2)
• if both values are negative, then the point lies in the third quadrant (3)
• if the x value is positive and the y value is negative, then the point lies in the fourth quadrant (4).
UPPER – YEARS 5 AND 6 OXFORD UNIVERSITY PRESS UPPER –YEARS 5 AND 6 191
2 2 –2 –4 –6 –8 –10 4 6 8 10 –2 –4 –6 –8 –10 4 6 8 10
Label the quadrants on the diagram. In which quadrant will you find (3, 2), (−3, 7), (−6, −8) and (5, −3)?
Discuss the students’ responses.
Distribute the grid paper and ask the students to construct and label the quadrants. Invite them to construct a polygon that covers all four quadrants and write the coordinates to define its shape. Ask the students to swap the coordinates with each other so that they can recreate each other’s shapes.
Car plot
Materials
• a computer
• screen
• whiteboard
• markers
• 1 cm grid paper
• pencils/pens
• ruler
Distribute the grid paper and ask the students to construct and label the quadrants. Invite them to sketch the outline of a car, covering all four quadrants and write the coordinates to define its shape. Ask the students to swap coordinates with each other so that they can recreate each other’s car designs.
What on Earth?
Materials
• a world globe, or screen image
Display the globe or screen image to the students. Explain to the students that latitude and longitude are the coordinate system of imaginary lines used to locate and describe the position of any place on earth.
Latitude is the distance north or south of the equator. Lines of latitude run parallel to the equator in the northern and southern hemispheres.
Meridians of longitude run at right angles to the lines of latitude, stretching from pole to pole. Longitude is measured eastwards and westwards from the Greenwich meridian.
Can you see the equator?
Can you see the northern and southern hemispheres?
What are the names of the areas at the top and bottom of the world globe?
Is Australia north or south of the equator?
Where does the Tropic of Capricorn cross Australia?
Variation
Ask the students to repeat the activity by referring to their atlases.
MORE DAILY WORKOUTS OXFORD UNIVERSITY PRESS 192
Extension
Investigate the position and nature of the International Date Line and how it relates to telling time on earth.
Investigating GPS
Materials
• a computer
• screen
Do you know what the initials GPS stand for?
• paper
• pencils/pens
Discuss the Global Positioning System and its use to describe the position of any place on earth.
Search the terms ‘latitude’ and ‘longitude’ online and select an appropriate application. Detail how latitude and longitude is recorded.
Ask the students to record their answers to the following questions.
What is the latitude and longitude of our school using GPS?
What is the latitude and longitude of our town or suburb?
What is the latitude and longitude of the nearest capital city?
Extension
Ask the students to investigate the coordinates of the place where they live and other locations of their choice.
Variation
Ask the students to investigate how the GPS works and which country provides the GPS for the world’s use.
What in the world?
Materials
• a computer
• screen
Search for ‘Wikimapia’ online.
Enter ‘Australia’ in the horizontal search bar.
• outline map of Australia
• pencils/pens
Enter a city and press the plus or minus buttons on the vertical search bar to zoom in or out. Find the locations of Australia’s capital cities on the map and discuss them with the students.
Ask the students to mark in the states and capital cities on an outline map of Australia. Have them record the GPS coordinates of each capital city.
Extension
Use Wikimapia to investigate other towns and cities in other countries and write their coordinates.
UPPER – YEARS 5 AND 6 OXFORD UNIVERSITY PRESS UPPER –YEARS 5 AND 6 193
Where in the world?
Materials
• a computer
Go to Google Maps.
• screen
Select a location. Click on ‘Map’ and ‘Satellite’ in turn to demonstrate the different representations of the countryside to the students.
Can you see how maps can be made from photographs?
Do you know from where the photographs are taken?
Discuss how the photographic imagery is provided by a network of satellites covering the globe.
Click on the ‘Directions’ icon. Enter the name of the school in the starting point box.
Ask the students to suggest a possible end address such as a park, shops or a sports field.
Enter the chosen item in the destination box for the route to be displayed. Change the route by adding a new destination.
Click on ‘Add destination’ to see the new route.
Extension
Have the students use the program to plan other journeys of their own. Print them out and discuss them with their classmates.
ANGLES Year 5
Demonstrating angles
Materials
• geostrips or cardboard strips
• split pins
Join two geostrips together and display them to the students. Turn the strips back and forth.
What have I made with these strips?
Call for answers. Discuss the concept of an angle as an amount of turn between two lines, and not the amount of space between the two lines.
MORE DAILY WORKOUTS OXFORD UNIVERSITY PRESS 194
Hidden angles
Materials
• a whiteboard
Hold the classroom door slightly open.
• markers
Look at the bottom edge of the door and the doorway?
Do you see a two-arm angle or a one-arm angle?
Explain to the students that sometimes, as in this example, the second arm of the angle cannot be seen.
Draw an inclined line on the whiteboard with a diagram of a car travelling down it. Look at the car going down the slope.
Do you see a two-arm angle or a one-arm angle?
Further discuss this example. Ask the students to sketch and label the doorway and inclined car as one-arm angles formed.
Extension
Discuss examples of angles where no arms are evident, such as a ball bouncing off the cushions of a pool table or the original video game called Kong. Search online for examples of angles that are not clearly apparent.
Hidden shapes
Ask the students to close their eyes and visualise what is happening in the following problem. A person is facing north. They take eight steps forwards and turn 90 degrees left. They take four steps forward and turn 90 degrees left again. They take another eight steps forward and turn 90 degrees left again. Finally, they take four steps forward and turn 90 degrees left.
In which direction are they now facing? What shape was traced by their path?
Call for answers and discuss the students’ responses.
Human angles
Materials
• string or wool
• paper
• pencils/pens
Go outside the classroom and form groups of three students. Challenge them to create different types of angles using wool or string.
Can you make a right angle? An acute angle? An obtuse angle?
A straight angle? A full-turn angle?
Can you draw each of these angles?
UPPER – YEARS 5 AND 6 OXFORD UNIVERSITY PRESS UPPER –YEARS
195
5 AND 6
Create the angle
Materials
• coloured paper circles
• scissors
• paper
• pencils/pens
Demonstrate to the students how to make an angle wheel. Take two different coloured paper circles and cut a slit to the centre of each paper circle. Line up the slits and then carefully fit the circles together to make a wheel.
Using your wheel, can you make an angle of 90 degrees?
Can you make an angle of 45 degrees?
What about 30 degrees? 60 degrees? 120 degrees? 180 degrees?
Display the angles made by the students. Label the angle measures.
Folding angles
Materials
• coloured paper circles
Challenge the students to create angles by paper folding.
Can you fold the paper to make an angle of 90 degrees? 60 degrees? 45 degrees? 30 degrees?
Discuss the students’ efforts.
Construct the angle
Materials
• protractors
• square dot paper or A4 paper
• rulers
• pencils/pens
Tell the students that they are going to construct angles of different sizes.
Can you construct a right angle? An acute angle? An obtuse angle? A reflex angle?
Give directions and support where necessary. Ask the students to label the sizes of the angles involved.
Year 6
Hunt and measure Materials
• geostrips or thin cardboard strips
• split pin paper fasteners
• protractors
• paper
• pencils/pens
• rulers
Ask the students to join two strips with paper fasteners to make angle testers.
MORE DAILY WORKOUTS OXFORD UNIVERSITY PRESS 196
Can you identify some angles outside of the classroom and measure their sizes?
Ensure that the students consider the natural as well as the built environment. Ask them to measure angles with the angle tester, transfer the angles using pencil and paper and measure them with the protractors.
On returning to the classroom, discuss the students’ findings. Label and display their work.
Estimate and measure 1
Materials
• a whiteboard
• protractors
• paper
• rulers
• pencils/pens
Ask the students to copy angles like the above from the whiteboard.
Can you estimate the size of these angles in degrees?
Measure them using your protractor. Were your estimates accurate?
Angle game
Materials
• paper
• pencils/pens
• protractor
• 2 players
Divide the class into pairs and play the following game.
Ask the first student of the pair to draw a selection of 10 different angles on a sheet of paper. Both students then write their estimates next to each angle. They then use a protractor to measure the angles. The student who has made the largest number of best estimates is the winner.
Ask the second student to draw the angles and repeat the activity.
Angle on time
Materials
• toy clock or wall clock
• worksheets, each showing multiple blank analogue clock faces
Pose the following questions to the students.
• paper
• pencils/pens
Can you estimate the following angles made by the hands of the clock?
UPPER – YEARS 5 AND 6 OXFORD UNIVERSITY PRESS
–YEARS
6 197
UPPER
5 AND
What is your estimate for 9 o’clock? Half past 6? 10 to 3? 20 past 9?
Allow time for the students to mark the times on their worksheets and determine their answers. Remind them to consider all types of angles made by the clock hands, including reflex angles. Select different students to present their findings. Demonstrate the solutions to the class.
Extension
Ask class members to work in pairs. One student selects a time to the nearest 5-minute interval and challenges the other student to calculate the angles involved.
Trace and measure
Materials
• a whiteboard
• markers
• pattern blocks
• paper
• pencils/pens
• protractors
Ask the students to work in pairs and trace the different pattern blocks, using pencils and paper. Have them measure the size of the angles formed and calculate the angle sums.
Call for answers and record the results in a table on the whiteboard. Discuss the results.
Shape Number of angles Angle sizes Angle sum
Triangle Square
Trapezium
Rhombus
Hexagon
Estimate and measure 2
Materials
• paper
• pencils/pens
• protractors
Ask the students to construct five different irregular polygons on their paper. Before measuring their angles, ask them to estimate the size of each of the angles and record them. Have them calculate the angle sum of each polygon.
What did you find out?
Were your estimates accurate?
Discuss the results.
MORE DAILY WORKOUTS OXFORD UNIVERSITY PRESS 198
Opposite angles
Materials
• whiteboard
• markers
• pencils/pens
• paper
• rulers
• protractors
Draw a pair of intersecting lines on the whiteboard and ask the students to study them.
What do you notice about the angles made by these intersecting lines?
Allow sufficient time for the students to talk about their ideas with each other.
Call for answers and discuss the students’ ideas.
Ask the students to construct their own sets of intersecting lines and measure the angles involved with a protractor.
What did you find out?
How many pairs of equal angles did you find?
What is the sum of all the angles?
Discuss how vertically opposite angles are always equal. In this case, vertical refers to the vertex or crossing point of the lines and not an up and down direction. The angle sum is 360 degrees.
Extension
Investigate opposite angle problems in which the size of one of the four angles is given and the other three angles must be calculated.
Imagine this
Encourage the students to practise their visualisation skills by answering the following questions. Close your eyes and imagine your answers to these questions:
• I am an equilateral triangle. One of my angles is 60 degrees. What is the size of the other two angles?
• I am an isosceles triangle with two angles of 70 degrees each. What is my other angle?
• I am a scalene triangle. One of my angles is 30 degrees and another is 45 degrees. What is the size of my other angle?
• I am a regular hexagon. What is the size of each of my angles?
• I am a quadrilateral with angles of 140 degrees, 60 degrees and 40 degrees. What is the size of my missing angle?
• I am a parallelogram. Two of my angles are 50 degrees and 130 degrees. What are the sizes of my other two angles?
Extension
Encourage the students to devise similar questions of their own.
UPPER – YEARS 5 AND 6 OXFORD UNIVERSITY PRESS UPPER –YEARS 5 AND 6 199