4 minute read
Installation instructions: Front Side
by PITT cooking
7. Position the heat shields, with the sealing rings in place (step 2), onto the burners and screw them into position with the screws provided.

10. Attention: do not yet remove the adhesive strip at the bottom of the control knob mounting disc. 8.The heat shields of the 2kW and 3kW burners are secured with two screws and may only be secured in this manner. 9. With the Simmer/Stir Fry burner make certain that the V-shaped opening is aligned with the axis of the burner. Fasten the heat shield with the three screws provided.


11. Carefully slide the unit into position: make sure that the burner gas valve stems are centered within the cutouts in the countertop. 12. Press the control knobs firmly onto the valve stems with the markings directed towards the front. Depress the knob and check whether it springs back to the rest position.


13. When properly placed there is a small space visible between the knob and upper end of the control knob mounting disc. 1
14. Tighten the mounting screws of group 1 (see step 3). This secures the heat diffuser against the countertop. 5-7mm
15. Stop tightening if the undersides of the control knobs descend towards the control knob mounting discs. The knobs must remain 5-7 mm above the mounting discs.
2

16. Screw the rearmost mounting screws (group 2, see step 3) thumb tight. Check whether the heat diffuser is in contact with the countertop in its entirety.

19. Check whether the heat diffuser is in entirely uninterrupted contact with the countertop and position the support bars in order to avoid stress to the countertop. See page 155. 3

17. Screw the middle screws (group 3 see step 3) thumb tight. Check if the heat diffuser is in contact with the countertop in its entirety. 18. Connect the unit to gas and electrical supplies and ignite the burners. If the flame dies after ignition the control knobs must be readjusted (step 14).


20. Remove the adhesive strip under the control knob mounting disc. Press the knob and disc as one unit onto the gas valve stem in such a way that they are centered and aligned. 21. Check whether the knobs turn smoothly and that they spring back to the rest position after being depressed. If necessary, carefully remove the disc and then stick it down again.

— Downloads
Installation video, Top Side
Installation Installation of a Front Side module
Below you will find a step by step guide to the installation of a PITT cooking unit with Front Side controls.
In order to protect the guarantee and assure proper functioning of the cooking unit it is essential to follow and execute the installation guidelines precisely.


1. Overview of all parts. 2. Carefully press the sealing ring over the edge of the heat shield. Check whether the ring is sealed completely and evenly. S
S S S S
S
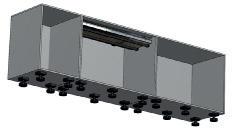
3. Overview of the mounting screws. These are separated into 3 groups and will come into play later in the instructions.
4. Turn back all the mounting screws to approximately 3mm above the unit surface. Then put the heat diffuser in place on the unit. 5. Place the flanges in the proper openings and carefully position the unit under the countertop. Check whether the heat diffuser is properly placed. 6. Check whether the flanges are centered in the cutouts. Attention: if this is not the case then the flanges will not function properly.


