8 minute read
DIY masterclass Learn how to prep

from Dfhht

REVAMP, REPAIR, Recycle

Advertisement
SHOPPING LIST
✔ Angled sanding block ✔ Assorted sandpaper sheets ✔ Clamps ✔ Dustpan and brush ✔ Paintbrushes ✔ Paint roller ✔ Palm sander ✔ Pencil ✔ Pliers ✔ Retractable knife ✔ Spray bottle ✔ Tape measure ✔ Universal saw ✔ Workbench ✔ Furniture paint ✔ Interior wood varnish ✔ Mitre adhesive ✔ Paint tester pots ✔ Panel pins (25mm) ✔ PVA glue ✔ Ultra-grip primer ✔ Non-structural hardwood plywood (for the panels) ✔ Dust sheet, gloves, goggles and a dust mask
3 4

Have fun with wallpaper and paint effects for a creative cabinet makeover


We love a thrifty project, and this cabinet upcycle is money-saving in more ways than one – not only are you giving an unloved piece of furniture a new, on-trend lease of life, but you can use leftover paint and materials to do it. We replaced our cabinet’s lattice panels with plain ones, got creative with a vintage paint finish, and lined it with wallpaper for a surprise pop of print; use what you have to create your own bespoke, budget-friendly design.
1Start by placing the cabinet on the workbench and ensuring your space is well-ventilated and protected with a dust sheet. Also ensure you wear goggles, gloves and a dust mask to work on your cabinet. Remove any cabinet fixtures that you’d like to replace, such as handles, latches and locks. Or, if you are keeping these, remove and clean them. Our cabinet has lattice doors that we decided to remove and replace with plain panels, and we also decided to add a panel to the open back.
2Sand down your unit to remove any rough edges and prepare the surface, including the more intricate areas; using an angled sanding block will help with this. Brush down the cabinet to get rid of any dust.
3To replace the lattice panels and add the back panel, first measure the height and width of the frames and back, then mark out the dimensions on a sheet of plywood. Use the built-in square on the back of a handsaw blade to draw straight cutting lines for each panel. Clamp the plywood firmly to the workbench and carefully cut along each cutting line with the handsaw.
4To attach the new panels, use a paintbrush to apply the PVA glue to the
7
door frames and back, adding a dab of mitre adhesive and then spraying with activator. You can also use 25mm panel pins to fix the panels in place. Hold the panels in place to adhere, wipe away any excess glue, then leave to dry.
5Using a brush, apply a liberal base coat of primer to the entire cabinet. Once the primer has dried, lightly sand the cabinet by hand using an angled sanding block for a smooth finish. Brush away any dust.
6Work the top-coat paint into the recesses of the cabinet and drawer, using a paintbrush to focus on corners, beading and decorative trims. Once the nooks are evenly coated, paint the larger surfaces with a roller. Paint the exterior and interior of the cabinet. Leave to dry, then apply the second coat.
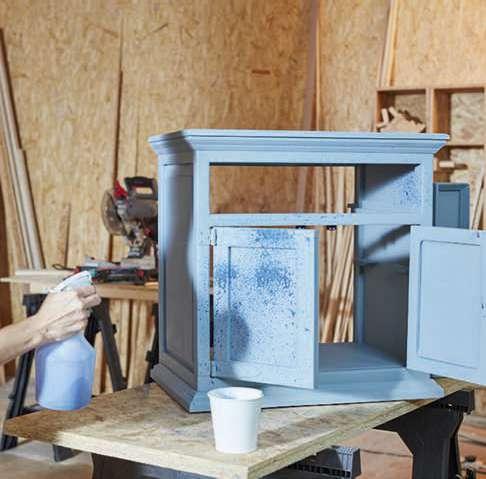
7For a vintage look, first mix a slightly darker coloured tester paint with a little water to create an inky solution. Pour it into a
8
spray bottle and spritz it onto the exterior from a distance. Using a cloth, wipe the solution from the flat surfaces, leaving it to settle in the recesses of the wood. Once dry, seal with varnish, using a clean brush to apply thin, even coats, then leave to dry.
8To line the cabinet with wallpaper, measure the surface area you’d like to line, then mark out your pieces using a pencil and ruler. Carefully cut the pieces out then check the size and trim to fit if needed. Water down a small amount of PVA glue and apply it to the cabinet using a brush. Lay the wallpaper in position and smooth it out.
9Replace any new or removed original fixtures and features to your cabinet, such as handles, latches and drawers, to finish.
This project was created by Wickes. Find more upcycling and DIY ideas at wickes.co.uk
Add a play ful touch with this patchwork floor pouffe!
We show you how to bring spirited style to your space with a homesewn pouffe. This project is super easy to stitch, so newbie crafters won’t be left behind, plus its patchwork sides are a great way to use up leftover material from other makes or a wardrobe clearout.
SHOPPING LIST

✔ 1m each of faux suede in 5 colours ✔ High-density foam, 40 x 60cm diameter ✔ Sewing machine ✔ Sewing needle ✔ Matching threads ✔ Metallic gold piping tape ✔ Scissors ✔ Pins ✔ Pressing iron ✔ Tailor’s chalk ✔ Super glue (optional)

1Trace around one end of the high-density foam with tailor’s chalk to get an accurate circle on the wrong side of the lightest-coloured suede fabric. You will need to add a 1cm seam allowance before cutting the fabric. Cut two circles; these will become the top and bottom of the pouffe.
2Cut 13 triangles, measuring 62cm tall and 28cm wide at the base. Remember to add a seam allowance of 1cm on each side of the triangle. For variety, cut three sets of triangles in three different colours and four triangles in a single colour.
3Pin and sew the triangles right sides together (RS) on opposite sides to create a patch detail that will sit around the pouffe. To do this, place one triangle against the next, reversing the position each time. Alternate the different colours to create contrast on the patchwork. Join the last two triangles through the middle and trim off any excess fabric.
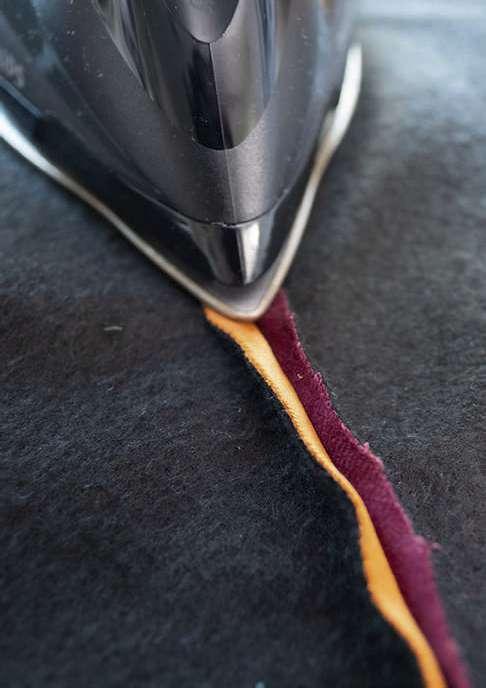
4Iron the seams open on the wrong side of the fabric with the iron set to a medium heat. Remember to turn on the ‘steam’ function to avoid burning the fabric.
5Pin and sew the metallic gold piping on one side of the sewn patchwork. Align the edge of piping tape to edge of the seam, keeping the folded side inwards.
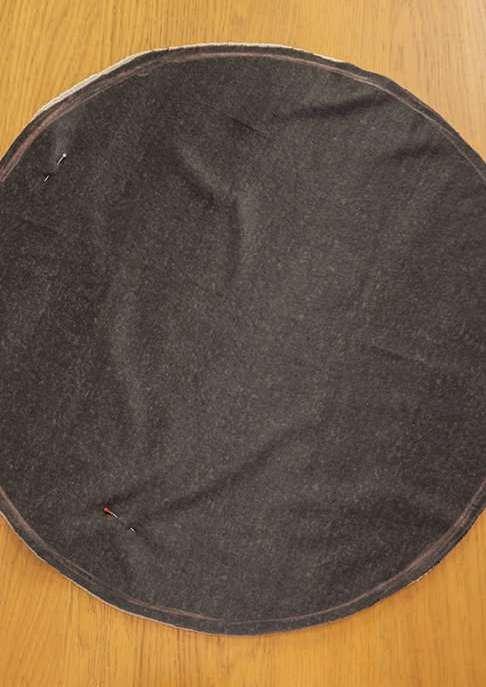
6Pin and sew one full circle to the side with the gold piping on a 1cm seam allowance. This will become the top of the pouffe. Sew the circle along the edge to close one end of the patchwork pouffe.
7Turn inside out to reveal the right side. Place the sewn patchwork and circle piece over the high-density foam and cover entirely. Ensure you pull the edges to sit around the foam evenly. 8 To finish and close the bottom of the pouffe, fold the ends of the second circular piece inwards and hand-sew to the bottom side edges of the patch piece. Alternatively, use super glue to join the bottom circle to the side of the pouffe, taking care to not leave any residue.
1
4 3

8
How to fill a hole in a wall
1CLEAN IT UP Remove any nails, wall plugs or screws that might still be stuck inside. Once these have been removed open the hole out using a snap or chisel knife. This will let the filler bind to a surface.
Clean away loose dust with a brush.

2SEAL LARGER HOLES For small holes you can skip to step 3, but if you have a wide or deep hole to repair, use a chisel knife to scrape away any loose plaster and neaten the edges of the hole. Dilute some PVA glue in water and apply to the hole. This will seep into the plaster and make it more solid for filling.
3FILL THE HOLE Apply some filler with a filling knife. Add the filler into the hole using the knife’s curved blade. If the hole is very wide or deep you might have to build up several layers. Follow the filler package instructions. It is often necessary to add a layer of filler in 10mm-deep sections and then leave it to cure before adding the next layer.
4SAND TO FINISH When the filler has cured, use some sandpaper and a cork block to sand the filler down till smooth. Then remove any dust with a microfibre cloth. You can now paint over, and the hole will be gone forever!

More advice
These guides were put together by the decorating team at Harris, a specialist company that has been producing quality paint brushes and rollers for over 90 years. For more expert advice and to view the range, head over to harrisbrushes.com.
3 PROTECT THE ROOM
Before undertaking either of these DIY projects, we recommend you protect the room you are working in. Move furniture out of the way or out of the room entirely and use a dust sheet to protect the floor. Tape the sheet in place using some masking tape.

1
4 4


