6 minute read
Exposure compensation


When working on location the lighting (sunlight) already exists. Th ere is often little the photographer can do to lower the brightness range. In these instances exposure compensation is often necessary to protect either shadow or highlight detail. Th e results of exposure compensation are easily assessed via the camera’s LCD monitor. Th e amount of compensation necessary will vary depending on the level of contrast present and what the photographer is trying to achieve. Compensation is usually made in 1/3 or 1/2 stop increments but when a subject is back lit and TTL metering is used the exposure may need increasing by two or more stops depending on the lighting contrast. Remember:
Increasing exposure will reveal more detail in the shadows and dark tones.
Advertisement
Decreasing exposure will reveal more detail in the highlights and bright tones.
Orien Harvey
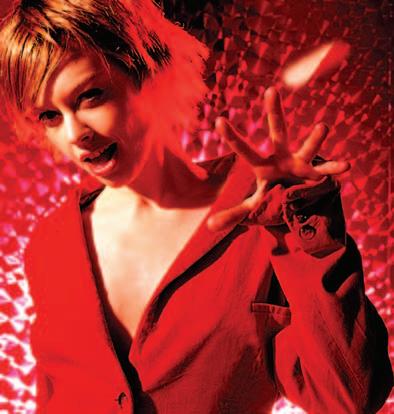
Exposure compensation adjustment

A compensation setting is required when the photographer wishes to continue working with an automatic metering system instead of manual controls. Using an automatic metering mode the photographer cannot simply adjust the exposure, from that indicated by the meter, using the aperture or shutter speed. Th e automatic mode will simply re-compensate for the adjustment in an attempt to record the overall tone of the framed subject matter as a mid-tone equal to the 18% gray card.
Photographers calculate the degree of compensation from MIE in a variety of different ways. Digital histogram - Most DSLR cameras and high-end prosumer digicams allow the user to view a ‘histogram’ of the exposure immediately after capture and/or indication of highlight clipping (overexposure). In the case of some cameras the histogram can be viewed live with the preview before capture takes place. This is now the most popular method for assessing whether exposure compensation is required when capturing images with digital cameras. It is worth noting, however, that DSLR cameras shooting in the Raw format are capable of capturing a broader dynamic range than the histogram may indicate (see the chapter ‘Exposure’). Although this is a reliable method for assessing appropriate exposure compensation it does not replace some of the traditional methods where compensation must be immediate and accurate. Bracketing - The photographer can estimate the necessary compensation by bracketing the exposures. To bracket the exposure the photographer must expose several frames, varying the exposure in 1/3 or 1/2 stop increments either side of the MIE. 18% Gray card - Photographers can use a mid-tone of known value from which to take a reflected light meter reading. A mid-tone of 18% reflectance is known as a ‘gray card’. The gray card must be at the same distance from the light source as the subject. Care must be taken to ensure the shadow of neither the photographer nor the light meter is cast on the gray card when taking the reading. The indicated exposure is suitable for an SBR not exceeding 32:1. If highlight or shadow detail is required the exposure must be adjusted accordingly. When capturing an image in black and white the indicated exposure is suitable for an SBR not exceeding 128:1. If the SBR exceeds 128:1 the exposure can be increased and the subsequent development time decreased. See ‘The Zone System’. Polaroid - Working with some medium-format cameras, a photographer has the added advantage of being able to use Polaroid to assess exposure and composition. Most film has a Polaroid of equal ISO and comparative contrast range. To best understand the relationship between Polaroid and film testing of both is recommended. This will give you the best correlation between how the correct exposure for film would appear on an equivalent Polaroid. Polaroid film holders (backs) fit most medium- and all large-format cameras. Polaroid backs suitable for small-format cameras are limited.
Re-framing - If the photographer is working quickly to record an unfolding event or activity the photographer may have little or no time to bracket or take an average mid-tone reading. In these circumstances the photographer may take a reading quickly from a scene of average reflectance close to the intended subject. This technique of re-framing may also include moving closer to the primary subject matter in order to remove the light source and the dominant light or dark tones from the framed area. Many modern cameras feature an exposure lock to enable the photographer to find a suitable exposure from the environment and lock off the metering system from new information as the camera is repositioned. Judgement - The fastest technique for exposure compensation is that of judgement, gained from experience and knowledge. The photographer must previsualize the final image and estimate the degree of compensation required to produce the desired effect.
The most common instance requiring exposure compensation is ‘back lighting’ using a TTL meter. The metering system will be overly influenced by the light source and indicate a reduced exposure. As the light source occupies more and more of the central portion of the viewfinder so the indicated exposure is further reduced. The required exposure for the subject may be many times greater than the indicated exposure.
If the camera is in manual mode or equipped with an exposure lock, the photographer can meter for the specific tonal range required and then re-frame the shot. An alternative used by many professionals is to adjust the exposure using the exposure compensation facility. Using this technique can avoid re-framing after first metering.

Mark Galer
Activity 2
Choose four different lighting situations where the subject is back lit. Take a photograph of each subject with the ‘meter-indicated exposure’ or MIE. Do not reposition the frame. Make a record of the exposures. Using your own judgement compensate the exposure using either the exposure compensation facility or adjusting ISO. Make a record of the exposures. Take a meter reading for the shadow area and with the camera set to manual make one exposure at this reading. Make a record of the exposure. Take a meter reading for the highlight area and with the camera set to manual make one exposure at this reading. Make a record of the exposure. Review the images and name the image files accordingly. Assess the results of your images using exposure compensation.


Recovery and Fill Light in Adobe Camera Raw and Lightroom
The Recovery and Fill Light sliders can rescue bright highlights that have become clipped and dark shadows that may otherwise be too dark to print. When the contrast of the scene is very high (bright sunlight) many good quality digital cameras can be set to warn us of overexposure by blinking the overexposed highlights. Sometimes we can lower the contrast by using a reflector or fill flash and sometimes we can rescue the highlights in Adobe Camera Raw. In the illustration above the highlight warning has been switched on by clicking on the triangle in the top right-hand corner of the histogram window. The red color indicates overexposure (pixels that would be rendered 255 if left unadjusted). Dragging the Recovery slider to the right brings these overexposed tones back under 255 and will allow them to print with texture and detail.


Great care needs to be taken when using the Fill Light slider to rescue dark shadow tones. In this example an extreme adjustment is being made to rescue the shadow tones that have been accidentally underexposed due to the bright tones in the centre of the viewfinder. Be careful with raising the Fill Light value too high, especially with photos taken with a high ISO, as Fill Light will also brighten noise in the photo and make it more apparent. Photos taken at a lower ISO, like ISO 100, will be more forgiving to the Fill Light slider and not expose problems like noise and tonal banding so readily.