8 minute read
Lighting ratios


Light meters are often incorrectly called exposure meters. Exposure is only one part of its function. It can also be used for measuring lighting ratios. This is achieved by taking an incident reading of the light source from the subject. The meter is pointed at a specific light source to measure the amount of light falling on the subject. If there is more than one light source each light can be measured independently by ensuring only one light source is on at any one time. In this way the ratios between the light sources can be measured. Lighting ratios and their relationship to SBR and latitude are best demonstrated and understood at a practical level. Take, for example, a photographer using a capture medium known to have a latitude of five stops. To make use of this information the photographer would try to light the subject to within this range. A five stop latitude would allow a photographer to use a maximum lighting ratio of 32:1 (5 stops). This ratio would retain detail in the highlights and the shadows.
Example 1
Advertisement
In a darkened studio a person is lit with a single light source from the right-hand side at 90 degrees to the subject. An incident light meter reading is taken from the right-hand side of the person’s face directly towards the light source. The aperture is f45 at 1 second. An incident light meter reading is taken from the left-hand side of the person’s face directly towards the opposite side of the studio to where the light is placed. The aperture is f4 at a shutter speed of 1 second. This is a lighting ratio of 128:1 (7 stops). To reduce this ratio another light or a reflector (fill) is placed on the left-hand side of the subject. The fill is moved towards or away from the subject until an aperture reading no more than three stops lower in number than that from the main light source (f16) is obtained. This is now a lighting ratio of 8:1.
128:1 8:1

The task is to light three sides of a single colored box with a one stop ratio between each of the sides. Pointing a light meter in the general direction of the subject would give an average reflected reading for ‘correct’ exposure but would not indicate the difference in the light falling on each of the three sides. This can be achieved by taking either a reflected reading of each side or for a more precise measurement taking an incident reading of each of the three light sources. This would give a measure of the actual amount of light falling on the subject. This information can then be used to adjust the balance of the lights to achieve the required lighting ratio.
1. A point source (spotlight) is aimed at the top of a neutral gray box from behind the subject. The shadow falls forward of the subject. An incident reading is taken of the light source by pointing the invercone directly at the spotlight. The reading is f16.
2. A diffuse source (floodlight) is aimed at the left side of the box, ensuring no light affects the top or right side of the box. An incident reading is taken of the floodlight (shield the invercone with your hand to prevent light from the spotlight affecting the reading) by pointing the invercone directly at the floodlight. The reading is f11. This is a lighting ratio between the top and left-hand sides of 2:1 (1 stop).
3. A piece of white card is used to reflect light back into the right-hand side of the box. The light reflected is gathered from the spotlight and floodlight. With both lights on, an incident reading is taken of the reflected light by pointing the invercone directly at the piece of white card. The reading is f8. This is a lighting ratio between the left and right sides of 2:1 (1 stop), and an overall lighting ratio between the top and left-hand side of 4:1 (2 stops).


1. Spotlight 2. Spotlight + floodlight 3. Spot, flood + reflector
An incident reading is taken by pointing the invercone from the front of the box back towards the camera. It should be f11. This is an average of the lighting ratio.
For more examples of lighting still life see Essential Skills: Studio Photography.
The task is to photograph a chain and a paper clip on a textured background. The lighting ratio between the most intense area of the background and the subject should be 8:1. The subject should be in focus, the background out of focus. The approach taken is the same as in Example 2, using incident light meter readings to control lighting ratios and exposure.
Using a point source (key light) from the right and above the subject light the staple and chain to create highlights along their top edge. Take an incident reading from the subject to the light source (e.g. f16). Place a diffuse light source (fill light) to the left of the subject. Between this light and the subject place a large sheet of tracing paper (the further the tracing paper is from the light source the more diffuse the light). With the key light turned off take an incident reading from the subject to the diffuse light source. Move the light closer to or further away from the subject until a lighting ratio of 2:1 is achieved (e.g. f11).
Position background approximately one metre behind the staple and chain. Adjust the position of the key light to ensure no shadows from the chain fall on the background. Turn off key light and fill. Place a point source of light behind and to the right of the subject. Aim the light across the background to increase the texture of its surface. Adjust the light until the desired highlights are achieved. Take a reflected reading of the most intense highlight on the background. Adjust this reading by three stops to render the highlight white (e.g. f22 to f11). Move the light closer to or further away from the background until a reading equal to the average of the key light and fill is achieved (e.g. average of f16 and f11 = f11.5). Turn on key light and fill. Filter lights and/or camera for effect. Take an incident reading from the subject to the camera. Choose an exposure aperture with sufficient depth of field to retain focus on the staple and chain but not on the background.

James Newman
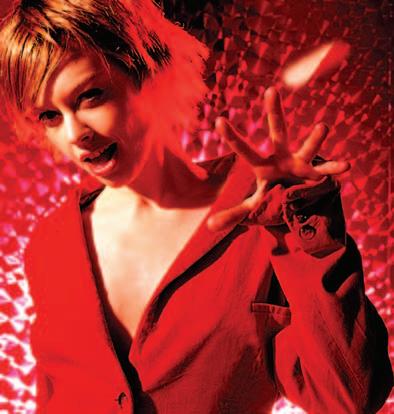
A photographer has to create a mid key portrait containing a predominance of average tones but with no extreme highlights or shadows. The result is achieved using a large, diffuse light source, creating a soft, even lighting quality, combined with selective fill and overexposure by one stop to obtain correct skin tones. This is one of the most commonly used forms of portraiture lighting. It is a relatively simple approach to lighting the human form compared to high and low key lighting and will generally produce good results with most subjects. It does, however, lack drama and mood and would not enhance subjects with strong individual character, delicacy of form or great physique.
1. Place the subject approximately two metres from a large diffusion screen (background). As viewed from the camera place a soft diffuse light source (flash soft box) in front of and to the left of the subject. Place a diffusion screen larger than the light source between the light source and the subject. The screen should be approximately one third of the distance from the light to the subject. Take an incident light meter reading from the subject to the camera. A typical reading would be f11 at 1/250 second.
2. Place a large (2m x 3m) white reflector in front of and to the camera right side of the subject. This will reflect light from the key light source back onto the right side of the subject. Adjust the distance of the reflector from the subject until an incident light meter reading from the subject to the reflector is one stop less than the key light. This should be f8 at 1/250 second. This is a lighting ratio of 2:1 between the left and right sides of the face and when used for exposure will overexpose the left side of the face to reduce any skin imperfections.
3. Place behind the diffusion screen in the background a large diffuse light source (flash soft box). Direct the light through the diffusion screen straight back at the camera. Adjust the light source so an incident light meter reading taken from the subject to the background diffusion screen is two stops more than the incident reading of the subject to camera (f8 at 1/250 second). This background reading should be f16 at 1/250 second. If the subject exposure is set to f8 at 1/250 second the background will appear white. For more examples of portraiture lighting see Essential Skills: Studio Photography.


1. Soft box 2. Soft box + fill 3. Soft box + fill + back light