9 minute read
Filters for lenses


Filters can be divided into five main categories: ~ Neutral filters ~ Black and white ~ Color conversion ~ Color balancing ~ Effects.
Neutral filters
Advertisement
A range of filters are manufactured that have little or no color. These include: ~ UV (haze) and ‘skylight’ filters (clear) ~ Neutral density filters (gray) ~ Polarizing filters (gray).
UV and skylight filters
Mark Galer
Ultraviolet (UV) radiation present in the spectrum of light is invisible to human vision but adds to the overall exposure of the image. It is most noticeable with landscape images taken at high altitude and seascapes. To ensure the problem is eliminated, UV filters can be attached to all lenses used on location. If the optical quality of the filter is good the filters may be left permanently attached to the lenses. The added benefit of this practice is the front lens element of each lens will be protected from scratching. A skylight filter also eliminates UV light and has a color compensating effect. Shadows filled by skylight have a blue cast and the slightly pink filter helps to create shadows with a neutral color cast. Skylight filters are identified as a 1A and a stronger 1B.
Polarized light is the light reflected from non-metallic surfaces and parts of the blue sky. A polarizing filter can reduce this polarized light and the effects are visible when viewing the image in the camera. A polarizing filter is gray in appearance and when sold for camera use consists of the actual filter mounted onto a second ring, thus allowing it to rotate when attached to the lens. The filter is simply turned until the desired effect is achieved. The polarizing filter is used for the following reasons: ~ Reduces or removes reflections from surfaces ~ Darkens blue skies at a 90 degree angle to the sun ~ Increases color saturation.

Possible problems
Mark Galer
The filter should be removed when the effect is not required. If not removed the photographer will lose two stops and reduce the ability to achieve overall focus. When the polarizing filter is used in conjunction with a wide-angle lens, any filter already in place should be removed. This will eliminate the problem of tunnel vision or clipped corners in the final image. Photographing landscapes when the sun is lower in the sky can result in an unnatural gradation, ranging from a deep blue sky on one side of the frame to a lighter blue sky on the other.
Activity 1
Create an image on a sunny day eliminating polarized light and one without using the filter. Try to remove reflections from a shop window using a polarizing filter. How effective is the filter at eliminating these reflections? Compare and contrast your results with other students.
With manufacturers going to great lengths to create fast lenses with wide maximum apertures it may seem strange to find a range of filters available which reduce the amount of light at any given aperture. These are neutral density filters and are available in a range of densities. If only one is purchased the photographer should consider one that can reduce the light by at least two stops (four times less light). Neutral density filters are used for two reasons: ~ Reducing depth of field ~ Increasing duration of exposure.
Reducing depth of field
Very shallow depth of field is not always possible when working on location if the ambient light is very bright. If the photographer is using an ISO setting of 100 and direct sunlight to illuminate the subject the photographer may only be able to select f5.6 or f8 as their maximum aperture, if the maximum shutter speed available on the camera being used is 1/1000 or 1/500 second. This aperture may not be enough to sufficiently isolate the subject. If the aperture was increased further overexposure would result. The problem can be solved by using a lower ISO, a camera with a focal plane shutter capable of exceeding 1/1000 second, or a neutral density filter.


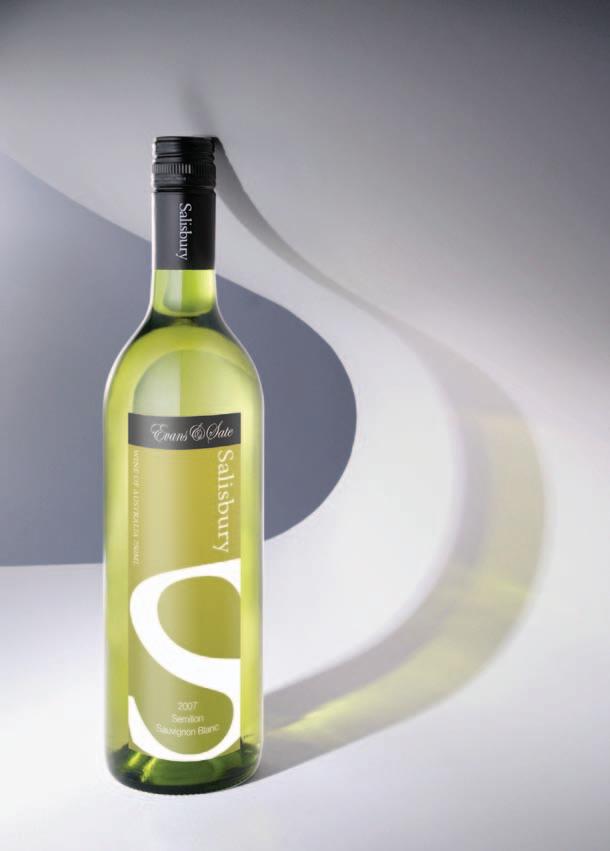
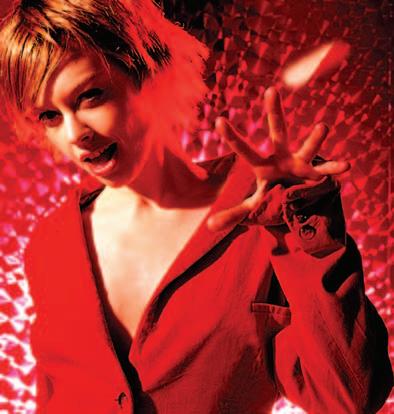
Duration of exposure - Martina Gemmola Reduced depth of field - Samantha Everton
Increasing duration of exposure
Long exposures are not always possible when working on location if the ambient light is bright. If the photographer is using a film or image sensor at 100 ISO and direct sunlight to illuminate the subject the photographer may only be able to select 1/60 or 1/30 second as their slowest shutter speed, if the minimum aperture on the camera lens is f22 or f32. This shutter speed may not be sufficient to give the movement blur required. The problem can be solved by using a lower ISO, a lens with a minimum aperture smaller than f32 or a neutral density filter.
When the photographer is using black and white film there is the option of controlling tonal values and contrast by using colored filters, e.g. a green apple and an orange may record on black and white film with the same tonal value or shade of gray. The use of an orange filter would result in the orange recording lighter and the apple darker; using a green filter would result in the apple recording lighter and the orange darker. Filters lighten their own color. In this way the tones are made different. Many photographers using black and white film use a yellow/green filter as standard to correct the bias of the film towards the blue end of the spectrum. The basic rule when using colored filters with black and white film is:
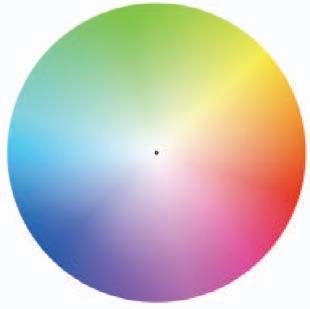
Green
Adjacent colors are lightened. Opposite colors are darkened.
Using the color wheel on the right, the photographer can quickly determine that colors the same as the filter and either side of the filter color will be lightened. All others will be darkened.
Cyan
Blue Yellow
Magenta Red
The color wheel
Black and white filters
Code Color Filter factor Effect
Y2 Yellow 2
G Green 4
YG Yellow/Green 2
O2 Orange 4 R2 Red 8 Reduces exposure of blue sky. As for Y2 plus lightens green foliage and renders good skin tones for daylight portraits.
Corrects tones to that of human vision.
Blue skies record as middle tones.
Creates dark and dramatic skies. Underexposes green foliage.
Activity 2
Using black and white film produce a landscape image using one of the filters from the ‘Black and white filter chart’ above. Take a control image without the use of a filter for comparison. Discuss your findings with other students.
The definition of a color conversion filter is one used to convert the color temperature of various light sources to match the color balance of the film being used. When capturing Raw file images it is possible to undertake color correction in post-production. See ‘Characteristics of Light’.
Tungsten light The filters used for this purpose are the 80 series including the 80A and 80B. These filters are blue in color and are used to balance daylight film with tungsten light sources. The 80B is used mainly in a studio situation to balance daylight film with photoflood bulbs specifically made for photographic lighting purposes.
Daylight 3400K 3200K
Daylight film None 80B 80A Tungsten film 85B 81A None
When using film a location photographer should have an 80A filter available. This filter allows daylight film to be used with tungsten-halogen lamps and record with approximately neutral tones. If daylight film is used in conjunction with an 80A filter and ordinary household light bulbs the resulting transparencies will still have a slightly warm cast. A problem associated with using an 80A filter is the loss of two stops (filter factor 4). The photographer prepared for this will usually carry a 400 ISO film which they are prepared to push if necessary.
Fluorescent light It is very difficult to assess the color cast that will result when fluorescent lights are illuminating the subject. Most images record with a green cast and most conversion filters are predominantly magenta colored with additional yellow or cyan filtration. An FLD filter is marketed for use with fluorescent lights and daylight film but it usually only improves rather than rectifies the situation. With six main types of fluorescent lights commercially available all requiring different color conversions the best advice to a photographer is to:
Switch fluorescent lights off if possible.
Photographers leaving fluorescent lights on run the risk of a heavy color cast. This is often an oversight or the photographer may think the fluorescent lights are contributing little to the overall illumination and knowingly leave them on. The result is often devastating. Individuals with fair hair appear with bright green sprouting tufts from the tops of their heads and the tubes, if in the frame, appear as bright green.
Color conversion chart
Color balancing filters are used to produce more subtle changes in the color balance of the final image. They are particularly useful when working on location using color transparency film. The most common light-balancing filters used are the 81 and 82 series filters. The 81 series are warm in color (yellow) and the 82 series are cool in color (blue). The subtlest changes are made with the straight 81 or 82 filter, the A, B and C becoming progressively stronger. Exposure compensation is between one-third and two-thirds of one stop.
Warmer Warm Neutral Cool Cooler
81EF 81D 81C 81B 81A 81 * 82 82A 82B 82C
One or two filters from the 81 series are particularly useful for removing the blue cast recorded when photographing in overcast conditions or in the shadows present in full sun. See the color correction chart in ‘Characteristics of Light’.
Effects filters
Numerous special effects filters are available from camera stores. Most are a gimmick and once used are quickly discarded by the serious photographer. These include star-burst filters and graduated color filters. Probably the most commercially viable special effects filter is the soft focus filter or diffuser. This is especially useful in close-up portraiture where the photographer wants to create a flattering portrait but the sitter has a somewhat less than perfect complexion.
Effects with standard colored filters
Many special effects can be created with conventional color filters and a little imagination. These include using a colored filter over the light source and a complementary filter on the camera lens. The effect is a neutral toned foreground with a background that bears the color cast of the filter on the camera lens. Another effect is obtained by mounting a camera on a tripod and taking three exposures of moving subjects on the same piece of film. If the photographer uses a different primary colored filter (25 red, 61 green and 38A blue) for each of the exposures the effect is a near neutral background with colored moving subjects. Take a meter reading without the filters attached and open up one stop for each of the three exposures.
Activity 3
Create an image using an effects filter or filters. If you do not have access to an effects filter create your own using a piece of glass, Perspex or Gladwrap. Place on the lens and alter the transmission of light by modifying the surface of the material chosen (smearing the glass or Perspex with Vaseline or stretching the Gladwrap). Experiment and discuss your findings with other students.