



Conectamos el cable USB del Panel en un conector trasero USB del PC (2.0 o 3.0) usando el alargador proporcionado.
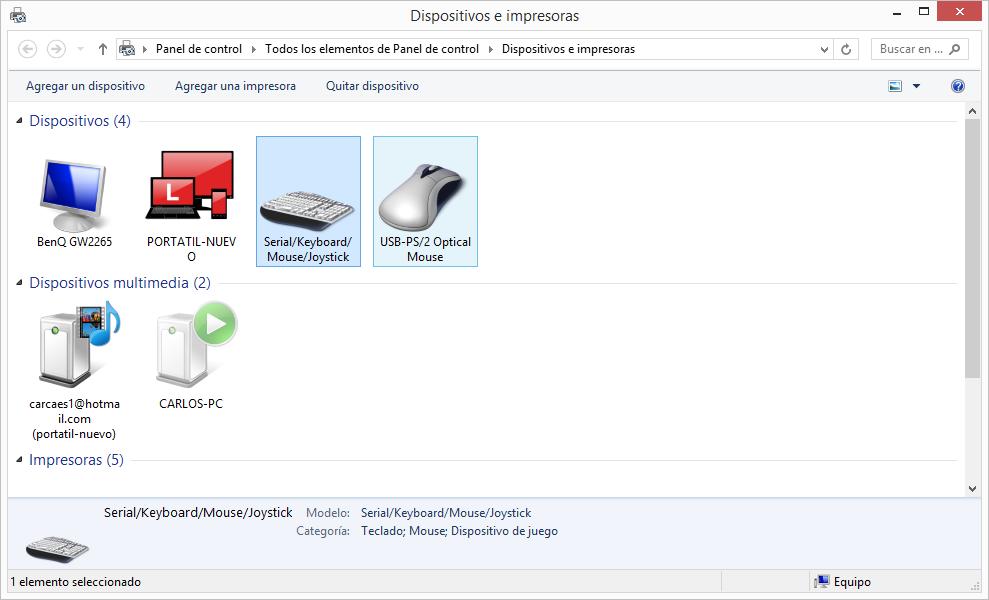
Windows nos detectará el dispositivo plug & play y nos aparecerá en DISPOSITIVOS E IMPRESORAS como
Serial/Keyboard/Mouse/Joystick


Para comprobar el funcionamiento de los botones y levas, vamos a Dispositivos y juegos, botón derecho, Configuración del Dispositivo

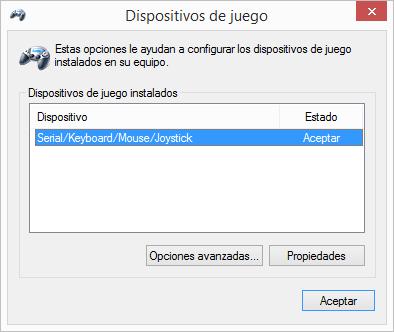
Y Propiedades.
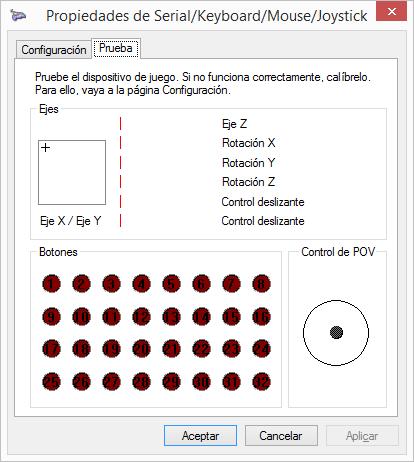
Pulsamos los botones y las levas y nos debería de aparece el botón correspondiente iluminado.


Si Windows no detecta automáticamente el panel, instalar estos drivers opcionales.
Link Descarga
DETECCIÓN EN WINDOWS
Si windows no lo detecta correctamente o nos aparece con un símbolo de admiración, proceder con los siguientes pasos.
A) Probar en otro puerto USB trasero (Si lo tenemos en un USB 2.0, probar en un 3.0 – color azul, o viceversa)
No usar HUB DE PUERTOS USB.
B) Ir Dispositivos e impresoras, y con el botón derecho, Quitar Dispositivo

C) Vamos a Sistema/Administrador de Dispositivos y vamos a la opción de Buscar cambios en Hardware


Si windows reconoce el volante, pero los botones dejan de funcionar al cabo de unos minutos, tenemos que ir a esta opción del adminitrador de dispositivos (Panel de control / Sistema).
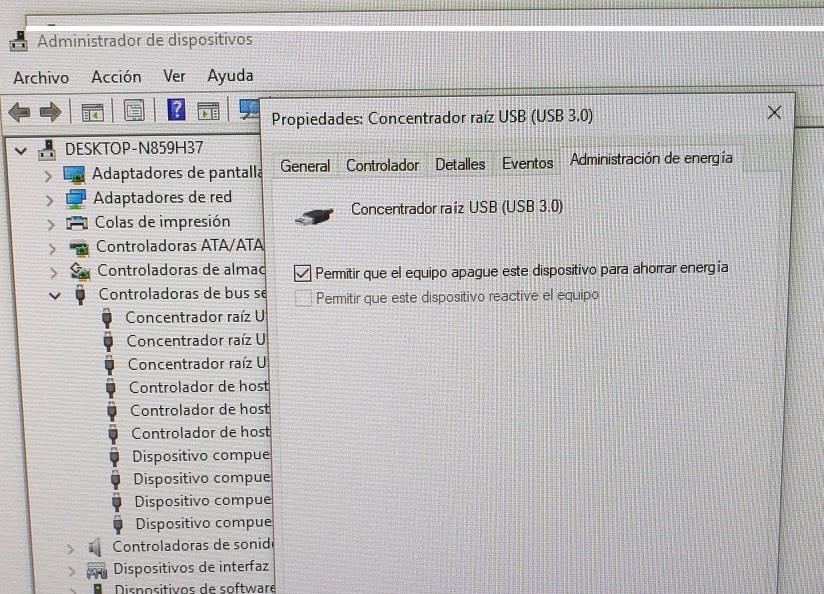
Y en los “controladoras de bus serie universal”, vamos uno por uno:
1 - Botón derecho, Propiedades
2 -Pestaña “Administración de energía”
3 - Deshabilitar la opción de “Permitir que el equipo apague este dispositivo para ahorrar energía” en todos los dispositivos USB
4- Aceptar
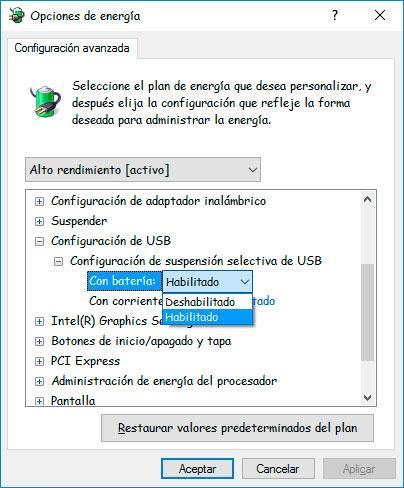
5 – Ir a Panel de control, Opciones de energia, Configuración Avanzada. Y deshabilitar la Configuración de suspensión selectiva de USB
6 – Aceptar
7 - Y ahora tendríamos que desinstalara manualmente el dispositivo en IMPRESORAS Y DISPOSITIVOS.

8 - Desconectarlo del USB y volver a conectarlo para que lo detecte de nuevo.
De esta manera conseguiremos que windows no paralice la función de la controladora USB del volante.

En algunas placas bases puede ocurrir que al encender el ordenador con el cable USB del panel conectado, no arranque correctamente.
En tal caso, desconectar el panel/volante del alargador USB que va al ordenador, encenderlo y una vez en windows, conectar el panel/volante al alargador USB.


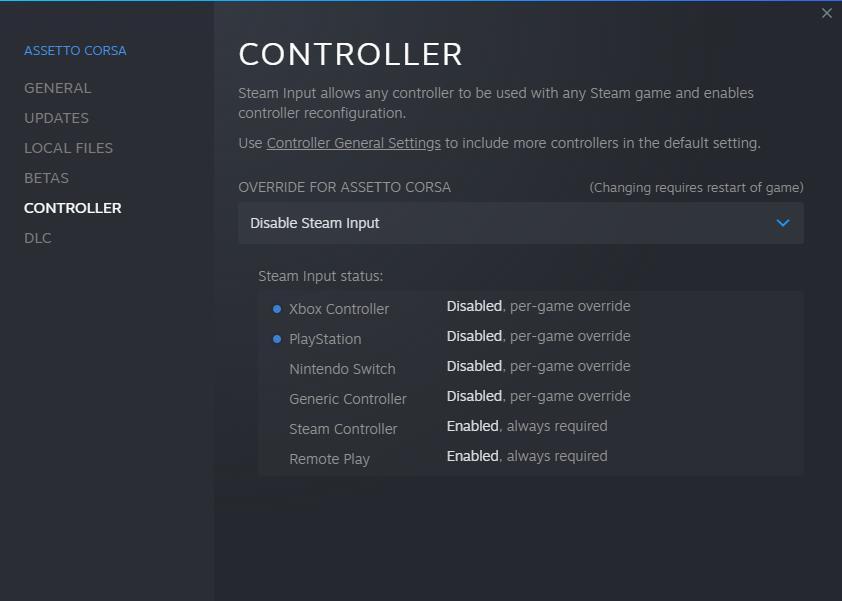
Si algún juego de steam no reconoce el dispositivo, ir a propiedades del juego y desactivar el Steam Input.

Si ocurren desconexiones aleatorias, puede estar ocurriendo que haya algún tipo de bajada de voltaje del puerto USB del ordenador. En tal caso, se recomienda usar un HUB USB alimentado para mantener el voltaje constante.
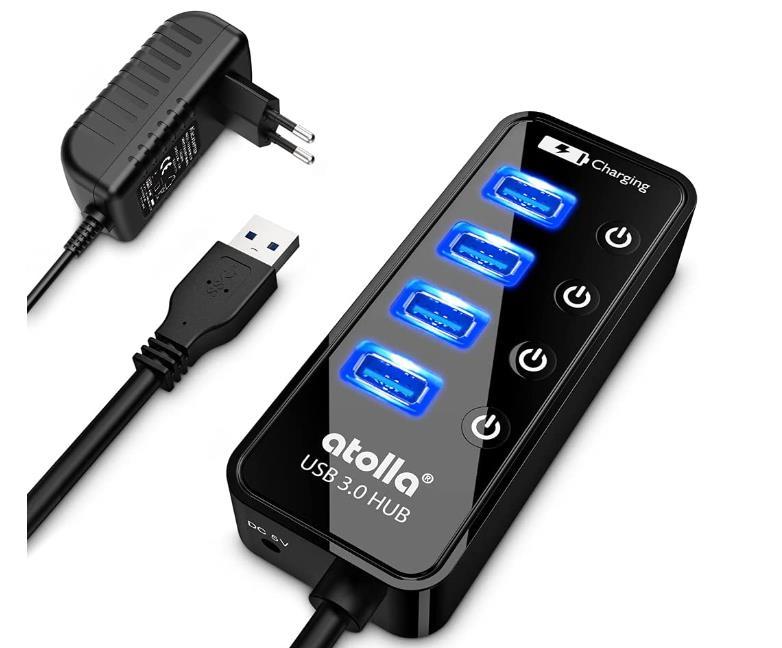
Enlace -> https://amzn.to/3JGf2q3
También podría estar debido a EMIS. (Siguiente apartado)

Si usamos un Open Sim Wheel o volante Direct Drive similar, puede haber Emis que afecten al funcionamiento de cualquier panel de botones y levas, incluido éste.

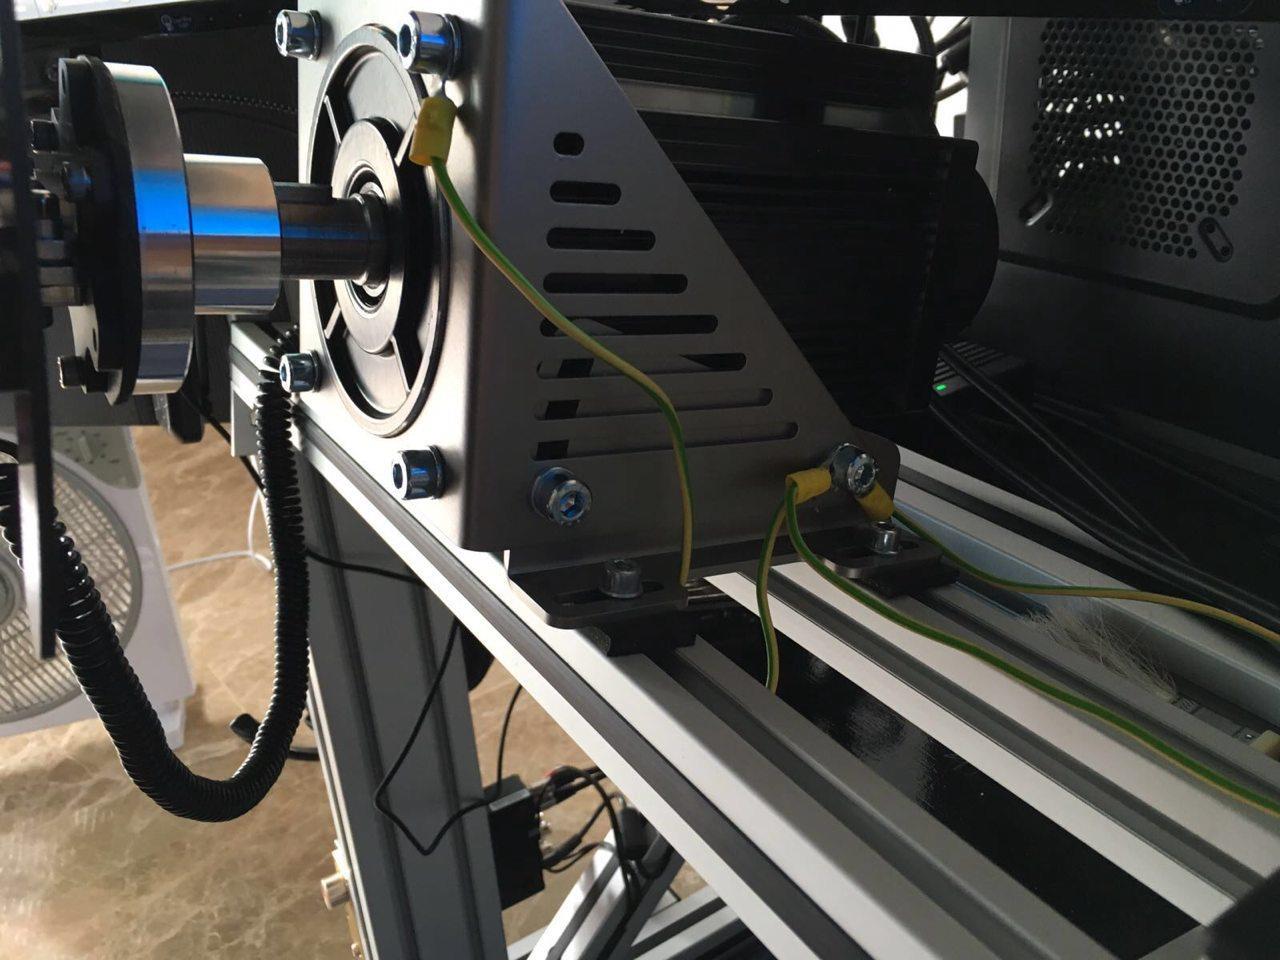
A) Es obligatorio colocar un cable de toma de tierra entre la caja de electrónica de nuestro Open Sim Wheel y uno de los 4 agujeros M8 del motor. Y además otra terminación que vaya al chasis del cockpit si es de metal o aluminio.
Este panel de botones y levas ya lleva internamente una PCB (Placa de Circuito Impreso) que aisla de EMIS.
B) Para más información y consejos, visitar este tutorial de EMIS
C) Si sigue sin funcionar, contactar conmigo a través de este mail carlos@simracingcoach.com

En ocasiones, Z1 dashboard puede no reconocer algunos dispositivos de juego. La solución para poder mapear funciones de este Software es usar la aplicación Joy To Key, que sirve para emular caracteres de nuestro teclado, y de esa manera, que nos lo detecte el Z1.
Vídeo Tutorial
https://www.youtube.com/watch?v=cqzfJzQ_-tU

Software Joy To Key
https://joytokey.net/en/

Se ha detectado un conflicto con el software Simhub usado para pantallas LCD o displays.
El problema viene porque este Software bloquea los puertos serie que detecta, entre ellos el de la controladora USB del panel de botones y levas. Para solucionarlo, hay que seguir estas indicaciones:

1) Antes de nada, ejecutar Simhub en MODO ADMINISTRADOR.
2) En el menú Arduino/My Hardware/Single o Multiple, seleccionar la opción de:

SCAN ONLY SELECTED PORTS
Y No marcar el TEENSY USB Serial (Volante SRC)
3) O también se puede seleccionar la opción de NEVER SCAN SELECTED PORTS Y marcar el TEENSY USB Serial (Volante SRC)
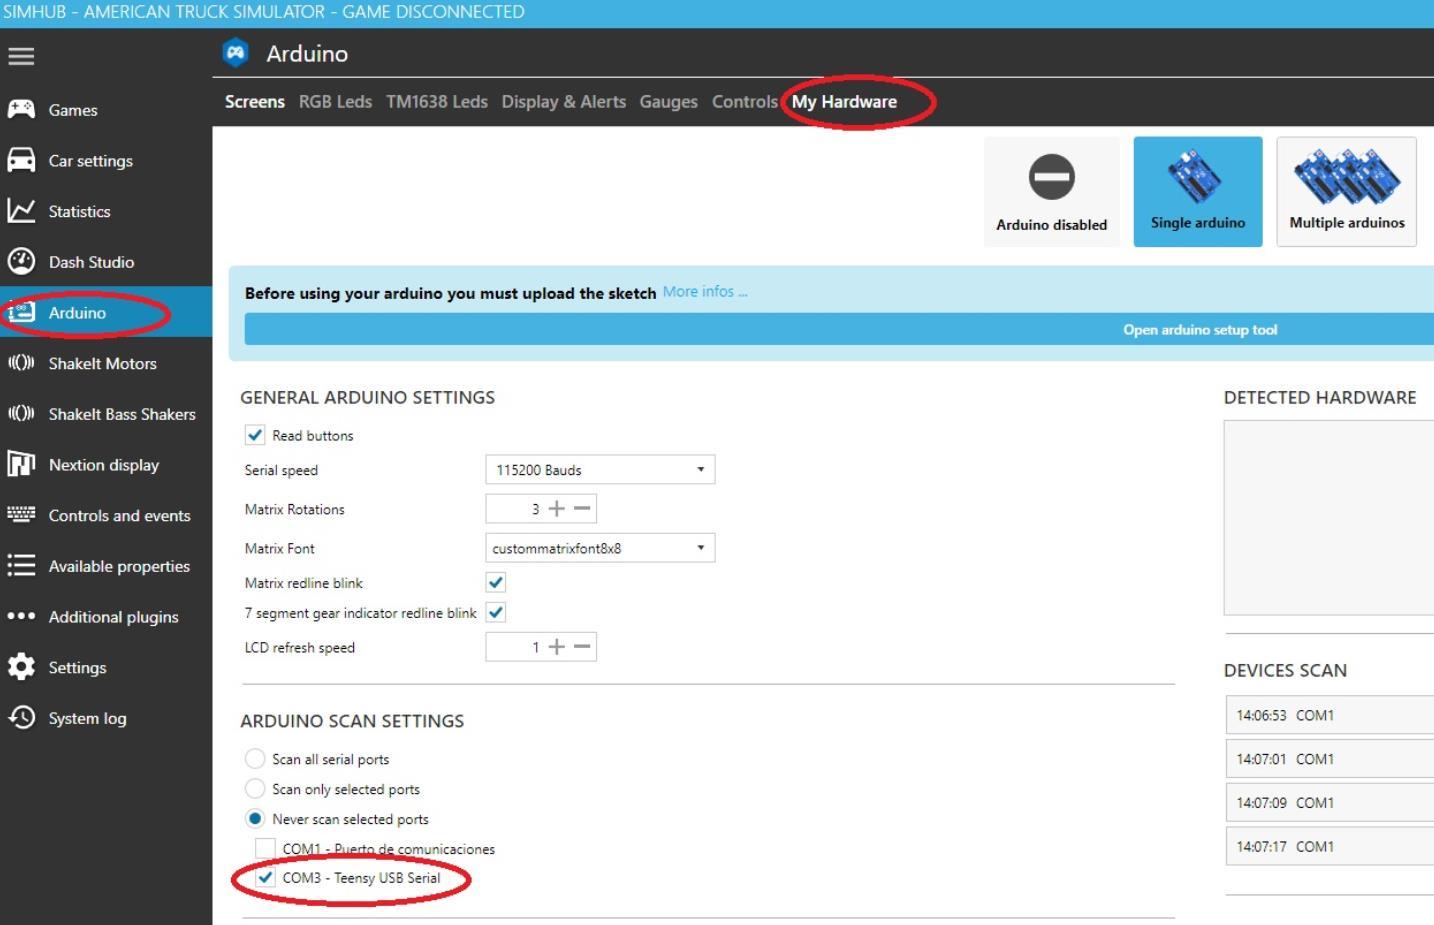


Cualquiera de las 2 opciones es válida
4) Cerrar el Software Simhub
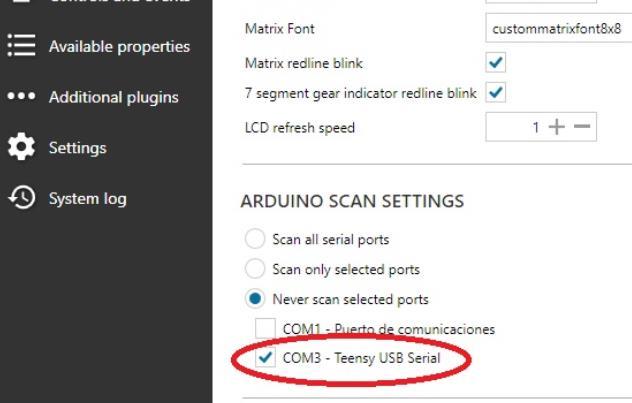
5) Desconectar el cable USB del PC
6) Conectar de nuevo el cable USB del PC
7) Volver a abrir el Software Simhub
8) Y comprobar el funcionamiento de los botones en el panel de control de Joystick
9) Ya debe funcionar correctamente

Para Versiones anteriores de Simhub
Hay que ir a la carpeta de configuración del SIMHUB y buscar el fichero
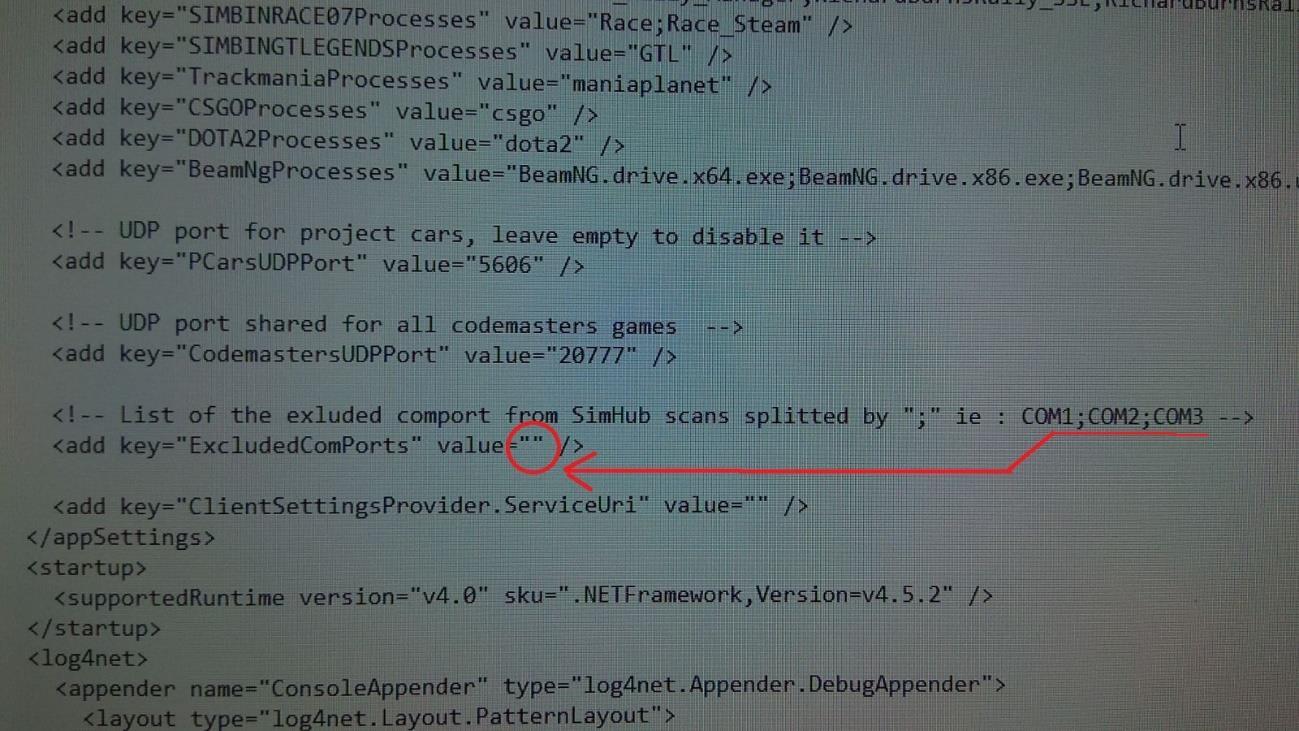
SimHubWPF
Lo editamos con el bloc de notas, y añadimos el puerto serie que detecta Windows para nuestro panel de botones y levas en la línea de ExcludedComPorts, entre las comillas de value=””. (Si hay que poner varios puertos serie, usaremos punto coma para separarlos).
Guardamos este fichero y ejecutamos de nuevo el SIMHUB.

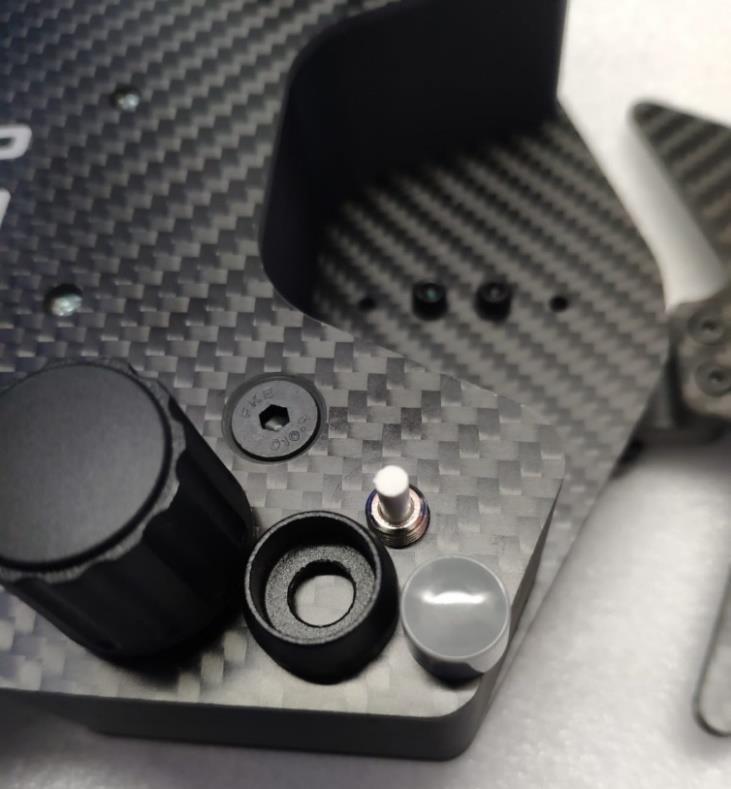

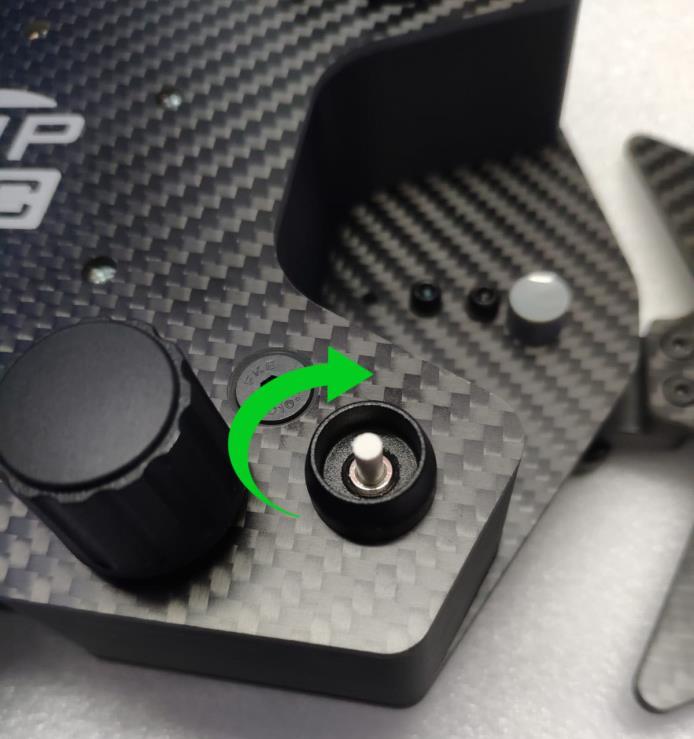
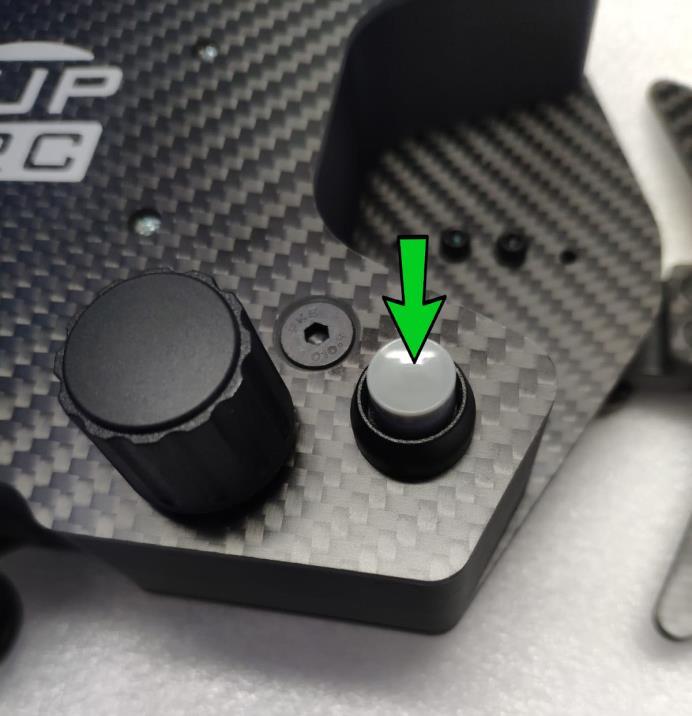
Desenroscar con la mano el cubre botón. (Si está muy duro, usar unos alicates)

Vídeo -> https://youtube.com/clip/UgkxXDaJAOXWG99i_IUzOd864ij07b08GzWO


Connect the USB Cable to a back plug of the computer (2.0 or 3.0) using the USB extended cable.
Windows will detect our device “Plug & Play” and will appear in Devices and Printers as Serial/Keyboard/Mouse/Joystick


To test the buttons and paddle shifters, click in Devices and Printers, right click and Setup/Configuration.


Push the buttons and paddle shifters and the numbers will light


If Windows doesn’t detect the button panel, install these drivers. Download

WINDOWS DETECTION

If windows doesn’t detect the button panel of there is a warning in the ddevice, we can do these steps.

A) Trye with other USB back plug. (2.0 or 3.0)
Don’t use with USB HUBS.
B) Devices and Printers, right click, Remove Device.
C) Devices Manager and Look for new changes in Hardware.
If windows recognizes the button panel, but buttons stop working after a few minutes, we have to this option of the Devices Manager (Control Panel, System)
And in the “USB UNIVERSAL Controller), one by one:
1 – Right click, Propertie

2 – Label “Energy Saving”
3 – Disable the option of “Allow that computer turns off the device in order to Energy Saving” in all USB devices.
4- Accept

5 – Go to Control Panel, Energy Saving, Energy Options, Advanced Configuration. And disable the USB selective sleep configuration.
6 – Accept
7 – And uninstall manually the device in Printers and Devices.


8 – Unplug it and plug it again.
In this way we will get that windows does not paralyze the function of the USB controller.


WINDOWS DOESN’T START WITH THE BUTTON PANEL PLUGGED
On some motherboards it may happen that when the computer is turned on with the panel's USB cable connected, it does not start up properly.
In this case, disconnect the button panel from the USB extension cable that goes to the computer, turn it on and once in windows, connect the button panel to the USB extension cable.

If steam doesn’t detect the steering Wheel, disable the Steam Input in properties of the game.


If random disconnections occur, there may be some kind of voltage drop from the computer's USB port. In such a case, it is recommended to use a powered USB HUB to keep the voltage constant.

Link -> https://amzn.to/3Q6g0OY
It could also be due to EMIS. (Next section)

If we use an Open Sim Wheel or similar Direct Drive Base, there may be Emis that affect the operation of any button panel, including this one.
A) It is mandatory to place an earth cable between the electronics box of our Open Sim Wheel and one of the 4 M8 holes of the servo motor. And also another termination that goes to the chassis of the cockpit if it is made of metal or aluminum.

This panel of buttons and cams already has an internal PCB (Printed Circuit Board) that isolates EMIS.
B) For more information and tips, visit this EMIS Tutorial.
C) If it still does not work, contact me through this mail carlos@simracingcoach.com

Occasionally, Z1 dashboard may not recognize some gaming devices. The solution to be able to map functions of this Software is to use the application Joy To Key, that serves to emulate characters of our keyboard, and in that way, that the Z1 detects it to us.
Vídeo Tutorial
https://www.youtube.com/watch?v=cqzfJzQ_-tU


Software Joy To Key
https://joytokey.net/en/
A conflict has been detected with the Simhub software used for LCD screens or displays.

The problem comes because this software blocks the serial ports it detects, including the USB controller of the button panel.
To solve it, these are the steps:
1) First of all, run SIMHUB as an ADMINISTRATOR.
2) In the menu Arduino/My Hardware/Single o Multiple, select the option:


SCAN ONLY SELECTED PORTS
And no mark the TEENSY USB Serial (SRC panel)
3) Or is possible next option. Select:


NEVER SCAN SELECTED PORTS
And mark the TEENSY USB Serial (SRC panel)

Either of the 2 options is valid
4) Close the Simhub Software
5) Disconnect the USB cable from Computer
6) Connect again the USB cable from Computer
7) Open the Simhub Software

8) Check the buttons in the Joystick Control Panel
9) They should work correctly

Go to the SIMHUB configuration folder and search for the file: SimHubWPF
We edit it with the notepad, and we add the serial port that detects Windows for our panel of buttons and cams in the line of ExcludedComPorts, between the quotation marks of value=””. (If you need to put several serial ports, we'll use semicolon to separate them.).

Save this file and run SIMHUB again.

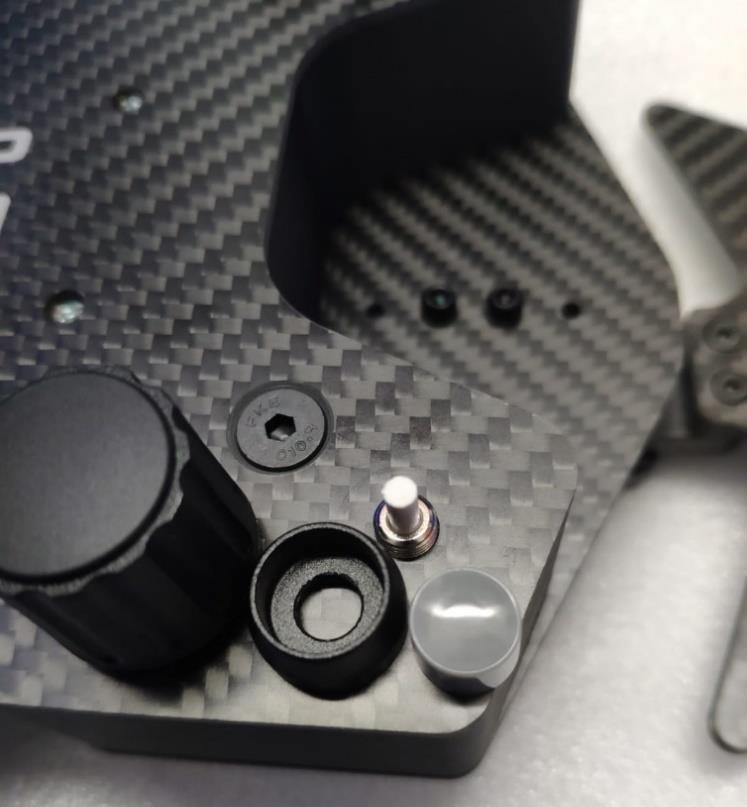

Unscrew by hand the button cover. (If it is too hard, use a pair of pliers)
Video -> https://youtube.com/clip/UgkxXDaJAOXWG99i_IUzOd864ij07b08GzWO


