

An imprint of Mixed Media Resources
19 West 21st St, Suite 601
New York, NY 10010
Editors JACOB SEIFERT, CARLA SCOTT
Creative Director IRENE LEDWITH
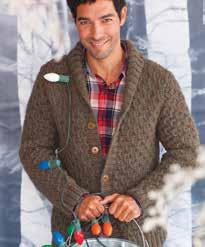
Cover Sample Knitters THERESE CHYNOWETH, MELISSA DEHNCKE MCGILL, SOPHIA MINAKAIS SANDI PROSSER
Photography JACK DEUTSCH
Cover Hair and Makeup CYNTHIA ADAMS
Publisher CAROLINE KILMER
President ART JOINNIDES
Chairman JAY STEIN
Copyright © 2024 by Mixed Media Resources
All rights reserved. No part of this publication may be reproduced or used in any form or by any means—graphic, electronic, or mechanical, including photocopying, recording, or information storage-and-retrieval systems—without written permission of the publisher.
The written instructions, photographs, designs, projects, and patterns are intended for the personal, noncommercial use of the retail purchaser and are under federal copyright laws; they are not to be reproduced in any form for commercial use. Permission is granted to photocopy patterns for the personal use of the retail purchaser.
Items created from patterns in this book are for personal use only and are not intended for commercial resale.
A catalog record for this book is available from the Library of Congress.
Manufactured in China
1 3 5 7 9 10 8 6 4 2
First Edition


Bunny Buddy Blanket
Stronger Together
Gridded Blanket
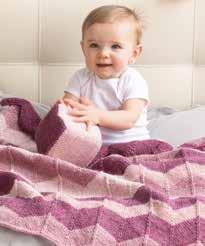
Chevron Pop Blanket
Purl Stitch Snowflake
Turtle Lace Blanket
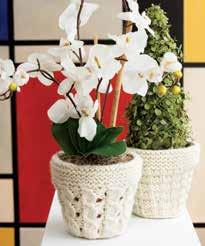
Garden Patch Lapghan
Garter Gingham Blanket
Candy
Shifting
HOME & OTHER
Garter
TECHNIQUES & HOW-TO

Have
you ever looked at a pattern, would have loved to proudly declare “I
knitted
this,”
but just didn't feel like
you had
what it took
to actually make it? You are not alone. Many knitters turn away from patterns they adore because they feel their knitting skills are inadequate. Every knitter has felt that way at one point or another. But this book is here to tell you that you can knit it all.
Within these pages, you will find 65 patterns from Knit Simple magazine, a publication known for producing patterns that are fun to knit, beautiful, and accessible to newer knitters. You don’t have to be stuck making an endless array of garter stitch scarves (unless that's a real passion for you, in which case, go for it!). You can knit mittens. You can knit hats. You can knit stunning shawls. You can knit cardigans and sweaters. You can knit it all! Many easy or beginnerfriendly patterns might look boring or be boring to knit, but the patterns in this collection were carefully selected to avoid those issues. Who says you can't knit lace? Start with a simple lace pattern in a pair of fingerless mitts. Who says you can't make a blanket? Knit one with an easy ridged chevron pattern and bright colors so the stitches fly by and are beautiful at the same time. What about sweaters and cardigans? Those chosen for this book build off the skills you already have by presenting a variety of constructions that will keep you engaged and get you
thinking about knitting in ways you might not have ever imagined. Are these patterns basic or boring? No. Can you really knit them all? Yes.
More than just patterns, this book explains many of the techniques beginners (and beyond!) might find intimidating. Seaming, short-rows, Kitchener stitch, much more are all explained so you can successfully
complete them. Sidebars throughout the book offer extra tips and ideas for personalizing your projects (and, yes, you can do that, too!).
When it comes to knitting, the best thing you can do is take the pressure off yourself. Don't worry about what you can't do. Focus on what you want to do. Have patience with yourself. Take your time. If you have to, rip out your work and try again. Knitting isn't a race. It's a journey. It's a talent you will develop one stitch, one technique, one project at a time for the rest of your life. The possibilities are truly endless with knitting. There's something magical about crafting things with your own two hands. You can express yourself creatively while also being productive, finding yourself with a tangible item as proof of your time and effort. So, don't hold yourself back. You can—and will—knit it all!
This book contains many beautiful patterns that you will enjoy making, but before you begin there are some things to consider. This section will help you understand how to make the best use of this book.
Rather than listing the exact yarn that was used to make the samples you see in the photographs in this book, the information about each original yarn has been included. This enables you to find similar yarns, possibly from your stash, to use. When it comes to selecting yarns, some things to consider here are:
The Standard Yarn Weight System (seen here) was created by the Craft Yarn Council to help standardize how people refer to various yarn weights, which currently range from 0 (lace) to 7 (jumbo). Every yarn for every pattern of this book includes a classification, appearing as an icon that looks like a skein of yarn with a number inside of it. Referring to these will give you a general idea of what weight (type) of yarn you will need for a pattern. Many yarn companies label their yarns according to these classifications, so you will more often than not find those same skein icons on yarn labels.
Even if a yarn has a Craft Yarn Council weight classification, there is more to consider. Try your best to match the listed skein weight (often 1¾ or 3½ ounces) and length (yards/meters) of the original yarn to the yarn you will use.
Yarn Weight Symbol & Categor y
Categories of yarn, gauge ranges, and recommended needle and hook sizes
Type of Yarns in Categor y Fingering 10-count crochet thread Sock, Fingering, Baby
Knit Gauge Range* in Stockinette Stitch to 4 inches
For example, if two different skeins of yarn both weigh 3½ ounces, but one skein has 300 yards and the other has 220 yards, the thicknesses of these two yarns will be quite different and affect your gauge, drape, and the feel of the knitted fabric. While some variance between the yarn listed in the pattern and the yarn you use is okay, you should match the skein weight and length as closely as possible.
Recommended Needle in Metric Size Range
Recommended Needle U.S. Size Range
Crochet Gauge* Ranges in Single Crochet to 4 inch
Yarn is made out of many different fibers and materials, and the composition of the yarn will affect the fabric you create and the final project. For example, a cotton yarn will drape and wear much differently than a wool blend. It is best to match the fiber of the yarn you use with the original yarn.
Recommended Hook in Metric Size Range
Recommended Hook U.S. Size Range
Gauge is listed for every pattern in this book. Refer to that and work the listed stitch pattern to a size that is a couple of inches/centimeters larger than the listed measurement, block the swatch (if blocking is listed in the finishing section of the pattern), and then see if you have the same number of stitches and rows.
• If you have too many stitches or rows, your stitches are too small. Knit a new swatch with a larger needle size.
• If you have too few stitches or rows, your stitches are too big. Knit a new swatch with a smaller needle size.
You will find many sidebars throughout this book. These include tips, tricks, suggestions on how you can customize projects, and more. This information is not essential to working the patterns, but we do recommend you read a pattern's sidebar before starting it.
All of the abbreviations used in this book can be found inside the front cover's flap. If needed, leave the flap folded outward as a handy reference while you knit.
* GUIDELINES ONLY: The above reflect the most commonly used gauges and needle or hook sizes for specific yarn categories.
** Lace weight yarns are usually knitted or crocheted on larger needles and hooks to create lacy, openwork patterns. Accordingly, a gauge range is difficult to determine. Always follow the gauge stated in your pattern.
*** Steel crochet hooks are sized differently from regular hooks—the higher the number, the smaller the hook, which is the reverse of regular hook sizing
This Standards & Guidelines booklet and downloadable symbol artwork are available at:
Once you have a suitable yarn, make sure to knit a gauge swatch. Even if gauge is not essential for the project, such as a blanket or scarf, making a gauge swatch allows you to see the density of the fabric, how it drapes, and how it feels. It's always better to spend a little extra time upfront to make sure you're happy with the knitted fabric than to realize you're unhappy with it after many hours of knitting. If you are not familiar with what gauge is, gauge is the number of stitches and rows you should have within a given measurement (often 4"/10cm square) when knitting a specific stitch pattern.
While most knitters keep a measuring tape handy, we have printed a ruler graphic on the inside of the back cover's flap. If needed, you can use it to measure a gauge swatch or the progress you've made in your overall project.
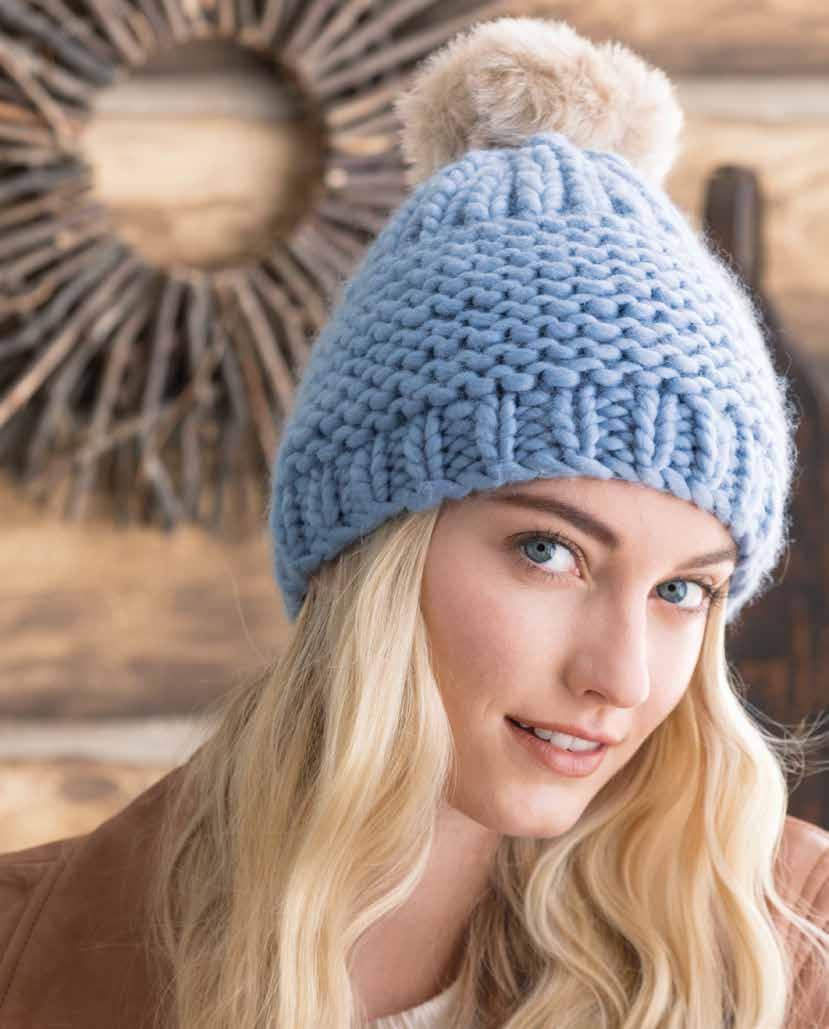
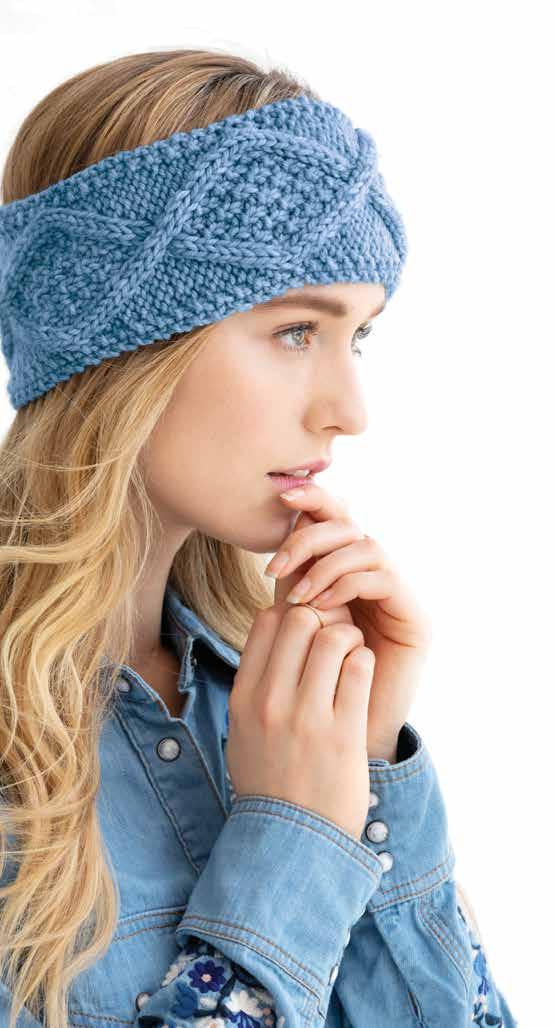
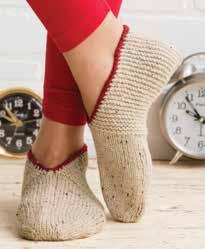
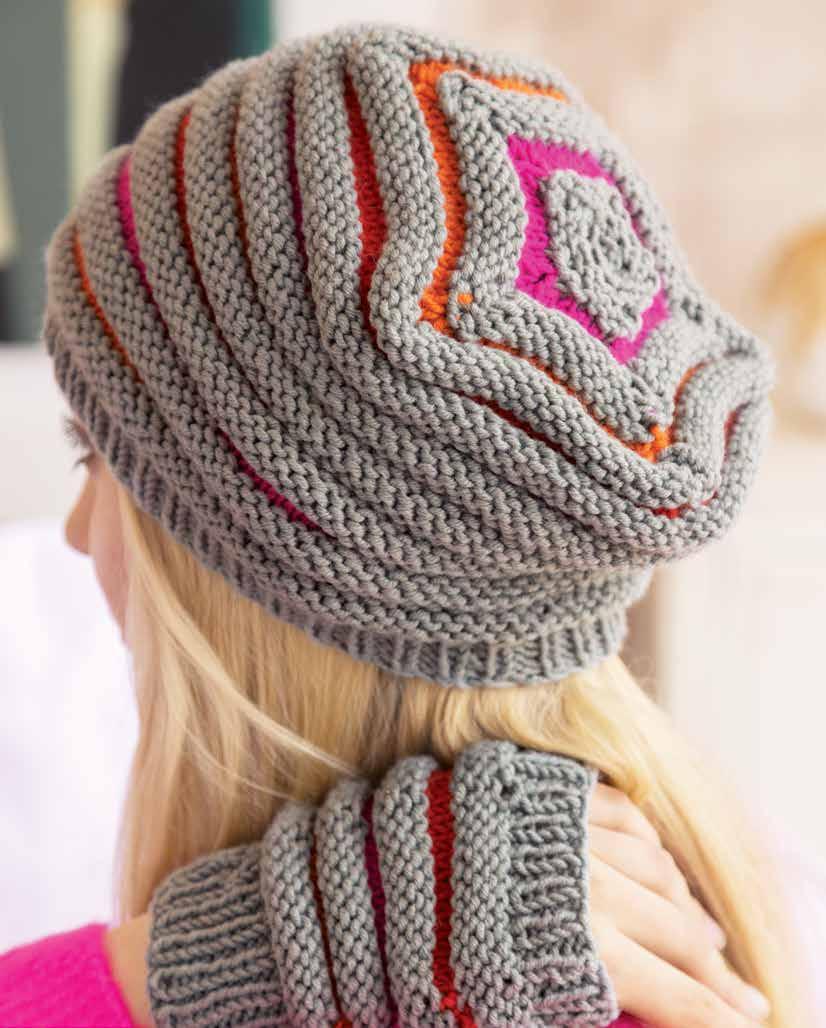
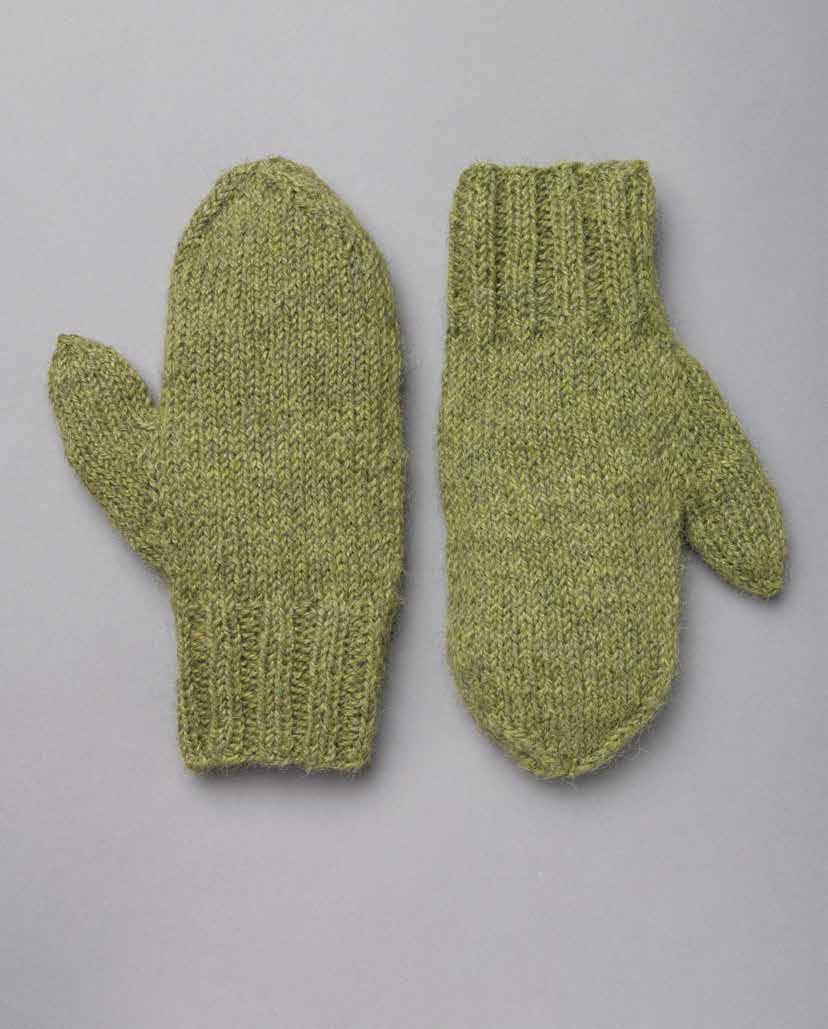
Because this hat is knit in the round, the garter stitch pattern is worked as knit one round, purl one round
Mattress stitch is nearly invisible if worked on the right side Given that the brim of this hat is folded up so the wrong side of it shows, seam the brim on the wrong side and the rest of the hat on the right side .
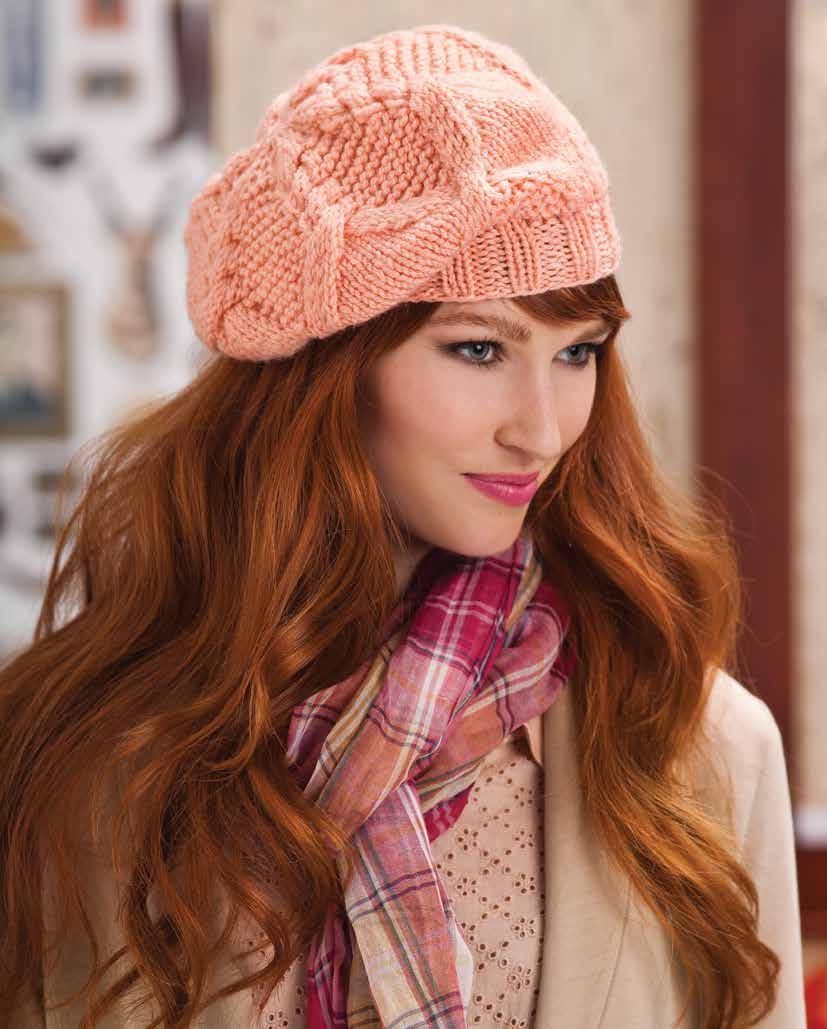
For hats with simple stitch patterns worked over a small number of rows/rounds, adjust the fit by working more or fewer repeats than stated . Make this hat more snug by working one 8-round repeat less before shaping the crown .
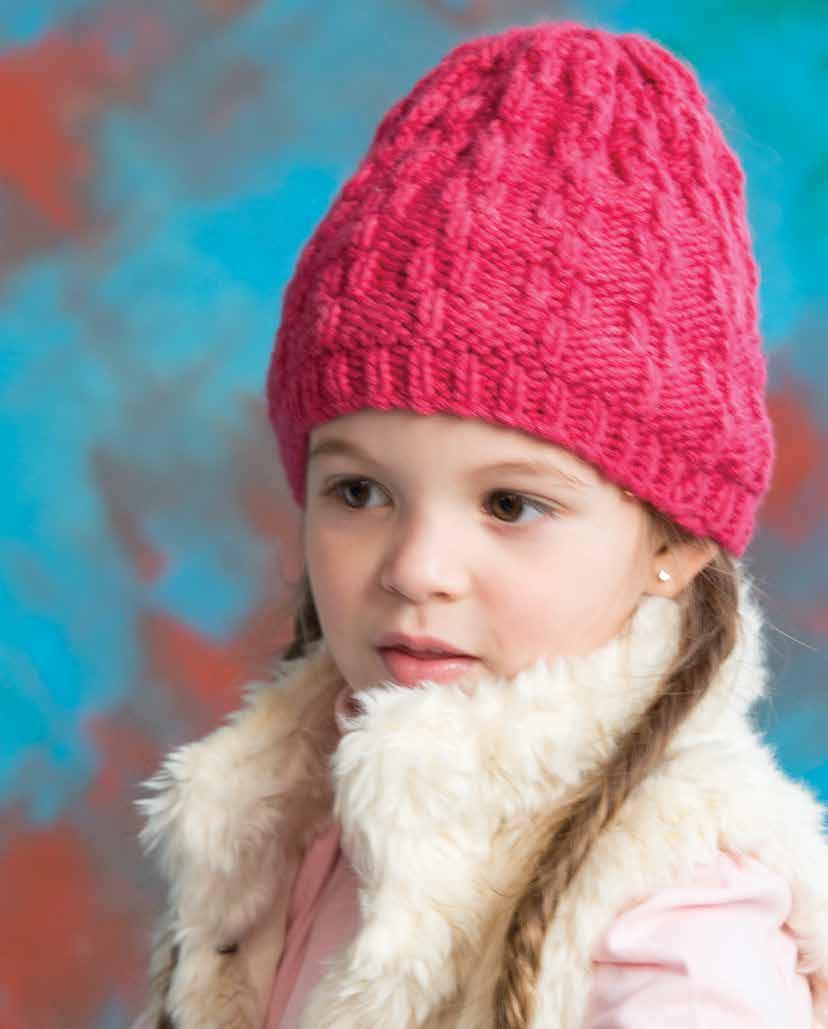
To work a stitch through the back loop, knit or purl into the loop that is on the far side of the needle This twists the stitch and creates a beautiful, compact texture
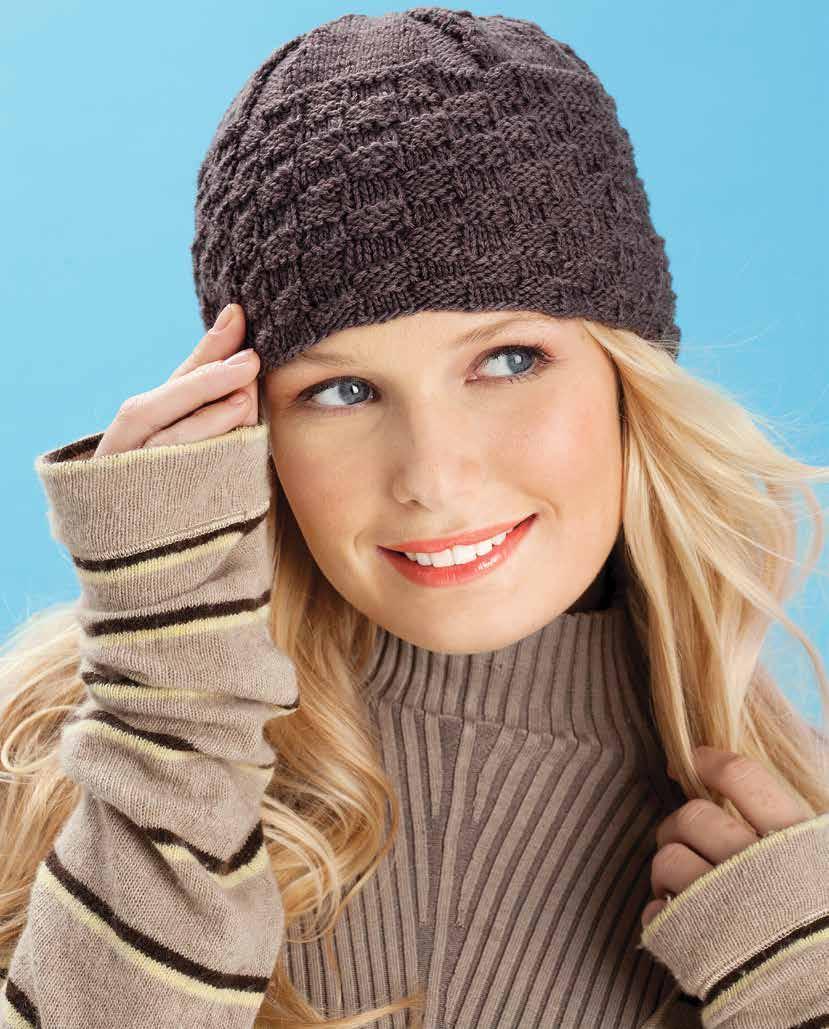
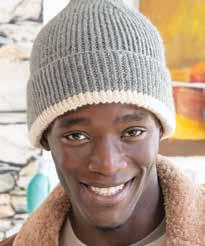
Not every pattern needs total consistency throughout The body and crown of this hat are worked in different stitch patterns to create a nice contrast
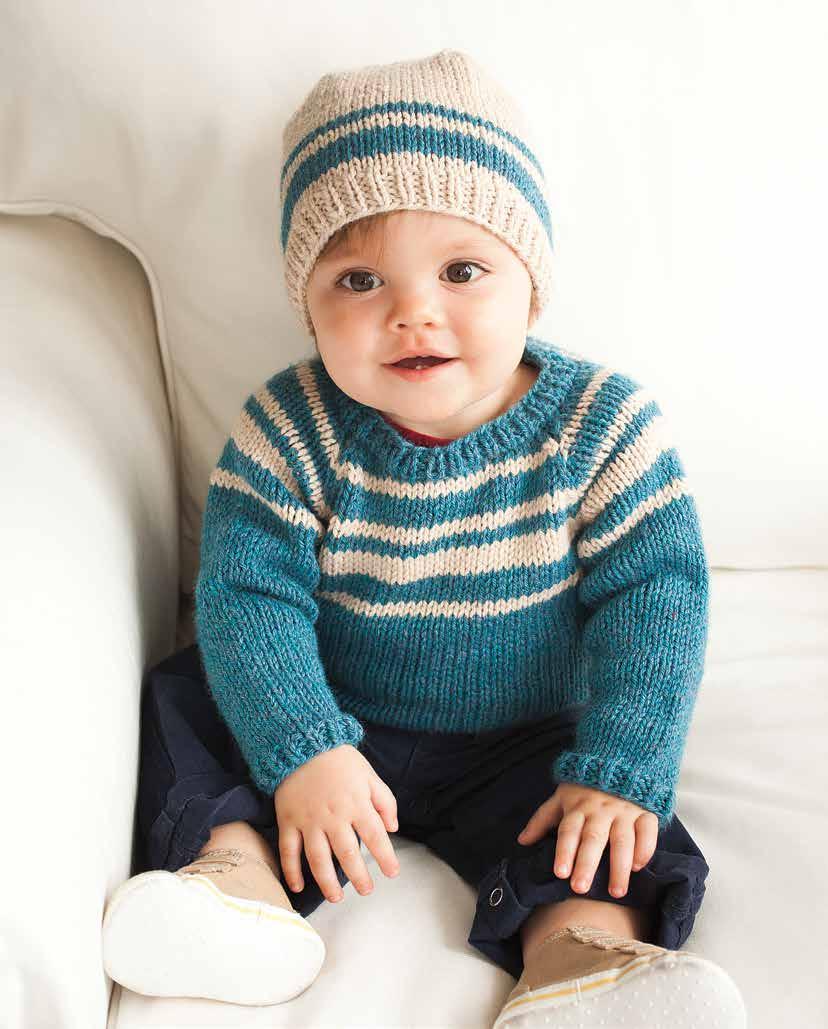
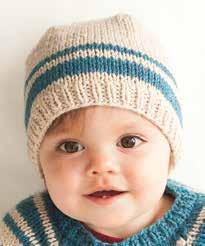
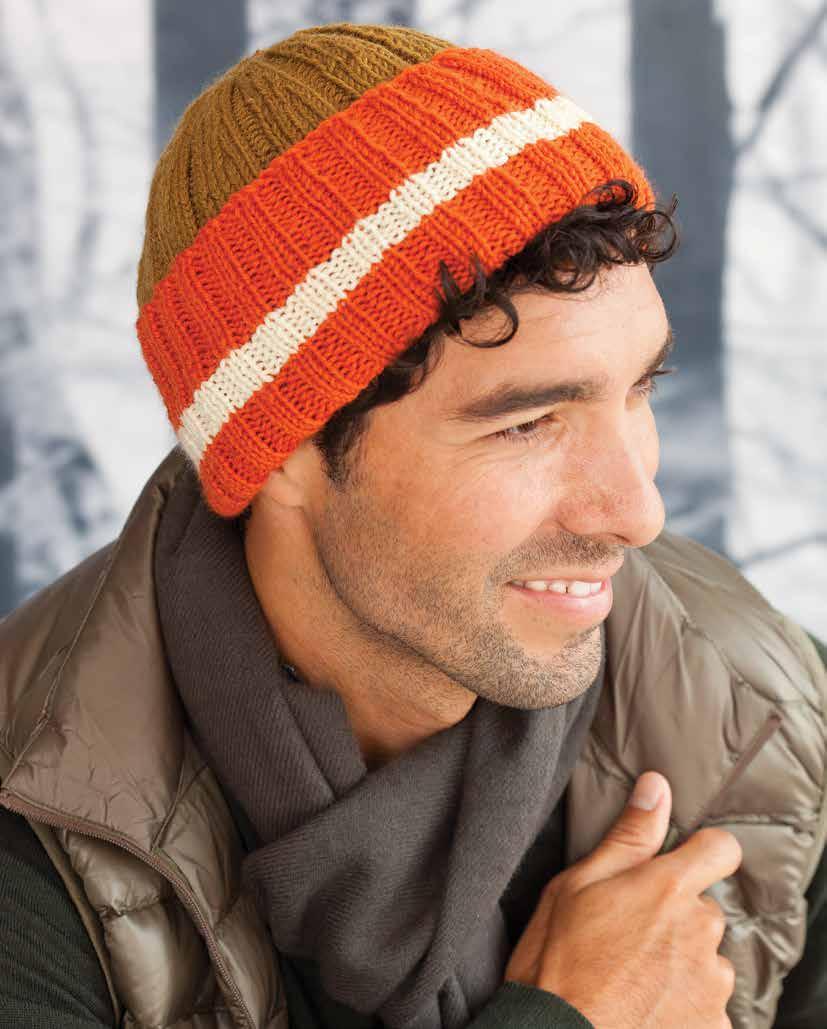
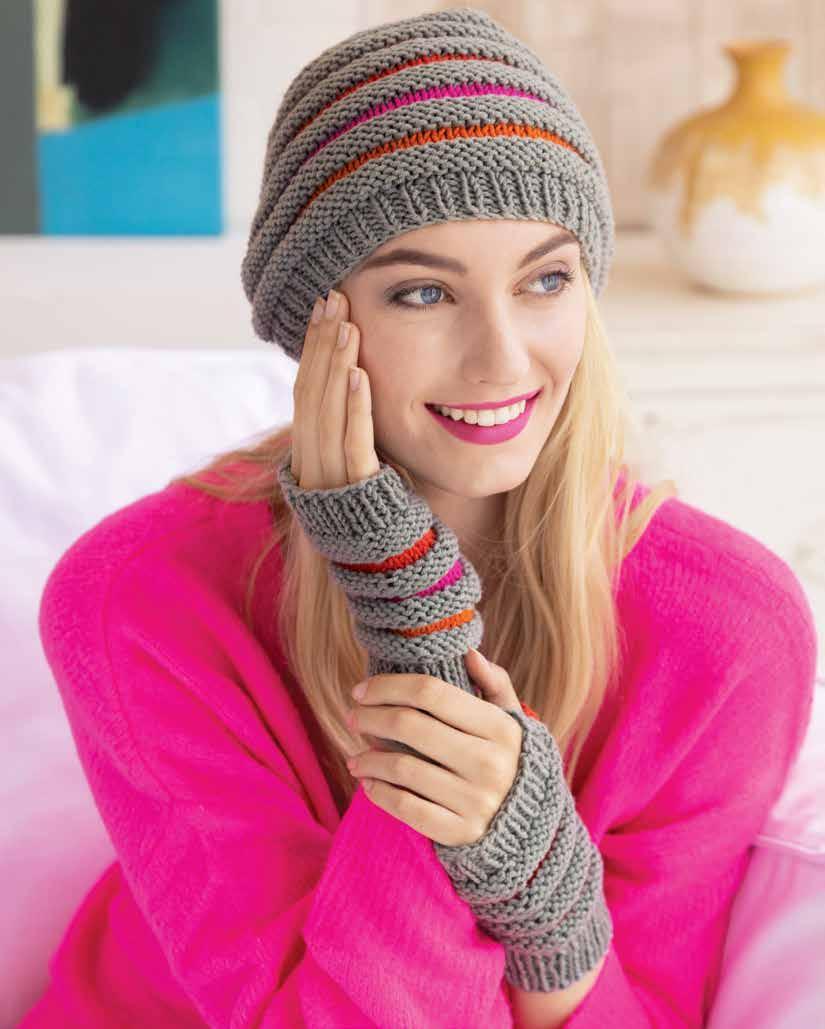
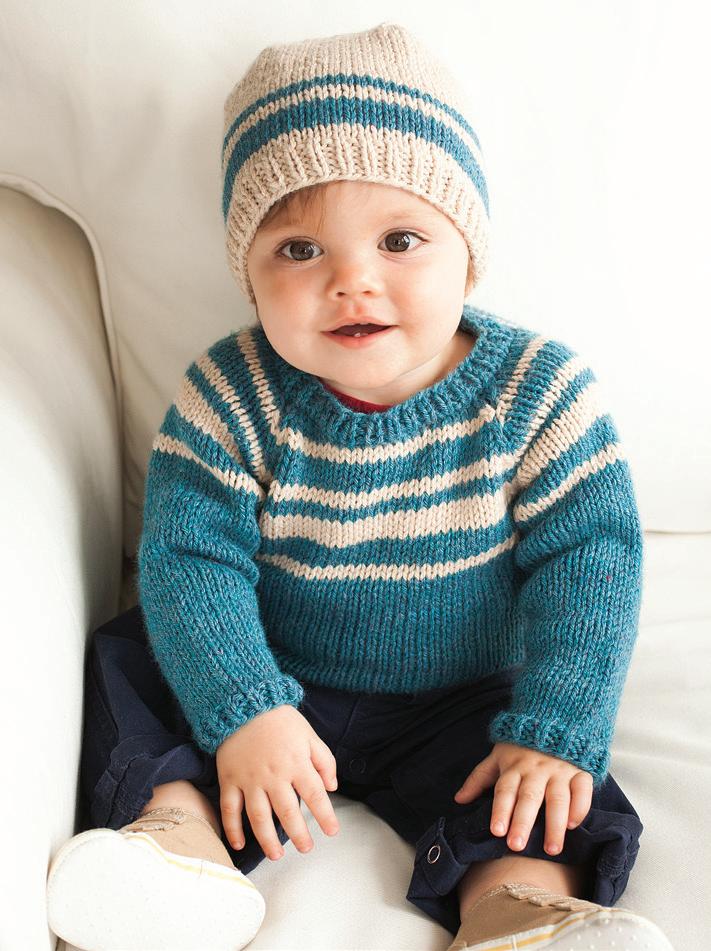
For simple striped projects, such as this hat, you can easily change the stripe pattern to match your preferences Add or remove stripes, adjust their widths, or even add a third color
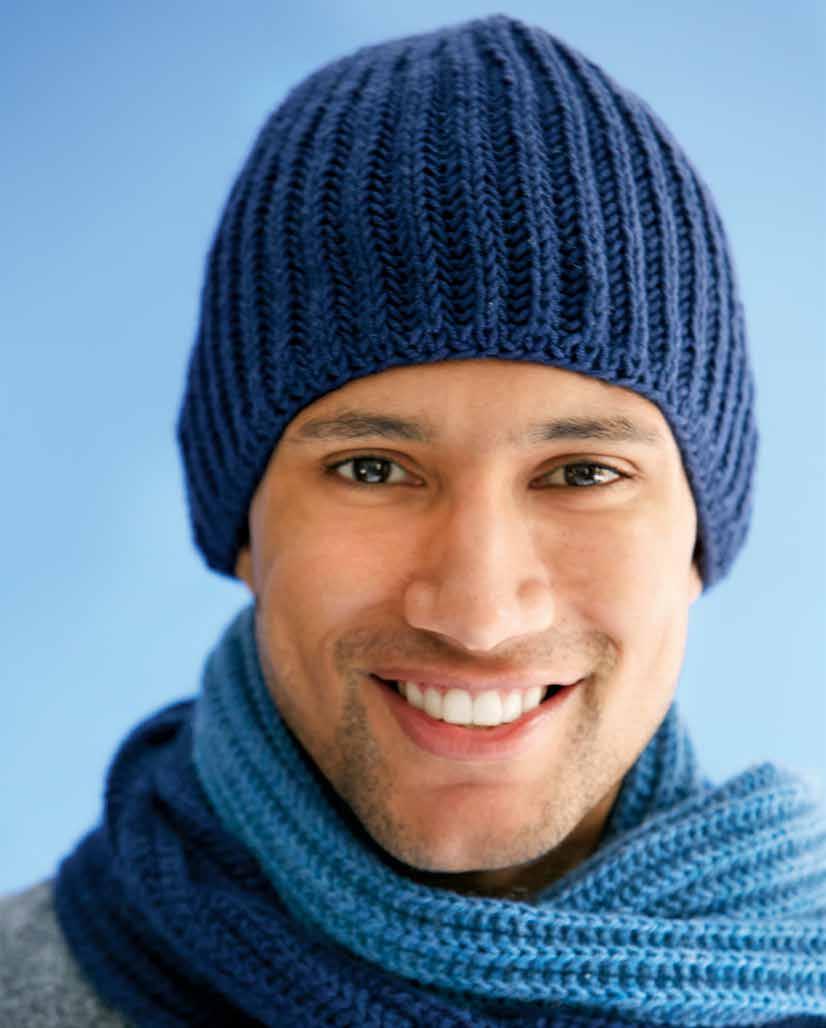
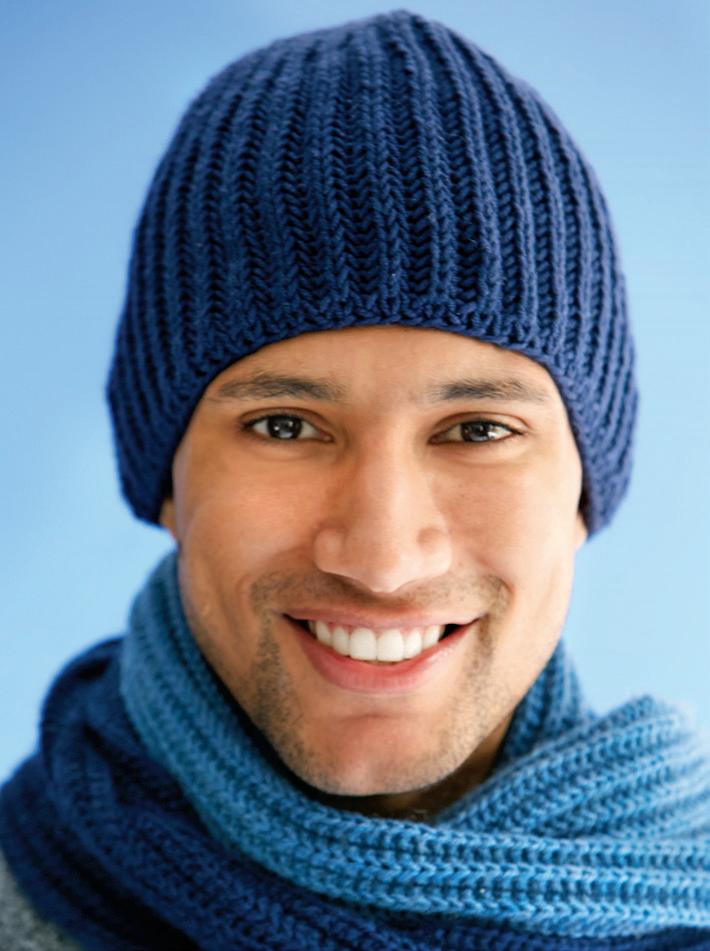
If you've ever wanted to try brioche knitting, this is the perfect way to get started Worked in the round with just one color and simple decreases, this hat will help you get the basics down .
Placing a stitch marker between every repeat can help you stay on track . If you reach a marker and haven't completed the full repeat, you can backtrack and fix your mistake
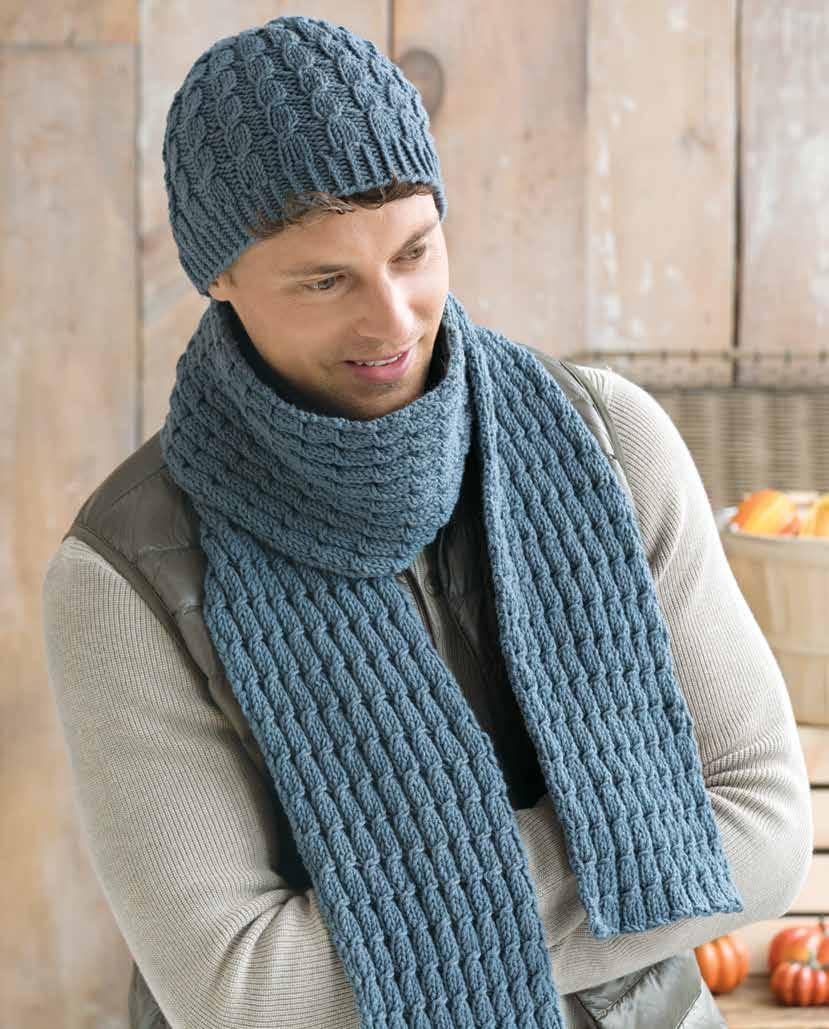
Working a pattern in rows will be different than working it in the round . This hat and scarf set is a prime example Take care to work the correct version of the stitch pattern for each item
When working in the round on double-pointed needles and the round starts at the beginning of a needle, place a removable (locking) stitch marker onto the first stitch of the round You can either leave the marker there or move it up every few rounds
With smaller dpn and A, cast on 34 sts with 12 sts on dpn 1 and 11 sts each on dpn 2 and dpn 3. Join, taking care not to twist sts, and pm for beg of rnd.
Rnd 1 *K1, p1; rep from * around. Rep rnd 1 for k1, p1 rib for 10 rnds more.
Change to larger dpn.
Dec rnd 1 With A, on dpn 1, k10, k2tog; on dpn 2 and dpn 3, knit—33 sts.
Rnds 2–5 With A, purl.
Rnds 6–8 With B, knit.
Rnd 9 With A, knit.
Rnds 10–13 With A, purl.
Rnds 14 and 15 With C, knit.
Inc rnd 16 With C, on dpn 1, k4, pm, M1, k3, M1, pm, k4; on dpn 2 and dpn 3, knit.
Rnd 17 With A, knit.
Inc rnd 18 With A, on dpn 1, p4, sm, M1 p-st, p to 1 st before marker, M1 p-st, sm, p4; on dpn 2 and dpn 3, purl.
Rnd 19 With A, purl.
Inc rnd 20 With A, rep inc rnd 18.
Rnd 21 With A, purl.
Rnd 22 With D, knit.
Inc rnd 23 With D, on dpn 1, k4, sm, M1, k to marker, M1, sm, k4; on dpn 2 and dpn 3, knit—11 sts between thumb markers.
Rnd 24 With D, k5, sl next 9 sts on scrap yarn for thumb, turn to WS, cast on 3 sts, turn to RS, k to end of rnd—35 sts.
Next rnd With A, knit.
Change to smaller dpn.
Dec rnd With A, k2tog, p1, *k1, p1; rep from * around—34 sts.
Cont in k1, p1 rib for 4 rnds more. Bind off in rib.
THUMB
Return to 9 sts on hold for thumb and with D, pick up and k 5 sts in the 3 caston sts and divide these 14 sts over 3 dpn.
Work in rnds of k1, p1 rib for 2 rnds. Bind off in rib.
Cast on as for left hand, only with 11 sts on dpn 1 and 2 and 12 sts on dpn 3.
Work same as for left hand to shape thumb gusset.
SHAPE THUMB GUSSET
Inc rnd 16 With C, on dpn 1 and dpn 2, knit; on dpn 3, k4, pm, M1, k3, M1, pm, k4
Work rem of right hand same as for left hand but with all shaping for thumb on dpn 3 instead of dpn 1.
Weave in ends. ■
Picking up stitches may tug on the fabric in ways that create unsightly gaps If a gap appears, undo the stitch causing it and pick up again in a slightly different area .
each needle).
Knit 1 rnd.
Next rnd (dec) K1, ssk, k to last 3 sts, k2tog, k1—16 sts.
Work even in St st until thumb measures 1½"/4cm, end with a WS row.
Next rnd [K2tog] 8 times—8 sts. Next rnd Knit.
Next rnd [K2tog] 4 times—4 sts.
Cut yarn and pull through rem sts, draw up and secure. Use tail to sew thumb seam. Sew side seam. Block lightly to measurements.
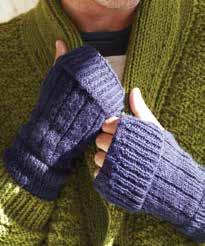
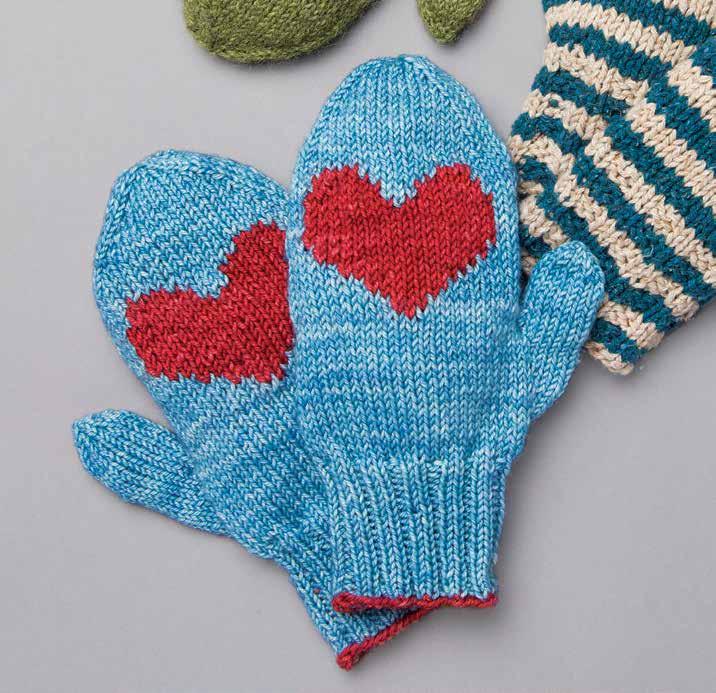
Work as for right mitten to thumb gusset
BEG THUMB GUSSET
Rnd 1 Knit.
Rnd 2 K22, pm, M1R, pm, k11, M1R, k11—46 sts.
Rnd 3 Knit.
Rnd 4 Work to marker, sl marker, M1R, work to marker,M1L, sl marker, work to end—2 sts inc’d.
Rnds 5 and 6 Knit.
Rep rnds 4–6 five times more—58 sts, 13
between markers.
Next rnd K to marker, place 13 sts for thumb on st holder or scrap yarn, pm, k to end—45 sts.
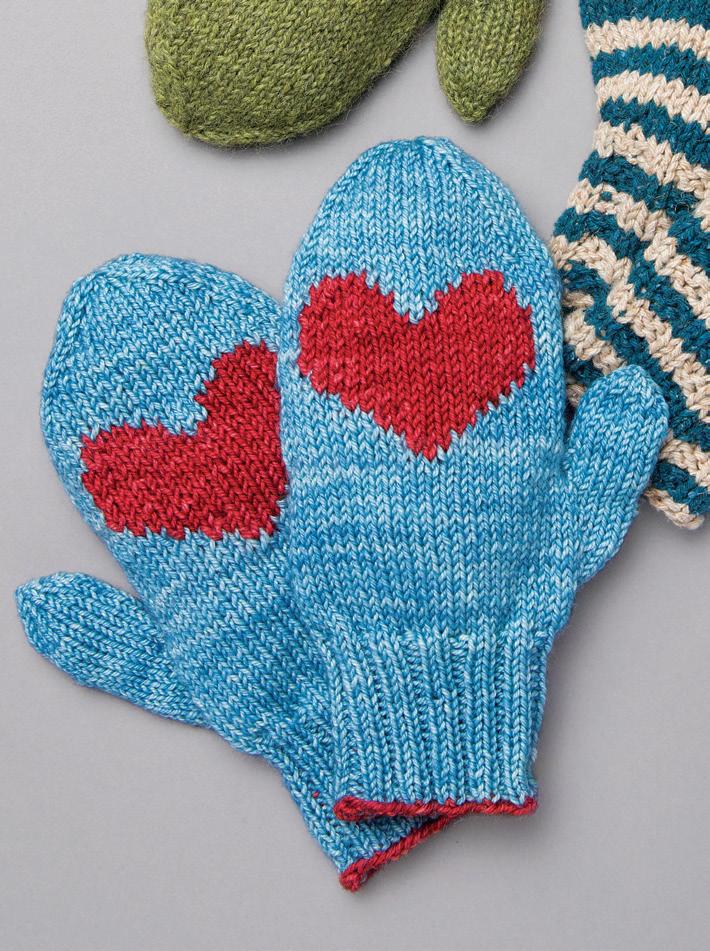
BEG CHART
Note Chart is worked in St st. Change to straight needles and work next 18 rows back and forth as foll: Row 1 K to marker, sl marker, work chart over 23 sts, using 2 separate balls of A. Complete as for right mitten. ■
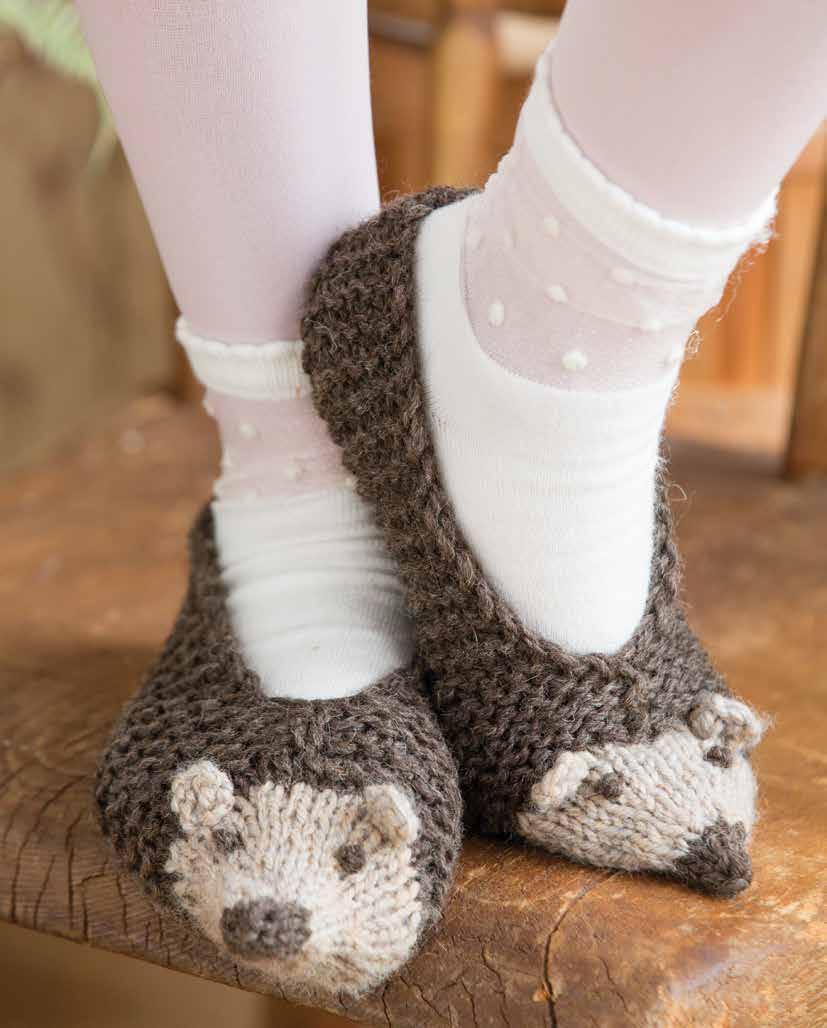
Sometimes adding a few extra pieces or embroidery stitches makes all the difference . Here, the hedgehog really comes to life with those simple extra details .
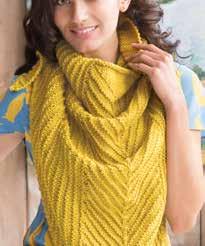
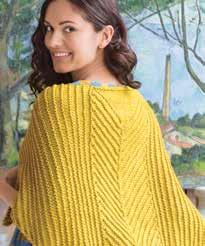
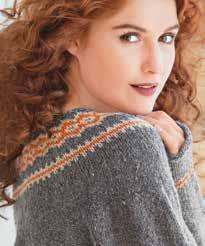
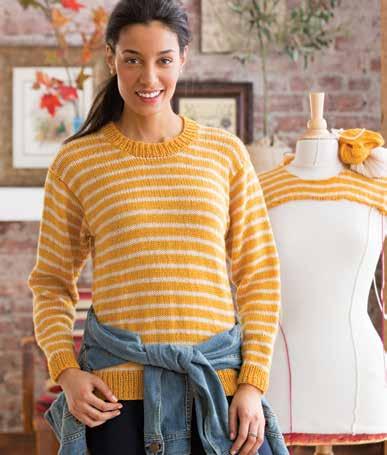
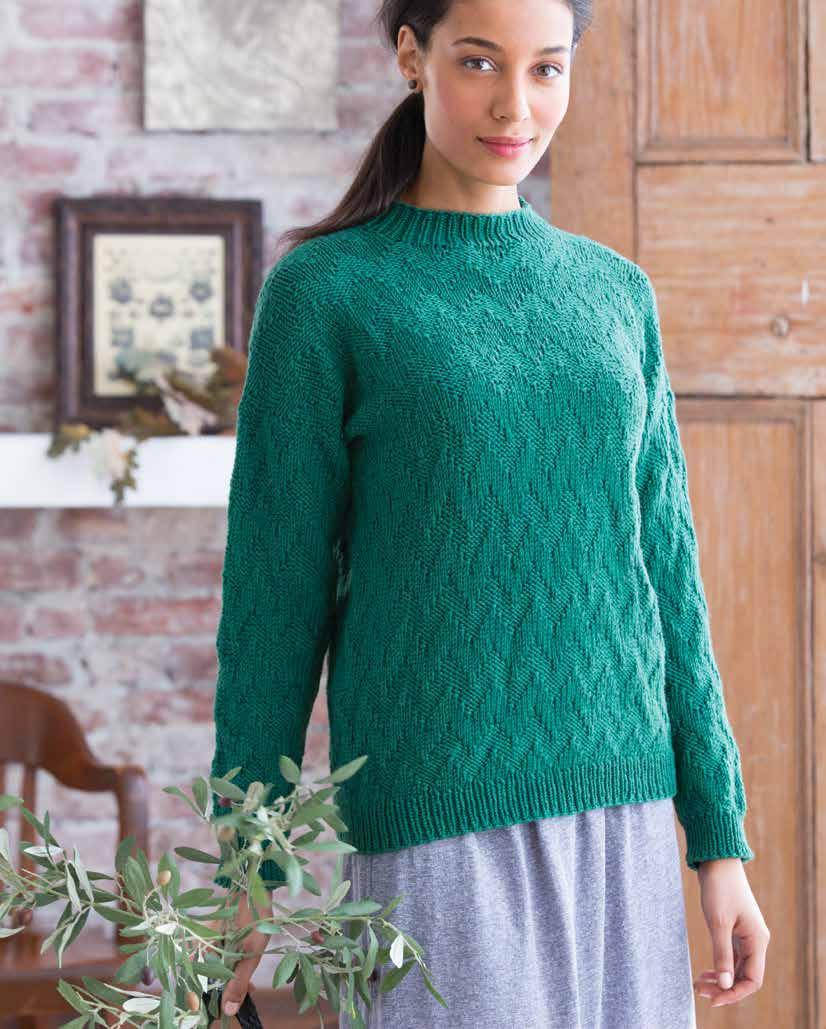
DESIGNED BY Yelena M. Dasher
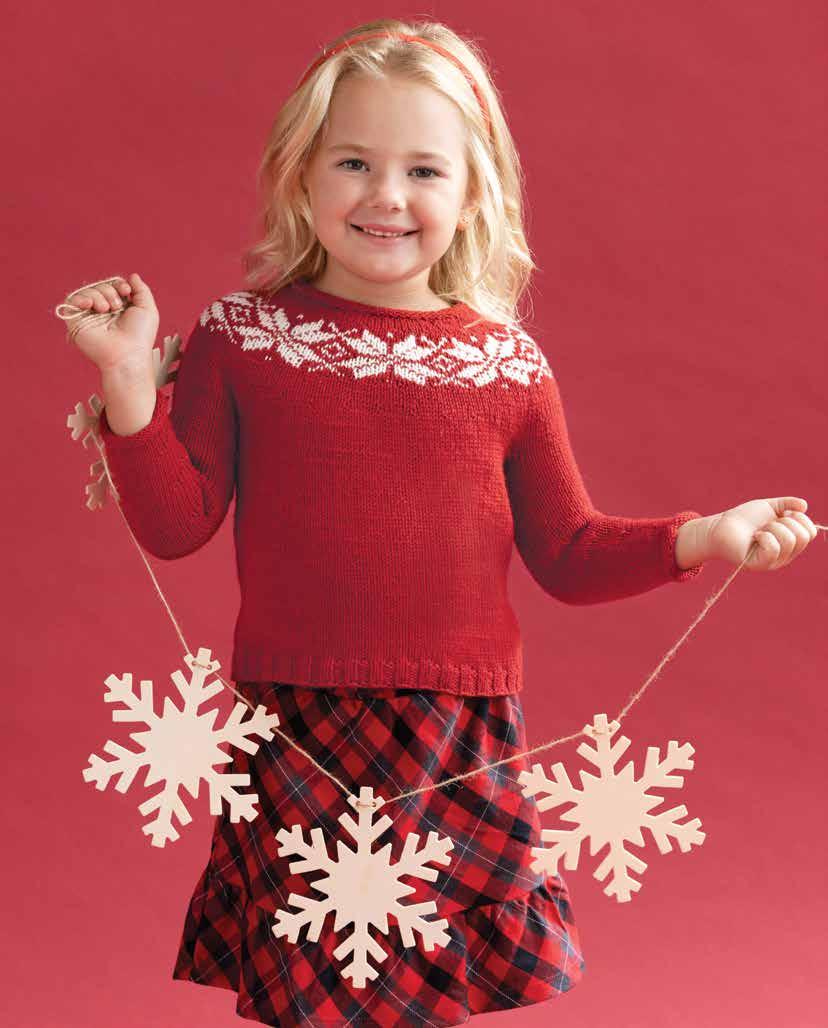
Knit and purl stitches create the textured chevron pattern in this top-down sweater.
Back
With larger needles, cast on 33 (37, 41, 41) sts. Knit 1 row on WS.
Row 1 (RS) Working row 1 of chart, beg with st 1 (5, 1, 1), work to rep line, then work 8-st rep 3 (3, 4, 4) times more, end with st 9.
Rows 2–7 Work chevron pat foll chart as established.
At end of row 7 (RS), turn work and cast on 23 (23, 23, 31) sts for neck. Lay piece aside.
With larger needles, cast on 33 (37, 41, 41) sts. Knit 1 row on WS.
Row 1 (RS) Working row 1 of chart, beg with st 1 and work 8-st rep for 4 (4, 5, 5) reps, then work sts 1–4 for 0 (1, 0, 0) time(s) more, end with st 9 (5, 9, 9).
Rows 2–7 Work chevron pat foll chart as established.
Joining row (WS) Work as established on 33 (37, 41, 41) sts of left back shoulder, cont in pat across 23 (23, 23, 31) cast-on sts for neck, work rem sts in established pat—89 (97, 105, 113) sts.
Cont in chevron pat until armhole measures 6¾ (7½, 8½, 8¾)"/17 (19, 21.5, 22)cm. Place sts on scrap yarn.
With larger needle and from RS, pick up and k 33 (37, 41, 41) sts from cast-on edge of right back shoulder.
Row 2 (WS) Beg with st 9 of chart row 2, work 8-st rep for 4 (4, 5, 5) reps, end with st 1 (5, 1, 1).
Rows 3–8 Work even foll chart.
Inc row 9 (RS) Work pat st to last st, M1 (k or p to inc into pat), k1.
Rep inc row (for neck) every RS row 3 times more—37 (41, 45, 45) sts. Work row 16 of chart. Place sts on scrap yarn.
With larger needles and from RS, pick up and k 33 (37, 41, 41) sts from cast-on edge of left back shoulder.
Row 2 (WS) Beg with st 1 of chart row 2, work 8-st rep for 4 (4, 5, 5) reps, then work sts 1–4 for 0 (1, 0, 0) times more, end with st 9 (5, 9, 9).
Rows 3–8 Work even foll chart.
Inc row 9 (RS) K1, M1 (k or p to inc into pat), work to end.
Rep inc row (for neck) every RS row 3 times more—37 (41, 45, 45) sts. Work row 16 of chart.
Next row (RS) Work row 1 of chart over right shoulder sts, cast on 15 (15, 15, 23) sts for center front neck, work across left shoulder sts in pat—89 (97, 105, 113) sts. Work even in pat until there are same number of rows as on back to armhole.
Intermediate SIZES
Small (Medium, Large, X-Large). Shown in size Small.
MEASUREMENTS
Bust 35½ (39, 42, 45¼)"/90 (99, 106.5, 115)cm
Length 23½ (24¼, 25¼, 25½)"/59.5 (61.5, 64, 65)cm
Upper arm 13¼ (14¾, 16½, 18)"/33.5 (37.5, 42, 45.5)cm
MATERIALS
• 3½oz/100g and 191yd/175m skein of any superwash wool 6 (7, 8, 9) skeins in Green
• One pair each sizes 6 and 8 (4 and 5mm) needles, or size to obtain gauge
• One each size 6 and 8 (4 and 5mm) circular needles, each 29"/74cm long
• One size 6 (4mm) circular needle, 16"/40cm long
• One set (5) each size 6 and 8 (4 and 5mm) double-pointed needles (dpn)
• Stitch markers
• Stitch holders
• Scrap yarn
GAUGE
20 sts and 28 rows/rnds to 4"/10cm over chart using larger needles. TAKE TIME TO CHECK YOUR GAUGE.
NOTE
Pullover is worked by beginning with the shoulder edge, then back and front are worked separately to the armhole. Then, pieces are joined to work in rounds for the body and the sleeves are picked up along the armhole edges and worked to the cuffs.
4¾ (4¾, 4¾, 6¼)" 6¾ (7½, 8¼, 8¼)" 16 (16, 16½, 16½)"
FRONT & BACK SLEEVE 35½ (39, 42, 45¼)"
Direction of work
Note When working body in rounds, cont to work in pat as established on each piece, that is in two identical pieces matched at underarm edges (not a continuous pat). Work each row of chart from right to left.
Next rnd Work chart as established across back sts, then work chart as established across front sts, pm, and join to work in rnds—178 (194, 210, 226) sts. Work even until piece measures 15"/38cm from beg.
Change to smaller circular needle. Next 12 rnds *K1, p1; rep from * around. Bind off using larger needle.
With larger dpn, pick up and k 66 (74, 82, 90) sts evenly around armhole edge, dividing sts over 4 dpn with 16 (18, 20, 22) sts on needles 1 and 3 and 17 (19, 21, 23) sts on needles 2 and 4. Join to work in rnds.
Rnd 1 K1 (selvage st), work 8-st rep for 7 (8, 9, 10) reps, work sts 9–17.
Work even over chart as established for 2"/5cm.
Dec rnd K1, dec 1 st (k2tog when first st is a k st or p2tog when first st is a p st), work pat to last 4 sts, dec 1 st (by SKP for a k st or p2tog for a p st), work 1 st, k1. Rep dec rnd every 8th rnd 8 (9, 11, 12) times more—48 (54, 58, 64) sts.
Work even until sleeve measures 16 (16, 16½, 16½)"/40.5 (40.5, 42, 42)cm from beg. Change to smaller dpn and work in k1, p1 rib for 12 rnds.
Bind off using larger needle.
NECKBAND
With RS facing and shorter circular needle, pick up and k 70 (70, 70, 86) sts around neck edge. Join to work in rnds and pm for beg of rnd. Work in k1, p1 rib for 12 rnds. Bind off using larger needle.
Weave in ends. Lightly block to measurements on WS of piece. ■
When working the increases for the front neck, increase by making a purl or knit stitch as you would need to continue the pattern in that given row
To tack something in place means to sew it down using loose stitches of your choice
Just make sure the stitches do not show through on the right side of your work .
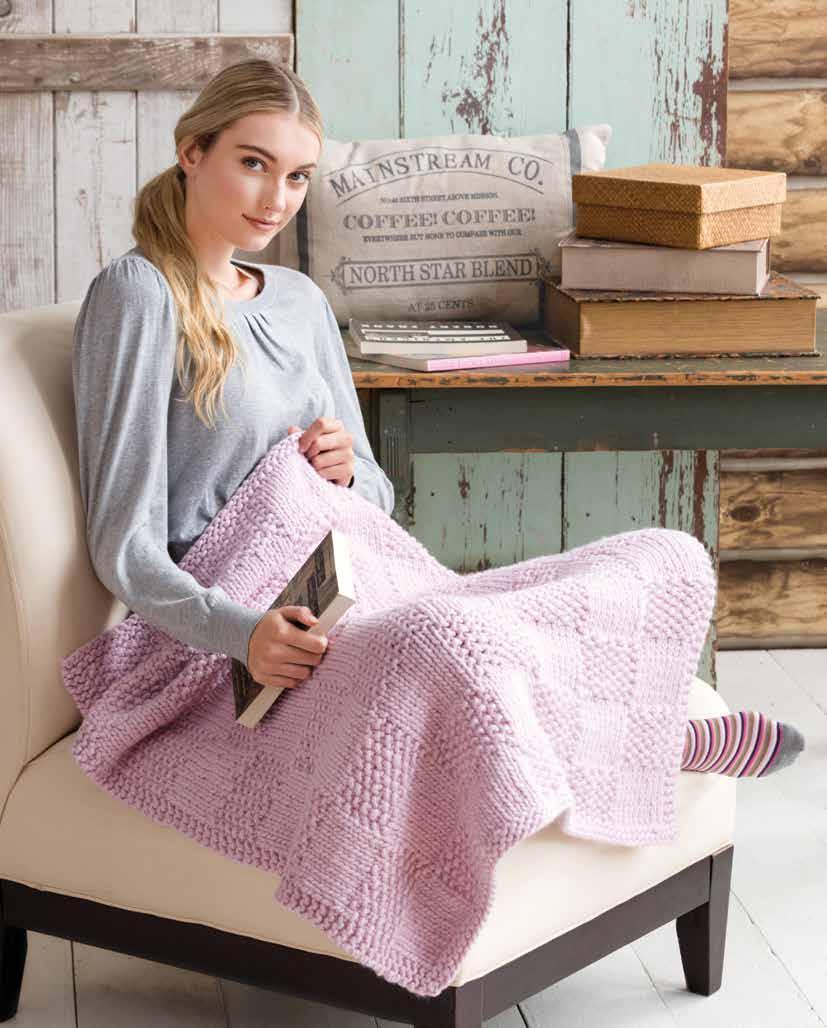
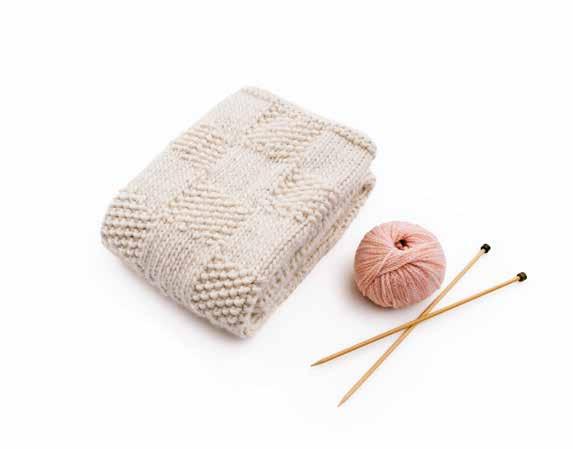
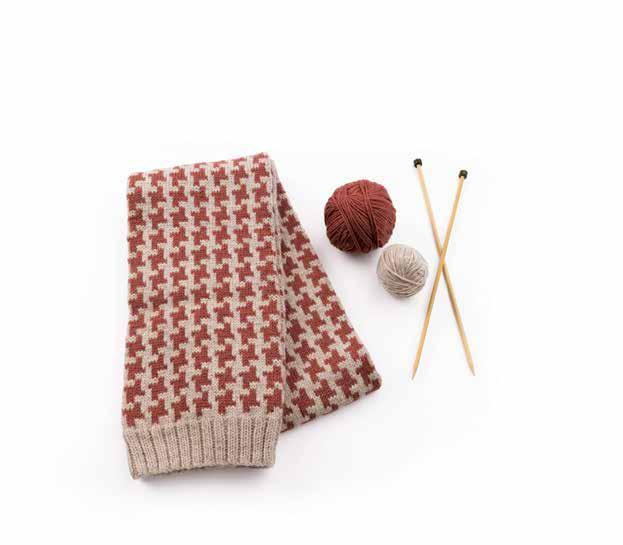
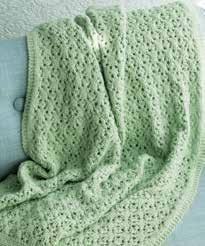
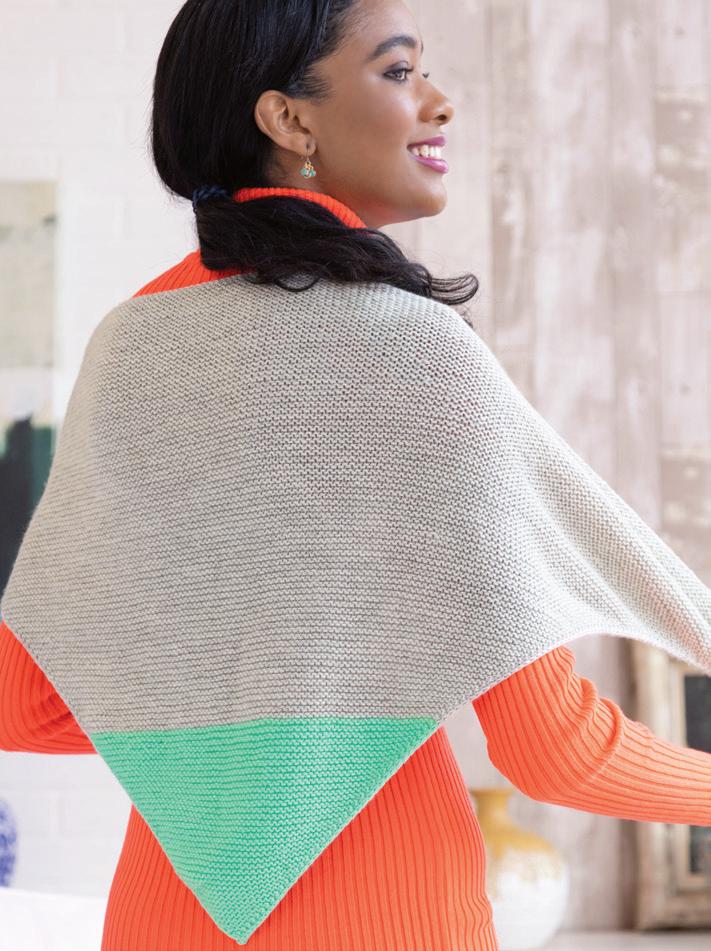
For simple patterns with simple repeats, like this blanket, adjust the final size by adding or removing stitch repeats (here, it is 18 stitches) and row repeats (here, it is 24 rows). Just make sure to buy plenty of yarn if going larger!
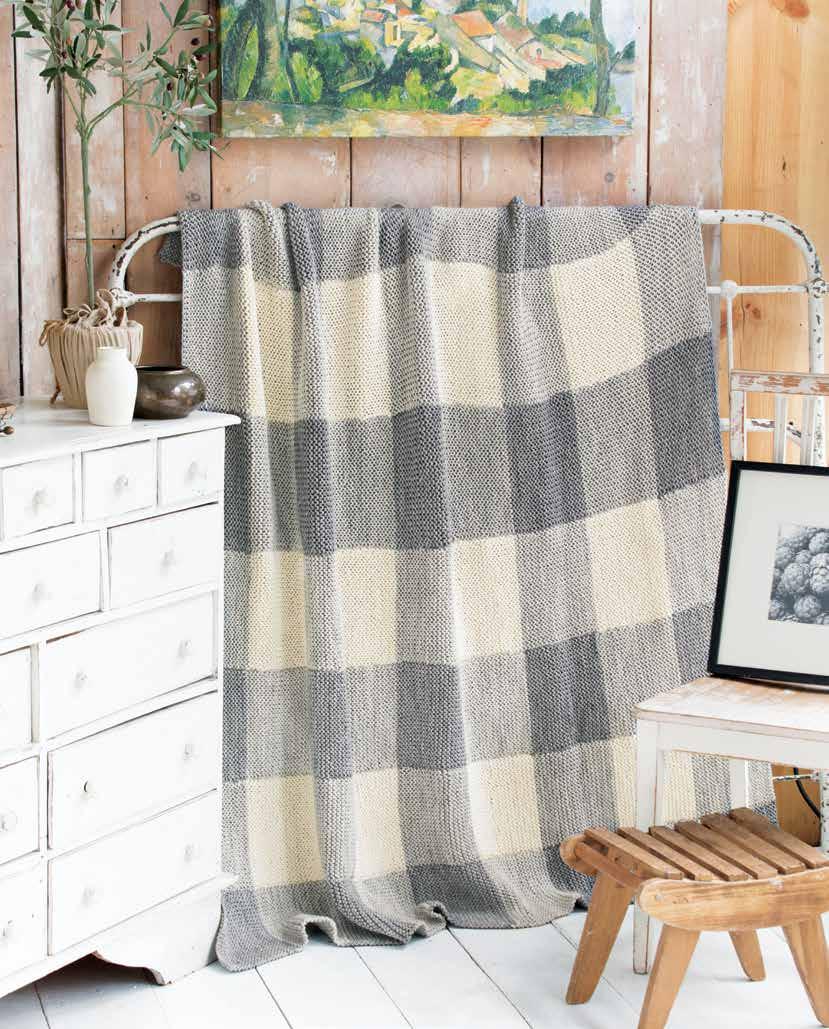
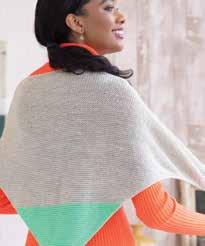
DESIGNED BY Audrey Drysdale
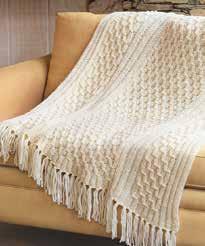
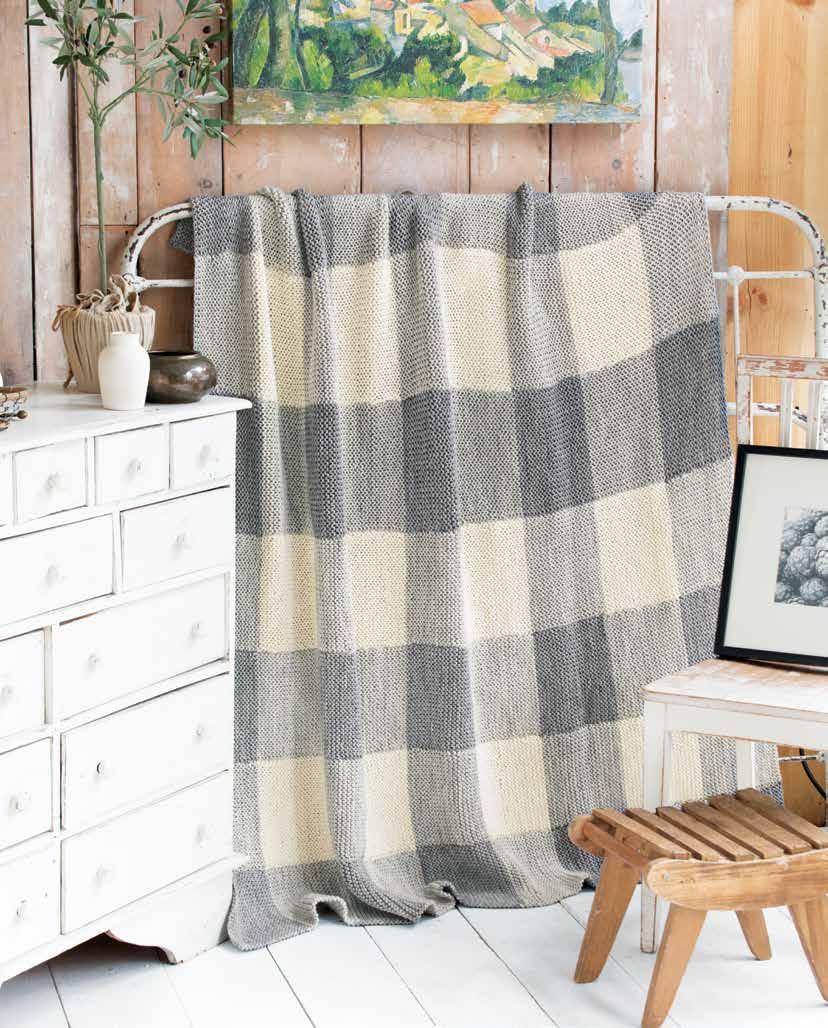
Holding two strands together makes this blanket twice as fast to knit. Knit seven strips, seam them together, weave in your ends, and then enjoy this comfy blanket.
MEASUREMENTS
Width 46"/117cm
Length 60"/152.5cm
MATERIALS
• 13/4oz/50g and 114yd/104m skein of any wool
• 24 skeins in Light Gray (A)
• 18 skeins in Dark Gray (B)
• 8 skeins in Cream (C)
• One pair size 101/2 (6.5mm) needles, or size to obtain gauge
GAUGE
151/2 sts and 26 rows to 4"/10cm over garter st using size 101/2 (6.5mm) needles and 2 strands of yarn held tog. TAKE TIME TO CHECK YOUR GAUGE.
NOTES
1) Blanket is made in 7 separate strips, then sewn together.
2) Hold 2 strands of yarn together throughout, even when seaming.
Strip 1 (make 4)
With 2 strands of B held tog, cast on 25 sts.
Row 1 (WS) Knit.
Cont in garter st (k every row) for 40 rows more.
*Cut B strands, join 2 strands of A. Knit 42 rows.
Cut A strands, join 2 strands of B. Knit 42 rows.*
Rep between *s 3 times more. Bind off.
Strip 2 (make 3)
With 2 strands of A held tog, cast on 25 sts.
Row 1 (WS) Knit.
Cont in garter st for 40 rows more.
*Cut A strands, join 2 strands of C. Knit 42 rows.
Cut C strands, join 2 strands of A. Knit 42 rows.*
Rep between *s 3 times more. Bind off.
Weave in ends. Block lightly.
Arrange strips, alternating strips 1 and 2, with strip 1 on each outside edge.
Using mattress st over garter st (see page 181), sew strips tog. ■
Knitting with multiple strands of different colors of yarn held together is called marling. The yarns naturally twist around each other as you knit, creating beautiful depth of color.
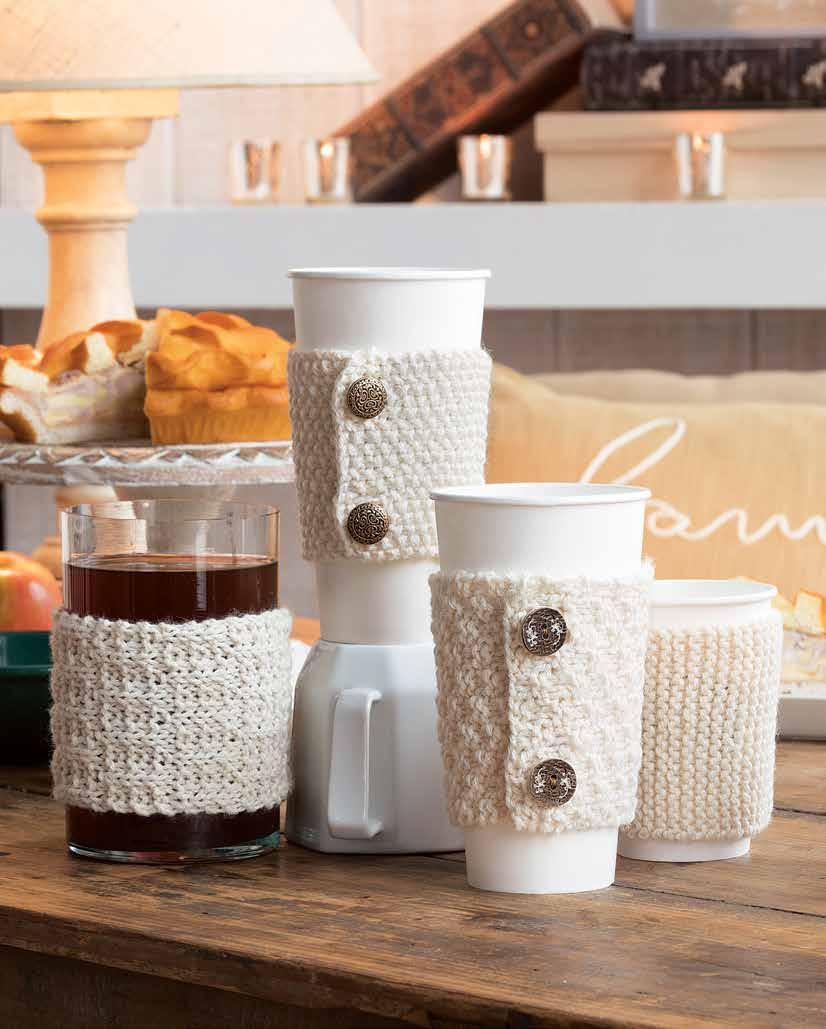
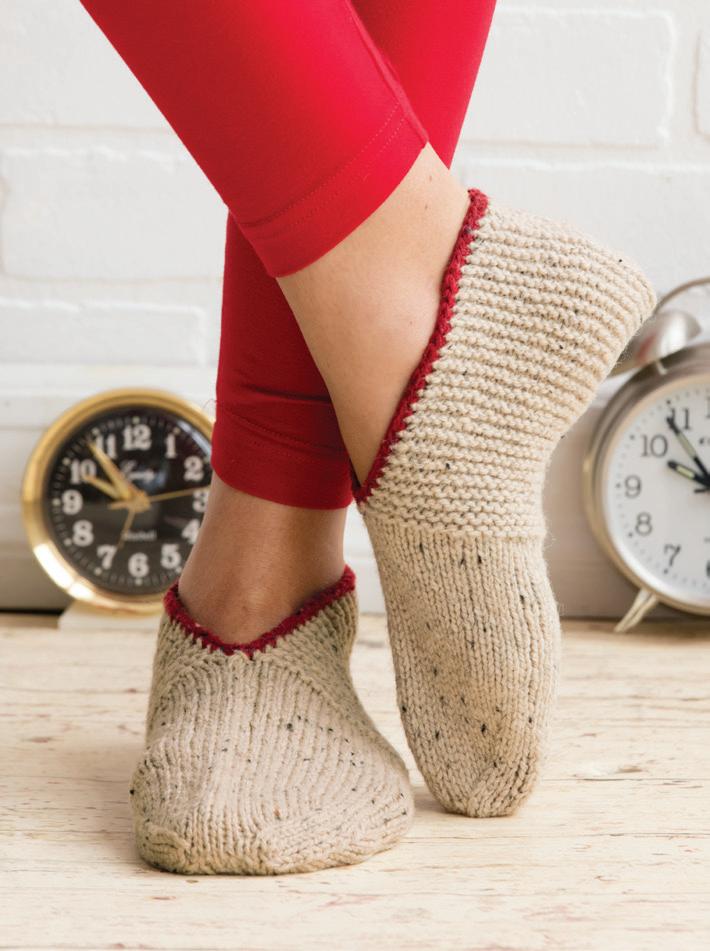
Because these cozies are knit sideways, you can easily knit more or fewer rows to fit any cup.
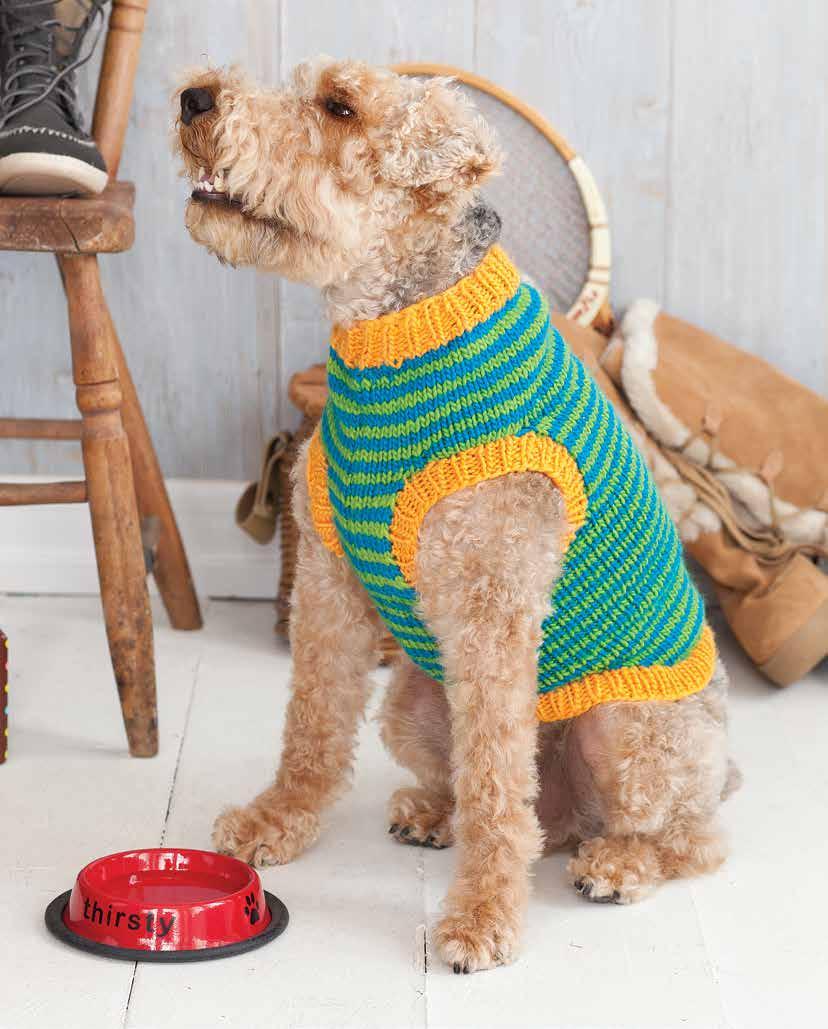
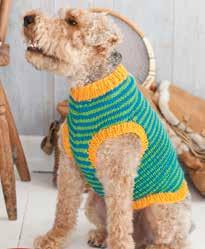
If your dog wears a harness, you can add a hole in the coat so the leash can hook onto it. Bind off stitches where the hook will fall, and then cast them back on the following row (effectively making a buttonhole).
This collection of 65 knitting projects from the archives of Knit Simple Magazine will appeal to all skill levels, even the beginner knitter. Included are quick and easy hats and scarves, along with other small accessories. There are a variety of ever popular wraps and shawls in all colors, shapes and sizes. You will find sweaters, cardigans, and some home décor items such as blankets. To make this book even more enticing, many of these pieces are unisex and for all ages from babies to adults. More than just patterns, You Can Knit it All! explains many of the techniques beginners (and beyond!) might never have tried.
CRAFTS • KNITTING
$19.99 US
ISBN: 978-1-68462-079-1