
3 minute read
STEP-BY-STEP LOW FADE LOOK FROM PIVOT POINT LAB


CREATING A LOW FADE TEXTURED LOOK
From Pivot Point LAB, a bespoke VTCT learning resource, this step-by-step guide takes us through the procedures for creating a low fade, blending to high graduation and textured layers.
01
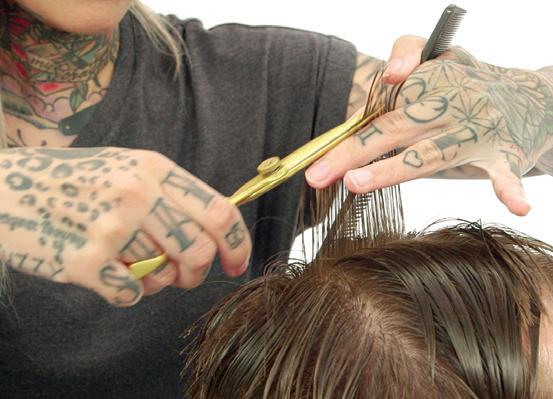
Consult with the client to determine the placement of fade, the length and desired interior texture. Section both sides from the recession area horizontally to the crown. Remove internal perimeter lengths at the sides using clippers with guard on. Connect the sides, creating a slightly rounded line at centre back. Cut using C-strokes to keep the length at the top.
02 02

03 04


FOUR ZONES WILL BE USED TO CREATE THE FADE:
• Each zone is approximately 1.25cm wide and slightly thicker towards centre-back
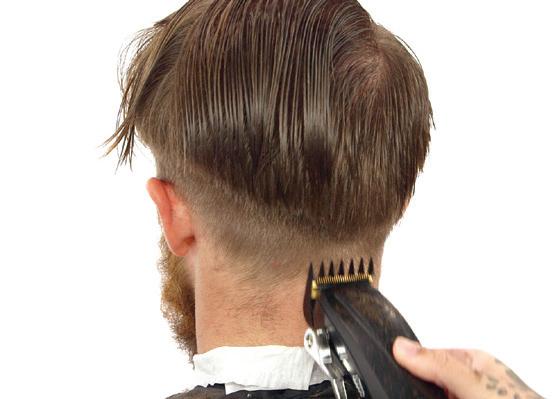
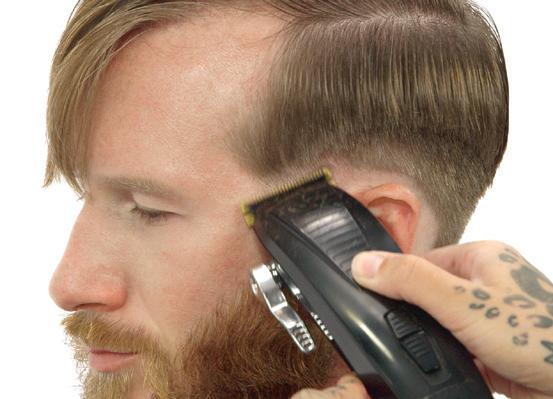
• For Zone 1, make a bald area slightly above the hairline. On the left side, use the corner of trimmers and short C-strokes. Creating a curved line, work back to centre nape
• Cut Zone 2 with no guard and clippers fully open
• Blend Zones 1 and 2 with no guard and clippers half open
• Further blend the bottom of Zone 2 to Zone 1 with no guard and clippers fully closed
• Cut Zone 3 with a 3mm guard and clippers fully open
• Blend Zones 3 and 2 with 3mm guard and clippers half open
• Further blend the bottom of Zone 3 to Zone 2 with 3mm guard and clippers fully closed.
05 06 07
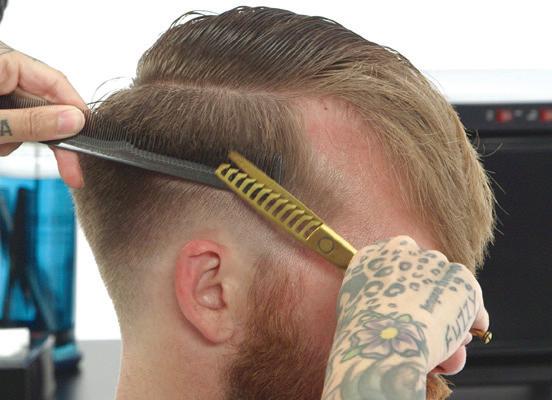
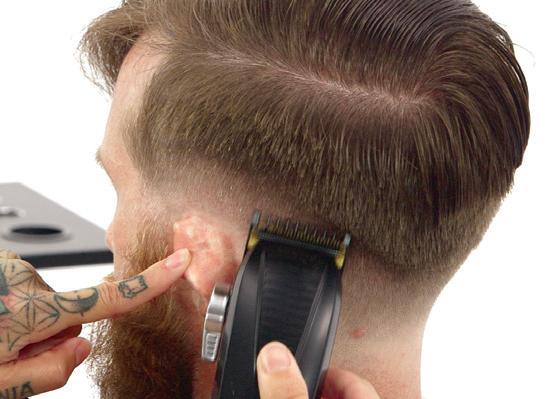
Pre-cut transition area using clipperover-comb technique, a 6mm guard, and clippers fully closed. Position comb diagonally back and cut to connect the lengths. Work from the left hairline to the centre back. Repeat on the right side.


08
• Cut Zone 4 with a 4.5mm guard and clippers fully open
• Blend Zones 4 and 3 with 4.5mm guard and clippers half open
• Further blend the bottom of Zone 4 to Zone 3 with 4.5mm guard and clippers fully closed
• Refine transition area using clipper-over-comb technique with 6mm guard
• Use thinning scissors and a scissor-over-comb technique to blend and refine lengths
09 10
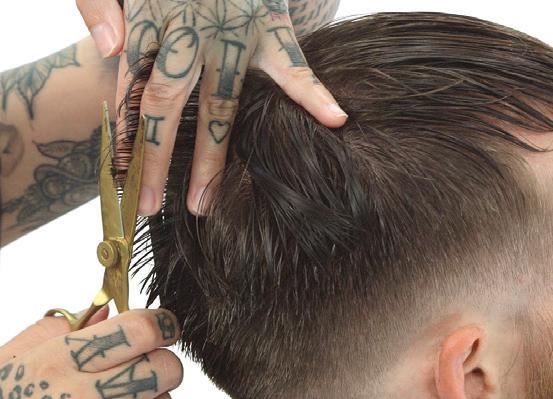
Take a centre vertical parting at the crown. Comb straight out, hold fingers vertically, and cut parallel, following a length guide from the parietal ridge. Work to the right using pivotal partings and a mobile guideline. Repeat on the other side.
11
Take a vertical parting through the upper crown and top section. Comb the hair straight up and cut to connect. Continue through the top, hold fingers for a length increase towards the front, cut parallel to the fingers. Use this parting as a mobile guideline to cut the top section. Release the triangular section, take a centre parting to the hairline. Comb hair straight up using a guide from the top section, hold fingers for a length increase towards the face and cut parallel. Use a mobile guideline to complete the section.
12


To extend the graduation into the top, release a horizontal parting from the recession to behind the ear. Take vertical partings from the front hairline, position fingers to create high graduation, and blend lengths. Repeat on the other side. Blow dry the hair. Take horizontal partings through the top section, hold the hair straight up, and point-cut into the ends to create texture. Use products to finish the look.

The finished look is a low fade along a curved line with contrasting longer interior lengths that offer texture and styling versatility. finished LOOK


