
4 minute read
Cemented vs. Screw-Retained Implant Restorations
By Steve Ratcliff, D.D.S., M.S., and Darin Dichter, D.M.D.
Historically, with the Branemark implant system, restorations were attached to implants and implant abutments with screws. Implant mechanics were challenging and complex and often confusing to restorative dentists.
Advertisement
In the late 1980s, Straumann introduced the ITI system in Europe and then brought it to the U.S. market in 1989/1990.1 This system changed implant restorative dentistry by modifying abutments so that they could be treated like a tooth that had been prepared for a crown. The system allowed for snap-on impression copings and for the final restoration to be cemented in place. Soon followed by the CERA one system from Nobel, implant restorative dentistry slowly became routinized. Cemented restorations replaced screw-retained restorations as the method of choice for final restorations (Figure 1).
Figure 1
In 2009, Wilson described retained cement in peri-implant mucocitis and peri-implantitis with the disturbing finding that the reaction to retained cement could occur as long as nine years post-cementation 2 (Figure 2).
CEMENTED VS. SCREW-RETAINED IMPLANT RESTORATIONS
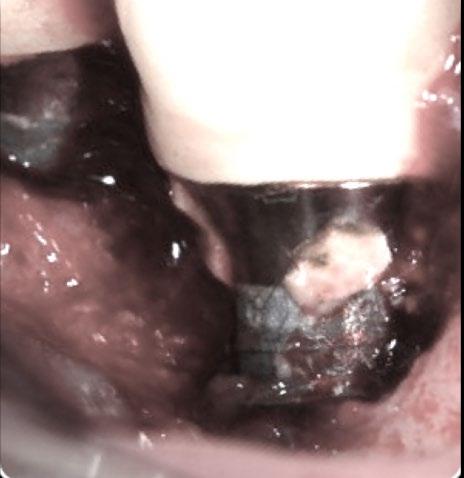
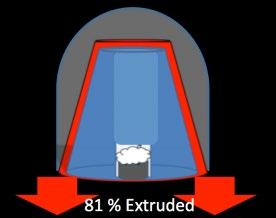
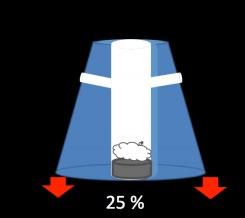
Figure 2 Since that time, Wadhwani and colleagues have described the mechanism for cement extrusion when restorations are cemented.3, 4, 5 They also have suggested that alterations to the abutment can reduce cement extrusion beyond the platform of the implant6 (Figure 3). Figure 3 These modifications or “venting” procedures allow higher percentages of cement to stay within the crown,
rather than being extruded (Figure 4). Figure 4
Sailer (2012), in a retrospective analysis, concluded that cemented implant/crown systems that fail are most prone to biologic failures (e.g. catastrophic bone loss) while screw-retained implant/crowns will fail mechanically from screw loosening, ceramic chipping or ceramic fracture and are less likely to lose the implant.7
Generally, screw-retained restorations have come back as the preferred method for attaching
crowns to implants.
15
HOWEVER, THERE ARE DEFINITIVE INDICATIONS FOR CEMENTED RESTORATIONS:
Esthetics – This is where a screw access hole through a crown would create a poor esthetic result
Figure 5
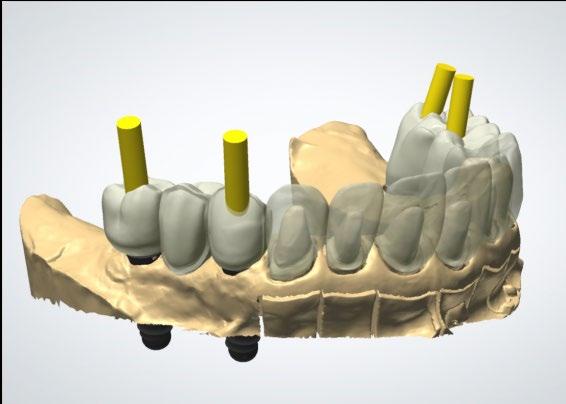
Implant position – Implants must be optimally positioned so that the screw hole is placed through the crown in the areas least likely to create compromise of structural integrity. If the screw access would be through a cusp tip that is a centric stop, the chances of porcelain failure significantly increase (Figure 5).
Interarch space – In order to use a screw retained restoration, there must be adequate space for the driver to be placed into the screw access hole. If the patient has limited opening, there may be enough room to screw an abutment in place, but not the final restoration. Severe clenchers and bruxers – Screw-retained crowns may be more susceptible to ceramic failure in these cases because of the screw access channel through the crown. A well-managed cemented restoration may be preferable to lower the chances of ceramic failure.
Minimizing cement extrusion and retention below the implant platform begins with abutment design. Stock abutments are not the best choice for managing cement; rather a custom abutment where the exact placement of the margins can be controlled by the dentist and technician is more predictable. Placing the abutment margin as close to the gingival crest as possible makes excess cement removal much easier (Figure 6).
Figure 6
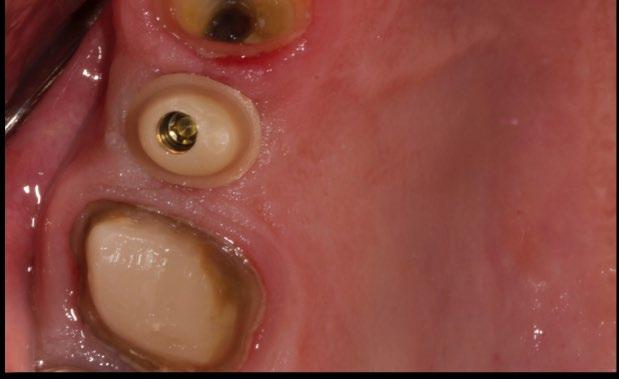
Once the abutment is torqued to place, the screw head must be protected. Medical grade PTFE tape works well. Use only enough to cover the screw head. The remaining space acts as a channel into which any excess cement can flow.
Crowns can be successfully cemented on implants. Wadhwani (2009) described a technique to deliver a cemented restoration with minimal cement extrusion.
HERE ARE FIVE STEPS TO CREATING A COPY DIE FOR CEMENT MANAGEMENT:
1. Line the intaglio of the crown with medical grade PTFE tape (e.g. CS
Hyde & CO.) to create a protective barrier and also to create a thin cement space much like die spacer on a conventional crown die.
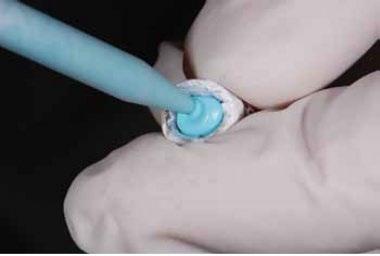
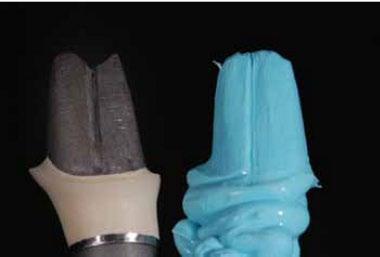
2. Inject a rigid bite registration paste into the crown and extrude past the crown margins to create a “tail” (Figure 7). Figure 7 3. The PTFE tape is removed from the intaglio of the crown and the surface is cleaned based on the manufacturer’s recommendations for the ceramic substrate. 4. Cement is loaded into the crown and the crown is firmly seated on the silicone die. Excess is wiped away with a cotton swab or cotton roll (Figure 8). 5. The crown is then seated intraorally on the implant abutment with very little excess to then be removed.
Retraction cord placed around the abutment has also been advocated as a way to block cement from flowing apically. If the cord is placed in tow pieces, one on the facial and one on the lingual, it can be removed without a sawing motion that might drag
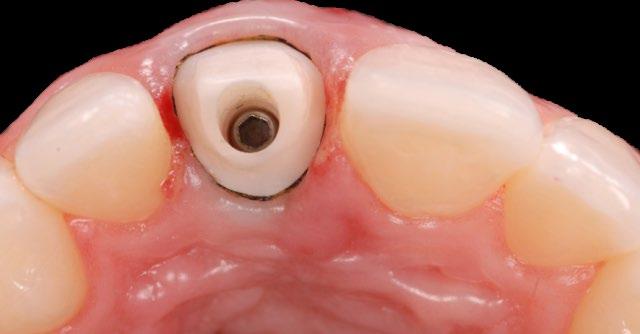
cement remnants apically (Figure 9). Figure 9
Choice of cement is also important. Use of a zinc-containing cement has been suggested by Wadhwani to optimize the chances of detecting retained cement radiographically. Currently that would mean ZOE cements or zinc phosphate. Because of its less retentive properties, ZOE, specifically TempBond (Kerr), can be used with abutments with good retention and resistance form. Zinc phosphate can be used with less retentive abutments. 3
Once the restoration is cemented and cleaned, it is important to check radiographically for any cement remnants and remove them as soon as possible.
17


