


ISSUE 48 • 2023 R40 incl VAT BRIGHTS HARDWARE VOUCHERS PAGE 11 WIN! 9772221941042 23048 9772221941042 23048
CONTENTS
Published by:
Picasso Headline, a proud division of Arena Holdings (Pty) Ltd Hill on Empire, 16 Empire Road (cnr Hillside Road), Parktown, Johannesburg, 2193
Postal Address: PO Box 12500, Mill Street, Cape Town, 8010 easydiy.co.za businessmediamags.co.za


EDITORIAL
Content Manager Raina Julies rainaj@picasso.co.za
Contributors Rod Baker, Johanita Corbett, Gina Hartoog, Geoff Hollingdale, Orlando Luis, Sami Simper
Copy Editor Brenda Bryden
Content Co-ordinator Vanessa Payne
ART
Head of Design Studio Jayne Macé-Ferguson
Senior Designer Mfundo Archie Ndzo
Advert Designer Bulelwa Sotashe
Cover Image zGel/istockphoto.com, tawatchaiprakobkit/istockphoto.com, Supplied
SALES
Project Manager Gavin Payne gavinp@picasso.co.za
+27 21 469 2477 I +27 74 031 9774

PRODUCTION
Production Editor Shamiela Brenner
Advertising Co-ordinator Johan Labuschagne
Subscriptions and Distribution Fatima Dramat fatimad@picasso.co.za
Distribution On the Dot Printing CTP Printers, Cape Town
MANAGEMENT
Management Accountant Deidre Musha
Business Manager Lodewyk van der Walt
General Manager, Magazines Jocelyne Bayer
2023’ S DIY LANDSCAPE
We have asked many of our experts in this issue to share with us what 2023 has in store for DIY home and renovation trends, best money-saving hacks for your garden, a must-do guide to fire maintenance and an easy metalwork project anyone could tackle. For the more professional DIYer, we’ve rounded up new products you may need in your home workshop.
For our Johannesburg DIYers, we hope you’ve enjoyed this year’s Johannesburg Homemakers Fair, and that you’ll pop into WoodEX for Africa at the end of June (see more details on page 3). And, here’s hoping you’ll feel more confident to get started with another of Geoff Hollingdale’s wood building projects on page 33.
For our littlest readers, we’ve added a new DIY feature for the kids. If your little one is keen on undertaking their own projects, why not turn to page 27 and get those little hands busy building their very own teepee?
And if you have a project, DIY tip or hack, send it through to us and we’ll share it with the rest of our DIY enthusiasts.
RainaJulies
CONGRATULATIONS TO
OUR WINNER FROM ISSUE 47 –SUMMER 2022/2023
EBRAHIM DOMINGO
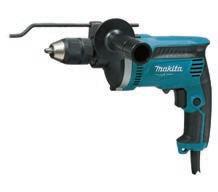
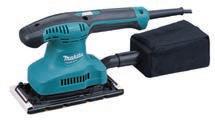
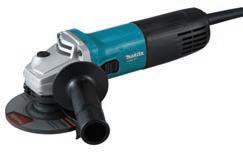
is the winner of a Makita MT Power Tool set (comprising a M9203B Finishing Sander, M9507B Angle Grinder and M8101B Impact Drill)

8
BITS ‘N’ BOBS
2 Product roundup for the professional and novice DIYer.
4 Subscribe to EasyDIY
FEATURES
6 DIY AND HOME RENOVATION TRENDS

Insights on what South Africans can expect in 2023 when it comes to DIY, home maintenance, upgrades and renovation.
10 FIVE GARDENING HACKS
Whether you want to start a new garden or spruce up an existing one, this collection of gardening hacks will help.
13 KEEP THE HOME FIRES BURNING
Our experts answer some frequently asked questions about fireplace maintenance and operation.
DIY 101
17 Dog stairs provide a safe way to get up onto furniture.
21 A handy foldaway plant stand.
DIY FOR KID HANDS
27 Transform some plain fabric and wooden dowels into a cool tribal teepee.
GUIDE TO
28 A braai fire-starter: it’s heavy and no beauty, but it works well and will last for ages.
WORKSHOP
Copyright: Picasso Headline. No part of this publication may be reproduced in any form without written permission from the publisher. The publisher is not responsible for unsolicited material. EasyDIY is published by Picasso Headline. The opinions expressed are not necessarily those of Picasso Headline. All advertisements/advertorials and promotions have been paid for and therefore do not carry any endorsement by the publisher.
33 Make a simple pine side table – based on a design used commonly by early cabinet makers for both large and small tables.
EasyDIY AUTUMN 2023 1 EDITORIAL COMMENTARY
WWW.EASYDIY.CO.ZA AUTUMN 2023
AUTUMN 2023
3
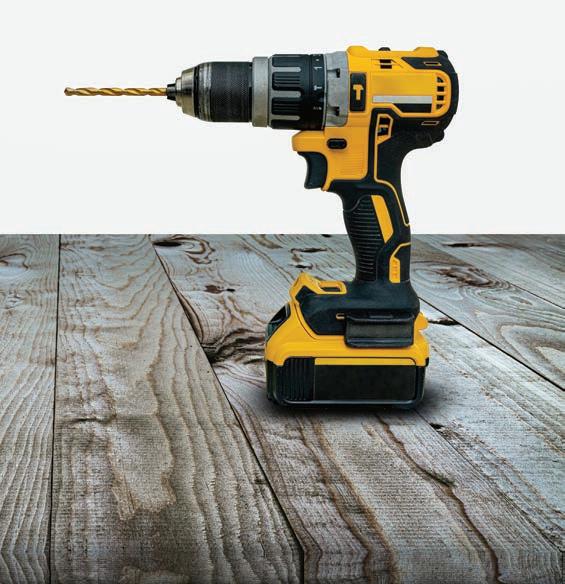
The latest tools and gadgets FOR THE DIYER
THE CAT® GRAPHENE BATTERY PACK

A battery pack that offers no downtime, lasts four times longer than the average battery, boasts a short charging time of 18 minutes, with no runtime or charging temperature rises, and a charger cycle of 1 200 versus Li-Ion at 300 cycles, the Graphene™ is a breakthrough in innovative technology for cordless power tools.
Graphene offers higher electrical conductivity than lithium-ion batteries. It allows for faster-charging cells that deliver extremely high currents. With high heat conductance, the batteries run cooler with an extended lifespan.
IT’S ALL ABOUT THE DESIGN
The battery design ensures high performance. Specialised protection provides increased security against vibration, impact, water entrance and thermal runaway. Ecore IQ is the brain of the CAT 18V battery pack, protecting against maximum discharge and
charging current while monitoring the individual cells for voltage reporting (under and over), temperature and full pack state of charge.
Nylon plastic and aluminium material encapsulate all the battery’s cells to draw heat away, allowing cells to stay cooler. This increases efficiency and runtime.
Scientifically, Graphene is a single layer of carbon arranged in a hexagonal lattice and has some unique properties.
THE SPECS
• A Graphene polymer lithium battery;

• On-board battery capacity indicator;


• Instant charging to full in 18 minutes;

• High max discharge current;
• Cool pack for continuous working; and
• Guaranteed four times longer charging cycle life.
The Graphene battery is available at all Builders and Makro stores.
For all CAT® enquiries, contact Greg de Villiers at Positec SA: 081 030 8944, Greg.deVilliers@positecgroup.com
NEW IN SA
Kress, founded in Germany in 1928, has recently launched its brand in South Africa. Kress has more than 90 years of experience in electric motors, research and development and production, and more than 50 years of experience in creating and producing power tools.

The Kress brand is packaged with its unique three-year warranty period applying to all AC (electrical) and DC (cordless) products from date of purchase. It offers to extend the warranty period for Kress DC tools by an additional three years, making a total of six years from the date of purchase of the product. Warranty registration is via www.kresstools.com within 30 days of purchase. Kress also guarantees to fullyreplace any Kress product within the first three months of the warranty.

The Kress brushless motor technology delivers greater power, longer motor life and more runtime. Brushless motors provide the electricity directly with the help of a built-in microprocessor. In this way, friction is avoided, and it can increase autonomy, power and tool life.
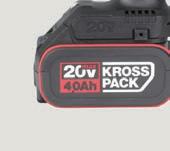
The Kress KROSSPACK® system offers customers one battery for all consumer needs. The KROSSPACK batteries are compatible with all Kress 20V products. All tools from the KROSSPACK category are available in the “tool-only” version, which implies great savings by not having to pay for unnecessary batteries and chargers.
For more information on the Kress brand, contact the Positec Group


PRODUCT ROUNDUP Bits ‘n’ Bobs 2 EasyDIY AUTUMN 2023
Whether it’s new product launches, or essential DIY tools, our round-up caters for the professional to novice artisan
RING SPOTLIGHT CAM PLUS

The all-new Spotlight Cam Plus is an outdoor security camera that builds upon the features of the popular Ring Spotlight Cam, which monitors and lights up outdoor spaces and provides live video feed to mobile devices through the Ring App. It’s equipped with colour night vision, customizable motion detection, and motion-activated lights. Simply mount the wireless camera and adjust the viewing angle for wide coverage throughout the day or night.
The Spotlight Cam Plus has customizable motion zones that are controlled in the Ring app. In addition, Spotlight Cam Plus has two-way talk with noise cancellation, and other advanced features like motion-activated notifications, 1080p HD video, and a built-in security siren.
Spotlight Cam Plus comes in different power options: battery, plug-in, solar, and wired.
This battery edition ensures that loadshedding will not interrupt the device from functioning. One of the major updates on this device is that, unlike its predecessor, the Spotlight Cam Plus has dynamic switching between plug-in and battery power modes.

The Spotlight Cam Plus is available from February 2023 at a RRP of R3 499.00 from Takealot and Incredible Connections
WOODEX FOR AFRICA 2023


Established in 2012, WoodEX for Africa has become a leading trade event for the wood and timber industry in Africa. The event, which takes place from 27 to 29 June, 2023 at the Gallagher Convention Centre in Johannesburg, is expected to attract over 8 500 visitors and feature 150 exhibitors from 30 different countries. This provides an ideal opportunity for exhibitors to network with important industry players and expand their business by finding new dealers, distributors and clients.

At WoodEX for Africa, you’ll find a comprehensive range of products and services related to the forestry, sawmilling, woodworking and furniture manufacturing industries, including wood-based raw materials, machinery, power tools and equipment, wood products, and many more. You’ll also have the chance to attend informative seminars and live workshops where industry experts will share their insights and expertise on the latest trends, technologies and best practices.
For more information about exhibition space, contact Annelize +27 (0)81 775 5859 or email info@woodexforafrica.com.

Book a stand link: https://woodexforafrica.com/exhibitor/#!/book\ Free registration to attend: https://qkt.io/e02KUYa
A CORDLESS INFLATOR

WORX’s WX092.9 20V 2-in-1 Cordless Portable Inflator can inflate all your car tyres and then some more. It fills up 4.5 tyres on one charge and goes from 0–2.5 bar (0–36 psi) in about four minutes per tyre. It does not need to be plugged into your car’s DC port as the powerful 20V battery (the same one used on all WORX power and garden tools) enables you to use it anywhere. Take it to the pool or the dock, or even pack it for a long bike ride – it is the ultimate in portability and convenience.


FEATURES

The inflator’s powerful LED light illuminates work areas and includes a red and yellow emergency light. The LED lamp outputs 100–200 lumens and can be used as a work light or a flashlight if you need to take a walk or work on your car in the dark. It is great as a load-shedding backup light or an emergency beacon to alert other motorists that you need assistance.
The flexible 0.9m high-pressure hose lets you reach hard-to-get-at nozzles and stems and comes with three adaptors, a sports ball needle, a Presta and bike valve adaptor, and a tapered adaptor for small inflatables such as pool toys. It has a soft-grip handle that is comfortable to hold and use for long stretches.


Other features include high-pressure inflation: it provides up to 10 bars (150 psi), perfect for inflating tyres, sports balls, and other small inflatables, and a digital LED gauge that displays accurate tyre pressure with the ability to preset the desired psi. To prevent overinflating, the inflator shuts off automatically once the set pressure is reached.

EasyDIY AUTUMN 2023 3
To view the full range of WORX products and view the videos go to https://worxsa.co.za
RELAUNCH OF POLVIN
After rigorous trials conducted under extreme conditions, including benchmarking against competitors, Plascon Polvin has been awarded flagship status. Plascon Polvin, with sleek new packaging featuring the updated Kansai Plascon brand identity, has been relaunched as a brand that performs at world-class standards.
Its new status and bold look notwithstanding, Plascon Polvin is actually the same winning acrylic emulsion formula for interior and exterior use that customers have known and trusted for almost seven decades. The Plascon Polvin formula has unrivalled durability, great hiding and impeccable whiteness.
Suitable for application to primed new cement, plaster, concrete, porous brickwork, and various types of building boards, Plascon Polvin has a smooth matt finish, low odour,

and outstanding scrubbability and washability. In a scrub-resistance test, Plascon Polvin performed twice as well as a leading competitor. In another test to establish washability, Plascon Polvin kept more of its coating thickness than the leading competitor, meaning it will last longer. Plascon Polvin also shone in the whiteness and hiding categories, offering superior hiding and a whiter finish than a leading competitor. This brilliant white finish is thanks to the premium-grade titanium dioxide used in the Plascon Polvin formula.
Plascon offers a 10-year guarantee on all Plascon Polvin products. While Polvin comes in a standard white (EPL 30), it can also be tinted into your choice of over 1 000 colours.
When it comes to colour choice, Plascon has also catered for members of the construction, architecture and interior design trades. To ensure that professionals can achieve their ideal
aesthetic, Plascon Polvin is available in a range of neutral tones such as Ponte Plaster (EPL 501), Malucca (EL 175), Carlton Grey (EPL 502), Hanging Greige (EPL 504) and Pale Cream (EPL 272).
For more information, contact the Plascon Advisory Service at 086 020 4060 or email advice@plascon.co.za.
PRODUCT ROUNDUP Bits ‘n’ Bobs 4 EasyDIY AUTUMN 2023
IMAGES: SUPPLIED
1 year of EasyDIY, 4 issues to enjoy for R130 (incl VAT) CALL 0860 52 52 00 Make sure you have your bank details handy when you call. Lines are open Monday to Friday, 8am-4pm TERMS & CONDITIONS n Offer valid for SA residents only. n Subscription activation is subject to payment confirmation. SUBSCRIBE EMAIL Feedback@arena.africa ONLINE AT https://subs.arena.africa 1 CALL NOW (Call with your credit card details or to arrange a debit order) 0860 52 52 00 SMS 'subs EDIY' to 43331 (standard rates apply) EFT OR DIRECT DEPOSIT Payable to: Arena Holdings - Media Circulation Subs Bank: FNB Branch code: 255-005 Account number: 62793068034 Reference: Your name, surname and cellphone/subscription number Email your proof of payment to: Feedback@arena.africa 5 E ASY WAYS TO SUBSCRIBE 2 3 4 5 SAVE20%
Take a break this EASTER THANKS TO RING


South African consumers are often nervous about leaving their homes alone when going on holiday. Ring has a variety of easy-to-install products that make keeping an eye on your home as simple as checking your phone
Ring products are smart security devices that connect to your phone via the Ring app. Ring’s first-ever video doorbell allowed users to receive notifications via the phone, as well as to see, hear and talk to visitors at their front door from anywhere.


Consumers have enjoyed the convenience of being able to keep an eye inside their home with the versatile indoor and outdoor stick-up cams, which can easily be positioned and installed in nurseries, living areas or entrance halls depending on each family’s needs. These products feature two-way talk and live view, which means you can see what your kids (or fur babies) are getting up to no matter where you are. Additionally, these devices have motion-activated notifications as well as night vision.
Ring continued its mission to make neighbourhoods safer with options for outside use. The spotlight and floodlight cams have become a popular way for users to check in on their garden, perimeter walls or driveways, day or night, when at work or travelling. What’s more, users can set up customisable motion zones on their phones and even sound the security siren remotely if something looks suspicious on their property. The DIY Ring Alarm system offers users affordable whole-home security right at their fingertips.
ABOUT RING
Building on the success of this range, Ring has introduced the Spotlight Cam Plus just in time for the Easter holidays. Spotlight Cam Plus offers colour night vision and two, motion-activated LED spotlights. Even better, to help consumers get through load shedding, the device comes with rechargeable batteries. Like its predecessor, this sleek next-generation spotlight cam features wide-angle, 1080p HD video, and view colour night vision.
Ring also announced the new solar panel USB-C, which is an attractive option during persistent load shedding. Compatible with Spotlight Cam Plus and other USB-C Ring security cameras, Ring’s solar panel USB-C connects easily and seamlessly to Ring devices. Just a few hours of direct sunlight every day will keep it charged around the clock. The adjustable arm allows users to get the ideal angle to maximise their solar
Since its founding in 2013, Ring has been on a mission to make neighbourhoods safer for everyone. Ring’s smart home security product line offers users affordable whole-home and neighbourhood security. At Ring, we are committed to making security accessible and convenient for everyone – while working hard to bring communities together. Ring is an Amazon company. With Ring, you’re always home.

power while keeping the setup tidy with built-in cable management.
The peace of mind afforded by being able to check in on your most valuable possessions via your phone in real-time is invaluable. If you’re looking for an affordable, high-quality DIY security system, then Ring is your ideal choice.


Ring products are officially available in South Africa through Takealot, Builders, iStore, Incredible Connection, Vodacom and Leroy Merlin at a range of prices that suit your budget needs.

Advertorial EasyDIY AUTUMN 2023 5
IMAGES: SUPPLIED
Scan this QR code to go directly to the ring website. For more information 0800 993 700 www.ring.com
DIY AND HOME RENOVATION TRENDS
Orlando Luis, CEO of Brights Hardware, a leading independent hardware retailer, shares some insights on what South Africans can expect in 2023 when it comes to DIY, home maintenance, upgrades and renovation


TRENDS Feature 6 EasyDIY AUTUMN 2023
THINGS HEAT UP FOR SOLAR ENERGY
In keeping with going green, but also now a massively growing trend in South Africa due to load shedding, 2023 will see more homes install solar energy systems. Solar lighting is a renewable and reliable source of light that will save you money in the long run. In terms of product development, we will continue to see new solutions coming to market – enhancing the selection already on offer in terms of outdoor and sensor lighting, rechargeable lightbulbs and portable lighting, among others. Likewise, solar geysers will become increasingly popular for the same reasons.

And staying with the trend of reducing demand on the electricity grid, I believe 2023 will continue to see a spike in the number of households changing their geysers to tankless water heaters. Tankless water heaters only heat as needed, as opposed to keeping a reservoir of water hot for long periods, as geysers do. These are very energy efficient and save on costs. Gas alternatives will also be in demand.
GOING GREEN IS GROWING
A trend that will continue to gain traction this year is greener homes, with more people looking at fresh and additional ways to adopt more sustainable principles in their homes. So we will continue to see new and innovative “green” products hitting the shelves in hardware stores. Examples include products such as the Waterform smart water management systems, which make rainwater harvesting easy and hassle-free. All the components of these systems are manufactured from recycled waste diverted from oceans and landfills. Greywater systems will also be in demand as South Africans attempt to reduce, reuse and recycle wherever possible.
GENERATING INNOVATIVE NEW SOLUTIONS

Generators will remain a much-desired purchase for South Africans in 2023 due to ongoing power cuts.
In response to this demand, manufacturers such as Red Rhino are creating innovative new options, such as the silent dual-fuel inverter gas generator. This generator uses either LP gas or petrol, and operates silently, making it a great option for those living in townhouse complexes and even apartments with balconies or patios.

Another example of a product that will see greater demand in the coming year is the Thermo-Solutions roof insulation, which is manufactured from recycled plastic drinking bottles. Each Thermo-Solutions roof insulation roll averages around 360 bottles that would have ended up in landfill. Having a well-insulated home also means less energy is needed to heat and cool the space.

EasyDIY AUTUMN 2023 7
Silent dual-fuel inverter gas generator.
Thermo-Solutions roof insulation.
UNATTACHED AND UNCOMPLICATED –CORDLESS TOOLS POWER AHEAD

Tool trends continue to see everything go cordless; this will remain the case in 2023. Going battery-powered means getting rid of the hassle of plugs and long extension cords when working with power tools. And, if your batteries are charged you can continue to work through load shedding. Most power tools work off the same 18V battery platform, and these batteries are interchangeable. From impact drills to circular saws and glue guns to screwdrivers – all are available in cordless versions, and most new power tools entering the market are cordless. This even includes power tools for gardening, such as hedge trimmers, chainsaws and lawnmowers.
MORE SOUTH AFRICANS DOING IT FOR THEMSELVES
This year will also see more South Africans embracing DIY. The DIY movement allows people to save money, get the job done quickly without waiting for a contractor and provides a wonderful sense of accomplishment at a job self-done. At Brights, we have made a point of welcoming and assisting women who come into our stores – and even have a special ladies-only rewards card for our female customers. We look forward to this becoming a growing trend in 2023.
SMART HOMES WILL REMAIN A BRIGHT IDEA

Another exciting home trend for 2023 will see more people creating smart homes that are automated and controlled via the homeowners’ smart devices. At Brights, we have already seen a spike in demand for such products, and the Xiaomi range of home automation devices continues to grow in popularity. Automated homes are also more environmentally friendly as lights and appliances can be programmed to switch off when not in use, saving on electricity and reducing the load on the grid.
COST (CUTTING) IS KEY
Overall, trends in consumer buying habits have shown that price is key, and manufacturers will need to keep bringing products to market in 2023 that meet the needs of the budget conscious. For example, we have seen brands such as Plascon and Dulux developing cheaper to mid-range paint solutions that are doing well among the selection.

TRENDS Feature 8 EasyDIY AUTUMN 2023
OUTDOOR TRENDS ON A BUDGET

Set the scene. If you don’t have an outdoor entertainment space, choose an area close to the house (preferably in some shade) or near the pool if you have one, and lay some cement paving stones and/or stone chips. Alternatively, you can pave the area with cobblestones or bricks laid in a crisscross or herringbone pattern – the internet and social media platforms offer many DIY tutorials.
Paving stones, cobbles and bricks don’t need a concrete foundation or substrate and can be placed directly onto the ground once levelled.
Another option is to create an area of wooden decking – people are doing clever things with reclaimed pallet wood that is cheap and effective.
Light it up. Once you have the stage set for your new entertainment area, the next thing is to provide some lighting. Many solar options on the market allow you to install instant lighting without needing to get in an electrician to do the wiring.
Choose between solar lanterns, spotlights, downlighters, motion
WIN!
element to your newly created entertainment area.
sensor lights, floating solar pool lights, garden lights, and many more. String up solar fairy lights for some extra ambience. If you don’t have a tree, the lights can be strung on poles sunk into the ground on the edges of your entertainment area or simply draped over pot plants.
Sitting pretty. No entertainment area is complete without seating and, ideally, a dining area for some alfresco meals. If you can, treat yourself to some new outdoor furniture to finish off your new space. There is a wide range of options available to suit all tastes and budgets. If you prefer to be a part of the upcycling trend, then hit the second-hand and junk shops and find tables and chairs that can be brought to life with a bit of sanding, varnishing and paint. There are many products available for the upcycling enthusiast, and you can customise the furniture to suit any colour scheme or style.
Blooming good ideas. Having some strategically placed pots planted with a variety of herbs, flowers, rose bushes, ornamental trees, or suitable bushes (whatever you prefer) will add a beautiful
You can use rectangular-shaped pots planted with sedges, bushes or climbing vines with a trellis to serve as a privacy screen around your entertainment area. Planters can also be made from pallet wood, or visit second-hand stores to find planters with a difference. For example, an old shower caddy makes the perfect tiered storage for holding a selection of flower-filled pots and adding colour to wall space. Old colanders make great hanging baskets, vintage teapots and watering cans make fun planters, or use an old wheelbarrow or enamel basin planted with bright blooms. Some fun upcycled elements, such as turning an old wooden window frame into a garden mirror, can add the finishing touches to your outdoor area, and mirrors bring in extra light during the day. They also reflect candles and fairy lights beautifully at night – brightening up your patio area and making it feel bigger.
Get things cooking. Last, but certainly not least, invest in a portable braai to go with your new entertainment area. There are so many kinds to choose from in different styles, sizes and formats – wood-burning, charcoal or gas, freestanding, table-top, and more.
Outdoor entertaining in South Africa is not complete without a braai. The evocative smell of meat sizzling over the heat with family and friends gathered to enjoy each other’s company and savour a delicious meal is one of our favourite pastimes.
Brights Hardware is giving three lucky EasyDIY readers the opportunity to won R1000 vochers redeemable at any Brights Hardware store nationwide. To stand a chance to win and be included in our Business Media Mags newsletter database, SMS EasyDIY BRIGHTS HARDWARE 1, followed by your full name, email and physical address to 33089. SMSes cost R1.50 each. To enter without inclusion in the newsletter, SMS EasyDIY BRIGHTS HARDWARE 2, followed by your full name, email and physical address to 33089.
SMS errors are billed; free SMSes do not apply. For full terms and conditions, visit easyDIY.co.za. Competition ends 20 April 2023.

EasyDIY AUTUMN 2023 9 IMAGES: KARELNOPPE/ISTOCKPHOTO.COM, ANDREYPOPOV/ISTOCKPHOTO.COM, BREAKERMAXIMUS/ISTOCKPHOTO.COM, CINDY SHEBLEY/ ISTOCKPHOTO.COM, CINDY SHEBLEY/ISTOCKPHOTO.COM, KATARZYNABIALASIEWICZ/ISTOCKPHOTO.COM, THREE SPOTS/ISTOCKPHOTO.COM, TAWATCHAIPRAKOBKIT/ISTOCKPHOTO.COM, KARELNOPPE/ISTOCKPHOTO.COM, SUPPLIED
Brights Hardware stores have on-site experts in all branches ready to provide advice and guidance on any product, building and renovating trends. Stores are located in Boston, Blackheath, Langebaan, Mitchells Plain, Montague Park, Plattekloof, Stonewood, Brackengate and Sunningdale. An online store shopping experience is available at www.brights.co.za, which offers delivery to anywhere in South Africa. Brights offers same-day delivery in the Western Cape for products purchased online, and also has a tool hire service.
Whether you want to start a new garden or spruce up an existing one, this collection of gardening hacks will help get you the beautiful greenery you’ve always wanted. By Johanita

garden nursery – plants,
THINK “INSIDE-THE-BOX”
The best thing about gardening is that whether you live in a drought-stricken region or a community facing water restrictions, you can still incorporate some unconventional and creative ways to grow your favourite plants. Consider growing your garden in a container so you can control your plants’ water intake better. In addition, a container will ensure that you don’t lose water due to factors such as evaporation.

GARDENING HACKS 2
Corbett, Builders buyer:
pets and animals
KEEP YOUR GREENS COOL IN HOT TEMPERATURES
South African summers are known for their hot temperatures, which is not ideal for thriving plants as it can cause heat stress.
Thankfully, there’s a way to keep your plants cool during the hot weather.
Create a mulch layer over your plant bed to avoid your beautiful flowers wilting and your vegetables shrivelling under the scorching sun. A mulch layer of organic or inorganic material applied to your garden’s surface lowers the temperature of the soil so that there is less water evaporation. You can make your own mulch from pruned plant material or grass clippings. Alternatively, you can use tree bark chips, gravel, pebbles, and even stones, all available from Builders’ garden nurseries.
OUTDOOR HACKS Feature 10 EasyDIY AUTUMN 2023
WHAT GROWS UP TAKES UP LESS SPACE
Gardening is about making the most of the area you’ve got to work with, including compact spaces that wouldn’t ordinarily be home to a traditional landscaped garden.
Thanks to vertical gardening, you can grow your plants, vegetables or fruits in compact spaces using vertical modular planters stacked on top of one another. Depending on your area, this setup can be a loose-standing unit or a wall-fixed unit. Hanging baskets, pots, wooden planters, and grow tables are also great for growing your edibles or ornamentals.
The benefit of a vertical garden is that you’ll cultivate healthy and beautiful plants without having to maintain a large gardening space.

PREVENT WATER-LOGGED AND COMPACTED SOIL
Excessive rain can lead to water-logged and compacted soil, which can be detrimental for plants as it deprives the roots of oxygen, significantly reduces nutrient take-up and causes root rot.
To prevent this, feed your soil with mulch and compost to boost the micro-organisms that make the soil a living, functioning system that naturally resolves compaction and drainage issues.

You can also raise your planting areas by piling the soil into a ridge or creating raised beds with sides. The latter is a quicker solution to resolving water-logged and compacted soil. These increased levels will be the first to drain once the dry weather returns, ensuring your plants aren’t standing in muddy ground.
PUT YOUR PLANTS ON A BALANCED (SLOW-RELEASE FERTILIZER) DIET
Feeding your plants organic or chemical fertilizers ensures your plant babies receive all the natural goodness they need to grow. Organic fertilizers are the best choice for edibles as they are entirely natural and boost the amount of organic matter in the soil to encourage microbial reproduction.
On the other hand, chemical fertilizers are very effective when used in flowerbeds and lawns. You can select the exact nitrogen, phosphorus and potassium variants to suit your needs, whether it is boosting your flowers, lawn, foliage, or fruit. This fertilizer is also predictable and has a rapid effect on plants.
It’s important to note that excessive use of chemical fertilizer can damage or burn your plants, so stick to the recommended application. Alternating chemical fertilizers with organic fertilizers will keep the pH of the soil balanced and improve microbial activity, which is reduced when using chemical fertilizers.
Ideally, you want to develop and maintain a soil structure that’s springy, open, and free-draining, but also hangs onto moisture when it matters. To achieve this, you should nourish your garden with organic matter. This can be anything from well-rotted manure to leaf mould.

EasyDIY AUTUMN 2023 11
3 IMAGES: VAIVIRGA/ISTOCKPHOTO.COM, SBYTOVAMN/ISTOCKPHOTO.COM, WITMERPHOTOGRAPHY/ISTOCKPHOTO.COM, SUPPLIED

Keep the home FIRES BURNING
Autumn days are shorter and there is a distinct chill in the night air, indicating that winter is on the way. If you have a fireplace in your home, you are probably waiting for that first cold snap to appear so you can make the first fire of the winter season. However, before that, it’s important to inspect your fireplace and chimney and undertake some essential maintenance tasks.

Here are the answers from our experts to some of the commonly asked questions. What parts of my fireplace and chimney need to be inspected before the winter?
Experts at Megamaster say that before lighting the first fire of the season, inspect your fireplace and chimney.
• Look for any damage, obstructions, cracks or other abnormalities, and repair if found.
• A damper is a plate or valve that
regulates the flow of air inside your chimney. Always ensure it is functioning as it should be before you light the first fire.
• Often, wood and gas fireplaces have gaskets fitted around their doors. Gasket material helps keep gas and smoke from entering your home and keeps excess oxygen from entering the fire-burning area. If your fireplace has a gasket, carefully inspect it to ensure it is intact. Replace the gasket if it is damaged.
FIREPLACE MAINTENANCE Feature EasyDIY AUTUMN 2023 13
Gina Hartoog
Should we have our chimney swept?
Petrus van der Westhuizen from The Original Chimney Sweep advises that it is important to have your chimney swept at least once every 12 to 18 months. A good time to do this would be before you use your fireplace at the start of winter. The more frequently the fireplace is used, the more often it should be swept.
Sweeping the chimney will clear it of any debris, such as twigs and leaves that may have blown in. Occasionally a bird’s nest might have to be cleared away. It is also a good idea to clear the chimney of old soot, tar and creosote – doing so will enable the smoke to escape freely and help prevent chimney fires. Some insurance companies require residential chimneys to be swept every 12 months. Also, consider the types of wood you burn in your fireplace. Starting fires is easier with softwoods, but burning a hardwood yields a more sustainable warmth in the fireplace. Hardwoods are recommended for use in the home fireplace and, especially, in wood stoves. Softer woods are better suited to outdoor entertaining.
What is a chimney fire, and what should I watch out for?
Deon Visser, East Rand Fire, shares that a chimney fire is caused when deposits, such as soot and creosote, build up inside a chimney or stove pipe. As the deposits stick to the walls of the chimney, they are only partially burnt due to a lack of heat and oxygen inside, and if they get hot, they can catch fire again. The chimney structure isn’t designed to withstand the high temperatures of a fire, so this can result in serious damage to the structure. Birds’ nests and other debris (plant material) inside the chimney may also cause a chimney fire.
Flames are one of the most apparent signs of a chimney fire – these may be seen from the top of the chimney.
TOP TIP
You may also hear a loud cracking, popping or roaring noise, see smoke and identify a strong smell. Visually, there may be cracks and damage to the chimney and bits of creosote found outside the chimney. Having your chimney inspected and swept annually is a good way to prevent a chimney fire.

We painted our fireplace last spring, and I know from experience that the first fire of the season usually smells quite strong. Is there any way we can prevent this?
Noel Mashayamombe, head of technical decorative at Kansai Plascon, says that although Plascon Fireplace Paint is water-based, it does contain additives with volatile solvents, which are responsible for the odour given out during drying and/or when the first fire is made. It is not possible to completely eliminate the odour during the first fire. However, there are ways to minimise the intensity of the odour. Here are some recommendations:
• Ensure longer periods of drying before use of the fireplace to allow as much of the volatiles to leave the film so that


If you have a fireplace in your home, for safety, you must have either a carbon dioxide or dry chemical powder fire extinguisher in your home. These are for Class A, B or C fires.
by the time the first fire is lit, very few volatiles remainin the paint film.
• Ensure good room ventilation during the drying process. Ventilation is important because it allows the volatiles to leave the paint film faster, as the room environment naturally attempts to equilibrate.

• Low heat during the first fire ensures that the residual volatiles leave gradually, thereby reducing the odour concentration. For effectiveness, this must be done together with the above points. Always follow the instructions on the product datasheet. Two key recommendations are to not dilute the paint during application and to ensure that the fireplace is cleaned before painting. Dilution of the paint will reduce the film thickness, which is important for metal/substrate protection. The unit should also be free of any oily or greasy contamination that will affect the adhesion of the paint.
We don’t have a chimney cowl, but I’ve been told they are beneficial. Should I consider one?
Rudie Scheepers, director at Home Fires, says yes, it’s definitely a must for any chimney. Cowls keep the rain out of the chimney system, and even if you don’t have any steel products, such as a braai or a fireplace,
FIREPLACE MAINTENANCE Feature 14 EasyDIY AUTUMN 2023
at the bottom of the chimney, your brick chimney can deteriorate with constant rainwater running down the chimney. If you do have a steel braai or steel fireplace, then a chimney cowl will protect the steel against corrosion caused by rainwater accumulating inside your appliance. Rotating or turbo chimney cowls also prevent wind from blowing down the chimney and causing smoke problems inside the house.
Consider the following when choosing the correct cowl:
SMOKE ALARMS
All homes should have smoke and carbon monoxide detectors. If you don’t have these essential safety devices, consider installing them. You can purchase a separate smoke alarm and carbon monoxide detector or dual units for both.
• Make sure the base of the cowl coincides with the opening of the chimney and doesn’t reduce the opening size as that might lead to smoke problems inside the house.
• If your chimney is very high and difficult to reach, choose a fixed cowl instead of a rotating one because rotating cowls need yearly maintenance to regrease the moving parts. If maintenance is neglected, a rotating cowl might seize and get stuck in a certain position.

KNOW THE LINGO
• Soot is a black powder that remains when something is burned. It is a collection of carbon particles.

• Creosote is a mixture of chemicals that have very different properties depending on the wood being burnt. On one side, creosote can be a thick black tar-like substance and on the other side, a yellow liquid with a strong smoky smell – it’s usually a mixture and highly flammable. Creosote can build up as the smoke escapes your chimney; this mixes with moisture in the air and congeals on the sides of the chimney. Creosote build-up is a major cause of chimney fires.
Source:www.chimneysweep.co.za
IMAGES: ARTJAFARA/ISTOCKPHOTO.COM, GABORT71/ISTOCKPHOTO.COM, SUPPLIED

TIME
1day, additional time for finishing
SKILL
GOING up
Dog stairs provide a safe way to get up onto furniture. By
 Gina Hartoog

Any vet will tell you that your dog shouldn’t be jumping up onto couches and beds. This is especially important for large breed puppies that risk developing early-onset joint problems. Some breeds, such as dachshunds and corgis, shouldn’t be allowed to jump on furniture throughout their lives. Dog stairs provide a safe and easy way for your furry friend to get onto a bed or couch. This unit incorporates a storage locker, accessible via a lid that forms the top step. You can use the space to store your dog’s toys and bedding.
SIZING
Our unit measures 650x425mm with a height of 330mm. We planned it around a small- to medium-sized breed and a couch 400–500mm high. If you have a much smaller dog, you will need to adjust the height of both steps and possibly consider adding a third step to the unit.
HERE’S HOW:
Cut the wood to size as indicated on the materials list. Sand down the planks and plane the edges to ensure they are square.
ASSISTANT
YOU WILL NEED:
• SA pine shelving (21mm thick)
• 2 x 300x305mm (side braces –top step)
• 3 x 305x425mm (back, step platform, lid/top step)
• 2 x 305x150mm (side braces –bottom step)

• 1 x 150x425mm (front riser)


• 1 x 155x425mm (step riser)

• 1 x 425x50mm (hinge support plank on top step)
• Chipboard countersink screws (4x40mm)
• Wood glue
• 80- and 120-grit sandpaper
• 2 cabinet hinges
• 4 straight connectors
• Drill bits
• Countersink bits
• Wood filler (optional)
• Paint or varnish
• Piece of 5mm masonite board.
TOOLS:
• Tape measure
• Pencil
• Drill
• Jigsaw/hand saw
• Orbital sander
• Planer (optional)
• Painting or staining supplies.
TOP TIP
Take your time with this project to ensure that it is properly made – sturdy and safe for your dog.
DOGGY STAIRS DIY 101 EasyDIY AUTUMN 2023 17
COST R800
Preferable
1
Make the braces. Join one top-step brace to one bottom-step brace using two straight connectors and screws on each side. Ensure that you make one right and one left brace, not two of the same.

TOP TIP
Don’t need dog stairs? Use the same unit as a plant stand. You can store your gardening tools and gardening gloves in the storage locker on the top step.
Attach the back to the braces. Drill two holes 30mm from the end of each side of the back plank and 10mm from the 300mm edge. Place a glue bead down the end of the step brace and attach to the back. Screw in place. Now drill an additional hole in the middle between the two screws and fasten with a screw.
The step riser is attached between the bottom and the top step. Attach the step riser to the unit. Drill two holes 30mm at each end and 10mm from the edge of the 155mm (step riser). Place a glue bead down the end of the step brace and attach the step riser to the brace.
Now mark out the hinge position and holes on both ends of the plank, using the hinge as a template. Place the hinge 50mm from the outer edge of the hinge support plank. Place the edge of the hinge along the marked line with the hinge flipped back on top of the hinge support plank. Draw a line around the outside and mark the holes.
Attach the front riser to the front of the unit. Drill two holes 30mm at each end and 10mm from the edge of the 150mm (front riser). Place a glue bead down the end of the step brace and attach the front riser to the brace.
Fit the bottom step platform by drilling two holes along the 305mm width, 30mm from the end and 10mm from the edge on each side. Place a glue bead along the bottom step on three sides and fasten in place. Now drill an additional hole in the middle between the two screws and fasten with a screw.
Drill a small pilot hole in the middle of the marked hole position about 15mm deep. Chisel out the recess for the hinge to the thickness of the hinge plate. To make this easier, make a crease along the line that marks out the hinge plate area using a chisel at 90 ° , with the chisel-bevelled edge facing the marked-out hinge plate area to be removed.
Attach the hinge support plank to the top step (back of the lid opening). On the hinge support plank, drill one hole from the front edge 10mm from the front and 10mm from the side. Drill another hole 30mm from the edge and 10mm from the back. Do the same on the opposite side. Place a bead of glue along the back and 50mm down either side and fasten in place.


Be patient! Remove small slithers of wood at a time.

DOGGY STAIRS DIY 101 18 EasyDIY AUTUMN 2023
2 4 3 5 7 6 8 9 10
Fasten the hinge with the barrel facing the lid. Place the lid against the hinges and draw a line along the top of the lid on one of the hinges. Transfer the 50mm measurement on each side of the hinges onto the lid on both sides. Remove the lid and the hinge and mark a 50mm line down the thickness of the plank (21mm) where the hinge will be fitted. Place the hinge edge on the 50mm mark, making sure that the line that you have drawn along the hinge is flush with the top of the lid. Draw a line around the outside and mark the holes. Drill two pilot holes 15mm deep for both hinges. Chisel out the hinge recess for the hinge plate as indicated above and attach the hinges.
You will note that the lid will hang about 3mm over the top of the step riser. This facilitates the opening of the lid.


14
17
18
16 15
Paint or varnish the unit as per your choice. If you opt for varnish, follow the manufacturer’s instructions regarding drying times between coats.
If you find the stairs are slippery (depending on your finish), purchase rubber step mats and glue them in place on each platform.
TIP

EasyDIY AUTUMN 2023 19 IMAGES: SUPPLIED
TOP
11 13 12
Give the unit a thorough sanding using 120-grit sanding discs.
Sand the masonite flush with the edges of the unit.
Place a piece of masonite on the workbench, then place the unit on the masonite and draw a template. Cut out the base using a jigsaw.
Attach the base to the unit using glue and nails. Allow the glue to dry.
The completed unit after sanding.

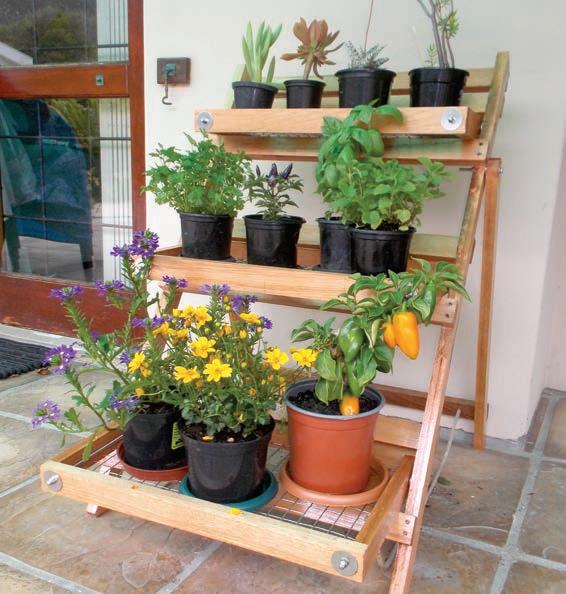
A foldaway PLANT STAND

This handy foldaway plant stand, ideal for potted herbs, or patio.
By Rod Baker
There is no complex carpentry required here … almost all the cuts are 90 ° , the only angles to be cut are for the feet, and those are simply angled cuts – in this case, 22 ° for the backrest and 33 ° for the main frame feet. Pot plant trays – as used in this project – are available in a range of sizes. Ensure that whatever size of trays you decide on, they will be wide and deep enough to accommodate your choice of pots. Also available are troughs or boxes, again in a range of sizes, and if you go this route, you need to be aware of their dimensions as well.
There’s no point in making the trays too narrow or too short that they cannot accommodate your choice of containers. But bear in mind that all the trays are exactly the same width – only the depth varies – so that you don’t end up being able to fit only two-and-a-half and not three pots/trays across.
Also, bear in mind that you will be placing drip trays under the containers, so their diameter must be taken into account too.
I suggest you take a tape measure to your local garden centre and measure the various containers and their drip trays and then size your planter trays to suit your choices as closely as possible.
NO MESHING ABOUT …
As this planter stand uses mesh bases for the trays to allow free drainage of overflow water, the widths and depth of the trays are governed by the mesh size – in this case 25mm – hence 25mm squares. Thus, all the trays in this planter are 25 mesh squares wide (21 bars), plus, of course, the 22mm each side for the tray sides, but tray depths are as follows (in mesh squares):
• Top: 7 (8 bars)
• Middle: 9 (10 bars)
• Bottom: 11 (12 bars)
• Plus the 22mm front and rear for the tray front and rear.)
TIME Two weekends
COST
R1 000
SKILL ASSISTANT
YOU WILL NEED:
• Meranti – 22x44mm – 8 lengths of 1 830mm, cut as follows*:
• Trays:
• 6 lengths of 555mm
• 2 lengths of 180mm
• 2 lengths of 232mm
• 2 lengths of 278mm
• Back legs:
• 2 legs of 750mm – tops bevelled at 45° and feet at 22°
• 1 brace of 648mm
• Main frame:
• 2 legs of 1 040mm – tops cut square at 90°, feet bevelled at 33°
• 7 braces of 600mm
• Mesh (25mm) – one length
540x1 000mm
• Sash cord rope stays – 6mm – 1 length of 2m
• Fasteners:
• Decking screws – 8x75mm – 28
• 6mmØ S/S threaded rod – 2 lengths of 1m cut as locking bars to suit tray depths
• 6 S/S dome nuts – 6mm – tray fronts
• 14 S/S Nyloc 6mm nuts – tray rears, tray pivots, leg pivots
• 12 S/S fender washers – 38mm x 6mm –tray fronts and rears
• 6 S/S 40mm 6mmØ – tray pivots
• 2 S/S 60mm 6mmØ bolts – leg pivots
• 24 S/S 6mmØ flat washers – tray pivots
• 36 S/S 6mmØ 30mm fender washers – tray pivots, leg pivots, sash cord washers
• Waterproof wood glue
• Finish of your choice – I chose high-gloss interior/exterior marine varnish.
*If you decide on different tray sizes, and go for a wood or slatted wood base rather than mesh, then the cutting list and materials will differ from the above.
TOOLS:
• Jigsaw or circular saw (preferred)
• Drill/driver
• Hacksaw
• Socket spanners and/or adjustable spanner and/or spanners.
FOLDING HERB STAND DIY 101 EasyDIY AUTUMN 2023 21
No
HERE’S HOW:
Having decided on your tray width and depth, clamp down the mesh (it arrives at the retailer in rolls so you need to clamp it flat, temporarily, to measure each panel of mesh accurately), snip along the middle of the mesh squares, as shown here, so you have 12mm ends projecting – they will be inserted into the tray’s sides.


Repeat the same procedure for the other side and for the two lengths. This shows the junction between the tray’s one side and its one cross-member. The illustration shows how the trays come together. You can also see how the mesh actually aligns the wood components and reinforces their junctions.

Allowing for about 6–8mm on each end, cut the 6mmØ threaded rod to length.


This shows one (temporarily) assembled tray. The other two trays are assembled using the same procedures.

Here are all three trays. Each is exactly 555mm wide, but as can be seen here, the depths vary, from shallowest on the top, to intermediate (middle) and deepest at the bottom.

FOLDING HERB STAND DIY 101 22 EasyDIY AUTUMN 2023 1 2 11 4 3 5 7 6 8 9
Snip off the end of the roll where the manufacturer completed the weld.
Snip off just the end 12mm length as it will be right on the end of the tray side. This is looking down the length of the top tray.
Mark off the position of each 12mm projection against the tray side. Note that the end of the side projects about 2mm beyond the mesh uncut bar.
Drill a 2mmØ hole about 12mm deep and 10mm up from what will be the bottom edge of the tray side.
This shows the 12mm projections inserted into the holes you drilled in the side.
Each tray’s outer dimension is 555mm wide.
10
To set the distance between the main frame legs and to allow full and free folding of the trays, I inserted a piece of 8x44mm cover strip (on one side only) and clamped the trays to the main frame leg.

I cut the 1 040mm main frame legs and the 750mm back legs to length. Then to set the right distances between each tray when folded away – namely 44mm – I used a couple of 22x44mm meranti offcuts as spacers.

To ensure the stand would close properly, I positioned the back leg pivot between the top and middle tray closed positions. Note that I have bevelled the tops of the backrest legs at 45 ° , partly for aesthetic reasons and also to ensure there are no square-cut corners to snag on either tray.
I inserted a thinner 3mm piece of ply (on one side only) between the back legs and the main frame legs (with the trays still clamped in position as shown just above) and cut the brace of 648mm. This will ensure that the backrest fits comfortably against the main frame when the unit is folded.


Then I checked the amount of wood behind the pivot and marked off a cutting position to trim it. I trimmed the offcut and drilled a 6mmØ pivot hole 67mm from the trimmed end.
This actually came later, but this is how I marked off the bevels on the main frame and back leg feet – first ensuring that the frame and back were spread sufficiently. Alternatively, you can carry out this step after assembly.
Then I secured the brace in position 50mm up from the feet using two decking screws and glued each end to assemble the back leg assembly. I used offcuts to lock the legs at exactly 90 ° while the glue cured.

I then used the offcut as my template for each tray’s pivot hole positions, which is on the centre line and 67mm from the outer rear edge of the frame. This is how the locking bar passes the recessed pivot bolt head. It means that even if the nut falls off the outer end of the pivot bolt, the bolt is still locked in position by the bar.


With the pivot spacing set as per the illustration, I used a length of 9x44mm cover strip as a gauge to set the position of the pivot hole in each tray side – using a level to ensure the offcut was level. At this stage, the main frame top and bottom braces had been added and temporarily strapped at the correct spread angles so that I could level the trays.

This is how the rear edge of the tray should rest against the main frame cross-member. lf you set the tray too far back you will you lose space in the tray itself (the cross-member protruding into the tray space) and will also make the tray less stable – its mass, with and without pots on it, should be heavily biased towards the front of the tray. (Also refer to the main illustration lower left detail.)
As you can see from this image, the cross-member does not take any storage space out of the tray itself.

EasyDIY AUTUMN 2023 23 13 21 12 20 16 15 23 14 22 17 18 19
Here are the two main frame legs and back legs temporarily assembled.
In turn, I temporarily fitted each tray in position, starting with the bottom tray, again using a level to get it level, and clamped a 600mm brace under it just touching the underside of the tray, having applied glue to the surface.

If you cannot use a level by resting it on top of the tray because a clamp is in the way, hold it up against the underside.
As I was using 6mmØ bolts 40mm long, I countersunk the inner ends of their holes in the tray sides. I inserted the bolts (each with a 6mm flat washer) from the tray side to the frame.
I drilled two pilot holes in the end of each brace, but to ensure there would be no splitting, I clamped the ends and further secured the join with two 8x75mm decking screws. This shows one driven in.
For the pivot bolt heads to be fully recessed, I countersunk each hole to a depth of about 5mm …


Hint … there is a 6mmØ 30mm fender washer between the frame and the tray – and it was a devil to align. So, attach a short length of masking tape to the washer(s), ensuring they are aligned, and shift the washer/washers until you can push the bolt through.
RUST? NO PROBLEM …
With the tray in its open position, I repeated the procedure with the upper brace.
… like so. The bolt heads must be recessed sufficiently to not snag on the back legs when the stand is closed.
The tray is free to pivot, but the pivots do not take any strain as the lower (front) and upper (rear) braces take all the strain.
I applied three coats of varnish to all three trays (including the galvanised mesh to further protect it against corrosion), and when the final coat dried, fitted the trays into position.
There is no problem should any of the mesh panels become corroded and require replacement at any time. The trays are held together only by the threaded rod locking bars (there are no screws passing through the frame pieces securing them together) with the mesh keeping the frame pieces aligned, so if mesh needs replacing, simply unbolt and remove the locking bars, withdraw the pivot bolts, and remove the tray from the stand. Now all you do is pull the tray frame pieces off the old mesh, cut a replacement mesh panel to the same size as the old one, slip the frame pieces back on, reposition the tray in place on the frame, insert the pivot bolts, insert the locking bars and rebolt them. Job done and as good as new!
FOLDING HERB STAND DIY 101 24 EasyDIY AUTUMN 2023 24 25 27 26 28 30 29 31 32
33
It is important to have a washer in this position to prevent the tray sides and inner surfaces of the frame wearing against each other. That would, in time, remove the protective varnish finish and allow water to penetrate the wood, possibly causing it to swell in wet weather and making folding the trays more difficult.


A close-up of the feet. Note that the front (outer) edge has been trimmed to around 80 ° This blunts the feet, making scratches less likely, and minimises the risk of chipping or splintering. This illustration shows the various measurements of the stand featured here, but bear in mind you may decide on different dimensions according to your requirements.

I drilled a 6mmØ hole about 75mm in from the ends and on the centre line in the rear leg brace and the bottom brace on the main frame and cut two lengths of sash cord as my rope stays. The 6mmØ 30mm fender washer stops the ends of the cord wearing against the edges of the holes. I kept the cord knot at the front quite short.
The end passing through the rear leg brace can be a bit longer; as the cord stretches, you might need to take it in a bit. You might also want to adjust the spread depending on the slope of the surface on which you place the stand.
These materials are available at selected Mica stores. To find your closest Mica, go to www.mica.co.za. If your local Mica does not stock exactly what you need, they will order it for you or suggest an alternative product or a reputable source.

EasyDIY AUTUMN 2023 25 IMAGES: SUPPLIED 34 35 36 37 38 40 39 41
I secured the bolt in position with a flat washer as a cushion, and a 6mm Nyloc nut to secure it.
Trays down and ready for their plant containers.
Here it is erected with the trays folded away. As you can see, the top tray is flush with the top of the frame when folded away. Folded down flat for storage

The tribal TEEPEE
HERE’S HOW:
RSTEP 1
Step 1
To create the frame of the teepee, drill a hole 30cm from the top of each piece of dowel. Thread leather strapping through all the holes. Tie a knot firmly, then wrap the rope around a few times and knot again. Spread the poles evenly to form a circular shape.
Step 2
For the teepee cover, lay the fabric on the floor. Using a tape measure and pencil, measure and mark six triangular-shaped panels that are 17cm at the top, 1m at the bottom, and 2.08m for the two sides. Cut out each panel using sharp scissors.

Step 3
With the leftover fabric, cut 15 strips that measure 30x4cm. These will be used to secure the cover to the frame.
Step 4
Lay out two triangular panels on top of each other, and use a sewing machine to sew along the length of one side of the panel, about 5cm in from the edge.
Step 5
Unfold panels, then repeat step 4 until you’ve sewn five panels together. Note: make sure the seams are all on one side. With the last panel, cut in half lengthways (this will be used for the door). Sew one half of the panel to each end of the row of panels.
Step 6

Along each seam, sew two of the previously cut strips – one at 65cm from the bottom and the other at 1.3m from the bottom. Sew one strip on either side of the door.

Step 7
YOU WILL NEED:
• 6 x 2.4m wooden dowel
• Drill & 5mm-drill bit

• 6m of fabric

• Tape measure
• Pencil
• Fabric scissors
• Sewing machine or sewing service
• 2m leather strapping
• Safety pin.
At the top of the teepee cover, turn over the fabric by about 5cm. Sew into place, leaving a 3cm hole above where the door is. Attach a safety pin to the remaining strip of fabric and thread it through the seam. Sew a 2.5cm hem along the bottom of the cover.
Step 8

TEEPEE DIY FOR KIDS’ HANDS EasyDIY AUTUMN 2023 27
Transform some plain fabric and wooden dowels into a cool tribal teepee. By Sami Simper
Position the fabric cover over the frame and tie the fabric strips to the poles. P
PROJECT SAMI SIMPER | STYLING ASSISTANT JACKIE BROWN PHOTOGRAPHY BRETT STEVENS/AREMEDIASYNDICATION.COM.AU/MAGAZINFEATURES.CO.ZA
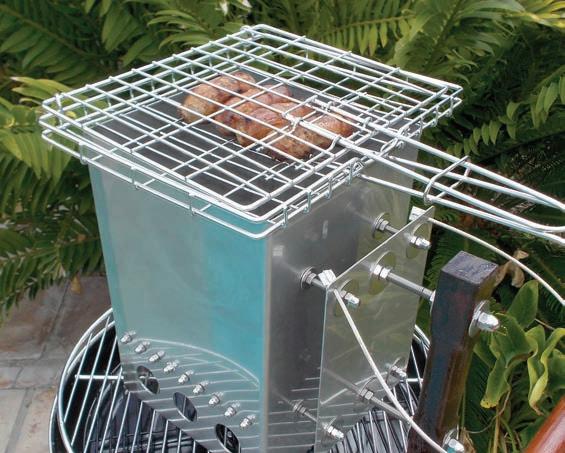
Your lifetime BRAAI BUDDY
By Rod Baker
There are many fire-starters on the market, ranging in price from less than R100 up to R550 or even more.
But I wanted to make one that would last for decades.
That meant going for stainless steel (living on the coast is great, but sea air plays havoc with mild steel) and having some way to replace the fire-grate –where the coals rest and the paper starter material sits – as this is often the first part to go as the metal ablates over time due to being repeatedly exposed to naked flame.
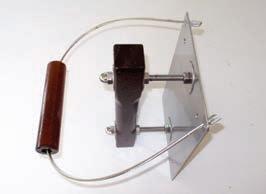
When you look at the main picture, note that the braai on which the fire-starter is resting is not large, so the fire-starter looks very big by comparison.
To be fair, it is not small, but it has a charcoal or briquette capacity of 8 800cm³ (8.8L). That capacity means it can be used to create a wide bed of coals in a large braai, or when only half full or less, a bed of coals for a small braai. It can also be used as a braai when a small 230mm grid is placed on top. However, it creates a lot of heat, so flip your sausages or steaks frequently unless you want burnt offerings.
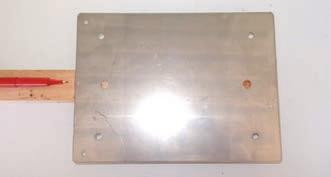
I chose 1.6mm gauge (thick) 316-grade (marine) stainless steel and a square shape, so that its fire-grate can be easily renewed as and when required.

All the parts are stainless steel, resulting in a heavy unit (almost 4kg), which is extremely sturdy and durable.


TIME
3–7 days
COST
R800-R1 000 (depending on the materials you use and the cost of the breaking and welding – unless you can do both yourself)
SKILL ASSISTANT No

BRAAI FIRE-STARTER Guide to 28 EasyDIY AUTUMN 2023
T
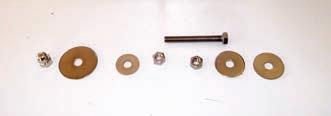
Here are the basic materials.
I taped and marked off the corners of the heat shield.
Filing each corner to round it off takes only a few seconds.
2
HERE’S HOW: 1
3
YOU WILL NEED:
• Stainless steel* 316-grade (marine) sheet, 1.6mm gauge:

• 1 x 300x800mm length folded and welded down one corner to form a chimney box 300mm high and 200mm on each side
• 1 x 200x150mm plate to act as a heat shield


• Stainless steel bolts:
• 4 x 50x6mmØ
• 2 x100x8mmØ
• 2 x1m lengths of 5mmØ threaded rods, cut to make 9 lengths of 220mm for the fire-grate
• Stainless steel washers:
• 4 x 38x8mm fender washers (used on handle)
• 4 x 25x8mm fender washers (used on handle)
• 4 x 20x6mm fender washers (used on heat shield)
• 4 x 30x6mm fender washers (used on heat shield)
• 8 x 6mm flat washers (used on heat shield)
• Stainless steel hex nuts:
• 8 x 6mm hex nuts (used on heat shield)
• 4 x 8mm hex nuts (used on handle)
• Stainless steel dome nuts:
• 18 x 5mm (used to secure fire-grate bars)

• 4 x 6mm (used on heat shield)
• 2 x 8mm (used on handle)
• Stainless steel rope:
• 1 x 600mm length 3mmØ
• 2 x 5mm washers
• Aluminium:
• Wire rope ferrules – 2 x 4mm
• Meranti:
• 1 x 220mm length 32x32mm for main handle
• 1 x 100mm length of 25mmØ dowel, drilled down the centre for the cable-mounted tipping handle
• Mahogany exterior varnish to protect the handle and tipping handle from the elements
• Masking tape to mark drill hole positions and prevent the drill bit tip from skittering across the steel’s surface.

*If you decide on different dimensions and/or materials or a different design, it will affect the cost of the final unit.
TOOLS:
• Mains power drill

• Hacksaw
• Router (to shape handle)
• Socket set and spanner/s or adjustable spanner
• Vice grips or crimping tool or a bench vice (to crimp the ferrules on the cable)
• 35mmØ hole cutter for metal

• 3mmØ HSS drill bit for drilling pilot holes and/or centre punch to indent steel before drilling
• 5mmØ; 6mmØ; 8mmØ HSS drill bits
• Deburring tool or 10mmØ drill bit to clean up reverse sides of drilled holes.
The one tipping handle 5mmØ hole, the one 6mmØ shield securing bolt hole, and the 8mmØ handle securing bolt hole.
Use masking tape on the areas to be drilled so you can mark hole positions accurately. Note that the diameter of each hole was also indicated to avoid any mistakes.
I used a countersink bit to deburr the reverse edges of each hole to allow the washers to seat properly.
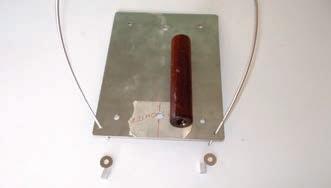
I used a centre punch to indent the surface of the heat shield at each drill point and then drilled each hole in turn. Shown here is the indent in the heat shield for the 8mmØ handle securing bolts. They were on the centre line of the heat shield and 30mm in from the upper and lower edges.
Now to position the heat shield on the side of the fire-starter and drill the holes for the heat shield securing bolts. Take care to line up everything in the centre and along the centre line.
There are two 5mmØ holes for the tipping handle cable and four 6mmØ for the bolts that secure the heat shield to the side of the fire-starter.
Then, using the predrilled holes in the heat shield, drill the hole for each one through the side of the fire-starter box. It is a good idea to drop a 6mm bolt into each hole as you complete it so that all four of the holes are exactly aligned. I marked a piece of tape on the top of the heat shield with the words ‘TOP OUTER’ so that the securing holes would be exactly aligned. (I positioned the holes as accurately as I could, and they were spot-on, but if one is just even half a millimetre out, the bolts will not seat properly; doing it like this ensures a perfect alignment).
EasyDIY AUTUMN 2023 29
The result … no sharp corners to ruin your hands.
4 5 6 7 8
10 11
9
Then, using the same techniques (tape, measuring, marking off and centre punching), I drilled the nine 5mmØ holes for the fire-grate bars. They are spaced at 20mm centres in a line 80mm from the base of the fire-starter. Thereafter I drilled three 6mmØ starter holes for the mandrel for the hole drills. This is because it is sometimes difficult to accurately see exactly where the tip of the centring drill bit is as the rim of the cutter itself shadows it. Drilling what is essentially a pilot hole solves this problem.


If you cannot get a drill bit or deburring tool into the body of the fire-starter, use a screwdriver to snap off the protruding skerf (shards) of drilled material that did not fall free during the drilling operation. These shards are extremely sharp and can cut. Hint: Use old pantyhose to check for any sharp bits still in place – this also works well when checking a wood surface for splinters before applying finish.
They are also nicely lined up.
Note that hole saws designed for use on metal have to be run at specific speeds, depending on their diameter. This 35mmØ has a maximum speed on steel of 250rpm. You can use oil as a cooling lubricant, but I used soapy water to keep the cutter cool … the bubbles help trap the debris.
I then cut and fitted the nine 250mm fire-grate 5mmØ bars, using a dome nut at each end to secure each bar. It is important to make these bare a little longer than the width of the fire-starter, so they do not distort the box shape when cooling after use.


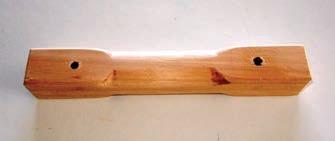
Now for the main handle … which will be 220mm long and cut from a length of 32x32mm meranti.
The three vent holes are 35mmØ, centre and 45mm in from each side, and 40mm up from the base of the fire-starter.


I used a ratchet drive and adjustable spanner to secure the dome nuts.
Without cutting off the 220mm length of the full length of meranti – which would have made securing it difficult – I routed each edge to a length of 100mm or so for a comfortable grip and left the ends squared off so that their securing bolts would bear on flat surfaces.
Then I cut the handle to a length of 220mm and sanded off all the surfaces.
The completed holes. There are just six vent holes in all – three per side – to allow air to get to the paper starter material and then to the coals so that an updraught can be created.The completed fire-grate top view.

I positioned it and clamped it firmly along the centre line of the heat shield.
Then I drilled 8mmØ holes about 5mm into the handle at each position.


BRAAI FIRE-STARTER Guide to 30 EasyDIY AUTUMN 2023
12 16 20 13 17 21 14 18 22 15 19 23 24
25
I
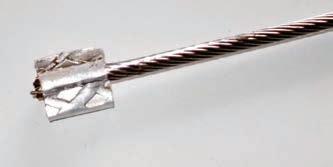
Now for the difficult part … drilling a hole down the dead centre of the tipping handle dowel. I began by countersinking a hole in the centre of each end to ensure that the 5mmØ drill bit tip would self-centre. I drilled the hole from one side.


I lightly crimped one ferrule on the end of the rope to lock it in position and then clamped it in my bench vice to lock it very solidly on the end of the rope.
Slip the washer onto the bolt and then the bolt through the heat shield, then the washer, nut, nut, third washer, handle washer, and finally dome nut. I suggest you tighten the dome nut first so that the handle ends up exactly parallel to the heat shield, but there is no need to overtighten it.
Then I turned it round, drilled a countersink hole in the other end, and completed the 5mmØ hole. Spot on!
This is a close-up of the result – and it will not be budging … ever.
Then tighten the other nuts. This will firmly secure the handle to the heat shield and to the fire-starter.

The completed hole. Even if the one you drill does not meet precisely, that junction is bang in the middle of the handle and invisible.

Then I threaded a washer onto the rope, passed its end through the heat shield, then through the handle, back through the heat shield, slipped on a washer, and then slotted the second ferrule onto the end. Now is a good time to fine-tune the length of the rope, but I found 600mm worked well.
Now to secure the heat shield to the fire-starter. Use the exact same method as you attached the handle – again, note the order of the washers and nuts …
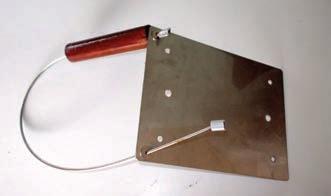
I repeated the securing process, and this is the completed tipping handle assembly.
… washer, bolt through side of fire box, washer, nut, nut, washer, shield, washer and finally dome nut.
These materials are available at selected Mica stores. To find your closest Mica*, go to www.mica.co.za. If your local Mica does not stock exactly what you need, they will order it for you or suggest an alternative product or a reputable source.
The parts of the tipping handle; the 3mmØ wire rope can be cut short if you wish. Shown here are the heat shield (outer surface), cable, two 5mm washers, two 4mm ferrules, and the tipping handle, already dipped in mahogany finish three times.
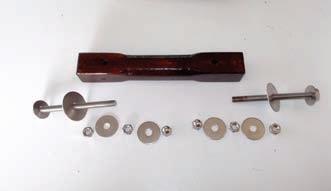


Now to attach the handle to the heat shield using the 100x8mmØ bolts – note the order of the washers and nuts.
*You may find that your Mica store does not stock stainless steel sheet and in all likelihood would not offer a breaking (bending) or welding service. You would then need to find a company that does offer these services. All the other parts, such as the stainless steel nuts, bolt and washers should be available in Mica stores.

EasyDIY AUTUMN 2023 31 IMAGES: SUPPLIED
26 27 36 31 28 37 32 29 38 33 30 39 34 35
completed the holes, and the handle is complete apart from applying the mahogany finish.

Because this pine table doesn’t weigh very much, it’s easy to move around and serve as a portable table.

Simple pine SIDE TABLE
This project for a side table is based on a design used commonly by early cabinet makers for both large and small tables.
By Geoff Hollingdale
WORKING WITH WOOD Workshop EasyDIY AUTUMN 2023 33
THE CONCEPT
PLEASE NOTE: The design we’re going to use is made of one-piece laminated pine shelving 1 000 x 457 x 20 mm –standard or cut from 1 800 x 457 x 20, plus one piece 1 800 x 220 x 20 mm. (You can scale up or down with the size to suit your needs.)
Rather than show you photos of the various stages of cutting and trimming, a six-step guide is described, which, using simple power and hand tools, will enable you to construct the table. For example, it is best to cut the leg and feet parts to final shape after they are assembled.

The table is made up of parts A through E. Start by making the feet (A) and (B) legs. Try to select pine with not too many knots as these parts support the table.
Step 1. Cut four pieces of 20mm pine shelving to 130x280. These will become the item “A”.
Step 2. Mark out the pieces as shown in Fig. 2. Remember to measure twice before cutting. Accuracy is important here, so before starting to cut to shape, check that the angles noted are close to those given. The design of the table is to “squeeze” as much as possible out of standard pine PAR.


Step 3. This step involves clamping a foot piece into a wood vice and carefully marking out the slot that needs to be cut. Use a tenon or backsaw to cut a 28mm deep slot; you can use a steel rule to check depth. Keep inside the lines marked on the edge of the wood. Use a 12mm well-sharpened chisel to remove material and clean out the slot. As a “test” jig, you can use two pieces of 6mm MDF glued together to see if the slot is evenly cut and the test piece of 12mm is a snug fit. Do this on all four of the foot pieces.
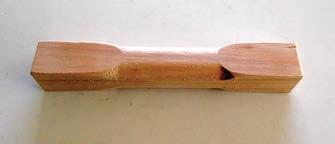
Step 4. Here we start preparing the legs “B”. Make two pieces as shown in Fig.3. The work to be done here is to cut the tenon and the slot in the middle of the leg. Again, take care in measuring and marking out. The centre slot can be drilled out initially using a 12mm Forstner or flat drill bit. Clean up the tenon with a chisel.
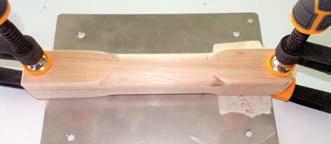
This is where we join the feet pieces to the leg piece (Fig. 4).
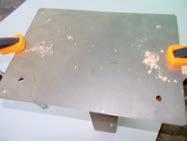
“Dry fit” the leg piece to two feet pieces. Mark out and cut right angle slots in the leg pieces 25x25mm. The right-angle slots will accommodate a pair of clamps. Glue the leg tenon, ensuring an even coating of glue on the tenon. Place and tighten clamps. Leave overnight to harden.

Originally, I was going to join the legs to the cleat “D” with a tenon joint – you can work with this option. I decided to use 8mm dowelling to secure the leg (B) to the cleat (D).
A long piece of stiff card bent slightly will assist in marking out and creating the curve on the leg. This curve at the centre point is 60mm. Use small panel pins to position the card to draw the line of the curve using a pencil. We’ll leave the shaping of the leg until we’ve got the feet attached.
WORKING WITH WOOD Workshop 34 EasyDIY AUTUMN 2023
FIG 1.
STE-BY-STEP GUIDE
FIG 2.
FIG 3.
FIG 4.
Create a paper stencil for the foot shape using a layout like Fig.6. Make a mirror image copy for the right leg. Tape the left and right sides together. Use stencil glue or double-sided tape to hold the paper stencil on the foot assembly.
Take some time and care doing this as you will use the stencil to cut to shape the legs.
When you’ve marked up both leg and feet pieces, use a jigsaw to cut to the stencil line. (Fig. 7). Keep the cut line outside the stencil line. Use a wood rasp to shape the legs and feet to the desired profile. Sand the assembly with an orbital sander fitted with 120-grit sanding paper. “Break” all edges to slightly round them. I like to use a hand-size finishing sander, such as the Maktec or Ryobi, both of which allow you to use, economically, a quarter piece of a standard sanding sheet.


Step 5. Now we start to create parts C and D, the cross-brace and the top support.
Again, to create the line for the curve, use a strip of stiff card positioned with panel pins to draw the curve.
Carefully mark out the two tenons using a single-pin marking gauge. This is one of the tools you should have in your basic set of woodworking tools. Carefully cut to the outside lines of the tenons. Use a 12mm chisel to trim to dry fit tightly in the leg pieces. Take some time doing this step to get an aligned joint square to each leg. You don’t want a result where the table rocks from side to side because of poor alignment between the legs and the cross-brace. If necessary, trim the tenon to get the assembly to stand upright without skew between each side.
Finally, cut a sawblade thin slot in each tenon to take the thin wedge used in the final glueing. Use a jigsaw to cut the curve. Keep the blade outside the marked line. Use a wood rasp and an orbital sander with 120-grit paper to give a smooth shape to the piece. “Break” all edges with the sandpaper.
The top support is shown in Fig. 9. The profile can be cut using a tenon or back saw. Use a wood rasp to create the rounded ends. The suggested end rounding is 16mm, but you can draw a curve around a pill bottle, for example, to create the shape.


For the dowelling, I used a dowelling jig made by Milescraft©, the Joint Crafter kit, which allows 6, 8 and 10mm dowelling to be positioned accurately on mating pieces of wood. I used the 8mm doweling drilling holes in the top of the legs that we discussed in Step 4 to mate with the holes in the two support pieces.
The holes drilled for the top fixing screws were 4x40 mm. I overbored the holes to 5mm to allow for shrinkage and movement of the top.
EasyDIY AUTUMN 2023 35
FIG 5.
FIG 7.
FIG 8.
FIG 9.
FIG 6.
Step 6. Now we can cut and shape the top. Piece E. The shape you will cut the top to is a compound set of curves. From the 1 000x457x20mm pine shelving, start by cutting the length of the board to about 750mm.
Mark out the curves on the top using panel pins and stiff card strips. I marked off several points at 35mm from the edge to use as the curve termination edge points from the centre line. See Fig. 10.
Carefully trim the edges using the jigsaw outside the marked lines to get the general shape. Use a wood rasp to shape the top to the curves. A worthwhile hand tool to have for this sort of work is a spokeshave. These are available at hardware shops and range in price.

Sand the edges with a rounding action to create an edge without hard edges; it should feel gently rounded. Pick which side looks better, in other words, fewer knots and breaks. Sand the side you’ve chosen to a fine finish. A 220-grit paper is more than enough.
Check all the parts have been sanded to a fine finish. It’s now time for the assembly.
THE ASSEMBLY
Start by glueing the tenons on the cross-brace to the legs. Prepare some thin wedges from any hardwood offcuts to use in pinning the tenons. Lightly glue the tenons, don’t overglue. Wipe off any surplus glue as the tenons fit into the legs. Stand the table on its feet and check that the feet are aligned on either side. The legs should not be “skewed” to each other; the assembly needs to sit firmly on its legs.
Drive the thin wedges into the tenons to lock them in place. Set the assembly aside to allow the glue to set.
The next step is to have the 8mm dowelling already cut to size and ready for assembling the top support to the legs. Use the 8mm dowelling that is sold with the “rifling” already cut into the dowel. Lightly spot glue onto the dowel and gently tap it into the top support pieces. Take each top support and lightly spread glue across the joining surface and the dowels and set into each leg. Use a scrap piece of wood and a mallet to ensure the top support is firmly on and square to the leg assembly. Set aside for the glue to dry. Chisel and sand the protruding leg tenons flat to the surface. You can leave it like that or make small shaped pieces that can be positioned and glued over the tenons as I did on the version shown in this article.
The final step is to prepare the finish on the table before assembling the legs to the top. In the version I made, I used Woodoc Gel Stain. It’s an easy-to-use concentrated stain for wood. It spreads easily and evenly when applied. Gel Stain is available in a range of colours in wood and decorative tints.
The advantage of the gel stain is that it does not run on the surface and gives clean lines with masked areas. This makes it easier (and less messy) to work with and gives better results when masking areas. It is also easy to control the intensity of the colour by applying multiple coats (each coat is dry enough for another coat in about one minute).
Assemble the top to the legs. Recheck that the table sits firmly on its leg without rocking.
If there is a slight misalignment, you can use a drawing pin tapped into a leg to correct the table stability. Finish the assembled table with Woodoc 5 Sealer. Two coats will be sufficient. Lightly rub down the surface between coats.
A CUTTING LIST IS SHOWN IN THE FOLLOWING DIAGRAM:

PROFILE JIG SHEET

A profile jig sheet in A3 format for the legs is available HERE: EasyDIY@picasso.co.za

WORKING WITH WOOD Workshop 36 EasyDIY AUTUMN 2023 IMAGES: SUPPLIED
FIG. 10.
The spokeshave. A useful tool for you to add to your hand tools.
FIG. 11.