
12 minute read
Plough Maintenance
Plough gets a good prep
The opportunity to acquire a modern classic Kverneland PB 100 six-furrow semi-mounted plough to run behind his Ford TW-25 Force II was too good to miss for machinery journalist Geoff Ashcroft. Here, he explains how he prepared his new purchase for work by firstly giving it a good check-over, and then carrying out a number of adjustments and maintenance jobs.
Advertisement
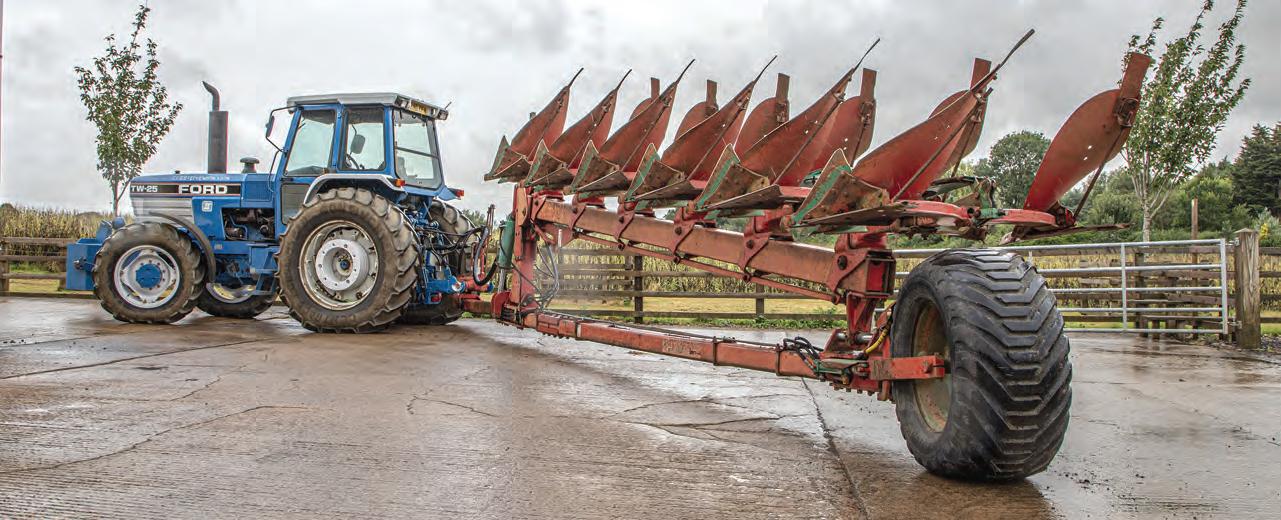
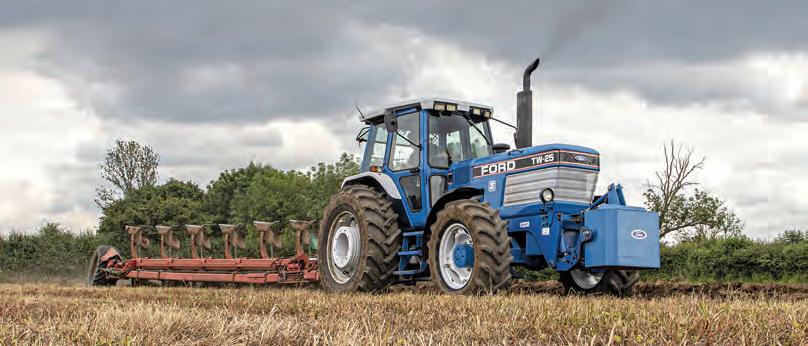
BACK IN THE EARLY 1990s, it wasn’t uncommon to see a Kverneland PB 100 semimounted plough on the back of a big Ford. Fast forward some 30 years and it was a classic combination that I was keen to replicate with my own Ford TW-25 Force II.
The Kverneland PB, available in builds from four to eight furrows, was instantly recognisable from its depth wheel location, which was right at the back of the plough. This format helps to keep the turnover height much lower than semi-mounted ploughs with a wheel ahead of the rear furrow, although the tradeoff is that ploughing in corners could be considered a compromise.
To improve manoeuvrability, the PB’s rear wheel is plumbed into the turn-over cylinders, so the wheel steers the plough during the turnover sequence, reducing the space needed for headland turns.
The plough has hydraulically-adjustable furrow widths from 12-20in (30.5-50.8cm), an underbeam clearance of 75cm (29.5in) and a generous 100cm (39.3in) point-to-point clearance. Kverneland’s autoreset spring protection system is part of the PB’s specification, while RB versions swapped leaf springs for shear bolts.
From a tractor hydraulic perspective, there is a requirement for a minimum of three spools: the first is a single-acting service to raise the plough on its depth wheel; the second is a double-acting function for the turn-over mechanism, which is also linked to the rear wheel’s two steering cylinders; and a third doubleacting service is required for the vari-width function.
As an option, a hydraulic front-furrow width adjuster can be fitted, to replace the mechanical screwtype setting. On tractors where a fourth service is not available, it has been known to connect a change-over valve to the hydraulic brake line, allowing a dab of the brake pedal to switch between two spool functions.
When transporting the plough, the bodies are turned half-way, into the butterfly position. Taps on the turn-over cylinders allow the function to be locked, which diverts oil to the rear wheel; this allows the turnover spool to be used solely to steer the rear wheel, improving on-road manoeuvrability and simplifying access into tight gateways.
Having stood the test of time since its introduction, the PB has only recently been replaced in the Kverneland catalogue by the more-modern 6300S Series. What this means is that parts availability is still very impressive.
This particular PB 100 plough had been in regular use on a farm in the Scottish Borders up until a few years ago, and its condition reveals that it had been well-looked after. When its operator retired, the farm changed to a five-furrow fully-mounted model, and consigned its PB to retirement.
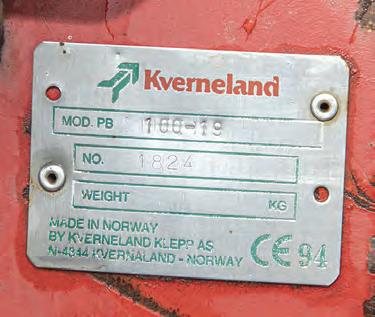
The serial number of 1824 revealed a 1995 builddate for this six-furrow plough with manual front furrow adjustment. It is equipped with Kverneland’s HD spring pack, No.19 bodies, maize skimmers and a 550/45 x R22.5 flotation tyre.
Buy it now
FOLLOWING THE COMPLETION of its refurb, this 1995 Kverneland PB 100 plough is now up for sale. It is ready to go to straight to work and is in great shape for its age. It is £5000 plus VAT. If you are interested, give Geoff Ashcroft a call on 07977 129726.
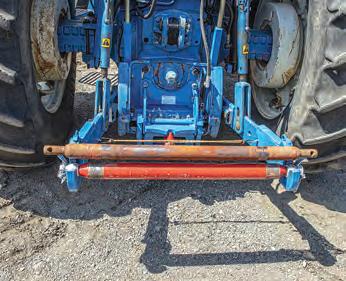
Cross shaft is wrong size
1
With the plough’s pivot-point behind the tractor, the three-point linkage needed to be stabilised. This required a change of plough cross-shaft to work with the TW-25’s wear pads and sway blocks. Kverneland offers a variety of crossshaft sizes covering 825-965mm, suiting Cat II and III link arm requirements.
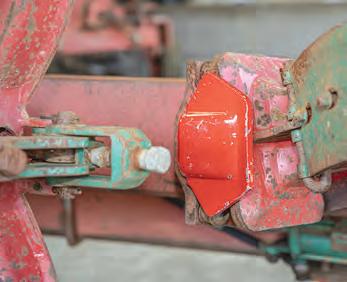
Steering plate is replaced
4
On auto-reset models, the ballsocket connection for each body assembly is partially covered by a steering plate so that when the bodies trip out of work, they move vertically. The plate ensures that each assembly resists misalignment as it lowers, to correctly re-seat on its ball and socket connection.

Leaf springs are tensioned
7
Correctly-tensioned spring packs are curved, not flat. Using the long spanner, the spring tension was checked by lining-up the ground notches with the spring pack’s retaining pins. Spring tension was set using the rear set screw, aligning the spanner’s notches with the pins. It should be a distance of 70cm.
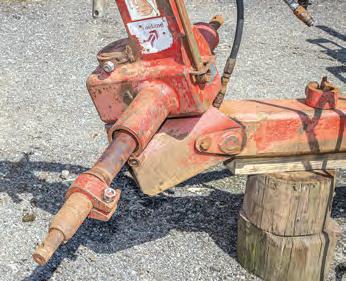
Replacement shaft centred
2
Cross shaft replacement was straightforward. Loosening the stop-ring clamps allowed the 60mmdiameter shaft to be withdrawn from the headstock. Its locating top-hat steel bushings were replaced. Care was taken to centre the cross-shaft in the headstock before locating and tightening the stop ring clamps.

Check-up for leaf springs
5
Auto-reset leaf spring protection is obviously less effective when some of the springs are snapped. The HD spring pack uses a total of seven leaf springs to protect each leg assembly. Each body assembly needed checking for the correct spring count, with any broken or missing items being replaced.

Tyre pressure is important
8
The 550/45 R22.5 flotation tyre should be run at 2.5 bar (36psi) pressure to prevent tyre compression in work. Compression of the tyre could affect the ploughing depth for the rear bodies. The bearings were checked for free play using a pry bar. The hub was taped over to help retain the dust cover.

Skimmer is a different type
3
The overall condition of the wearing metal was generally very good, with additional pieces welded on areas that wear quickly. The first right-hand skimmer body was clearly not a match for the others, and was put on the list of parts to replace. All skimmer adjustment bolts were loosened and lubricated.
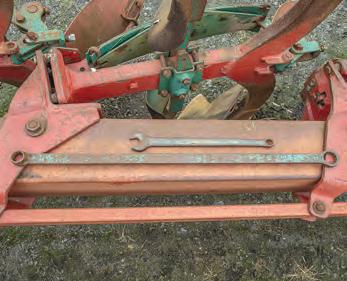
Plough spanners provided
6
All Kverneland ploughs come with two spanners that fit every nut and bolt on the plough. They are 19/27mm and 27/36mm and are carried on the headstock. The longer of the two spanners comes with inscribed measurements to assist with working depth settings and two very important notches ground into one side.
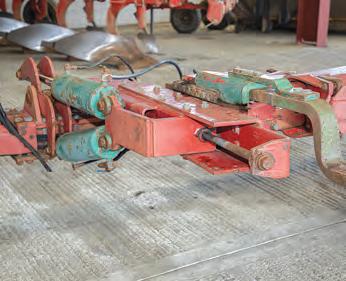
Adjustment of front furrow
9
With the filler point fitted, it was checked for alignment. It should be at right angles to the top of the tank when fitted correctly. When the work to unite the top tank and core had been completed, the assembly was turned upside-down and shaken to dislodge any bits of solder that had got into the tank.
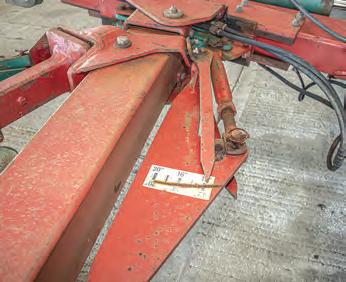
Reset hydraulic vari-width
10
The spool was operated to check the vari-width function which opens and closes furrow widths using a linkage, giving a 12-20in working range as indicated on the pointers. It was reset by moving the cylinder’s 200mm stroke length to mid position and adjusting the turnbuckle until the indicator showed ‘16in’.
Access to trip mechanism
13
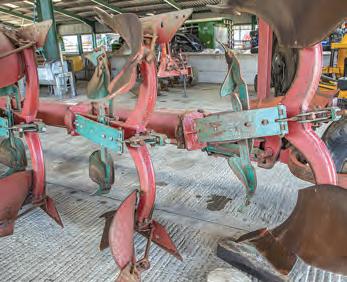
In the ball/socket fixings that provide four-way movement when the auto-reset mechanism trips, the balls are prone to wear and can become loose. They were inspected and then replaced as necessary by lowering each plough point onto a block of wood to trip the auto-reset mechanism and create access.
Coding the hoses with ties
16
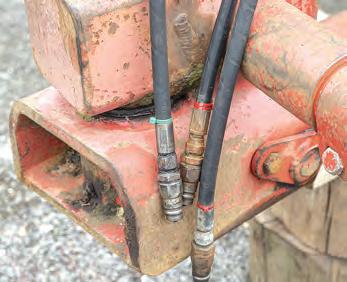
Deciphering hydraulic hose connections for the plough’s three services meant tracing pipe runs to their respective cylinders and adding different coloured tie-wraps to ease identification of each control element. A single wrap was used to indicate outward oil flow; a double was used on returning pipes.
Broken turnbuckle bracket
11
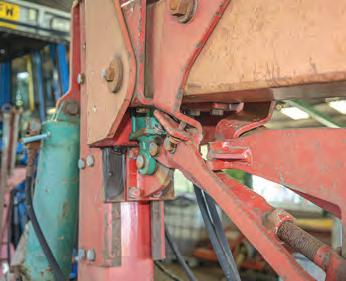
Misalignment on the furrow width pointers needed investigation to find why the measurements didn’t line up on both sides on the plough. The culprit was a failed turnbuckle bracket that needed a retaining lug welding back into place. Furrow width adjustment and indication could now be correctly reset.
Worn shins being replaced
14
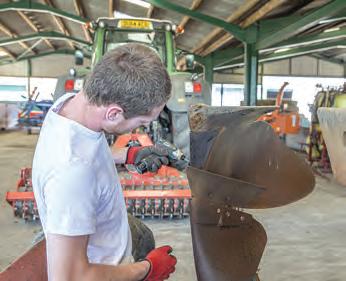
The shins on this particular plough had seen better days, with their furrow-wall edge worn away to expose the leg. As such, they were in immediate need of replacement. Original parts with all new fasteners are still available and were obtained from Kverneland for the PB100, guaranteeing a perfect fit.

Sheathing will be replaced
17
Replacement of a damaged hydraulic hose had been done the easy way at some time, and simply tied-up onto the headstock. To contain and group all the pipes neatly, the original pipe sheathing would be removed and replaced by spiral hose wrap protection supplied by Apex Fluid Power of Carlisle, Cumbria.
Lubrication for slide plates
12
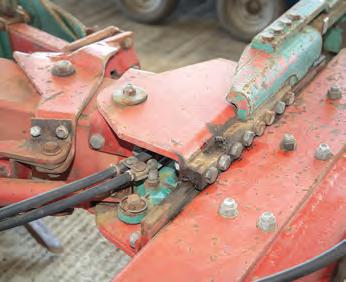
Vari-width plough slide plates need to be greased to ensure easy, onthe-move adjustment of the plough’s furrow width. After greasing the side plates, the vari-width function was operated from its widest setting to its narrowest setting. This was done to ensure the grease moved across the plates.
Swapping over the points
15
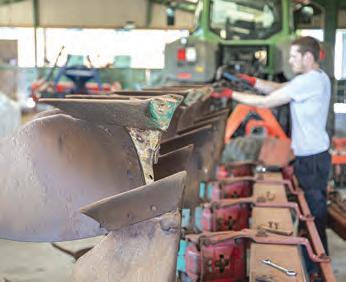
The reversible plough points were barely worn, but it wasn’t known why they had been fitted left-ontoright and vice-versa. The points were swapped and a spare set was added to the inventory. Knock-on points and holders are available to retro-fit, reducing downtime for those working in abrasive soils.
New pipe clamps are fitted
18
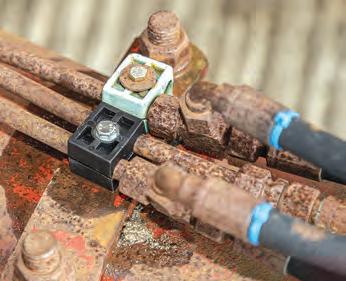
The plough’s steel hydraulic pipes are secured to the plough beam using nylon pipe clamps. Some of them had broken or been lost over time, so to retain the integrity of these pipes, and prevent unwanted movement and fracturing, new hose clamps were installed to hold the pipes securely in their positions.
System has got relief valve
19
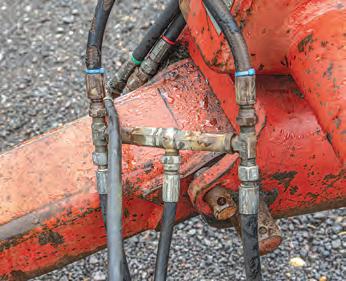
Examining the hose layout revealed a link hose between the turn-over cylinder feed and return lines. A relief valve in this link with a leak-off pipe protects the cylinder rods from damage during turn over, if the tractor spools don’t return oil quickly enough. Excess pressure spills through the valve.
Serial number was useful
22
The original serial number plate proved useful in establishing the plough’s 1995 build date, and also allowed identification of the correct parts required to get the plough back into good working condition again. The mouldboards had plenty of life remaining, as did most of the soil-engaging parts.
Stable in transport position
25
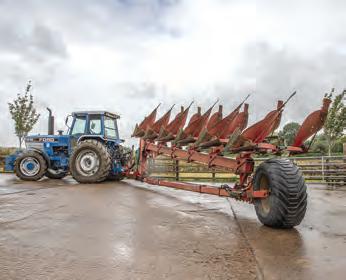
On-road stability is enhanced when the furrow width is at its narrowest setting, and the link arms and depth wheel are lowered. This lets the plough beam ride as close to the ground as possible, lowering the plough’s centre of gravity. A Sparex Connix wireless road lighting kit would be a useful addition.
Replacing vari-width parts
20
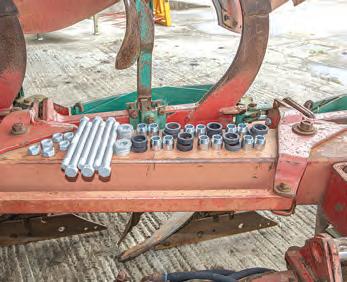
The PB100 plough’s vari-width mechanism uses wear rings and collars for each body assembly, and these were easily replaced in order to keep each pair of bodies tight. Worn parts would cause furrow widths to vary. Removing the bolts and sliding the bodies gave easy access to the vari-width components.
Wing stops need attention
23
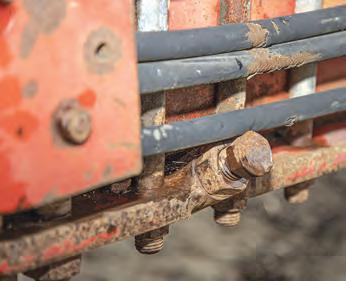
Both of the plough’s wing stops were in need of attention to allow the plough bodies to sit vertically when in work. Any changes made to the working depth would require these to be adjusted to suit. They are there to offer finetuning in different soil types, to ensure correct soil inversion is achieved.
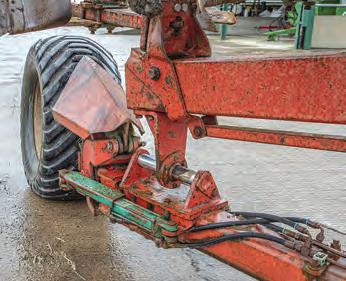
Wheel steering is engaged
26
With the plough in its butterfly position and the turn-over rams isolated, oil can flow directly to the depth wheel’s two steering cylinders on either side of the frame. They allow the plough’s rear wheel to be steered, improving on-road manoeuvrability and simplifying access into tight gateways.
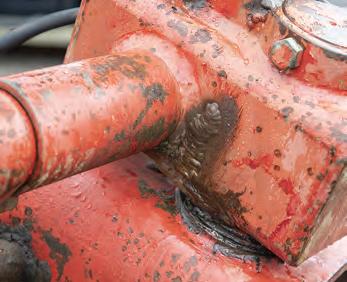
Cracks have been repaired
21
The stresses and strains on a semimounted plough can sometimes manifest themselves in the headstock. All credit to the previous owner of the PB100, as this plough had been repaired rather than allowed to fail. Such diligence had helped to maintain the integrity of the plough’s original structure.
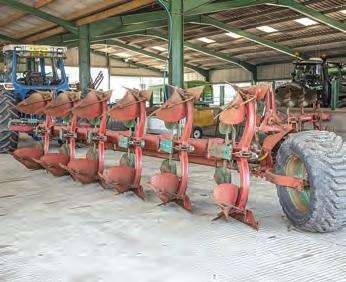
Mouldboards are checked
24
Mouldboard positioning was checked to ensure left- and righthand sides matched. Measurements across the back of the bodies should be the same as the point-to-point clearance. Unless the mouldboards are in line and at the same spacing, you will struggle to get both sides of the ploughing to match perfectly.
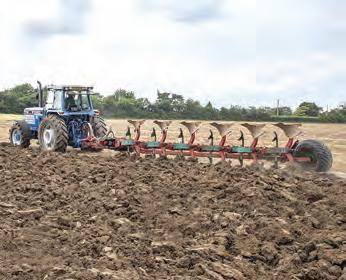
Trial run in heavy clay soil
27
Gloucestershire heavy clay that had been fallowed for two seasons proved to be a suitably tough proving ground for both the PB100 and the Ford TW-25. All that is required now are some summer stubbles to get those mouldboards shining! As this plough is now for sale, someone else may have the pleasure of that.


