
15 minute read
Ask the Experts
Got a technical problem or query? CLASSIC TRACTOR and its panel
of experts are here to help. Drop us a line by e-mail or letter and we’ll do our best to answer your technical questions through the magazine.
Advertisement

CONTACT US
e E-Mail: asktheexperts@sundial
magazines.co.uk
NEW HOLLAND 8360 IH 574


QFor the past five years we have been using a New Holland 8360 for contracting work. It has previously been no trouble, but just recently it has started missing reverse gear and is flashing ‘CP’ on the dash. If you stop and start the tractor then it is OK, but the problem is getting worse. Friends tell me that the synchronisers are worn out and that replacing them will be an expensive job. Are they right and is it a difficult job?
Paul O’Sullivan, Mallow, Co. Cork.

AIt sounds likely that it could be a synchroniser failure. Synchronisers are a wearing part and they do need changing periodically. Firstly, it would be worth getting an engineer to come out and calibrate the transmission. If the synchronisers are at fault, then this will bring up a fault code during calibration. Calibrating the transmission also detects any wear and accounts for the wear when changing direction or gear. If calibrating the transmission doesn’t work, look under the transmission on the right side. You will see two rotary sensors, known as potentiometers. Remove the retaining nuts and slide the potentiometers off the short dowels that secure them. Inside you will see small plastic teeth that grip onto a rod protruding from the transmission. If the plastic tabs inside the potentiometers have worn off, then the synchronisers have failed. The reason for this is that when the synchronisers wear and fail, the rods that select the synchronisers move further than they should. This results in the rotary rods, connected to the synchroniser rods, moving more than the potentiometer allows for. As a result, the small plastic teeth break off inside the potentiometer.
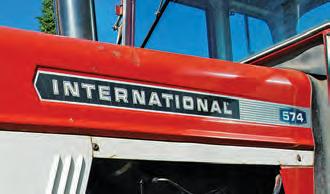
QMy 1976 IH 574 is suffering from a loss of drive which I think may be linked to its Torque Amplifier (TA) splitter. The problem has been occurring after prolonged periods of grass topping. Upon losing drive, if I dip the clutch for a few seconds I feel a small bump and then drive returns for a few minutes. The drive problem then occurs with increasingly frequency until I shut off the engine and leave it for a while. The oil level seems to be fine and I can stall the engine with the TA in high or low. The clutch seems fine and I can feel the change in speed when moving. When I’m topping, I’m running at about 1600rpm in third gear, Low range, with the TA in high.
Alex Pettie, Edinburgh, Scottish Borders.
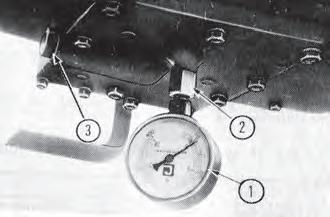
AThe Torque Amplifier on your tractor has two parts. The ‘high’ drive is through a clutch pack working at 180-220psi, while the ‘low’ drive is mechanical through a sprag clutch (freewheel). When you have been topping in high drive, the oil has got hot and thin, which may have been leading to a loss of pressure. If you can, get a 400psi pressure gauge in the cab on a flexible tube and plug it into the test port (see number 2 on diagram) on the plate under the tractor. You can check this gauge as you are working. When the pressure in the clutch pack drops, the sprag should take up drive, but unfortunately this is not happening. The sprag is gripping from a standing start, but if the pressure drops and high drive slips, it is expected to
Write to:
ASK THE EXPERTS, CLASSIC TRACTOR,
Sundial Magazines, 17 Wickham Road, Beckenham, Kent BR3 5JS.
pick-up drive. As the shaft and hub are spinning, it is failing to grip the shaft and drive is being lost. Oil for the TA comes from the oil cooler return. The oil flow should be 2.0-2.5 gallons/minute. This can be checked by running half-a-gallon of oil into a measure in 10-15 seconds with the engine running at 1600rpm with the PTO disengaged, then checking again with the PTO engaged. A big difference may show the fault to be leakage in the PTO, resulting in a shortage of oil for the TA. A pump on the base plate supplies TA pressure via a regulator spring behind the plug (number 3 on the diagram) facing forward on the base plate. That spring may be at fault. If the oil flow and pressure are correct then a TA rebuild and new sprag will be required.
JOHN DEERE 4020

QI have recently purchased a John Deere 4020 Powershift. I had been assured the engine had recently been overhauled, but I notice that the engine is breathing heavily from the vertical breather pipe. Am I correct in assuming this is due to worn pistons and/or liners and is an expensive rectification to undertake?
Jim Swanson, Holt, Norfolk.
AOn any tractor other than a John Deere 4020 the answers to your last two questions would be ‘yes’ and ‘yes’. The 4020 is different. When introduced, the 4020 engine was far ahead of its time and far ahead of the then current lubrication oil specification. It was thought that some oils could produce life-shortening oil vapours. To counter this possibility, an air pump was mounted on the nearside ▼
rear of the engine front mounting plate. The pump was driven from the adjacent timing gear and sucked filtered air from the intake manifold. This air was then pumped into the crankcase via the timing cover interior. From there it picked up the vapours and the resultant mix discharged from the engine breather pipe. Therefore, the heavy breathing you mention is a perfectly normal design feature on this engine and nothing to worry about.
DAVID BROWN 1210

QFor the past 12 months, the engine on my 1972 Davis Brown 1210 has gradually lost its ‘snap’ and doesn’t hang-on under load as it used to. My local mechanic has checked the compression, the fuel injectors and fuel injection pump and has found no faults. All we notice is a slight noise coming from the area of the power steering pump, although this is working perfectly. We would appreciate any advice you may have.
Ken Lovely, Tiverton, Devon.
AThe problem is probably worn timing gears. Early David Brown engines were fitted with coarse-toothed spheroidal graphite timing gears for quiet running. However, with the extra load imposed by the power steering pump and the Minimec in-line fuel injection pump, the timing gear teeth were prone to wear, thus retarding the pump and valve timing with the consequent loss of performance you mention. The factory cure was to switch to fine-tooth, steel gears, which had improved wear characteristics albeit with a very slight metallic ‘ting’ on tick over. To check this theory, remove the power steering pump and check the backlash in the timing gear train. It should be 9-12 thou, gear to gear. If greatly in excess of this, replacement of the timing gears will be required. This will entail salvaging the gears from a post-1974 David Brown 1210 or 1212 at a breaker’s yard.
WHEEL NUT SPACERS
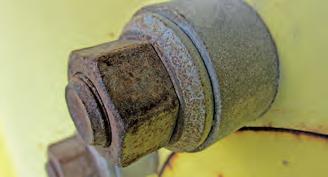
QCan you enlighten me on the purpose of the spacers (see picture) located between the wheel nuts and centres of my John Deere tractor? They seem to have no discernible practical function. Thanks in advance.
Jim Stevens, Royston, Hertfordshire.
Rear lift problem is resolved


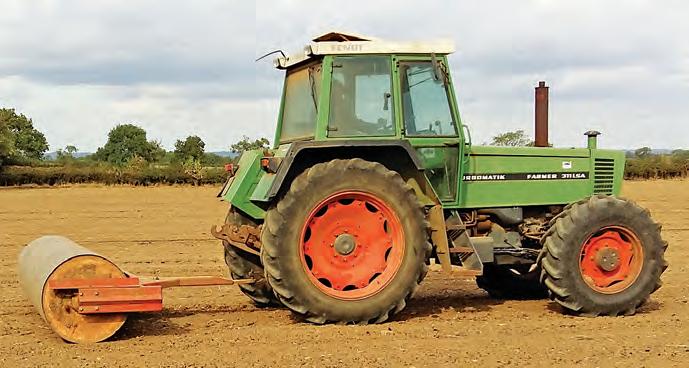
QMy Fendt Farmer 311LSA has a problem with its rear hydraulic lift. It periodically stops working, at which point the trailer tipping function stops too. When I check the hydraulic oil level, it is low, but there are no leaks from any hydraulic functions. Can you advise me on the possible cause of the problem?
Alan Kennedy, Kells, Co. Meath.
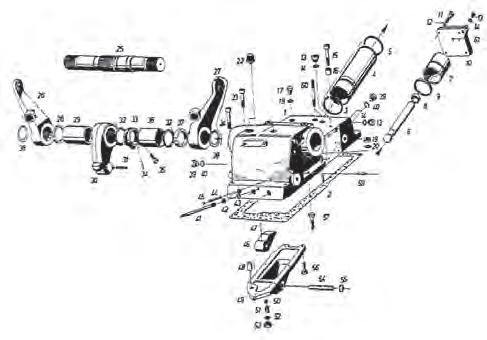
AFirstly, do the lift arms drop if they are left in the raised position and has the transmission oil level increased? If so, it indicates that the main lift piston seal has worn or hardened over time inside the power lift casing. Check that the rear axle oil is not about to run out of the breather on the top cover. When your tractor was new, it would have been delivered with a parts book, but as this is probably no longer available to you, here is the schematic you need from the parts book. You will need to replace the worn/hardened seal (number 9), insert (number 8) and cylinder O-rings (3 and 5). You will also need the top cover gasket (number 2) and various other O-rings to seal the front plate. The lift housing can be removed without raising or removing the cab but will require the fabrication of a lifting bar and a suitable floor crane. It may help to remove the rear wheels and support the tractor safely to gain easier access to the fixings. Lower the power lift completely and then disconnect the lift arms and assister ram, and catch all the oil. Start by lifting the cab mat and the metal cover in the cab below the front of the seat. The linkage and necessary pipes can be detached. When all of the bolts (numbers 24, 23, 15 and 57 on the schematic) have been removed, the unit can be lifted with the crane, balancing it with the fabricated bar. Pull it to the rear. The rest is straightforward. Make sure everything is clean and use lubricant to re-assemble the components. There should be no need to make any adjustments to the operating linkages, provided nothing is damaged. The moving parts in the lift, especially the lifting crank and push rod, should be coated liberally with high pressure grease and there will be oil in the housing (number 49). When everything has been re-assembled and refitted, it is advisable to replace the rear transmission oil, which should be EP80 gear oil. The hydraulic system was either 10w30 engine oil or STOU. These oils are not compatible and mixing them may cause seal issues and synchro wear in the gearbox. Replace the hydraulic filter in the tank and check the two cone filters in the suction pipes to the pumps (note the direction of fitment i.e., point towards the pump). There is an alternative method but it involves detaching the hydraulic steering hoses, heater hoses, gear levers and linkages, and lifting and supporting the front of the cab to access the front of the lift housing. The lift assembly doesn’t come off, but one must take care not to damage other components.
AThe clamping force exerted by the wheel bolts or cap screws is directly proportional to the stretch of the bolt or cap screw shanks and nut torque. A longer shank will therefore increase the clamp the wheel MASSEY FERGUSON 360 Q The rev counter on my MF 360 goes up to 1600rpm and stays there, no matter what the engine speed is at force, as will a higher nut torque. Fitting spacers, the time. I’ve had the alternator checked and as per those on your tractor, allows the use of longer it appears to be working correctly. I don’t shanked bolts or cap screws, thereby providing want to buy a new rev counter at £300 to greater clamping force. Hope this helps. find out that I have the same problem. The


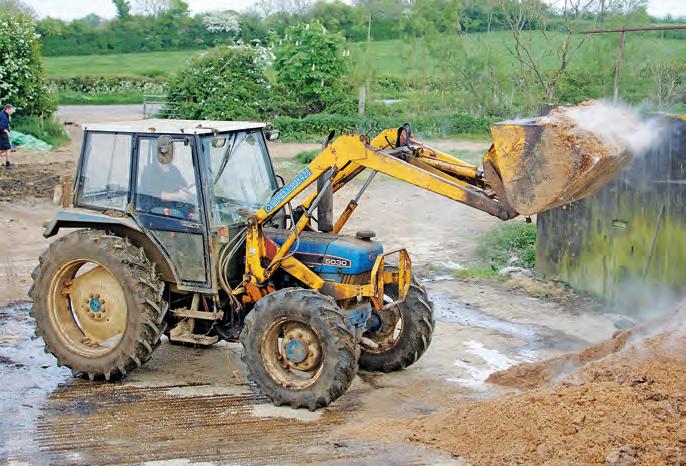


QCan you give me some advice on a Ford 5030? To cut a long story short, my tractor’s Synchro gearbox has failed. We can’t get any parts for it as Kubota, which originally made the transmission for Ford, apparently doesn’t make them anymore. The question is, can I fit a Ford 8x2 transmission? I have spoke to a breaker and he said the 8x2 ‘box just fits straight in. He mentioned the gear shift levers would be in the middle of the cab, as opposed to the side, but I could put up with this as we are desperate to get it going again. My tractor also has Dual Power and I was wondering if we could use this in the new transmission. What do you recommend?
J. Carter, British Columbia, Canada.

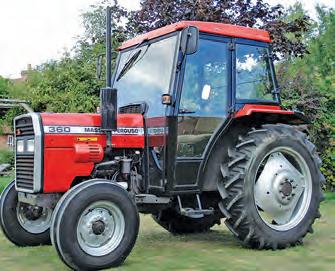
rev counter is the quadrant type. The tractor has done only 3000 hours and the hour-meter still works. A number of MF parts are now obsolete, so what can I do?
D. Upton, Burton upon Trent, Staffs.
AWhile it would appear that the fault is in the rev counter, there are some checks that can be carried out before committing to a new unit, assuming one can be obtained. The rev counter works by sensing the number of pulses emitted by the alternating current generation components of the alternator at varying engine speeds. While the alternator may have been checked and tested in terms of its charging output, has the output from the W-terminal (rev counter) been tested? This test is for phase voltage and phase A The transmission in the small Ford/New Holland 30 Series tractors was made by Kubota and as you say, parts can be difficult to obtain. These tractors were available from new with the 8x2 transmission so it will be possible to fit this gearbox. One thing to check before buying a transmission is that the number off splines on the two input shafts of the donor gearbox are the same as the current transmission. If not, then you may need a new cutch assembly to match. It is also worth noting that the 8x2 transmission, although reliable, is not as nice to use as the Synchro transmission. The Dual Power has quite a few differences, so will not swap across. We would suggest you search the breakers’ yards for a Synchro gearbox to match what you have. It would also be worth trying some UK dealers to see if they have any new ‘old stock’ parts you can use to rebuild your existing transmission.
frequency and may be outside the normal scope of an auto electrician. Your local MF dealer should possess an MF 3004 Test Unit which can apply a set pulse signal to the rev counter at selected different speeds. They may also have the voltage and phase test equipment. These tests should show whether it is the rev counter or alternator that needs replacing.
JOHN DEERE 6830

QMy high-hour John Deere 6830 has suffered a major turbocharger failure. The driven shaft from the turbine to the impeller has sheared adjacent to the turbine and the shaft is seized in its bearings due to a shellac-type contaminant. My local service technician blames the failure on ‘driver error’. Could you expand on this and advise how to avoid any similar, expensive, repeat failures?
Alan Moate, Canterbury, Kent.
WE REGRET THAT we can’t respond to readers’ enquiries directly by letter, but we will attempt to answer as many questions as we can through the ‘Ask the Experts’ section in the magazine. The advice of our experts is given in good faith. Photos (preferably good quality digital images of 500kb or more) are particularly helpful and can be e-mailed to: asktheexperts@sundialmagazines.co.uk
AYour local technician is undoubtedly correct in diagnosing ‘driver error’, in this case resulting from hot shutdowns, probably over a period of time. When worked on medium-to-high load, the engine burns proportionately more fuel which in turn leads to higher working temperatures in general, and exhaust gases in particular. These gases heat up the turbo to such an extent that if the engine is shut down before a 4-5 minute tick-over cooling period, the small amount of residual oil in the turbo bearing housing is ‘cooked’ to the shellac you describe. This in turn results in the failure you describe. To prevent any subsequent similar failures, follow the engine shutdown procedure outlined in the tractor’s operator’s manual.
BULLETIN BOARD
Using service bulletins of the past, we pinpoint when product changes took place.

SINGLE LEVER FOR GEARS
March 1991 saw the announcement of a signifi cant midlife improvement package for the highly popular Massey Ferguson 300 Series. The HiLine cab models now had a fl at fl oor and there was also the option of a new 12/12 shuttle transmission. On the 12/12 ‘box, the main gear and range changes were controlled by a single right-hand gear lever, with forward and reverse changes being made using a shuttle lever mounted on the dashboard. This created the ideal set-up for loader work. At the same time, MF also introduced a new hydraulic console for all 300 Series tractors. This console housed the spool valve levers on its front face and the linkage controls on top, as well as a rocker switch for operating the front and rear diff locks on four-wheel drive models. Other MF 300 Series improvements rolled out in March 1991 included automatic engagement of four-wheel drive when braking as well as electro-hydraulic engagement of four-wheel drive.


