
19 minute read
Radiator Rebuild
Safe paint spraying

Advertisement
PART THREE
Completing the radiator

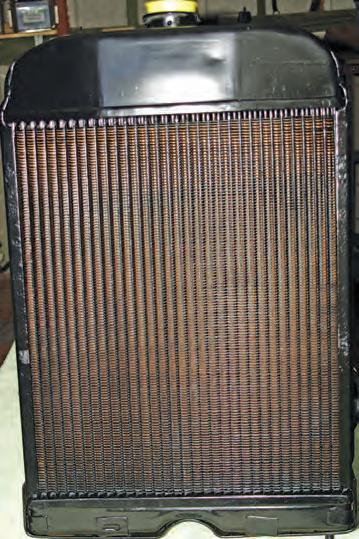
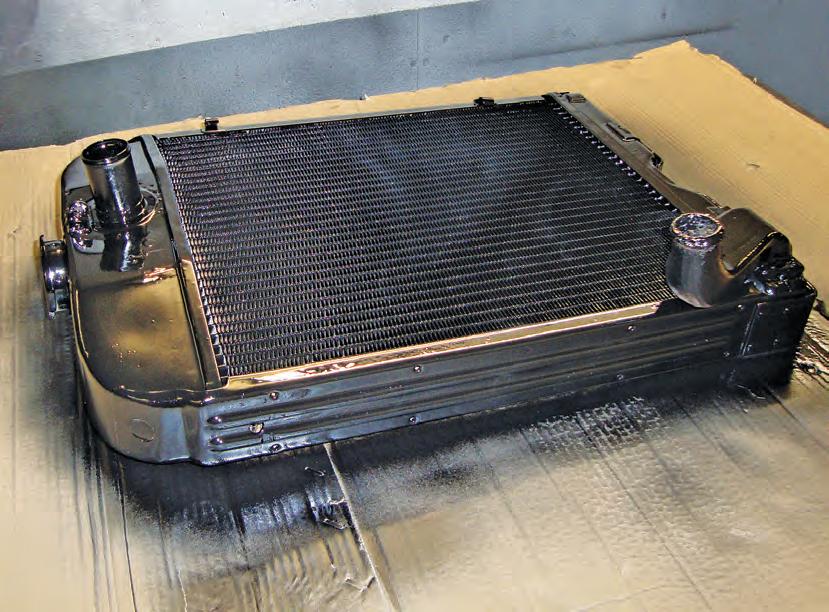
Repairing an old radiator is a job for the professionals. To find out how it’s done, Lance Butters has been following a classic radiator on its journey through the workshop of a specialist at Preston in Lancashire. In the third part of his series, he looks at the final repair and re-assembly work that was involved in returning this radiator to A1 working condition.

THE PAINT USED T for spraying this radiator contains isocyanate, the vapours of which can co cause asthma, which may become permanent cau and severe. Strict regulations govern the use of these paints in the workplace, and the spray area has to be inspected and certificated on a regular basis. The spray booth at Motor Radiator Specialists is tested and certified annually. Isocyanate paints are also known as 2K, two-pack or polyurethane paints. Anyone involved in tractor repair and restoration should be aware of safe spraying procedures even when doing the work on an amateur or hobby basis. A HSE leaflet, Safety in Isocyanate Paint Spraying, can be downloaded at: www.hse.gov.uk/pubns/indg388.pdf
Buyer beware


WHEN OUR PROJECT tractor radiator was found to have a leaking and damaged core, it was taken to Motor Radiator Specialists at Ashtonon-Ribble, Preston, Lancs, for a full overhaul. The previous two instalments of this series focused on how the radiator was stripped down, how the components that were being reused were bead blasted to clean them, and how the original top tank was fitted to a new radiator core.
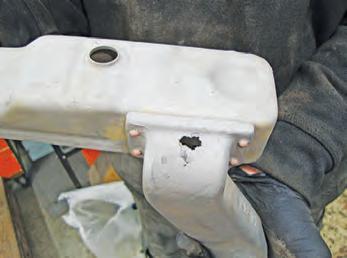
The next stage in the rebuild process involved fitting the original bottom tank to the core, and this gave Motor Radiator Specialists’ technician Sam a number of challenges to overcome. Firstly, the bead blasting had uncovered some serious corrosion on the bottom hose connector. This part is a cast iron elbow, and it had corroded on its bend to such an extent that a sizeable hole had appeared.
Secondly, the cast iron bottom hose flange prevented the bottom tank fitting properly onto the new core. The third problem occurred with the drain plug, which screws into a threaded bush soldered into the base of the bottom tank from the inside. When repairing the bottom hose connection, the heat melted the solder and the drain plug bush fell inside the tank. The fourth problem arose when testing showed that the repaired corrosion area had not sealed correctly on the first attempt.
However, problems like this are relatively minor and all part of the day’s work at Motor Radiator Specialists. Each one was calmly and expertly overcome, enabling the radiator repair to be successfully completed.


ACKNOWLEDGEMENTS
Thanks to Howard Brumwell of Motor Radiator Specialists of Shelley House, Pechell Street, Ashton-onRibble, Preston, Lancs, PR2 2RN (Tel: 01772 736500) for facilitating this project in his workshop, and to his technician Sam who expertly carried out the work. WHILE CLASSIC TRACTOR technical specialist Lance Butters was working on this project, a local farmer brought a brand-new budget radiator to Motor Radiator Specialists for testing, thinking he had damaged it during installation. During the subsequent pressure test of this radiator, every fold in the two tanks lost pressure, indicating that metal fatigue created during the manufacturing process had caused the brass to fracture when it was pressed into shape. The lesson here when buying a replacement radiator is to try and inspect the product thoroughly, if possible, and do your research.
Next month
IN THE FINAL PART of our cooling system series, we discuss the common causes of cooling problems and explain how to test components and rectify faults.

Fitting the bottom tank to the new radiator core wasn’t that straightforward, as a repair needed to be made to the bottom hose connector, and part of the flange around the bottom of the core had to be cut away to accommodate the shape of the connector. This was the procedure followed Motor Radiator Specialists’ technician Sam as he carried out the work.


• Examination of the bead-blasted bottom tank revealed a corrosion hole in the cast iron bottom hose connector riveted to the tank. This would be repaired after fitting the bottom tank to the core. • Aligning the bottom tank to the core showed that the position of the bottom hose connector was preventing the tank from sitting correctly on the core flange, requiring a section of the flange to be cut out. • The threaded bush for the drain plug needed to be soldered into the bottom tank from the inside, before fitting the tank to the core. • Soldering the bottom tank to the core was done with two runs of solder to ensure a fully secure and sealed seam. • Solder was used around the seam between the bottom hose connector and the tank, in order to seal it in case the riveted joint had been disturbed • A repair was made to the corroded hole in the bottom hose connector using an overlapping brass patch which was soldered on. The heat from this process melted the solder securing the drain plug bush, resulting in it falling into the tank. It was retrieved and resoldered without further problems.


Blasting reveals corrosion
1
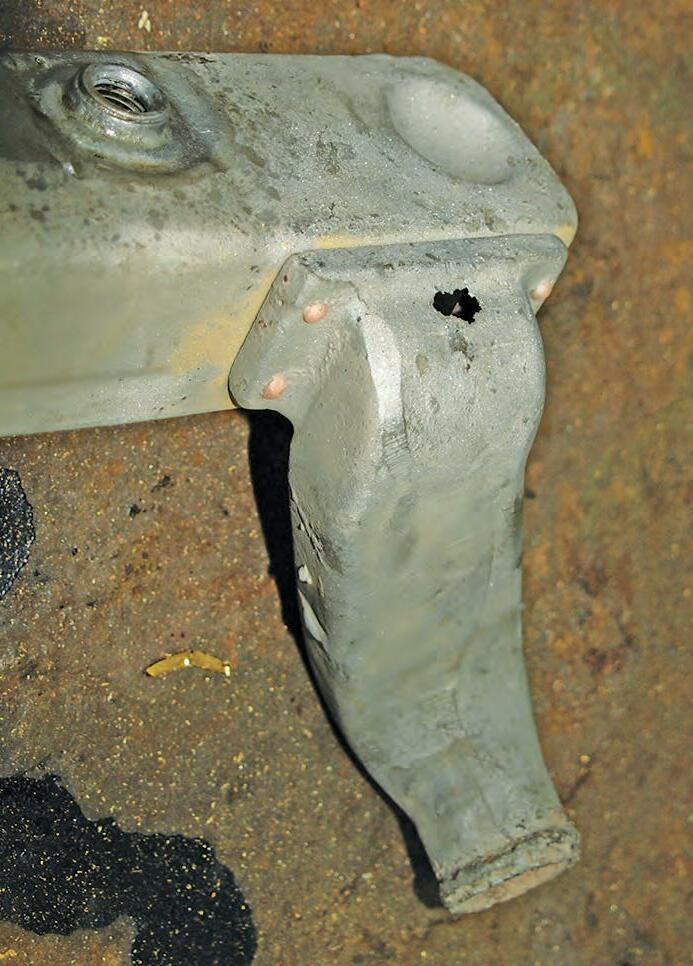
When the bottom tank was bead blasted, the bottom hose connector elbow was so corroded that a hole appeared. The cast iron connector is riveted to the bottom tank with copper rivets, and to disturb this seal could lead to future leakage problems. The best option was to repair the holey elbow in situ.

Internal repair is ruled out
2
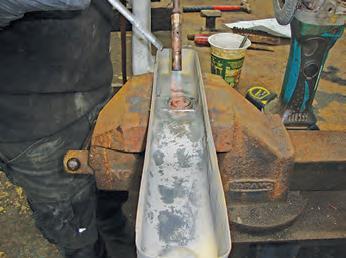
Viewed from the inside, the bottom hose connector is riveted through a reinforcing plate attached to the inside of the bottom tank. The corroded section can easily be seen, but to repair it from the inside would be difficult. It was time to consult Howard Brumwell, who advised soldering a patch on the outside.
Drain plug bush soldered
3
The repair would be done later, but now the first job was to fit the threaded drain plug bush into the bottom tank. It has a stepped flange and is soldered into position from the inside. Obviously, this cannot be done with the bottom tank in place, and if forgotten, it would need removing to start again.


Project notes Project notes


Soldering different thickness metals: When soldering thick and thin metals together, the thin metal heats up faster than the thicker material. The gas flame is manipulated to heat the two metals evenly to the same temperature. Soldering dissimilar metals: A soldered joint is not a fusion join, so providing the two metals that are going to be joined can each be soldered, there is no problem as the solder can stick them together. Soldering cast iron: Cast iron has a large grain structure which allows molten solder to penetrate the surface pores to provide a strong bond. When cast iron is to be soldered or brazed, the surfaces should not be prepared by grinding. This would smear the surface and destroy its pore structure. A file is preferred for final preparation. Metal fatigue: Metals subjected to continued mechanical stress will weaken and crack. Differential expansion and contraction can cause seams and folds in the radiator to fail. Brass and copper may harden and crack when continually stressed. A radiator must be assembled and installed so that the unit is not under unnecessary stress.


Soldering different thickness metals: When soldering thick and thin Dull black finish: Radiators are painted dull black because the colour metals together, the thin metal heats up faster than the thicker material. black is both a good absorber and good radiator of heat. White and The gas flame is manipulated to heat the two metals evenly to the same glossy surfaces perform less well. In reality, the efficiency is a laboratory temperature. measurement and matt black is about one per cent better than gloss white. Soldering dissimilar metals: A soldered joint is not a fusion join, so Fitting the drain tap: Fitting the drain tap into the threaded bush before providing the two metals that are going to be joined can each be soldered, soldering it into the bottom tank might appear a way to prevent losing the bush there is no problem as the solder can stick them together. inside the bottom tank if the solder seal melts during other reassembly work. Soldering cast iron: Cast iron has a large grain structure which allows However, if it were to melt with the tap fitted, in all probability the solder would molten solder to penetrate the surface pores to provide a strong bond. creep by capillary action into the threads making it impossible to unscrew the When cast iron is to be soldered or brazed, the surfaces should not be tap assembly. prepared by grinding. This would smear the surface and destroy its pore structure. A file is preferred for final preparation. Metal fatigue: Metals subjected to continued mechanical stress will weaken and crack. Differential expansion and contraction can cause seams and folds in the radiator to fail. Brass and copper may harden and crack when continually stressed. A radiator must be assembled and installed so that the unit is not under unnecessary stress. Dull black finish: Radiators are painted dull black because the colour black is both a good absorber and good radiator of heat. White and glossy surfaces perform less well. In reality, the efficiency is a laboratory measurement and matt black is about one per cent better than gloss white. Fitting the drain tap: Fitting the drain tap into the threaded bush before soldering it into the bottom tank might appear a way to prevent losing the bush inside the bottom tank if the solder seal melts during other reassembly work. However, if it were to melt with the tap fitted, in all probability the solder would creep by capillary action into the threads making it impossible to unscrew the tap assembly.


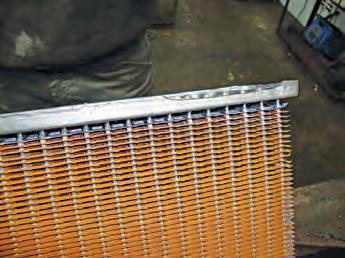
Bush seal will be tested Correct alignment needed Recess cut out of flange
4
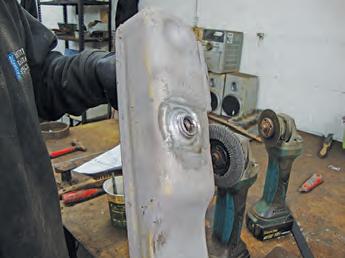
When the drain plug bush was in position, its seal could not be tested until the completed radiator was pressure tested. Being in close proximity to the seam between the bottom tank and core, heat from soldering the seam could cause the drain plug solder to melt, leading to the bush falling inside the tank.
5
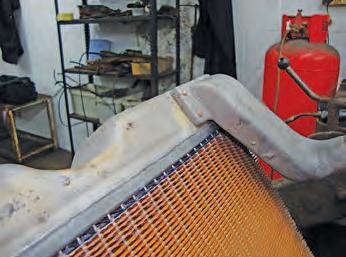
The next job was to align and fit the bottom tank to the core, which was rectangular in shape with a raised edge or flange for locating the bottom tank. The bottom hose connector was preventing the bottom tank from sitting correctly inside the flange, holding the edge of the tank clear of the core base.
6
The core flange needed to be reshaped after marking out the position of the bottom hose connector in relation to the core flange. The edge of the flange was removed with an angle grinder to provide a recess to locate the bottom hose elbow. One slip with the angle grinder would damage the radiator tubes.
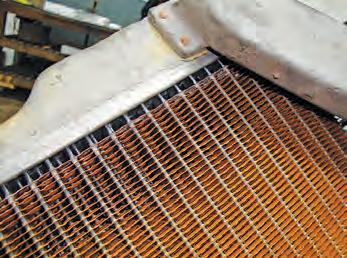
Tank is correct fit on core
7
The bottom tank now fitted correctly, ready for soldering to the new core. This process was exactly the same as that used for the top tank. A layer of solder was melted into the base of the core flange to seal the edge of the top tank to the core, followed by a second solder layer to seal the sides to the flange.
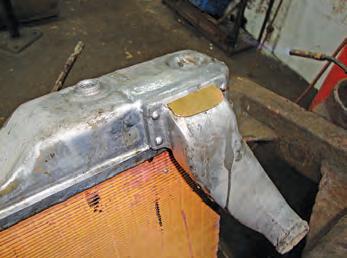


Patch to overlap the hole

10

Now the corroded area of the bottom hose connector could be repaired. A patch was cut from a piece of suitable brass sheet. This patch needed to cover the hole and extend some way beyond the edges over solid metal. It also needed to be shaped to fit the profile of the elbow curve and sit flat on the surface.

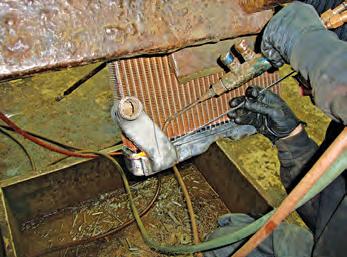
Solder behind connector
8
The soldered seal had to continue all the way round, including behind the bottom hose connector. For this part, Sam used an oxy/acetylene torch, set to a very mild flame, to solder in this difficult-to-access position. Great care was required, as any misjudgement could damage the radiator core tubes.
Heat releases drain bush
11
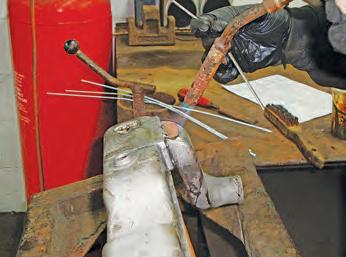
When soldering the repair patch into position, all was going well until the drain plug bush solder seal melted and the bush fell inside the tank. This was not unusual, and technician Sam had a selection of tools to locate and pull the bush back into position and hold it there as it was resoldered in place.
Connector seam is sealed
9
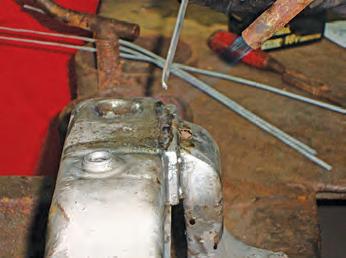
To make sure the bottom hose connection did not leak, a layer of solder was sweated around the contact join between the connector and the side of the bottom tank. This required considerable skill in manipulating the gas flame, to heat the thick metal of the connector without overheating the tank sides.
Drain tap is fitted in bush
12
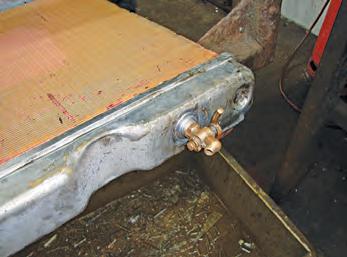
Now that the bottom tank was soldered into position on the new core, the drain plug needed to be fitted. The threads inside the bush had become contaminated with solder and these needed to be cleaned-up using a tap and wrench to decontaminate the threads and allow the drain plug and washer to be fitted.
With both the top and bottom tanks now fitted to the new radiator core, the radiator was ready to undergo pressure testing to ensure there were no leaks and that it would withstand greater pressure than it would experience in the tractor’s cooling system. The procedure was as follows:

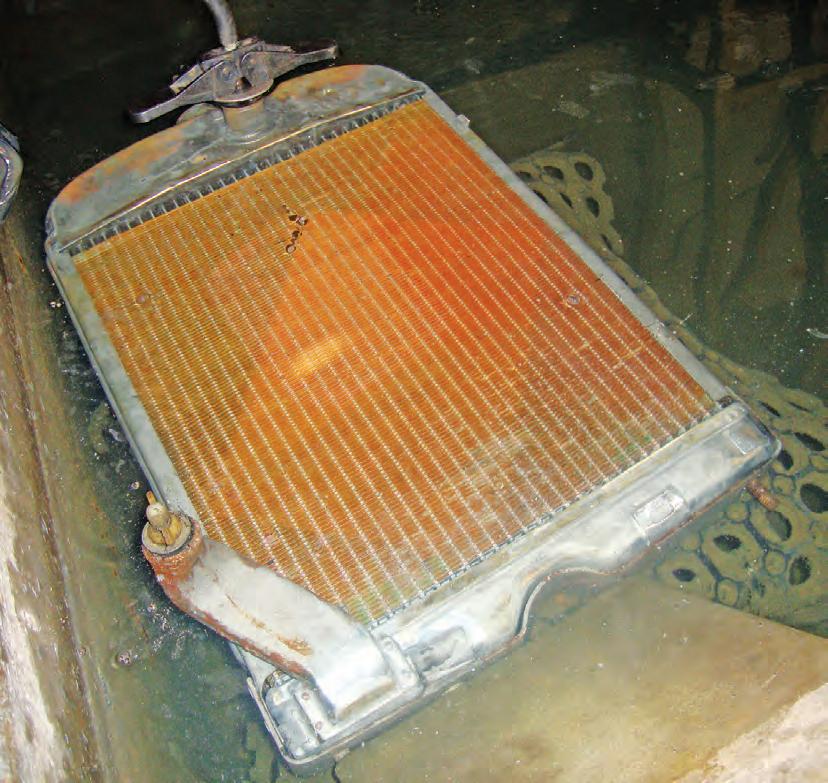
• Fit expanding bungs to seal filler cap and bottom hose connector. • Attach compressed air line to top hose connection and pressurise radiator to twice normal operating pressure. • Submerge radiator in water test tank and examine for any leaking air bubbles. • Seal leak from patch repair with solder. • Replace leaking original radiator drain tap with new.

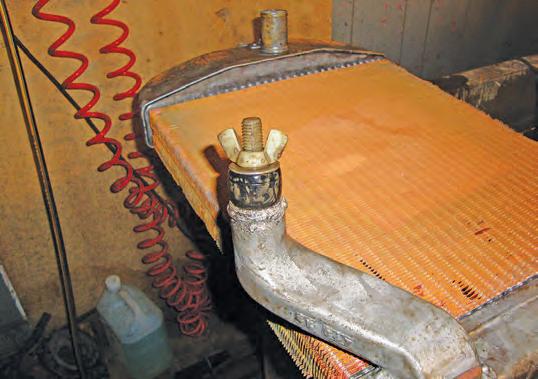
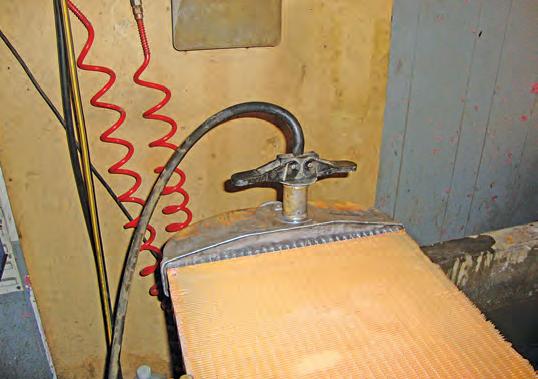

Radiator sealed for testing Compressed air is fed in

A
With the drain tap turned off, the bottom hose connection and filler cap were sealed with expanding rubber bungs. These consist of a rubber bung with a washer at each end and a bolt through the centre. Tightening the wing nut squashes the depth of the bung, expanding its circumference to seal the hole.
B
The top hose connector was fitted with a bung connected to a compressed air supply. The air was supplied through a pressure control valve set to about twice the operating pressure of the tractor cooling system. Our project radiator’s cooling system operates at 4psi so the air pressure was set to 8psi.
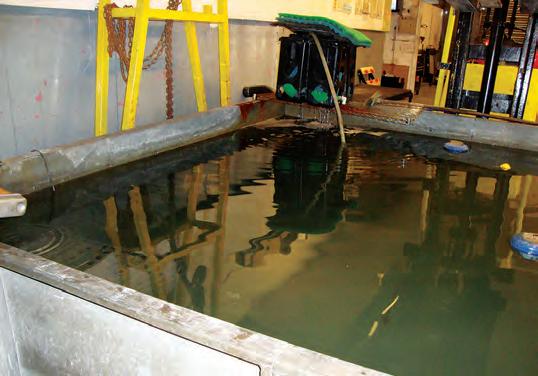

Pressure test in water tank Bubbles indicate leak area
C

This large tank of water is used for pressure testing radiators both before and after repairs. It is not simply a tank of static water: the water has to be kept circulating and filtered, and an additive is used in the tank to prevent it becoming stagnant and, consequently, a health hazard to those using it.

D
The pressurised radiator was lowered into the tank of water and completely submerged. All the seams were air tight, except for the repair patch. Bubbles showed a very slight leak, which could be eliminated by resoldering. A few bubbles were leaking from the drain tap, indicating that it needed to be replaced.
With the radiator core and tanks now tested and found to be free of leaks, the assembly could now be refitted into its support frame, which provides rigidity and positions the radiator correctly in the tractor, especially in relation to the fan. This is how the job was done.
• Markings made on the frame during the initial strip-down were used to ensure it was refitted the correct was round. • Frame base and side supports were soldered to the bottom tank and top tank respectively. • Fully-assembled radiator tested for leaks. • Radiator was dried in a drying cabinet. • Radiator was cleaned with sanding disc and wire brushes on angle grinder, in preparation for painting. • Self-priming dull black radiator paint is applied to radiator.
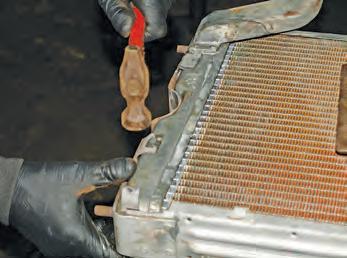
Bend the tabs to fit to tank
3
The base of the radiator support frame is made up of a flat metal strip that is secured by a number of tabs which needed to be bent to fit around the tank. The soft mild steel metal was easily tapped into position using a light hammer, taking great care to avoid bending or hitting the sides of the bottom tank.
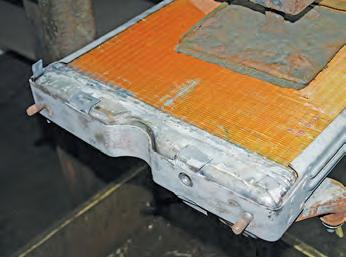
Align the frame correctly
1
After making sure the radiator was 100 per cent air tight, the mild steel support frame needed to be refitted. This had also been bead blasted in preparation for fitting. The bottom part of the frame was aligned using the markings made prior to disassembly, to make sure it was fitted the right way round.
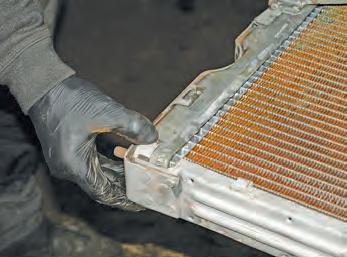
Final check for positioning
4
After making sure the locating tabs were flush with the surface of the brass bottom tank, a final check was made to ensure the frame was correctly positioned. The frame holds the radiator in the correct position on the tractor by two captive bolts. Once attached, the radiator’s position cannot be adjusted.
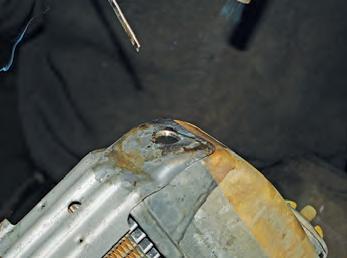
Side struts fix to top tank
6
After securing the bottom of the support frame, the two side struts were soldered to the top tank. The radiator assembly is held in place on the tractor by two studs at the bottom, supported on a rubber pad. The side supports provide rigidity and the flexible top hose allows slight movement created by vibration.

Black paint finishes the job
7
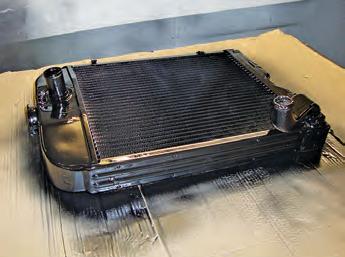
Following a further leakage test, the complete assembly was dried in a drying cabinet to ensure all the moisture had been removed. The top and bottom tanks and the support frame were cleaned using a cordless angle grinder and sanding pad, before the whole radiator was spray painted with a black paint.
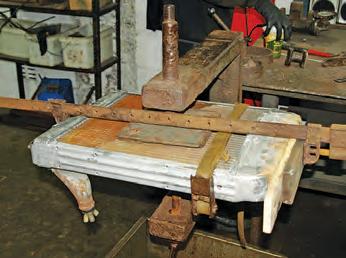
Secure the support frame
2
The support frame was secured using a combination of strap wrenches and rack clamps. This strategy ensured the frame was correctly positioned in relation to the radiator. The frame supports the radiator in the right position on the tractor; misalignment could result in the fan hitting the radiator core.
Tabs are soldered to tank
5
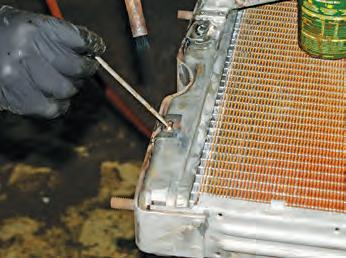
Soldering started at the bottom of the frame when tabs were alternately soldered to the bottom tank, taking care to avoid overheating and melting the solder joint between the bottom tank and core. The base of the frame was held in place by the soldered tabs, which are its only connections to the bottom tank.
Use correct length screws
8
The completed radiator. When it comes to refitting the fan cowling, care will need to be taken to check the length of the retaining screws. Using screws that are too long will pierce the end cooling tubes, ruining the radiator. A repair would require removing the support frame and soldering the holes.


