1 minute read
Styles


To enter a value, you do not need to select the VCB. Simply typing when a tool is active will enter the desired value into the VCB. Pressing Enter will apply that value.
Example: Select the Rectangle tool and pick the first point. Then type 100´,100´ (the rectangle dimension) and press Enter. SketchUp will create a flat rectangular surface that is 100 feet in length and width.
Advertisement
Styles
SketchUp lets you adjust how geometry and the SketchUp environment appear. They can be adjusted through the Styles menu (Window > Styles). The Styles menu has many options, and it takes some practice to realize the full potential of this menu. For now, the focus is on edges and the SketchUp environment.
Edge Settings
On the Styles menu, select the Edit tab. Five icons that control many SketchUp settings will appear. Select the Edge settings (first from the left). By default, Display Edges and Profiles are both checked. Unselecting both options will make all the edges in the model invisible.
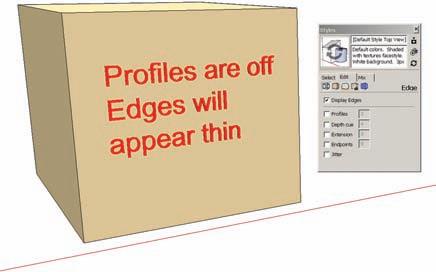
The Profile line adds thickness to SketchUp lines that form the perimeter edges of faces. Profile lines also indicate when edges are subdividing a face; the lines will lose their thick profile and become thin when they properly subdivide a face (Fig. 2-20, Fig. 2-21).
The downside to keeping Profiles checked is that it makes edges appear very thick in comparison to other edges. Practice working with Profiles unchecked. You can then determine for yourself whether or not you want to use them.
Background Settings
In the Styles menu, the background options are in the middle under the Edit tab. There are several options: Background Color, Sky, and Ground.
Fig. 2-20: Profiles are unchecked, displaying thin edges.
Fig. 2-21: Profiles are checked “on,” displaying thicker edges.


