2 minute read
Additional Tools
Using a Selection Box Clicking and dragging the Select tool (Click+hold and drag) will create a selection box. The direction of the selection box provides two options:
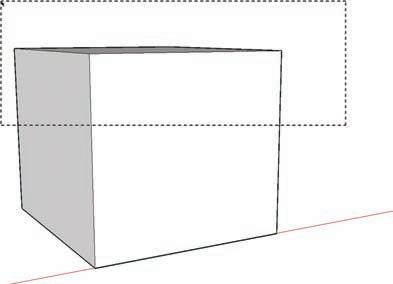
Dragging from left to right creates a selection box that will select only geometry that is entirely within the box (Fig. 2-12, Fig. 2-13).
Advertisement
Dragging from right to left creates a selection box that selects anything the box touches, including the geometry inside.
Shift+click and Ctrl+click work when using the selection box.
the Click and Select Method Clicking on an object or face will select that geometry. Double-clicking on a face will select the face and the edges that compose that face. Triple-clicking on a face will cause all connected geometry to be selected.
Additional Tools
Fig. 2-12: A selection box is used to select the geometry of the 3D cube/object.

Fig. 2-13: The selected object.
Below are some basic SketchUp tools used to draw, modify or adjust face and edge geometry. Many of these tools are used extensively with the various tutorials. You should become familiar with how they function. Additional tools are reviewed throughout the book. the arc tool The Arc tool requires three points to be inputted. The first and second points define the length, and the third point provides a radius or bulge for the arc (Fig. 2-14).

Fig. 2-14: The Arc tool requires three points to define an arc.
rectangle Creates a rectangular face. Activate the Rectangle tool and select the first rectangle point. The tool will remain active and require a second input that will help define the width and length of the rectangle. (Fig. 2-15). Move/Copy Selected geometry can be relocated or copied. Selected geometry can be moved by simply clicking on a point with the Move tool and moving it to the desired location.
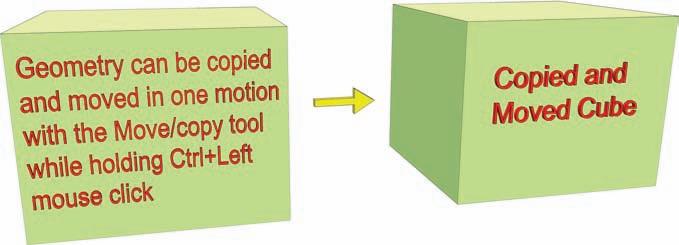
To create a copy, select the geometry and with Move/ Copy active, Ctrl+click, release the mouse button, and move the mouse away from the original. The copied geometry will move when it is dragged (Fig. 2-16).

Fig. 2-15: The Rectangle tool.

Fig. 2-16: Selecting an object and then holding Ctrl with the Move/Copy tool will create a copy of that object.
eraser and hidden Geometry Dragging the Eraser tool over edges or faces will delete them. Holding the Shift key while using the Eraser tool on geometry will hide it from view. The hidden geometry can be viewed by turning on View > Hidden Geometry. Offset The Offset tool creates a copy of selected geometry parallel to the original selection. Using Offset on a selected face will create a copy of all the edges that compose that face and will either expand the face (offset outward) or further subdivide the face (offset inward) (Fig. 2-17). Selecting and offsetting edges will create copies of the selected edge. Fig. 2-17: The Offset tool can offset faces and edges to create parallel elements.


