2 minute read
Window Components
Window Components
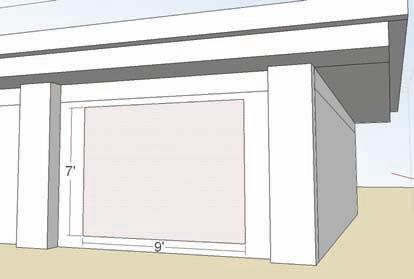
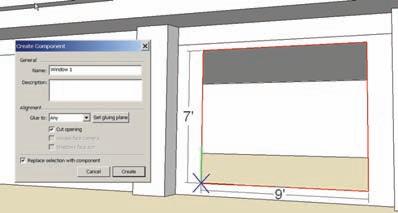
Now that you’ve added mass to the buildings, you can add the window components. You will learn to create window variations from a single component. 1. Draw a 7 ´ × 9´ face on Building 1, between the columns. Delete the subdivided face. Make sure to be working in the Building 1 instance. 2. Select the four edges, right-click over one of the edges, and select Make Component. Make sure that Glue To is set to Any and that the Cut Opening box is checked. Name the component Window 1.
Advertisement

3. In the component instance, heal the face with the Line tool.


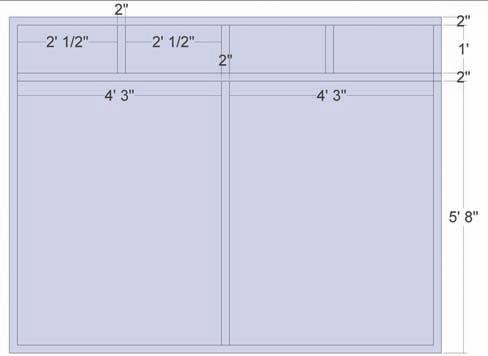
4. On the face, draw and offset the face with the dimensions shown in the graphic.
5. Push/Pull the large faces inward 3˝. Add color (Translucent_Glass_Corrugated) to the large faces. Paint the window mullions (window supports) using Color_008.
6. Exit the Window 1 instance. Move the window to the top left corner, intersecting the overhang and the column edge. 7. Scale the component to fit between the two columns.


8. Select the window and copy it over by using the column endopoint as reference. The copied window will cut the face on which it is placed.
9. Array the windows four times (5x) immediately after copying the component in step 8.
The windows should be copied between the columns.


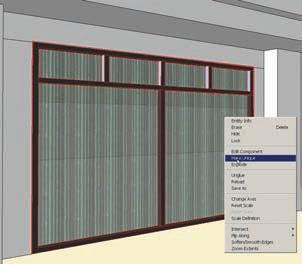
10. Copy the window from Building 1 into the component instance of Building 2. Select the copied component and then select Make Unique. 11. Scale the Window component width in half (Scale Factor of .5). Copy the scaled window next to the original. There should be two window components between the columns.
12. In the Window component instance, at the base of the window, draw a rectangle with the indicated dimensions. Convert the drawn rectangle into a component. Name it
Awning. 13. In the Awning component instance, Push/Pull the rectangle face 3˝ in height.
14. Exit the Awning component instance, and move the component upward on the window as indicated.


