
2 minute read
Working with Ruby Scripts


and intended edge. This solves the problems with gaps between edges in imported AutoCAD lines.
Delete Short Lines This script will delete all overlapping and minuscule edges that prevent faces from being healed. The script helps remove the overlaps found in imported AutoCAD lines.
Advertisement
Close Open Line Segments This script helps generate an edge between two points where a gap is present. Although similar to Extend Close Lines, it is different. Extend Close Lines only extends a single edge (makes it longer). Make Faces This script will generate faces from the selected linework. Instead of using the line tool to heal faces, selecting the entire base and running this script will heal faces for an entire site plan. Intersect Overlapping Lines This is the supplemental fifth script. This ruby will sift through all the selected edges and convert any overlapping edges or intersections into endpoints.
Working with Ruby Scripts
Download File: AutoCAD to SketchUp Flatwork
The following procedure outlines the process for using combined scripts on the imported AutoCAD edges. Sometimes the scripts run differently on different computer systems. Due to these inconsistencies, make sure you save your work after each step. 1. Select all the edges. From the Plugins menu, select Extend Close Lines. A dialogue window will appear indicating how many edges were extended by the script. Save the file (Fig. 18-22, Fig. 18-23).
Fig. 18-22: Select the all the linework of the exploded flatwork edges. From the Plugins menu, select Extend Closed Lines.

Fig. 18-23: Select all the linework of the exploded flatwork edges. From the Plugins menu, select Extend Closed Lines.
2. Reselect all the edges. From the Plugins menu, select Delete Short Lines. This script runs inconsistently. One of two things will happen:
After the script runs the operation, all the edges will appear to be deselected. How33 ever, all of the selected but hard-to-see short lines will be selected. Immediately press the Delete key. All of the short lines will be deleted. Save the file.
A pop-up menu will appear and indicate how many lines were deleted (Fig. 18-24). If 33 this happens, you won’t need to do anything else.

Fig. 18-24: From the Plugins menu, select Delete Short Lines. One of two things will happen.
3. Select all of the edges. From the Plugins menu, select Close Open Line Segments. You will be asked if you want to save a copy of the file. Select No (you should already be saving the file in each step anyway). Press OK.
The Close Open script takes longer to run than the other two scripts. Once the script is completed, a pop-up window will appear indicating how many edges were closed. Save the file (Fig. 18-25).
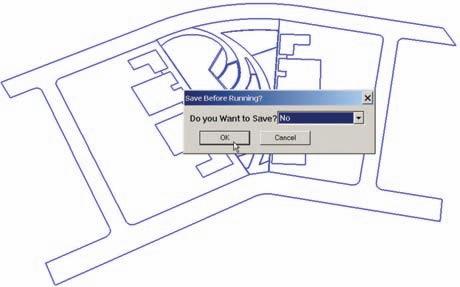
Fig. 18-25: The Close Open Line Segments script will allow you to save the file before you run the script.
4. Select all of the edges. Under the Tools menu, select Make Faces. A progress bar will run at the bottom left. Once the script finishes running, faces will be generated from the edges (Fig. 18-26, Fig. 8-27).

Fig. 18-26: Select all of the edges. From the Tools menu, go to the bottom and select Make Faces.


