4 minute read
Healing with the Line Tool
imported linework; they can crop up even when you are performing simple modeling. Learning how to problem solve the generation of faces in SketchUp is a useful skill.
Method 2 is practical and simple to use. To perform it, you will need to purchase three custom Ruby Scripts and download a fourth one that is free. However, the small expenditure is worth it because of the ease of use.
Advertisement
Method 1 is simple and involves using the Line tool (View > Toolbars > Drawing > Line Tool). Its drawback is that it can take hours—if not days, depending on the size of the file—to complete the base.
The basic premise of this method is to create faces. Instead of adding edges to create faces, the Line tool is used to identify imported edges by sampling points along an edge. Ideally, you select the endpoint of an edge and select (draw) another endpoint on the same edge.
For example, a surface area is defined by the perimeter of four edges. To heal the face with the Line tool, select an endpoint of one of the edges, travel along the same edge, and select another point (on the edge, midpoint, or endpoint). If the perimeter is closed and contains no anomalous edges, a face will be created.
However, it will become quickly apparent that this does not work so cleanly with all the edges in a drawing. Distortions in the imported linework will prevent some (or many) areas from healing faces.
Here are some tips and tricks to make this method work:
Sample the same edge. The idea is to identify the endpoints of existing edges, not to draft a new line. This mistake is easy to identify if a new edge is created (Fig. 18-6 through
Fig. 18-10).
First endpoint on edge Second endpoint on edge

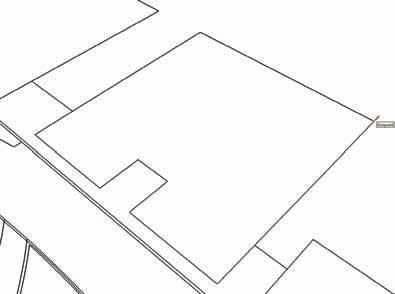
Fig. 18-6: Using the Line tool, select the endpoint of an edge. Fig. 18-7: Select the second point on the edge. Identifying the two points along a straight edge will heal the face.

Fig. 18-8: The healed face.

Fig. 18-9: Avoid drawing new edges. Identify only the endpoints along the same edge. Fig. 18-10: Enlargement of small drafted edge. If an edge is drawn and a face is created, simply delete the extra edge and the face should remain.

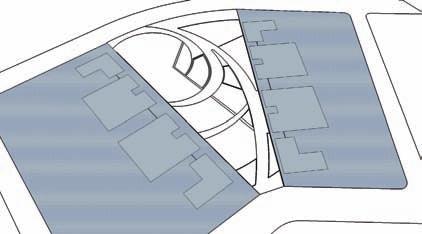
Start with arcs. Locate any arcs and attempt to heal the surface area perimeter. If that fails, zoom in as close as possible to the intersection of an arc and an edge (or an arc and an arc). Look for the overlapping line and delete it—or use the Line tool to connect the endpoint of the arc to the adjacent and intended edge. heal the large areas first. Try to heal the faces of large, well-defined areas first. Select the endpoints and see if a face is healed (Fig. 18-11). Work with the smaller areas next. Fig. 18-11: Heal the larger surface areas first.

hunt down the problem edges. If selecting the edge points fails, the next approach is to “hunt down” the problem edges. Starting at the endpoint of a line, draft another strategic edge and connect it to the midpoint of an adjacent line. One of three things will happen:
The entire face will be healed. If that is the case, delete or hide the strategic edge 33 used to heal the face.
No face will be generated. Try again by drafting a line from di33 fferent areas or try to heal a small area of the perimeter surface.
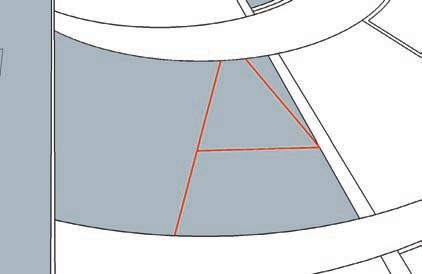
A face will be generated on one side of the drafted edge. Th33 is is the most common result. The opposite side without a face reveals where an anomaly might exist. Continue to add more edges. Draft another line sampling another edge (endpoint, midpoint, or on edge). The result will be one of the three results detailed above. The goal is to narrow down the possible location of the problem edge. When enough edges are added, the location of a problem becomes more apparent. By zooming into the area where the faces will not generate, you will highlight the anomaly, typically a short line or an overlap (Fig. 18-12 through Fig. 18-15).

Fig. 18-12: When edges will not heal by identifying endpoints, use strategic edges within a surface perimeter. Fig. 18-13: Continue to add edges to narrow down the location.


Fig. 18-14: The area should get smaller with each added edge. Fig. 18-15: Add edges until the face is healed. It might be necessary to zoom in close to find the anomalies.


