
11 minute read
Chapter 3 Project Management


Unwavering, relentless organization is essential to a successful project. Just like a messy desk, a messy PROJECT folder can cause miscommunication, lost work, and ultimately cost you time and money. The techniques illustrated in this chapter will help you organize your design projects. Keep in mind that this is not a rigid system; the suggested workflow is flexible and can be tweaked to meet your specific needs. In other words, feel free to modify this method any way you see fit to meet your project type and office standards.
f ol D er S A n D f ile S
Advertisement
Approaching folders and files the same way every time will help your team collaborate efficiently. First, you need to understand some standard ground rules regarding how to organize PROJECT folders. Then you can apply the logic of this system to your PROJECT folders and further develop your own set of standards.
naming Standards
Take a moment to invent an identifying acronym. This shouldn’t be too hard; architects and designers do it all of the time—for example, HOK, RNL, and SOM. Your identifying acronym will be used to name files and many other things that you create in the digital world. This is important, not necessarily from a marketing point of view, but from an organizational point of view so that everyone knows who made the file. The acronym used for the examples in this book is BIC, which stands for Bright Ideas Consultants. Anticipate replacing the “BIC” with your own identifying acronym as you complete the exercises in this book.
Folders
Folders contain files and other folders, and they have a strong tendency to become a complete mess. Read the next sentence several times so it is etched into your memory. The contents of a folder should present the fewest number of choices, and all choices should be self-explanatory. That sentence thoroughly describes folder organization logic, and it is the keystone of an organized folder.
All PROJECT folder names should be in capital letters to clearly and concisely describe the folder—for example, OFFICE REMODEL. Ideally, all subfolder names within the project folder will be one word in caps; frequently, subfolder names are abbreviated. For instance, administrative files such as contracts and correspondence will be stored in a folder named ADMIN. Pictures, sketches, and diagrams will be kept in a folder named IMAGES. By capitalizing the file folder names, you are visually separating those folder names from the filenames residing in the same folder.
Files
An efficient filename gives the user as much information as possible without ever looking at the file properties (Figure 3.1).
For example, examine the filename BIC_Office Remodel – Existing Conditions.skp This file was created by Bright Ideas Consultants, is part of the Office Remodel project, illustrates the existing conditions, and opens in SketchUp. By providing this information in the filename, you answer many questions about the file before anyone even tries to open it Any consultant or member of your team who opens your files will immediately know where the files came from and how to use them.
Only one current version of each file should be stored in the main PROJECT folder. Avoid giving files confusing names that will make sense only at the moment you name it. Do not name files with the words current, best , use this , or delete . These types of filenames do not make it perfectly clear which file in the main PROJECT folder is actually the current file. Vague filenames provide users with ambiguous information, cause confusion, and ultimately lead to duplicated work and lost time. See Figure 3.2.
Standard folders
By placing your folders in logical places, you help your team keep track of active projects and their associated files. To start organizing your projects, you only need three basic folders: a TEMP folder, an ACTIVE PROJECTS folder, and an ARCHIVE folder. Again, this is not a rigid system; you can customize it to a system that works for you.
TEMP Folder
One way to keep junk files from accumulating on your machine is to create a place to dump them. Create a TEMP folder on your desktop.
The TEMP folder is for anything that you don’t need to keep. This is a great place to save program installers, quick sketches, and email attachments. Files saved in this folder will not be missed when this folder is emptied. Every month or so, go into the TEMP folder and delete all of its contents. If you wonder whether or not you will need a file, more than likely you should save it in a PROJECT folder rather than save it in the TEMP folder.
On a side note, never save anything onto your desktop. The only items that should be on your desktop are the Recycle Bin, TEMP folder, ARCHIVE folder, ACTIVE PROJECTS folder, and possibly some application shortcuts. Never save files to your desktop. If you just need to use a file briefly, save it in the TEMP folder. If you ignore this rule, your desktop will become a mess (Figure 3.3).

TIP eliminate application shortcuts from your desktop by dragging them to the Start Bar menu, or by dragging them to the bottom of your screen and pinning them to the taskbar.
ACTIVE PROJECTS Folder
An active project is one that you access on a daily to weekly basis. The files within the ACTIVE PROJECTS folder change daily. Create a folder on your desktop and name it ACTIVE PROJECTS , or place it on a shared server. Save all current and active projects into your ACTIVE PROJECTS folder using the folder and file naming structures previously described.
TIP Always be aware of exactly where you are saving your active files and projects. Avoid using My recent Documents to open files.
ARCHIVE Folder
An inactive project is a project that has already been invoiced, been paid, and probably won’t be accessed again. Saving all finished work is important, just in case phase two comes around or you need to pull a piece of a model from a past project to use on a current project. Create a folder on your desktop and name it ARCHIVE . Inactive projects should be saved in the ARCHIVE folder on your desktop.
TIP for more information about adding completed projects to the ArchiVe folder, see “closing a Project” later in this chapter.
reSoUrceS folder
Within the ACTIVE PROJECTS folder, create another folder named RESOURCES. The RESOURCES folder holds all of your components, materials, plugins, scrapbooks, styles, and templates. You can also store Windows Themes, preferences.dat files, fonts, and anything else that you use across all of your machines in this folder. Add a folder for each category as shown in Figure 3.4. Consider prefixing each folder name with your identifying acronym.
ProJecT folders
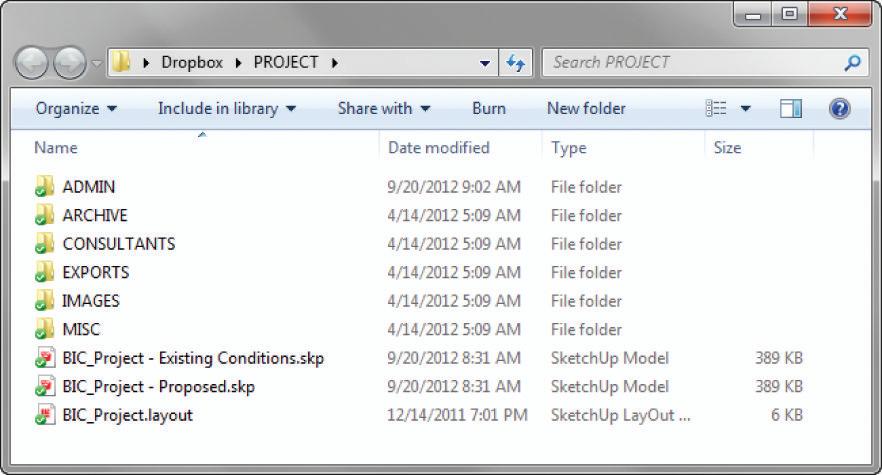
This section suggests a starting point and system to help you organize your PROJECT folders. A PROJECT folder should contain the following subfolders: ADMIN, ARCHIVE, CONSULTANTS, EXPORTS, IMAGES, and MISC. Your particular projects can include other folders if needed.
The main project files, typically SketchUp and LayOut files, should be stored in the main PROJECT folder with the other project subfolders (Figure 3.5). This will provide easy access to the most frequently used files, which usually have the .skp and .layout filename extensions.
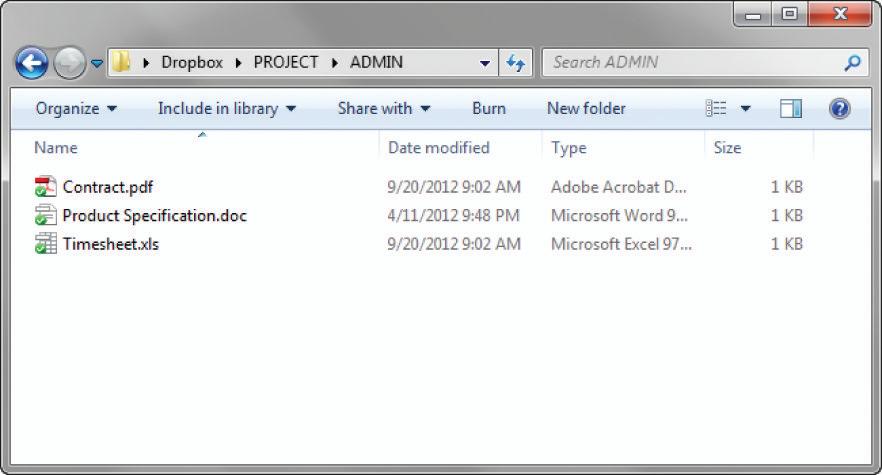
ADMIN Folder
The ADMIN folder should contain all administrative files. You should save contracts, time sheets, product specification sheets, correspondence, and memos that relate to the project in this folder (Figure 3.6). A safe rule of thumb is that if a file is not graphic in nature, it probably belongs in the ADMIN folder. Typical file extensions found in this folder are .doc, .xls, and .pdf.

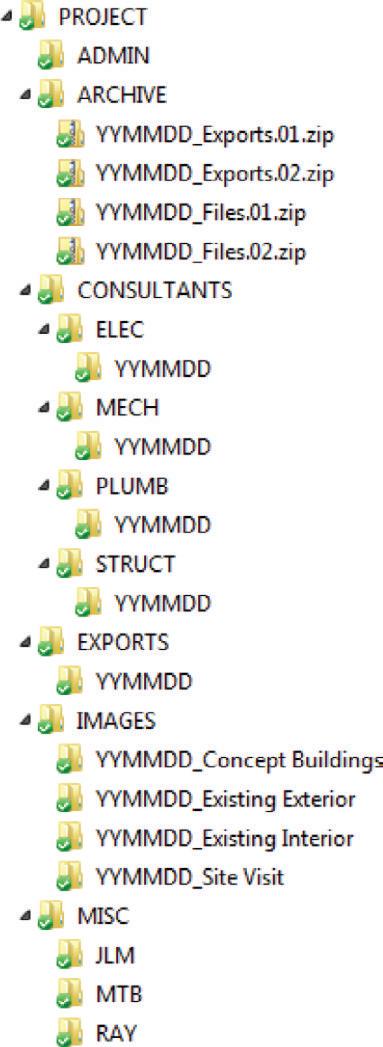
ARCHIVE Folder
The ARCHIVE folder is used to preserve past versions of all important project files. Typically, you should store only zipped files and zipped folders in the ARCHIVE folder (Figure 3.7). All files should be titled with the naming convention YYMMDD_Files.zip or YYMMDD_Exports.zip
By designating project files and exports within the .zip filename, you will be able to easily sort the archives and find any files you need. Because you will rarely access these files, they can be compressed into .zip files to save disk space.

TIP for more information on creating .zip files and backing up your work, see the “Archiving” section later in this chapter.
CONSULTANTS Folder
All of the files you receive from consultants should be saved in the CONSULTANTS folder within their respective folders. Typical subfolders include ELEC, MECH, PLUMB, and STRUCT (Figure 3.8). Each consultant you work with should have their own folder. Typically, a consultant’s folder contains not only .dwg files, but also .pdf files that represent the .dwg files.
Within each consultant’s folder, add subfolders with the naming convention YYMMDD. This will provide a record of when you received the files from each consultant.
EXPORTS Folder
The EXPORTS folder will hold anything that you produce, or export, from your main project files. Some examples of exports are 3D models, 2D .dwg files, and image exports. To help you keep track of your exports, use the YYMMDD naming convention for subfolders. This folder naming system will also make it easy to create archive .zip files.
Because you probably will be exporting several files a day, it is convenient to have one folder that always has the current backgrounds and the entire current set of files ready to print. Create a CURRENT SET subfolder. This folder should always contain all of the current .dwg backgrounds and .pdf prints associated with the project. Whenever someone needs to have a set of documents printed, or CAD backgrounds updated, you can go to this folder to access the most current set. This also means that whenever you export to a YYMMDD folder, you will need to overwrite the files in the CURRENT SET folder to keep those exports up to date. See Figure 3.9.
TIP As the project progresses, turn your eXPorTS folders into .zip files. The folders within the eXPorTS folder should be compressed as new, dated eXPorT folders are created. once you are confident that these exports are not needed on a daily basis, move them to your ArchiVe folder.

A typical EXPORTS folder

IMAGES Folder
The IMAGES folder will hold any photographs, field measurements, sketches, and diagrams relating to the project. Organize the subfolders using the YYMMDD_Description naming convention. You probably will want to separate site photos from interior photos from concept photos. The following folders will help keep them organized not only by the subject of the photographs, but also by date: YYMMDD_Site Visit, YYMMDD_Interiors , YYMMDD_ Concepts (Figure 3.10).
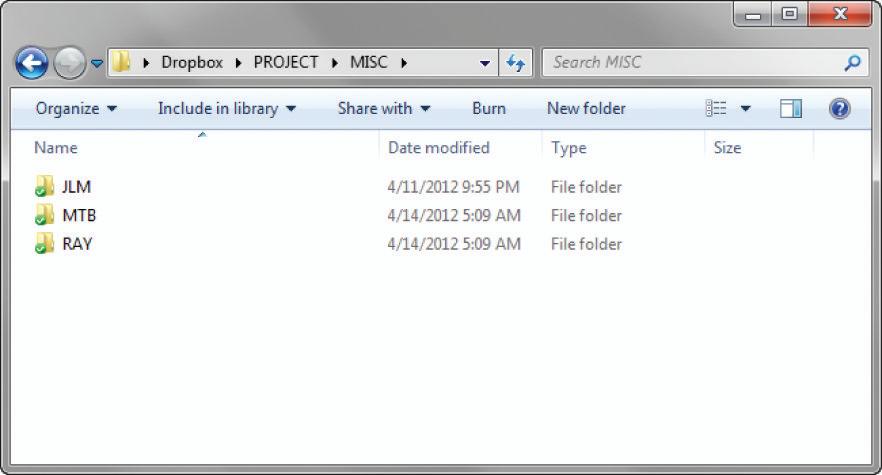
MISC Folder
The MISC folder is the TEMP folder of a project. Save whatever you want within your MISC folder as long as it relates to the project; everyone needs a junk drawer. Subfolders of the MISC folder should be named using capitalized initials so that everyone on the team has their own junk drawer (Figure 3.11). Typically, components, sketch models, and texture images will end up in this folder. Take time every month or so to clean out the backup files and auto-save files to be sure that you don’t waste space on your system.

Refer to the chapter files to see a typical PROJECT folder that has already been created (Figure 3.12). You can copy it to your own ACTIVE PROJECTS folder and use it as a template for new projects.
c lo UD S T or A ge
Consider saving your ACTIVE PROJECTS folder to the cloud for safe keeping, automatic archiving, and additional sharing options (Figure 3.13). Some standard features that many cloud storage solutions offer include:

☑ Automatic archiving
☑ File sharing without the need for an FTP site
☑ Access to previous versions of files and folders
☑ Seamless access to all of your files and folders on all of your computers
☑ File access from an Internet browser or smart phone
☑ Large file sharing without the need to email them
☑ Team sharing of PROJECT folders, even with team members who are not in your office
Archi V ing
Clients change their minds. Systems crash. Data gets lost. Archiving is your free insurance policy that protects your time and work. Archiving is essential to a clean PROJECT folder and successful file management. Archiving allows you to keep a copy of your work in case of an unexpected crash, accidental deletion, or any loss of data. Archiving also helps protect you from indecisive clients because you can revert back to previous versions without re-creating work. The techniques outlined in this section make it is easy to keep a running record of your work for a swift recovery.
Strategy
You don’t need to archive everything all the time. You need to archive only the files that are constantly changing. Typically, these will be the files saved in the main PROJECT folder, the .skp and .layout files. You don’t need to constantly archive the IMAGES folder or the ADMIN folder because these folders rarely change and do not reflect your time and work.
TIP you would be wise to archive before you begin making any major changes. Typically, you should archive at least once a day for an active project.
creating a Project Snapshot
Select all of the current project files, right-click on the selections, and select Send To c Compressed (Zipped) Folder. Name the .zip file using the file-naming convention YYMMDD.01_Files.zip. Use the number at the end to track snapshots throughout the day (Figure 3.14).
Organizing
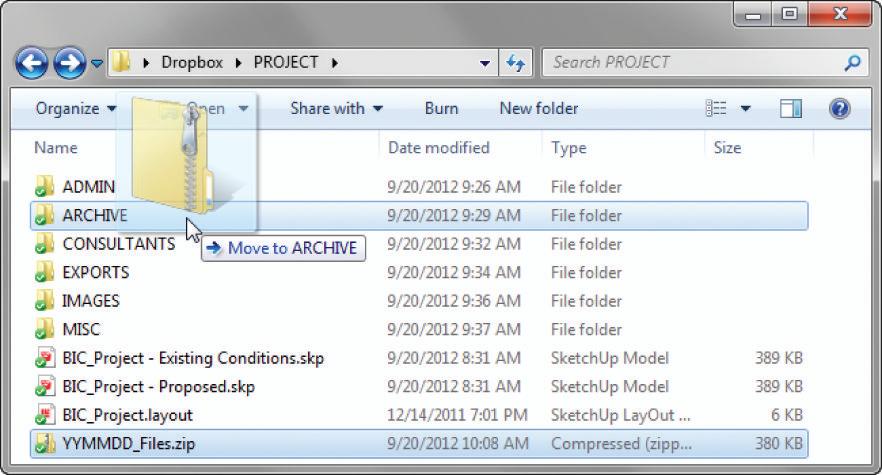
Now drag the .zip file to your ARCHIVE folder in the main PROJECT folder (Figure 3.15). By naming the .zip archive files with the YYMMDD naming standard, you can easily sort them by name. Just click on the Name header in your file browser to put the files in chronological order by the date they were created and also in the proper order throughout the day. You could use the Date Modified tab within your file explorer as well; however, if you make any changes to the .zip file while looking for an old file, the files will no longer be in the correct order. The filename is always static and will allow you to keep archives in perfect chronological order.

closing a Project
Regardless of how long a project drags on, one day you will eventually finish. When you do, you should remove the PROJECT folder from your CURRENT PROJECTS folder to free up disk space. Once a project is complete, it is important to close the project and create a final archive in your main ARCHIVE folder.
TIP Before you archive a project, consider deleting all past archives within the project ArchiVe folder. This may or may not be appropriate depending on the project and its potential to resurface.
Archive the entire project folder by right-clicking on the actual PROJECT folder and selecting Send To c Compressed (Zipped) Folder. This creates a separate .zip file that contains the files and folder structure of your project file in a compressed format. You can now delete the entire project folder and move the project .zip file to your ARCHIVE folder on your desktop. Here it will sit until you need to access the contents in the far and distant future.
TIP To be safe, burn these archives onto a disk, store them on a jump drive, or copy them to an external hard drive, and then store them in a safe as an additional layer of protection. you never know what can happen!
re-opening a Project
The time may come when you need to re-open a project. To do so, right-click on the project .zip file within the ARCHIVE folder and choose Extract All. Click on the Browse button and choose the CURRENT PROJECTS folder on your desktop. Click Extract. All of the files will be restored to your CURRENT PROJECTS folder and maintain their original file and folder structures.
If you only need a couple of files within the archive, double-click into a zipped folder to view its contents, the same as you would a regular folder. Once in the zipped folder, drag and drop individual files into your TEMP folder for inspection. This does not actually move the file out of the .zip file; it makes a copy of it and leaves your archive intact.
c h APT er Poin TS
☑ The small amount of time you invest in organizing files will pay for itself hundreds of times over throughout the design process.
☑ Always know where you are opening a file from and where you are saving it. Never use My Recent Documents to open files.
☑ Archive often, sometimes multiple times during the day. It is better to archive too much rather than too little.
☑ Archive with .zip files to save disk space.
☑ For added convenience and protection from data loss, send your current files to the cloud.


