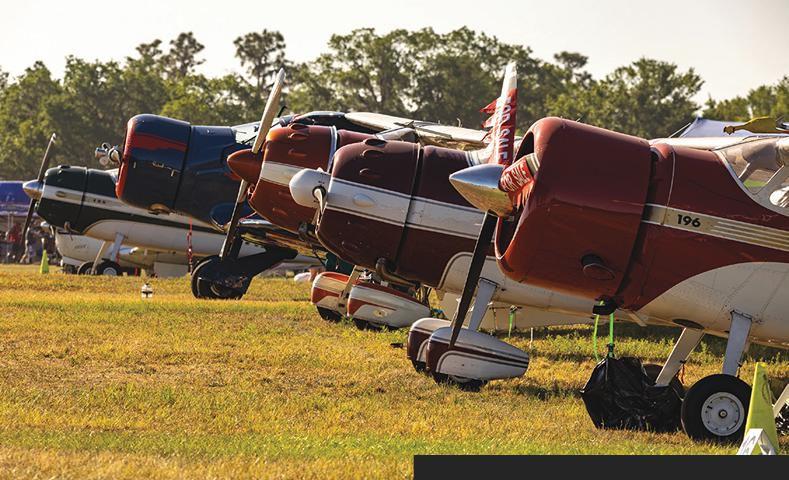
FAIRCHILD PERFECTION


A COUPLE OF MONTHS AGO the Vintage Aircraft Association board of directors put their seal of approval on the Vintage youth education building by unanimously voting to move forward with the project. Construction is scheduled to begin immediately following EAA AirVenture Oshkosh 2023 with a scheduled completion date just prior to EAA AirVenture 2024. The new youth education building will be located just south of Charlie’s Park/Vintage Village and immediately west of the Vintage Café. A groundbreaking ceremony will be held on Monday, the first day of AirVenture 2023, at 9 a.m. at the building site. Everyone is invited to attend. Also, just prior to the groundbreaking ceremony Vintage will hold its annual (and complimentary!) coffee and doughnut gathering in the Vintage Hangar, beginning at 8 a.m. And again, everyone is welcome. This is your opportunity to sample some of the delicious and famous (or so it is rumored!) doughnuts that are made by our own Vintage volunteers at the Tall Pines Café. This is also your opportunity to meet and talk with the VAA officers and directors on a one-on-one basis. As an aside, we have purchased new coffee makers for this event to avoid the catering delays that we experienced last year!
July/August 2023
STAFF
Publisher: Jack J. Pelton, EAA CEO and Chairman of the Board
Vice President of Publications, Marketing, Membership
and Retail/Editor: Jim Busha / jbusha@eaa.org
Senior Copy Editor: Colleen Walsh
Copy Editors: Tom Breuer, Jennifer Knaack
Proofreader: Tara Bann
Print Production Team Lead: Marie Rayome-Gill
Advertising Manager: Sue Anderson / sanderson@eaa.org

Mailing Address: VAA, P.O. Box 3086, Oshkosh, WI 54903
Website: EAAVintage.org
Email: vintageaircraft@eaa.org
Phone: 800-564-6322
Visit EAAVintage.org for the latest information and news.
While the new youth building is under construction, we will be working in the background to develop an aviation-related curriculum for our young attendees. Many thanks to AC Hutson from Griffin, Georgia, who has stepped forward to help us in this regard. AC is a recently retired airline pilot, aircraft builder, and restorer extraordinaire, and more importantly to the project at hand in Vintage, AC was a longtime volunteer in Ron Alexander’s Youth Aviation Program at Peach State Aerodrome (GA2) in Williamson, Georgia.
Current EAA members may join the Vintage Aircraft Association and receive Vintage Airplane magazine for an additional $45/year.
Wednesday late-afternoon VAA
By the way, other than a youthoriented aviation educational facility, the new building will also serve as the site for the Wednesday late-afternoon VAA annual membership meeting and the Saturday evening aircraft judging awards program. Holding these two events in the youth education building will be a gigantic improvement over the current venues, as the youth building will be both insulated and air conditioned.
Don’t forget! Complimentary coffee and doughnuts in the Vintage Hangar at 8 a.m. followed by the groundbreaking ceremony at the site of the new building at 9 a.m. on Monday, July 24, 2023. I’m looking forward to seeing you there!
Have you ever wondered what events were happening in the Vintage area during AirVenture but did not have a clue as to where you could find
CONTINUED ON PAGE 64
EAA membership, Vintage Airplane magazine, and one-year membership in the EAA Vintage Aircraft Association are available for $55 per year (Sport Aviation magazine not included). (Add $7 for International Postage.)
Foreign Memberships
Please submit your remittance with a check or draft drawn on a United States bank payable in United States dollars. Add required foreign postage amount for each membership.
Membership Service
P.O. Box 3086, Oshkosh, WI 54903-3086
Monday–Friday, 8 AM—6 PM CST Join/Renew 800-564-6322 membership@eaa.org
EAA AirVenture Oshkosh www.EAA.org/AirVenture 888-322-4636
By the way, other than a youth-oriented aviation educational facility, the new building will also serve as the site for the
annual membership meeting and the Saturday evening aircraft judging awards program.

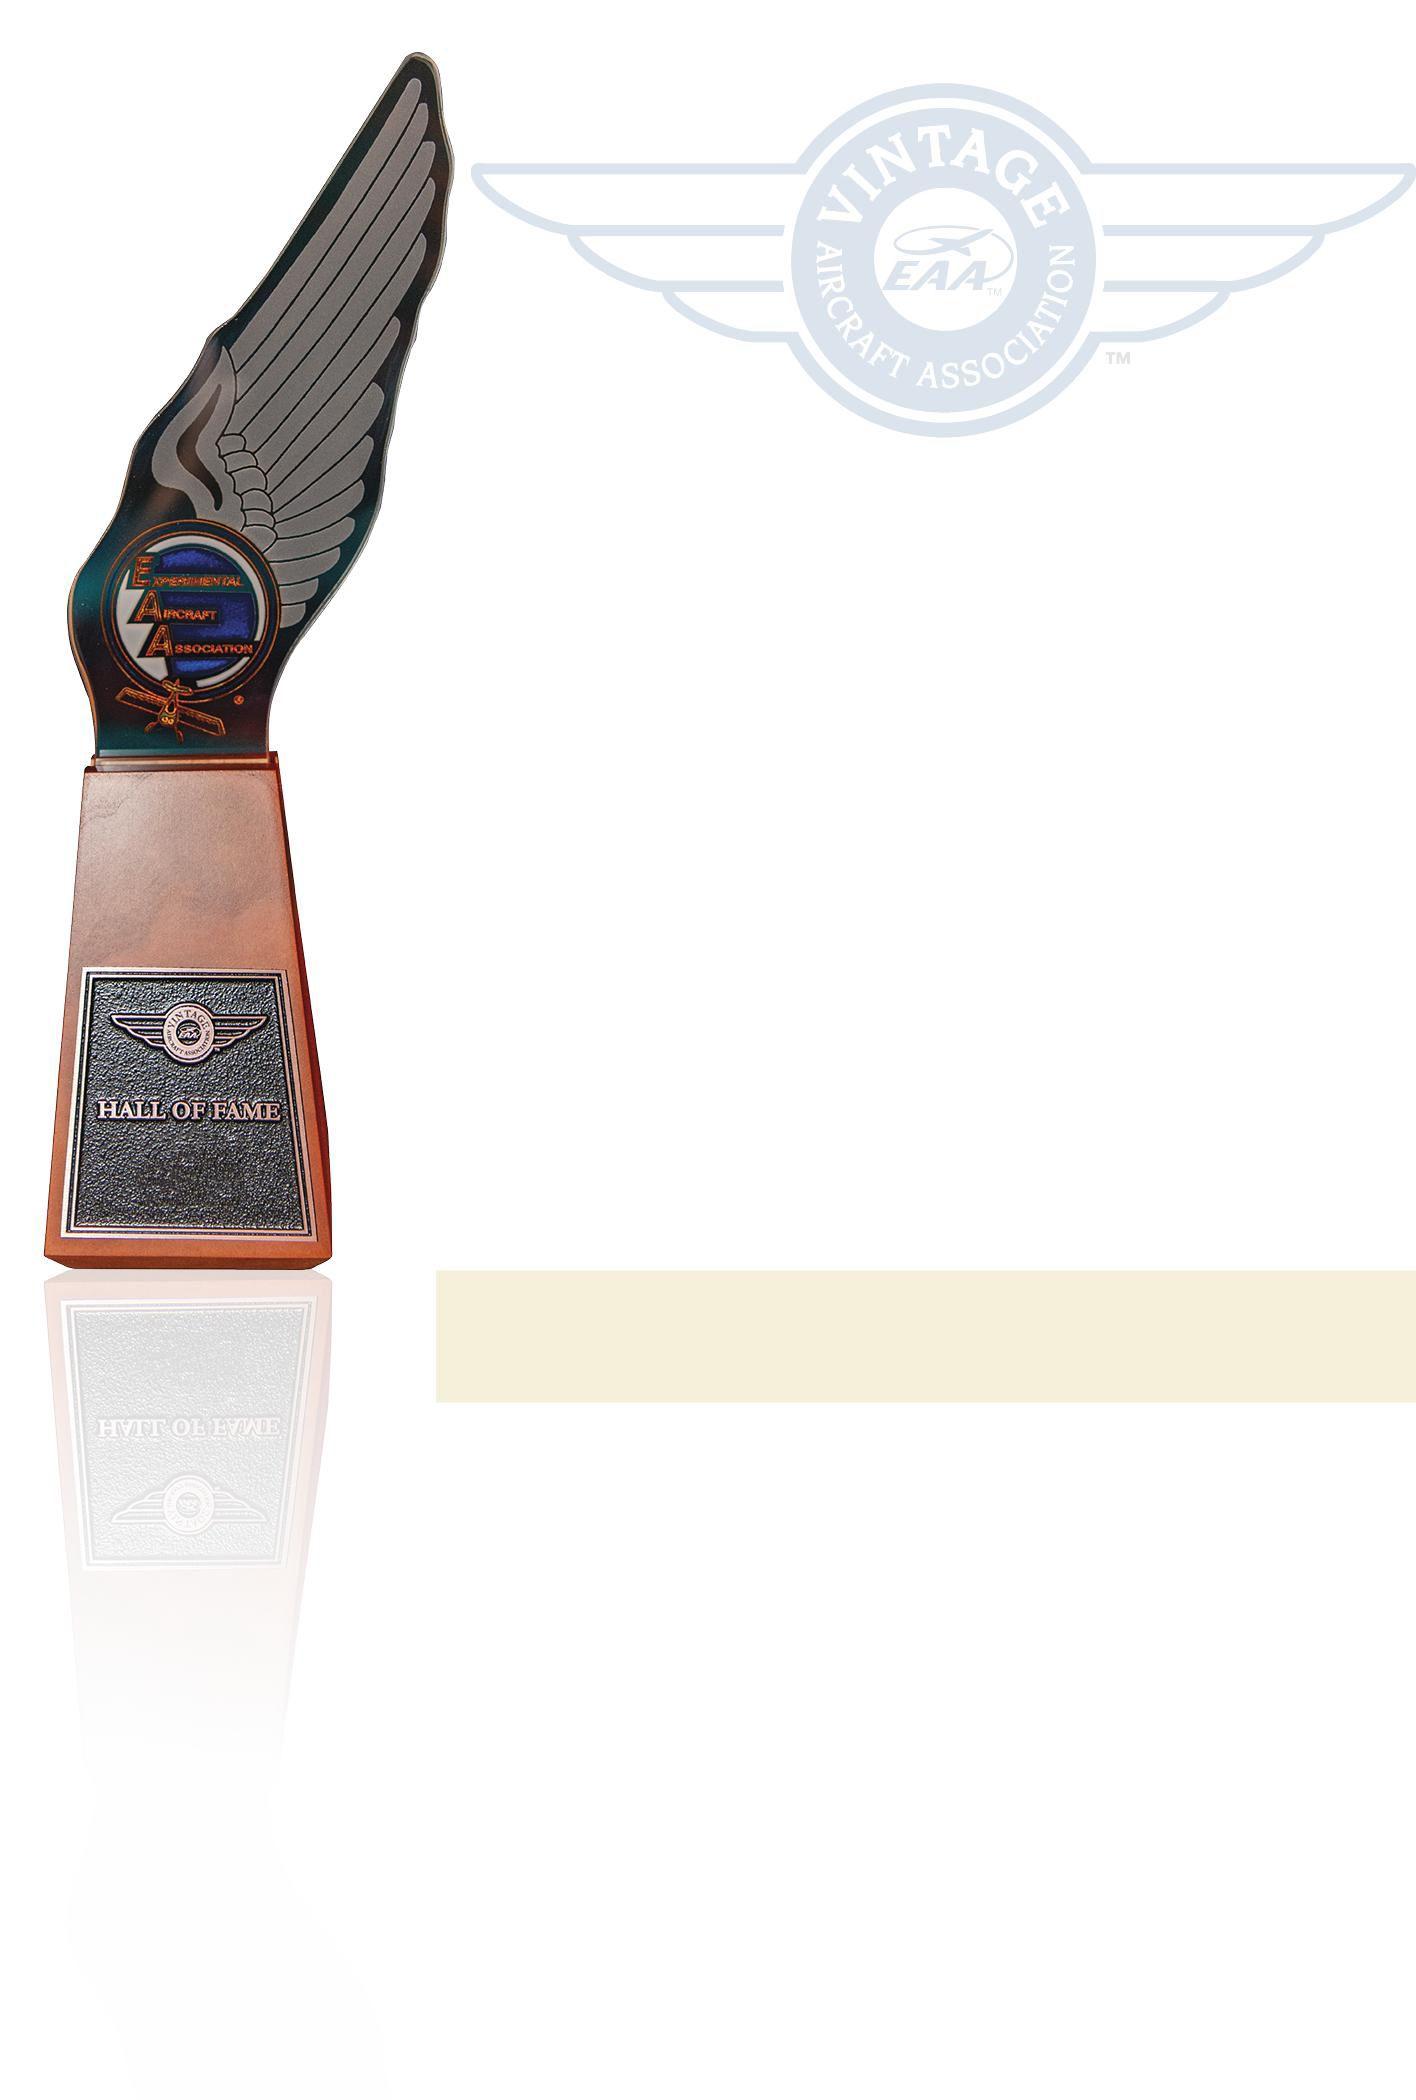
Nominate your favorite vintage aviator for the EAA Vintage Aircraft Association Hall of Fame A great honor could be bestowed upon that man or woman working next to you on your airplane, sitting next to you in the chapter meeting, or walking next to you at EAA AirVenture Oshkosh. Think about the people in your circle of aviation friends: the mechanic, historian, photographer, or pilot who has shared innumerable tips with you and with many others. They could be the next VAA Hall of Fame inductee — but only if they are nominated.
The person you nominate can be a citizen of any country and may be living or deceased; his or her involvement in vintage aviation must have occurred
between 1950 and the present day. His or her contribution can be in the areas of flying, design, mechanical or aerodynamic developments, administration, writing, some other vital and relevant field, or any combination of fields that support aviation. The person you nominate must be or have been a member of the Vintage Aircraft Association or the Antique/Classic Division of EAA, and preference is given to those whose actions have contributed to the VAA in some way, perhaps as a volunteer, a restorer who shares his expertise with others, a writer, a photographer, or a pilot sharing stories, preserving aviation history, and encouraging new pilots and enthusiasts.
To nominate someone is easy. It just takes a little time and a little reminiscing on your part.
• Think of a person; think of his or her contributions to vintage aviation.
• Write those contributions in the various categories of the nomination form.
• Write a simple letter highlighting these attributes and contributions. Make copies of newspaper or magazine articles that may substantiate your view.
• If at all possible, have another individual (or more) complete a form or write a letter about this person, confirming why the person is a good candidate for induction.
We would like to take this opportunity to mention that if you have nominated someone for the VAA Hall of Fame, nominations for the honor are kept on file for three years, after which the nomination must be resubmitted.
Mail nominating materials to: VAA Hall of Fame, c/o Amy Lemke VAA P.O. Box 3086 Oshkosh, WI 54903
Email: alemke@eaa.org
Find the nomination form at EAAVintage.org, or call the VAA office for a copy (920-426-6110), or on your own sheet of paper, simply include the following information:
• Date submitted.
• Name of person nominated.
• Address and phone number of nominee.
• Email address of nominee.
• Date of birth of nominee. If deceased, date of death.
• Name and relationship of nominee’s closest living relative.
• Address and phone of nominee’s closest living relative.
• VAA and EAA number, if known. (Nominee must have been or is a VAA member.)
• Time span (dates) of the nominee’s contributions to vintage aviation. (Must be between 1950 to present day.)
• Area(s) of contributions to aviation.
• Describe the event(s) or nature of activities the nominee has undertaken in aviation to be worthy of induction into the VAA Hall of Fame.
• Describe achievements the nominee has made in other related fields in aviation.
• Has the nominee already been honored for his or her involvement in aviation and/or the contribution you are stating in this petition? If yes, please explain the nature of the honor and/or award the nominee has received.
• Any additional supporting information.
• Submitter’s address and phone number, plus email address.
• Include any supporting material with your petition.
For one week every year a temporary city of about 50,000 people is created in Oshkosh, Wisconsin, on the grounds of Wittman Regional Airport. We call the temporary city EAA AirVenture Oshkosh. During this one week, EAA and our communities, including the Vintage Aircraft Association, host more than 600,000 pilots and aviation enthusiasts along with their families and friends.
As a dedicated member of the Vintage Aircraft Association, you most certainly understand the impact of the programs supported by Vintage and hosted at Vintage Village and along the Vintage flightline during EAA AirVenture Oshkosh every year. The Vintage flightline is 1.3 miles long and is annually filled with more than 1,100 magnificent vintage airplanes. At the very heart of the Vintage experience at AirVenture is Vintage Village and our flagship building, the Red Barn.
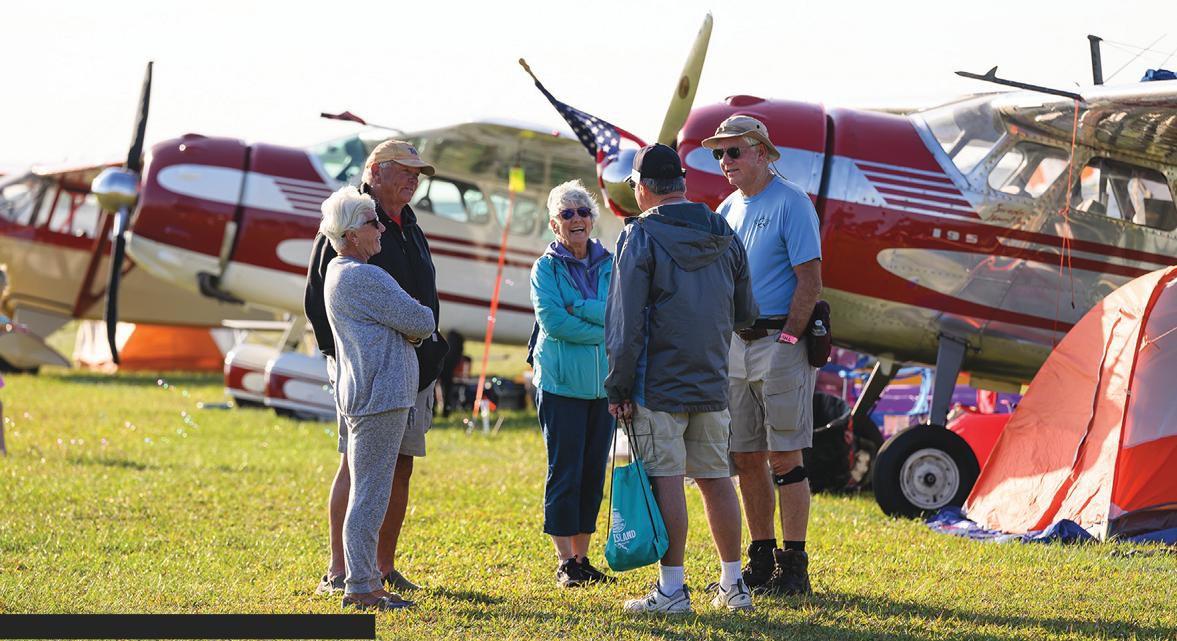
Vintage Village, and in particular the Red Barn, is a charming place at Wittman Regional Airport during AirVenture. It is a destination where friends old and new meet for those great times we are so familiar with in our close world of vintage aviation. It’s energizing and relaxing at the same time. It’s our own field of dreams!
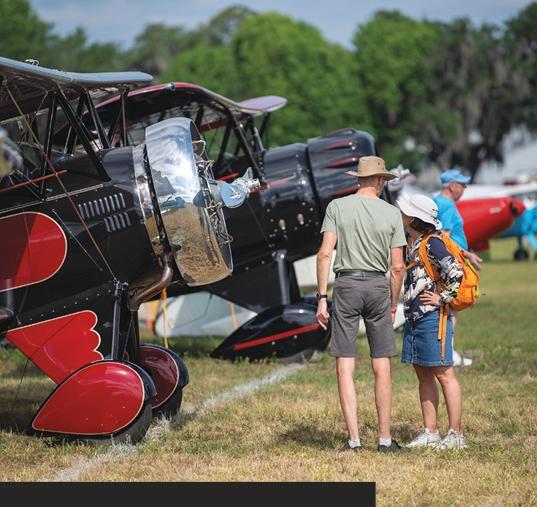
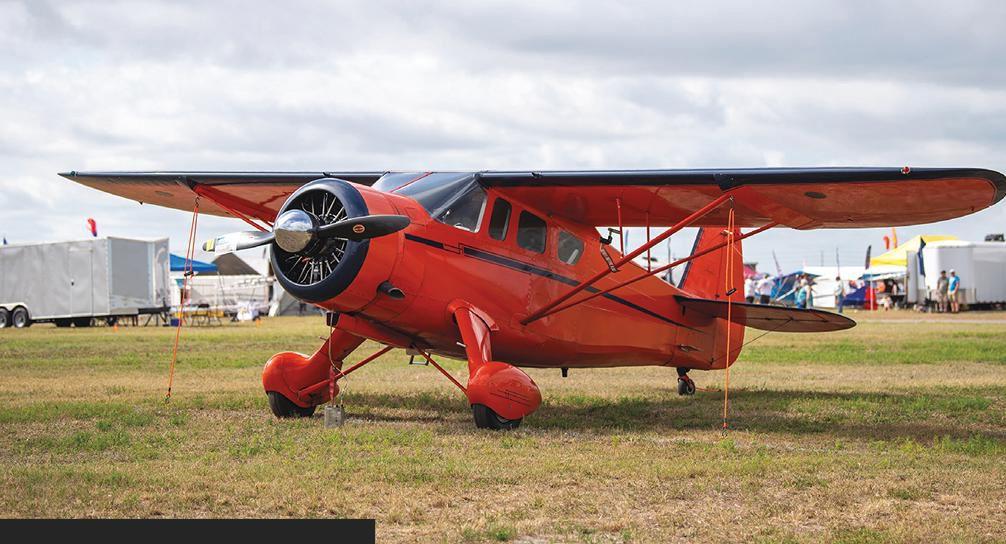
The Vintage area is the fun place to be. There is no place like it at AirVenture. Where else could someone get such a close look at some of the most magnificent and rare vintage airplanes on Earth? That is just astounding when you think about it. It is on the Vintage flightline where you can admire the one and only remaining lowwing Stinson Tri-Motor, the only two restored and flying Howard 500s, and one of the few airworthy Stinson SR-5s in existence. And then there is the “fun and affordable” aircraft display, not only in front of the Red Barn but along the entire Vintage flightline. Fun and affordable says it all. That’s where you can get the greatest “bang for your buck” in our world of vintage airplanes!
For us to continue to support this wonderful place, we ask you to assist us with a financial contribution to the Friends of the Red Barn. For the Vintage Aircraft Association, this is the only major annual fundraiser and it is vital to keeping the Vintage field of dreams alive and vibrant. We cannot do it without your support.
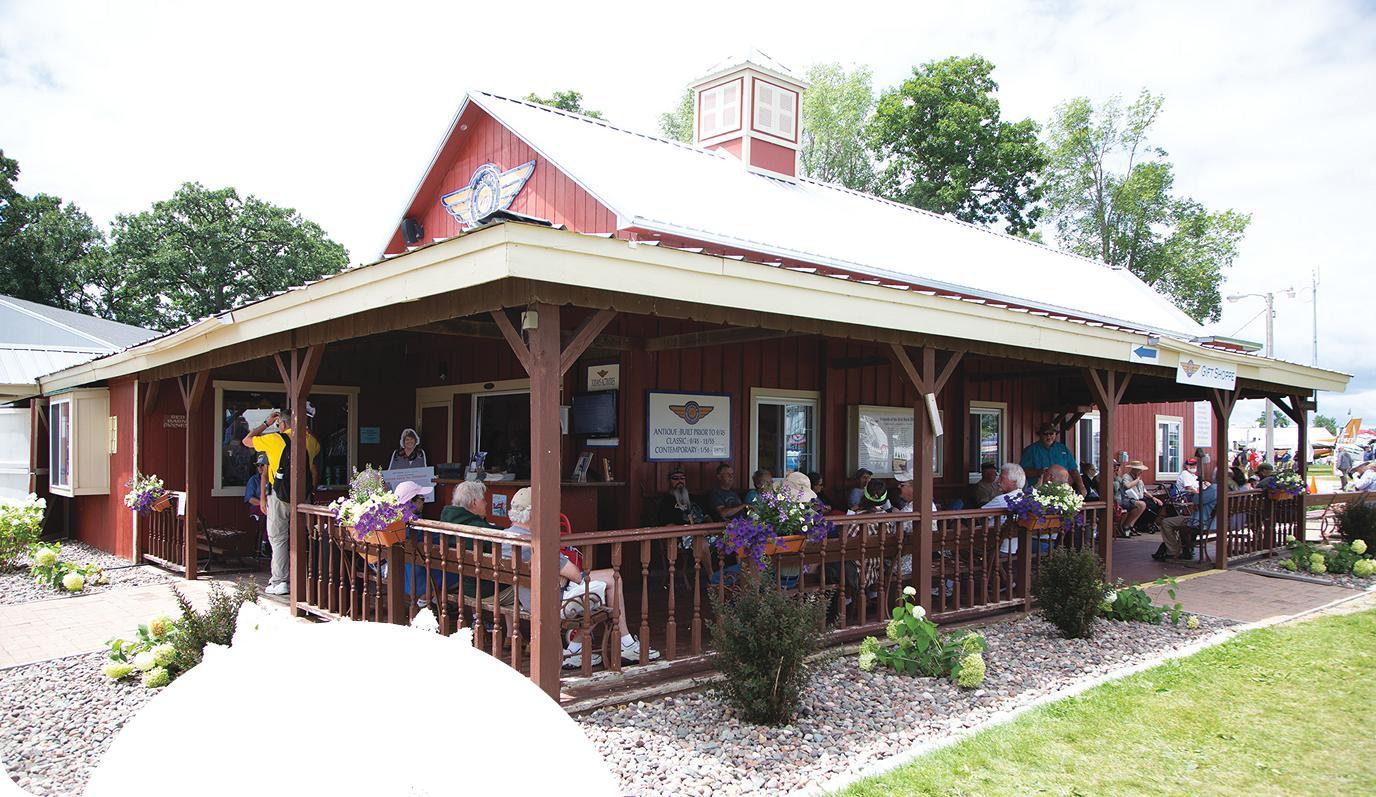
Your personal contribution plays an indispensable and significant role in providing the best experience possible for every visitor to Vintage during AirVenture. Contribute online at EAAVintage.org. Or, you may make your check payable to the Friends of the Red Barn and mail to Friends of the Red Barn, P.O. Box 3086, Oshkosh, WI 54903-3086.
Be a Friend of the Red Barn this year! The Vintage Aircraft Association is a nonprofit 501(c)(3), so your contribution to this fund is tax deductible to the extent allowed by law.
Looking forward to a great AirVenture 2023!
 BY ROBERT G. LOCK
IN THE OLD DAYS OF GRADE A COTTON fabric, inspection rings and drain grommets were secured to the fabric using butyrate dope. Since the material used in making these pieces was acetate plastic and the dope was made from cellulose acetate butyrate, the two were compatible and the bond was good. However, with the advent of synthetic fabric processes, the bond was not all that good, and the inspection rings
would commonly come loose, which made for a messy repair to correct the situation.
Synthetic fabric manufacturers suggest that inspection rings and drain grommets should be covered with a layer of fabric to securely bond them in place. Here is an easy way to make the doilies used to reinforce rings and grommets.

Make a frame of any size; mine measures 2-by-3 feet. Obtain some lightweight Dacron fabric and then stretch and tack it to the frame. I use nailing strips to hold the fabric in place. Then lightly shrink the fabric to remove all the wrinkles (they won’t come out after bonding to the fabric).
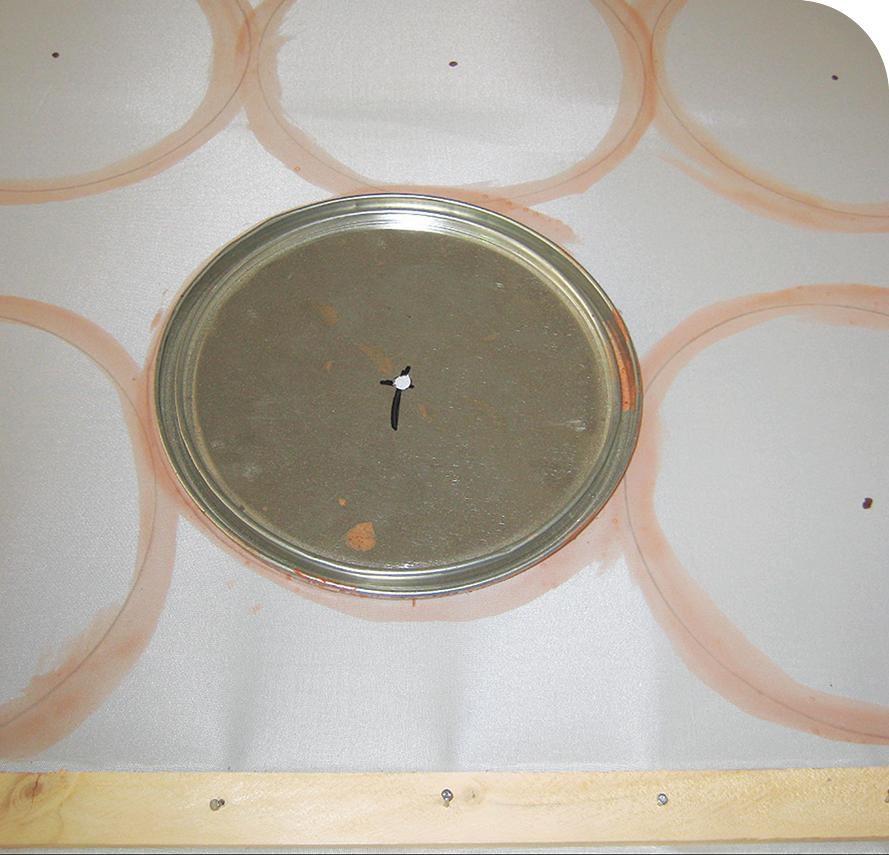
I use the lid from a 1-gallon paint container as the diameter to cut the doilies to size. Mark each doily while the fabric is still stretched in the panel. Mark with a pencil, then brush Poly Brush (or whatever the base coat is) around the pencil marks and allow it to dry. Note that I have drilled a hole in the center of the can lid so the center of the circle can be located. (Figure 1) Cut out the doilies with pinking shears — the base coat will hold fibers in place and prevent raveling of threads and filaments. Drain grommet covers can be made the same way but, of course, use a smaller diameter circle — something around 2 inches.
At the proper time in the process, locate and bond the inspection rings and drain grommets to the fabric and allow them to cure thoroughly.
Wet out the center of the inspection ring with a brush and the base coat material, and place the doily in the center of the ring using the center dot as a guide. Press the doily well into the base coat and use the paintbrush handle to work the doily tightly against the plastic ring. Allow it to dry before going on to the next step.
Now, wet out the remaining area under the doily using a paintbrush and smooth the doily down, being careful to remove all air bubbles and again pushing the doily against the ring with the handle of the paintbrush.
With a little care and patience the final product will look something like Figure 3. By using a two-step method of bonding the doily to the fabric surface, a good air bubble and wrinkle-free covering of the inspection ring will occur. If you don’t let the center dry before sticking down the outer part, the doily will continue to creep around and you will never get it centered, remove all the air bubbles, and get it stuck securely to the plastic ring.
Don’t count on a rain shower to help wash away dust and grime from your vehicle. It’s been exposed to so much more than a dusty road - UV light,
temperature changes, pollutants and weather patterns- all contribute to any vehicle looking worn out and old before its time. Fortunately, NUVITE’s aviation-certified CitriCut® Series of Cleaners & Degreasers provides solutions for any exterior surface including cars, planes, trains, boats, RVs & more!
Know the facts… while rainwater can provide a light rinse, there’s also a layer of grime that rainwater will not dislodge. Pollen and pollutants along with the dust that raindrops collect

dry on the surface. Organic matter like insect residue and leaves have an acidic effect that will effectively eat through paint and cause metal to rust. Add the sun to bake it all in, along with daylight exposure for ultraviolet rays to further
oxidize, dry and fade exterior paint and your vehicle is just begging for relief.
NUVITE’s CitriCut® Series is guaranteed to keep that shine! Rely on CitriCut® Concentrate, a citrus-based debugger, degreaser, and general wet wash cleaner, or CitriCut® Xtra, an exceptional cleaner that enhances glass and provides a hydrophobic sealant with UV protection. There’s also CitriCut® Gel, a heavy-duty surface-cling cleaner for gears, wheel wells, flaps cowling & more. Count on NUVITE to maintain that showroom shine.
Effectively clean dirt, carbon, grease, hydraulic fluids and more, while applying a protective sealant and enhancing your paint gloss. Citricut® Xtra is a heavy-duty citrus cleaner formulated to address all three – Clean, Protect and Shine.
A manual chemwipe using CitriCut® Xtra can carry you through. Use full strength or dilute with water depending on the extent of soiling and type. Agitate surface with a wash pad to loosen soils and hand buff dry. DO NOT allow work surface area to dry. It’s the perfect in-between solution.






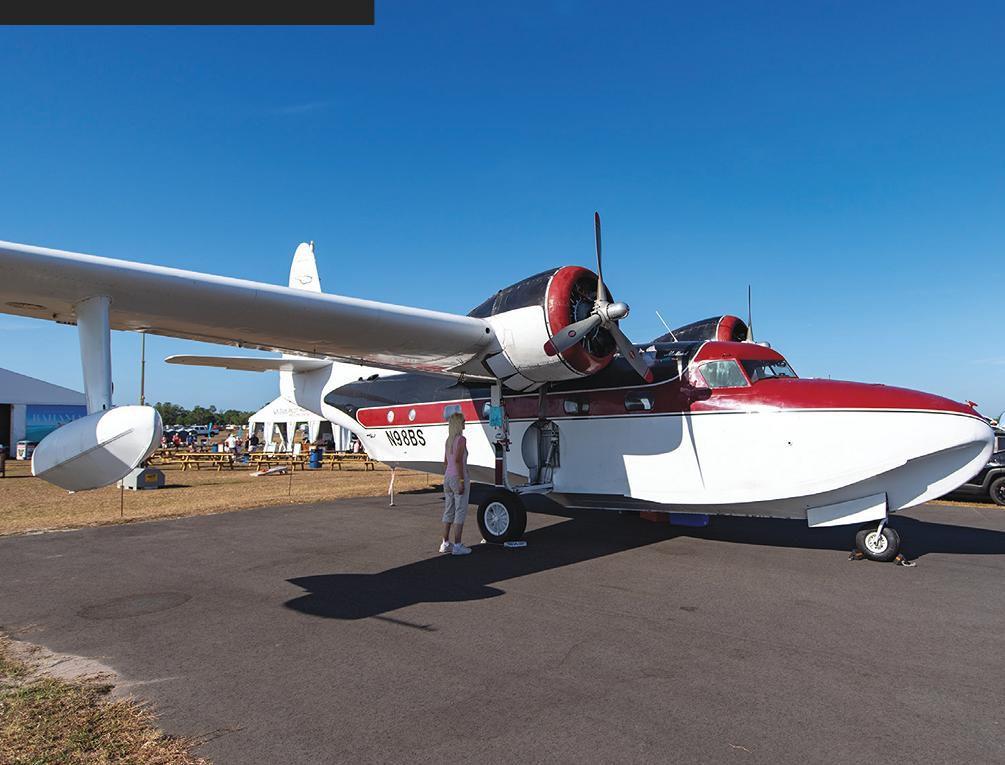
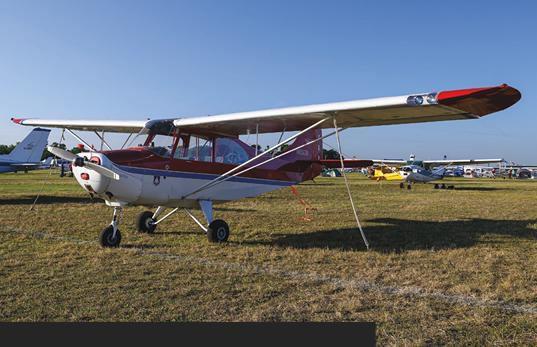

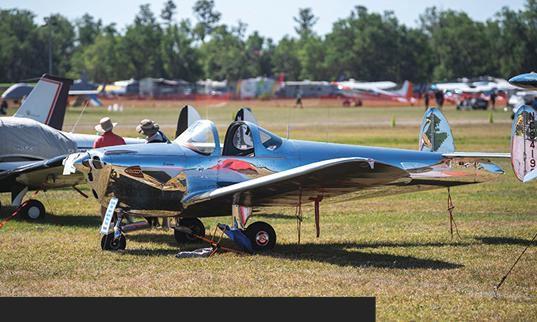

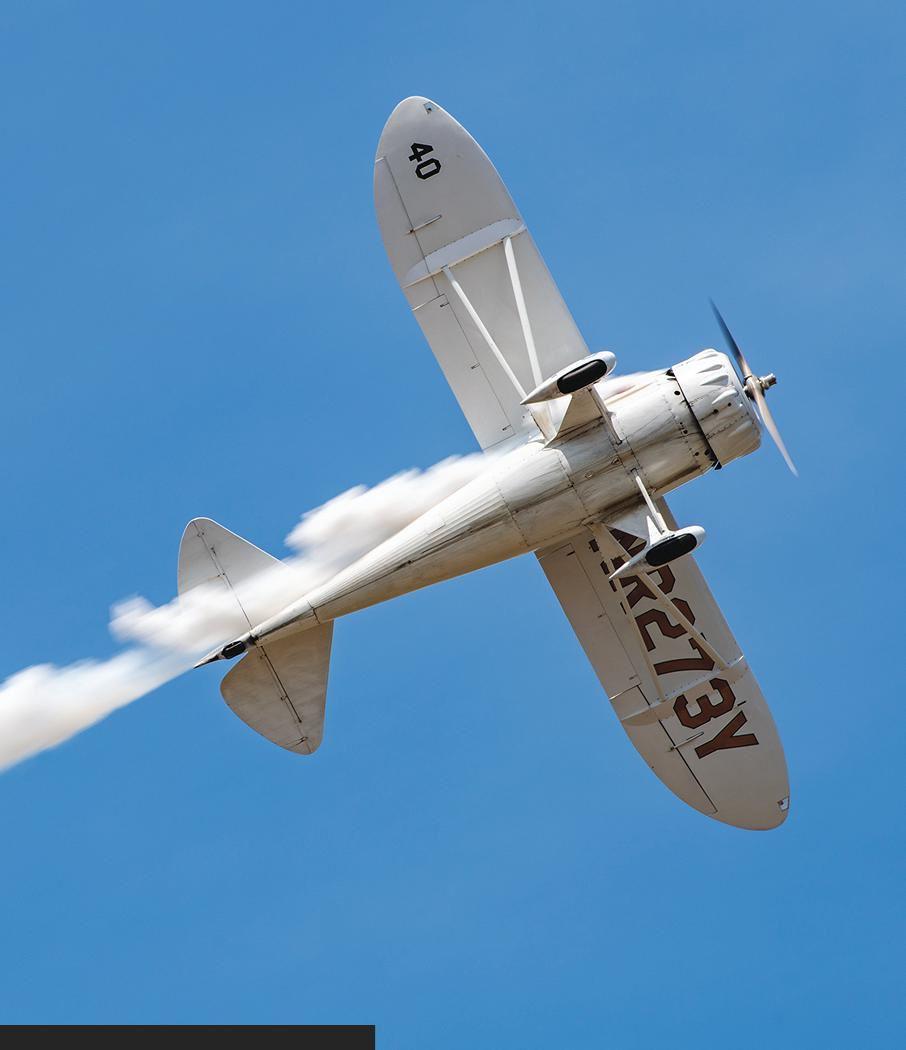






SS“Where are those bums?”
Qantas air stewardesses
Ethel Barlow and Louise Hankin, jilted on the very tarmac at Brisbane by the philandering flight crew who got off the plane before they did and ran into the hangar to avoid them They had no intention of keeping those in-flight promises given solely to make time with the girls They’ll be back in the air in an hour, on their way to Darwin with another pair of stewardesses.
Sure, it’s an age-old ploy and it hurt only the girls’ egos, right? But the girls filed a complaint, and the boys were soon hauling sheep carcasses to a disposal site. Of course that doesn’t happen nowadays does it?


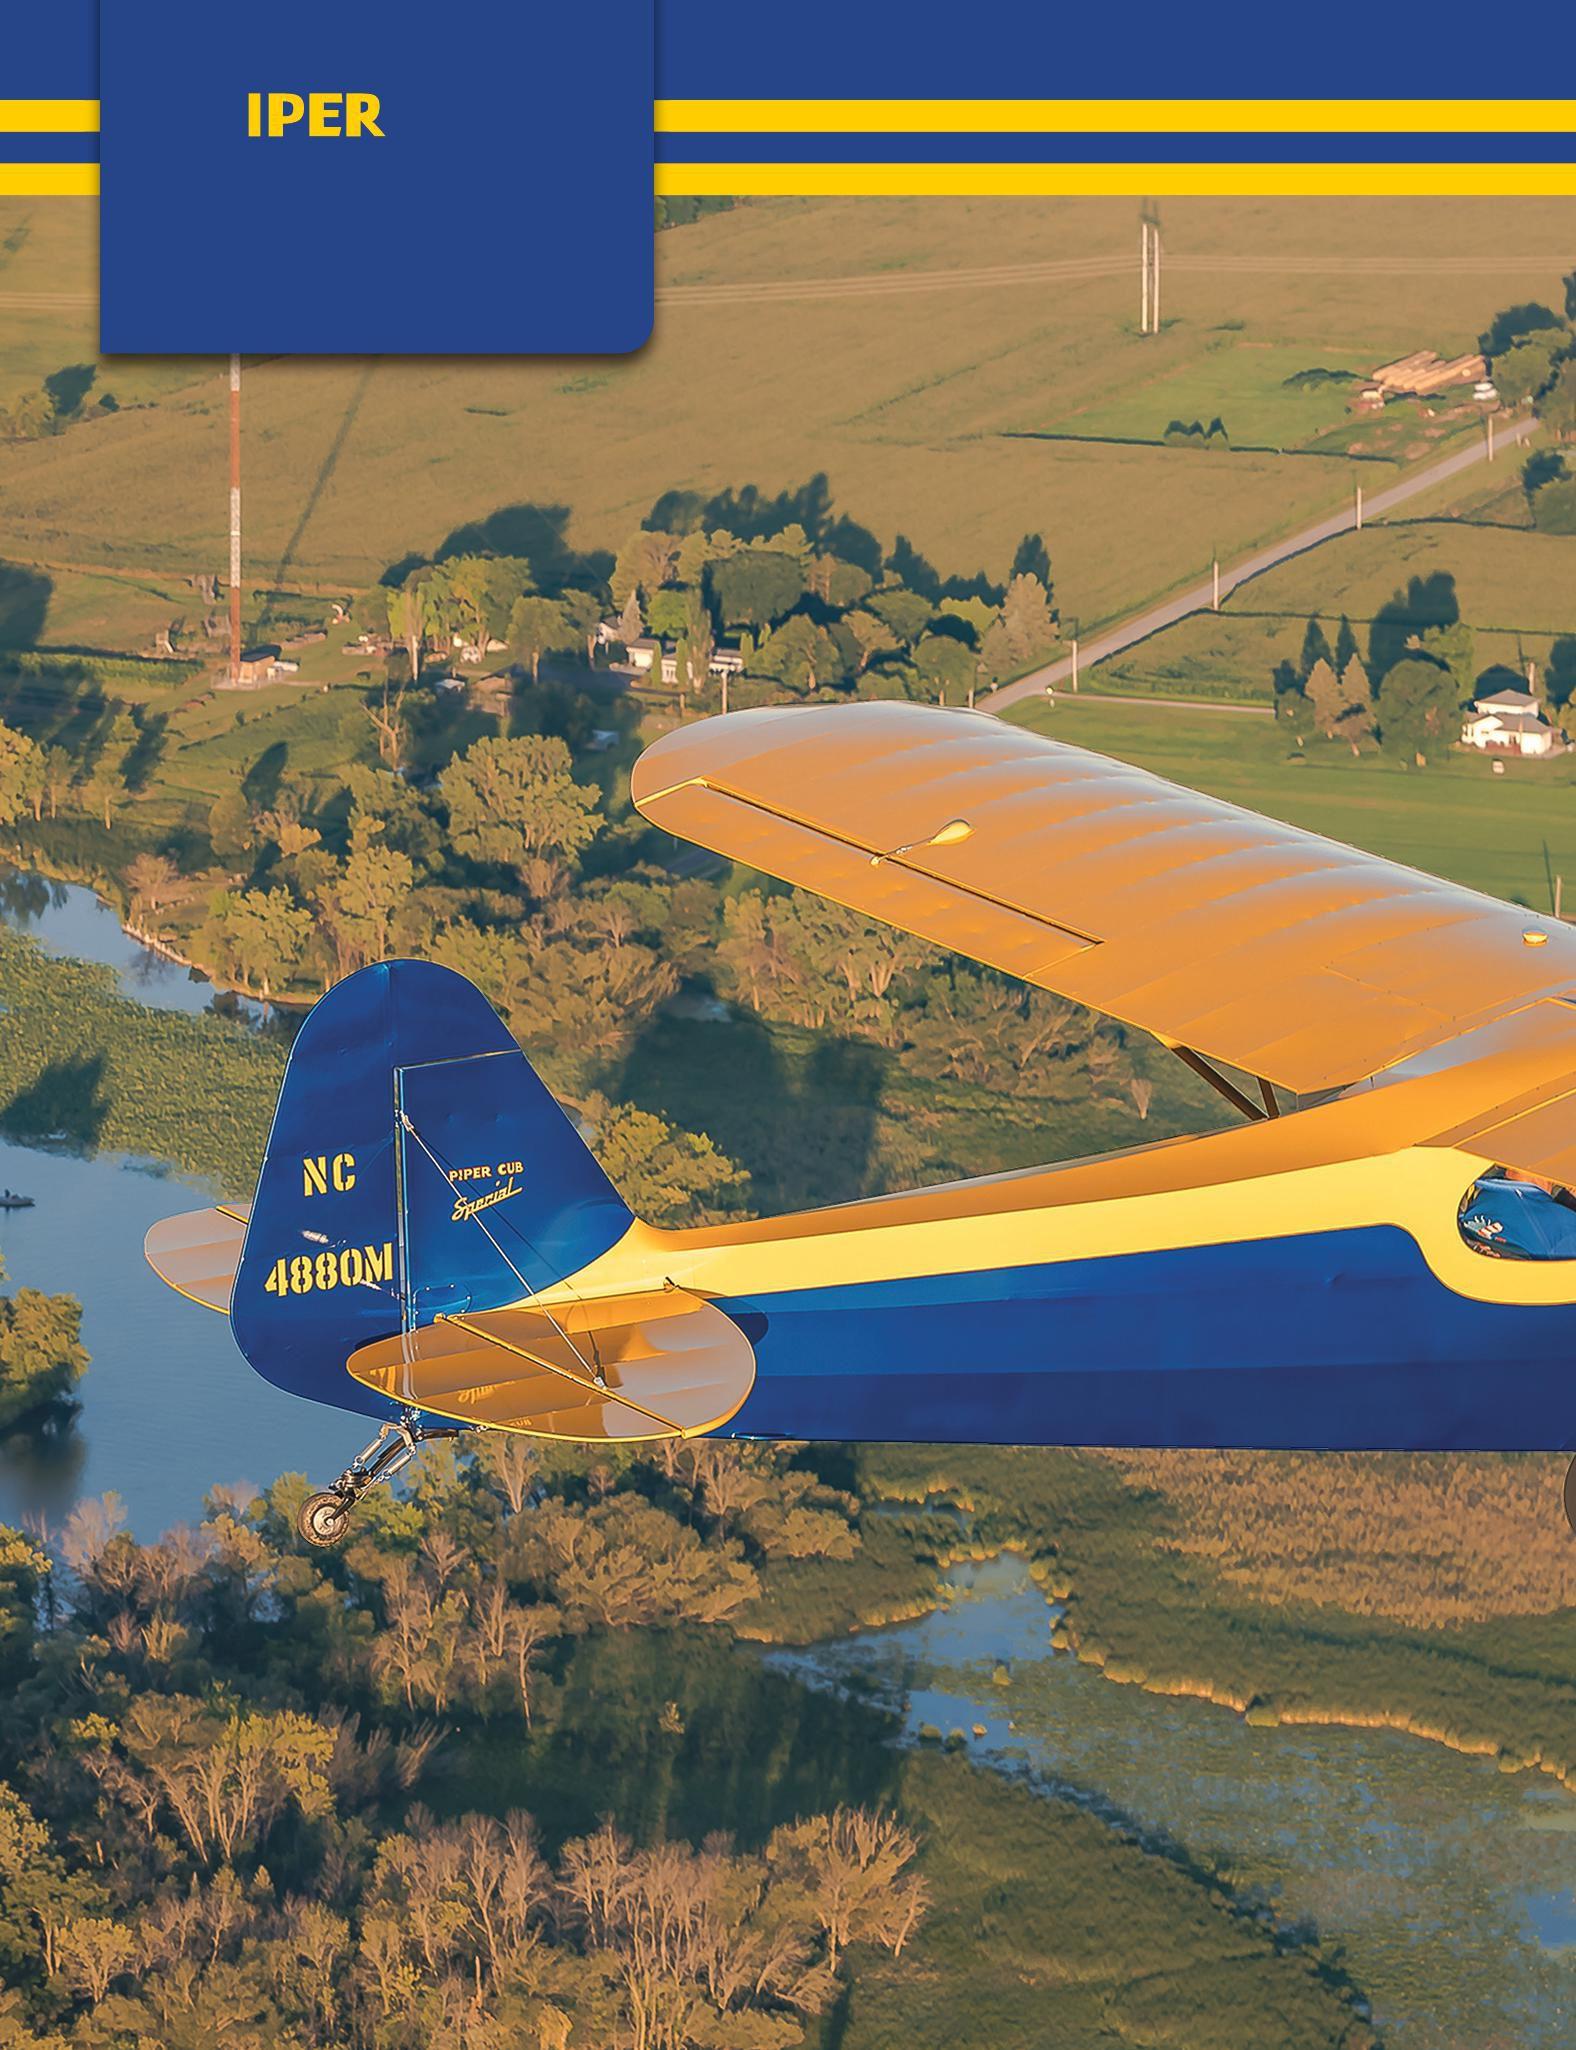
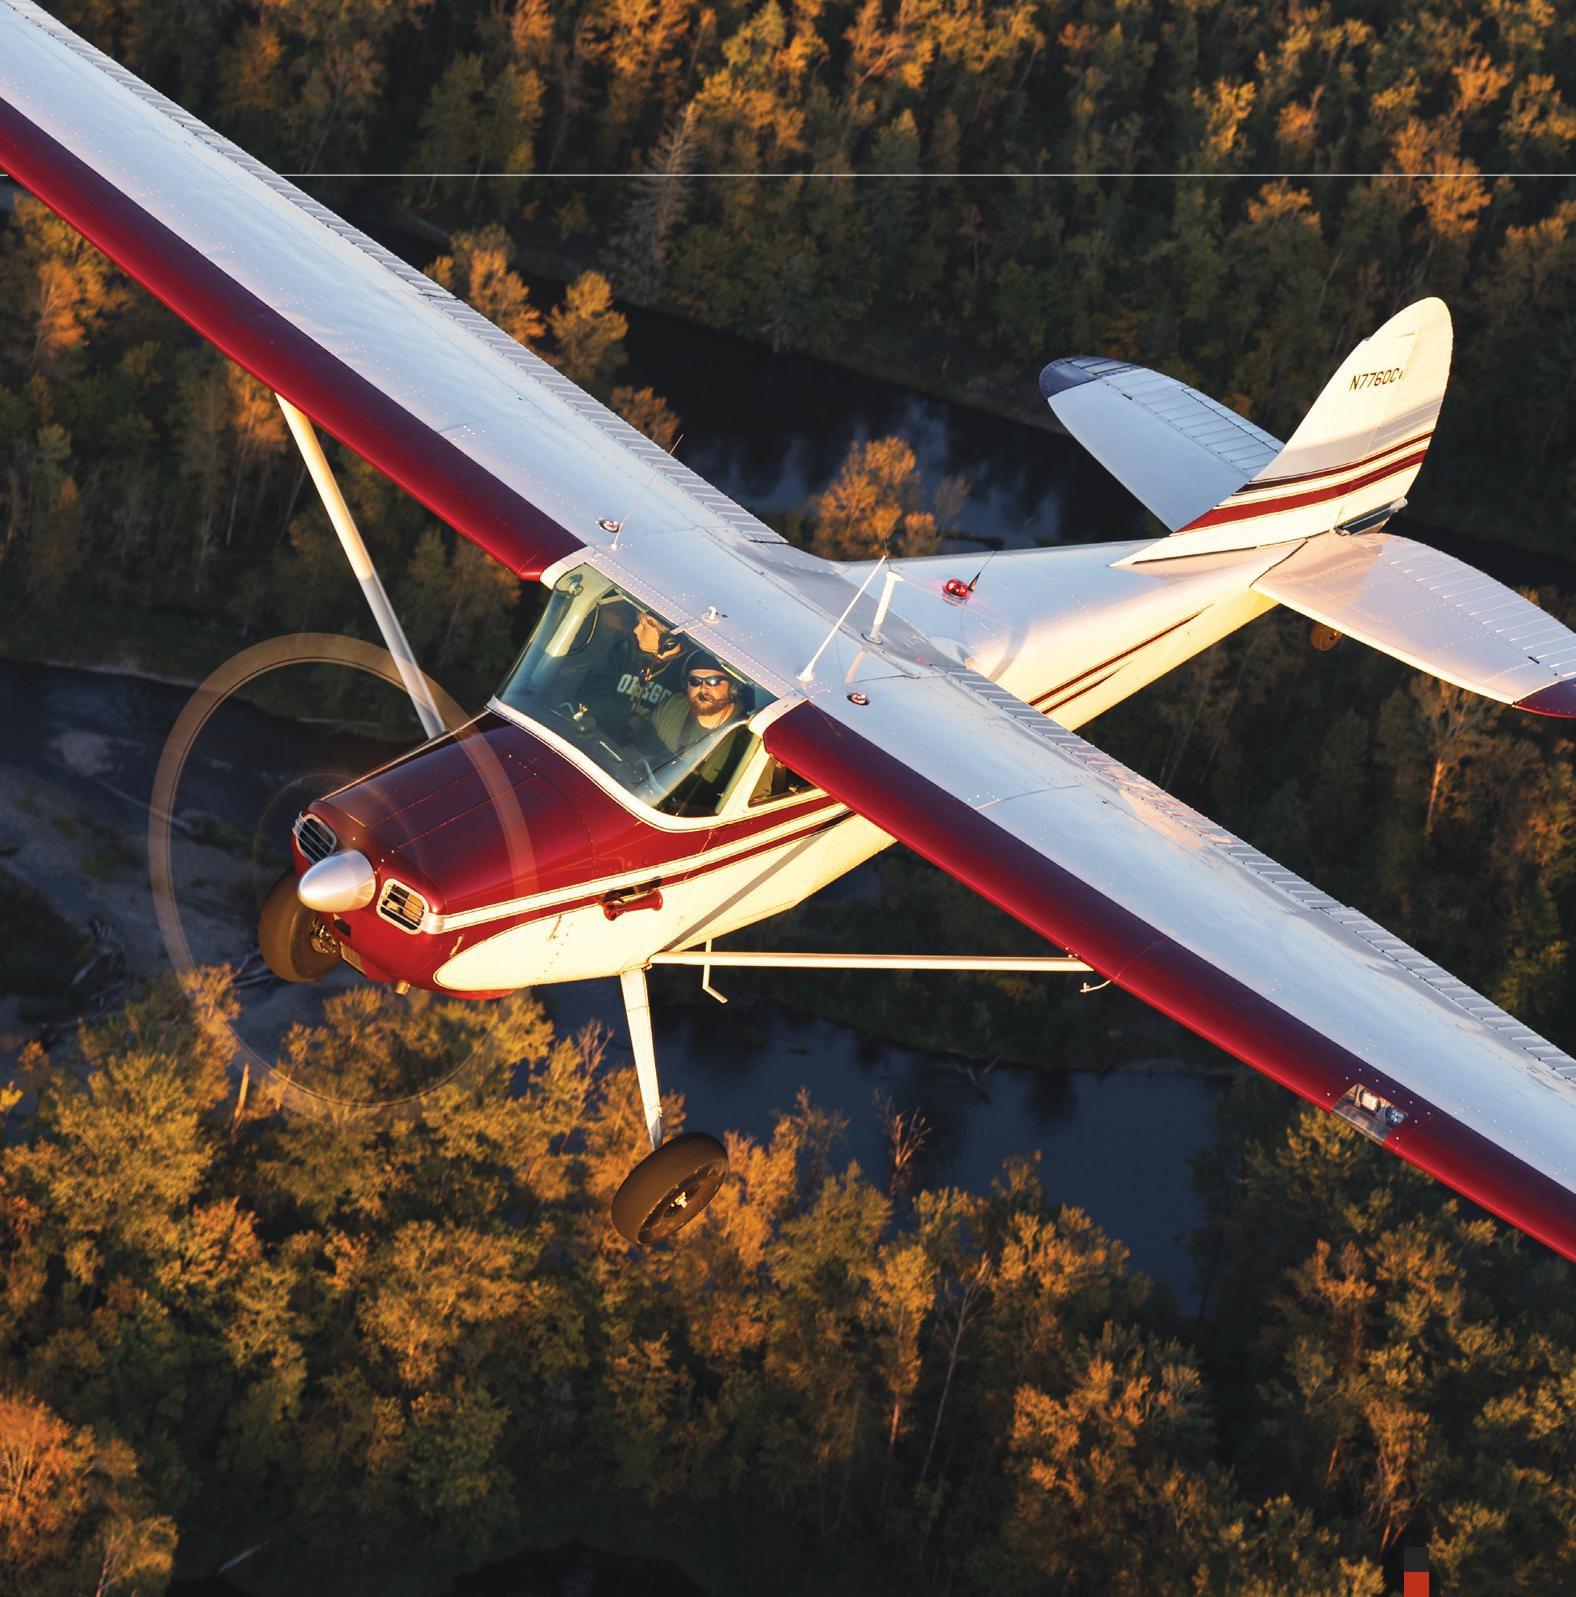
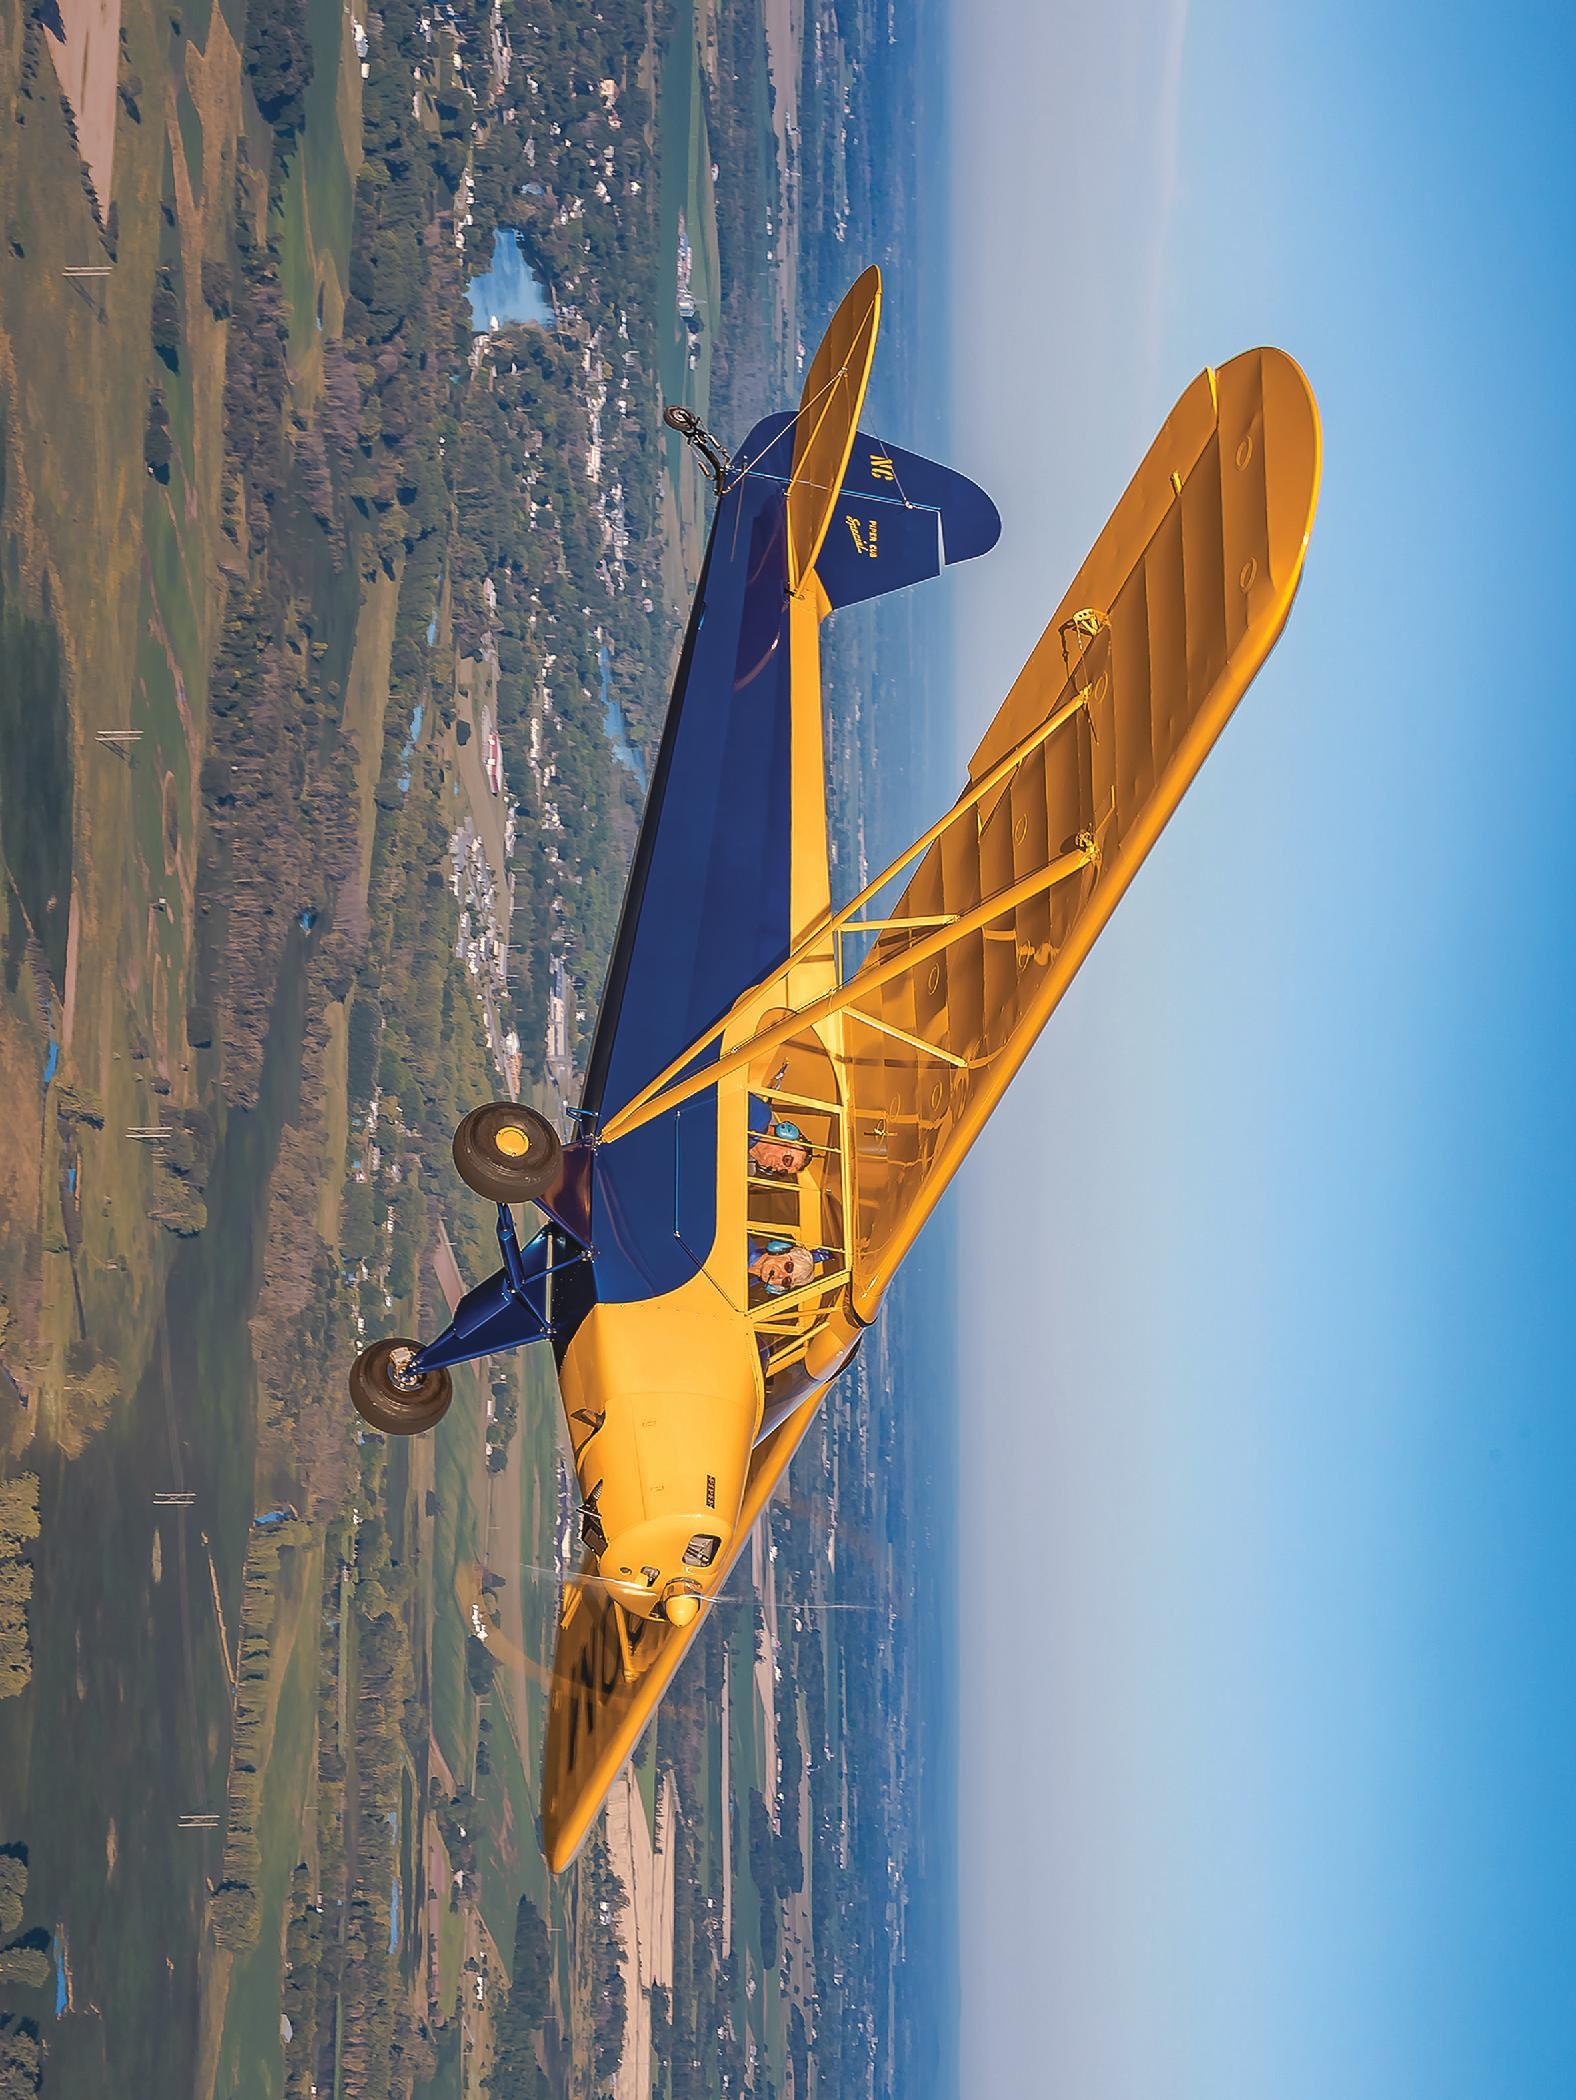
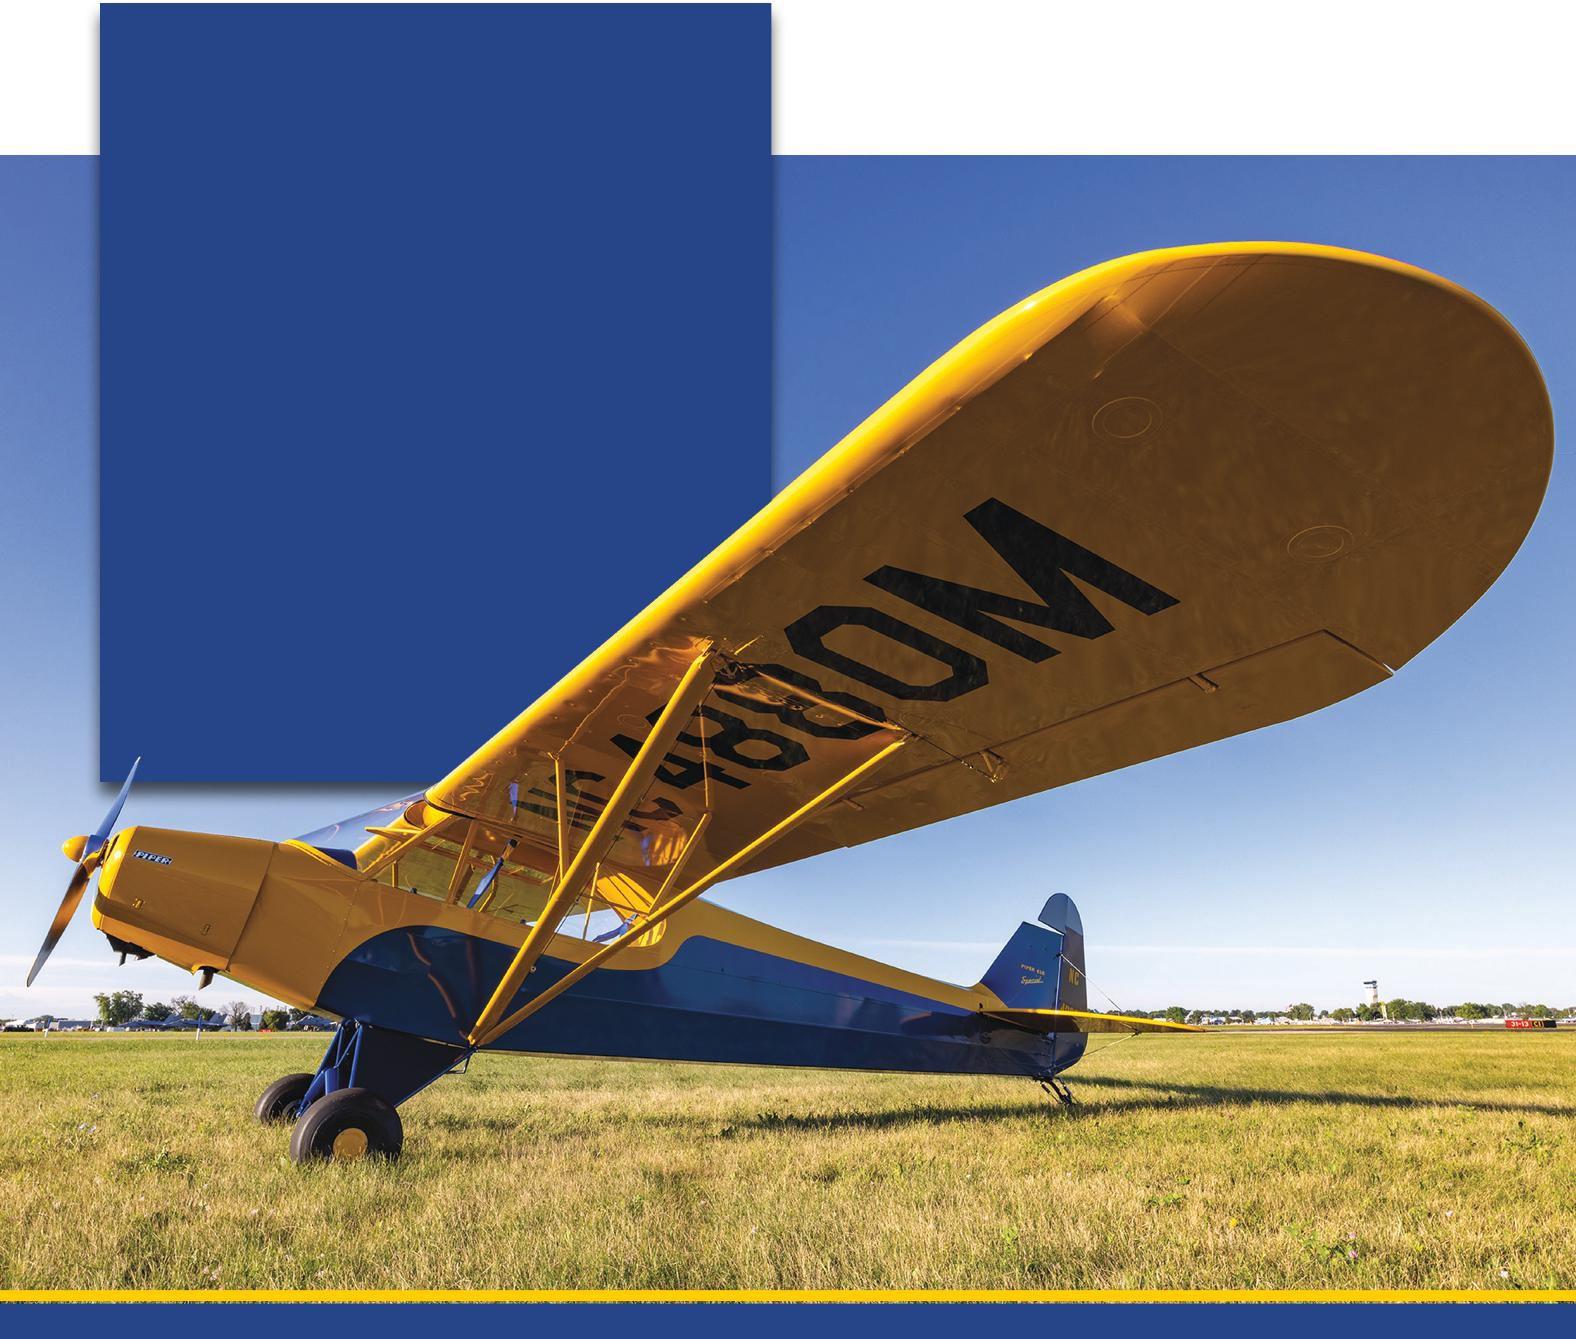
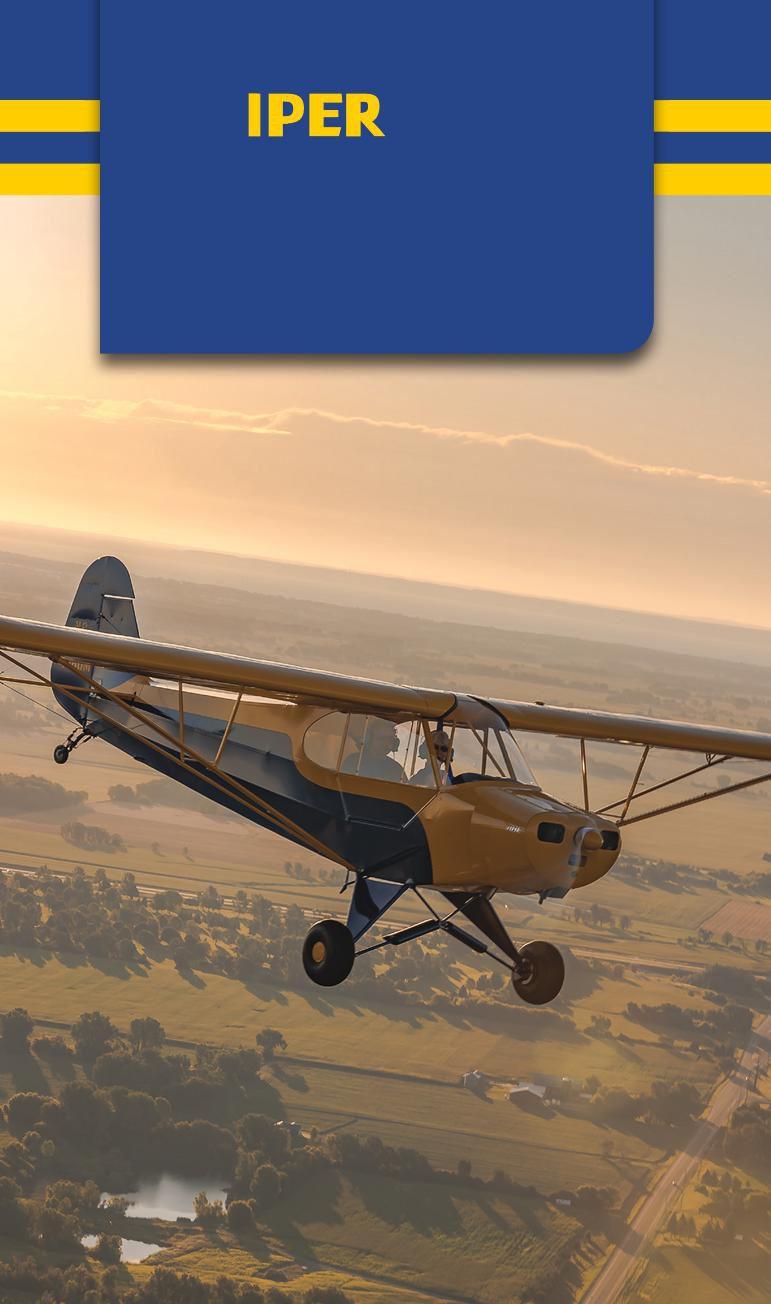
ITS METALLIC BLUE TRIM simply shimmered in the sunlight, making NC4880M a halcyon representative of Piper Aircraft’s postwar production. One could easily imagine this PA-11 had just rolled off Piper’s production line in 1947, after being thoroughly inspected and approved by a quality assurance team. But in this particular case, it was Dave and Jeanne Allen who filled the perspicacious role of quality control.
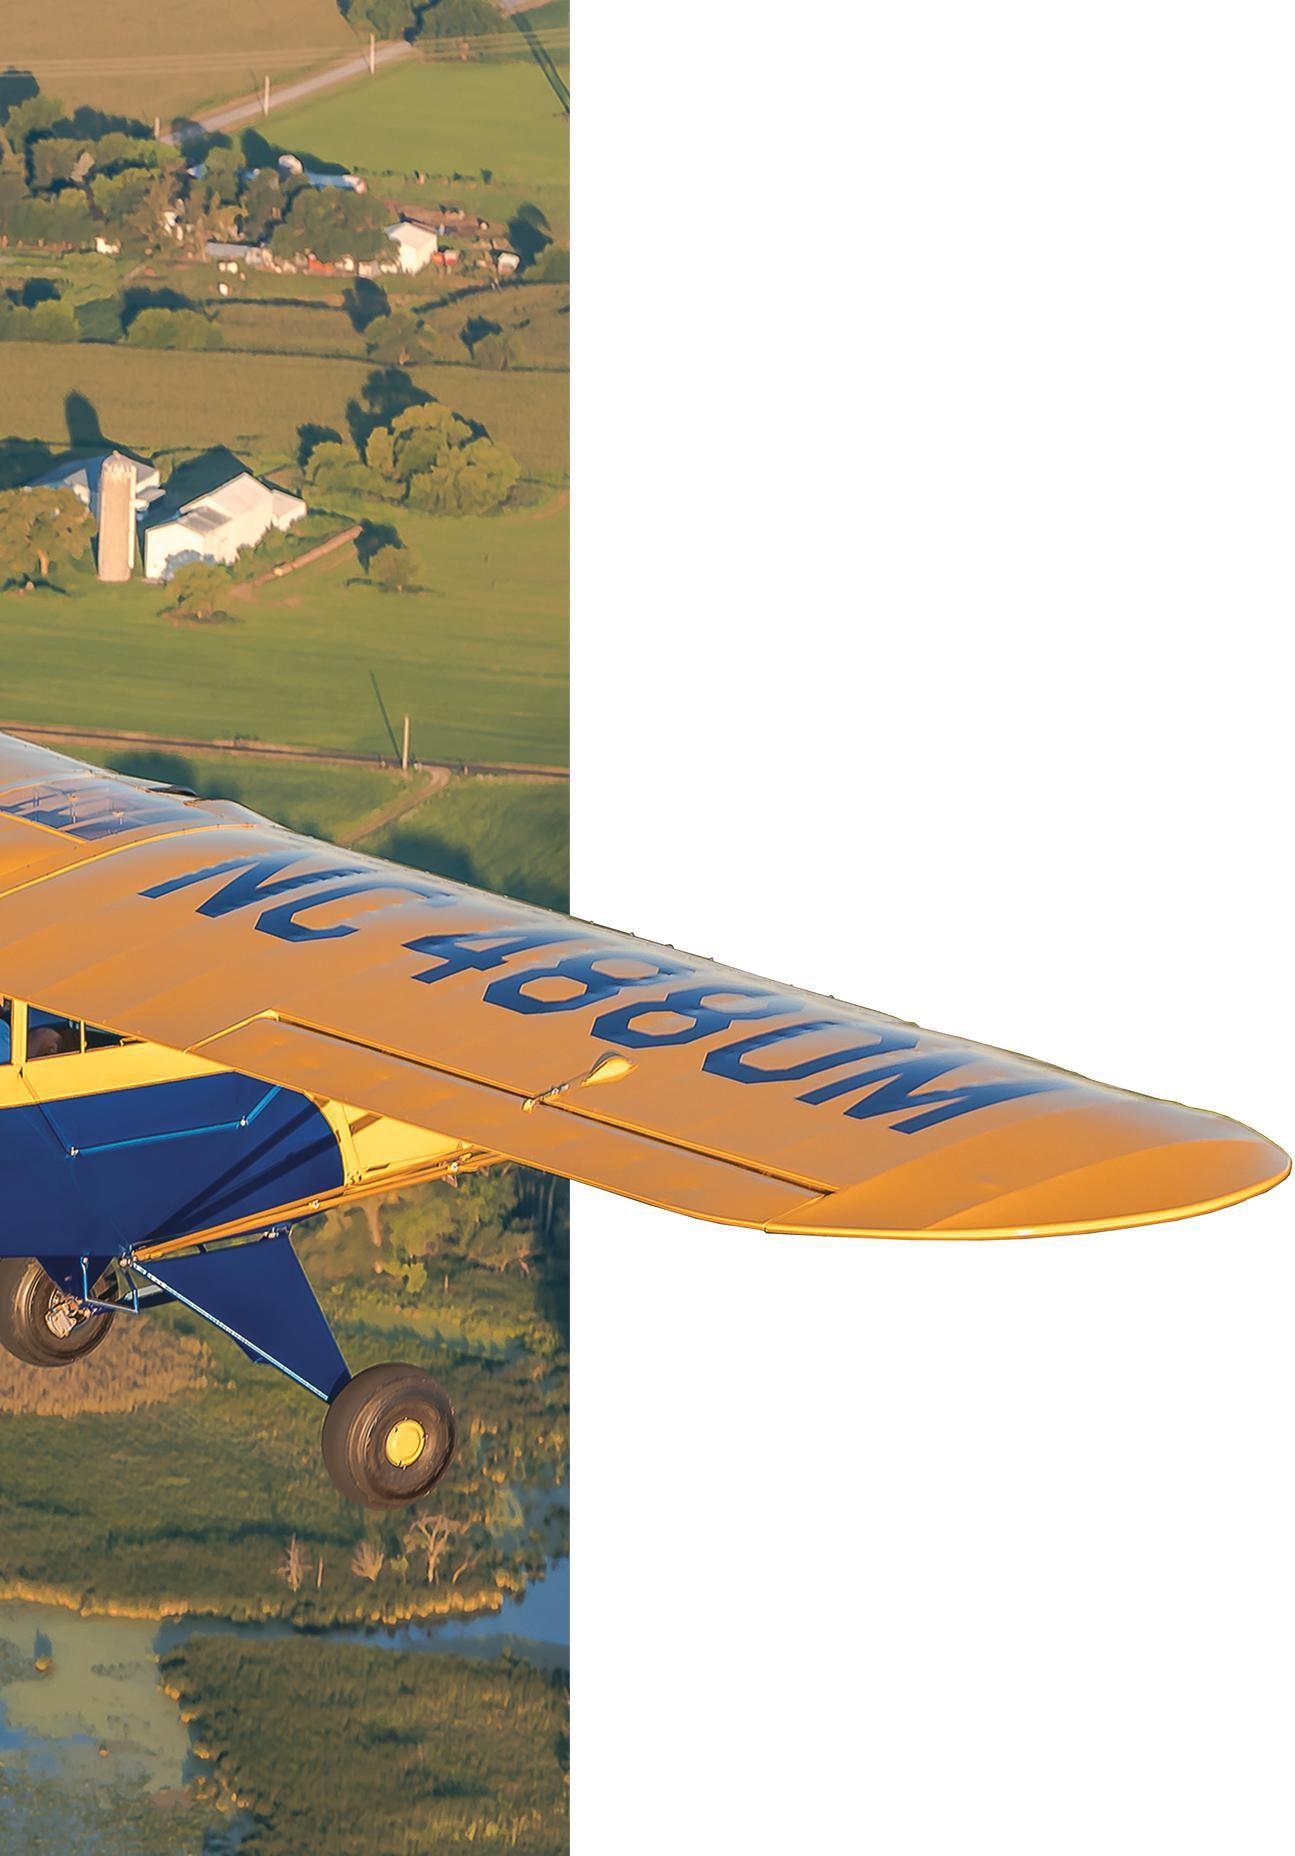
The PA-11 Cub Special was Piper Aircraft’s first model to enter production after World War II. Powered at first by the Continental A65-8, the Continental C90-8 became an option in early 1948. In 1949, the distinctive metallic Piper Trainer Blue and Lock Haven Yellow paint scheme (which bore some resemblance to its competitor, the Aeronca Champ) was changed to all yellow with a brown stripe. Some 1,500 PA-11s were built from 1947 to 1949, and about 430 remain on the FAA Registry today. Most were produced at Lock Haven, Pennsylvania. Others were produced at Piper’s Ponca City manufacturing facility from late 1947 until early 1948.

The Cub Special filled the niche in Piper Aircraft’s lineage between the earlier J-3 Cub and the later PA-18 Super Cub. Don Downie heaped praise upon the new Cub in his “Pilot’s Report … Piper Cub 90” (Skyways, October 1949): “Just about every pilot has flown a Cub trainer — even here in Mexico. And just about every one of them has a soft spot in his heart for this bright little yellow trainer. … While most airplanes huff and puff while picking up flying speed at these high altitudes [referring to the Central Airport at Mexico City’s elevation of 7,347 feet], this little Cub ‘90’ went right to work and hopped into the air with a surprisingly short run.”
The Special featured a number of significant modifications from its J-3 predecessor. Changes included a newly designed nose bowl, a lowered engine mount to improve forward visibility, a pressure cowling to enclose the cylinders, boot cowl, instrument panel, and more of a sloping windshield. The main fuel tank was removed from the fuselage, and a wing tank was installed in the left wing. The Special had a stirrup step, streamlined lift struts, an elevator bungee, and its landing gear shock cords were enclosed with streamlined fairings. Changes to the seats allowed the pilot to fly from the front. The cabin sidewalls and baggage compartment were metalized to improve interior durability and facilitate maintenance and inspection.
“While the [Cub Special] was intended primarily for student instruction, it was adopted successfully to other industrial and agricultural uses. It was found particularly useful on the farm because of its ability to operate from short rough fields. Farmers used the plane for a variety of

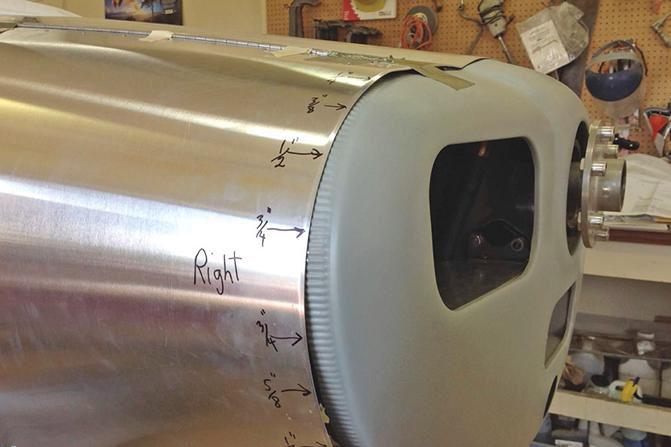
 Fabricating the new engine cowling.
Dave at work on the wing.
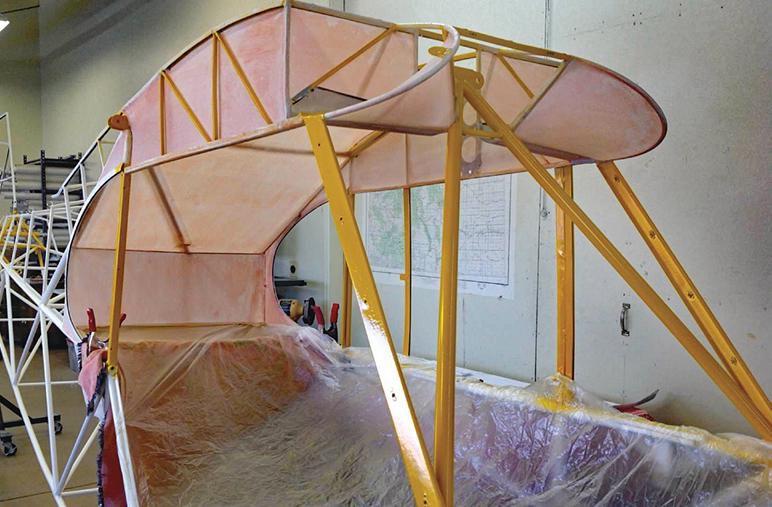

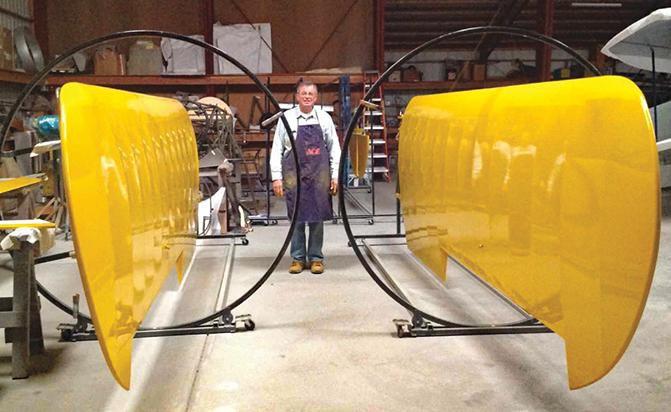
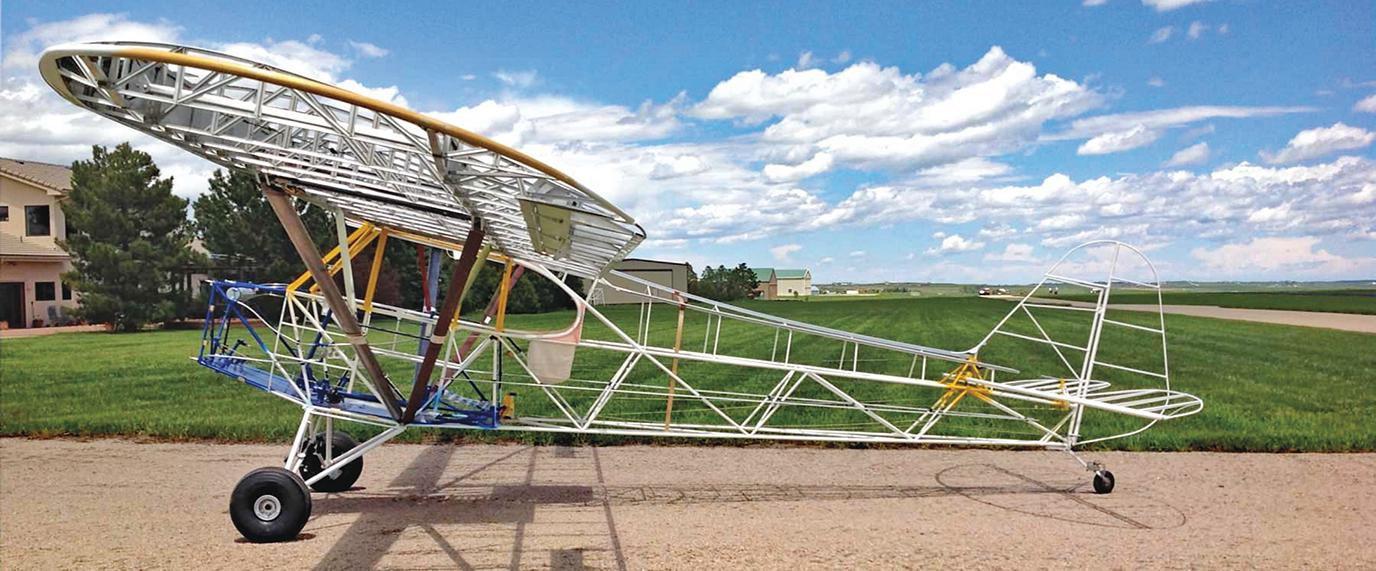 Test fitting the airframe components prior to fabric installation.
A rotisserie facilitates fabric installation.
Fabric installation on the cabin interior.
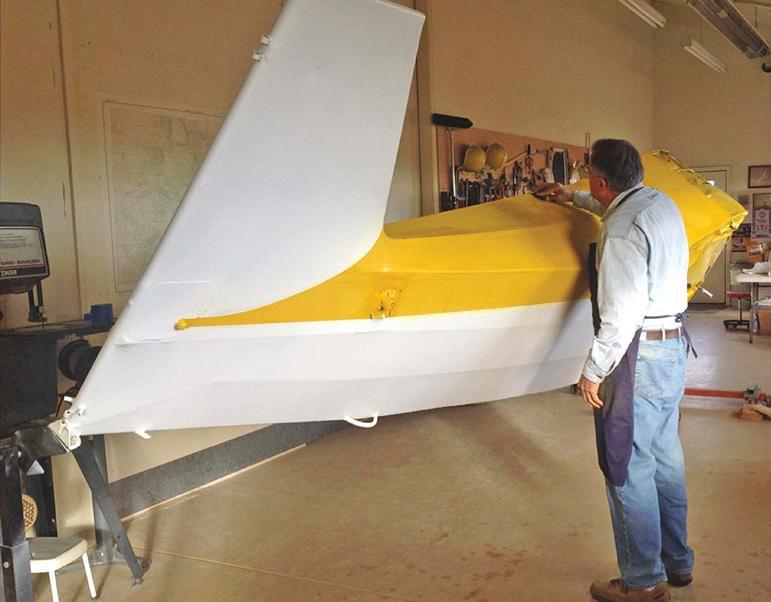
Dave gently sands the fuselage color coat.
purposes, including checking fence lines, coyote hunting, searching for stray cattle, flying to nearby towns for parts and groceries, and visiting neighbors. When especially equipped for crop dusting, the Cub carried 500 lbs. of insecticide.” (The 1947 Aircraft Year Book)

Dave and Jeanne became interested in a PA-11 as a light-sport aircraft back when the FAA’s BasicMed hadn’t yet been approved, and the Cub Special was eligible to be flown by a sport pilot. Plus, “Forrest Lovely told us that the PA-11 would be one he himself would keep,” Dave shared, “and he told us that Sadie Hawkins had a PA-11 project at Creve Coeur.”
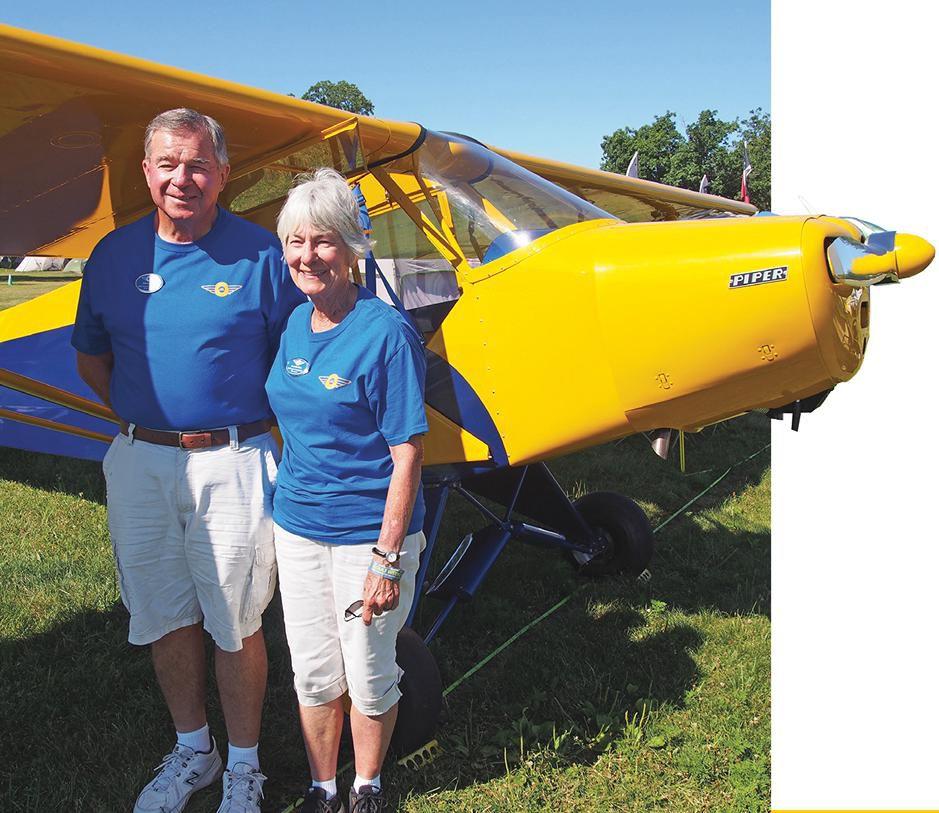
Southern Air Services of Memphis, Tennessee, purchased NC4880M in September 1947 for $2,495 and promptly sold it to Jackson Aircraft Sales of Jackson, Tennessee. Franklin Knapp of Jackson bought it in January 1950 and based it at McKellar airport. Harley and Lilburn Weiss of Kirkwood, Missouri, became the new owners in April 1951 and flew it home to their own airport. NC4880M remained in Missouri for a number of years, being purchased in 1955 by Midwest Aviation, and then in early 1961 the airplane went to St. Louis Flying Service at Lambert Field.
It changed hands in March 1961, and Samuel David Lobmaster based it at Lobmaster Field in Chesterfield, Missouri. Barely a year later, he sold it to Baker Flying Service at Chesterfield. That year, the fuselage, ailerons, and rudder were re-covered with Grade A cotton and dope. A Schweizer tow hitch was installed, and pilot Harold Baker towed advertising banners with the Cub.
As Don Downie wrote, “Piper makes no claims about his new ‘90’ being a plush, family aircraft. It’s a working airplane, whether used as trainer, photo ship, sprayer or duster.”
In 1963, then-owner Baker Aeronautics Inc. sent a letter to the FAA requesting the “necessary placards or information” to authorize NC4880M to fly with its door removed for photography work. It was a hardworking ship, accumulating 10,000 hours on its airframe. (In a tragic twist of irony, each of these young men, who were only in their 30s, perished in airplane crashes — Lobmaster while flying a Piper Apache in 1964, and Baker in 1965.)
In 2005, Arthur W. “Sadie” Hawkins of Wentzville purchased NC4880M. Described by those who knew him as “one of the nicest guys you’d ever meet,” Sadie apparently had intentions of restoring the airplane. But the years
Cub Special (in a controlled slip) is featured on the cover.went by, as they are wont to do, and he eventually decided to sell it to Dave and Jeanne Allen of Elbert, Colorado.
The Allens began their six-year restoration of the Cub Special in 2014. They wanted to shine a spotlight on forlorn flivvers and demonstrate that, especially when imbued with new vigor via restoration, these old airplanes provide rewarding and economical ways to enjoy fun flying. Their diligent efforts made NC4880M the “Cinderella” of the vintage ball in 2022, when it was awarded the AirVenture Classic Grand Champion Gold Lindy.
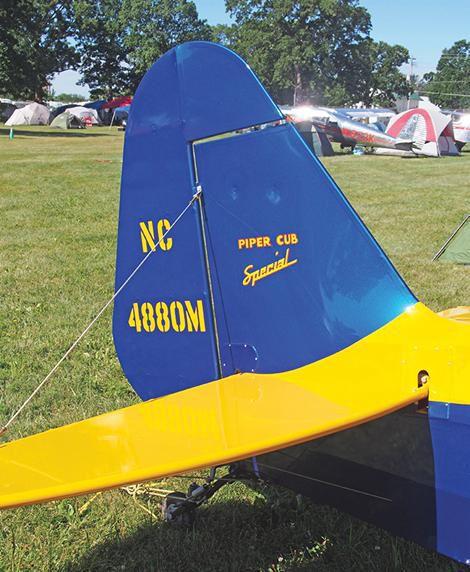
Dave and Jeanne have restored a number of aircraft and long ago learned how to work together to enhance their productivity. Throughout the project, Dave tackled the mechanical aspects and Jeanne focused on the “hidden” details of cleaning and corrosion control, prepping the steel with phosphoric acid and applying chromate on the aluminum components.
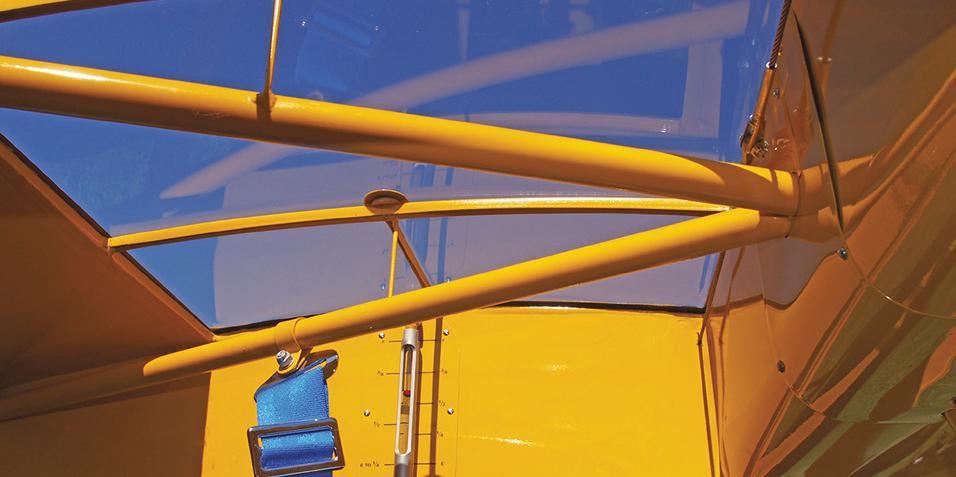

When they purchased the project, the fabric had already been stripped from the airframe. The fuselage needed the least amount of work, and the wings needed the most. “Sadie had already had John Murray replace the aft lower longerons, so the fuselage was in good shape,” recalled Dave. The airworthiness records show that the right and left lower longerons were repaired 38 inches forward of the fin post by splicing the inner and outer sleeve and TIG welding.
Items that needed repair “included the tail feathers, which required a little work,” Dave said. “The gear legs had repairs we couldn’t live with, so we bought new ones. We checked the gear alignment before we covered
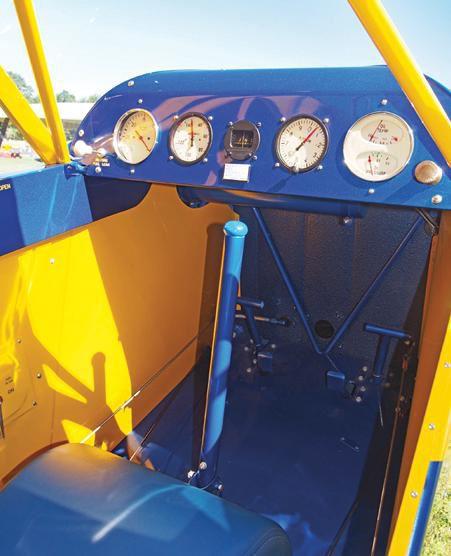
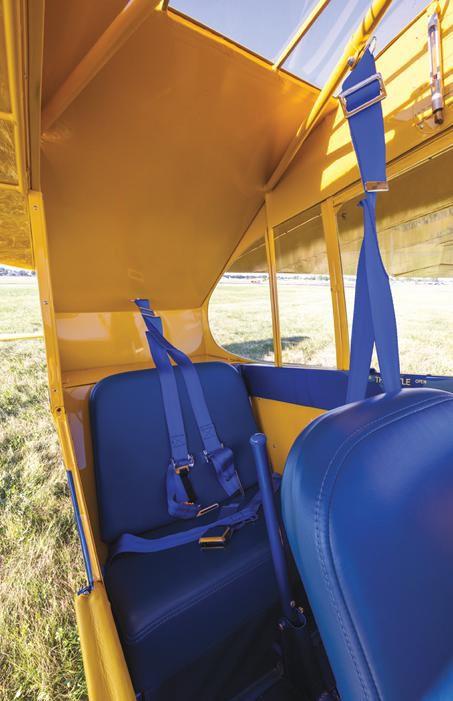
The metallic Piper Trainer Blue sparkles in the sunlight. The neatly finished interior – note the metal sidewalls and blue knob on the control stick. Note the fine detail and the blue knobs for the cabin and carb heat controls.them with fabric. People sometimes get the airplane all covered and ready to fly, and then check their gear alignment. But by then, it’s hard to use a torch to make an adjustment, and even if you do it cold, it might wrinkle the fabric on the gear legs.”
New sealed wing lift struts were obtained from Univair. Dave ladled praise on Univair’s “Jim Dyer and his engineer, Mike Wotavitch. They were a huge help with advice and parts throughout the project. Univair hosted Clyde Smith’s (The Cub Doctor) Piper restoration course, which we attended. Clyde was also great to work with, and was an invaluable resource the entire way.”
Dave used the old sheet metal for patterns, fabricating his own new interior sheet metal and boot cowl. “We got the firewall forward sheet metal from Univair,” Dave said, “and we got the instrument panel and the firewall blank from Clyde. We also needed a new lower door, which was supplied by David Pearce, and grommets for the wing lift struts were supplied by Pierce Aero. Of course we needed all new hardware, and B&B Aircraft Supply was a great source for that.”
The PA-11 has aluminum spars and ribs, and the wingtip bows are wood. Although they could have purchased new PA-11 wings, Dave and Jeanne wanted the PA-11 to be as original as possible. Despite the poor condition of the project wings, they elected to spend the time to repair and replace wing components as necessary. “The wings were in bad shape, because at some point, the fabric had been attached with PK screws to the ribs. So we had to repair or replace pretty much every rib,” recounted Dave.

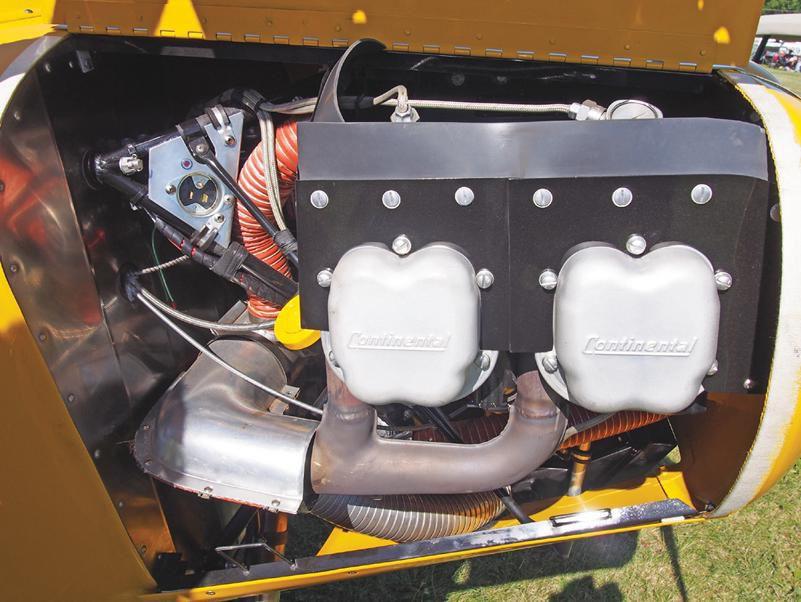
“Fortunately, a couple of local guys, Mike Gugeler and Sean Hillis, had restored Cubs. Mike was very helpful with advice on rebuilding the wings. In addition to the extensive rib work, we also
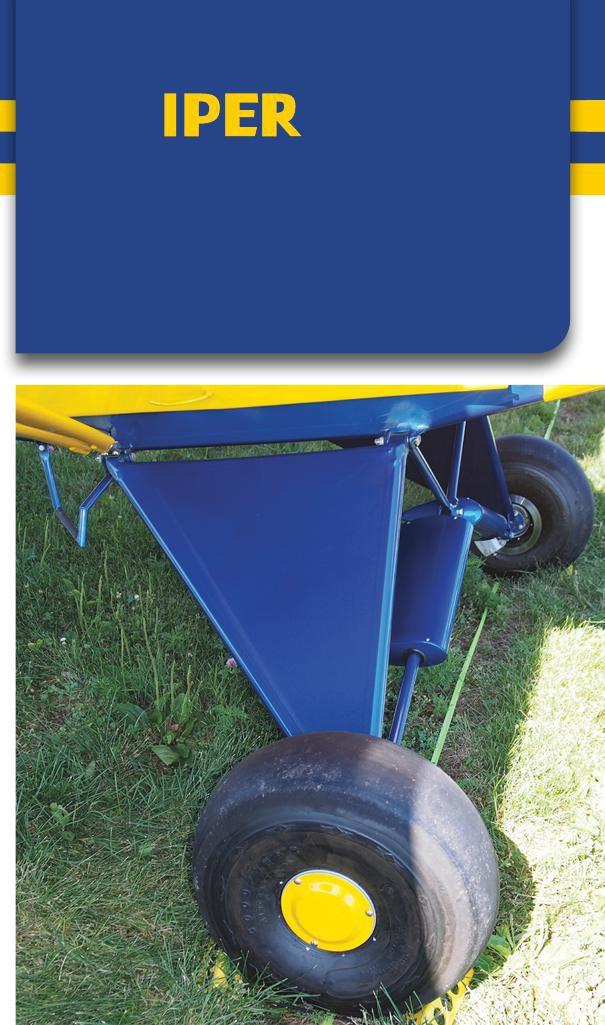 Note the streamlined fairings over the landing gear bungees, and the Grove brakes.
The Cub Special has the same type of door as its predecessor, the J-3.
installed new aluminum leading and trailing edges, false spars, steel aileron hinges, and wooden wingtip bows — all of which we bought from Univair. By the way, Univair was a huge help; we had them special-order 0.016 leading edges, which was original, rather than the 0.020, which is what everybody now is using. And of course, we also spent a great deal of time removing, stripping, and painting hardware.”
The Allens worked side by side when it came time to install the Poly Fiber fabric. A couple of areas on the fuselage presented quite a conundrum, so they sought tips and techniques from their aviation allies. “Sean Hillis, together
MANUFACTURED UNDER AIRCRAFT SPECIFICATION A-691
Eligible to be flown by a sport pilot.
ENGINE: Continental C90-8F
LENGTH: 22 feet, 4 inches
HEIGHT: 6 feet, 8 inches
WINGSPAN: 35 feet, 2 inches
USEFUL LOAD: 470 pounds
EMPTY WEIGHT: 750 pounds
BAGGAGE: 20 pounds
GROSS WEIGHT: 1,220 pounds
MAX SPEED: 112 mph
CRUISING SPEED: 100 mph
LANDING (STALL) SPEED: 40 mph
CLIMB RATE: 900 fpm
SERVICE CEILING: 16,000 feet
FUEL CAPACITY: 18 gallons wing and 1 gallon header tank
FUEL BURN: 4.7 gph
OIL CAPACITY: 4 quarts
RANGE: 350 miles
with The Cub Doctor, helped with advice on how to do the interior fabric the way Piper did it, without sewn seams,” Dave said. “Carol Leyner, of Colorado Classic Aircraft, was great, supplying all the fabric covering and helping us try to match the Piper Trainer Blue and the Clyde Smith-approved postwar Lock Haven Yellow.”
The proper shade of Piper Trainer Blue was especially elusive. “We ended up mixing it ourselves, and we did over 100 spray-outs trying to get it right,” Dave elaborated. “We’d send them to Clyde, and he’d say, ‘no.’ We finally just gave up and said, ‘This one is pretty; it’ll have to do!’”
Aside from the interior, figuring out how to install the fabric where the vertical stabilizer meets the top fuselage stringer required some careful thought. “That was very tricky getting that fabric right, since we were using the blanket method and not an envelope,” Jeanne said. “That transition was really giving us a fit, but we’re pleased with the way it turned out.”
Dave installed a layer of felt across the leading edges of the ailerons to smooth out a few small dings prior to installing fabric on those control surfaces. He applied the requisite coats of Poly-Brush and Poly-Spray. Then, after a coat of white Poly-Tone, he painted the final Ranthane color coats.
Blue knobs, nothing but blue knobs, would do to help this Cub Special complete its time travel back to 1947. But those highly prized and sought-after Piper blue knobs are exceedingly rare. That fact didn’t dissuade the Allens; it just invoked their creative yen.
“All we had was a broken knob, which gave us the correct shape and color from the inside; the outside was worn and faded. We used Poly Fiber’s SuperFil, which is an ultra-lightweight epoxy resin and micro-balloon filler.
Then we used an old wooden dowel and made SuperFil ‘Popsicles.’ We chucked the dowel into the drill press and shaped the SuperFil using the template we made from the old knob,” Dave explained. “We matched the original knob color with Ranthane, and voilà! We had blue knobs for the control sticks. The cabin and carb heat knobs were easier, since we used modern knobs for 10-32 thread push/pulls, ground them to spherical shape, and applied the Ranthane.”
NC4880M sports original-type Cub gauges in its panel. They were obtained from, or overhauled by, Ken Pringle at Keystone Instruments, at Lock Haven. “Joe Flood supplied a Cub tachometer and an altimeter,” Dave said. “Ted Davis was making some PA-11 seats, and we needed one to replace the Super Cub seat that came with the project. One of our local guys, Dan Pounds, upholstered the seats.”
Dave and Jeanne have clearly enjoyed quite a bit of help from a wide array of aviators. They hope that by sharing their experience, others will consider transforming a forlorn flivver into a fun and affordable airplane. “There is a lot of help out there, especially through the type clubs,” Dave said. “John Hofmann and the Cub Club newsletters, Cub Clues, are just a wealth of restoration information. In our opinion, anyone doing a restoration would be well advised to join the appropriate type club.”
The tired Continental C90-8 that came with the project was entrusted to A&P/IA mechanic Jamie Treat, who overhauled it. A Precision (formerly Marvel-Schebler) MA-3SPA carburetor was installed in lieu of a BendixStromberg carburetor, complete with a mixture control for higher altitude operations.
The Cub Special was equipped with an 18-gallon fuel tank in the left wing, and a 1-gallon header tank behind the firewall. At some point in its life, an additional 18-gallon tank had been installed in NC4880M’s right wing, along with another header tank mounted aft of the baggage compartment.
“Since she was going to retire from being a hardworking banner tug to a pampered fly-in breakfast and $100 hamburger flyer, we didn’t really need 36 gallons of fuel,” Dave said. “One header tank was all we could live with. So, out came the right wing tank, requiring considerable wing work, along with the aft header tank and all the associated fuel lines. While we were at it, we installed a new Dakota Cub fuel valve and nose header tank. Using the best butt rib to replace the missing rib where the right tank was and installing very sturdy Univair stamped butt ribs is another story altogether!”
While originality was their goal, the Allens did include a few other modifications, in addition to those already mentioned. They installed shoulder harnesses and replaced the old expander tube brake assemblies with reliable and smooth-operating Grove disc brakes. They also replaced the original wood fuselage stringers with new Univair aluminum stringers.
As Dave so aptly proclaimed, “That’s the beauty of doing a restoration, isn’t it? Within the limits of our federal friends and their administration, the restorers can tailor the ship to their needs and desires. Is vintage aviation and restoration great or what?”


On at least one occasion, the Cub Special took its pilot to new heights: “An official NAA altitude record was set by Mrs. Mildred Zimmerman of Reading, Pa., on Sept. 26, 1949, by reaching a height of 26,130 ft. in a Piper PA 11 (Continental engine C-90-B).”
Another noteworthy and historical PA-11 flight was that flown in July 1966 by teenagers Kern and Rinker Buck in N4971H. They restored their ship, and afterward, flew it from New Jersey to California in six days. Rinker’s colorful book, Flight of Passage (1998), described their adventure. Forty-eight years after the Buck brothers’ flight, Chris and April Nesin restored that same 1948 Cub Special. In 2014, they retraced the Bucks’ flight across the country.
The Cub Special has repeatedly endeared itself to aviators, offering an inimitable and sprightly blend of cross-country performance, inspiring pilot and passenger alike to enjoy their journey aloft and their transcendent journey within.
As Kern Buck shared with the author in 2014, “The adventure of the flight across America is what continues to hold my interest to this day. Watching the ever-changing texture of America appear before us as we crossed the country at low altitude was a thrill which has no equal. More pilots, young and old, should undertake the adventure.”
Now, it is Dave and Jeanne who cherish their own Cub Special journey. Being well beyond their teenage years, they flew their PA-11 on a jaunt across the interior portion of the country in July 2022. They initiated their flight with a sentient spirit of adventure, flying 775 nm miles from their home at Kelly Air Park (CO15) to Oshkosh. It took them nearly 10 hours’ travel time, spanning three days (counting the 30-minute flight into Oshkosh), and bequeathed them with a wealth of memories. No doubt this Gold Lindy-winning husband-andwife team will enjoy many more Cub Special journeys, no matter the distance traveled.
 BY BRITTANY JONES
IT WAS THE SUMMER of 1984. A young Jim Hammond was attending his sister-in-law’s wedding in Cincinnati, Ohio, and (as one might imagine) he was bored out of his mind. It wasn’t until the reception that Jim managed to find the one airplane guy in the whole joint — a man by the name of Dick Griffith, who was retired from the Civil Air Patrol. The two got to talking shop, and amid the conversation, Dick brought up the infamous (to the antique airplane world) “airplane in a barn” story, which piqued Jim’s interest.


Dick told Jim that 10 years prior, he’d seen this old airplane in a barn somewhere. Although he couldn’t remember exactly where it was, or what the airplane was, he knew it was an old World War II trainer. Dick said the airplane was in Sharonville, Ohio, a Cincinnati suburb not far from the wedding venue’s location. Lucky for Jim, Dick knew the name of the road, told him it was a couple miles out of town, and that the barn was red and old. That’s it. No address or precise location to be had. He was looking for an old red barn. Jim was skeptical. This was before “barn find” was a thing, and everyone knew that an airplane in a barn story was usually just that, a fabricated myth, 99 percent of the time.
On his way home to Yellow Springs, Ohio, the next day, Jim decided to take a detour. Of course he just had to see if this airplane was in fact real or an unfounded myth. Using the limited directions Dick had given him, Jim managed to find the old red barn. He eagerly knocked on the farmer’s door but nobody was

Jim has a love for all things vintage, especially wooden vintage things, and it’s so visible in his attention to detail.Jim Hammond, pilot and custodian of many vintage aircraft.
home, so Jim decided to take a peek in the barn anyway. The barn itself was large and dark, full of campers and cobwebs, and all other kinds of equipment and things, but clear in the back corner — there it was! A real, tangible airplane that was no myth at all!
Jim, having grown up loving airplanes and building models as a kid, recognized the airplane immediately and knew it was a PT-19. He’d even built a model PT-19 as a young boy. The airplane was abandoned below a nest of bats that had made a home in the rafters, and the whole right side of the center section was covered in a heaping mound of guano (that’s bat poo, ladies and gents!). Jim remembers looking up to see the bats squirming around in their nest, and can still recall the horrible stink they left behind. And in spite of this, he still wanted the airplane.
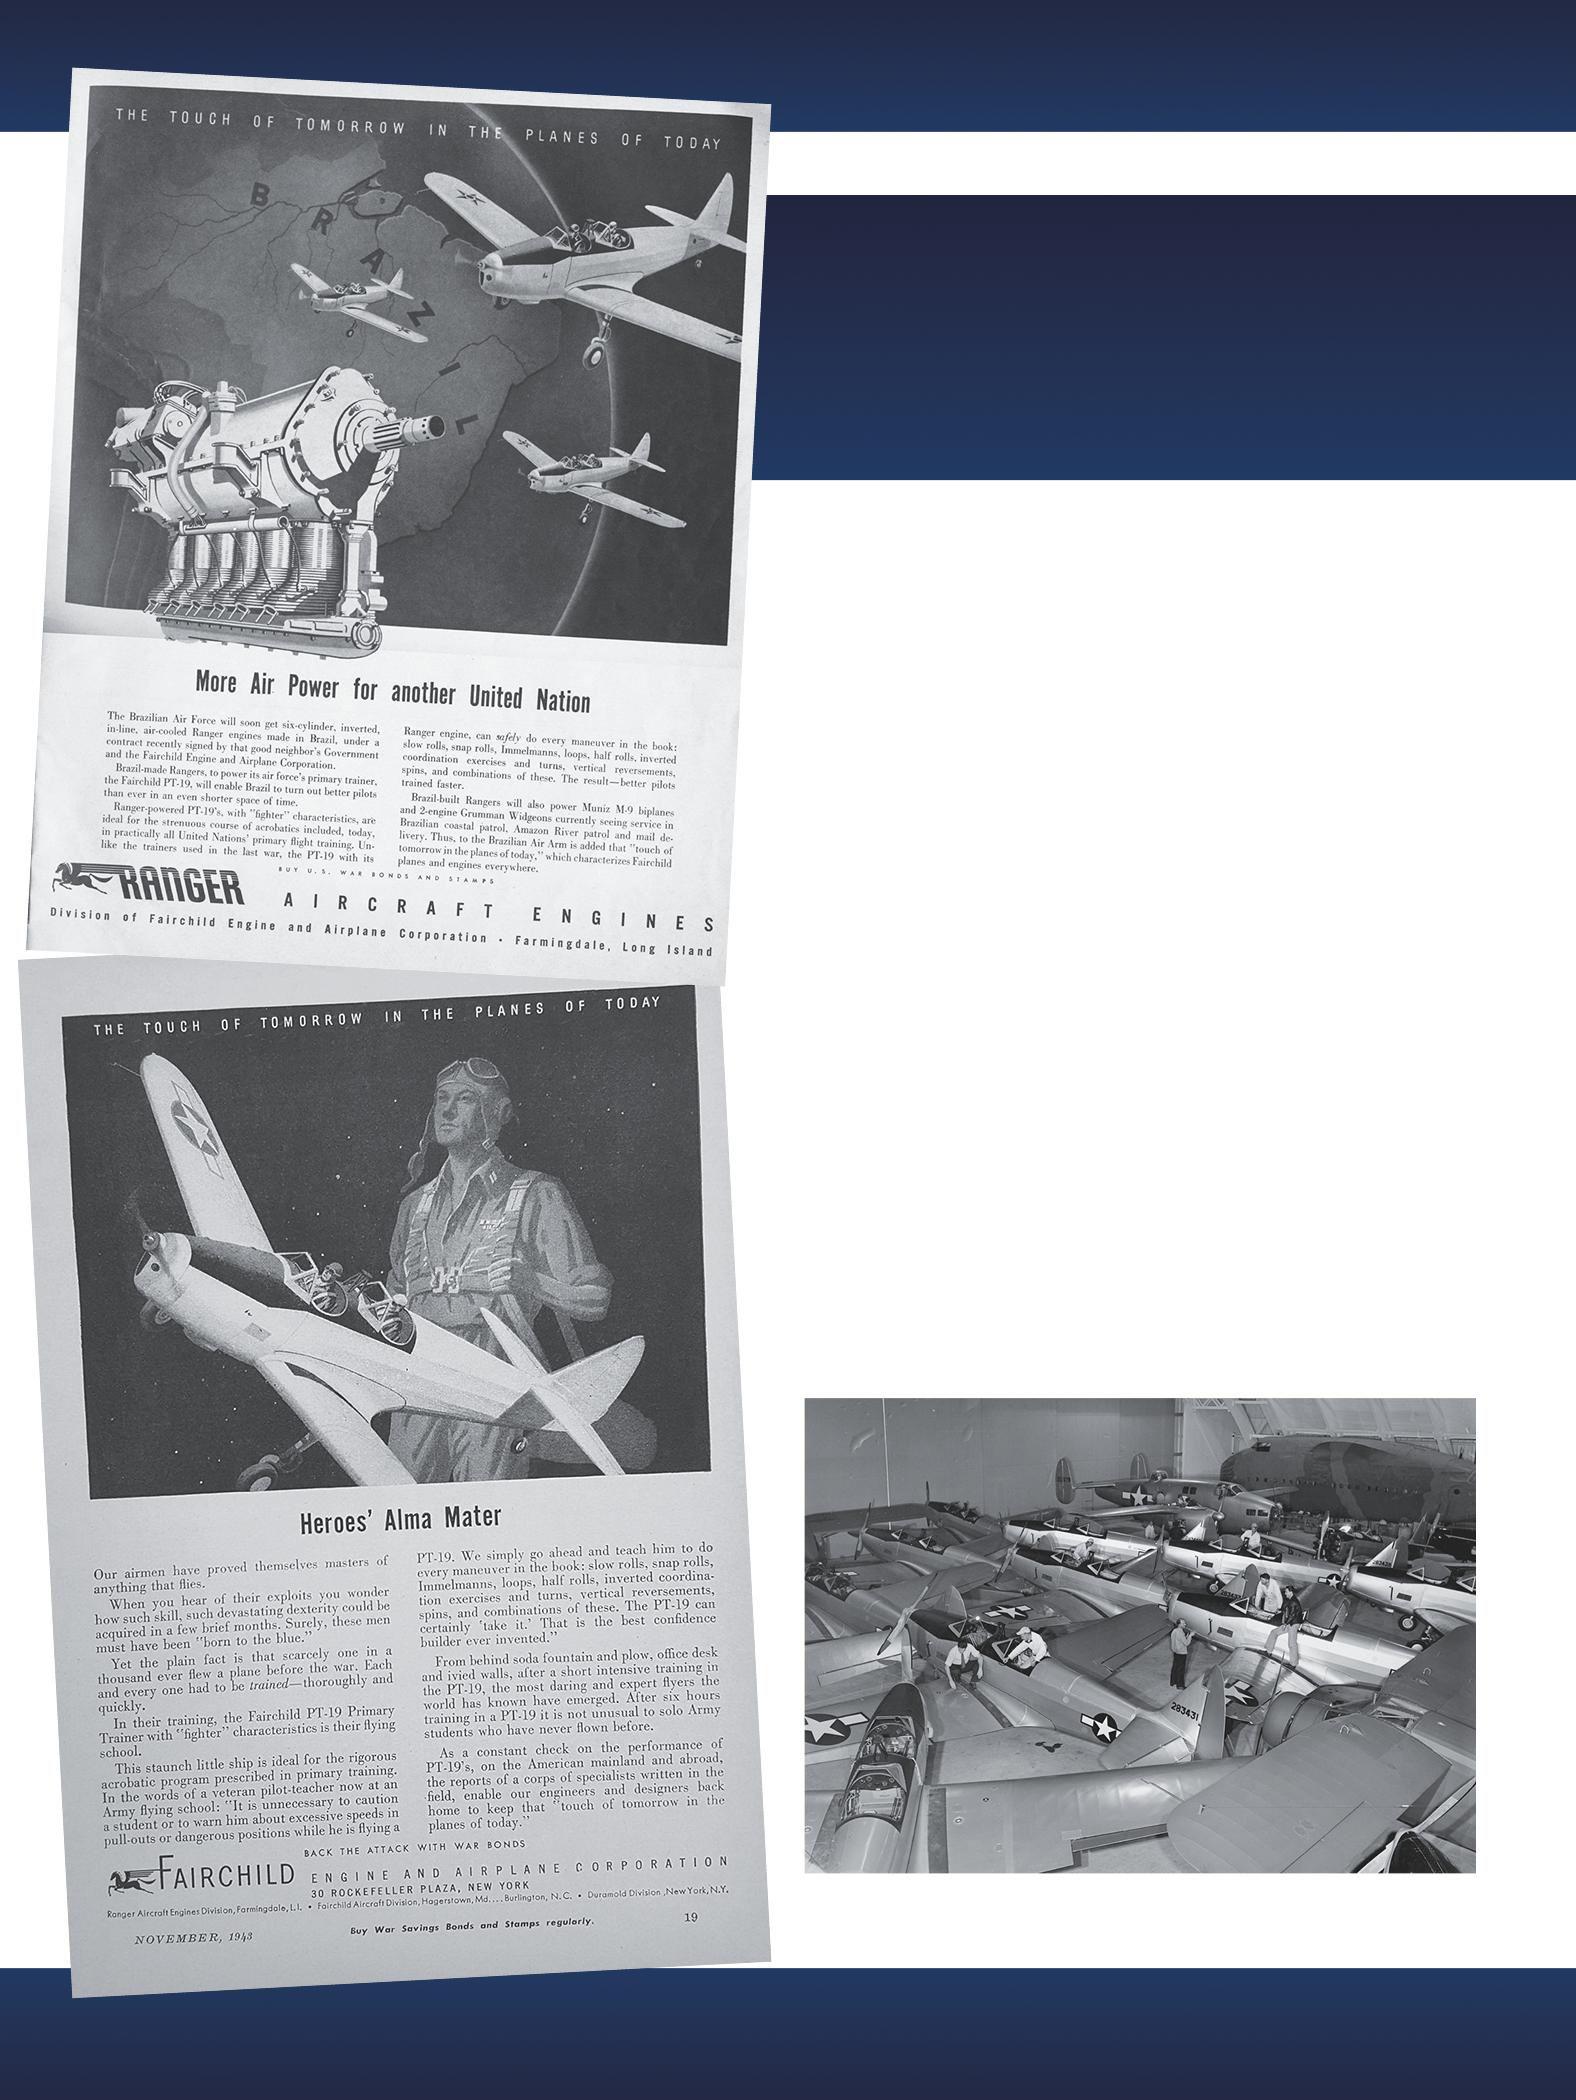
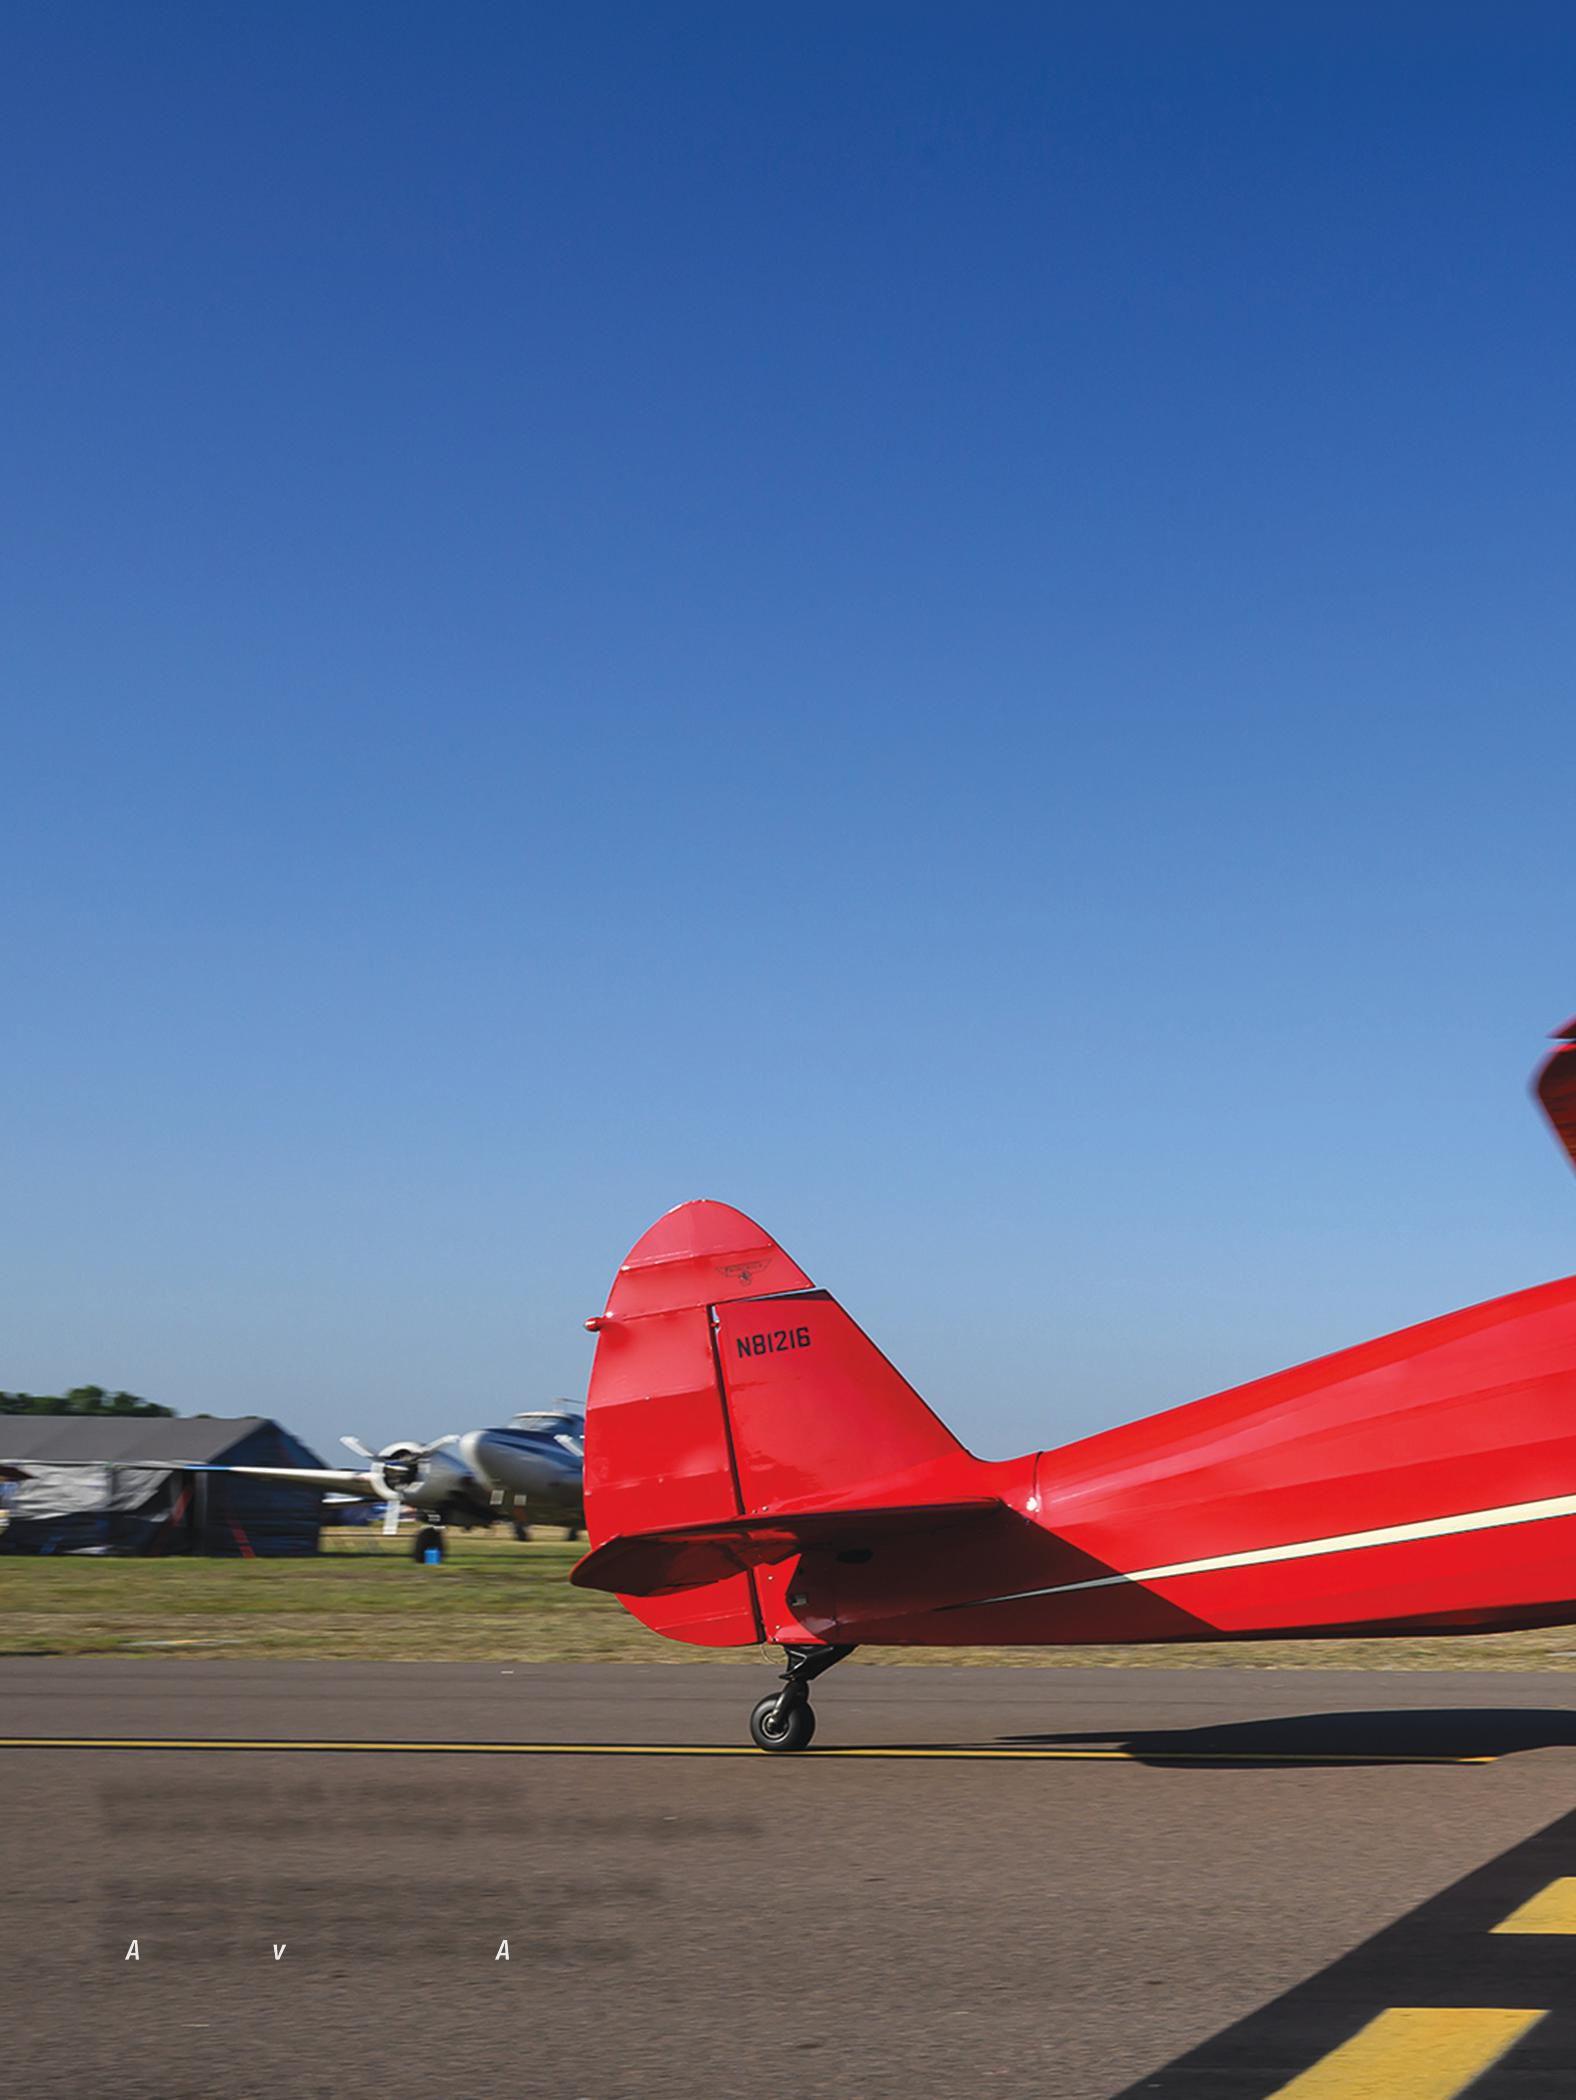
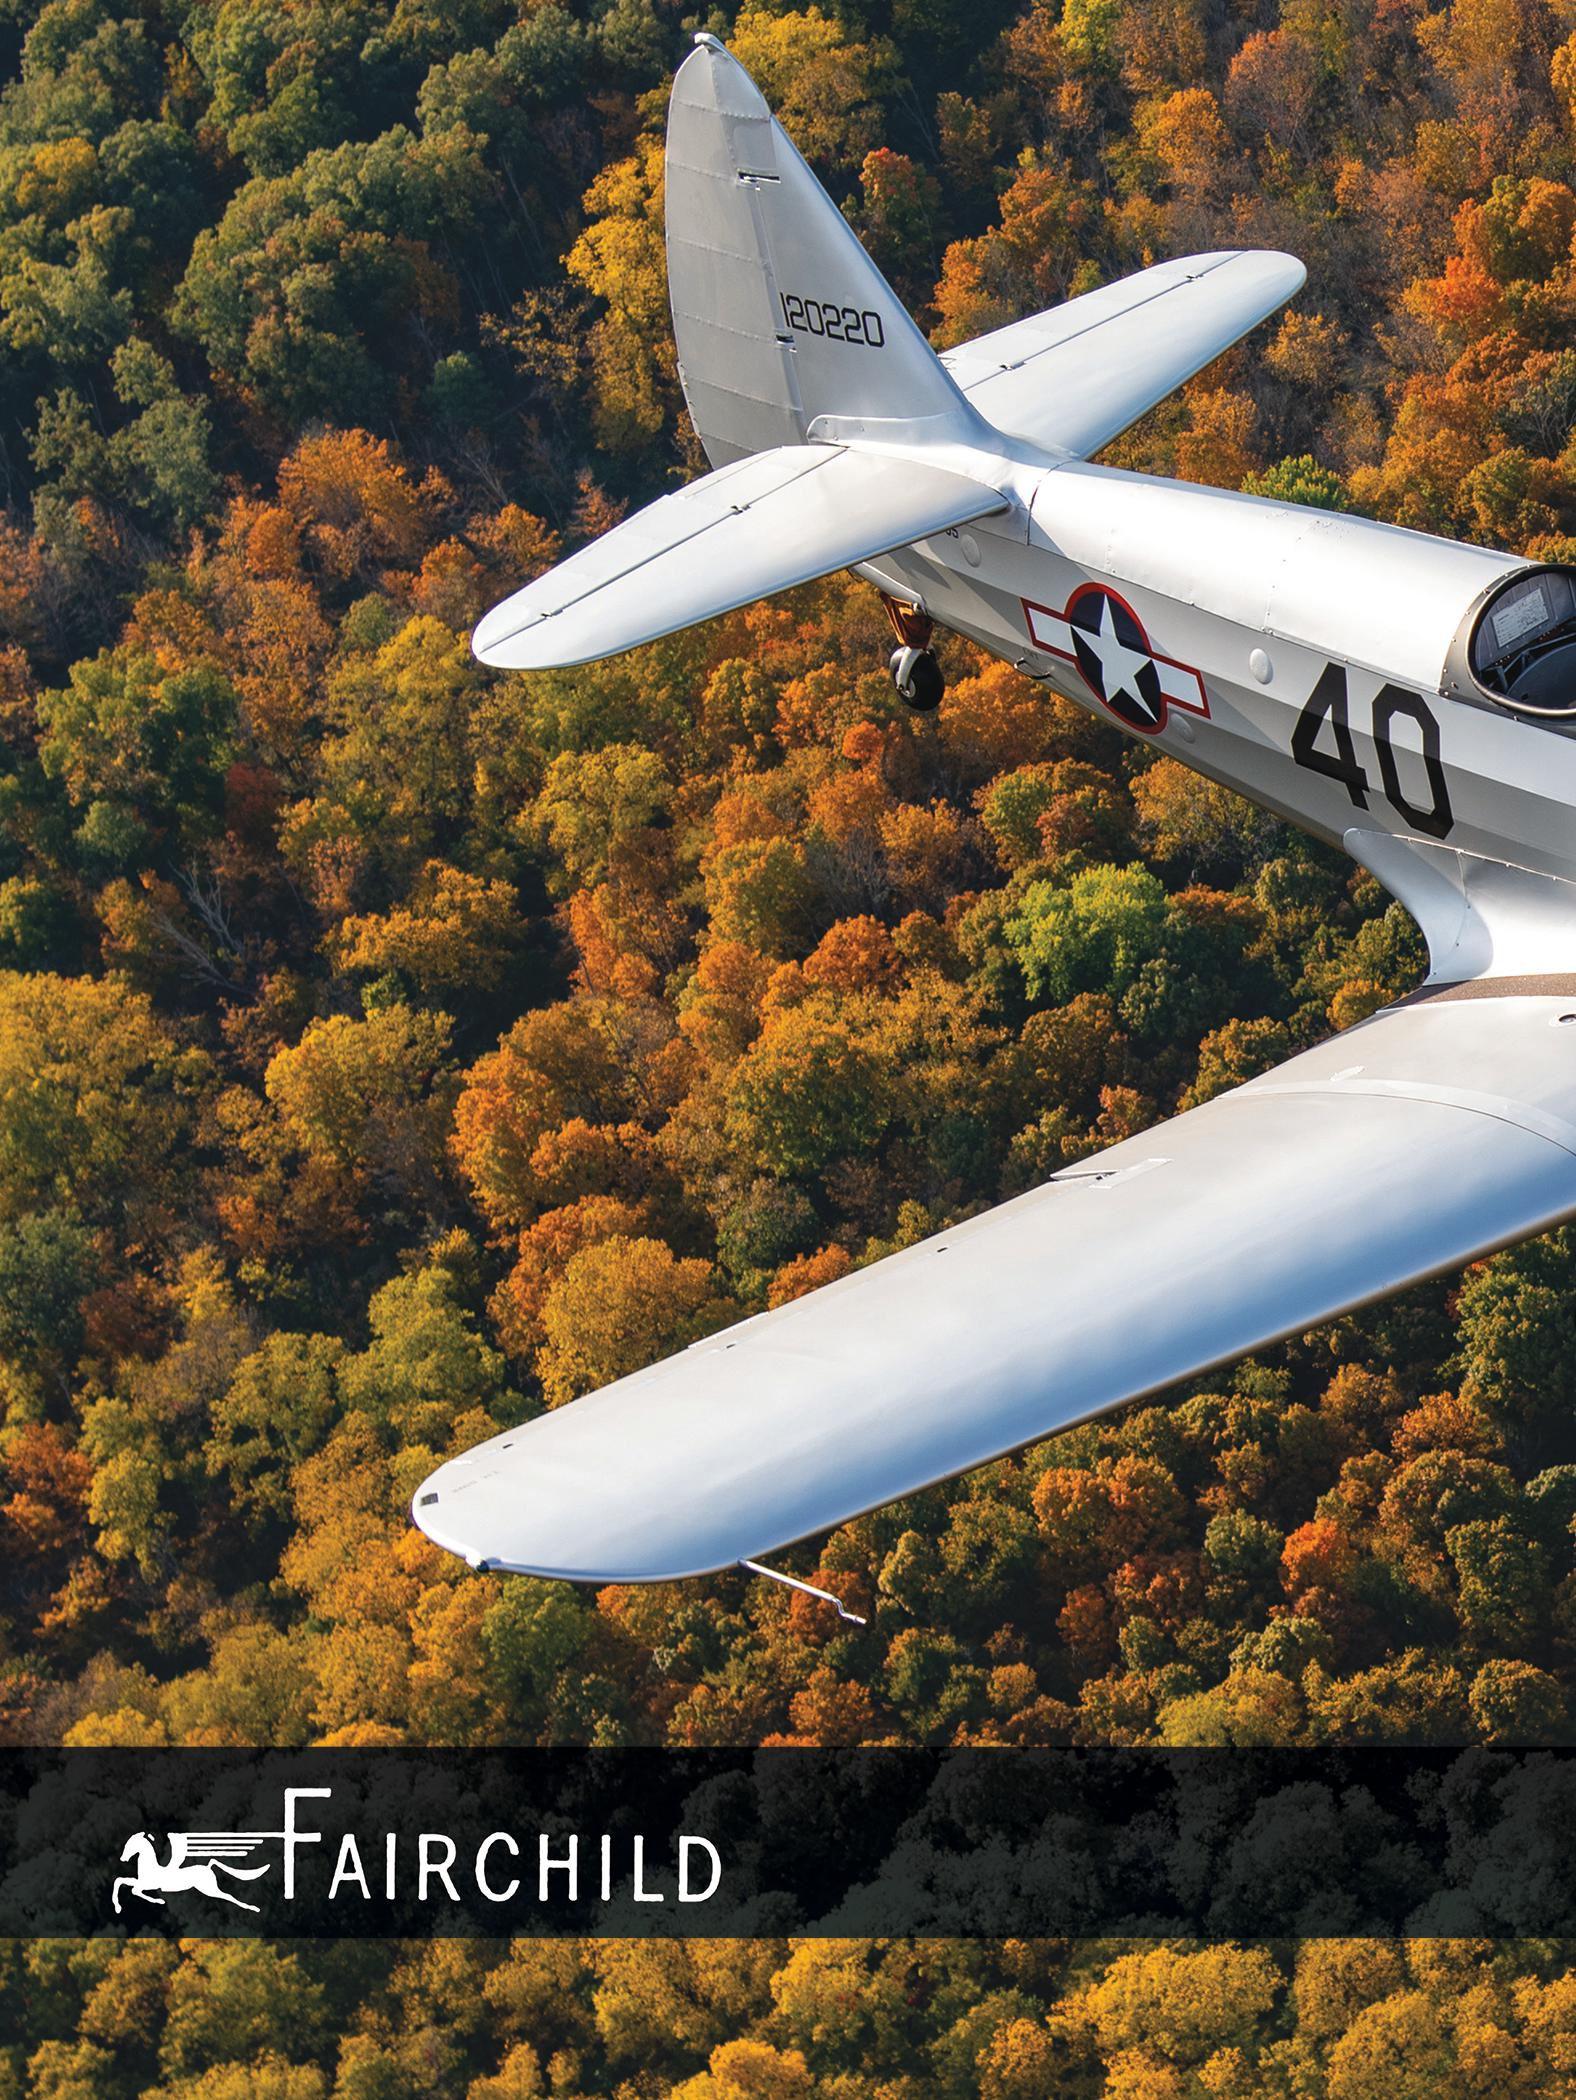
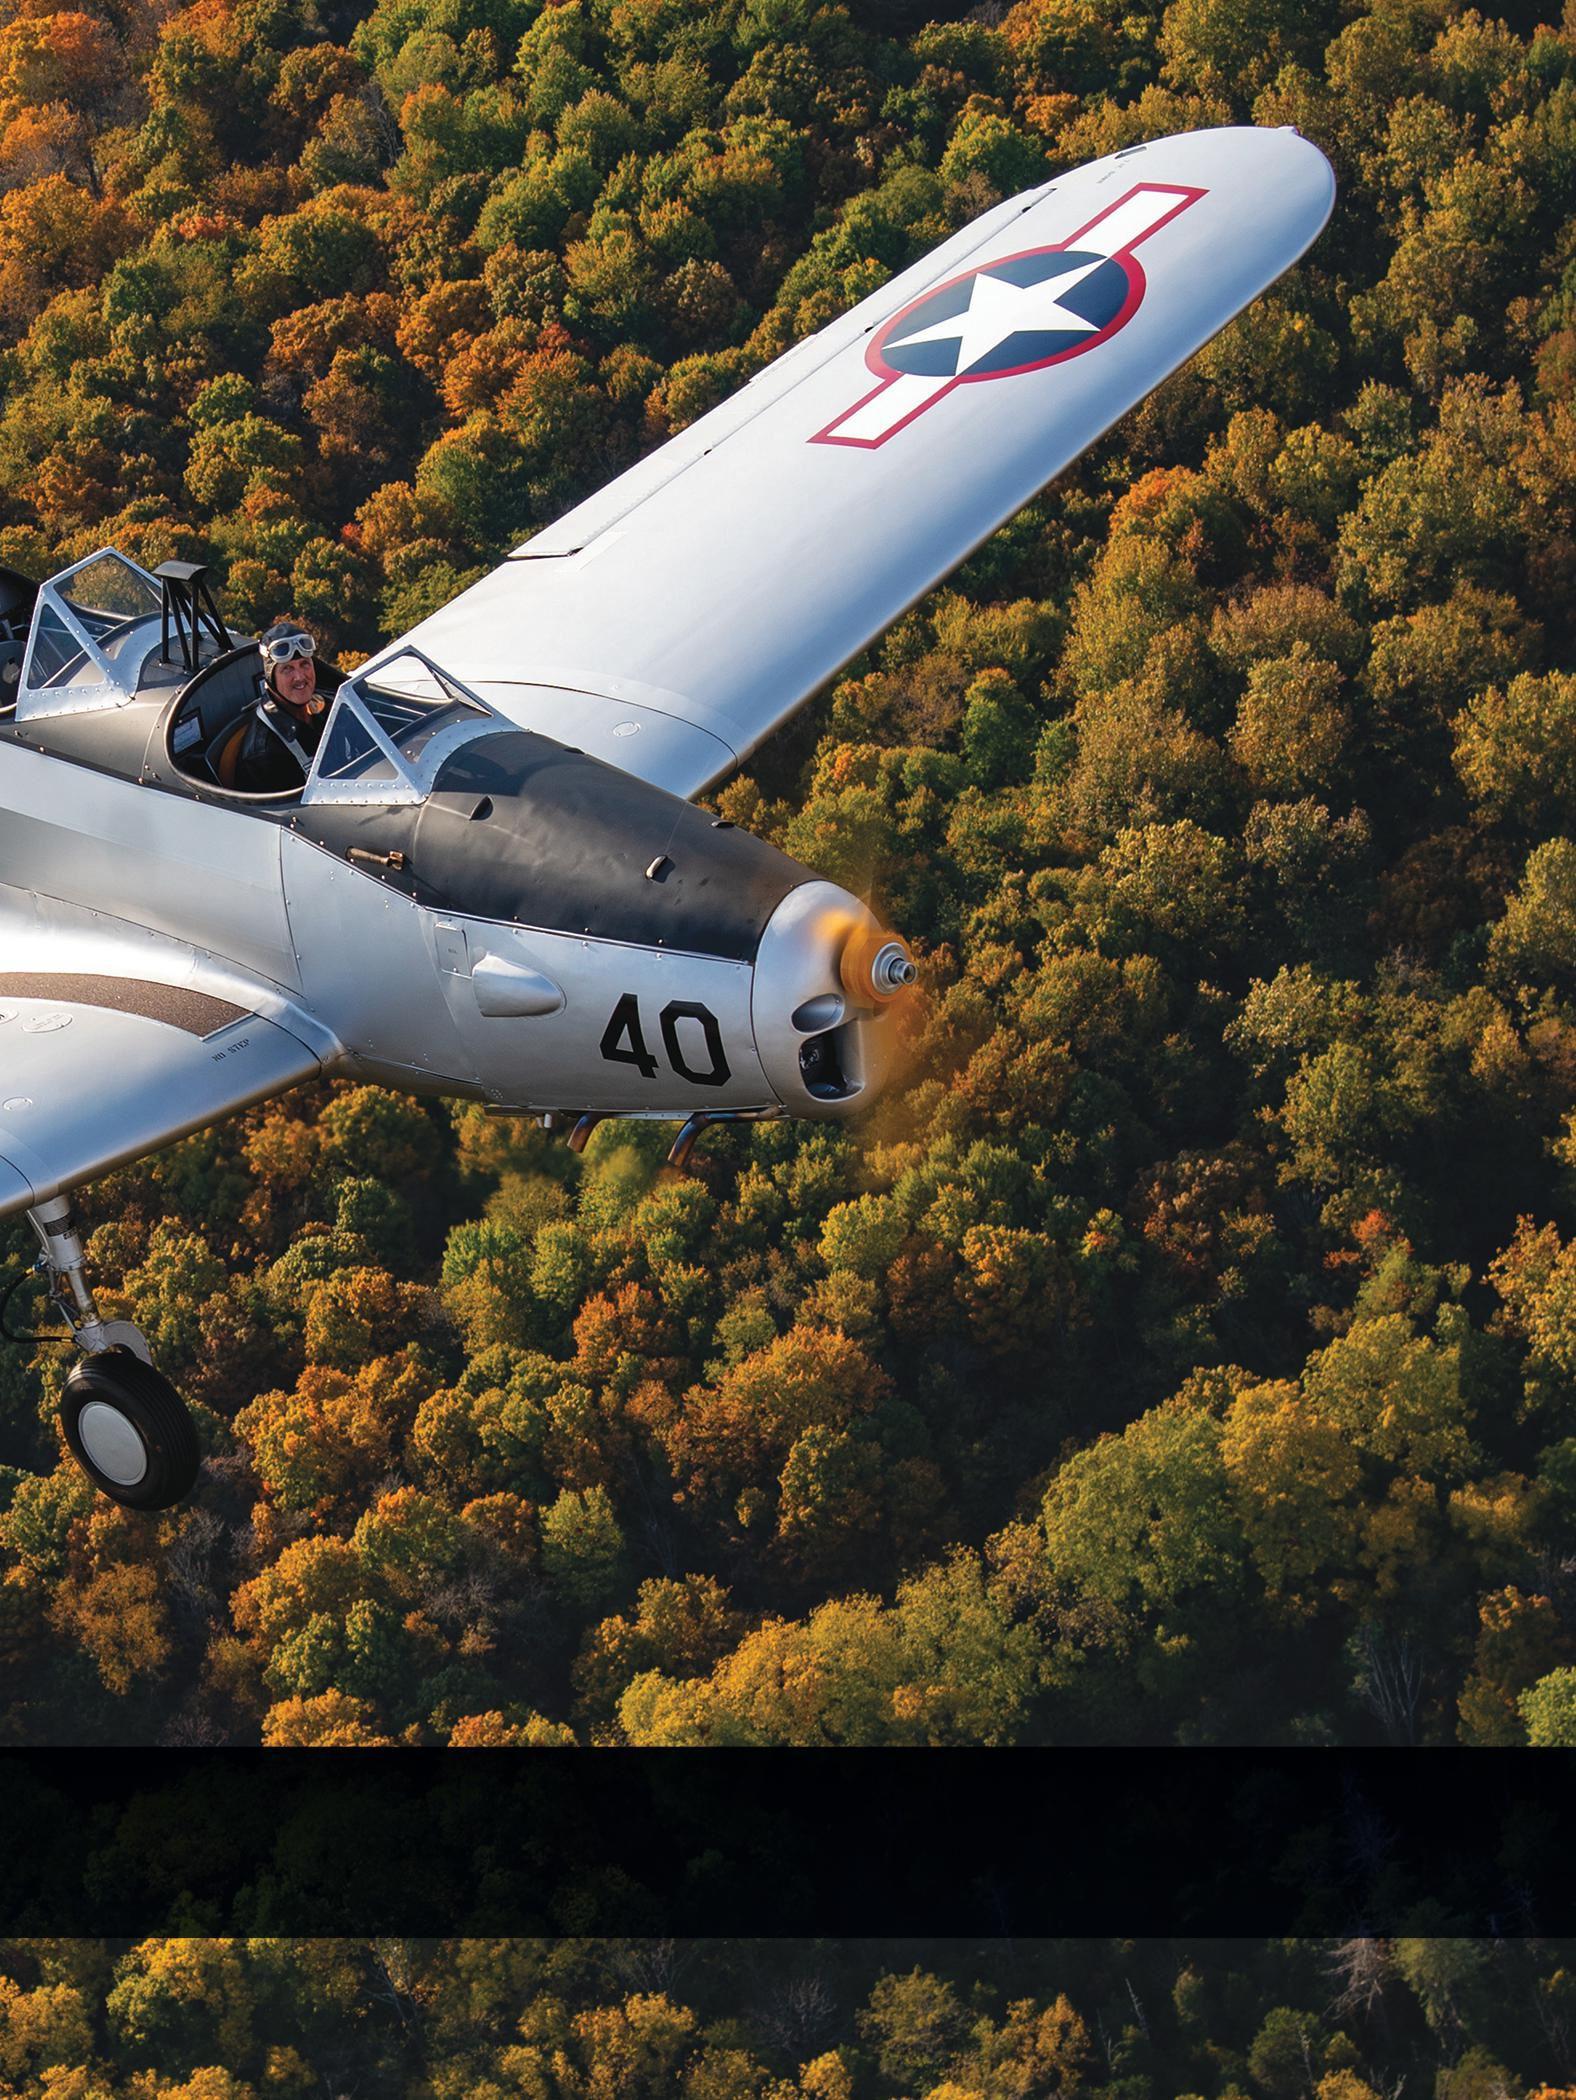
The airplane was Fairchild’s contribution to the U.S. Army Air Corps training program in 1939, just before the start of WWII. Monoplanes had begun replacing biplanes in the mid1930s, and the military wanted an advanced, sturdy airplane that could withstand the beatings of fledgling pilots, plus the PT-19 had that certain “it” factor. Compared to earlier trainers, the PT-19 could reach higher speeds more closely related to that of combat aircraft. The design was considered inexpensive and easy to maintain. In fact, Fairchild beat out 17 other types of aircraft hoping to be chosen for use in the U.S. Army’s training program. The only complaint about it was that it was too easy to
It draws a crowd wherever it goes, and along with it, a story gets told. Restoring the PT-19 was a labor of pure love and patience, but entirely worth the wait.Fairchild wartime factory photo showing both PT-19s and PT-23s along with other types ready for delivery.
fly, although thousands of cadets began their flying journey in a Fairchild PT.
Thousands of PT-19s and their siblings (the almost identical PT-23, which has a Continental radial engine, and PT-26, which has an enclosed cockpit) were dispersed to bases all over the country during the war, and many were delivered by Women Airforce Service Pilots (WASP). They served at training bases around the United States up to the end of the war in 1945. Afterward, a considerable amount of these birds found their way onto the civil register and began new lives in the hands of private owners. Which is precisely how this particular PT-19 ended up in a barn in Sharonville.
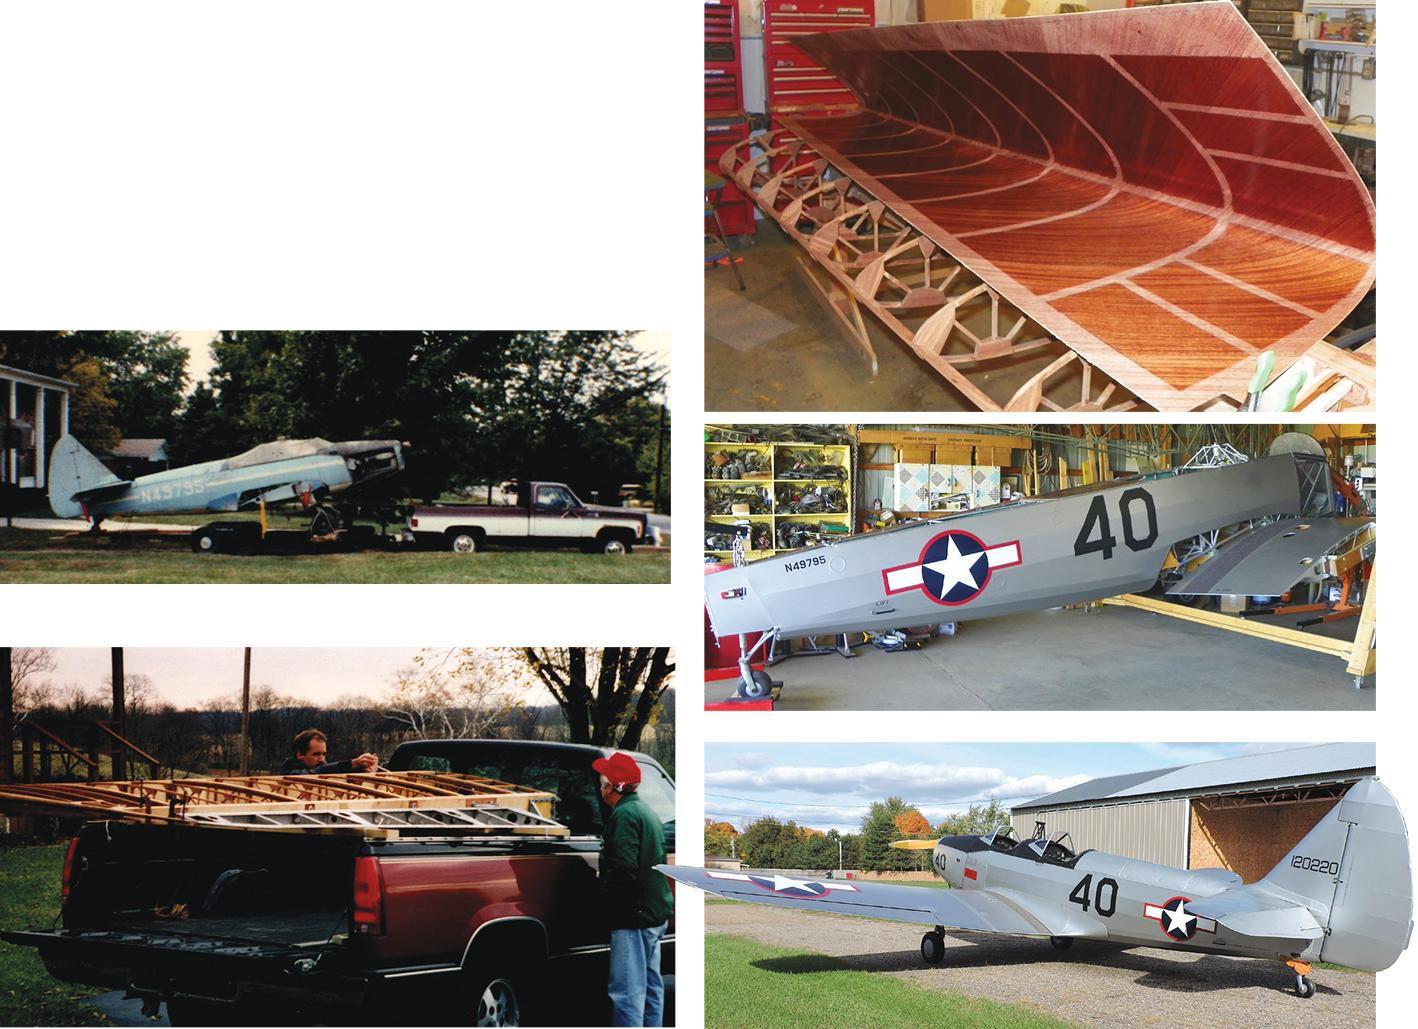
After his initial discovery, Jim made a trip back to the barn about a week later, and this time, the farmer was home. Jim asked about the airplane and told the farmer he was interested in purchasing the PT. The farmer said, “Why don’t you just get this thing the heck out of my barn? The owners dumped it here 15 years ago, and I haven’t heard from them since!” As much as Jim wished he could take it right then and there, naturally, there was a procedure to follow, and the first step was tracking down the people who had dumped the airplane there to begin with. Jim was able to find the registration and the owners’ addresses. He also found sectional charts from 1966 in the baggage compartment (and keeps them stored there to this day).
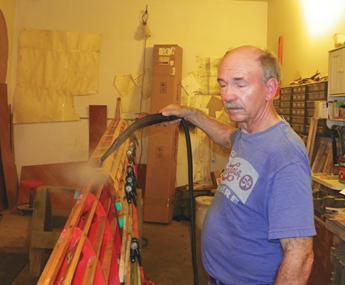
The owners, Bill Bartos and Roger Shewfelt, had purchased the airplane in Florida in 1965 for a grand total of $700. They were brand new engineers working for Pratt & Whitney, and they fixed the airplane up and painted it with a civilian color scheme.
“In those days, the rules for flying in Florida were pretty relaxed,” Bill said. “With lots of vacant wetlands and pastures, we could buzz to our heart’s content.” They got their kicks out of flying up and down the beaches, waving at girls without offending any folks with the ruckus. In 1966 they moved to Cincinnati to work for GE Aircraft Engines and brought the airplane with them. They housed the airplane at Hogan Field (which is now Butler County Regional Airport) in Hamilton, Ohio.
Jim recalled a story from Bill saying he and his partner would buzz the Ohio River for fun like they did in Florida, only the Ohio feds weren’t quite as relaxed, but the FAA could never catch them in the act. Bill’s final flight in the PT was in 1967. It was time for the aircraft’s annual inspection, which was scheduled to happen at Lunken Airport. Because there wasn’t a reliable radio in the airplane, Bill had arranged with the tower to fly in behind a friend’s airplane, and the friend would call the tower to get permission for Bill to land. His friend signaled that it was okay to land, but there was a commercial airliner on a long approach and their permission to land was denied. “My buddy should have continued around the pattern, but he didn’t,” Bill said. “When he turned off, I thought that was the signal, so I landed. The airliner was forced to go around. The tower, the commercial pilot, and the FAA were all really ticked off.” And unfortunately for Bill, the FAA grounded the PT-19. “The annual didn’t take place, and subsequently our photo ended up in the Cincinnati Enquirer as we towed the plane down Columbia Parkway on our way to a barn in Sharonville, Ohio.” Bill and Roger showed up a couple of weekends to work on it, and then … life happened. The guys found wives and moved away, and promptly forgot all about the PT-19 stashed in the farmer’s barn.

After hearing Bill and Roger’s story, Jim began to do as much research on the aircraft as he could, and found an article about a guy by the name of Mike Kelly. Mike is the president of the Fairchild Club and specializes in restoring PT-19s and PT-26s. Jim decided to call him up and tell him what he had found. Mike expressed his excitement and encouraged Jim to buy it, saying, “If you don’t buy it, I will!” with no mention of cost.
Now, when you take on a project of any caliber, research is half the battle. If you want to do a job right, you might spend just as much time researching as you do on the restoration itself. Mike told Jim about a book by Herb Puckett, which at the time was quintessentially the Holy Grail of PT-19 restoration information. In 1985, Jim ventured to Oshkosh, Wisconsin, for the esteemed air show, located the book, and even better — found Herb Puckett himself! (During our meeting, Jim showed me the well-worn and beloved copy with Herb Puckett’s autograph.)
Jim felt pretty good about his decision, so he made an offer on the airplane and brought it home in the spring of 1985, where (as you might have guessed by the title of this piece) life happened!
Jim and his wife, Libby, had just moved into a house on his family’s farm and promptly stuck the PT-19 right into another barn. (Unbelievable, I know! But let’s give the guy a break.) Jim is not a man prone to idleness, nor is he the type of man who works on one project at a time. In the midst of starting a family, Jim also immersed himself in restoring the farmhouse and building a garage so he could finish working on a Hatz biplane project he’d started from scratch. He then built a hangar on the farm, got his A&P mechanic certificate, finished the Hatz in 1990, as well as some other projects, and then sometime in the early ’90s he went to the barn where the PT was housed (sans bat guano) and began taking the wings apart.
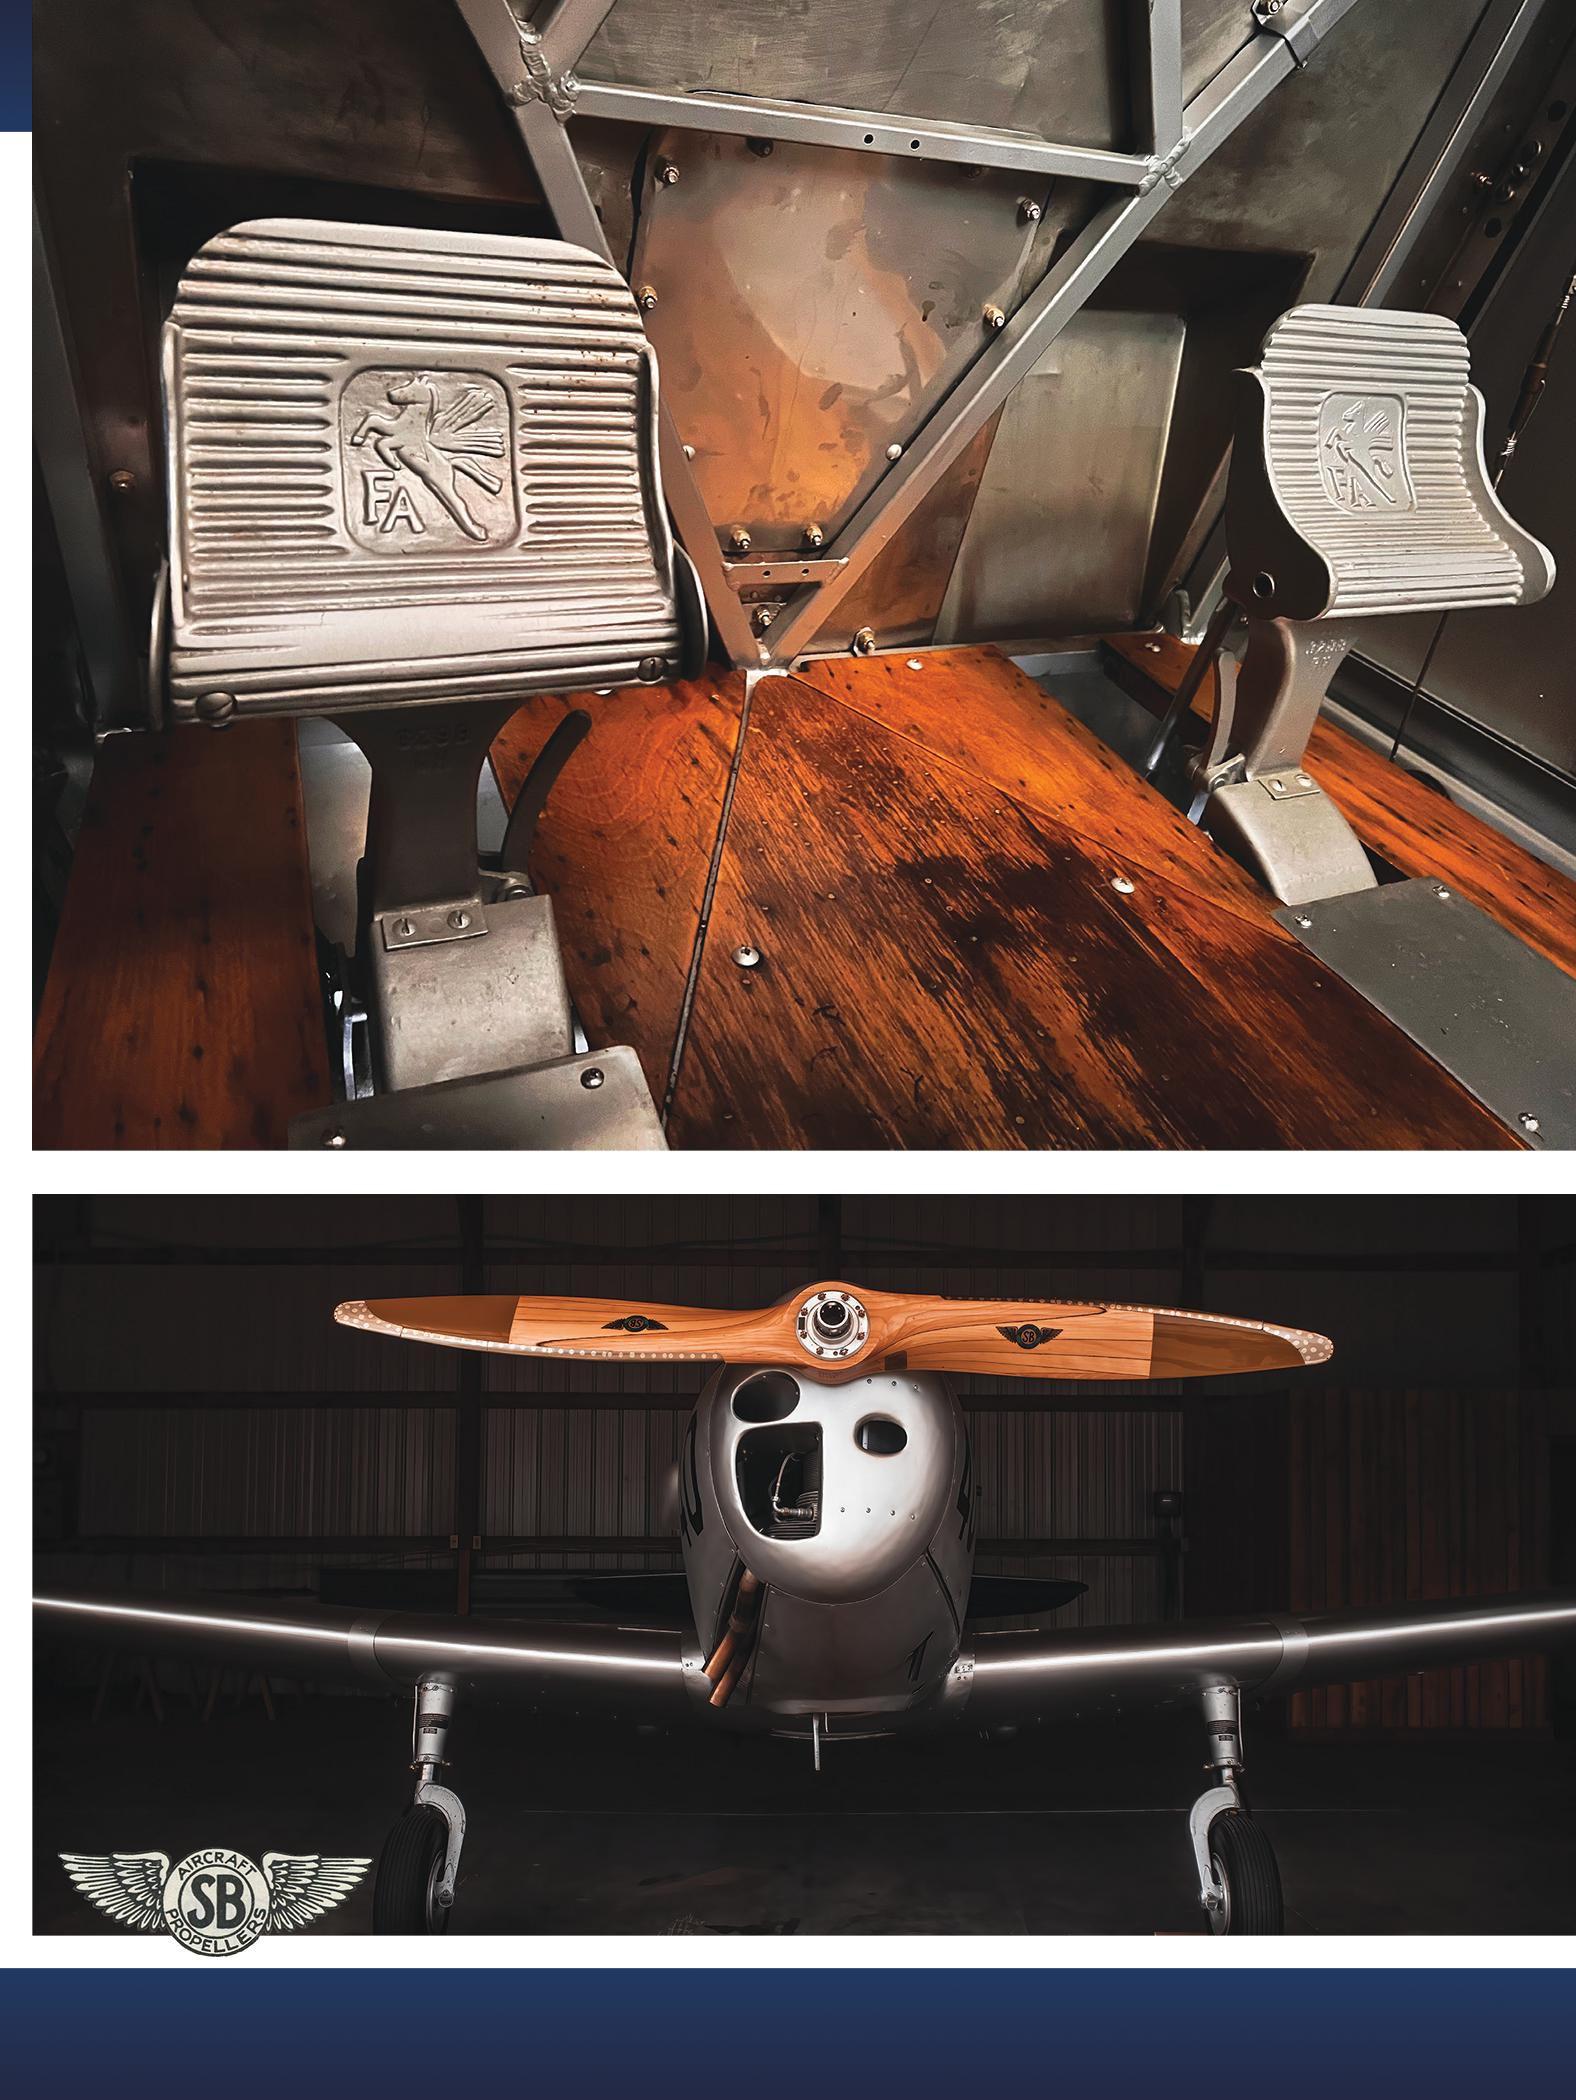
Jim started with the wing panels and then later moved to the center section, which he had been warned had a tendency to rot out. This was the main issue that had grounded most of the PT-19s after the war. The trainers at that time were largely wooden due to a strategic materials issue during the war. The military was saving as much metal as they could for bombers and fighters. When Fairchild got the contract to build, they subcontracted with piano and organ companies to make many of the wooden parts. The wings, center section, and tail are almost entirely wooden on the PT-19. The control surfaces are aluminum framed, and the fuselage structure is steel tubing with wooden formers and stringers fairing out the shape.
When Jim was taking the wings apart, he found identification stamps from both Baldwin piano and Moller organ companies, and found it bizarre that his wings came from two different places. To Jim’s surprise, the center section looked pretty good, but the only problem he was running into was the glue. Casein glue, to be precise, which was made from proteins in skim milk and used for wooden aircraft structures until better adhesives were developed during the war. Though somewhat water resistant, the glue does break down with time and becomes susceptible to moist conditions.
Jim found that everything was coming apart easily — the skins had popped right off (which is kind of scary!). He found that the only thing holding the gussets on were the nails, so he pulled all of them off and made new ones. He was able to save the original ribs by doing that. The spar webs had to be removed one side at a time. He would clean one side up, glue a new web on, flip it over, and do the other side. Jim had to carefully chisel around each nail, pull the nails out, sand and file, and cut the plywood down to the glue line so he didn’t hurt the original spruce. Now, the airplane has a 36-foot wingspan and two spars, so you can probably imagine how time-consuming that would have been. Jim said it took nearly a year just to complete that task alone. Then, he had to build a whole bunch of fixtures and rotisserie racks to support the weight of the heavy center section.
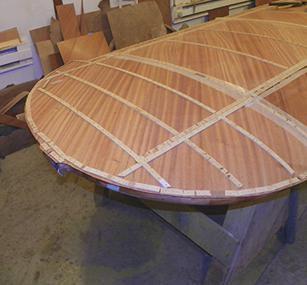
Jim’s biggest fear was skinning the wings, due to having to steam them and wrap the plywood around the leading edge. The material used for this is 3/32-inch thick mahogany plywood, 45-degree grain, which is steamed, soaked, and needs to bend without breaking. Not to mention the 10-to-1 scarf joints on the 4-by-8 plywood panels over the 36-foot wingspan. Once he got the wings and the center section rebuilt, it was time to give Mike Kelly another phone call, since he and his wife, Penny, specialized in those things. Mike agreed to help Jim out with all the steaming, bending, and skinning, the caveat being that he had to catch up on
his own work first, and (you guessed it) life happened! It was 15 years before Mike was able to get back to him.
In that gap, Jim continued to work on many other projects, such as restoring an old Camaro, working on a covered bridge, restoring a mill, building a hotel, working on a 1920s carousel with a carny barn to house it, and, of course, working on other airplanes. Jim has a love for all things vintage, especially wooden vintage things, and it’s so visible in his attention to detail. He made sure to work on the PT-19 every year, usually in the winter, just focusing on one little thing at a time.
Finally, in 2016, Jim received a call from Mike saying that he was ready for the wings. A few days later, Jim was loading up a trailer with the wings, center section, stabilizer, and a giant pile of plywood, and began heading for Coldwater, Michigan. Mike and Penny spent a couple of winters working on the PT, so Jim used that time to link up with Joe and Mark Denest to get the engine overhauled. The PT-19s were powered by the inline 175-hp Ranger L-440-1 engine, and Joe and Mark were familiar with Rangers and completed the overhaul in six months. When Jim picked it up, he strapped it down in the bed of his truck and drove through Gettysburg as a nod to all the history that happened there.
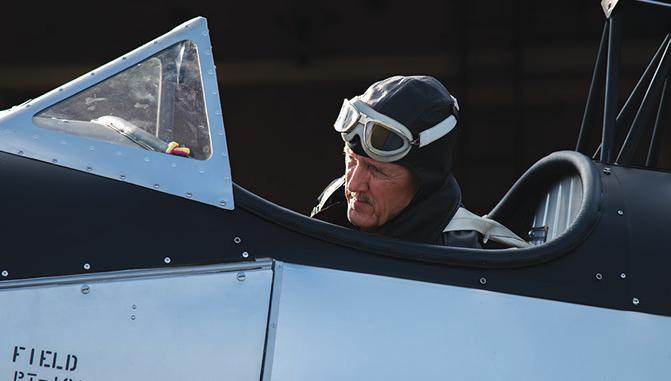
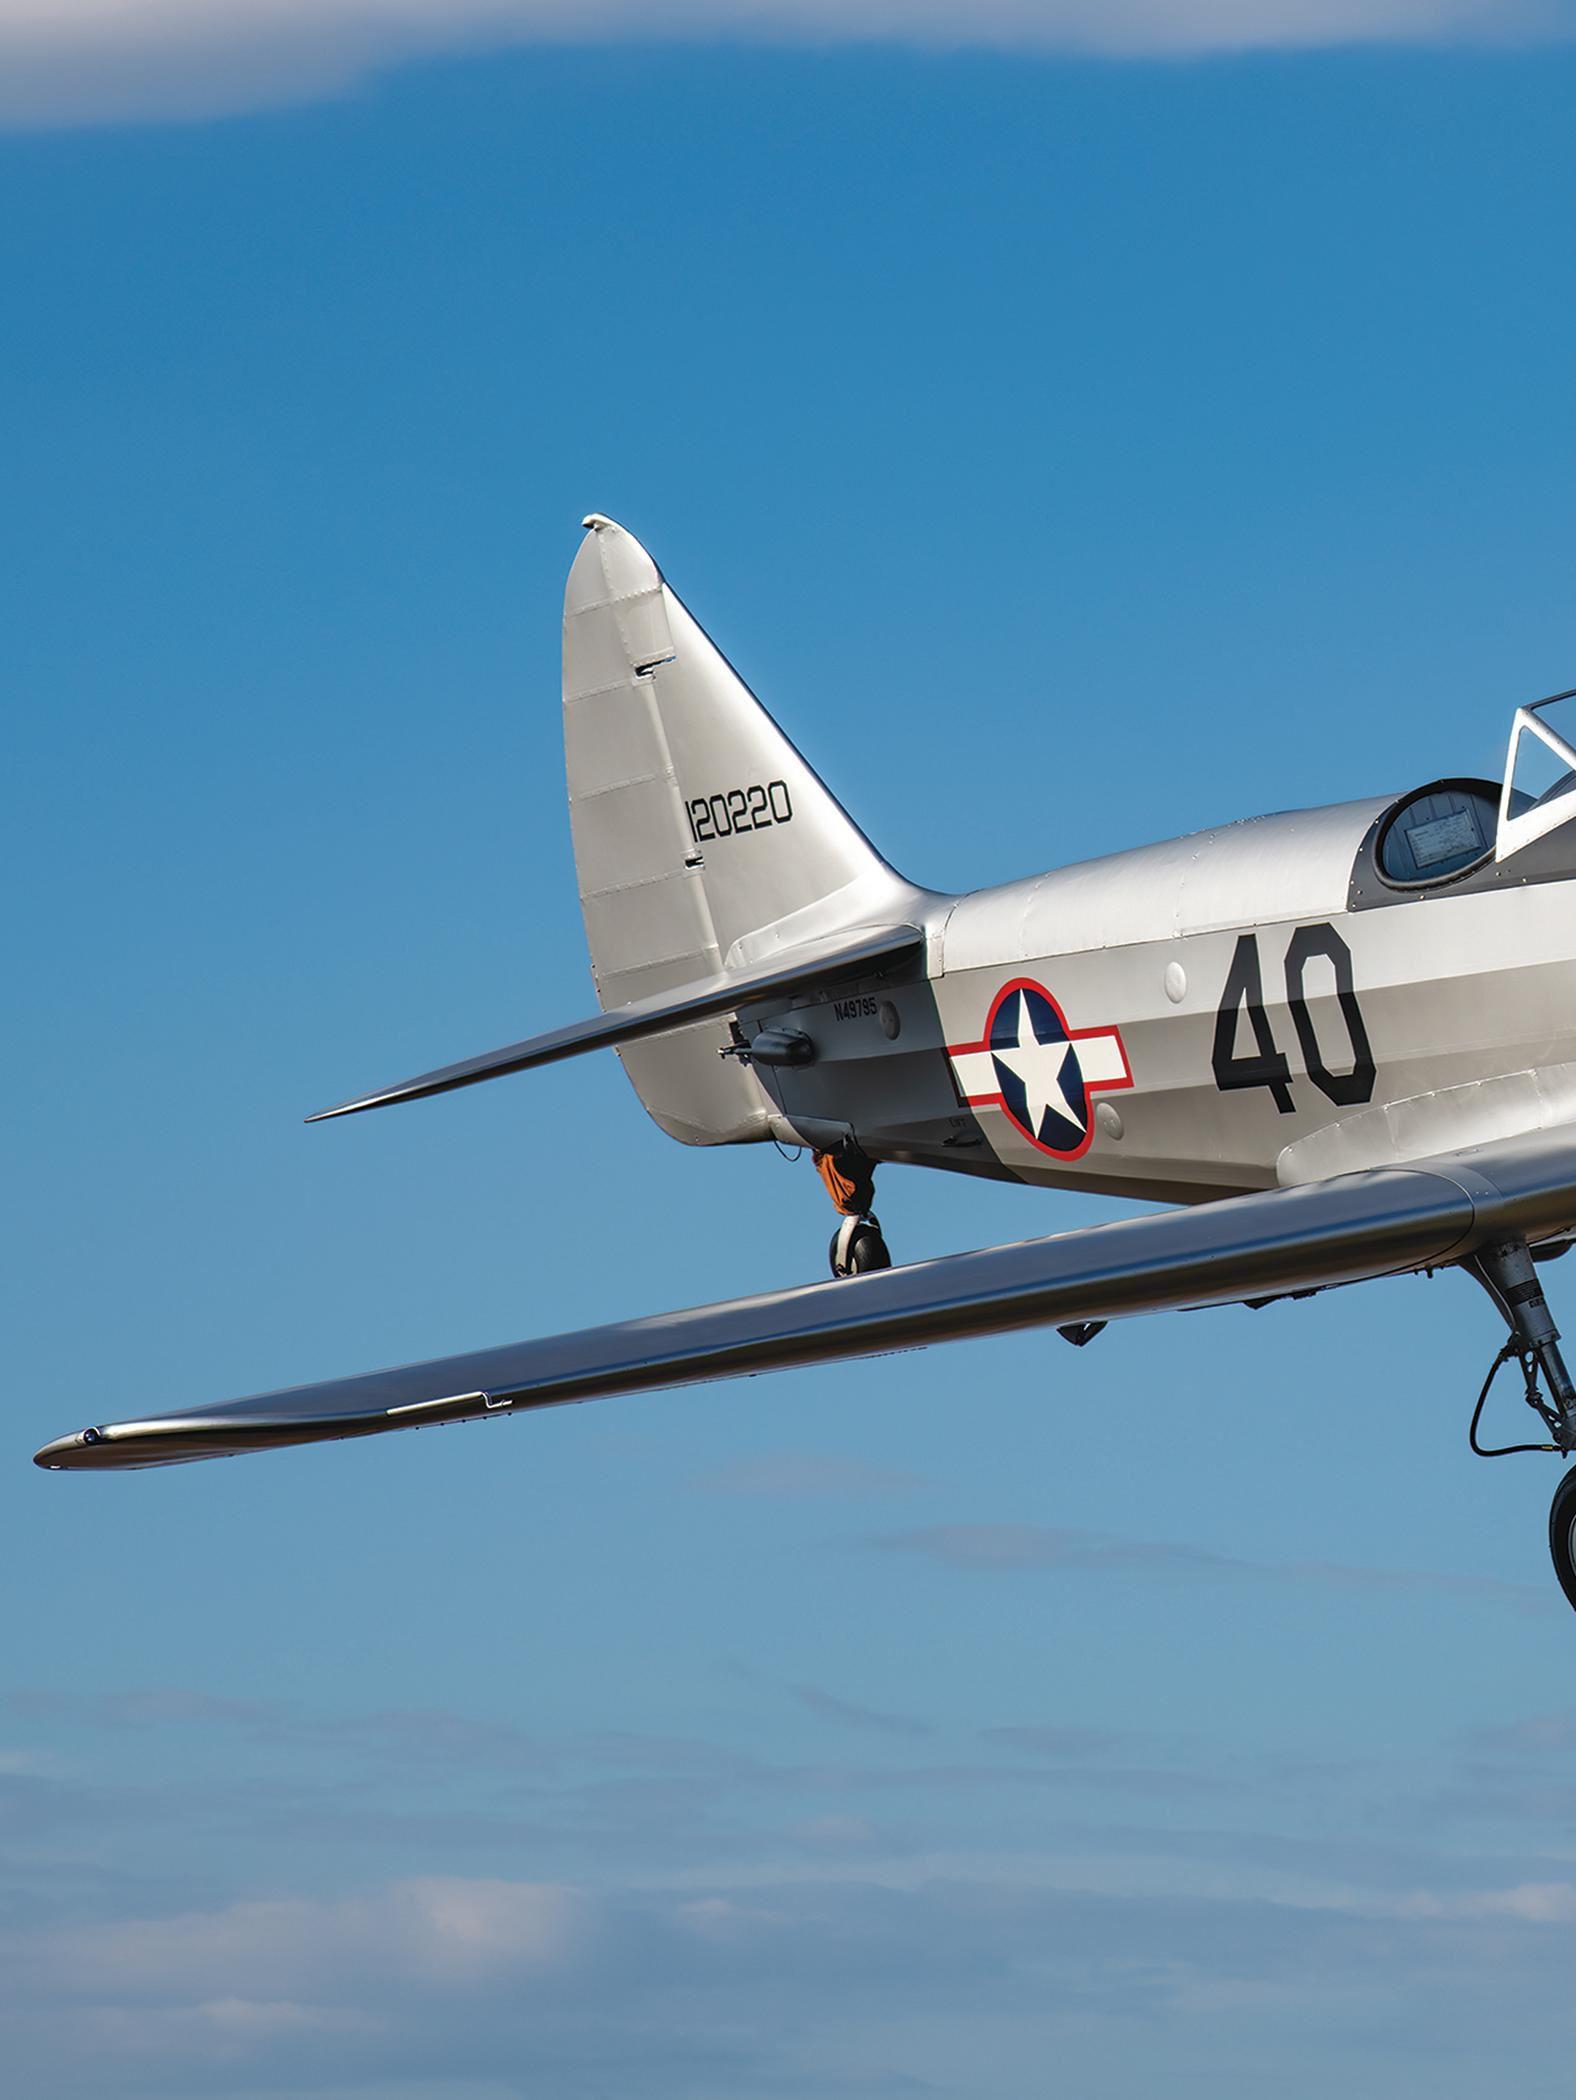
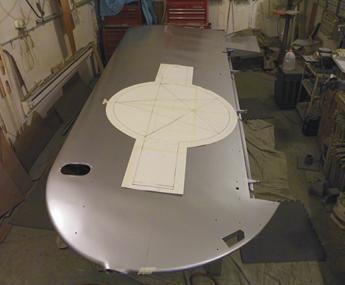
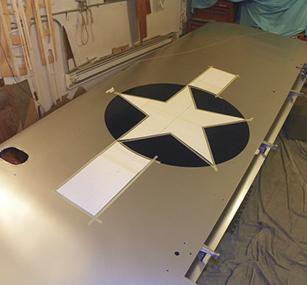
When the U.S. Army’s PT-19s first rolled off the assembly line, they were painted in standard trainer colors, blue fuselage with yellow wings and tails, with the national markings on the wings. The rudders had horizontal red-and-white bars and a vertical blue stripe on the leading edge. In 1942, the Army Air Corps
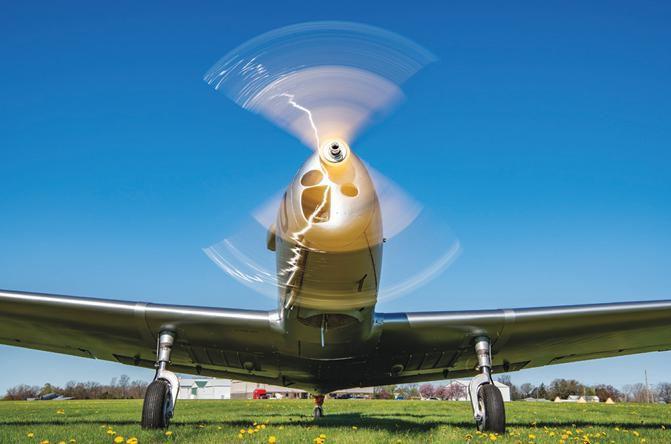
decided all their training aircraft would be painted silver. Also changed was the traditional Army stars marking, which had a red dot in the center that resembled a little too closely the Japanese national emblem. This was removed, as were the rudder markings. New aircraft were now silver, and existing ones were repainted, and it also made the identification numbers a lot easier to see. When Jim found his PT-19, the airplane had been in a civilian paint scheme, and Mike called Jim to ask about restoring it back to silver. Jim agreed. After Mike got the wings, center section, and the tails covered and painted, he told Jim to come and get them. Jim said, “Wouldn’t it be easier if I just bring you the fuselage and then you finish that, we can put the wings on it, and we’ll fly it home instead of dragging it home on the trailer?” After talking it over with his wife, Mike agreed to take on the fuselage. Jim finished the sheet metal and made several trips to Coldwater to drop off the finished pieces.

Finally, in May 2022, when the airplane was finished, it was time to fly! Jim loaded up his Cessna 180 with a couple of friends and headed for Coldwater for the first test flight. The test pilot was Andrew King, who has been a good friend of Jim’s since the mid-1980s and is also something of an expert when it comes to vintage flying machines. He has a wide range of experience and knowledge, so Jim felt most comfortable with Andrew doing the first flights. The airplane is started from outside using a crank lever inserted behind the engine. “There’s a fire extinguisher hatch near the hand crank, which can be used to reach inside to wobble-pump the fuel pressure, adjust the throttle and mag switches, and then she fires up like a champ!” Jim said.
Andrew flew two test flights. The initial test was his normal 20-minute first flight, which is a standard time increment that will usually determine whether something will go wrong. It
was a completely normal flight with no squawks. He landed and the group looked over the airplane and determined that everything was fine, so he fired it back up for round two and stayed in the air for an hour and 10 minutes. At the time, Andrew had been flying 1920s and 1930s aircraft like the New Standard biplane and the replica Fokker D.VII. The PT-19 was incredibly smooth in comparison, and he remembered thinking, “Wow this thing flies really good!” After that, Andrew flew the airplane two hours back to Jim’s 2,100-foot grass strip in Yellow Springs, its new home.
Mike had given Jim a ride in one of his PTs, and Jim had flown another PT in Cincinnati, so he knew most of what to expect in terms of flight operations and how the airplane would handle. About a week later, Jim took it out for the first time in its fully restored glory since bringing it to his farm in pieces in 1985. Jim eagerly took to the blue summer sky, enjoying the breeze as he circled over nearby Springfield airport and made two landings that were almost perfect. After that, he said, he started overthinking, and there may have been a couple of bounces that followed.
The aircraft weighs about 1,900 pounds empty and 2,545 pounds at gross, is easy to fly, and is light on the controls. It doesn’t like to be below 80 mph on landing approach. Jim said when he was flying it onto his grass strip the first time, he put the flaps down but they retracted on their own as he was landing. This caused the airplane to accelerate, and he rolled all the way to the end of his strip and then some! Luckily, he hasn’t had any issues with it since.
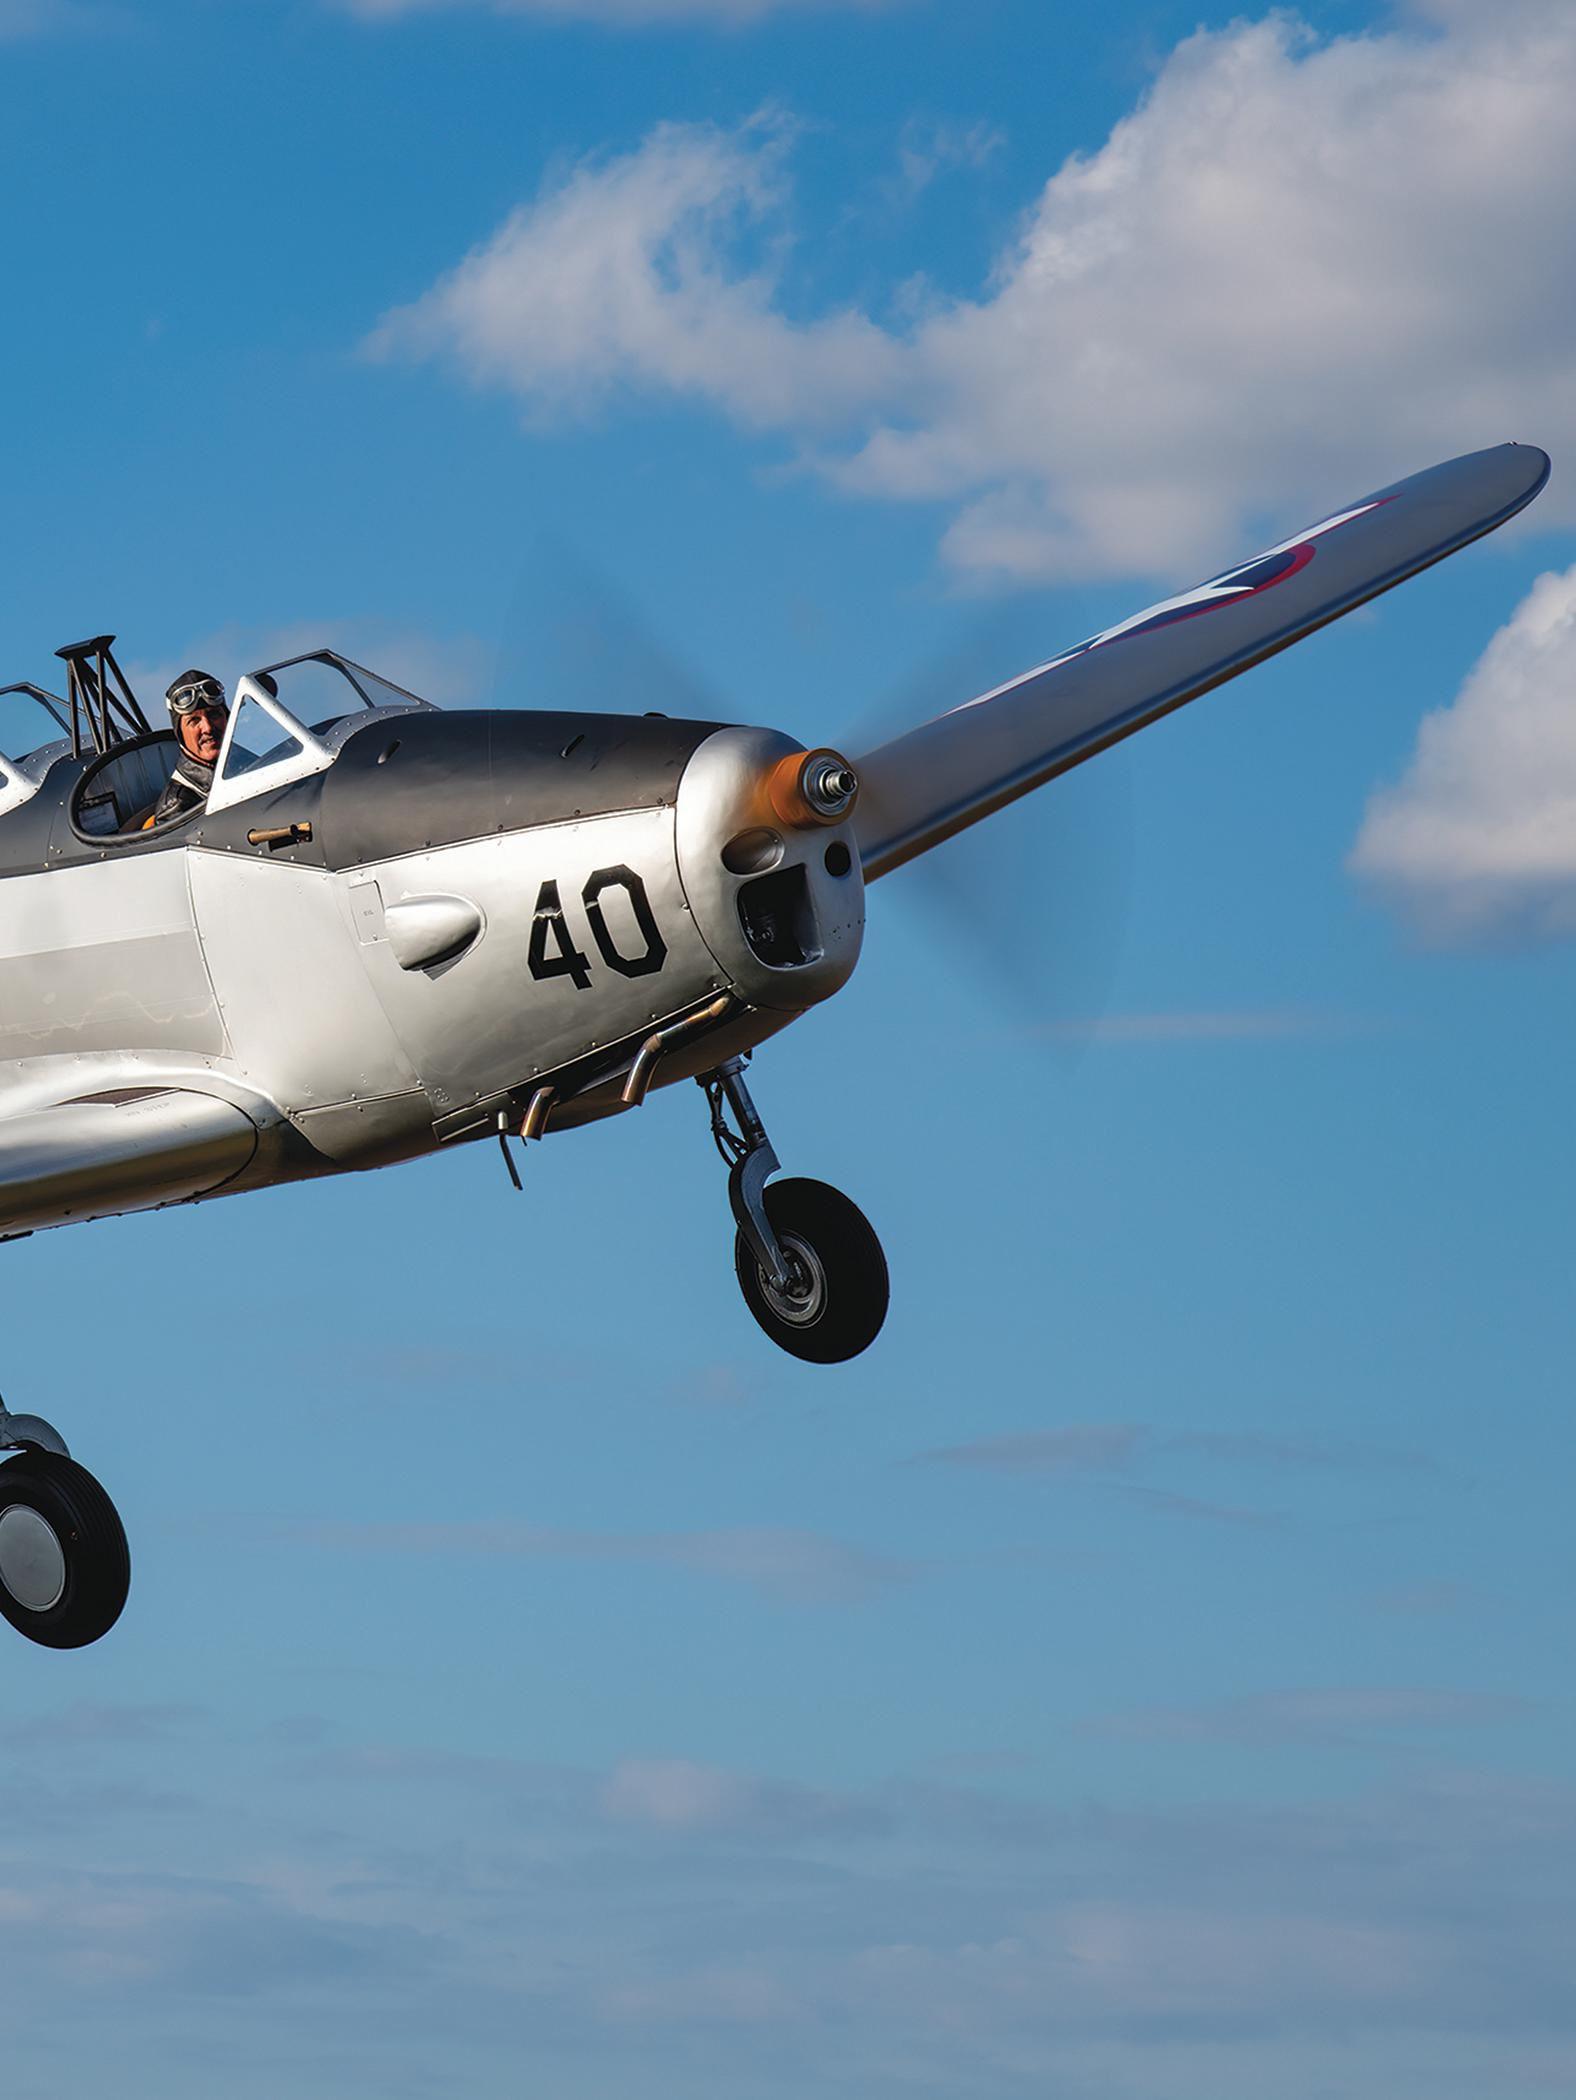
All in all, the airplane is one of the smoothest machines for its time, with very well-harmonized controls. It draws a crowd wherever it goes, and along with it, a story gets told. Restoring the PT-19 was a labor of pure love and patience, but entirely worth the wait.

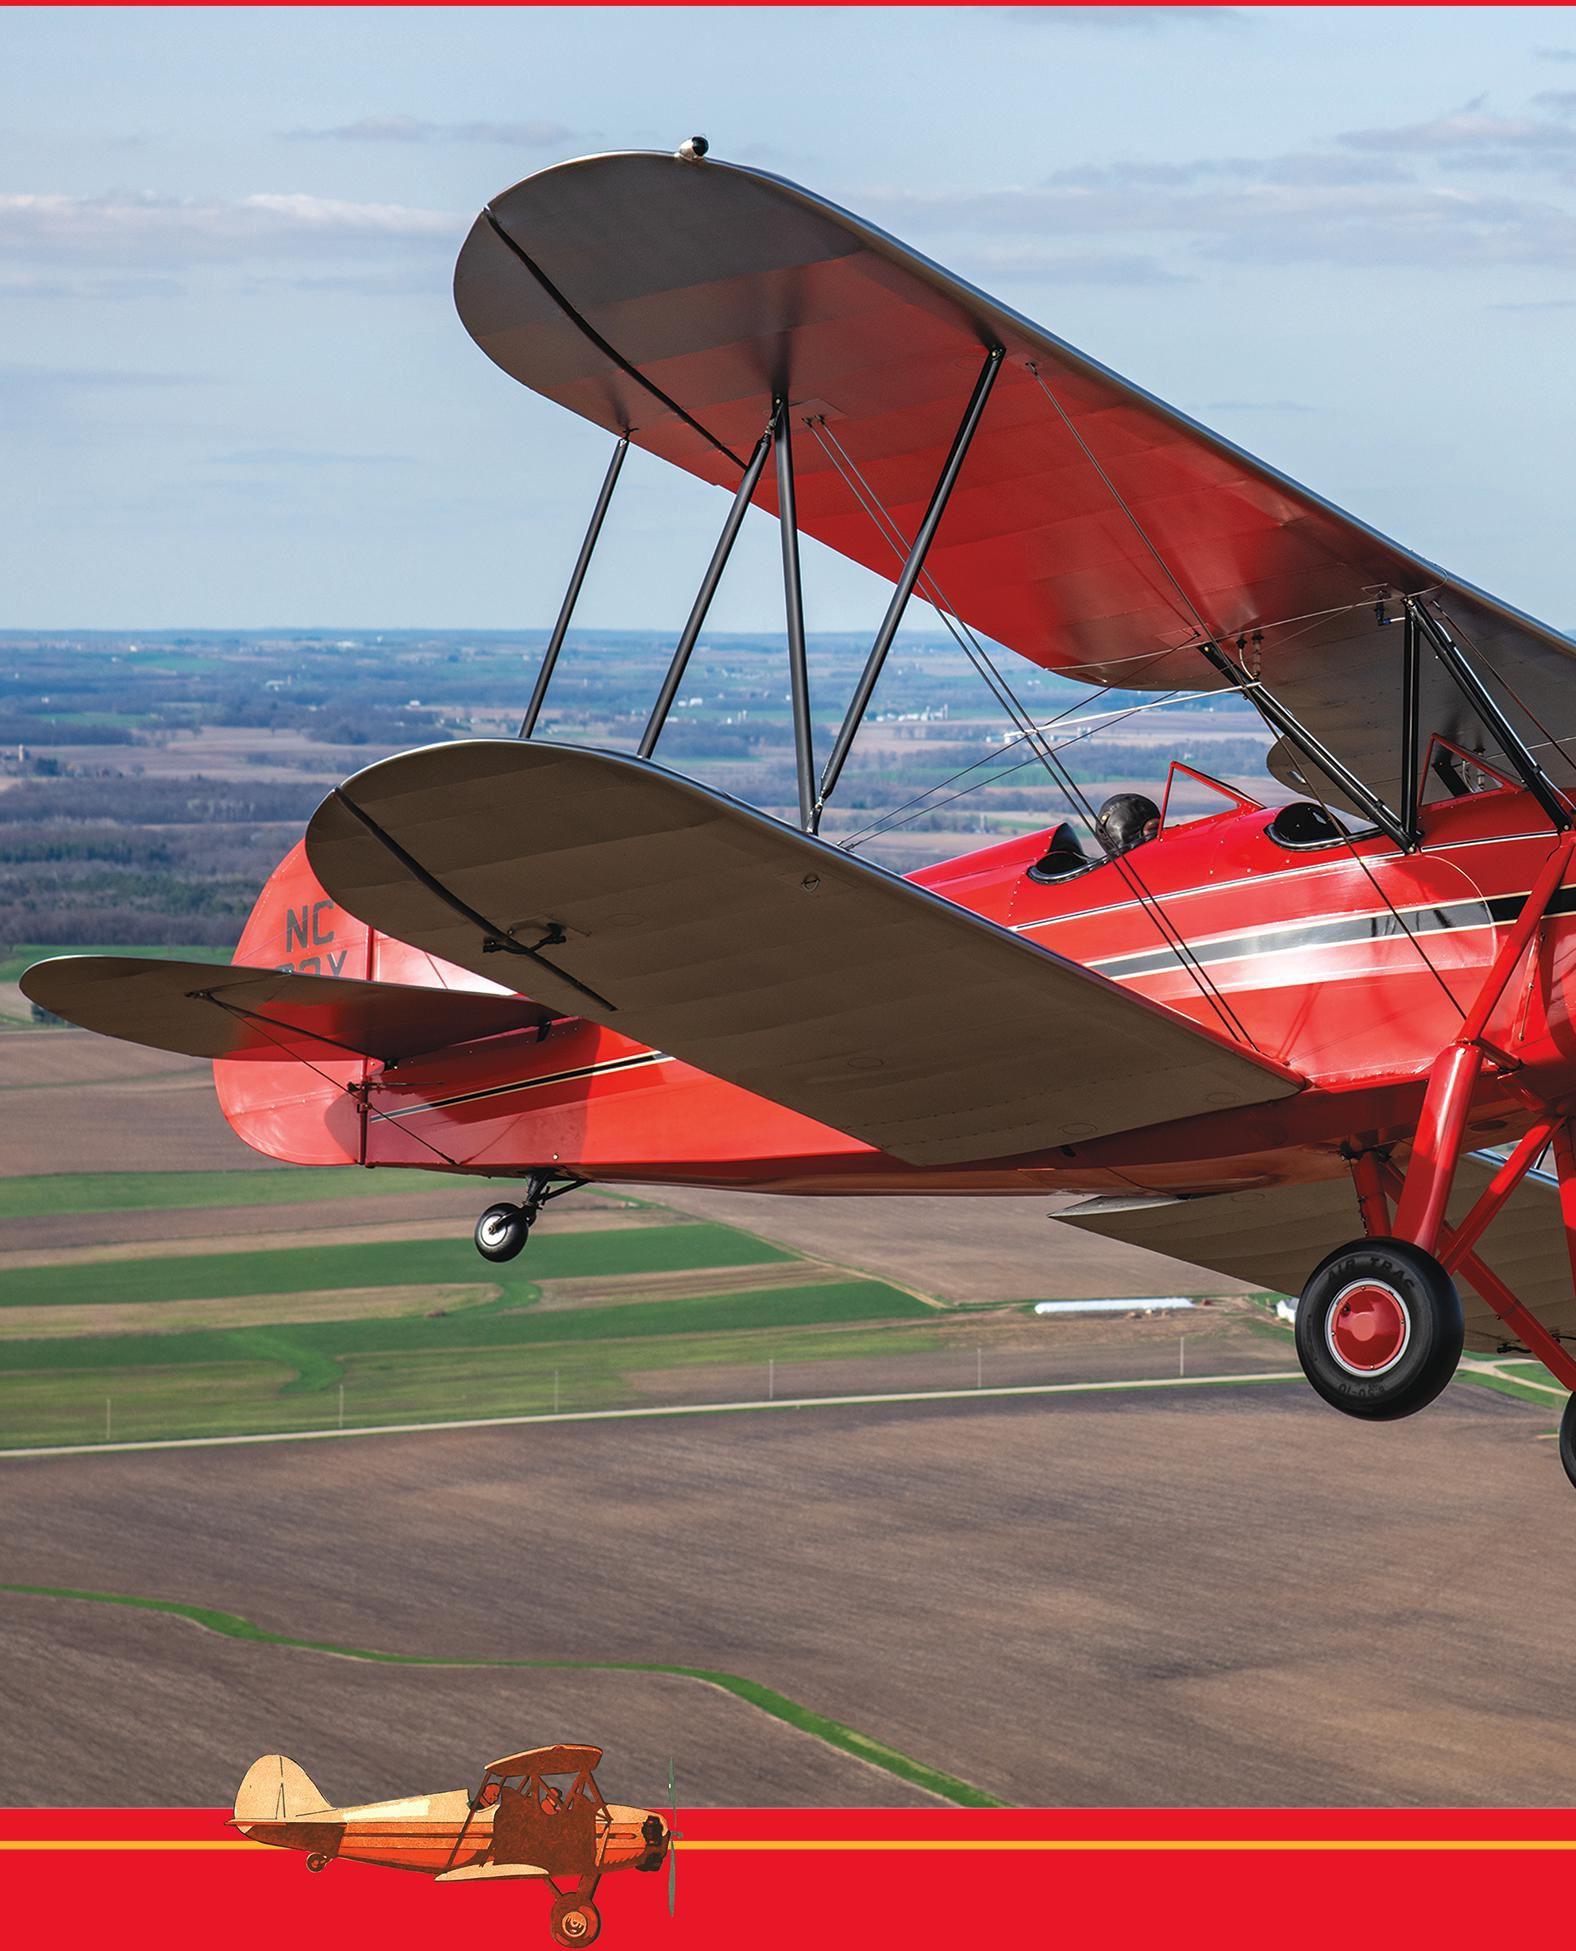

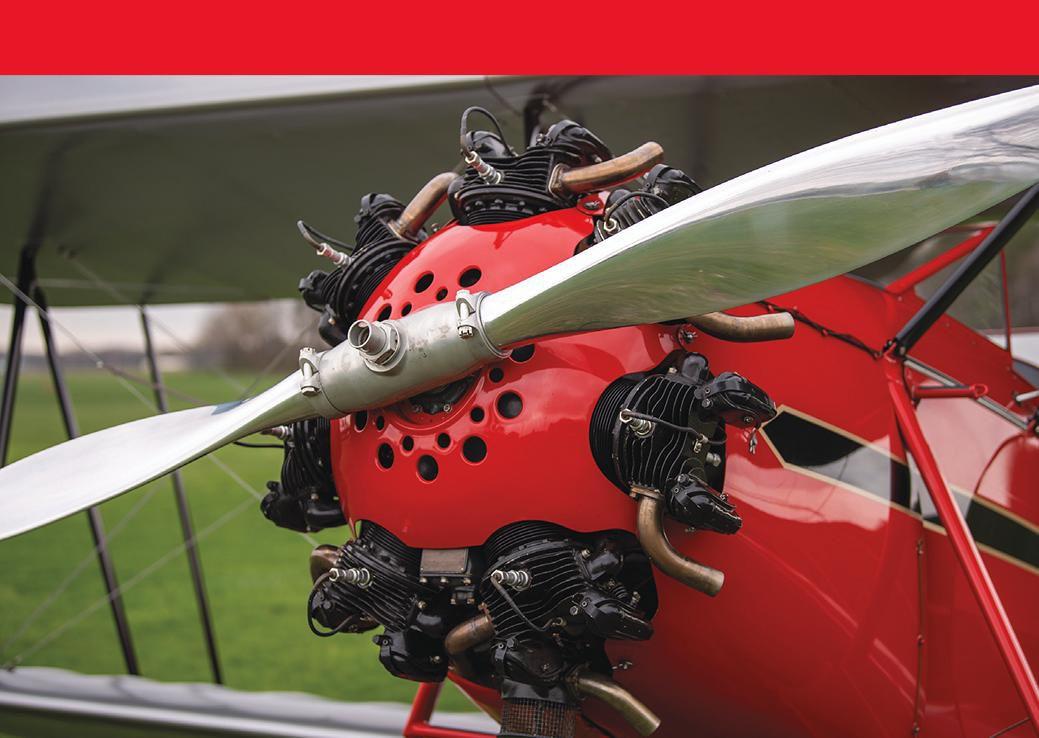
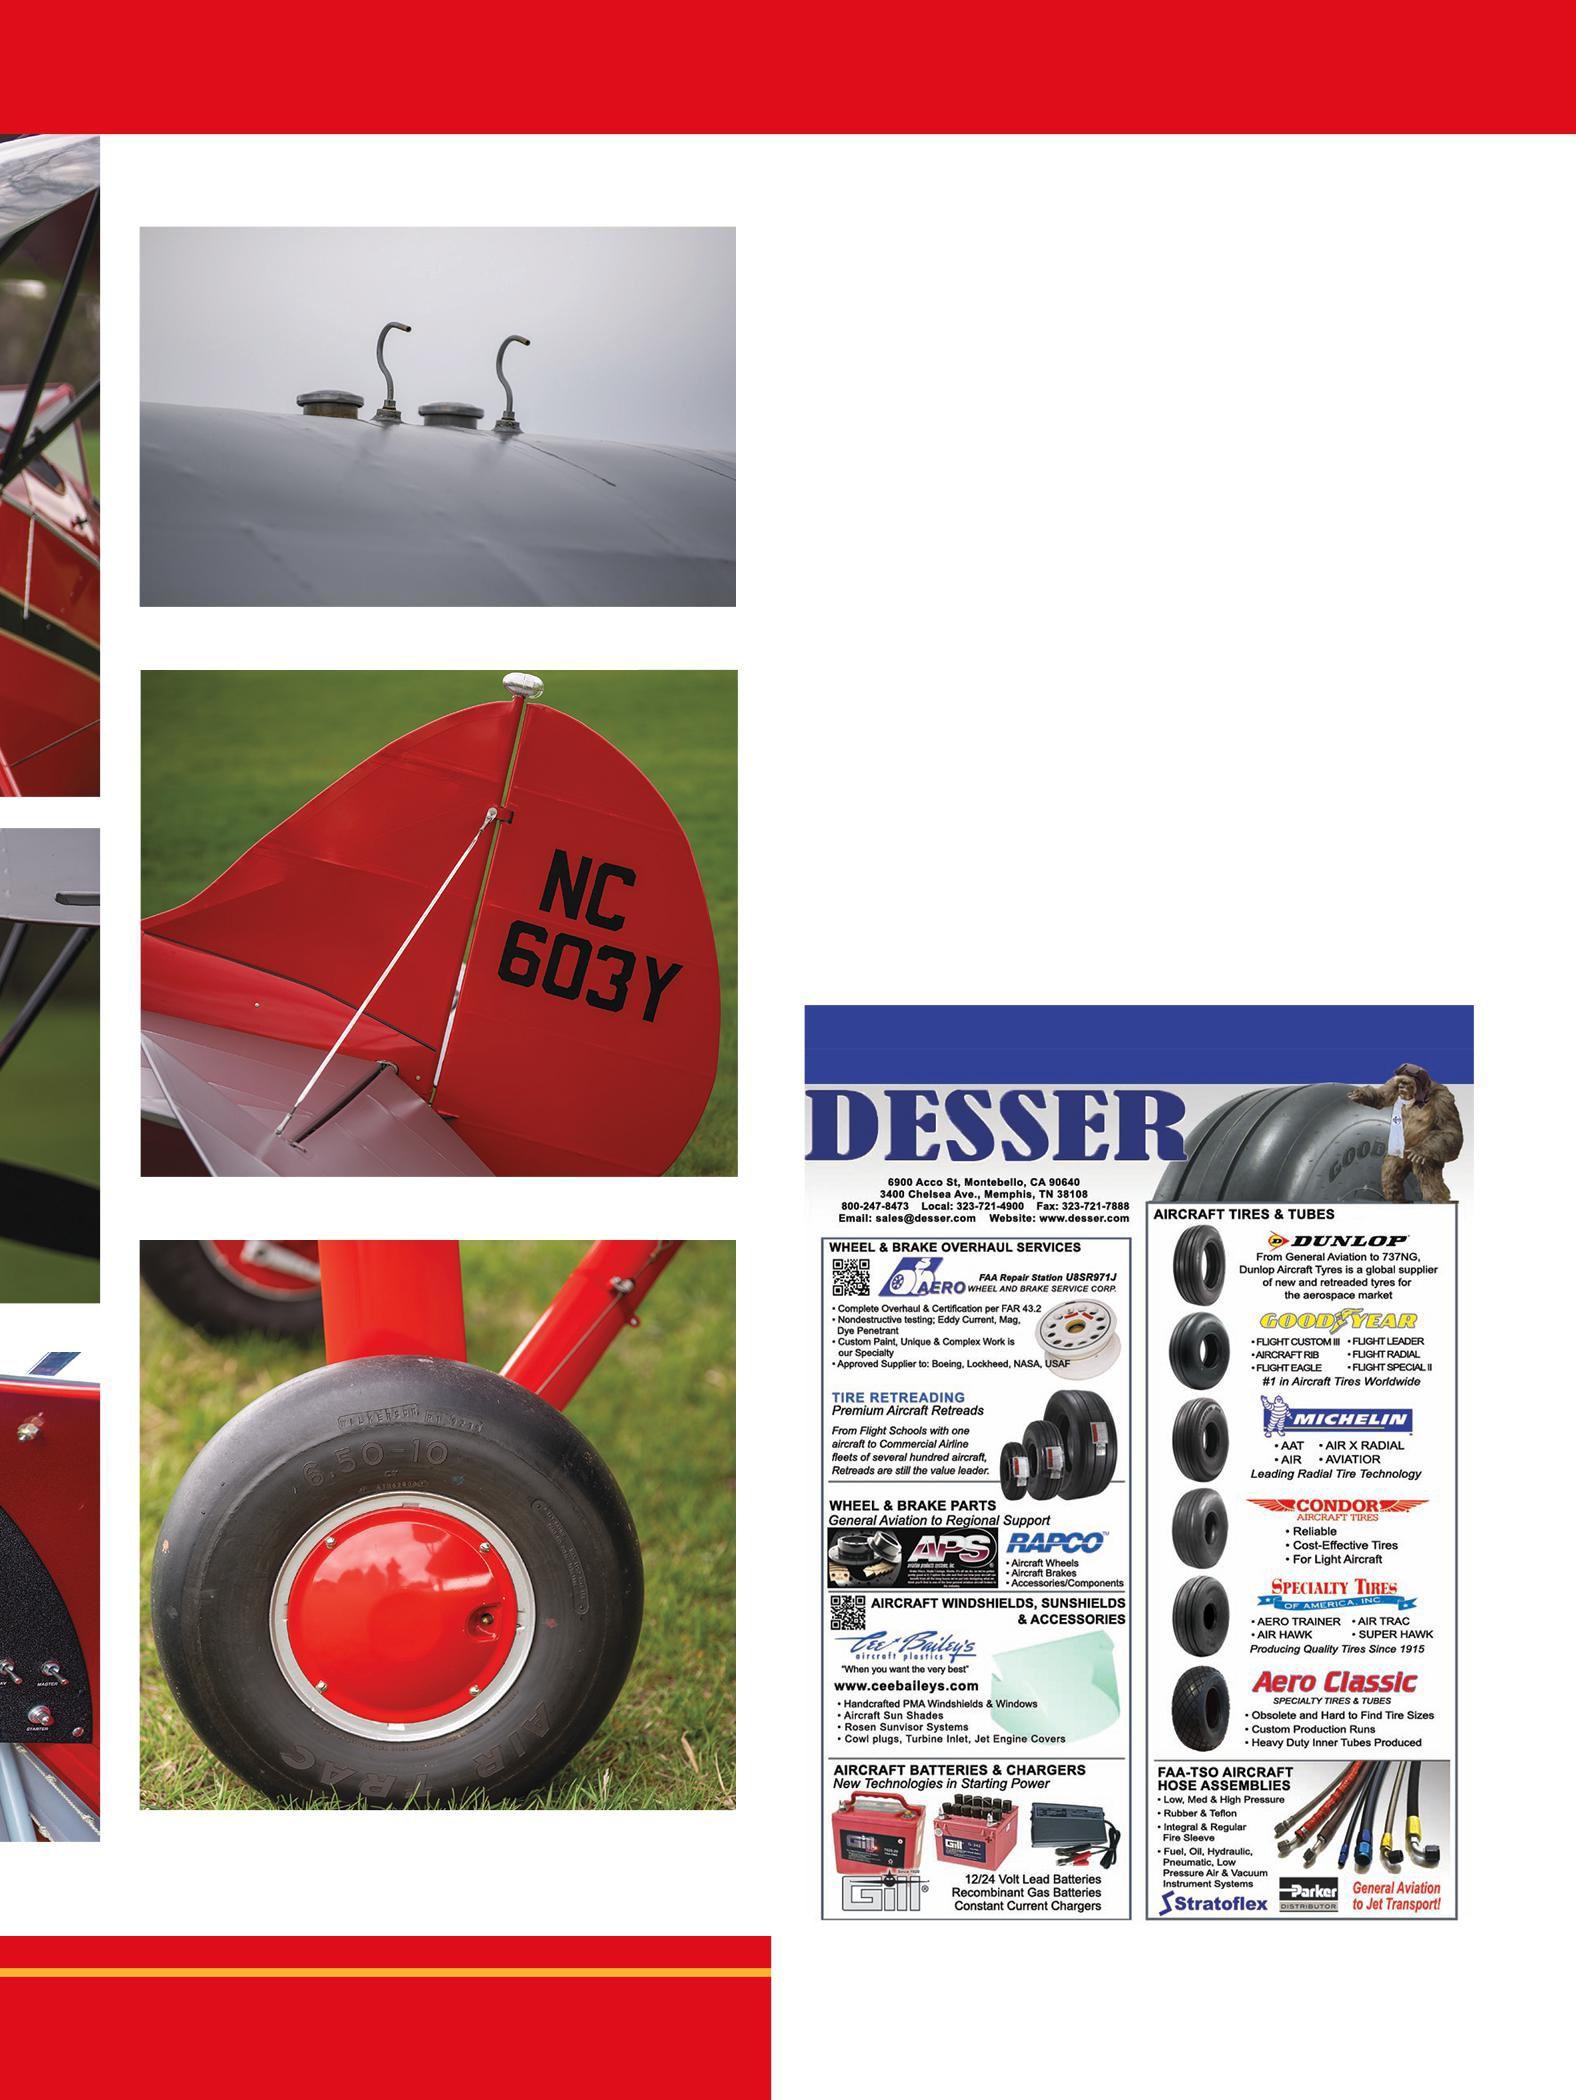
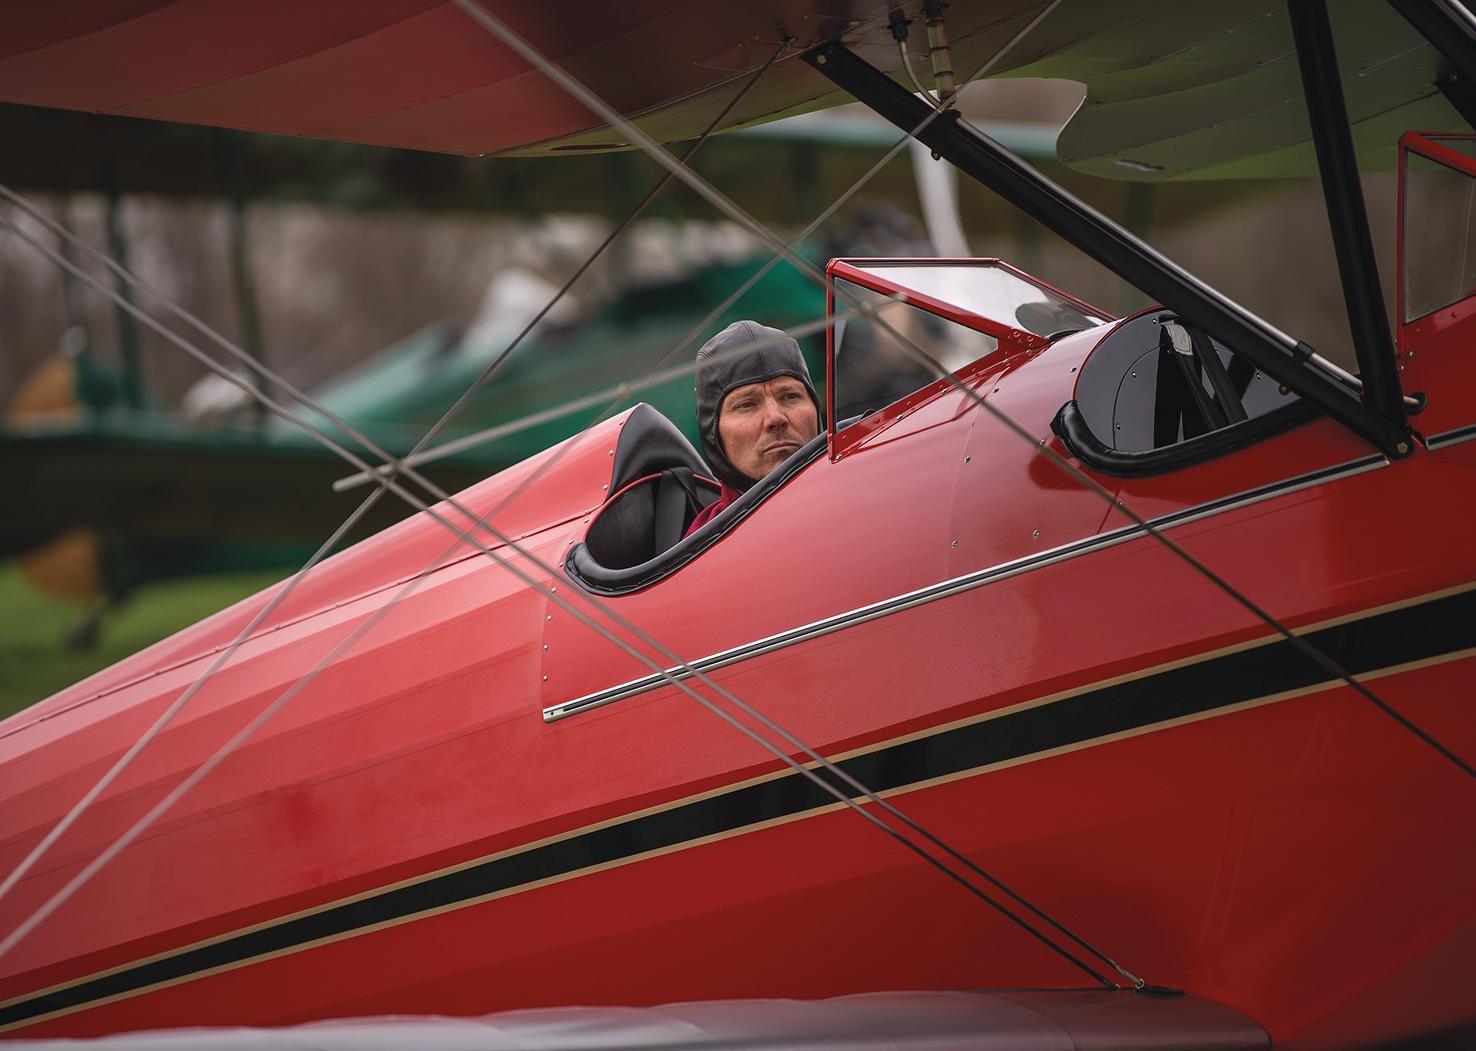
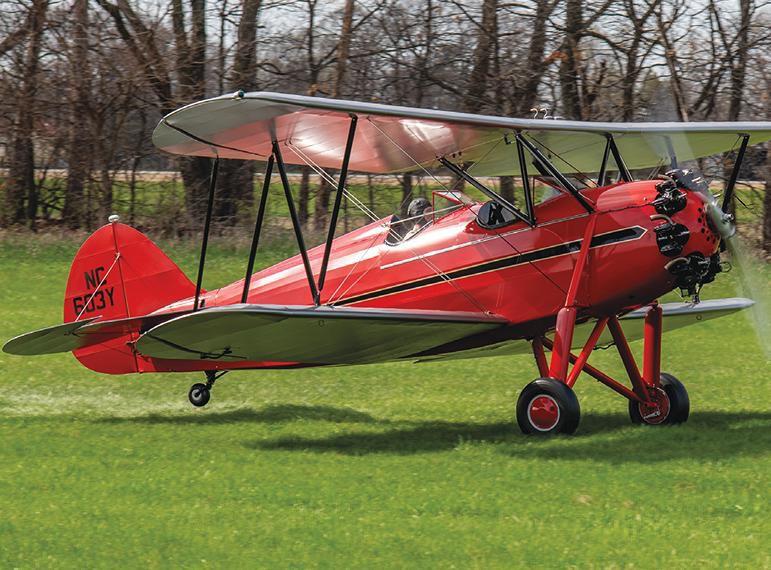
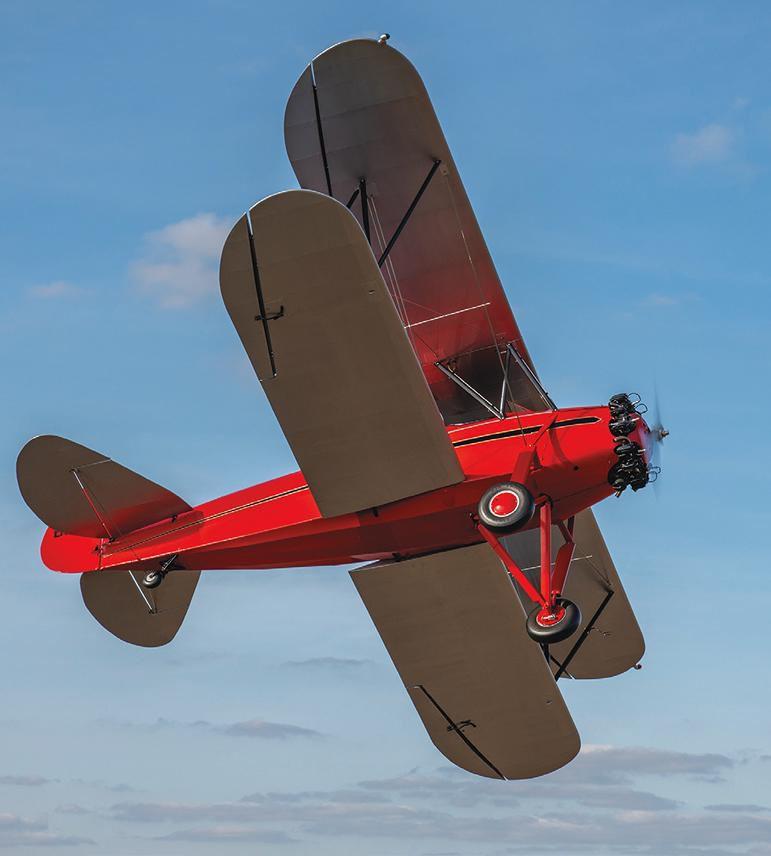
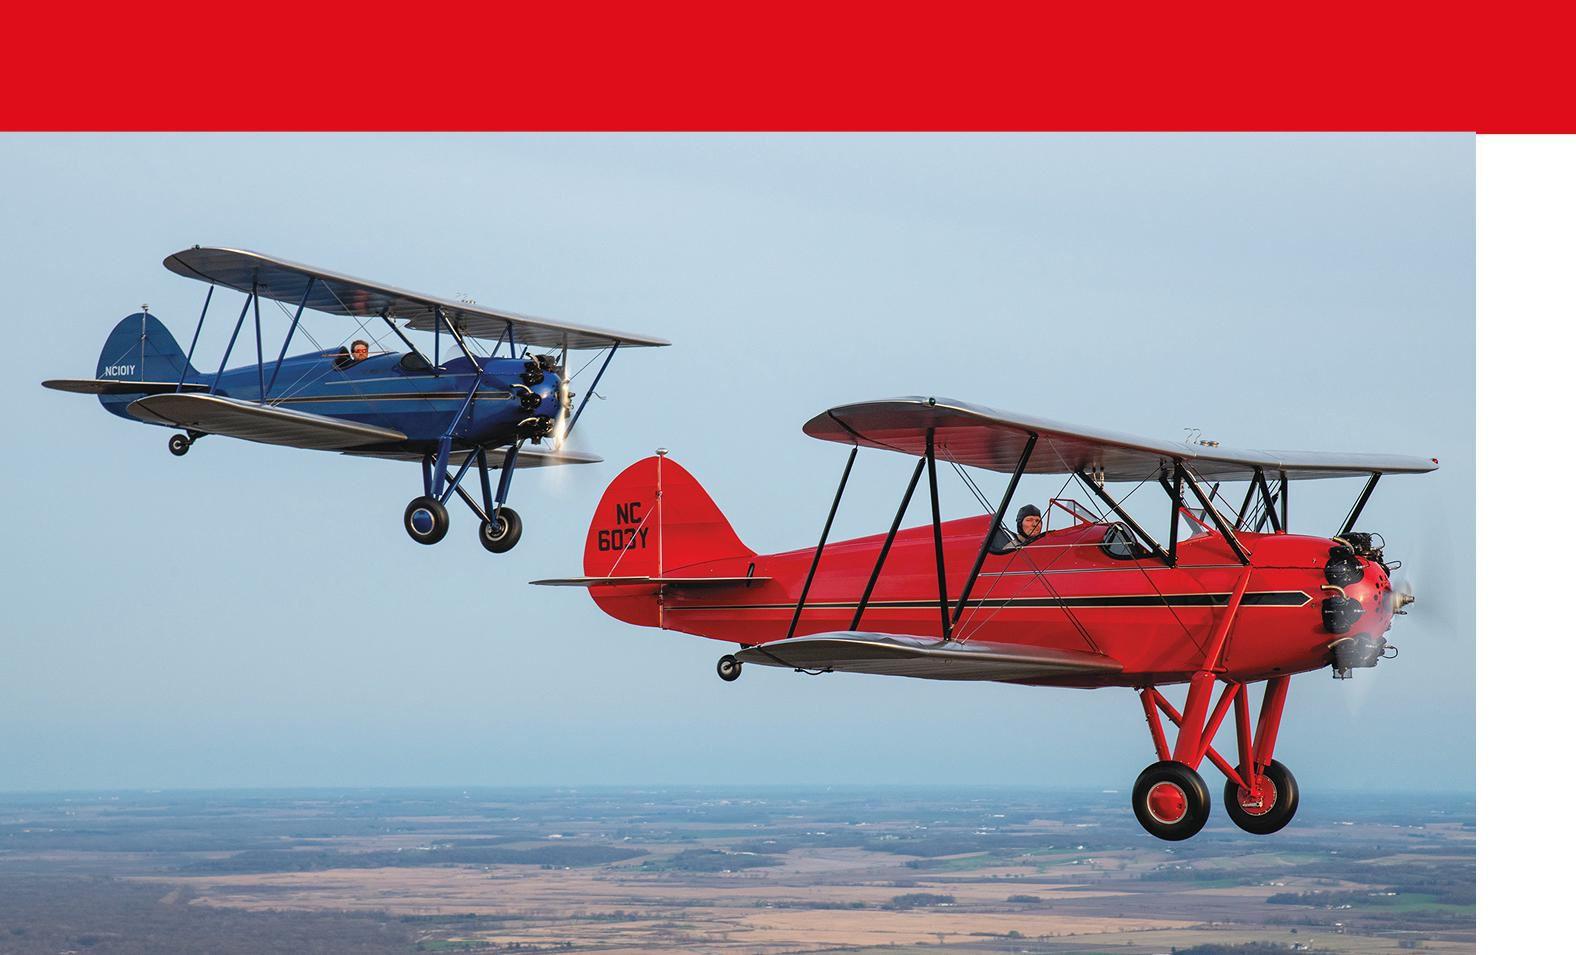
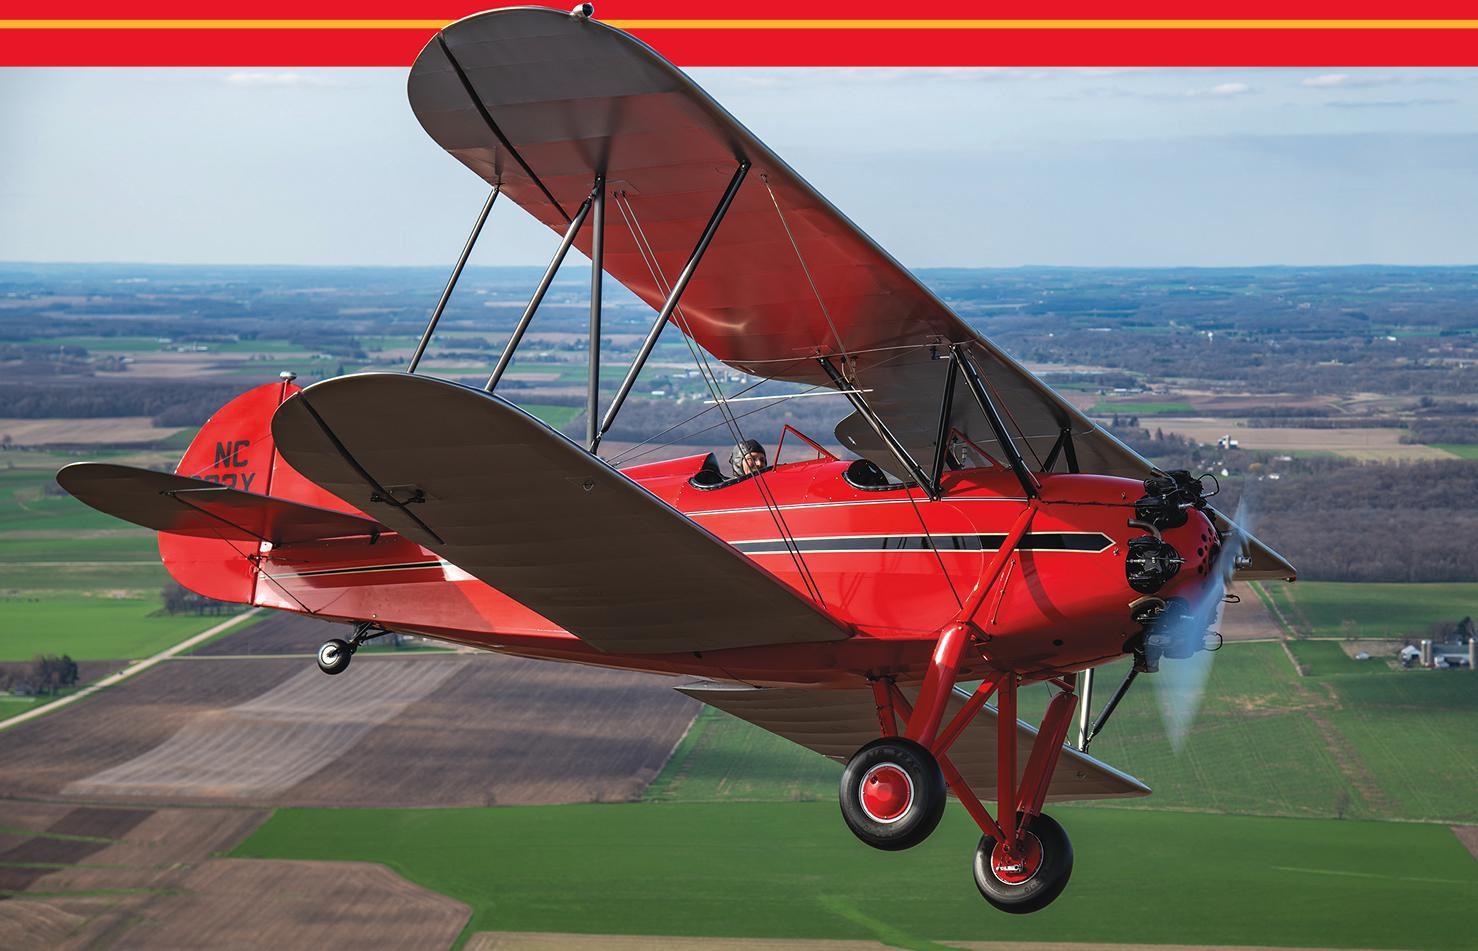
THE KELCH AVIATION MUSEUM located at Brodhead Airport (C37) in Brodhead, Wisconsin, is home to 22 vintage aircraft, a number of vintage automobiles, and a wide array of related unique artifacts. Many of the aircraft that call the museum home have truly incredible stories tied to them. One aircraft in particular, a bright red Waco RNF, NC603Y, is no exception. NC603Y is currently owned by Jayson “Jay” Ayres and has called Brodhead home for more than 50 years, which is plenty of time for an airplane to gather a lifetime of stories. As fate would have it, thanks to Jay’s curiosity, a whole other lifetime’s worth of stories were discovered, dating back to 1930, the year it was manufactured.
Now living in San Antonio, Texas, Jay Ayres grew up in Brodhead. His father co-owned a Cessna 120 and based it at C37, and from kindergarten through junior high school, Jay was an airport rat, kicking around the airport and bumming a ride with anyone who would take him flying. Though aviation ran in the family, he had no idea he’d one day own the RNF. Just before Jay’s early years at C37, 603Y had been purchased by United Airlines Capt. Don Wichelt, who was based in San Francisco at the time. Originally a Chicago native, Don wanted to move back to the Midwest, so he and his wife, a former flight attendant, bought a farm near Brodhead. Don ferried the Waco to his new home before moving it to a Brodhead hangar where Jay first met the biplane that would later be his. “My first aerobatic experience in an airplane was as a child in the Waco,” he remembered. “We did some lazy-eights and some minor aerobatics.”
Another “airport rat” remembers the Waco’s early days too — Patrick Weeden, current executive director of the Kelch Aviation Museum. Like Jay, Pat grew up on a diet of avgas and exhaust. “Jay and I, we literally grew up at this airport. I remember getting a ride in [603Y] when I was 7 or 8. We used to take our G.I. Joe toys and make parachutes for them, and then Don would take us up in the Waco and we’d throw the G.I. Joe parachutes out at the top of the loop.”
While 603Y would remain in Brodhead under Don’s care, Jay’s path would take a temporary departure from 603Y and the antique aviation world. “My father sold his Cessna 120 when I was in junior high, and I didn’t have a reason to go out to the airport anymore. After college, I ended up joining the Army, going to flight school, and flying UH-60 Black Hawks. That’s where my real aviation career picked up.” After leaving the Army in 2009, Jay achieved his private, instrument, and commercial certificates, and now flies helicopters for PHI Inc. Jay’s wife, Mary, is still on active duty with the Army, based in San Antonio. Jay and Mary still own a hangar on the airport and have strong family ties to Brodhead, so together with their daughter they make frequent trips back to the Midwest.
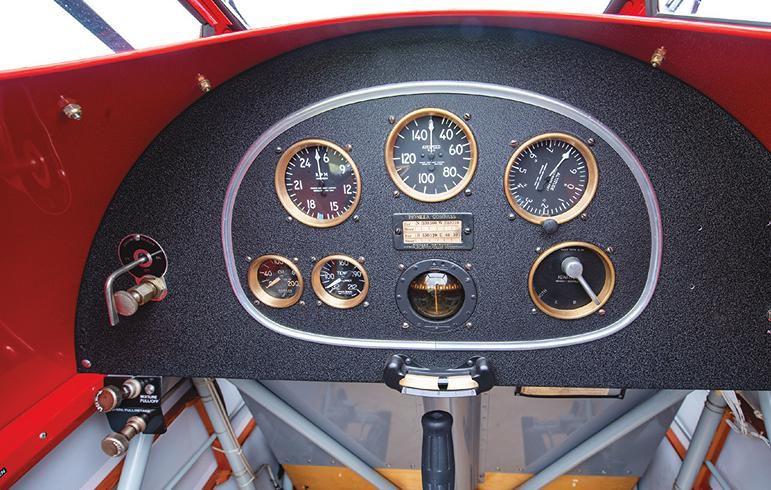

In the meantime, Don sold 603Y to locals Bill and Sue Knight in 1993. The Knights owned a successful manufacturing business in Brodhead, Knight Manufacturing, and
Bill was passionate about vintage aircraft, owning multiple airplanes and basing them all at C37.
Until 2007, the only major work done on the Waco had happened well before its relocation to the Midwest. The aircraft had nosed over in a landing accident, requiring a new center section and repairs on one wing, and the fabric had been replaced at some point, but the airplane had never been taken all the way down for a restoration. Under the expertise of Tom Brown of Hartford, Wisconsin, the aircraft was completely restored and returned to flight status in 2009. Unfortunately, Bill Knight passed away in 2016 from cancer. The RNF was briefly owned by Tom Brown, and then sold to Bill Knight’s close friend, another Brodhead local, Scott Bruns. In 2019, Bruns decided to sell the Waco and had a pretty good idea who the next owner should be.
“[Scott] called me before he even put it up for sale,” Jay recalled. “He said, ‘Hey, I know you love this airplane. I know it was part of your childhood. Would you be interested?’” Jay didn’t hesitate. “When I think of biplanes, I think of that Waco. I felt it was really important to keep that airplane at Brodhead, and it was just my turn to take care of it.”
Though Jay knew the airplane well, he wanted to know more about the ownership history pre-Brodhead. “I started thinking, ‘I wonder how many people have owned this airplane?’ I decided to pull the FAA Registry online. I was curious to see if maybe it had a tail number change or anything crazy.”
Records showed 20-plus owners, most of them on the East Coast before a move to California in the 1950s. On a whim, Jay did a quick Google search of previous owners’ names, starting with the very first: Charles Taliaferro (pronounced “Toliver”). As it turns out, Charles had evidently purchased the airplane new from the factory as a 21st birthday present for his son, Charles “Champe” (pronounced “Champy”) Taliaferro.
Upon further searches, Champe’s name kept popping up, revealing a long and diverse career in aviation. That included roles as an air mail pilot and barnstormer, then
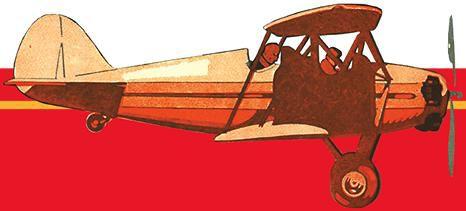
later flying with the Naval Air Transport Service during World War II, and finally retiring as the chief flight instructor for Pan Am. It was enough information to fill a book, and Jay quickly found there was in fact a book about the man titled A Reckless Grace, written in 2008 by Champe’s wife, Margaret Taliaferro.
Within A Reckless Grace, Jay discovered a short chapter detailing Champe’s adventures flying 603Y, along with a black-and-white photo of the aircraft in 1930. Topping off the incredible find was Jay’s observation in the foreword of the book, which was by a third-generation Charles Taliaferro at St. Olaf College, December 2007. Charles’s contact info was on the college’s website. Jay couldn’t believe his luck. “I thought, ‘What the heck? I’ll email the guy.’” Not a day later, the phone rang. Charles wanted to tell the story of his dad, Champe Taliaferro, legendary American pilot.
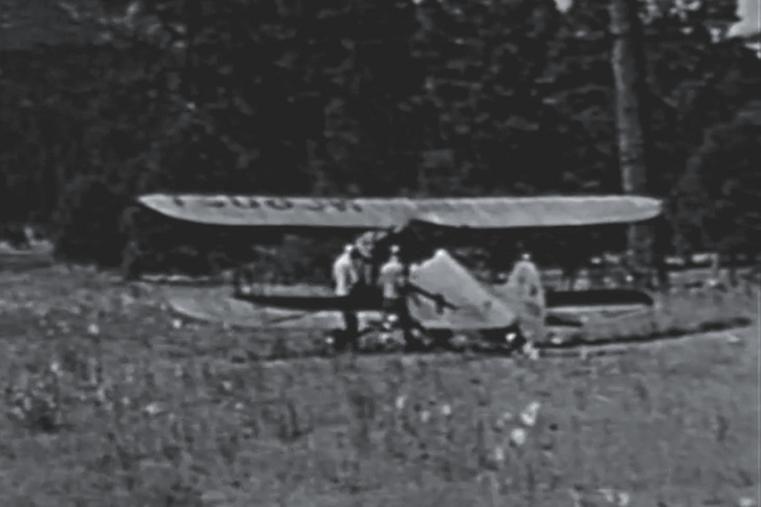
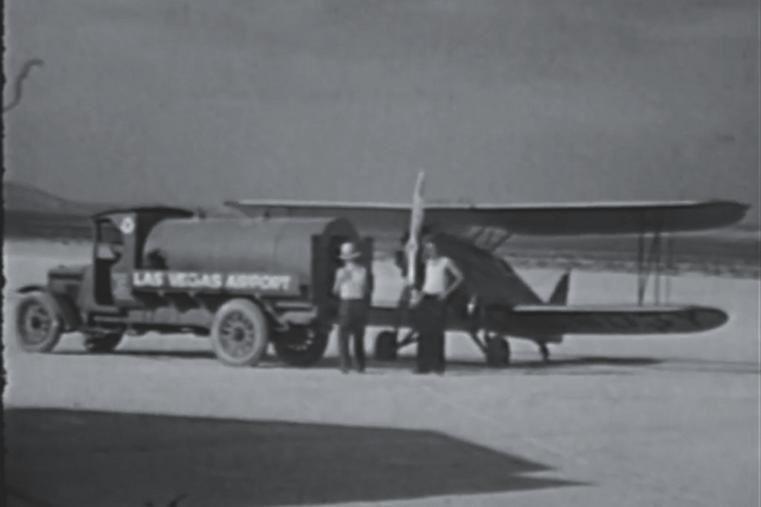
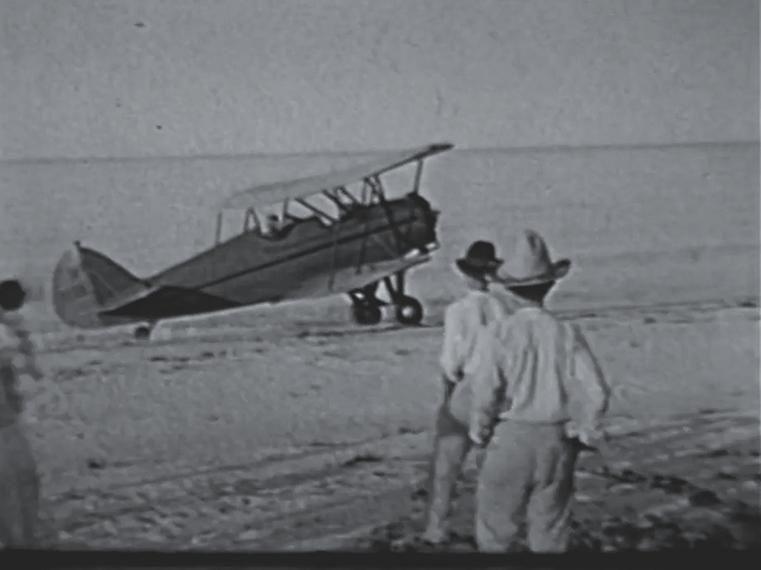
Jay and Pat Weeden interviewed Charles over a joint phone call. “Turns out, this guy really should be famous in aviation history,” Pat said. “Champe was a barnstormer and an aerobatic pilot. He was the USA’s youngest air mail pilot. He won stunt competitions. He was the lead training pilot for Pan Am airlines way back when. He flew ‘flying boats’ on trans-Atlantic trips!”
Before all that, though, came the little Waco RNF, 603Y. After taking ownership of the brandnew biplane in 1930, Champe grabbed a buddy and embarked on a cross-country flight. “[They] flew it from the East Coast all the way across the United States,” Jay said, shaking his head at logging all those hours in an open cockpit, with no fancy navigation tools or regular gas stops.
“South through Vegas, down into the Grand Canyon, all the way down into Mexico, then across into Cuba — where they were detained for a week, and the United States government had to get involved so that he and his friend could be released from Cuba! After that, they flew up into the Florida Keys, and up the East Coast back home.”
Hearing that story from Champe’s son would have been cool enough, but it went one step further. As it turned out, young Champe took a 16 mm film camera on his 1930 journey, and the Taliaferro family still had the footage. Needless to say, Jay couldn’t wait to see it. The family sent a digitized copy, and the guys loaded the footage

“with shaking hands.” In typical film reel fashion, the clips cut abruptly, flickering from a school function to some kind of family gathering.
Several minutes in, however, 603Y appeared, sleek and new, clearly showing the tail number that proved it was the very same RNF Jay now owns. The guys slowed the footage down to watch the next part: “There’s a shot where you can see the tail number, and we were so excited to see it that at first we didn’t realize that the plane is actually in midair, flying,” Pat said.
“The shot pans forward and the back seat where the pilot would be is empty because Champe is operating the camera — he literally climbed out midflight to film. Then the camera pans down. Champe is sitting out on the wing; you can see his feet dangling down below the leading edge. It’s like something in a movie,” Jay said, laughing. “Once you get over the shock, you realize, ‘Good god, they’re flying over the Grand Canyon.’ You look at the front seat, and there’s his buddy waving; he’s got the stick. You’re like, ‘What are these guys doing?’”

It certainly was a different era and hard to fully imagine what kind of guts it took. Would Jay and Pat, modern-day buddies, do the same as Champe and his pal did 90 years ago? “I don’t know, man,” Jay said. “It’s crazy — to just take off on the East Coast and fly a plane like that all the way
across the country, landing in farmers’ fields and giving a ride to get gas. Who says, ‘Hey, let’s just poke into Mexico and fly the Yucatan, hop on over the Gulf into Cuba’? That’s unbelievable.” As unbelievable as it sounds, the footage is all there to prove it, along with the family stories.
Speaking of the family, the existing Taliaferro family, including Champe’s children Charles and Barclay and several other relatives, had heard stories about the Waco but had no idea it still existed, much less that it was still airworthy. Champe’s daughter Barclay Marcell (Taliaferro) lives just two hours from Brodhead Airport, in the suburbs of Chicago. At the start of the 2022 flying season, her family made the trip to C37 to see the RNF.
“Barclay and her husband, and their kids and granddaughters, the whole family, ended up coming to the Kelch Aviation Museum in May of 2022,” Jay said. “It was a perfect spring day when the Taliaferro family was reunited with the little red Waco RNF that their patriarch had owned nearly 100 years ago. I gave some rides, we took some pictures, and it was just a really, really special experience.”
Jay would be the first to say he wouldn’t be able to operate the aircraft without the C37 community. “The folks around Brodhead [Airport] steered me in the right direction in terms of skills, care, maintenance, etc.,” Jay said, adding, “I was a little apprehensive about purchasing the airplane because I feel like I didn’t earn my wings. I just wanted to capture the history and keep the airplane in Brodhead — which is the best place ever to own and operate a plane like this!”
That community “brain trust” was also invaluable to Jay when it came time to actually fly the RNF. “Chris Price was the one who taught me how to fly biplanes — he did my tailwheel endorsement, too — so I went and talked to him, and he was so jazzed about it. But that’s the way Chris is!”
Chris is the living embodiment of a 1920s barnstormer, having done his own coast-to-coast flight at age 19, and has been flying antiques out of Brodhead for decades. Anyone who knows Chris is well aware of how fired up he gets about this kind of stuff. “Chris worked with me on that biplane, showed me the ins and outs of it. The rest is up to me, right? I always fly in the evenings, when it’s not too crazy windy. But that’s mainly just because I don’t want to screw that plane up. I want to keep it preserved.”
Jay explains that when it comes to flying the RNF, the escape from his normal flying is what he enjoys the most. “I spend so much of my flight time in complex glass cockpits with autopilots and so much technology,” he said. In contrast, the Waco is “just grassroots, basic stick and rudder, feel the aircraft, manage energy because it’s not like you’ve got a ton of power.”
That’s what Jay, and so many vintage aircraft pilots, love about it: the simplicity. “You can go out on a nice evening and just putter around the southern Wisconsin skies at low altitude, just enjoying the experience of an open-cockpit biplane. That probably sounds too simplistic, but that’s what I love about it.
“It’s part of history. This is exactly how it felt back in 1930 when they made this aircraft,” he said. There’s nothing quite like how authentic the experience of flying an antique biplane feels. “What else can you do these days? Even if you take an old-fashioned car — well, the roads are totally different now, much better shape. Don’t get me wrong, antique cars are great to drive. But what other antique machine can
We carry hundreds of quality FAA-PMA approved and original Cessna parts specifically for the Cessna 120, 140, 140A,and170series.We’vealsobeenaddingnewitemsfor the Cessna 150, 172, 180, 182, and 185, along with distributor parts such as tires, windshields, tailwheels, navigation lights, and much more.

Call us or visit our website to request your free Univair catalog. Foreign orders pay postage.

you go use and have it be exactly like it was intended? [It’s] still fabric. It’s still wood. It’s the same engine, same air, same skies. So you might as well put on the goggles and the leather helmet and completely relive the vintage experience.”
On top of all that simplicity and nostalgia, Jay’s love for this airplane is cemented in the history tied to it. “You buy a more modern airplane, and no one looks at the registration — who’s flown it or anything like that. But when you get into antiques, history really becomes a big deal, especially something this old. I really love telling the story about Champe. The Waco isn’t just a plane that I wrote a check for and now I own. … I know about the first person who owned this airplane. There’s a book written about this guy! He had a phenomenal aviation career his entire life, and the plane is right here, today.”
Though Jay owns a hangar at Brodhead, 603Y is kept in the Kelch Aviation Museum, where visitors can stroll through, admire the airplane, and learn some history. In another full-circle coincidence, the museum’s main hangar and the Waco’s current home is named in honor of Bill and Sue Knight, whose foundation largely funded the construction of the state-of-the-art museum hangar.
Jay’s 603Y is an important part of the museum’s display. According to Pat Weeden, the museum’s executive director, “A lot of people, especially locals, walk in here and say, ‘Oh, I’ve seen that airplane; that’s been around here forever!’ And now we can tell the story about its early days with Champe and just illustrate it even more.”
As a history expert who focuses on stories and bringing history to life, discovering the Waco’s illustrious past delighted Ami Eckard-Lee, the museum’s creative director. “We thought we knew the whole story, you know? And then out of the blue comes this incredible adventure and family story and films. For such a familiar airplane to suddenly have this whole chapter revealed to us … well, every airplane in the museum’s collection has a unique story, but this one — there’s video footage, and we can literally go talk to the guy’s kids. You couldn’t get more tangible than that!”
If anyone reading this article would like to see 603Y in person, it is on display year-round at the Kelch Aviation Museum, and it can be seen in flight during the summer months in the skies over Brodhead. A visit to the Kelch museum can be a perfect stop, whether you are flying or driving, and chances are, if it’s not too windy, maybe you’ll see 603Y soaring through the skies, exactly like it did 93 years ago.



 BY BUDD DAVISSON
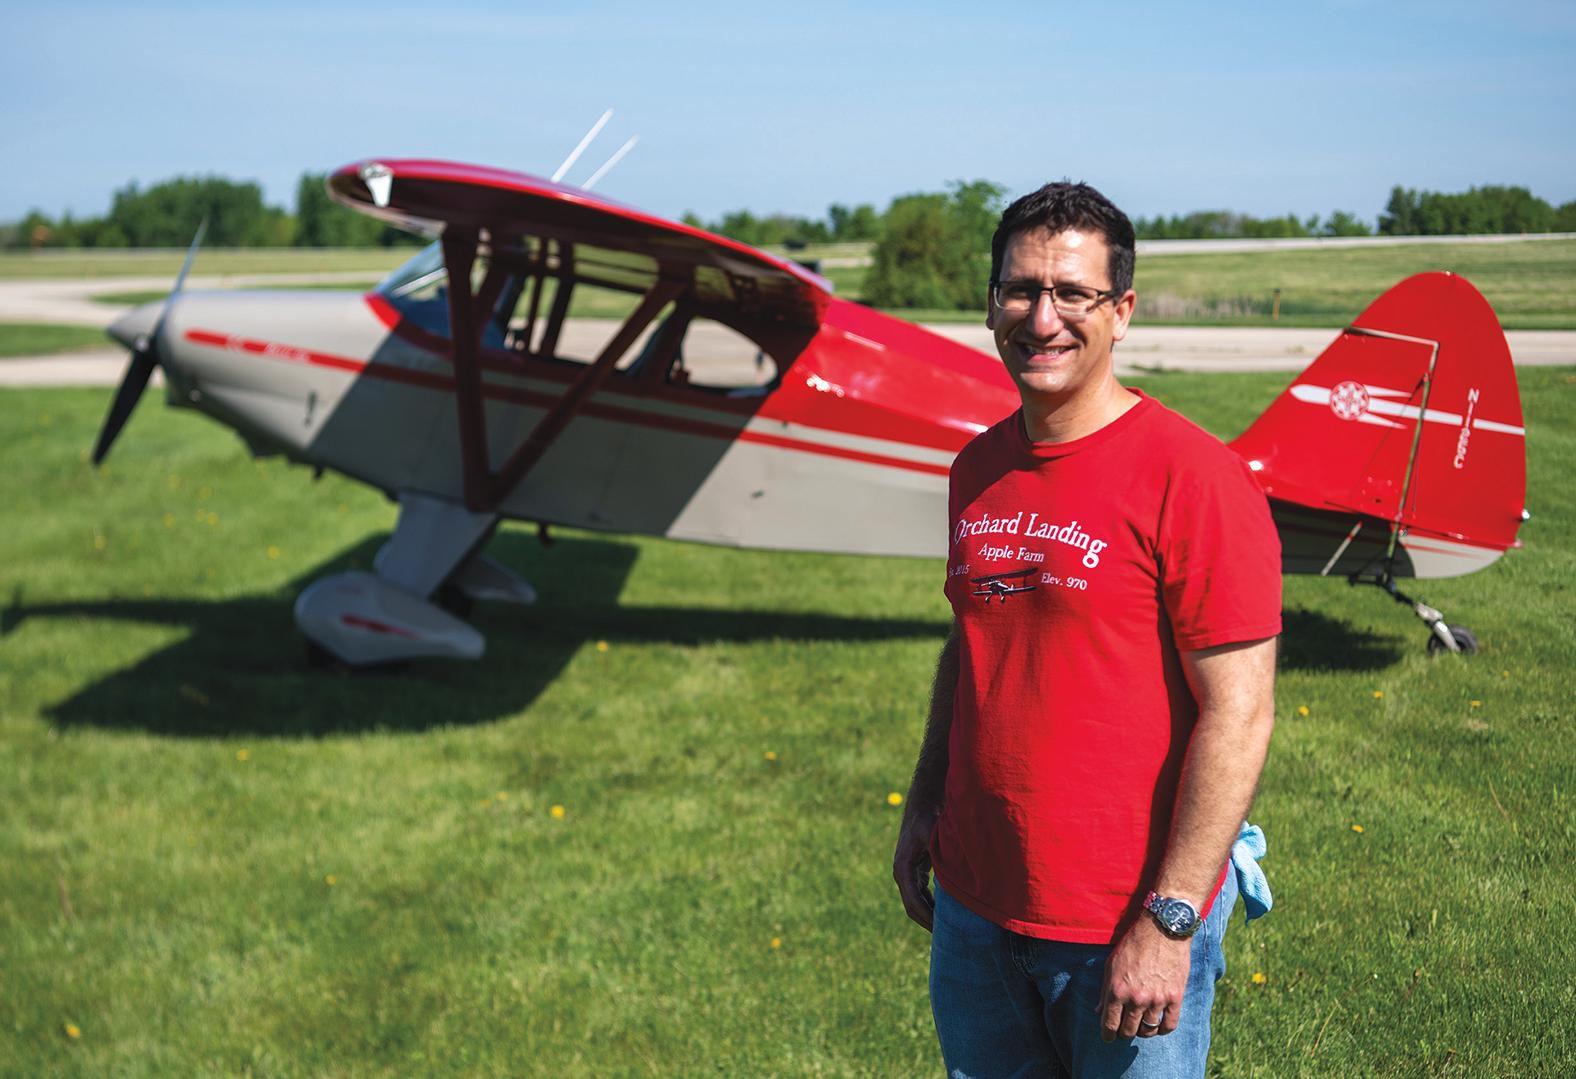
“IT WASN’T SO MUCH that the airplane became central to our family life, as it was the way it hooked me on diving deeper into my aeronautical education,” said Mike Crosta of his 1953 PA-20 Pacer. “I found myself reading aviation mechanic handbooks and AC 43.13 on the flight deck during dead parts of long flights. Even though this was a very simple airplane, and even though I’m fairly mechanically oriented, college coursework and pilot training doesn’t properly prepare you for airplane ownership. I knew little or nothing that applied. I didn’t even know what an Adel clamp was or how wiring was done. I came to view the airplane as an aerial classroom through which I could learn ‘airplane’ rather than just ‘flying.’ Learning almost became an obsession, and I sought out people who could help me learn in the process of rehabilitating my little airplane.”
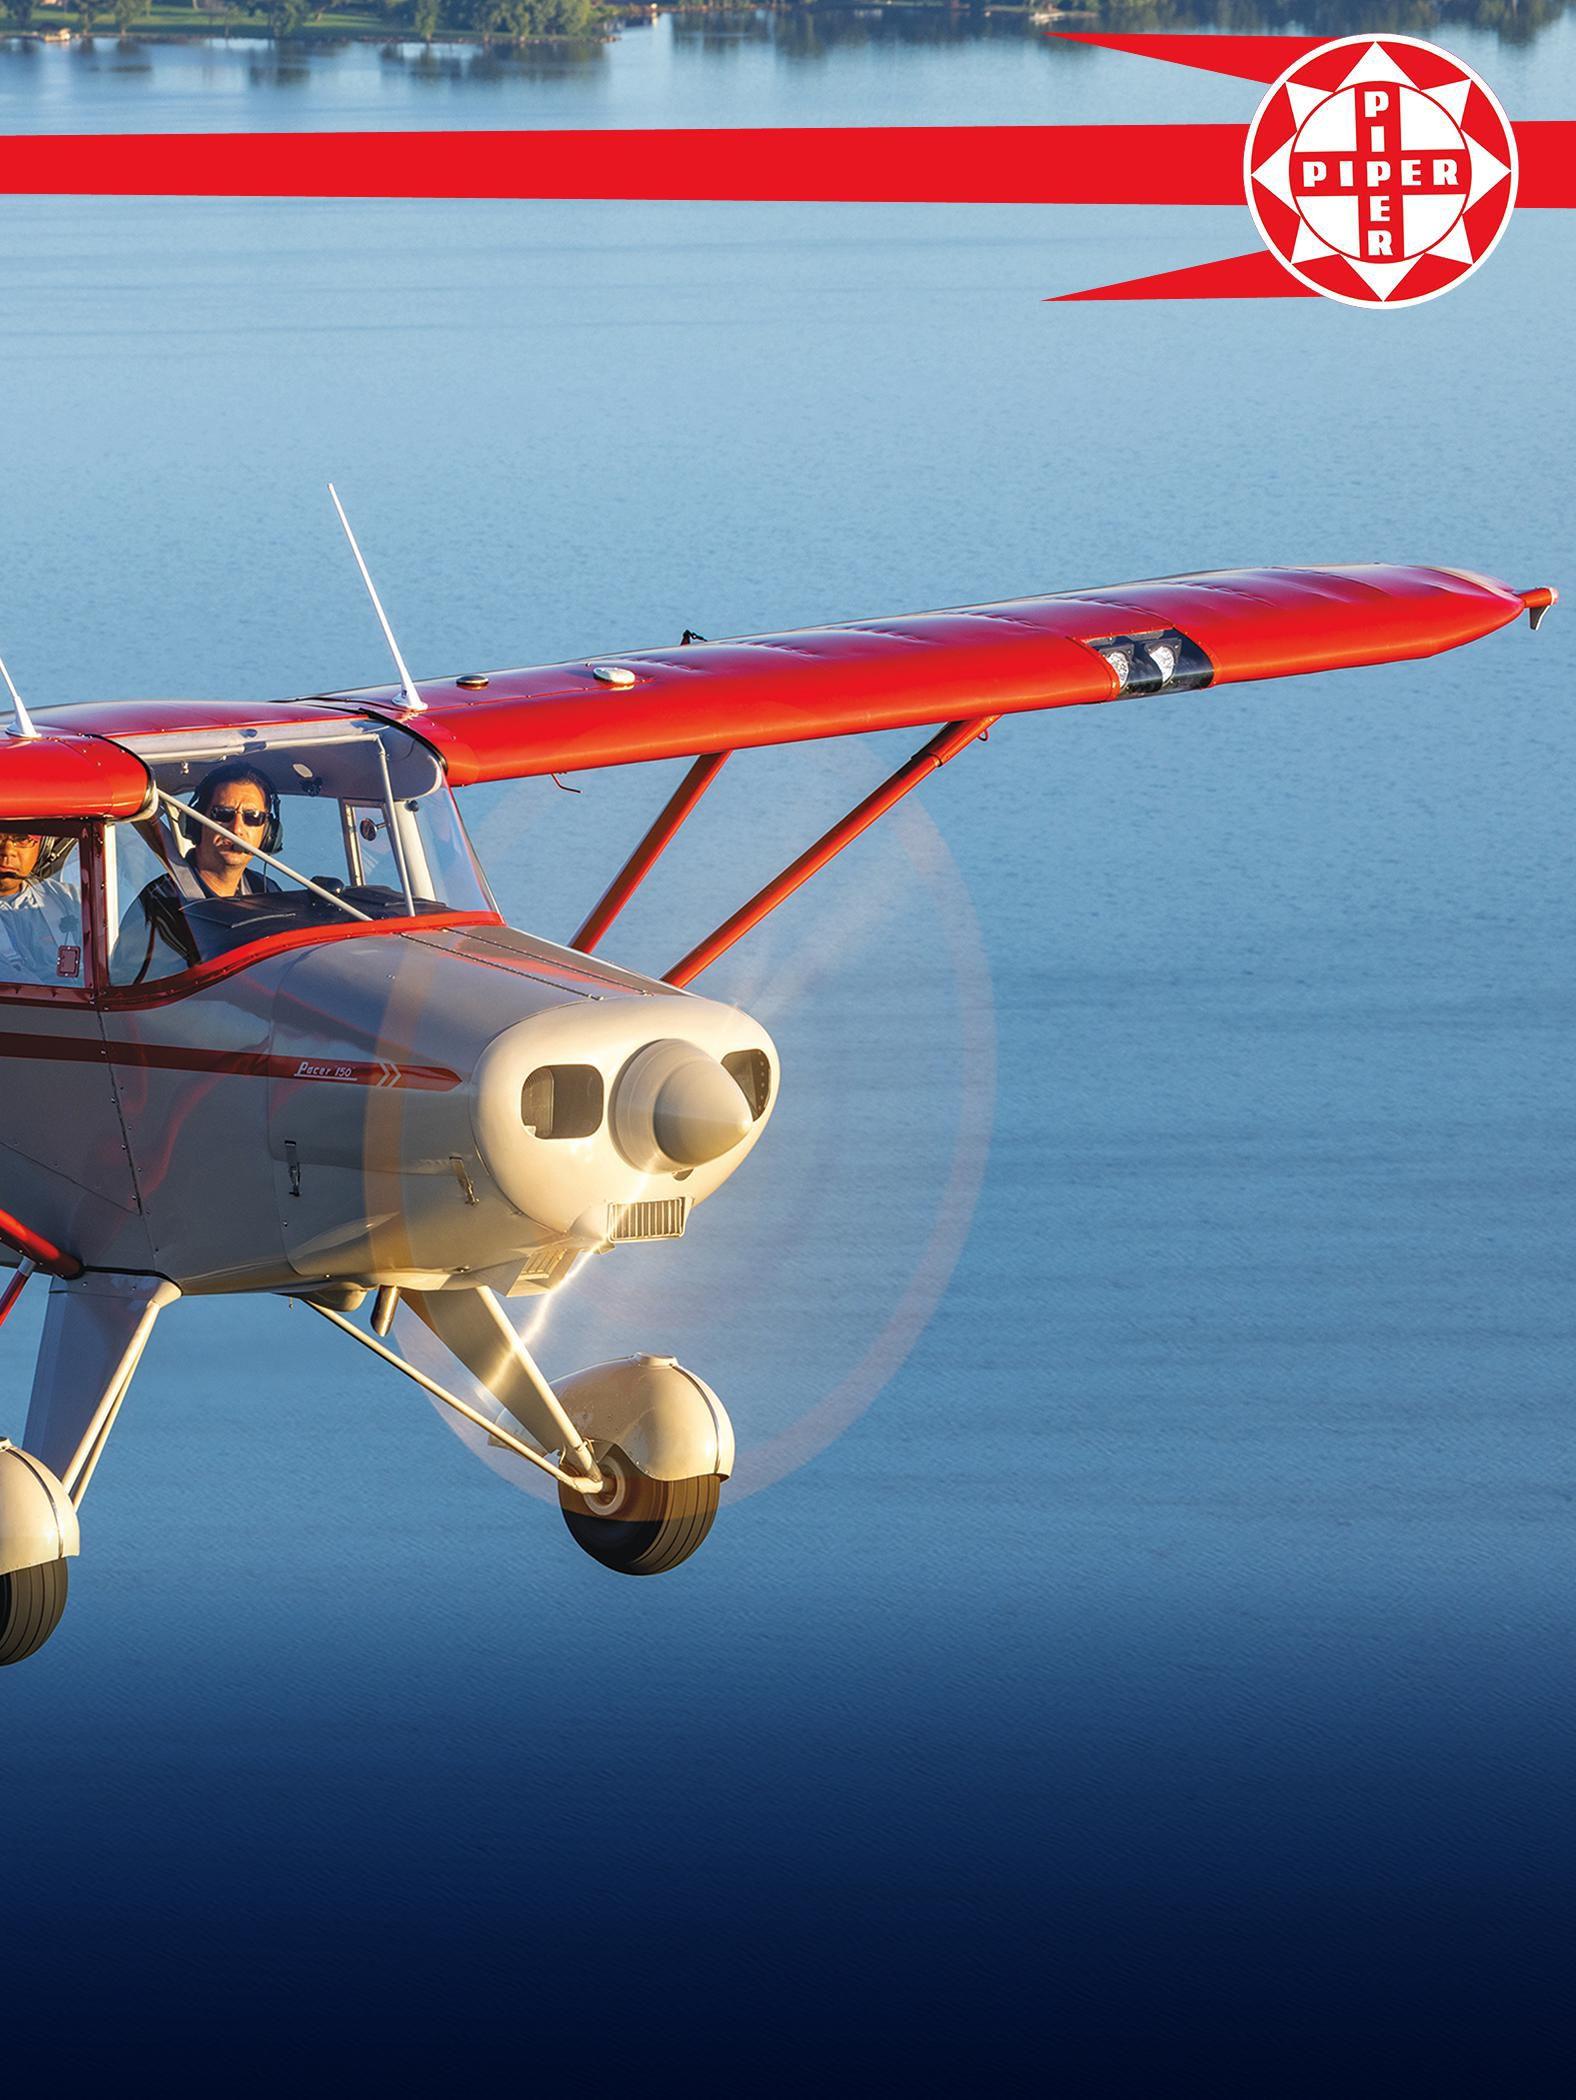
Mike, EAA 725828, VAA 726459, calls Sugar Grove, Illinois, home and credits an uncle who was a devoted RC model builder and flyer with getting him into aviation.
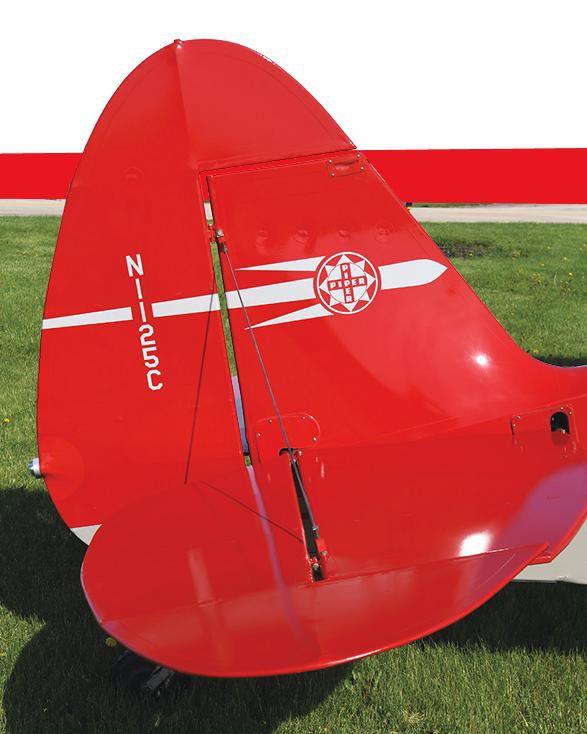
“As a kid, we’d build and fly RC, and he would take me to air shows,” Mike said. “These really piqued my interest in aviation, and shortly after high school I started flight training at Robert Miller airport in Toms River, New Jersey, and got my PPL.”
Mike started working in the information technology field and taking college courses at night.
“I was going part time here and there but then decided I needed to speed up getting a degree if I was going to get ahead,” he said. “I also wanted to change careers and become a professional pilot. So, in an impeccable piece of timing, I decided to move to Arizona and go to school just before 9/11, which pretty much shut everything down. I was living with my brother’s family and figured this was an excellent time to go to college, since everything else was dead in the water. I wound up going to University of North
Dakota’s satellite campus on Williams Gateway Airport in Phoenix, then finished my degree at the main campus in Grand Forks, North Dakota. I received all my ratings and winded my way through the usual regional airline jobs, then got a job at Southwest in 2016.”
After marrying and starting a family, Mike and his wife decided they needed more space and went shopping for houses.
“I kept complaining about the prices, and my wife kept pestering me to get one of the new houses they were building next to Aurora airport a little to the west,” he said. “She knew I was getting crazy about general aviation airplanes and thought that would help me. I’ve learned I’m better off if I listen to my wife, and this is where that lesson started. We moved next to the airport and couldn’t be happier.”
Next up was buying an airplane.
“One of my good friends from my EAA Air Academy instructor days, Mario Rosales, had purchased a
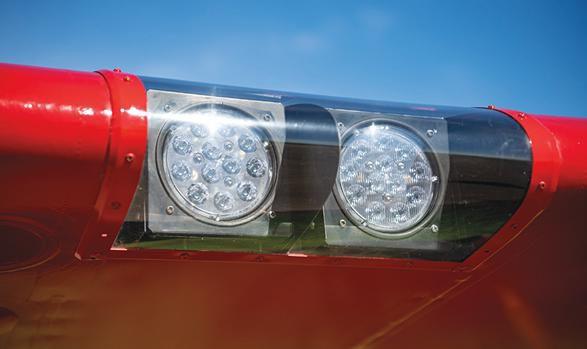


Cessna 170B and is the guilty party for my reentry into the general aviation field,” Mike said. “I decided to purchase my own aircraft and I had two little girls, so it had to be an affordable four-place and it had to be something that was easy to work on. I had pretty much narrowed it down to being a 170 or a Pacer, mostly because it had to be a more or less modern taildragger. I was poking through Barnstormers, and there was this very austere, one-line ad that said, ‘For sale: 1953 Piper Pacer.’ That was it! Said nothing about engine time or anything. Almost a questionable ad, but the price was right, so I called him and set up a date to go see it. If there was a downside to the airplane it was that it was 250 miles north, near the Canadian border, and it was January and minus 20 degrees out. Since I was new to aircraft ownership, I asked — pestered is more accurate — our local EAA tech advisor and A&P/IA, Alan Shackleton, to come with me. We both nearly froze to death looking it over!”

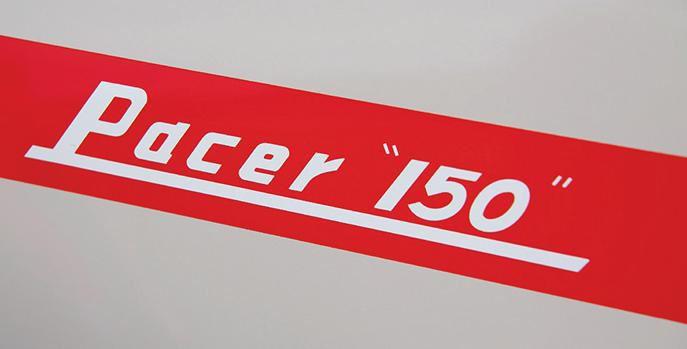
Mike said the airplane turned out to be an interesting one.
“It had been fairly recently re-covered; however, other than that, it hadn’t been touched,” he said. “Every single thing inside of the fabric, which was actually quite good, was exactly as it came
out of the factory. Cotton wiring, terribly tired seats, etc. It only had a total of 1,850 hours on the airframe and 785 [hours] since major overhaul on the 150-hp O-320 that had replaced the 135-hp O-290 sometime in the very early ’60s. I don’t know why it was replaced, but I’m suspecting someone just wanted more power. The engine ran fine and everything in the airplane worked, but every single part of the airplane was made and installed at the same time Eisenhower became president!
“The logs, which were quite complete, were also interesting because it showed that this 65-year-old airplane had gone through only two or three owners, one of them for a very short time,” Mike said. “The longest owner was in southern Arizona, which probably helped preserve it. When I started showing the airplane on Instagram (@Pacerpilot53), I got a letter from that owner’s son. He was really glad to see the airplane was still around, and he shared fond memories of flying with his dad in it. The next owner was a
family friend of theirs, and [he] re-covered the aircraft, bringing it back to the original Piper paint scheme. My understanding is that he hurt his hip and had trouble making the stretch into the cockpit so didn’t fly it very much at all.”
After the aircraft received a fresh annual and a thorough cleaning, Mike said he flew it for about a year before deciding to restore it.
“The seats were broken down and terribly uncomfortable, and I was also uncomfortable knowing that every wire, every hydraulic line, everything about every system in the airplane was really old,” he said. “I wasn’t comfortable taking my family for extended trips. Stuff that old is bound to fail at some point. It only made sense that I not expose my family to that kind of risk, especially since they are why
I bought the airplane in the first place. So, I made a major decision and grounded the airplane to continue the restoration process.
“I should probably mention,” Mike said, “I’m proud of being of Italian working-class descent, which is another way of saying that working with our hands is central to my families’ lifestyle. My entire family were tradesmen. My dad was an upholsterer, and both of my grandparents were in the trades as well, one a plumber, the other a carpenter. We’re used to building and fixing stuff. My aircraft system training comes from the pilot side of the house. I knew I would need to take a dive into the mechanics pool to tackle this project.”
Mike said he was incredibly lucky to find Eric Dienst, EAA 454335, an A&P/IA mechanic located in DeKalb, which is near Sugar Grove.

“He’s an incredibly patient, dedicated A&P,” Mike said. “He’s the yin to my yang. Or maybe the Abbott to my Costello. We haven’t worked that part out yet. However, from an aviation perspective, we grew up exact opposites that perfectly complement each other. When it comes to aircraft maintenance, I knew nothing. He knew everything. What’s not to like about that? We’re about the same age, kids are about the same age, so what started out with him watching over my shoulder became a close friendship. That kind of thing seems to happen around airplanes a lot.
“Eric approached me and this airplane in an interesting manner,” Mike said. “Knowing my urge to learn how to do everything the airplane needed, he used the same sort of teaching/learning technique I’d seen from my dad. He’d explain the basics that needed to be done, then he’d stand back and let me figure things out for myself and correct my own mistakes. At the same time, he’d stop me just short of making an expensive mistake, and he’d sort of force me to come to him with a solution. He said, ‘Don’t come to me until you’re stuck.’ This worked really well with me, as I’m very independent and enjoy working out problems on my own. It’s a great guided self-education.”
Another of Mike’s friends, Mike Bargman, EAA 618334, was also an integral part of the equation.
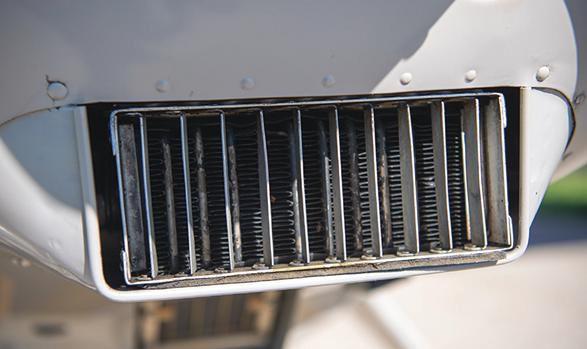

“When you tackle these projects, you need someone to bounce ideas off of, and Mike [Bargman] is a venerable Ph.D. in auditory therapy,” Mike said. “He was a much-needed lifeline for many, many reasons, up to and including a solid alternative to those I’mabout-to-throw-a -wrench-against-the-wall moments.
“What none of us knew was that we were just starting to tear into the airplane when words like ‘COVID’ and ‘restrictions’ were being heard,” he added. “We had the entire inside of the airplane stripped out in late February, and everything went nuts in March. I’d go into Midway airport thinking I’d be flying, and the entire terminal would be totally vacant. It was like being in an apocalypse movie, and I was the only survivor. So I was sent home, which,
from my Pacer’s point of view, was a bonus. I knew there was a possibility I’d lose my job, but I had time I hadn’t planned on, and since my kids were sent home as well, I was able to have both of my girls, who were 5 and 7 years old, work on the plane with me. They were there to hand me stuff, and it was a ton of fun. The airplane had become the central point of our lives. Considering how negative everything was at that time, it was good to have something positive to focus on.”
Mike always intended to use the airplane for family transportation, including trips to west of the Rockies, so, even though he was restoring the airplane, he didn’t plan to make it totally accurate to 1953.
“I’d build it as I thought Piper would build it today, using what we know now and make it as safe and as useful as possible,” he said. “Plus, I fly 50 or 60 Young Eagles a year. So I’m carrying other people’s children, which is a big responsibility, and the Pacer had to be up to that task.
“I personally went through the entire airplane, replacing every wire, pulley, questionable-looking cable, etc.,” he said. “We CNC’d a new panel over at Mike Bargman’s place, but, even though I stayed with the generator rather than going to an alternator, I installed a Zeftronics regulator and a gel-cell battery. Since all of the lighting was upgraded to LED, the current draw is less than 10 amps total with everything on. When equipping the panel, I made believe I was a 1953 Piper designer who, in some sort of “Back to the Future” event, was given a copy of a 2023 avionics catalog and
a new thing called a ‘credit card.’ I guess you might consider the panel to be a ‘resto-mod’ — bringing 1953 into the new millennium. But then, this airplane was built to be used, not looked at.”
According to Mike the engine is running really well and doesn’t show its age.
“I pretty much disassembled everything ahead of the firewall to be cleaned and painted,” he said. “This, even though I knew I’m going to be changing the engine soon. I picked up a 160-hp O-320 that was in an accident, and Eric and I are going to rebuild it. Engine parts, especially serviceable crankshafts and cams, are really hard to find, and this engine needs both. However, I’m really looking forward to doing the rebuild. It’ll be like my last semester in airplane college, where I learn all the really critical stuff.”
Mike said some of the more interesting aspects of the rebuild were the wheels and brakes.
“The airplane originally had expander tube brakes and 8.00-by-4 wheels and tires, just like a J-3 Cub,” he said. “The tires are a little fat, but I think that’s just part of the Pacer’s original charm. I’ve thought about upgrading both tires and brakes,
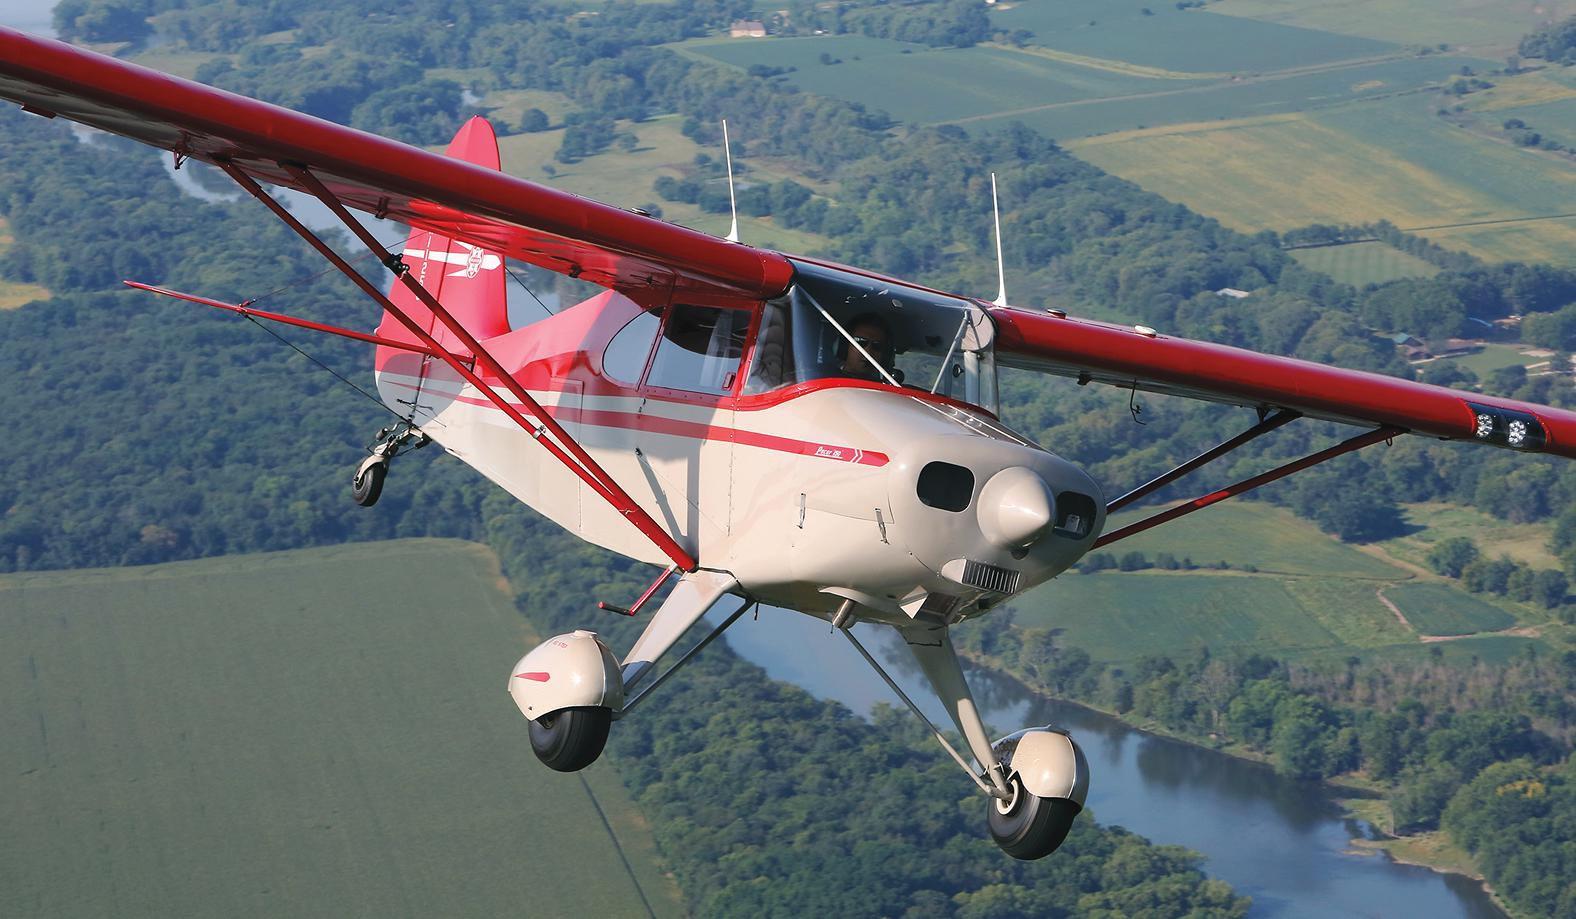
which just about everyone does, but the wheelpants are the original factory aluminum ones, and they are flawless. I really don’t want to cut them to install Clevelands. And I’ve been cautioned about putting too much brake on the airplane, because it’s easy to put it on its nose with brakes. The expander tube brakes aren’t very strong, but they’re plenty for the airplane, so rather than fixing what’s not broken, I’m going out of my way to make sure the old expander tube system keeps working.
“The expander tube concept essentially has fluid being forced into a 4-inch inner tube, which expands and forces the brake pad segments that surround it against the drums,” he said. “It’s a little crude but definitely works. However, the rubber expander tubes are nearly impossible to find, and no one appears to have any interest in making new ones. Ditto the brake pads. So, I absolutely haunt swap meets at every fly-in and, so far, have managed to collect enough parts that that I have six working extra sets of brakes, which is unheard of. However, I’m still searching for more. And, don’t bother asking — none of them are for sale!”
When it came to the interior, Mike leaned into his heritage. “Dad was an upholsterer and completed many classic car restorations,” he said. “I’d help him as a kid, so I at least knew the basics. I found an industrial-grade sewing machine and started cutting and sewing. Fortunately, I could call Dad and ask something like, ‘Hey, I forgot how to make a French seam,’ and he’d remind me.
“Before doing any upholstery or wiring work, while the airplane was still totally gutted inside, I masked off the entire outside of the airplane and painted the inside the same Polar Gray as on the outside,” he said. “At least I tried to. It turns out Ranthane and Aerothane both have Polar Gray in their catalog, but they’re slightly different colors. Who knew?”
Now that the restoration is complete, Mike said they’re flying the airplane regularly, but he’s looking forward to finishing up the new engine, which is 160 hp versus 150 hp, because he’s been told that small increase in power will be very noticeable.
AeroEducate is a totally free resource now open for all youths, parents, educators, and youth leaders to register and explore the wide world of aviation and aerospace.

Start your journey today!
AeroEducate.org
Our partners:

“Right now, I flight plan 132 mph at 9 gph,” he said. “The airplane has a useful load of right at 850 pounds and holds 36 gallons, or about 216 pounds, of fuel, so I have just under 634 pounds for my family (two girls, wife, etc.). Since my family has been blessed with the short gene, I currently have more than enough space and useful load to do what I’m likely to want to do. As the girls age, I’m certainly going to creep up on max gross weight, which is why having the 160 hp will be a welcome addition. If I’m going to travel the West with those I love, I’m going to learn what I need to know to protect them. In the meantime, this little, short-wing fun machine has been a terrifically good investment in both time and money. This has turned out to be such a big bang for the buck that I can’t imagine any airplane doing what we want to do better for the same investment. Better yet, I’m much more rounded as an aviator, and that kind of knowledge is priceless.”

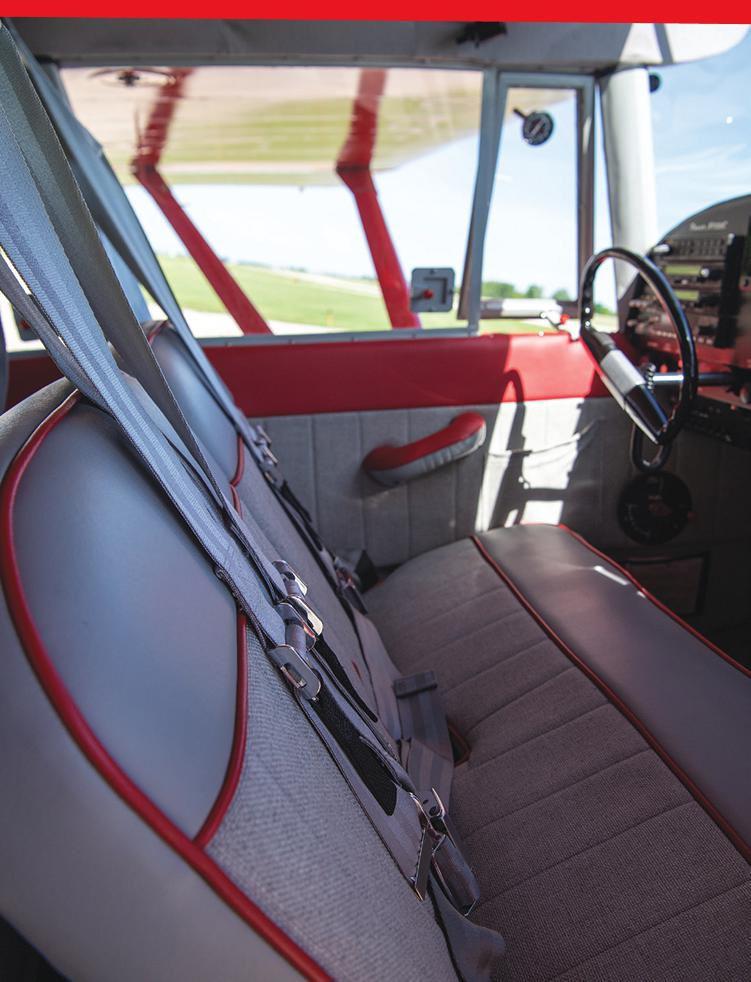
It has been said that learning should always be an integral part of life. However, seldom is that learning experience as obvious and as useful as the Pacer college Mike attended. Education is seldom that well rounded. Or that much fun!
Gather up your friends and family, pack your blanket or lawn chairs, and settle in to an outdoor movie experience that is one-of-a-kind! Relax and unwind while watching blockbuster and classic aviation movies on a five-story high screen.


SATURDAY JULY 22
Top Gun (8:30 p.m.)
JULY 23 Top Gun: Maverick (8:30 p.m.)
Tail Spin (8:30 p.m.)
TUESDAY JULY 25
The Great Waldo Pepper (8:30 p.m.)
WEDNESDAY JULY 26 Amelia (8:30 p.m.)
THURSDAY JULY 27 Flight of the Intruder (8:30 p.m.)

FRIDAY JULY 28 Devotion (8:15 p.m.)
SATURDAY JULY 29
Those Magnificent Men in Their Flying Machines (8:30 p.m.)
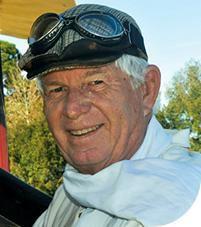
I SENT OUT EMAILS to various Travel Air Restorers Association (TARA) members asking for input into what they felt were critical inspection items. Thus far I have received three responses. I am looking for “common threads” that may run through the lists. My task was to compile a list of 10 critical items, publish that list in TARA’s newsletter, and then add to the list as other concerns appear. These additional concerns can be added at a later date, but I want to get things going. We will only be helping ourselves by getting information like this out to members now. By publishing these critical inspection items and proactively addressing them during maintenance, there should be little or no need for future airworthiness directives (AD) notes on these old airplanes. In other words, the Federal Aviation Administration (FAA) is allowing us to “police” our own airplanes for critical airworthiness issues. I think that is much better than facing possible future AD notes. While this list is specific to the Travel Air, it can serve as a “brain teaser” for you as you create your own critical inspection item list for your favorite airplane. So let’s get with the program.
The old Civil Aeronautics Administration (CAA) airworthiness maintenance bulletins were the first attempt to warn owners of potential hazardous problems with their aircraft. These bulletins apparently began in 1938. Today they are airworthiness directives, or AD notes (FAR Part 39).
I will rely on some fine work forwarded to me by Phil Wyels and will duplicate it here in this column. For further information, contact the Travel Air Restorers Association.
The following is quoted from Phil Wyels.
There are no airworthiness directives listed in FAR Part 39 applicable to the Travel
Air or Curtiss Wright Travel Air. There were the equivalent of today’s AD notes issued by the CAA. These were titled airworthiness maintenance bulletins. The three of which the writer has a copy are:
Bulletin 8 dated 4-11-39. Subject: Wing to center section spar fitting; early model 2000, 3000, and 4000 with single vertical bolt.
Bulletin 30 dated 7-13-40. Subject: Axle inspection and reinforcement; B series with outrigger landing gear.
Bulletin 51 dated 6-10-41. Subject: Rear safety belt attachment; applies to all Travel Air aircraft.
The CAA also issued a document titled “Changes in Aircraft Specification,” which in later issues were titled “Aircraft Maintenance Inspection Notes for CurtissWright Aircraft.” The latest copy the writer has is No A-1231 dated July 7, 1941. The introduction states, “Supplements Aircraft Specifications for all models listed below. Inspectors must report compliance in accordance with the current Certification and Inspection Division instructions covering special inspection procedures.” Thirty-three Travel Air and Curtiss-Wright Travel Air models, each certificated under a different ATC or Group 2 Approval, are listed. The writer is of the opinion that these should be treated the same as a recurring AD.
Periodic (Annual) Inspection Required for the Following Notes:
SPECIAL NOTE 2: November 5, 1930. Open fabric under fuselage or remove floorboard and check for failure of dual control column socket.
SPECIAL NOTE 9: February 18, 1938. On airplanes equipped with Bendix 30-by-5 inch wheels, determine that the hub cap bolt extends through outboard wheel adapter and axle proper; or in case axle tube is short and hub cap bolt goes through wheel adapter only, make sure that the adapter is welded to the axle proper around the entire circumference instead of by only a few spot welds, as found in the field.
SPECIAL NOTE 10: October 20, 1938. Inspect U-shaped center section diagonal wire fitting at upper front spar for cracks at the base of the flange. Faulty fittings must be replaced and defects reported on the usual form.
SPECIAL NOTE 11: October 20, 1938, revised March 6, 1939, and June 15, 1940. Ascertain that inspection has been made and entry has been made in logbook in accordance with Airworthiness Maintenance Bulletin No. 8. (Model D-4-D added September 10, 1940.)
• Inspect the stabilizer connecting tube forward through the bolt attachment for off-center location and/or elongation of the holes in both the stabilizer leading edge tube and the internal cross tube. Inspect the bolt for wear.
• Inspect rudder and elevator cables in the fuselage aft of pilot’s seat for chafing on each of the bulkhead brace wires. If the tailskid has
been replaced by a tail wheel, check the wires for chafing against the tail wheel and support structure.
• The early 30-by-5 wheels used brass bushings instead of bearings between hub and axle. Check these wheels with the weight removed for side play wobble.
• Check the stabilizer adjustment lever for positive seating of the pin in the quadrant slot when plunger is released. This check should be performed under simulated air loads on stabilizer.
SPECIAL NOTE 12: January 7, 1939.
Ascertain that the inspection and safetying of the shock absorbers has been accomplished in accordance with Maintenance Bulletin No. 4. A copy of this bulletin has been forwarded to all owners and inspectors.
SPECIAL NOTE 13: March 23, 1939. Inspect the aileron hinge bracket on the wing for cracks in the vicinity of hinge pin lugs. The ailerons should be removed to facilitate

EAA¨ turned 70 this year!
We’re raising a glass to celebrate with an official commemorative beer. It will be available in 7 different, highly-collectible designs, each featuring a key piece of EAA and our 70-year history.
this inspection. In case defects are found, brackets must be replaced with stiffer ones, preferably made from 0.065-inch thick X4130 steel.
SPECIAL NOTE 17: July 31, 1940. Ascertain that the shock absorbers, piston head, and packing gland nut of the cylinder are safetied in a positive manner. In this connection, Airworthiness Maintenance Bulletin No. 4 should be considered as also applying to the Model 16-E.
SPECIAL NOTE 18: July 31, 1940. Ascertain that the logbook carries a record of inspection or rework of the landing gear axle in accordance with Airworthiness Maintenance Bulletin No. 30.
SPECIAL NOTE 19: September 10, 1940. Inspect rear stabilizer support fitting for cracks in the weld where streamline tube joins fuselage longeron. If defects are found, repair and reinforce by welding finger straps (0.065 inch X4130) on both sides of fitting, with fingers extending along streamline tube and fuselage longerons.
SPECIAL NOTE 20: November 22, 1940. On airplanes with detachable engine mounts, inspect the engine mount members for cracks in the vicinity of the attachment fitting to the fuselage. In case defects are found, the entire end fitting should be replaced.
SPECIAL NOTE 21: February 3, 1941. Inspect the stabilizer front spar for cracks in the vicinity of the root ribs. If defects are found, repair and reinforce with outside sleeve (1-1/4 by 0.049 inch X4130).
SPECIAL NOTE 22: May 2, 1941. Ascertain that portions of the exhaust collector rings inside of the cowling are shielded from the engine accessories compartment by means of baffles extending from the engine ring to the inside periphery of the cowling. Such baffles were originally installed by the manufacturer, and their removal is prohibited. The original engine mount ring is provided with drilled holes for the insertion of such baffles, and the engine cowling is provided with exits for the cooling air, which impinges against the required baffles.
SPECIAL NOTE 23: July 7, 1941. Ascertain that the rear safety belt installation is revised in accordance with Airworthiness Maintenance Bulletin No. 51.
NOTE: If anyone has a copy of Airworthiness Maintenance Bulletin No. 4 or any others not listed, the writer would appreciate a copy to add to TARA files.
From Phil Wyels comes the following list of critical inspection items:
Items to Check When Doing an Annual Inspection on Your Travel Air Aircraft:
• The steel tubes at the aft end of a tailwheel aircraft can corrode internally. Check the lower portion of the tail post, both longerons in the last bay, and the elevator torque tube. These have been areas where moisture accumulates. Punch test the tube at 1-inch intervals using a Maule fabric tester or an ice pick.
• If your Travel Air has pulleys installed in a control system, inspect the pulleys for wear in the groove and the cable for broken strands where it rides on the pulley. (AN type pulleys presently may not be used in a control system where the bend in control cable is more than 30 degrees. Prior to 1941, a 2-7/8-inch pulley could be used.)
• If your Travel Air still has return springs attached to the rudder pedals, they should be inspected for grooving at the attach points and for rust corrosion.
And now a list as prepared by Bob Lock: Critical Inspection Items for Travel Air Airplanes:
• Structural Considerations: All major attachment points for security and cracks. Streamline wires for correct tension (looseness could indicate possible internal structural problems). Wood deterioration, particularly lower wings at wing-walk trailing edge. Any suspicious wrinkles in fabric at any location could mean possible internal problems. Landing gear attach points for wear/cracks. Shock cords for condition (replace cords before they stretch and/or break).
• Seats and Restraint Systems: Seats firmly attached to structure. Seat belt/shoulder harness attachment points secure. Belts/harness for chafing. Locking devices (if any) are positive and work freely.
• Trim System: Excessive wear on trim sector and handle. Cable tension correct. Excessive looseness (slop) in stabilizer (up and down, sideways). Tension on brace wires. Lube hinge points.
• Primary Flight Controls: Excessive looseness (slop) from cockpit control to surface. Push/pull tubes and cables for wear/ damage (always set/check cable tensions with surface in neutral position). Lube all hinge points.
• Fuel System: Evidence of leaks and chafing of fuel lines. Positive movement of selector/shut-off valve. No fuel flow with valve(s) in OFF position.
• Oil System: Leaks and chafing of lines. Tank hold-down straps for security and cracks. Hoses for cracking/deterioration and clamps tight.
• Engine Controls: Full range of travel and “spring back” on cockpit control when stop is reached. Condition of control ends. Eliminate any excess movement. Carb heat for proper operation and condition of air filter.
• Main wheels: Closely inspect Bendix 30-by-5 wheels for cracks or loose rivets. It will be necessary to jack aircraft, deflate tire, and break bead. Move the tire bead in to inspect rivet heads around rim. It’s a pain to do this but well worth the effort if
loose rivets or cracks are found. Also check inner and outer spinnings for dents or other damage.
• Tail Wheel, Steering/Locking: Tire for correct inflation and check wear pattern. Steerable assembly: Check for positive movement with rudder, springs snug, positive locking in “trail” position. Locking assembly: Check for positive lock/unlock, shock strut condition, servicing, and lubrication points.
• Tires: Check for wear patterns; when wear pattern becomes visible, remove and reverse tires. Always replace tube when replacing tire. Never allow cord to show.
• Brakes: A most important item that must always work and work well.
• Mechanical: Cables and pulleys (metallic pulleys should always be used), return springs, lubrication of assembly, lining and drum condition.
• Hydraulic: Leaks, correct fluid type used for servicing, return springs, lubrication of moving parts, condition of lining and drums (check for out-of-round; if they’re out-of-round, the brakes may “grab”).
This commences our listing of the most critical inspection items on Travel Air and Curtiss-Wright Travel Air aircraft. The list will expand with time, and we will continue to publish the data as it is received and
compiled. My thanks go to Phil Wyels for his input into this column. Any owner/operators, mechanics, or inspectors are encouraged to file your list of critical inspection items for Travel Air airplanes. You may send the lists to the association, and the lists will find their way to me. Thanks in advance for all your help in keeping owners, pilots, and our aircraft safe. If you have a task that you feel is a critical inspection item on a different type of aircraft, and you think it’s generic to most other vintage airplanes, send it along. Also included in this article is an example of an old CAA airworthiness maintenance inspection notes dated November 6, 1942. It concerns Command-Aire Model 3C3 aircraft and is signed by the ship’s original designer, Albert A. Vollmecke. Note that Albert was division chief of the CAA (later the FAA), a position he occupied until his retirement from the FAA in 1968.

information on those events? Well, we are going to make it easier for you. This year we will be adding signage throughout the Vintage Village as well as some signage along Wittman Road to list our events or to guide you to your destination. Look for postings on the back of the VAA Volunteer and Membership booths as well as signage (white, A-framed, and about 3 feet tall!) around the grounds and, in particular, in the Vintage Village. Events will also be posted on our media outlets, including our website (EAAvintage.org), Facebook, and Instagram. In addition, you can pick up a schedule of events at the Hospitality Desk in the VAA Red Barn. These schedules will also be included in the arrival packages that our Welcome Team (led by the capable Welcome Team Chair Luke Lachendro) gives to every arriving airplane that parks on the Vintage flightline. Just remember that these events can be moving targets as
airplanes are sometimes delayed by unplanned circumstances such as weather and/or mechanical issues. Online postings will be regularly updated through our outlets up until the first day of the convention.
See you all in July. Blue skies!
BOOKS
“To Look Upward: One Flight Instructors Journey” Rob Mixon Amazon
COPYRIGHT©2023 BY THE EAA VINTAGE AIRCRAFT ASSOCIATION. ALL RIGHTS RESERVED
VINTAGE AIRPLANE (USPS 062-750; ISSN 0091-6943) copyright © 2023 by the EAA Vintage Aircraft Association, Inc., is published bimonthly and owned exclusively by the EAA Vintage Aircraft Association, Inc., EAA Editorial Department, 3000 Poberezny Road, Oshkosh, WI, 54902. Periodicals postage is paid at Oshkosh, WI, 54901, and additional mailing offices. U.S. membership rate for the EAA Vintage Aircraft Association, Inc. is $45 per 12-month period for EAA members, and $55 for non-EAA members.
POSTMASTER: Send address changes to EAA MEMBERSHIP SERVICES, P.O. Box 3086, Oshkosh, WI 54903-3086. CPC 40612608
FOREIGN AND APO ADDRESSES: Please allow at least two months for delivery of VINTAGE AIRPLANE to foreign and APO addresses via surface mail.
ADVERTISING: Vintage Aircraft Association does not guarantee or endorse any product offered through the advertising. We invite constructive criticism and welcome any report of inferior merchandise obtained through our advertising so that corrective measures can be taken.
EDITORIAL POLICY: Members are encouraged to submit stories and photographs. Policy opinions expressed in articles are solely those of the authors. Responsibility for accuracy in reporting rests entirely with the contributor. No remuneration is made. Material should be sent to: Editor, VINTAGE
PRESIDENT Susan Dusenbury 1374 Brook Cove Rd. Walnut Cove, NC 27052 336-591-3931 sr6sue@aol.com
VICE PRESIDENT
Dan Knutson 106 Tena Marie Circle Lodi, WI 53555 608-354-6101 lodicub@charter.net
SECRETARY
Dan Wood 75 Walton Place Dr. Newnan, GA 30263 678-458-3459 fly170@gmail.com
TREASURER
Paul Kyle 1273 Troy Ct. Mason, OH 45040 262-844-3351 paul_e_kyle@hotmail.com
Jerry Brown Greenwood, IN 317-627-9428 lbrown4906@aol.com
George Daubner Oconomowoc, WI 262-560-1949 gdaubner@eaa.org
John Hofmann Columbus, WI 608-239-0903 john@cubclub.org
Ray L. Johnson Marion, IN 765-669-3544 rayjohnson@indy.rr.com
Steve Nesse Albert Lea, MN 507-383-2850 stnes2009@live.com
Earl Nicholas Libertyville, IL 847-504-6945 eman46@gmail.com
Joe Norris Oshkosh, WI 920-279-2855 wacoflyer@gmail.com
Tim Popp Sun City, AZ 269-760-1544 tlpopp@frontier.com
Charlie Waterhouse Dayton, OH 260-385-0851 charles.e.waterhouse@gmail.com
Jesse Clement jesseclement1@gmail.com
Luke Lachendro avidaviator98@gmail.com
Kathy McGurran kmcgurran@aol.com
Kevin McKenzie kevinamckenzie@yahoo.com
, P.O. Box 3086,
WI 54903-3086. Phone 920-426-4800.
Maxwell Wenglarz waco20900@gmail.com
David Bennett antiquer@inreach.com
Robert C. Brauer photopilot@aol.com
Dave Clark davecpd@att.net
of Statement of Ownership: Publication required. If the publication is a general publication, publication of this statement is required. Will be printed in the July/August 2023 issue of this publication. 18. I certify that all information furnished on this form is true and complete. I understand that anyone who furnishes false or misleading information on this form or who omits material or information requested on the form may be subject to criminal sanctions (including fines and imprisonment) and/or civil sanctions (including civil penalties). Jim Busha, Editor, 07/14/2023. PSForm 3526, July 2014.
Phil Coulson rcoulson516@cs.com
Ronald C. Fritz itzfray@gmail.com
Robert D. “Bob” Lumley rlumley1@wi.rr.com
Gene Morris genemorris@charter.net
Amy Lemke alemke@eaa.org
This year we will be adding signage throughout the Vintage Village as well as some signage along Wittman Road to list our events or to guide you to your destination.
