We specialize in the professional installation of windows, doors, decks, gutters, siding and roofing to fit every need and style.
We feature Pella and Andersen replacement windows. Our window installations go the extra mile to preserve your home’s authentic details.
A great window is only as good as its installation, so why trust your installation to an uncertified contractor or worse yet, an uncertified, unlicensed and uninsured installer. Elegant Exteriors installs its windows and doors with its own employees, not subcontractors or piece workers. Elegant Exteriors by TBS, LLC is a Trex Pro as well an Andersen and Pella certified contractor which means that all of our installations come with a 2-year labor warranty.
Photo Credit: Jimmy Moore
Renovations
Finding the Beauty Again
PHOTO: KATHRYN FELDMANN
PHOTO: JAMES RIVER MEDIA
PHOTO: JAMES RIVER MEDIA
PHOTO: JAMES RIVER MEDIA
When I visited Iceland last year, I was impressed by the friendliness and generosity of the people as much as the stunning landscapes — lava flows, ice caves, waterfalls and canyons. One tradition for Icelanders that I would love to celebrate for the holidays is Jólabókaflóð, which roughly translates to “Christmas book avalanche.” Don’t ask me to pronounce it, but Jólabókaflóð began during WWII when there were strict limits on the importation of goods. Today, it continues in giving books to loved ones on Christmas Eve and then enjoying reading those gifts during the holiday. A good book by a cozy fire? Count me in!
When Katherine Fulghum Knopf suggested an article on holiday traditions around the world, I thought of the Icelandic book tradition. Katherine already knew about several others, and it seemed like such an interesting way to find new traditions for our own homes. I hope you enjoy this piece as much as I did!
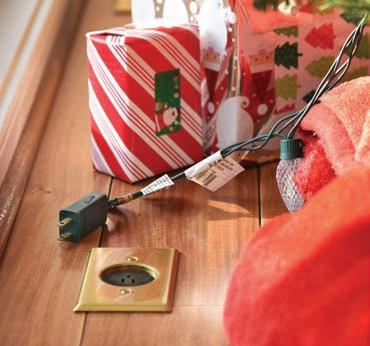
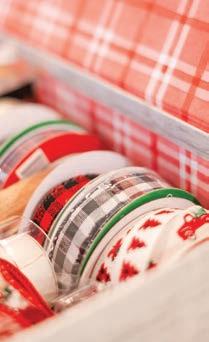
Speaking of gift giving, I think we’ve all been caught in a situation where we need a last-minute gift. Maybe we’re invited for dinner and need a hostess gift. Or someone unexpected is coming to our holiday event, and we don’t want them to be the only person without a gift. Kendall Atkins Livick has the perfect solution: the gift stash! Keep everything you need handy — and organized (isn’t that the hardest part?).
I credit my mom with suggesting an article on the Christmas cactus. She always has one — or more — blooming during the season. Learn a little more about this annual favorite and how to keep it thriving from year to year.
As always, we have a beautiful showcase home to share. The Davenports’ home demonstrates that a good layout and beautiful things make improvements easy.
I think we all have go-to recipes (often handed down by our moms) for holiday entertaining. This issue we decided to share our HOME team’s personal favorites. We hope you enjoy them with your friends and family this season. Happy reading, Happy Holidays and Merry Christmas from our HOME to yours!
Donna Dunn | donna@jamesrivermedia.com
SUSAN BAILEY
REALTOR ® Licensed in VA
C: 540-525-1844 | O: 540-989-0863
E: SusanBailey@LongandFoster.com
W: LongandFoster.com/SusanBailey
A: 5324 Fallowater Lane, Suite 100 | Roanoke, VA 24014
PHOTO: JAMES RIVER MEDIA
BrightStar Care® of Roanoke
offers in-home care for all ages and medical staffing that goes above and beyond. We call it
a higher standard
BrightStar Care’s goal is to provide the right type of assistance that allows residents of all ages to remain safely and comfortably in their homes – wherever “home” is – an apartment, single family, or a senior living neighborhood. These services range from companion care all the way through skilled care. They include:
Companion-level care: Includes meal preparation, companionship, light housekeeping, errand running, and transportation to and from appointments and social engagements.
Personal care: Includes companion-level care plus medication reminders and assistance with “Activities of Daily Living,” including bathing, mobility assistance, toileting and dressing.
Skilled Care: Includes medication management, infusions, wound care, catheter care, feeding tube administration, and around-the-clock care delivered by a nurse.
WHY CHOOSE BRIGHTSTAR ® HOME CARE?
In addition to Joint Commission accreditation — which demonstrates our commitment to safety and quality standards — our compassionate and proactive caregivers deliver a personalized nurse-led plan of care right in your loved one’s home.
Jenifer Alty Massie Regional Director of Operations
WHEN TO SEEK IN-HOME CARE
Recognizing when it’s time to seek in-home care is crucial for ensuring the well-being and safety of your loved ones. Here are some signs that it might be time to consider in-home care services:
• Difficulty with Daily Activities: If your loved one struggles with daily tasks such as bathing, dressing, or meal preparation, in-home care can provide the necessary assistance to help them maintain their independence.
• Frequent Falls or Injuries: An increased frequency of falls or injuries may indicate that your loved one needs more supervision and assistance to ensure their safety.
• Chronic Health Conditions: Managing chronic conditions such as diabetes, heart disease, Alzheimer’s disease, or cancer can be challenging. In-home care provides specialized support to manage these conditions effectively.
• Medication Management Issues: If your loved one is having trouble keeping track of their medications or is experiencing adverse effects from improper medication use, inhome care can help with medication management and compliance.
WHAT TO LOOK FOR WHEN SEEKING IN-HOME CARE
When searching for in-home care for your loved ones, it’s essential to consider several key factors to ensure they receive the best possible care:
Personalized Care Plans
Professional and Compassionate Staff
Comprehensive Range of Services Commitment to Quality and Safety 24/7 Availability
Local Expertise and Community Involvement
Positive Testimonials and Proven Track Record
VOLUME 1 7 ISSUE 5
PUBLISHER
Trish Roth
EDITOR
Donna Dunn
ART DIRECTOR
Kira Rider
CONTRIBUTING EDITOR
Katherine Fulghum Knopf
CONTRIBUTING WRITERS
Mitzi Bible
Becky Calvert
Paula Peters Chambers
Martha S. Coffey
Laurel Feinman
Katherine Fulghum Knopf
Margie Lippard
Kendall Atkins Livick
Sloane Lucas
Christina Moore
Ginny Smith
Ashley Blair Smith
PHOTOGRAPHER
Kathryn Feldmann
GRAPHIC DESIGNER
Donna Collins
SALES DIRECTOR
John Mazzei
ADVERTISING SALES
Kirsten Morey Becker
Lisa Bowers
William Neely
Kenny Shelton
SUBSCRIPTIONS
Roanoke Valley HOME is published five times annually by James River Media, LLC. For an annual subscription, please send $20 and your name, address and telephone number to: Roanoke Valley HOME 109B Tradewynd Drive, Lynchburg, VA 24502
For advertising information please call (434) 845-5463 or email sales@jamesrivermedia.com.
To discuss coverage of an event relating to home or garden, please contact Roanoke Valley HOME at home@jamesrivermedia.com
JAMES RIVER MEDIA, LLC (434) 845-5463
Copyright 2024 by James River Media, LLC. All rights reserved. No part of this publication may be reproduced or transmitted in any form or by any means without written permission from James River Media, LLC. All pictorial material reproduced in this magazine, whether in a produced ad or by itself, has been accepted on the condition that it is with the knowledge and prior consent of the photographer or the artist concerned. As such, James River Media, LLC is not responsible for any infringement of copyright or otherwise arising out of publication thereof. The information contained herein has been obtained from sources believed to be reliable. However, James River Media, LLC makes no warrant to the accuracy or reliability of this information. Opinions expressed in this magazine are those of the authors and do not necessarily reflect the opinions of ownership or management.
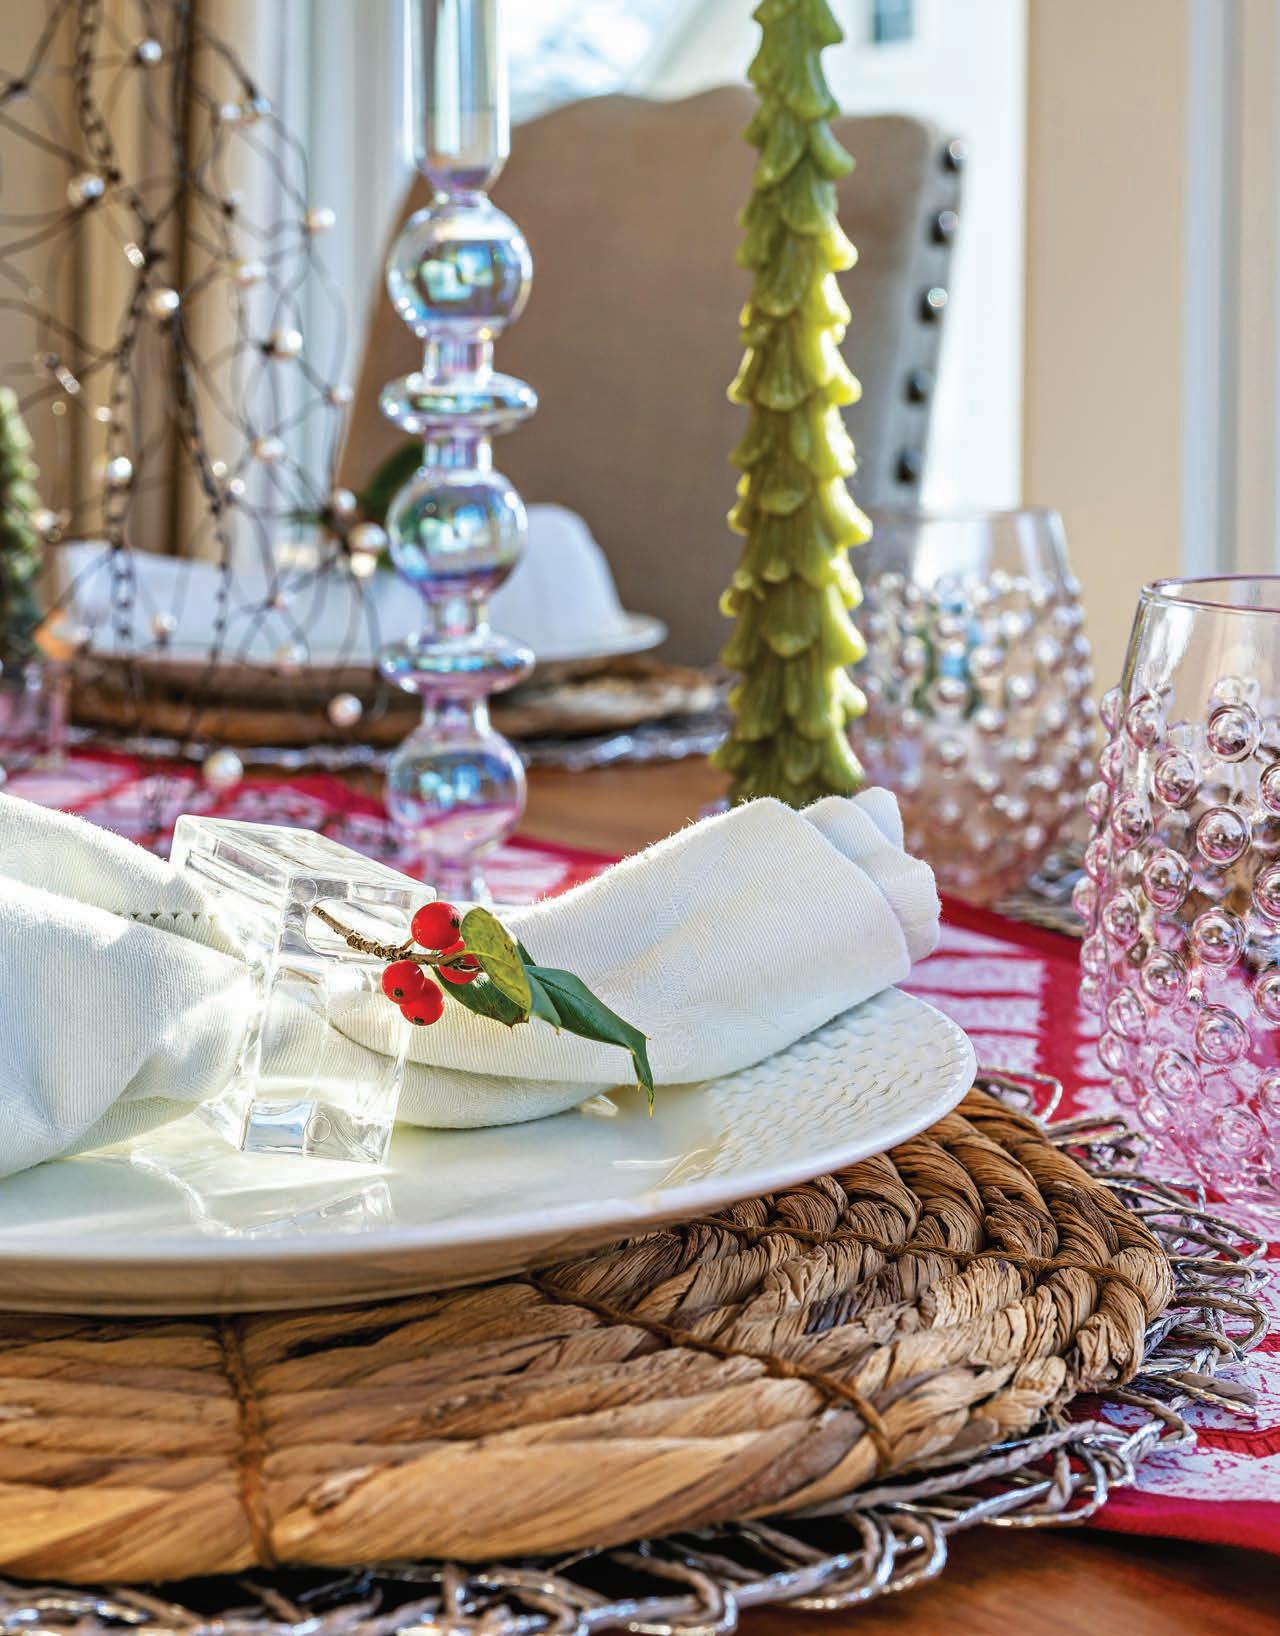
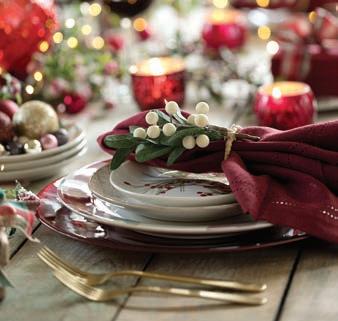
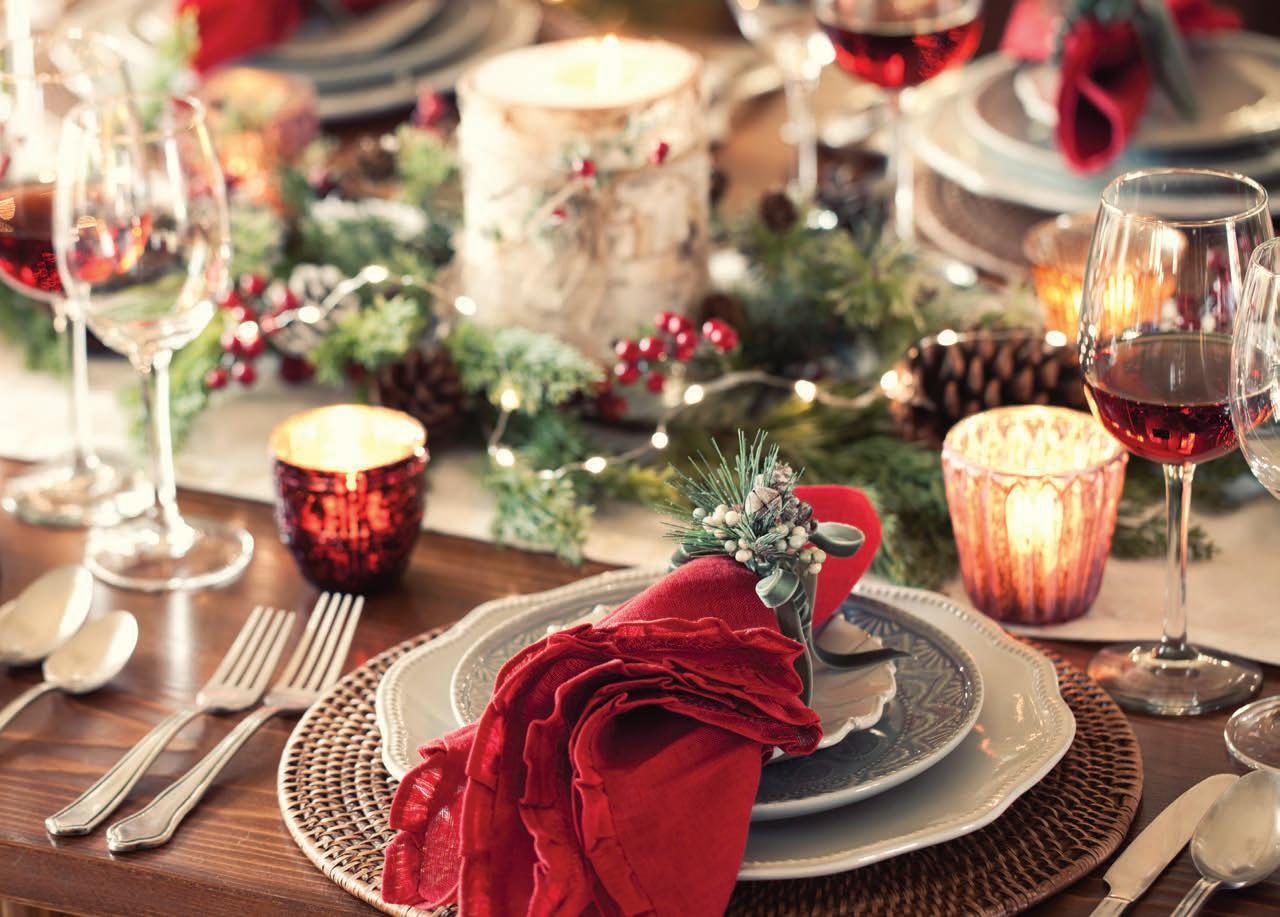
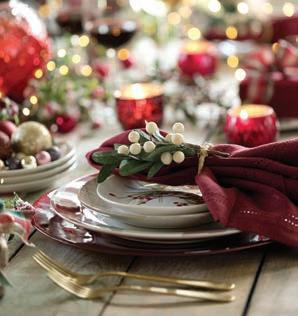
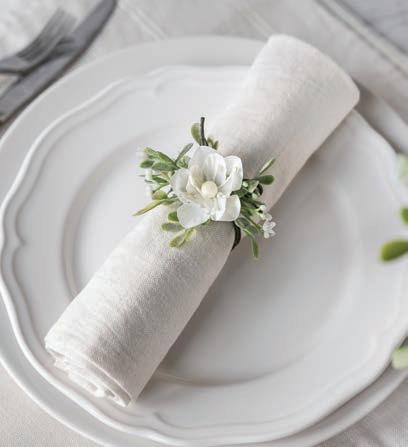
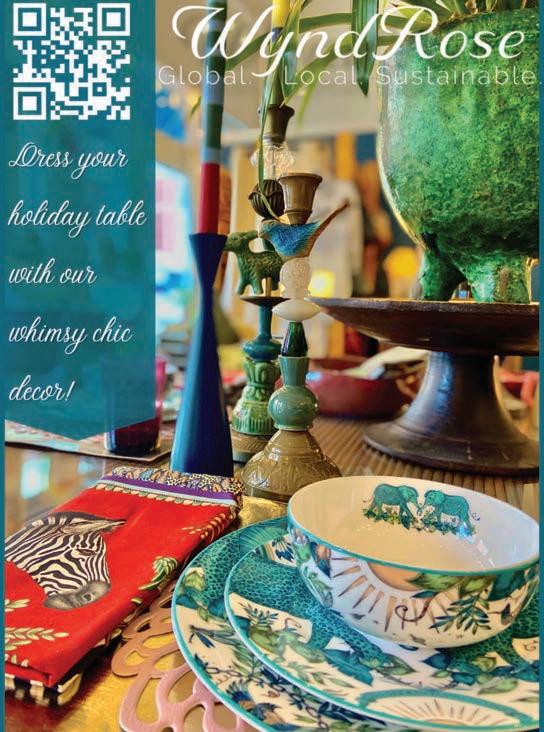
Setting the perfect table
BY LAUREL FEINMAN
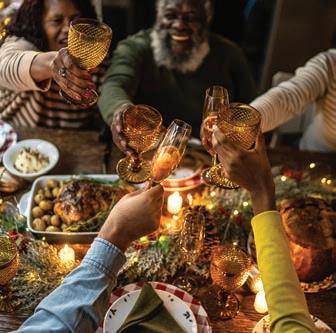
Setting the table for a party can set the tone for the entire event. Whether hosting an intimate dinner with close friends, a festive family gathering or something in between, arranging your table enhances the experience and makes your guests feel special.
Choose a theme or color scheme
The first step in setting a party table is to unleash your creativity by choosing a theme or a color scheme. This decision guides your choices in table coverings, napkins, centerpieces and place settings. For a sophisticated dinner party, opt for a monochromatic color palette, such as white and gold. For a casual gathering, bright colors and patterns may feel more appropriate. Your theme can be seasonal (fall harvest or cozy
winter), holiday-specific (traditional Christmas or glitzy New Year’s Eve), or something more personal, like a favorite hobby of the guest of honor.
Stick with a theme once you’ve settled on it to create a cohesive look. For example, a traditional holly green and cranberry red “Dickens Christmas” and a technicolor, whimsical “Whoville Christmas” evoke two totally different (and conflicting) vibes. Don’t try to mix them.
Arrange the place settings
The place setting is where functionality meets style. A formal place setting, like the ones you see in the grandest dining rooms, includes a dinner plate, salad plate, soup bowl, utensils, glassware and a napkin. Some may even add a charger plate, bread plate, multiple utensils to complement each course, and specific wine, water and champagne glassware. In the opening montage of every episode of Downton Abbey, white-gloved footmen precisely measure and place sparkling crystal goblets and lustrous silver flatware on Lord and Lady Grantham’s dining table. Without a Carson and Mrs. Hughes harrumphing about in the scullery, you don’t have to be so fussy. Here’s a guide to arranging the basics:
n Plates: The dinner plate goes in the center, with the salad plate on top if you’re serving salad. The soup bowl can go on top of the salad plate if you are serving soup.
n Utensils: Place forks to the left of the plate and knives and spoons to the right. Utensils are placed in the order they will be used, starting from the outside. The salad fork goes to the left of the dinner fork because the salad course will presumably be served before the entrée. Please place knives with the cutting blade facing the dinner plate.
n Glassware: Set glasses above the knives. The water glass should be placed directly above the dinner knife, with the wine glass to its right.
n Napkins: In a casual tablescape, napkins can be placed on the dinner plate or underneath the forks. They should be put to the left of the forks in a more formal setting.
TABLE SETTING DINNER PLATE
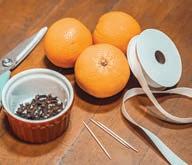
HOW TO MAKE AN ORANGE POMANDER
Materials needed:
n Orange
n Cloves
n Ribbon n Toothpick
n Scissors
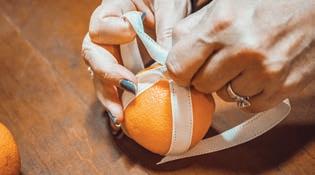
1
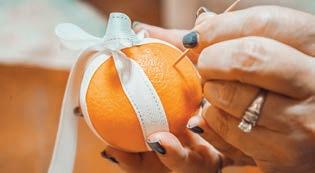
2 Use a toothpick to make holes in your orange.
3
Push a clove into each hole, and continue this process until the whole orange is covered. (Or make lines or shapes.)
4
Use as part of a centerpiece or hang for festive fragrance around the house.
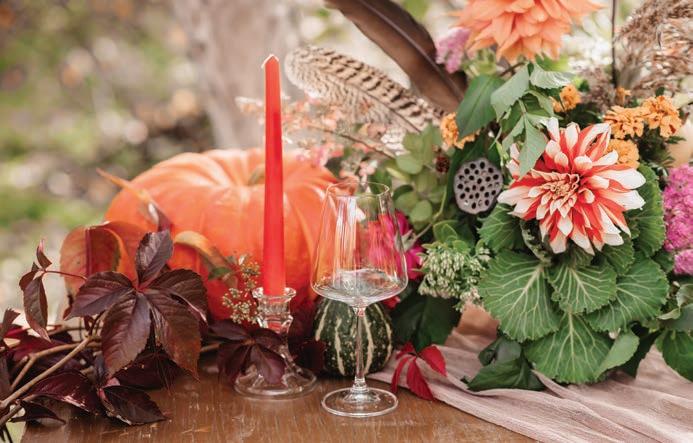
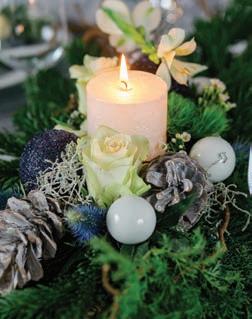
Create a focal point
Centerpieces are the focal point of the table. They should reflect the theme and add to the ambiance without overwhelming the space or obstructing guests’ views. Fresh flowers and greenery are a classic choice and can be arranged in vases, jars or even directly on the table. Be mindful about choosing flowers that are not overly fragrant, lest their scents compete with or overpower that of the food. Natural elements such as clove-studded orange pomander balls, vegetables and herbs can be incorporated into the centerpiece and complement the food, as their aromatic qualities mingle with the flavorings used during the food preparation. (See our guide on how to make orange pomander balls on the left.) Candles add a warm, inviting glow and can be used in addition to or instead of flowers. Whatever you choose for your centerpiece, just be sure it is low enough to allow for easy conversation across the table.
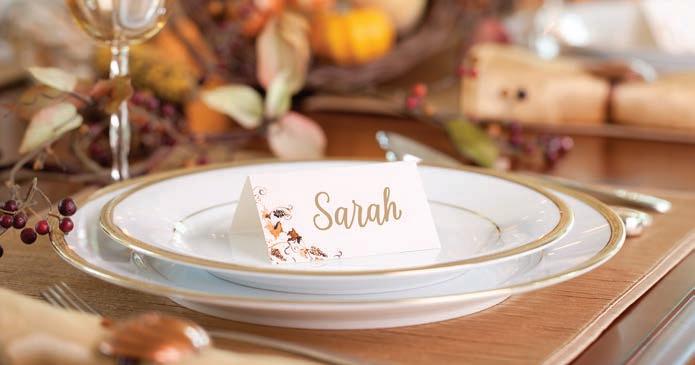
Personalize with place cards
Source: natgeokids.com
PHOTOS: JAMES RIVER MEDIA
Place cards are not just a practical tool for seating arrangements; they are a thoughtful touch that makes guests feel special. In my family, the school-aged children always made place cards for our family dinners. It was the perfect activity to get the kids engaged in helping prepare for the occasion without being underfoot in the kitchen. Years later, these crayon-scrawled place cards are a fun reminder of years gone by. You can, of course, purchase them pre-made or print your own if you prefer. Party favors can be placed at each setting as a thank-you gift for guests. This can be something small and simple like a tiny jar of homemade jam, a miniature potted plant or a fun novelty like a Christmas Cracker. These favors double as table décor and add that extra layer of charm to your tablescape.
Criss-cross a ribbon around the orange, and tie it in a bow.
Pay attention to details
Have a plan for managing all the decorative accents and service items once the table becomes laden with people, food and beverages. Where should the salt and pepper shakers go? Where should guests put their napkin rings after unfurling their napkins onto their laps? How many gravy boats and butter dishes will this crowd use? Think these details through in advance so they don’t cause confusion during the meal. Consider setting your table the day before the big meal so you have time to dwell upon these details and make adjustments and additions before the guests arrive.
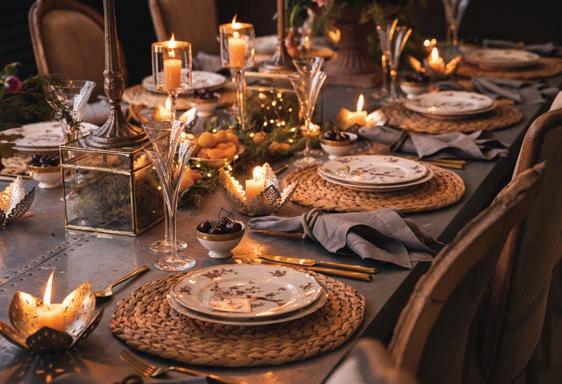
Set the mood
Flattering lighting is crucial for creating the right ambiance at your dining table. Candles are a timeless choice that can be used in addition to the room’s overhead lighting, but probably not instead of it.
Setting the table for a party is about more than putting out plates and forks — it’s about creating an experience. Thoughtfully arranging your table shows your guests that you care about their comfort and enjoyment. Whether you’re hosting a grand holiday feast or a simple weeknight dinner, setting a beautiful table makes your event more memorable. Remember: the most important element at your table is the care and thought you put into making your guests feel welcomed and appreciated. ✦
(See our article on page 28 to learn how to make the most of your table linens.)
Sentimental FAVORITES
The HOME team shares recipes they enjoy making for the holidays
BY DONNA DUNN
Photography by James River Media
The aromas of cinnamon and vanilla, the warmth of the oven and family gathered around the table imbue the holidays with comfort and joy. Cooking, especially during this time of year, is about more than putting food on the table. It’s about connection and reliving fond memories, together.
Each of us has traditions that help to create a sense of home during the holidays — our HOME team included! For this issue of the magazine, we wanted to take a moment and share our favorite recipes to serve or share during this special season. Some are fancy, others are everyday delights, but we hope you enjoy them with someone you love.
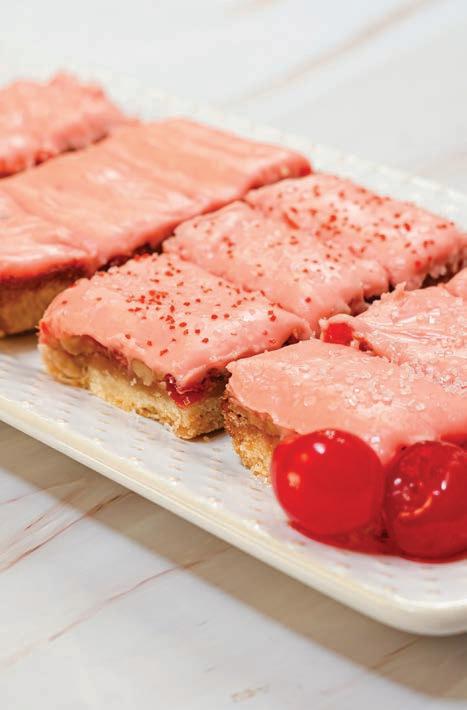
Cherry Walnut Bars
2 1/4 cups flour
1/2 cup sugar
1 cup margarine
2 eggs
1 cup brown sugar
1/2 teaspoon salt
From HOME Publisher Trish Roth:
“I hosted a cookie exchange for many years, and these bars were always requested. They are easy to make, beautiful on a platter and delicious! I only make them around the holidays – with good reason; it’s hard to stop at just one!”
1/2 teaspoon baking powder
1/2 teaspoon vanilla
1, 10-ounce jar Maraschino cherries, chopped
1/2 cup walnuts, chopped
FROSTING:
2 Tablespoons margarine
2 cups powdered sugar
Reserved cherry juice
Preheat oven to 350 degrees. Mix flour, sugar and margarine until crumbly. Press into a 13x8x2" pan. Bake for 20 minutes or until light brown. Blend eggs, brown sugar, salt, baking powder and vanilla. Drain and chop cherries. Reserve liquid. Stir cherries into egg mixture, and add chopped walnuts. Pour on top of baked crust. Bake for 25 minutes. Remove from oven and cool. Frosting: Mix margarine, powdered sugar and enough cherry liquid to reach a spreadable consistency. Frost bars.
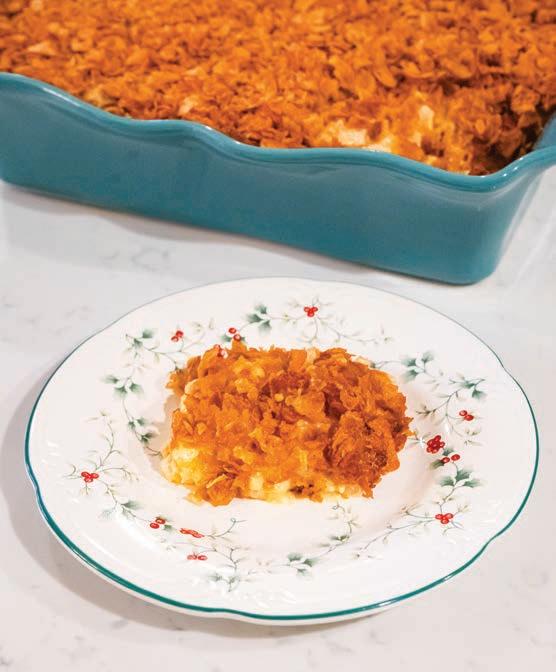
From HOME Art Director
Kira Rider:
“This is a classic dish in our family. It’s super simple, but delicious, and can easily be made the night before, which comes in handy during the chaos of the holidays. Mix everything ahead of time, but don’t bake it until you’re ready to serve. Add more cornflakes if you like an extra crunch.”
Cheesy Potato Casserole
2 pounds frozen hash browns, thawed
1 cup melted margarine, halved
1 teaspoon salt
1/4 teaspoon pepper
1/2 cup grated onion
1 can cream of chicken soup
2 cups grated cheddar cheese
2 cups sour cream
2 cups cornflakes, crushed
Preheat oven to 350 degrees. In a large bowl, mix hash browns, 1/2 cup melted margarine, salt, pepper, onion, cream of chicken soup, cheese and sour cream. Put in a greased 9x12" dish. Top with cornflakes mixed with 1/2 cup melted margarine. Bake for 1 hour.
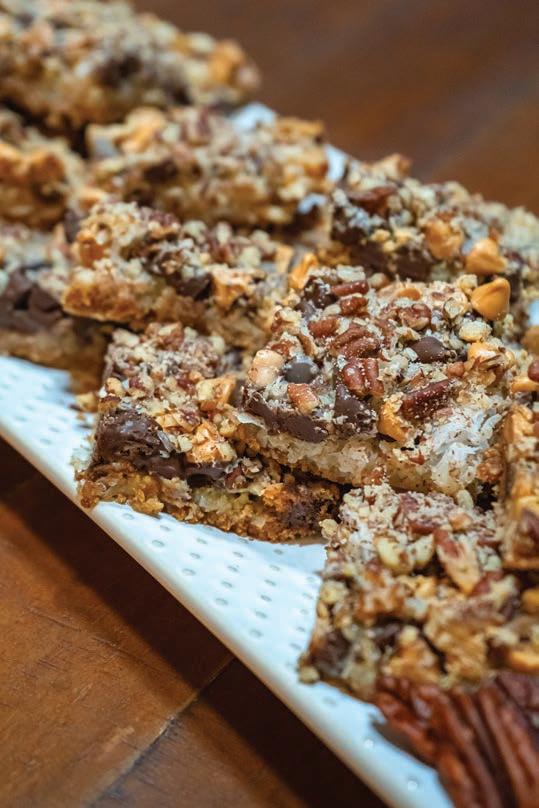
From HOME Editor Donna Dunn:
“Each Christmas, my mother-inlaw, Patty Dunn, would make one favorite treat for each of her sons: Party Mix for the oldest, Cheese Wafers for her middle son and SevenLayer Cookie Bars for the youngest, my husband. Here’s her recipe, adapted from the Hermitage High School Recipe Book, “The Stuffed Cougar.” My in-laws and their sons attended Hermitage, which is in Henrico County next to Richmond, Va.”
Seven-Layer Cookies
1/4 cup margarine
1 cup graham cracker crumbs
1 (7 ounce) can angel flake coconut
1 (6 ounce) package chocolate chips
1 (6 ounce) package butterscotch chips
1 can Borden’s sweetened condensed milk
1 cup pecans, finely chopped
Preheat oven to 325 degrees. Melt margarine in a 9x12" pan. Add other ingredients by layers, as listed. Bake for about 30 minutes. Cool in pan. Cut into small squares.
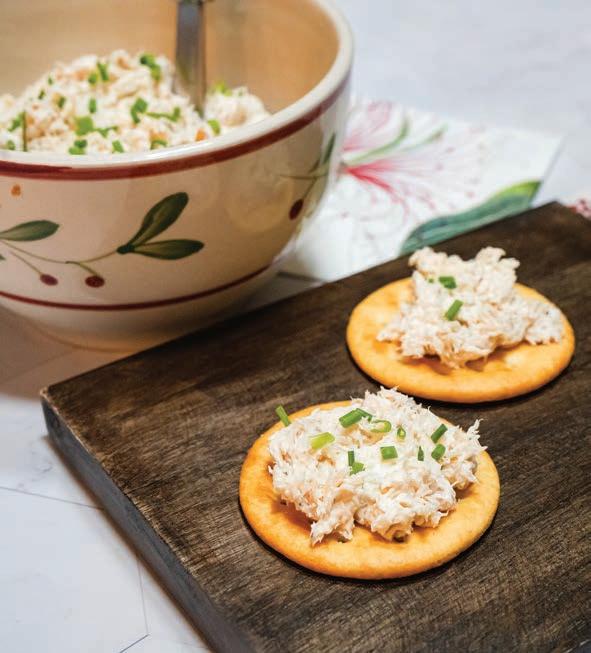
“My husband loves this dip! It is a great signature piece on a charcuterie board. It tastes delicious on your favorite crackers or crisp celery. Make it special and add a few bowls of pickles or olives, and you have an appetizer for all.”
Smoked Trout Dip
16 ounces smoked trout (pre-packaged in the seafood department)
1/4 cup sour cream (or Greek yogurt)
1/2 teaspoon salt
1/2 teaspoon pepper
4 ounces cream cheese, softened
2 teaspoons chives (fresh or dried)
Remove skin from trout (your dog or cat will love it!) and flake trout into a bowl. Add sour cream, salt and pepper. Stir. Break cream cheese into small pieces and slowly add into the trout mixture. Mix well. Put in a serving bowl and top with chives.
LAUREN HALE
INTERIORS
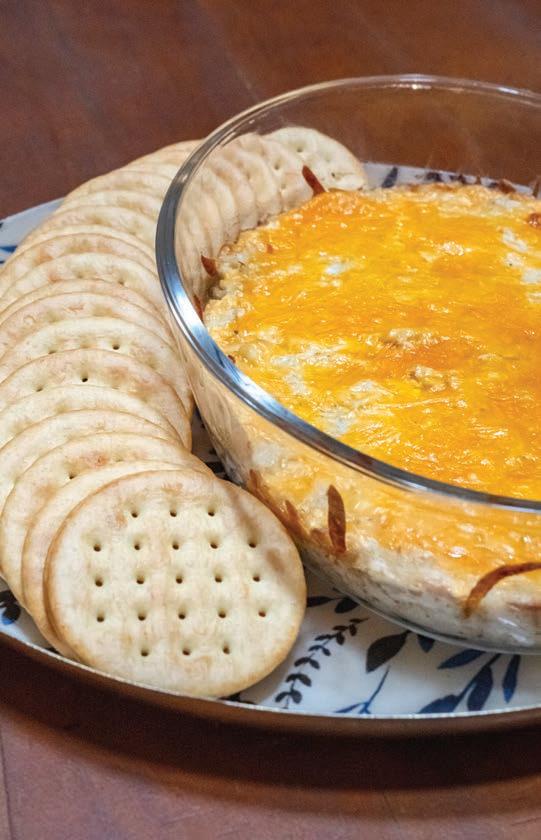
Hot Crab Dip
1 pound backfin crabmeat
8 ounces softened cream cheese
2 teaspoons Old Bay seasoning
2 Tablespoons mayonnaise
From HOME Food Writer Becky Calvert:
“Growing up, this dip was my favorite Thanksgiving appetizer. It’s since become my go-to dish to bring to parties.”
1 teaspoon Worcestershire sauce
Salt and pepper to taste
1/2 cup shredded cheddar cheese
Crackers or bread
Preheat oven to 350 degrees. Combine softened cream cheese with Old Bay, mayonnaise, Worcestershire sauce, salt and pepper. Fold crabmeat in. Place shredded cheese on top, and bake for 35-40 minutes or until bubbly and hot. Cool slightly before serving with crackers or bread.
Merry Moscow Mule
From Mari White, James River Media & contributor to HOME:
“I serve this at all holiday gatherings! It’s not too elaborate, but it is delicious, pretty and unique.”
1 part cranberry juice (100% juice works best)
1 part apple cider (not vinegar or hard cider)
2 parts ginger beer (I like diet Cock & Bull)
1 part vodka
Garnish choices:
Cranberries, apple slices, rosemary sprigs, lime wedges
Combine ingredients into a copper mug or pitcher (for a crowd) over ice; add garnish and enjoy!
For a twist:
n Substitute vodka with your favorite bourbon or rum.
n Leave out the vodka altogether for a sweet, gingery taste.
n Use different types of flavored juices.
n Use ginger ale instead of ginger beer for a sweeter version. ✦
Caring for table linens
Preserve their beauty and add a lovely scent
BY MARTHA S. COFFEY
Nothing spells SPECIAL OCCASION more than setting a table with beautiful linens. Whether yours are heirloom pieces from favorite relatives, treasured gifts from friends and family, linens purchased as souvenirs of long-ago trips or simply items purchased during memorable antiquing jaunts, keeping them in tiptop shape will extend their lives. Read on for some time-tested guidelines for caring for your table linens.
Pretreat stains and wash
Experts agree that pretreating any stains and then washing soiled table linens immediately after each use is the critical first step in prolonging their lives. The Spruce, an online source of information about all things home and garden-related, reminds us that some heirloom and embellished linens may benefit from
a spot cleaning with a mild laundry detergent and hand washing in cold water. This careful treatment will preserve the color and fiber strength of antique or embellished linens in cases where machine washing would be too rough. Indeed, whatever their fiber contents, all table linens can profit from prompt stain removal and laundering.
In the unfortunate event of an oily food stain on delicate fabrics, begin by dabbing (but not rubbing) a bit of heavyduty detergent such as Tide or Persil on the stain with your fingers or a soft white cloth. Then let the cleaning solution soak in for at least 15 minutes before rinsing the spot with cool water. If the stain still shows after the first rinse, spot treat with either Resolve or Oxi Clean formulated for fabrics and hand wash the item again. Repeat this process until the stain is gone. For dingy or stained all-white fabrics, a small amount of colorfast oxygen bleach may be used for spot treating and for overall lightening. Adding a drop of bluing liquid may also be used during laundering to restore yellowed linens to brightness.
Machine drying vs. air drying
According to eventswholesale.com, an online purveyor of all kinds of table linens for special occasions, air drying (also referred to as line drying) is the recommended method for drying all kinds of table linens except for those made of 100 percent polyester or cottonpolyester blends. These sturdier fabrics may safely be machine washed and dried at a low heat or on the permanent-press cycle and removed promptly to avoid excessive wrinkling.
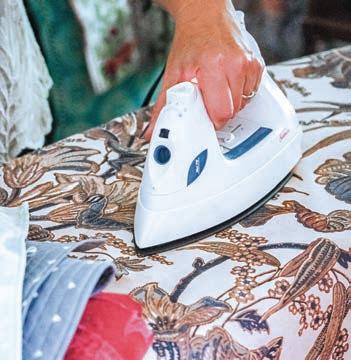
Ironing
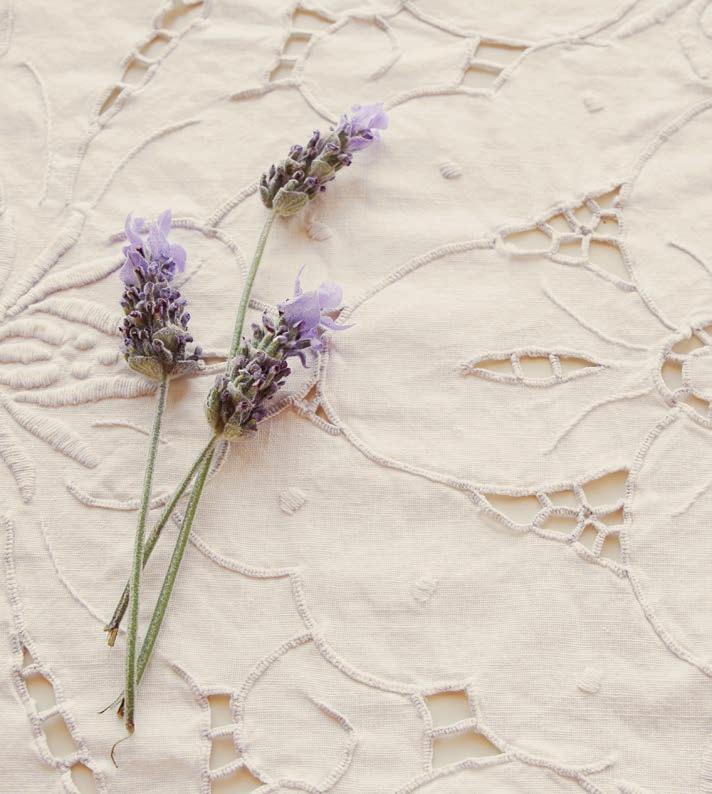
Many table linens, whether air or machine-dried, require ironing to look their best. If larger pieces of table linens such as tablecloths have been stored after washing without having been pressed, a spritzing with water or, better yet, scented water before ironing will produce better results. Of course, if you plan to iron your linens right after machine washing and drying, removing them from the dryer
when still slightly damp will make the job of ironing much easier.
For ironing larger pieces such as tablecloths, set up your padded ironing board at the foot of a bed or large table so that as you iron you can spread the fabric over the bed or table’s surface instead of letting the ironed portion puddle on the floor and wrinkle. Always iron the reverse side of the fabric and the front side only if necessary.
Another option for larger linens is to use a steamer. Steaming is gentle and doesn't damage the fabric, but may not get out wrinkles as fully as a traditional iron.
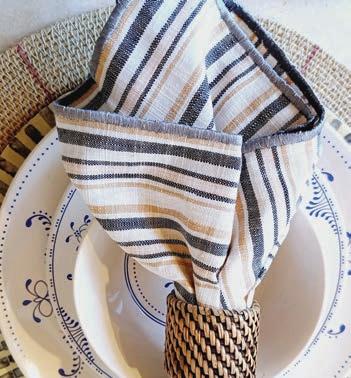
Cloth napkins that will be folded into rectangles may be stored either flat or folded, whereas those that will be folded into fancy shapes may benefit from a light spray of starch during the ironing process, stored flat and then artfully folded just before using. Note that it is critical that everything freshly ironed be left out for a couple of days to dry fully to prevent mildew.
Storing table linens
Once completely dry, table linens may be stored flat or hung in a cool, dry, well-ventilated area. Use padded hangers, or for larger, heavier pieces such as tablecloths, place them on heavy-duty blanket hangers to prevent creasing. Avoid storing table linens in plastic bags, cardboard boxes or in direct contact with cedar chests or wood drawers. Instead, loosely wrap all but the largest, hung linens in clean white 100 percent cotton sheets or acid-free tissue paper and store them on shelves in closets. With proper care and storage, treasured linens will be passed down through generations, enhancing festive occasions with each use. ✦
1 Tablespoon witch hazel or vodka 16 ounces distilled water
Shake together in spray bottle. Refrigerate leftovers.
PHOTO: JAMES RIVER MEDIA
PHOTO: JAMES RIVER MEDIA
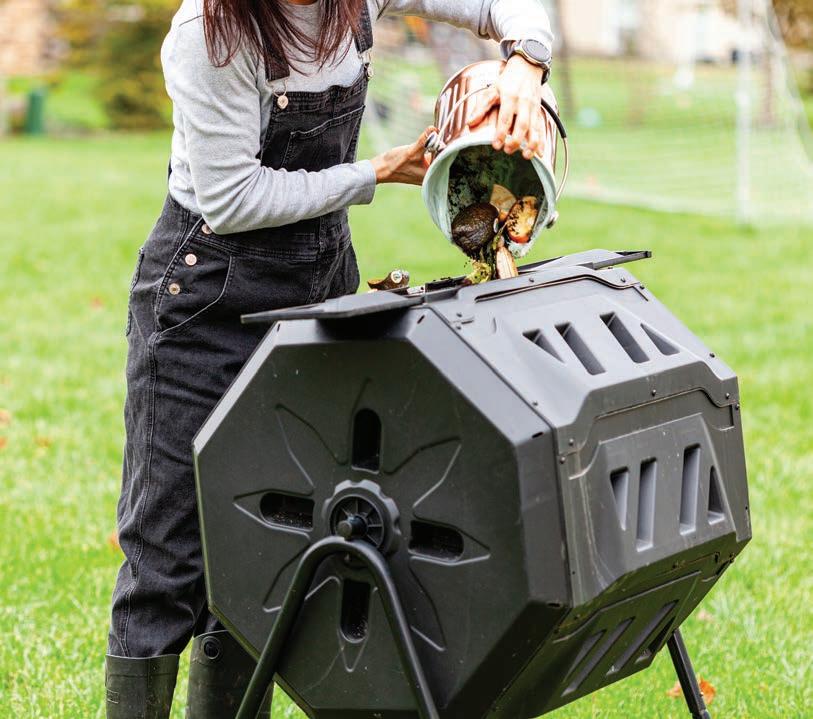
Turning waste into wonder
A guide to the basics and benefits of composting
BY CHRISTINA MOORE
Composting is an age-old practice that has gained renewed importance in today’s eco-conscious world. By turning organic waste into nutrient-rich soil, composting not only reduces landfill waste but also nourishes gardens and landscapes. Whether you’re a seasoned gardener or a beginner, understanding the basics of composting can help you contribute to a healthier environment while enriching your plants. In this article, we’ll explore the essentials of composting, the types of compost, its benefits, suitable materials, and some handy tips and tricks to get the most out of your composting efforts.
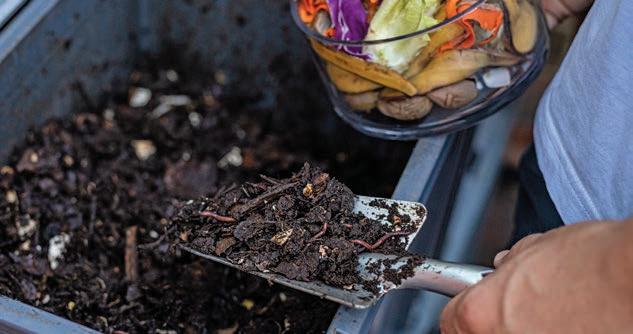
The basics of composting
At its core, composting is a natural process of decomposition that transforms organic materials, like kitchen scraps and yard waste, into a dark, crumbly substance known as compost. This rich, earthy material is packed with nutrients and can be used to improve soil health, making it a gardener’s best friend.
You have control of how simple or complex you’d like your composting to be! At its simplest, a compost pile can be
developed in your backyard by regularly adding organic waste and letting nature do its work. The process is driven by microorganisms, such as bacteria and fungi, that break down the materials. Over time, with the right balance of moisture, oxygen and temperature, these materials decompose into a rich humus that can be used to fertilize and condition soil. Conversely, there are more intricate composting measures that allow you to fine tune and control the process.
Types of compost
Not all compost is the same, and the type you produce can vary depending on the materials used and the composting method.
COLD COMPOSTING
This is the most basic form of composting where organic materials are added to a pile and left to decompose naturally over time. It’s low maintenance but slow, often taking up to a year to produce usable compost.
HOT COMPOSTING
This method is faster, taking only a few months to produce compost, but it requires more effort. By maintaining the right balance of green (nitrogen-rich) and brown (carbonrich) materials, and regularly turning the pile to introduce oxygen, you can keep the internal temperature of the pile between 130 and 150 degrees. This high temperature speeds up decomposition and kills weed seeds and pathogens.
VERMICOMPOSTING
This is composting with the help of worms, usually red wigglers. The worms eat organic material and excrete castings, which are rich in nutrients and beneficial microorganisms. Vermicomposting is ideal for small spaces or indoor composting, as it produces high-quality compost with minimal odor.
BOKASHI COMPOSTING
This method, originating from Japan, uses a special mix of microorganisms to ferment organic waste in an anaerobic environment. It’s especially effective for composting meat and dairy, which are usually problematic in traditional composting. Bokashi composting is quick and can be done indoors, making it a great option for those who may live in apartments, condominiums or other areas where there is limited outdoor access.
The benefits of composting
Composting offers numerous benefits, both for your garden and the environment:
SOIL ENRICHMENT
Compost is often referred to as “black gold” because of its ability to improve soil structure, increase moisture retention, and provide essential nutrients. It helps create healthy, fertile soil that supports robust plant growth.
WASTE REDUCTION
By composting, you can divert up to 30 percent of your household waste from landfills. This reduces the amount of methane, a potent greenhouse gas, produced by decomposing organic matter in landfills.
ECO-FRIENDLY GARDENING
Composting reduces the need for chemical fertilizers, which can be harmful to the environment. It also helps prevent soil erosion and can even remediate contaminated soils by binding heavy metals and other pollutants.
COST SAVINGS
Making your own compost means you don’t need to buy commercial fertilizers, mulches or soil conditioners, saving you money in the long run.
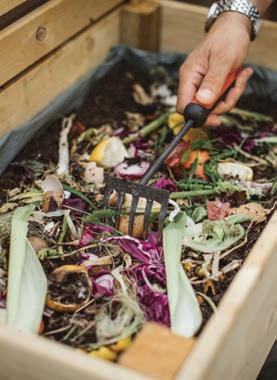
Materials to compost
The key to successful composting lies in knowing what materials to include.
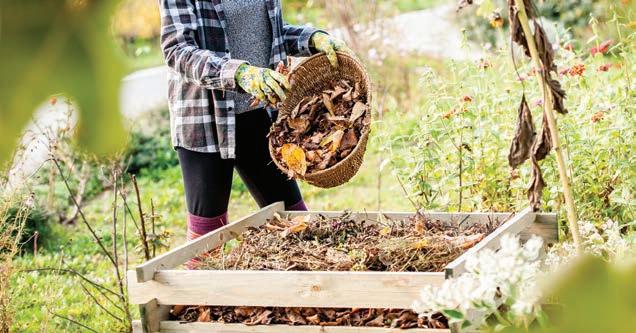
GREENS
These are nitrogen-rich materials that help to activate the composting process and include kitchen scraps such as fruit and
vegetable peelings, coffee grounds, eggshells, grass clippings and garden waste.
BROWNS
These are carbon-rich materials that provide energy for microorganisms and help maintain structure in the compost pile. Examples include dried leaves, straw, cardboard, paper, wood chips and small branches.
It’s important to maintain a good balance between greens and browns — typically, a ratio of 2:1 (browns to greens) works well. This balance ensures the right conditions for decomposition and helps avoid issues like odor or slow composting.
Composting containers
Finding the perfect composting container can make your composting journey smoother and more enjoyable! There are a few different options, each with its own perks. Traditional compost bins are great for backyard composting. They’re usually cylindrical with a lid and some ventilation holes, making it easy to add your scraps and keep the process going smoothly.
If you want to speed things up, a compost tumbler might be just the thing. These bins are on a stand and can be rotated, which helps mix and aerate the compost more efficiently. If space is tight, don’t worry — there are indoor options too. Kitchen compost pails are handy for collecting scraps in your kitchen until you’re ready to transfer them to a larger compost bin, while vermicomposting bins use worms to break down your waste indoors. Each container has specific benefits, so think about your space, how much waste you have and what you’re hoping to achieve with your composting.
Composting tips and tricks
To help you get the most out of your composting efforts, here are some practical tips and tricks:
CHOP MATERIALS
Cutting up larger pieces of organic matter, such as fruit peels or branches, into smaller pieces will speed up the decomposition process.
TURN THE PILE
For hot composting, regularly turning the pile (every 1-2 weeks) helps to aerate it, ensuring that the microorganisms have enough oxygen to thrive. This also helps distribute moisture and heat evenly.
MONITOR MOISTURE
The compost pile should be as moist as a wrung-out sponge. If it’s too dry, decomposition slows down; if it’s too wet, it can become anaerobic and start to smell. You can manage this process by adding water or dry materials as needed to maintain the right moisture level.
AVOID COMPOSTING CERTAIN ITEMS
Not everything organic belongs in a compost pile. Avoid adding meat, dairy, fats, diseased plants and pet waste, as these can attract pests and create unpleasant odors.
PATIENCE PAYS
Composting is a natural process that takes time. Depending on the method and conditions, it can take anywhere from a
few months to a year to get finished compost. Be patient and remember that the amazingly rich end product is worth the wait.
Composting is a simple yet powerful way to reduce waste, enrich your soil and contribute to a healthier planet. By understanding the basics, choosing the right method and following a few tips and tricks, you can turn your organic waste into valuable compost that benefits your garden and the environment. ✦
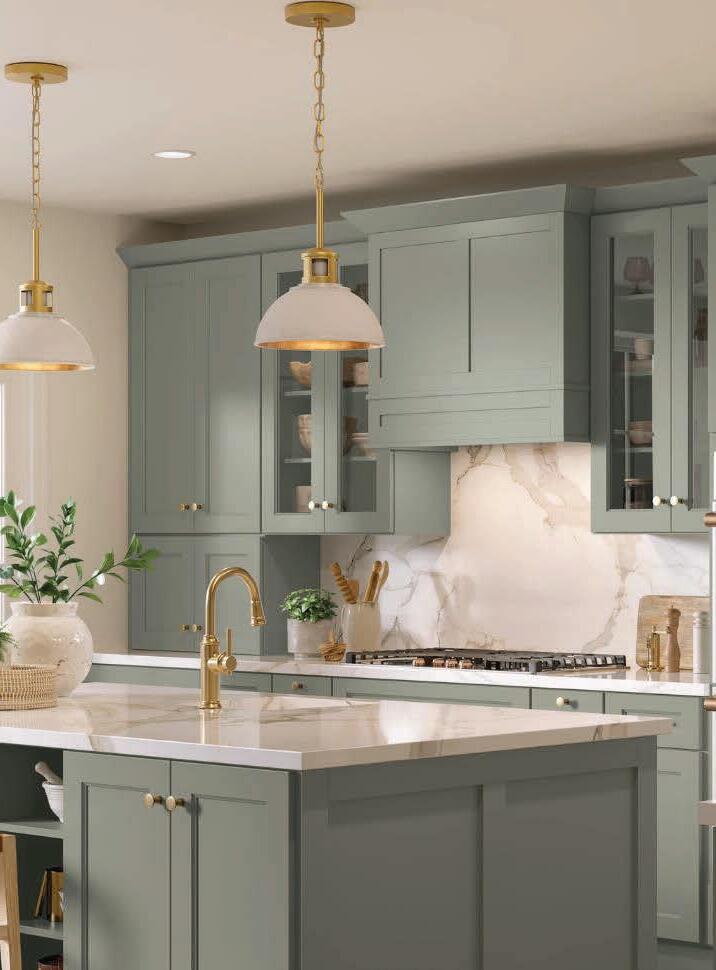
Bring a whole new look to your kitchen without having the mess and expense of ripping out your existing cabinets.
Whether you want a warm, traditional look or a modern, two-toned style to your cabinets, N-Hance will deliver a long-lasting, quality finish.
CELEBRATING 20 YEARS
2024 is an important year for local Class A contractor GroundScapes, as it marks their 20th year in business! GroundScapes President James Edwards says that two decades of successful contracting is an important milestone, and he is very thankful for all the people who have made the company a success.
“Not only do we have amazing customers, but we also have the best employees I could dream of. I sincerely love all of the people that have made these 20 years so special!” Edwards says.
If you have driven around Roanoke or Smith Mountain Lake and seen a breathtaking oasis in someone’s backyard that would rival any five-star resort and make your jaw drop, there is a high probability that you have seen a GroundScapes project! GroundScapes is known to Roanoke for its amazing outdoor living areas and resortstyle backyards, but they are experts with much simpler landscape and hardscape installations also.
We chose GroundScapes mainly because of the integrity I sensed as I spoke with James Edwards. If you are in need of any type of work GroundScapes offers, you would be fortunate to have them do the work for you.
-Mike & Ann Harper - Moneta, VA
“With our 20th anniversary here, I want our customers to know how much they mean to us and how much we appreciate them. Without them we just wouldn’t be here, and we wouldn’t be the welloiled machine we are today!”
“Our specialty is certainly custom, resort-style backyards with outdoor pavilions, decks, patios, pools, spas, fireplaces, outdoor kitchens and so on,” Edwards says. “But it takes a good mix of projects for us to maintain an efficient work schedule for our crews, so we appreciate the small jobs equally as much as the bigger ones!” He adds that although there is a cost associated with the upscale backyard living area projects GroundScapes specializes in, most of our clients end up saving thousands of dollars per year on vacations. The reality is that they would rather just stay home after we have designed and installed a backyard project for them!
When asked about the biggest changes in the industry in the past 20 years, Edwards says, “These days there are a lot more inexperienced competitors underbidding and not understanding the complexity of these types of projects. There’s a lot going on with these elaborate residential construction projects, and there simply just aren’t many contractors in our area with the capabilities, experience or the resources to execute them the correct way — and in a way that will allow them to hold up for years to come.”
OPENING THE DOOR
Smart technology in the home is what you make of it
BY PAULA PETERS CHAMBERS
What if you could keep watching the football game and turn off the oven at the same time? Or switch on all your holiday lights, indoors and out, with a single press of a button? Or open the door for weekend guests who have arrived while you’re still running last-minute errands? Here’s the good news: You can! Thanks to the internet and advances in technology, if you have a smartphone, you can live in a home filled with “smart” possibilities that can make your life easier and more enjoyable. But before you jump in, here are some realities to consider.
If you are thinking about a kitchen redo, fabulous outdoor living space or getting your main suite on the main floor, now is the time to start planning. Residential construction has been extremely busy and getting started early is the perfect way to get your project in line and on the calendar.
At Building Specialists, we have the team to get the ball rolling. We have 50 years in the industry and hundreds of happy homeowners. Call us for a free consultation to discuss how together, we can get you ready for your next exciting home improvement project!
A Great Choice for First-Time Homebuyers
JOIN OUR TEAM!
• Bring your entrepreneurial spirit and creativity to your work!
• Enjoy a flexible full- or part-time schedule working from home.
• Help your favorite businesses build their audience.
• Be part of a growing company that promotes the local community.
• Hit the ground running working immediately with some of our current advertisers.
• Unleash your potential — the more you sell, the more you earn!
An array of options
The kitchen is the heart of the home, where hours are spent preparing and serving family meals. Many newer kitchen appliances – wall ovens, ranges, refrigerators, dishwashers, microwaves and ice makers – have built in Wi-Fi capabilities.
“You just use an app downloaded to your phone,” says Carl Ramsberger, president and CEO of Appliance Studio in Roanoke. “You register the appliance and then can coordinate everything through your phone. And you can get alerts [when something is amiss].”
Delayed start time has been an available feature on ovens for years. Now, you can turn on your electric oven when you’re heading home from work or errands. (Remote start isn’t available on gas ovens.)
“People love the idea that the oven can be preheated [remotely], but you have to set that up before you leave in the morning,” Ramsberger says.
If you’re home, however, you can take full advantage of “smart” options. With a Wi-Fi-connected oven or grill, from your couch you can change the temperature or let a probe tell you if a dish is fully cooked. A smart refrigerator sends alerts when the door is open; some Sub-Zero models even offer a night mode that automatically dims the interior light when the door is opened to a darkened room. Certain dishwashers can be connected to an Amazon account, which prompts automatic ordering and delivery of detergent and rinse aids.
Beyond the kitchen
Smart technology can control much more than kitchen appliances. Smart thermostats allow you to turn on the air conditioning in a vacation home as you drive there or verify you’ve turned it off after you’ve left. They can also let you override a guest’s setting, which may not be the number you wish.
Window drapes and shades can be controlled remotely, too, so normal household routines can be mimicked even when the house is empty. The same goes for lighting: smart plugs don’t require any changes to the home’s electrical system, because they go into existing outlets, but they do require dimmable light fixtures. Outside lighting can be set to turn on automatically or on demand.
“You can turn [lighting] on before you get home, so you can see when you get home,” says Darrell White, project manager for Building Specialists in Roanoke. “It gives you flexibility over a schedule.”
When it comes to home security, we’re far past basic doorbell cameras. Sophisticated systems have clear images, wide views and even allow verbal communication, so you can provide instruction – or a warning. Deadbolt locks can also be accessed via Wi-Fi. “If you need to let somebody in, you don’t have to give them a code,” White notes.
Maintenance and security
Whether you care about smart technology or not, it’s here. “Gone are the days of the appliance guy in the truck with a box of tools,” Ramsberger says. “Even if you have knobs [on an appliance], there’s a control board behind it. If [your service technician] doesn’t have a computer that works on that particular manufacturer’s products, you’re out of luck.”
One upside of advanced devices is that a repair can begin even before the homeowner knows one is needed. “[The customer’s] refrigerator will email me, I can go in remotely to diagnose [the problem] or get a good idea,” Ramsberger says. “Then I call the customer to let them know they need a new part or a visit. That’s handy.”
But humans are still necessary. Ramsberger says fault codes, which are supposed to identify the problem for a technician, are more often wrong than correct. “You’re relying on something that’s broken to tell you what’s broken,” he notes.
And if you want to use remote access, an encrypted WiFi system – or personal server – is essential. Criminals who access home systems can unlock doors, open garages and even discern whether people are home. “If a refrigerator hasn’t been opened or closed for a few days, they assume nobody’s home,” Ramsberger says.
White says most customers are interested in some amount of technology, as options have become more affordable and reliable. “From lighting to appliances, everyone is starting to embrace it,” he says. “The best advice is to consult with a manufacturer’s representative who can help you design your system. Customers will need service down the line, and these are the guys who’ll be servicing it.”
Putting it all together
Richard Shively, who founded Shively Electric in 1974, encourages homeowners to think carefully about what they want, need and will use. When Shively built his home in 2007 (he’s an engineer as well as an electrician), he installed systems to manage HVAC, lighting and security, including cameras. While all are useful, he’s most enthusiastic about the systems that lead to savings.
“I am 110% sold on [remote HVAC control], because it saves money,” he says, noting that adjusting temperature from afar is useful, especially for a vacation home or while traveling away from the primary residence. Wall sensors can turn lights off in a room once people move elsewhere. Depending on the lighting system, it’s also possible to create a setting, for moviewatching or entertaining, which will dim lights in one area but not another. “This is smart home tech that’s practical,” he says. “Every time you dim a light, you save electricity.”
Bringing smart features into a home isn’t hard, but Shively advises a thoughtful approach. “It’s an after-market application, and you don’t have to run [new] wires,” Shively says. “But stay with manufacturers that have been around for a long time. When you need parts, you want that company to still be around.”
Shively’s best advice: “We’ve seen so many trends over the years. I’m all in [with technology] as long as it has a practical usage. You want functionality, not gadgetry.” ✦
World traditions
A snapshot of European & Scandinavian winter fetes
BY KATHERINE FULGHUM KNOPF
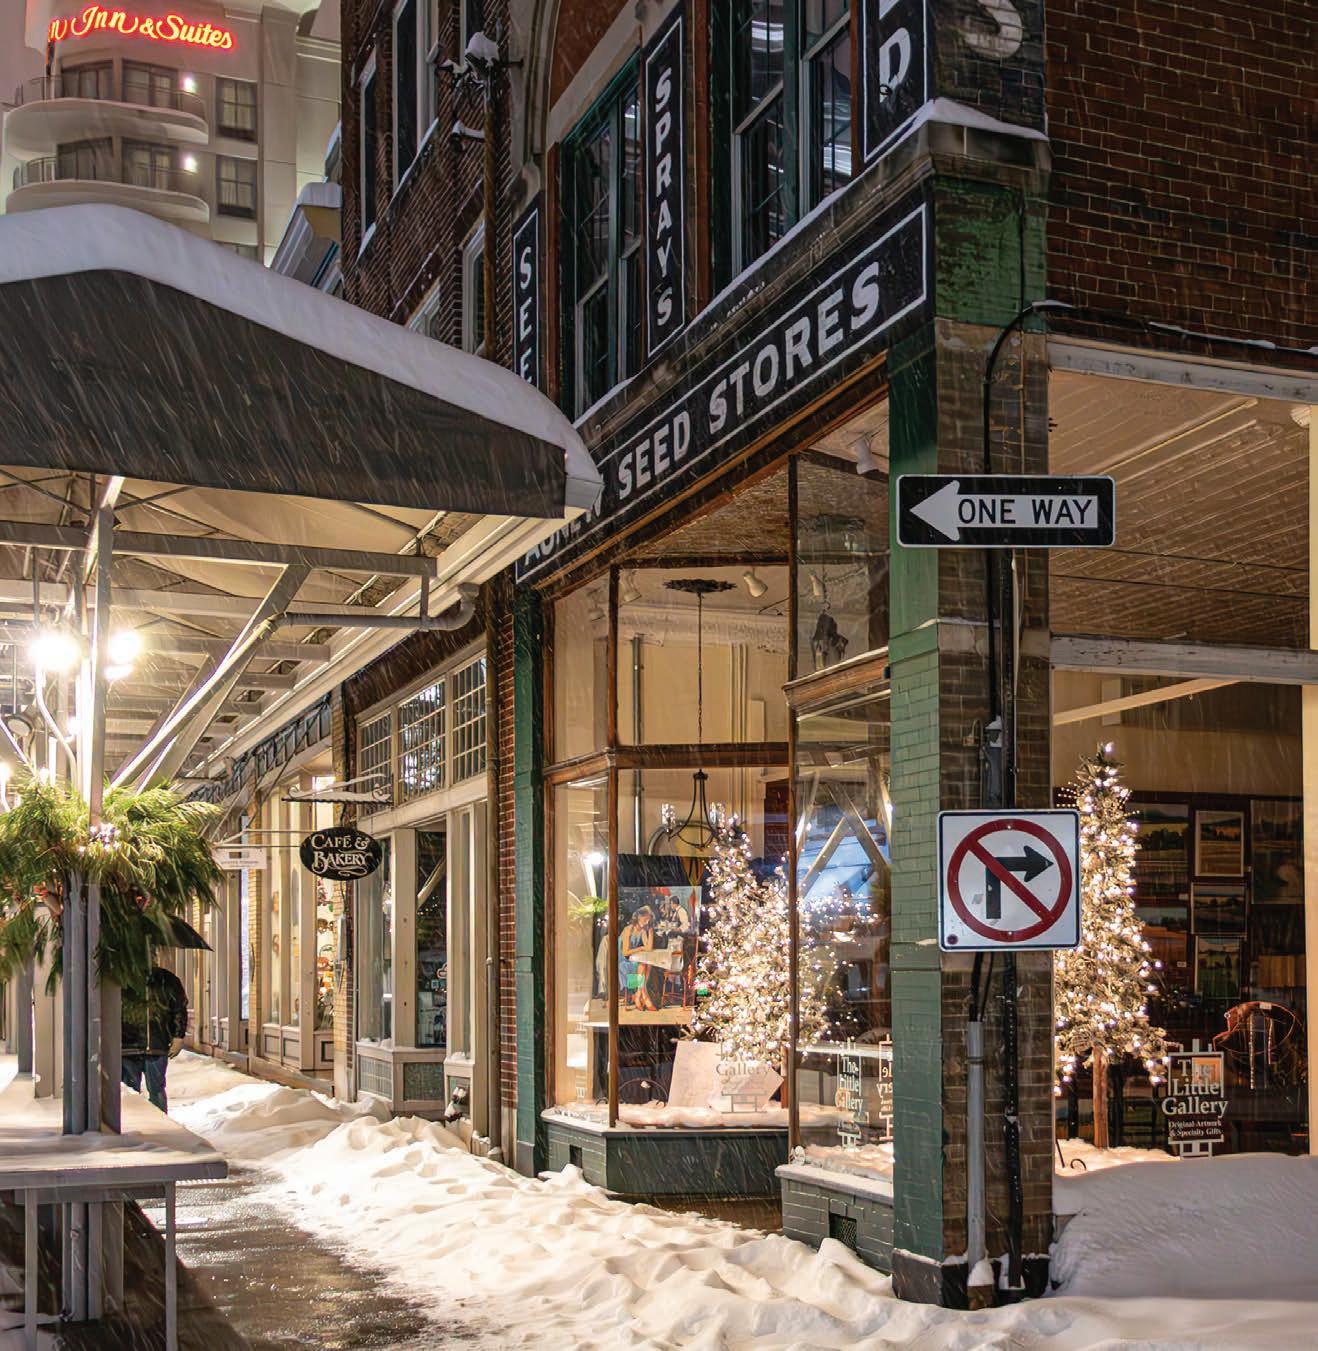
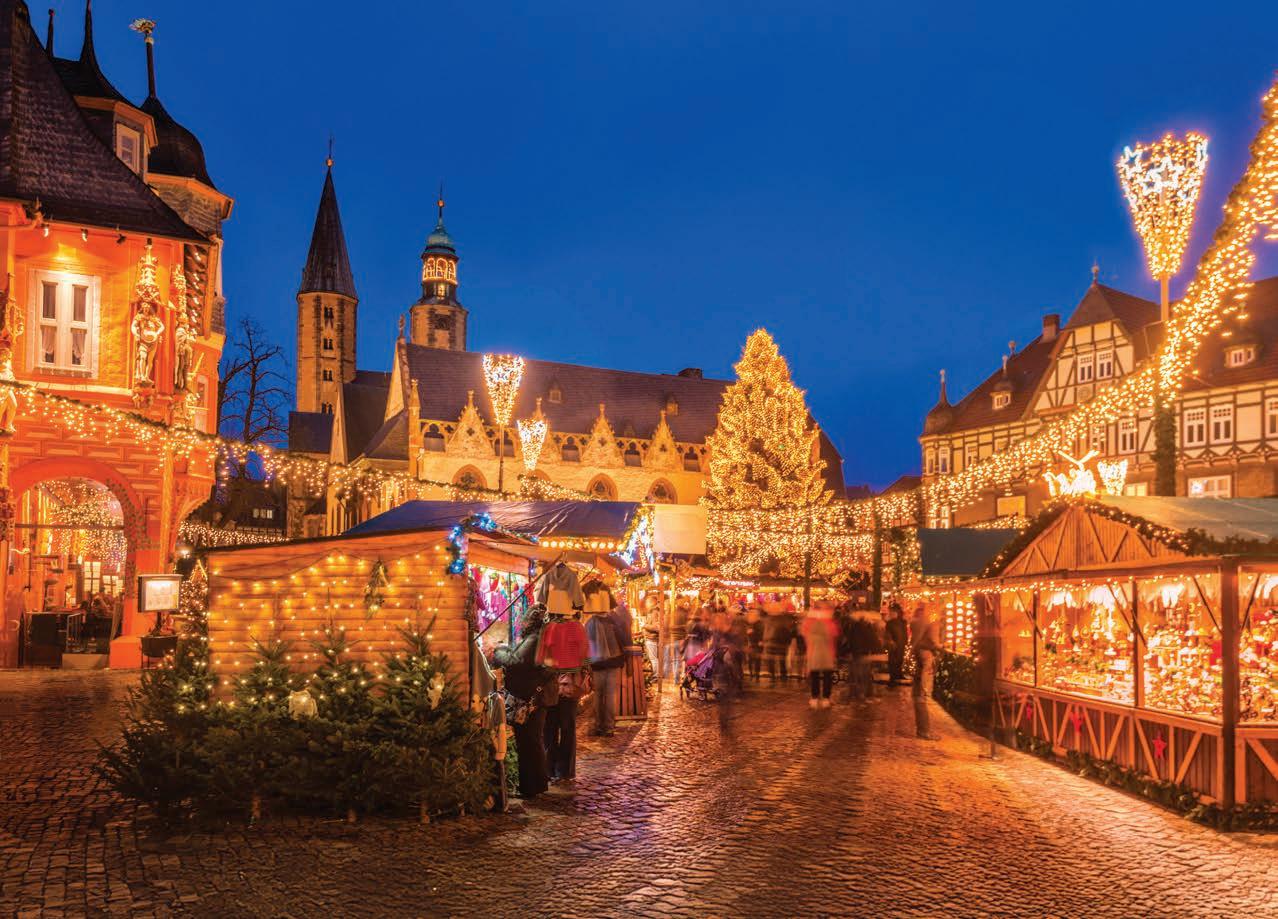
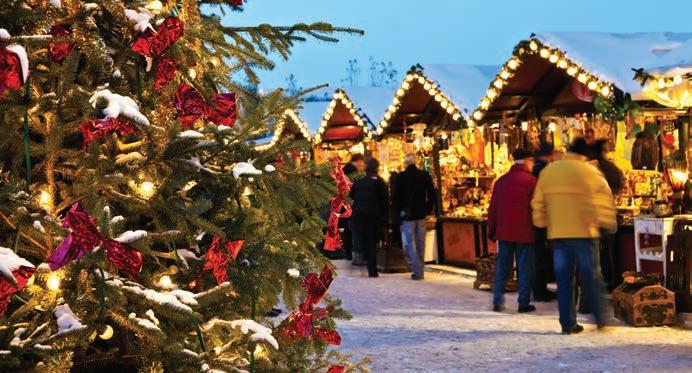
Winter holidays, born from history and tradition, encourage celebrations and gifts. Many festivities filter from country to country as travelers desire to create similar merriments at home. German Christmas Markets are one of the oldest of these traditions. Although the marketplaces in Germany are the most famous, many cities in Europe and the United States host Christmas Markets so local shopkeepers, artisans and performers have a venue to share their gifts.
Medieval roots
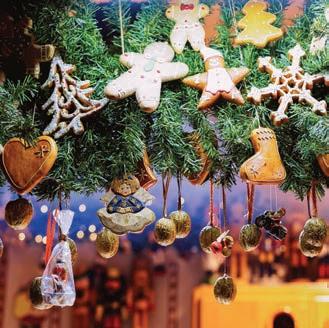
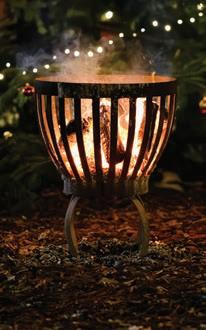
Christmas bazaars originated with a practical purpose: most people lived in the country far from town. Churches and cathedrals were located in the heart of the town and held their ceremonies on feast days leading up to winter. It was natural for people to visit town before the religious services so they could stock up on food and supplies to sustain them through long winter months. Gradually, these market days evolved into festivals. Medieval towns used fires to illuminate and add sparkle to drab city streets. They built wooden huts in the city center to house vendors that sold pastries, rolls and hot mulled wines. Stages were built to promote live nativity scenes and offer a place for thespians to present historical theater, puppet shows and poetry readings. Artisans sold paintings and carved wooden Christmas figures. Giant fir trees were erected for the crowning of the Christmas angel.
Modern-day additions
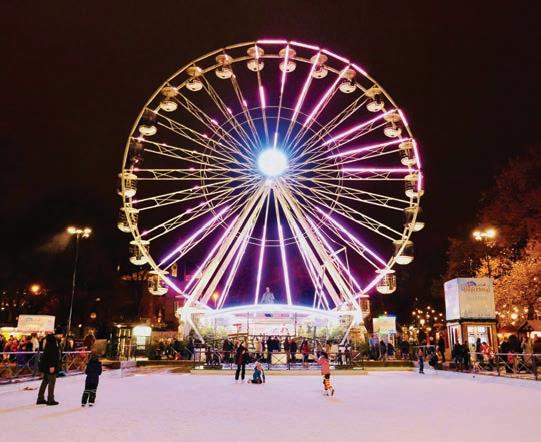
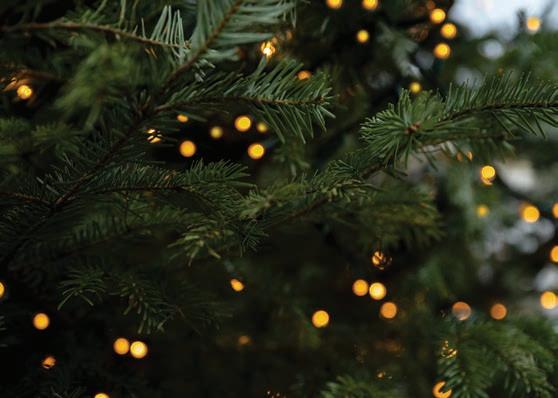
European cities fabricated these Medieval bazaars then added their own flairs to these celebrations that start in late November and carry on through Epiphany (January 6). It is a tradition that signals the start of the winter holidays and encourages outdoor festivities for locals, travelers and visitors. Today these fairs bring out all ages for ice skating, caroling, Ferris wheel rides and sparkling fairy lights that make old city alleys look magical. Shopping for gifts, holiday meals and supplies becomes an outing.
at SMITH MOUNTAIN LAKE
The saints and feasts
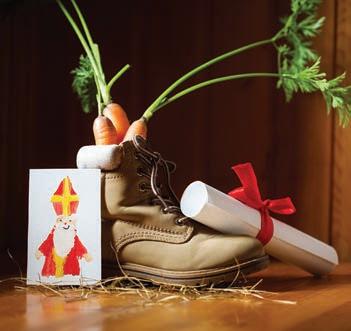
St. Nicholas Day or the Feast of Saint Nicholas is observed in European countries in various customs. In Germany and Poland, boys dress as bishops and beg alms for the poor. In Poland and Ukraine, children wait for St. Nicholas to put a present under their pillow if they are good. Misbehaving children receive twigs or coal. In Belgium and the Netherlands, children place a shoe filled with hay and carrots for St. Nicholas’ horse in hopes he will stop by and trade it for a gift. The British Father Christmas and U.S. Santa Claus derive many of their traditions from St. Nicholas’ legacy, as does the Norwegian Santa, called Nisse.
Christmas is magical in Norway; many farms and charming waterside towns provide the setting for a winter wonderland. The mountains’ snowy terrain creates the perfect scenery for their holiday legends. The Nisse expands a surprise twist to the traditional St. Nick role. A guardian for farms and their livestock, the Nisse is also a prankster if the children don’t keep him happy with good behavior. Instead of gifts, the Nisse may play a practical joke on them. The Nisse, dressed in Santa Claus garb, arrives on Christmas Eve to hand out gifts to the family.
St. Lucia Buns
¾ cup milk
1/2 teaspoon saffron threads
1 teaspoon white sugar plus 1/4 cup
1 (1/4-ounce) packet active dry yeast
3 1/2 cups all-purpose flour
1/2 teaspoon Kosher salt
Seeds from 3 cardamom pods, ground
1/4 cup unsalted butter, softened
1/4 cup sour cream
2 large eggs
1 egg, beaten for egg wash Raisins
In a small pot, heat the milk, saffron and 1 teaspoon of sugar together until the milk is steamy. Remove from heat, and stir to dissolve the sugar. Let cool until about 115 degrees, or warm to the touch, but not hot. Sprinkle the yeast over the warm saffron-infused milk, and let sit for 5 to 10 minutes until foamy.
In the bowl of a stand-up mixer,* whisk together flour, the remaining 1/4 cup of sugar, salt and ground cardamom. (*You can make this recipe without a mixer, it’s just a bit easier with one.) Make a well in the center of the flour, and add the yeast-milk-saffron mixture. Add butter, sour cream and eggs. Mix the ingredients until well incorporated.
Switch to the dough hook of your mixer, and knead on low speed. (Or knead by hand.) Slowly add additional flour, a Tablespoon at a time, kneading to incorporate after each addition. Do this until the dough is still a little sticky to the touch but does not completely stick to your hands when you handle it.
Shape the dough into a ball and place in a large bowl. Cover with plastic wrap. (Note: At this point, you can make ahead and refrigerate overnight if you wish.)
Let sit in a warm place for 1 to 2 hours, until the dough has doubled in size. (One way to tell that the dough is ready is that you poke your finger in it, and it takes quite a bit of time for the indentation left by your finger to go away.)
When the dough has doubled in size, gently press it down, and knead it a couple of times. Break off a piece, and form it into a ball about 2 inches wide. Roll the ball out into a snake, about 14 inches long. Then curl the ends in opposite directions, forming an “S” with spirals at each end. Place on a lined baking sheet, and repeat with the rest of the dough.
Cover with plastic wrap, and place in a warm spot until the dough shapes double in size, 30 minutes to an hour. Preheat oven to 400 degrees.
Brush the tops and sides of the uncooked buns with the egg wash using a pastry brush. Place raisins in the centers of the “S” spirals. Place in the oven, and bake for about 10 to 11 minutes (turning halfway through cooking to ensure even browning), until the buns are golden brown. Remove from oven, and let cool for 5 minutes before eating.
Recipe from Simply Recipes: www.simplyrecipes.com
St. Lucia Day (Dec. 13) plays a central role in Christmas celebrations for Nordic countries; it signifies the start of the Christmas holidays for Norway and Sweden. Saint Lucia was an early Christian martyr and is a woman deeply admired in Scandinavia. Legend tells of St. Lucia wearing candles on her head so she could see her way as she walked, her hands free to hand out provisions to the poor. To honor St. Lucia, children dress in all white cotton outfits and wear crowns of lit candles on their heads. They parade the streets and halls of office buildings, handing out St. Lucia buns and singing traditional songs. These delicious saffron buns studded with raisins are a pastry anticipated all year.
Books make the best gifts
In Scandinavia and Iceland, gift giving begins on Christmas Eve. Iceland’s tradition of Jólabókaflóð (translated as the book avalanche) embraces their annual release of new books. Jólabókaflóð occurs in the months leading up to December. These Nordic countries spend Christmas day feasting with family and reading the new books they received for Christmas. Traditions are the stories, songs and foods that shape our heritage. Learning the customs of other countries connects our world. It makes it smaller and more interesting. The quiet days of winter afford time for studying other countries’ rituals and trying their pastimes. Try making St. Lucia buns or visiting a Christmas Market during these wintry days. Remember to sing as you bake. ✦
PHOTO: THE ASSOCIATED PRESS
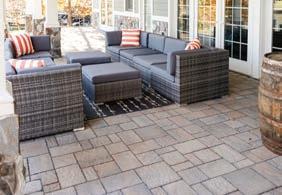
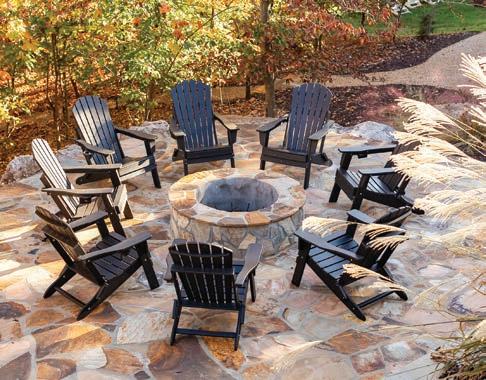
WINTERIZE your walkways
Protect your patio, sidewalk, deck & porch this winter season
BY ASHLEY BLAIR SMITH
Virginia winter weather can really pack a punch for your home’s outdoor living areas. Before you know it, your beautiful porch, deck and walkways can start to lose their radiance and may begin to show signs of erosion due to snow and ice.
The best way to avoid these issues is to take the time to properly care for and winterize your outdoor spaces before the frigid temperatures set in for the season. Here are several ways to ensure your stone and wood surfaces are ready to face the winter ahead.
Thorough inspection
For starters, it is important to do a thorough inspection of your outdoor hard surfaces. Remove all of the outdoor furniture, pots and planters off of your deck, porch or walkways so that you have an unobstructed view of the space. Look for any signs of wood rot, broken stones, mold, mildew or loose nails and screws. Store all furnishings and planters away for the winter season, as these provide places for mold and mildew to grow.
If you come across any damage that is a quick and easy fix, now is the time to go ahead and address that. This will help with upkeep and make winterizing your outdoor spaces less of a hassle.
Clean is key
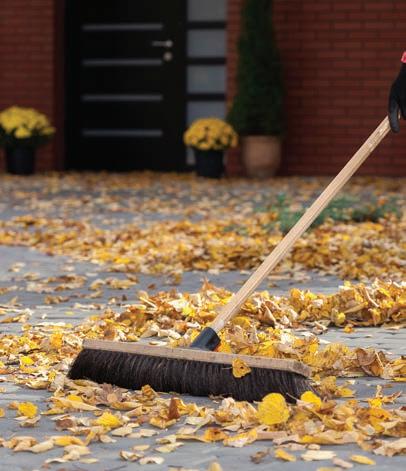
After you’ve attended to any minor damage on your outdoor hard surfaces, it’s time to do a clean sweep of these areas as well. Clean up any debris lingering on your walkway, porch or deck. If left alone, this organic matter rests in cracks and crevices, seeds can germinate and cause issues. To keep this from happening, make it a priority to use an outdoor broom or leaf blower at least once a week to get rid of any leaves, branches or dirt that may have accumulated in corners and under deck furniture.
Jeremy Gordon, construction division salesman for Seven Oaks Landscape & Hardscape, Inc., says it’s also a good idea
to keep leaves and debris off hard surfaces to prevent staining. “Clean outdoor surfaces with a low pressure power washer and the appropriate cleaner rated for that material,” Gordon says.
Gordon also recommends using a product like Wet and Forget, to help eliminate mold and mildew staining. Re-treat with Wet and Forget once a month to keep away moss, mold, mildew and algae.
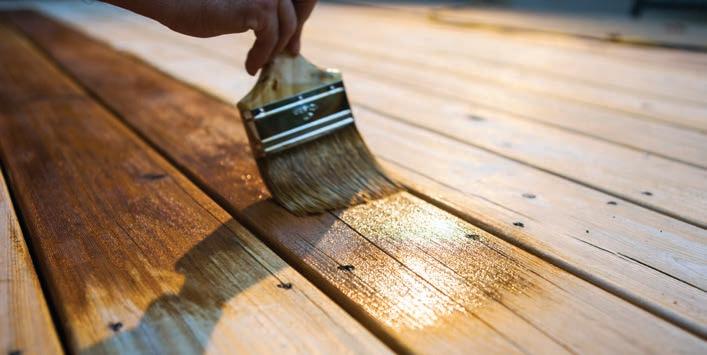
Seal it up!
According to Gordon, the single best thing you can do to protect the look and feel of your stone or concrete walkways and patios is to use a good penetrating sealer and close off the internal pores of the material. “This keeps moisture, salts and other chemicals from being absorbed into the material itself,” Gordon says. “This greatly reduces the effects of freeze-thaw cycles.”
It’s important to have your wooden decks sealed, too. “Keep all wood decks re-sealed every three years,” Gordon says. “This keeps moisture and chemicals out, which swell in the wood fibers with freeze and thaw cycles. It also helps block UV rays that damage the wood.”
After you’ve cleaned and properly sealed your outdoor hard surfaces, the next most important step is to keep your porch, deck and walkways clear of snow and ice.
Snow, ice and freezing rain
When the frigid temperatures pose the possibility of winter precipitation, you may be wondering what the best course of action is for your outdoor space. Should you salt your surfaces? Shovel the snow and ice away? Or, simply let mother nature do her thing and melt the snow and ice naturally?
“I do not recommend using rock salt (sodium chloride) on any of those surfaces,” Gordon said. Instead he suggests using calcium chloride, which is safe for wood, stone, concrete and composite decking; it is also safe to use around children and pets. “There is also calcium magnesium acetate, which keeps the snow from bonding to surfaces so it is more easily removed by shoveling,” Gordon says.
Use a shovel that is made from plastic materials, as the metal ones tend to scratch up hard surfaces.
Keeping snow and ice off your deck prevents damage to the wood. When snow and ice melts and refreezes, it can keep the wood on your deck wet for days, leaving opportunities for mold, rot and mildew. It can also result in the paint or staining on your deck to chip and fade. When shoveling your deck, make sure you go against the grain with a plastic shovel so as not to scratch the deck.
“Ice is by far the most common and problematic form of winter weather we get [in this area],” Gordon said. But don’t let the ice get you down this winter season. By putting in the time and effort to prep and winterize your outdoor space now, you can get yourself one step ahead of the snow and ice so you can enjoy the winter season. ✦
A DECADE OF
The Davenports create a canvas for holiday décor
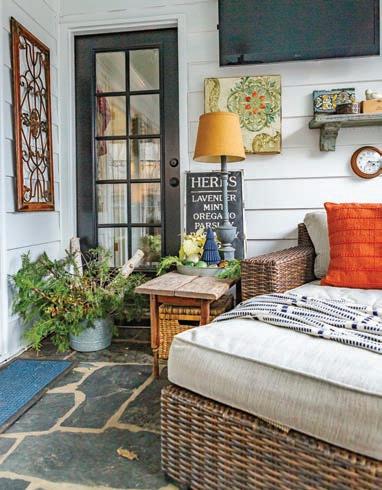
BY KATHERINE FULGHUM KNOPF | Photography by Kathryn Feldmann
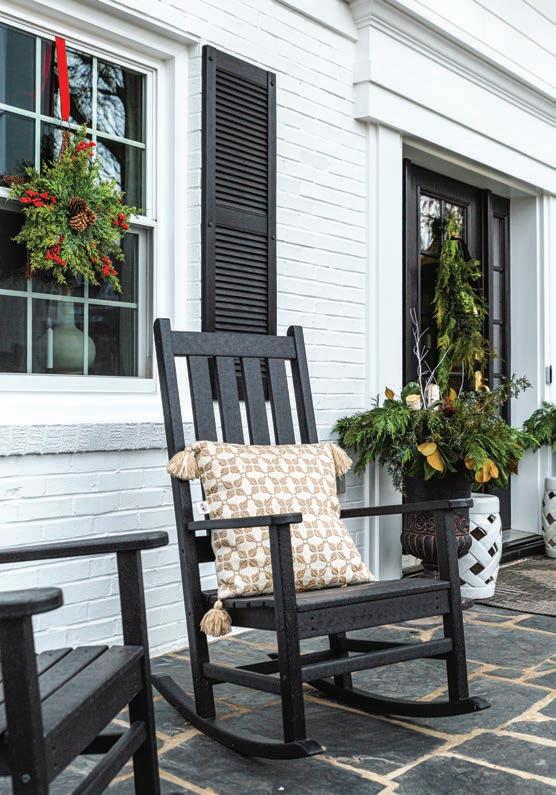
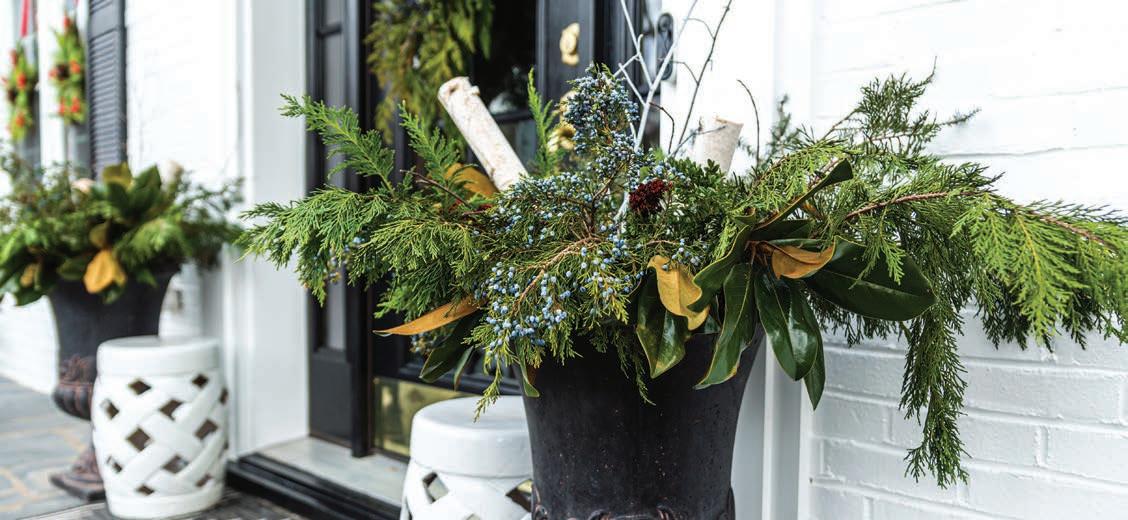
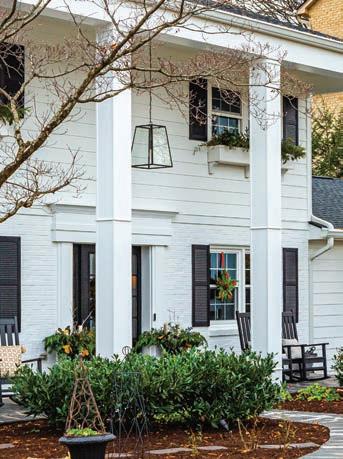
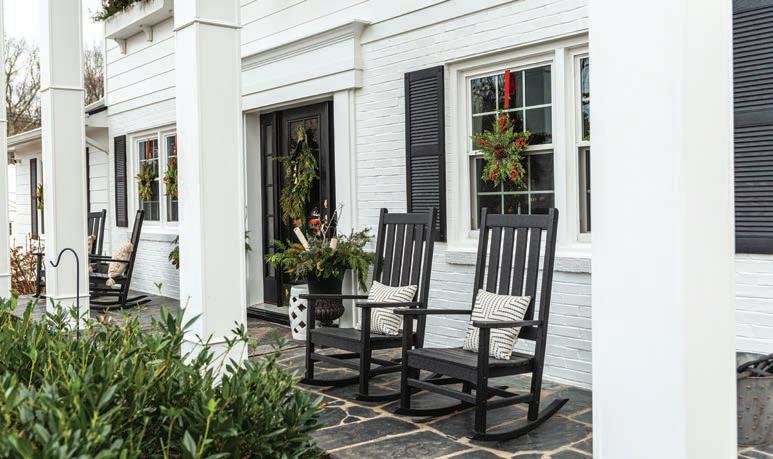
When first seeing the stately white colonial with two-story tall columns, Heather Davenport knew it would make a perfect home for her family. With a flat front yard, this home sits on a quiet street where children and families enjoy being outside. The home’s white siding, black shutters and large window boxes serve as a lovely backdrop for holiday decorations. The interior needed a few decorative changes, but its main features easily fit the family’s lifestyle. Thus, 10 years ago, Heather bought the house and dived right into painting rooms and then renovating the kitchen.
Improving the flow
The layout of the first floor with a primary suite, living, dining, kitchen, sunroom, office and family room offers a great flow for entertaining as well as daily family life. The big deck off the back provides amazing views of Chestnut Mountain and the Blue Ridge Parkway. Upstairs the bedrooms and baths offer private space for children and overnight guests. The sloping lot allows for the back wall of the basement and two upper floors to have myriad large windows to bring in the light.
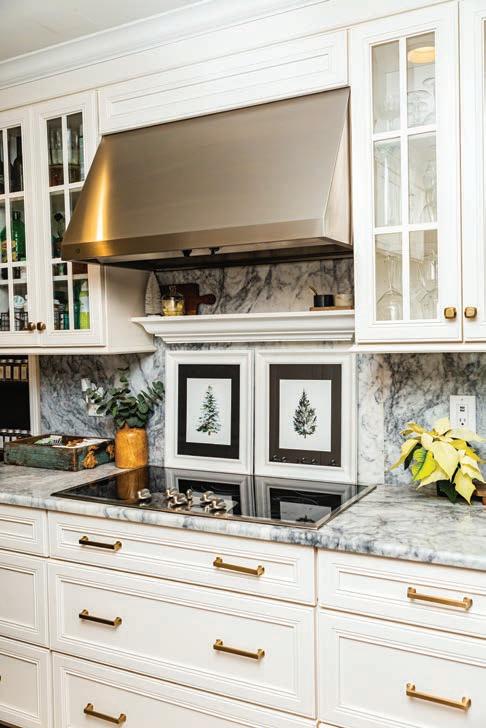
Heather’s vision to take the current galley-style kitchen and open it onto the sunroom kept the original layout while improving the flow and adding so much light for cooking. Choosing to install a big island painted black and topped with gorgeous marble countertops in the middle of the kitchen, carved out room for prepping meals while the countertop overhang offers space for tall bamboo and wooden chairs that invite hanging out in the kitchen. On the surrounding walls, white cabinets with marble counters and brass pulls define the space and balance the kitchen’s taupe walls that feature colorful art. Upper cabinet doors with glass fronts offer an elegant vibe and plenty of room for glassware and dishes.
Showcasing art & collections
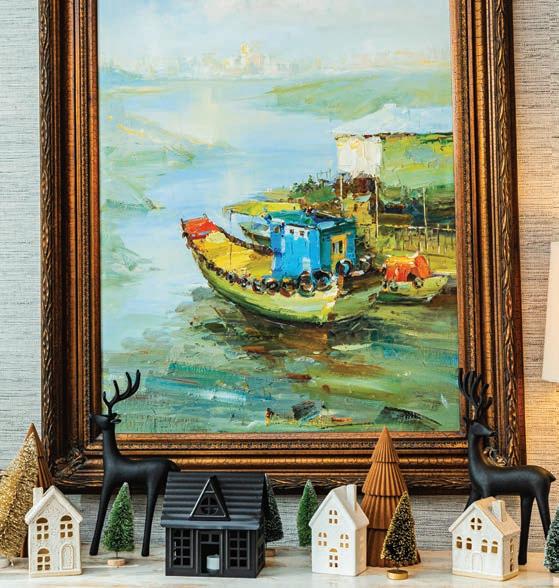
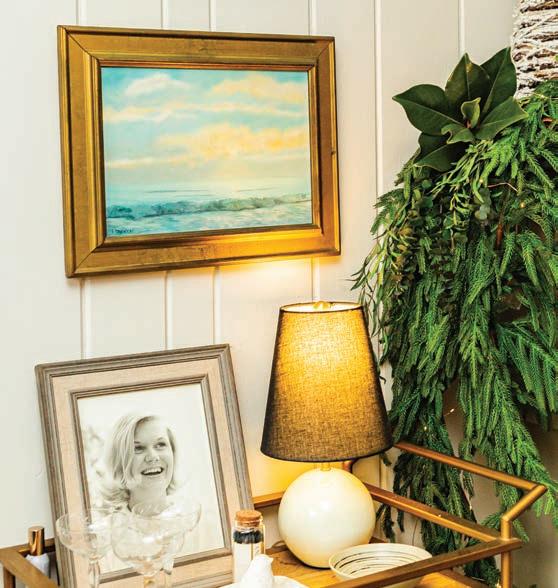
Both Heather and her husband Paul, who joined the family five years ago, love art. Their home is a gallery in which each room’s art ties in with the décor. The art changes with the seasons as they move it around the house. Paul’s mother, Ann Berry Davenport, was an artist in Richmond, Va., and her watercolors are displayed in many of the rooms. These beautiful paintings are a tribute to Paul’s mother and “provide a thread,” keeping his mom around their home. A black-and-white photograph of his mother sits proudly on a gold metal and glass cart beneath several of her paintings.
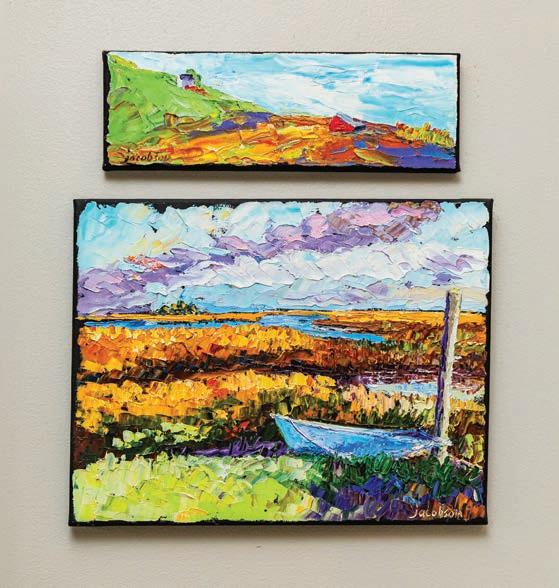
Paul and Heather enjoy collecting and curating their art. They try to buy at least one piece each year. During summers in Roanoke, they attend the annual Sidewalk Art Show to find new pieces for their collection. They are drawn to local artists: a few favorites are Diane Patton, Angie Patton Poe and Eastern Shore artist Carrie Jacobson. Paul’s mom taught him that with art, “the piece chooses you.” Bringing home a new addition means moving some current pieces. It keeps the look of their home fresh and offers a nod to Paul’s mother who instilled in him a love of art.
Heather’s talent for decorating and styling leads her to move their furniture and accessories around the house, too. She says her style is eclectic. Heather mixes comfortable pieces with practical tables and cabinets that hold her collection of distinct objects: vases, bowls and candlesticks that are useful as well as embellish their home, especially when she decorates for the holidays. Heather has an eye for detail that gives each room an inviting appeal. Paul brought many family pieces and antiques into their home. Heather loves those antique pieces, as well, and they blend with her love of moody colors. “It is really important to us that we incorporate our family pieces in our home,” Paul states. Adding these pieces from Paul’s mother and grandmother to the home worked well with the décor. Heather noted, “The house has an old style, so these pieces matched well.” The couch Heather and Paul sit on many evenings in their favorite living room spot is the one that Paul’s parents courted on many years ago.
Rooms with a view
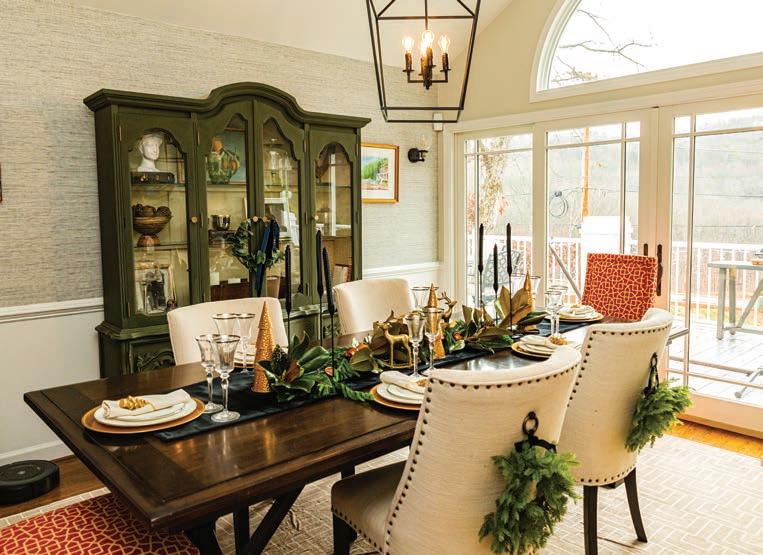
All the rooms flow from the central front hall. The living room opens into the dining room where French doors topped with an arched glass window open to the back deck. The mountain views in the distance are always changing – through each season, they feature a different look. Paul says, “It is truly a color wheel.”
On the other side of the entrance hall, a wide-cased opening allows light to flow into the first-floor office. Dark gray green walls make for a cozy space to work. Wooden slatted doors provide privacy from the den that sits on the other side. In the den, a warm leather couch and chairs keep the family comfortable for movie nights and evening gatherings.
Chris Smith, a local contractor, stepped in and helped with their exterior renovations. Under his guidance last year, Heather and Paul replaced the roof, took off the old wood siding and replaced it and the columns with Hardie® Plank materials. They installed a new front door with glass panes and side panels that flood light into the front hall. Paul says, “We’ve slowly now done everything.” These exterior improvements “made it look like it belongs in the neighborhood.” A sleek black lantern on a long metal chain lights up the front porch and adds a modern touch to the classic white home.
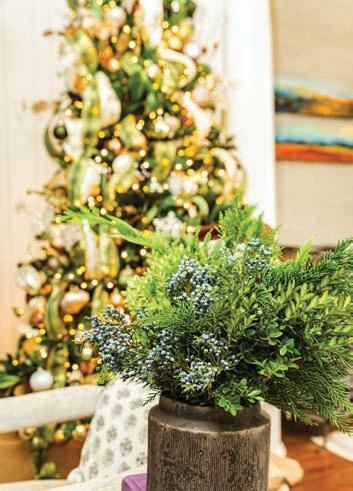
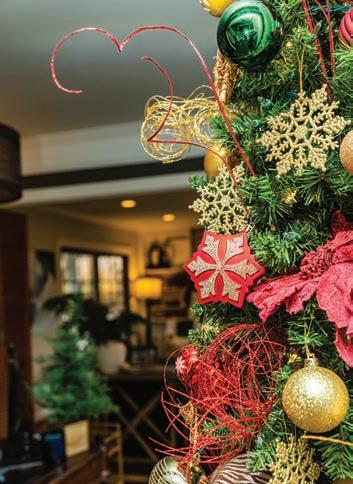
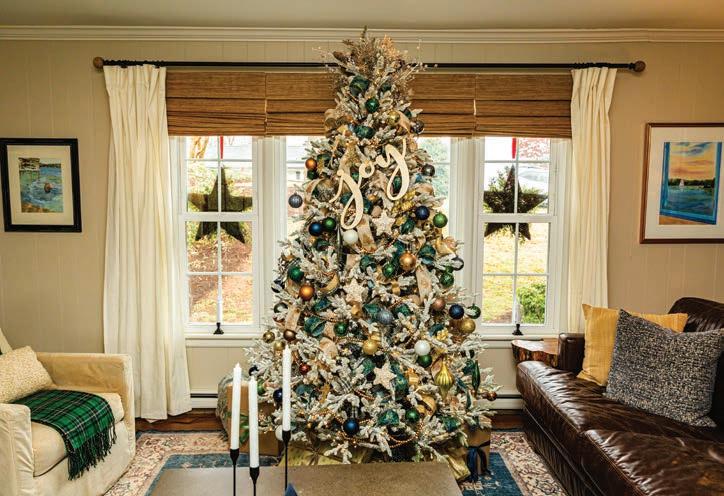
Festive for the season
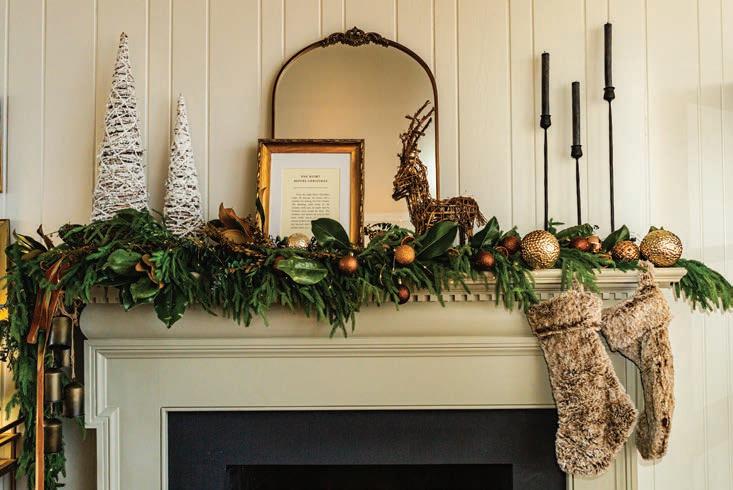
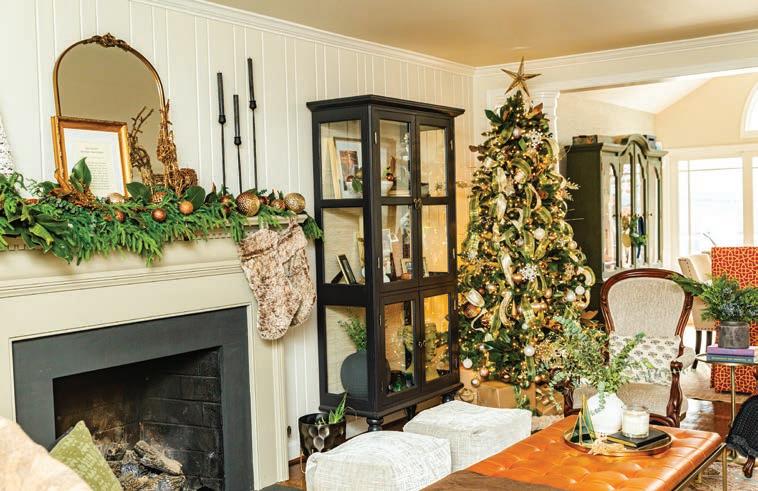
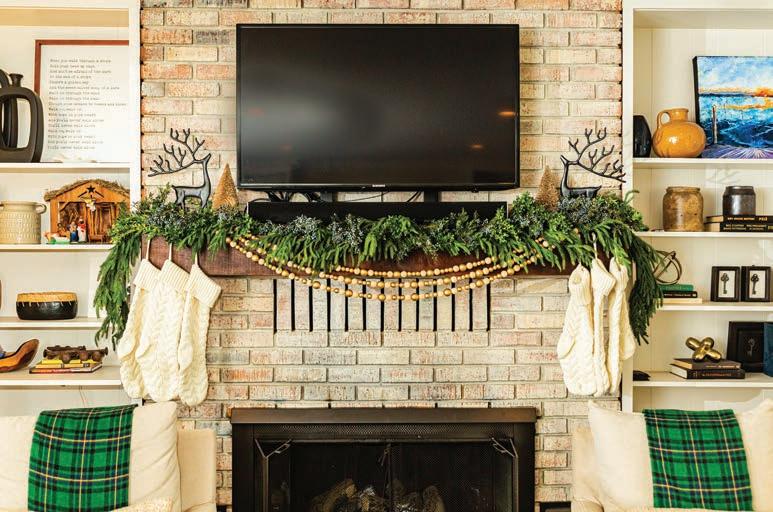
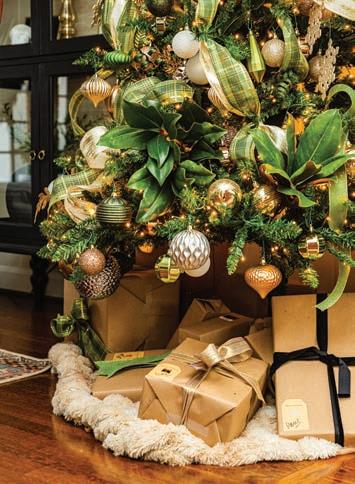
For the holidays, Heather uses a plethora of natural material. “When I was little, that’s the way we decorated,” Heather says, “so it is natural for me to mix pre-bought items with things from the outdoors.” Five years ago, Paul and Heather were married on a friend’s farm, so they often return there for cuttings and beautiful greens and berries to decorate their home. Heather demonstrates a knack for livening up jars and bowls with fresh greens in each room. It adds color and Christmas whimsy all over their home. Their graceful, curved stair banister and mantels are draped with greenery. She adds bows, pinecones, dried fruit and small holiday decorations like metal bells to make a unique setting.
Every year, Heather decorates at least two and sometimes three Christmas trees. “I love doing the trees,” Heather states. Each one displays a theme united by color and decorations. A more formal tree with white lights is in the living room. The casual tree, with all the gifts piled underneath, is in the family room. Some years, there is a tree in the office. Heather fills the outside window boxes with greens and hangs wreaths from velvet ribbons on the front windows.
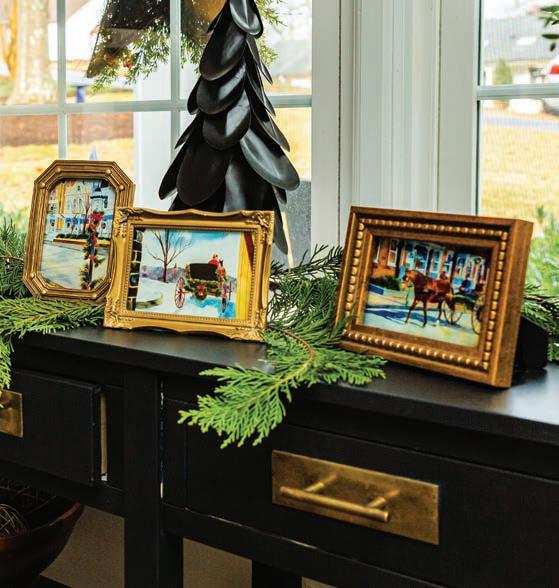
The decorations change a bit as their collections grow. The Christmas Village pieces were started by Paul’s mother to reflect his interests. She added pieces as his careers changed over the years from firefighter to EMS then Emergency Medicine. The dining room’s beautiful wood table reflects a bright winter scene — a long centerpiece of magnolia leaves, green garlands, small gold trees and dried oranges that Heather designs. On the back of each chair, Heather hangs a small green wreath to accent the natural cloth fabric edged with brass nails. Christmas décor makes this room of wood and neutral colors sparkle for holiday meals.
Heather says, “we’ve come full circle and done just about everything.” In a brief decade, she managed to update this lovely home while keeping the timeless style that the house emanates. Paul’s art and family pieces add just the right touches. What a perfect home to demonstrate that a good layout and beautiful things make improvements easy! ✦
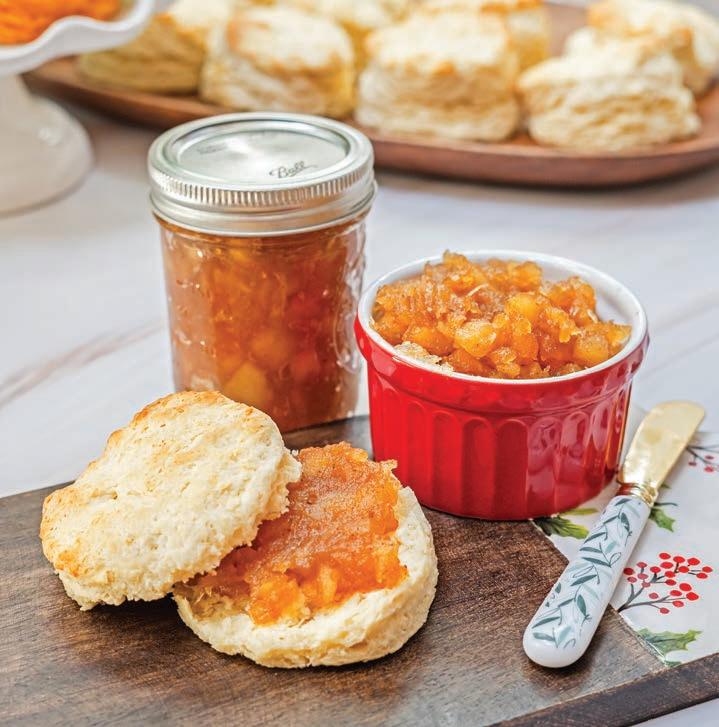
Perfecting the biscuit
BY BECKY CALVERT | Photography by James River Media
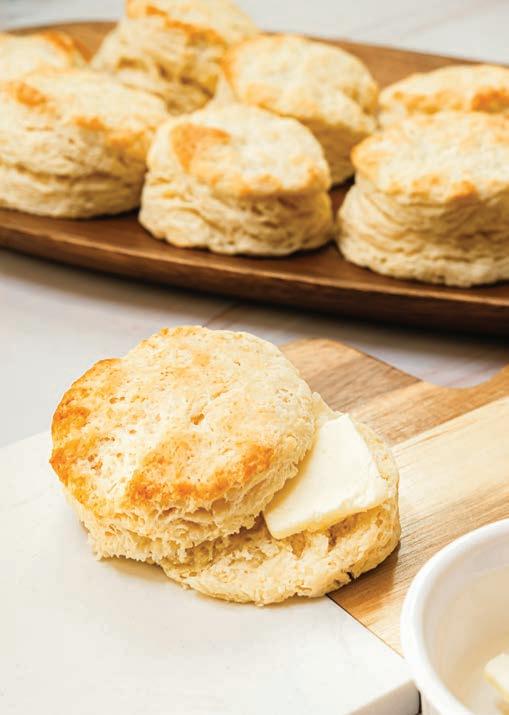
Biscuits are a relatively simple baked good, better made at home and served hot, fresh out of the oven. Essentially, they are flour, fat and liquid, but achieving that iconic, fluffy, perfect biscuit is harder than it looks. Many bakers, myself included, admit that learning to make biscuits is a journey that spans over years.
There are any number of tips out there for making the perfect fluffy Southern biscuit: the type and temperature of the fat used, the type of flour, how the dough is handled, the oven temperature and more. I could write an entire dissertation on all of this, but for the sake of efficiency (and
my editor’s demands of sticking within a certain word count), I’m just going to include everything you need to know in the recipe. Well, almost everything, with one caveat: flour. Not all flours are created alike. White Lily Flour is made with soft red winter wheat, which is lower in protein content than other all-purpose flours and produces a fluffier biscuit. One can substitute cake flour for a portion of regular all-purpose flour for the same result that one sees with using White Lily Flour. If you can find White Lily All Purpose Flour, then disregard the use of cake flour in the following recipes and just use all White Lily Flour.
Fluffy Good Biscuits
Yield: 8-10 biscuits depending on the size of your cutter.
3 cups flour (21/2 cups all-purpose flour + 1/2 cup cake flour OR 3 cups White Lily all-purpose flour)
41/2 teaspoons baking powder
¾ teaspoon cream of tartar
1 Tablespoon sugar
1/2 teaspoon salt
¾ cup cold fat – could be all unsalted butter or 1/2 cup unsalted butter, 1/4 lard/ bacon fat
1 egg, beaten 1/2 cup cream
1/2 cup milk or buttermilk
Preheat oven to 450 degrees. Mix dry ingredients together. Cut in the cold fat in two batches so that the first round is miniscule, the second round closer to pea size or smaller. (Note: You can use a food processor, a pastry cutter OR your hands to incorporate the fat into the flour mix.) Combine cream, milk and egg, pour into the dry mix. Stir together with a fork, then using your fingers, combine until the mixture forms a soft ball. (You may need to add more milk, but no more than 1/4 of a cup.) Turn out onto a floured counter, mat or cutting board. Pat down until about ¾" thick. To cut biscuits, dip your cutter (glass, cookie cutter, biscuit cutter, etc.) in flour and go straight up and down in the dough, not twisting. Place your biscuits close together on an ungreased pan (or lined with parchment paper or a silicone baking sheet for easier clean up). Chill biscuits for a minimum of 10 minutes. (This helps the flour absorb the fat for a better rise.) Place in oven, and bake for 10-12 minutes.
Specialist
Toppings for your biscuits
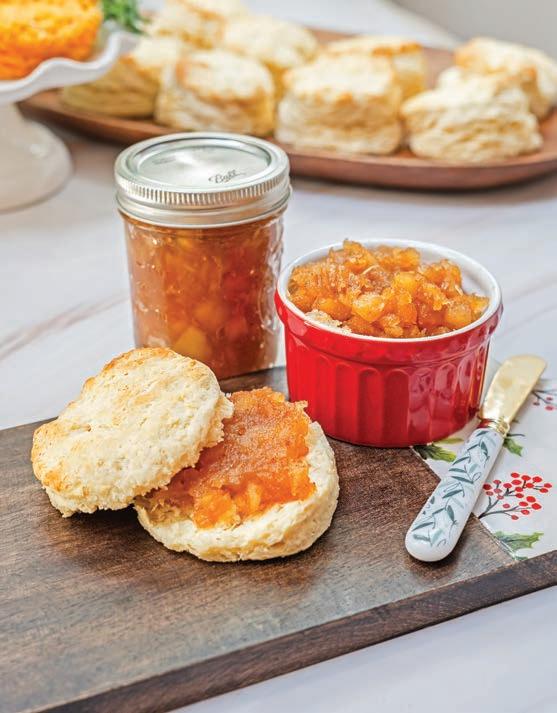
Apple Pie Jam
Homemade biscuits call for homemade jam. This is a favorite of my family’s this time of year. It keeps for several weeks in the fridge (if it lasts that long) or can be hot water bathed for longer storage in your pantry. Yield: 2 half-pint jars
3 cups peeled, cored, chopped apples (about a pound)
Grated zest and juice of 1/2 lemon
Dash of apple cider, apple juice or water
1/2 cup sugar
1/4 teaspoon ground cinnamon
1/8 teaspoon ground nutmeg
1/4 teaspoon fresh grated ginger
In a non-reactive pot, combine apples, lemon zest and juice, and apple juice. Boil gently for 30 minutes, or until apples begin to soften. Mash apples with a wooden spoon or a potato masher, if needed. Add sugar all at once and stir constantly. Bring mixture to a full, rolling boil, and cook until set. Remove from heat and stir in spices. Skim foam off the top. Ladle jam into hot jars leaving 1/4" headspace. Process for 10 minutes in a hot water bath if storing longer.
Toppings for your biscuits
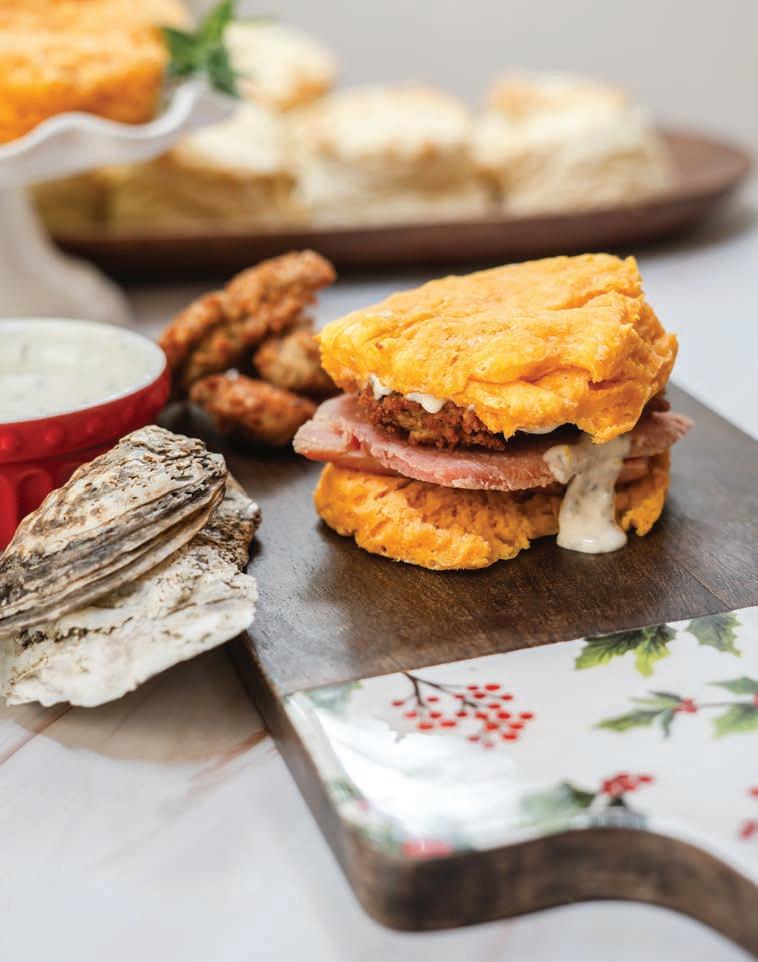
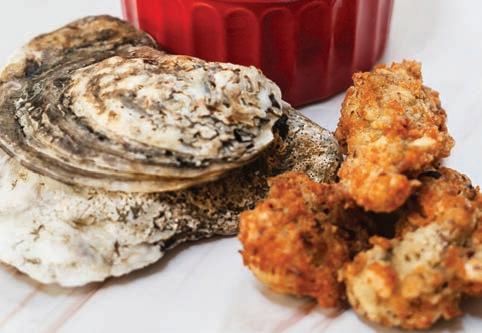
Fried Oyster and Ham Biscuits with Lemon Caper Mayonnaise
While biscuits are usually served with butter, honey or jam, they are also excellent as the basis for a breakfast sandwich or, best of all, when paired with Virginia country ham. Or go completely over-the-top and add a fried oyster to your country ham biscuit!
FRIED OYSTERS:
Oysters, freshly shucked
1/2 cup seasoned flour
1 egg, beaten
Dash of milk or buttermilk
1/2 cup cornmeal
1/4 cup Panko crumbs
1/4 cup finely ground roasted pecans
Oil for frying
Heat oil to 375 degrees. Put seasoned flour in a shallow bowl. Combine egg and milk in another bowl. Combine flour, cornmeal, panko and pecans in a separate bowl. Dredge oysters in seasoned flour. Dip into egg mixture. Coat with seasoned blend. Fry in hot oil until golden, taking care to not crowd oysters. Remove from oil and drain on plate.
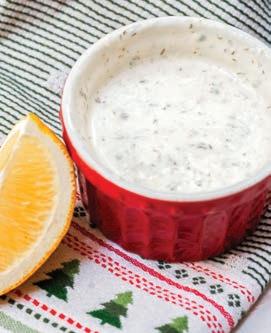
LEMON CAPER MAYONNAISE:
1/2 cup mayonnaise
1 Tablespoon capers, finely chopped
2 Tablespoons horseradish
Lemon zest and lemon juice from 1/4 lemon
Few drops of caper juice
Combine all ingredients and chill until ready to use.
FRIED OYSTER AND COUNTRY
HAM BISCUITS:
Biscuits
Prepared country ham, thinly shaved
Fried oysters
Lemon caper mayonnaise
Split biscuits in half. Add a few pieces of country ham to one biscuit half. Top with fried oyster. Spread a thin layer of lemon caper mayo on the other biscuit half. Assemble and serve. ✦
Christmas in bloom
A cheery cactus to brighten the holidays
BY SLOANE LUCAS
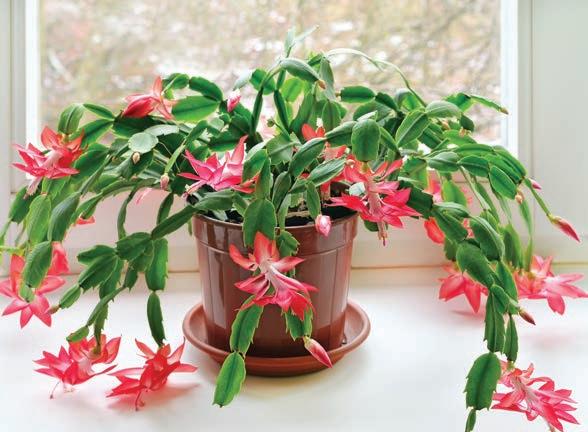
While plant-lovers across the country associate Christmas cacti with wintertime, the Schlumbergera bridgesii actually hails from much milder climes, originating in the Southeast coastal mountains of Brazil. Unlike dry-climate cacti, this beautiful flowering succulent evolved to thrive in humid environments with lots of shade.
Perfectly suited for growing indoors, the Christmas cactus brightens interior décor with red, pink, purple, orange or creamy white flowers. Another bonus for dog lovers – they are not toxic to your cats and dogs. The longevity of these plants is impressive. With proper care, they can last decades, flowering year after year.
Propagation techniques
There are several options for propagating. You can plant directly into soil, or you can root in water. Time your cuttings for when the cactus is dormant instead of when it is budding or blooming. Instead of cutting, pinch and gently twist off up to four segments, using the natural break between leaf segments. If planting directly into soil, make sure the soil is very moist and keep in a warmer area while roots grow. To grow roots in water, use a small glass container that allows you to keep the bottom inch submerged. You can also add small decorative stones to the jar to stabilize the cuttings. When roots appear, you can transfer to a pot with soil.
Potting and repotting
Planters should have good drainage to prevent roots from rotting and killing the plant. If repotting, aim for the new container to be three to six inches larger than its former home. Allow the plant to dry out a little before moving to the new container so the dirt stays intact. If the plant is rootbound, gently break up the roots. Add the new soil around the newly transplanted cactus and then water.
Caring for your cactus
A plant that prefers moderate climates, your cactus will thrive in temperatures between 60-70 degrees. Keep them away from heat sources, including warm air vents and radiators, hot windowsills and functioning fireplaces. Christmas cacti are thermo-photoperiodic, which means they need six to eight weeks of either cool weather or darkness to help spur budding. Keep the plant in a colder area of the house or enclosed patio where temperatures are between 50-55 degrees. Give it 13 hours of darkness at lower temperatures between 55-70 degrees to start the budding process. Or you can provide the plant darkness for 15 hours at a time in temperatures above 70 degrees. Bear in mind that darkness at higher temperatures needs to be uninterrupted – so sequester in a closet or windowless room. Do not fertilize it, either. Think of it as a period of hibernation where you want the plant to be as dormant as possible.
Did you know?
Allan Cunningham was the first botanist to collect and document the Christmas cactus during an expedition to Brazil in the early 1800s. — Birds & Blooms
Once you see buds, shift to an area that is bright and sunny, but without direct sunshine, which can dry it out.
You will need to walk a line to keep your cactus at the right water level. Overwatering will cause the plant to wither, but it still needs to be kept hydrated. To mimic rainforest conditions, buy or upcycle a mister to spray your plant daily. Set the pot on a sealed tray with decorative pebbles and add water to the tray to provide additional humidity. Check the soil, and water only when the top is dry. When water runs through the bottom, it is saturated. Do not let it sit in runoff water — if the tray is too full of water, drain it until it is below the level of the pot.
As with many plants, your Christmas cactus will be happiest in well-drained soil rich with compost. You can also add liquid fertilizer, following manufacturer’s instructions for timing and amount.
Blooms should appear about 12 weeks after the first buds form. You can even time your blooms by working backward from the date you hope to have flowers. Allow for two months of hibernation and three months for flowers to open and you can plan ahead for beautiful blooms that will last well over a month.
Get creative with cacti
With Christmas cacti in bloom, be sure to show them off. Use them as bold table centerpieces, hang plants from the ceiling to fill empty corners, place them on the ends of shelves for pops of color and greenery. You might also display several together in matching or complementary planters to create a colorful indoor garden. Take care of your beautiful Christmas cactus this winter, and it will bring joy season after season! ✦
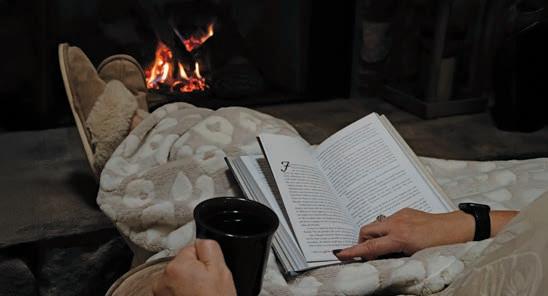
For the joy of reading
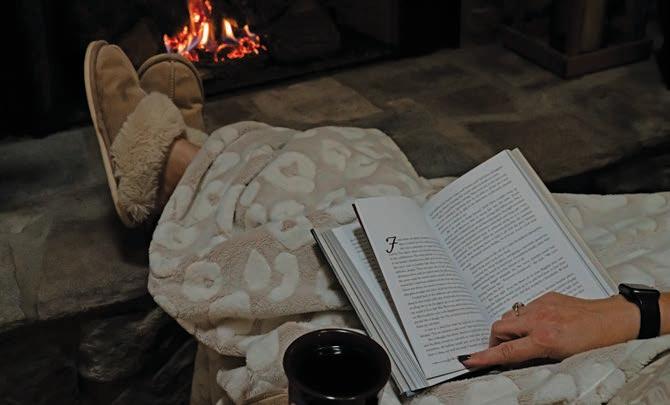
Creating a home reading nook
BY MARGIE LIPPARD
When I was a Smith College undergraduate, I read novels and poetry for hours nestled in a comfortable wingtip chair, my legs flung over its side arms, in the elegant Neilson Library Reading Room. Built-in shelves with leather-bound books lined the walls, oriental rugs adorned the wood floor, and antique tables displayed collectibles amidst whatever flotsam of books might be on a student’s syllabus. With a stately fireplace at its center, the room was an English major’s paradise.
While you may not have enough space for a dedicated library, you can create the perfect reading nook that fits your home’s dimensions and your budget. Its core elements mirror my college reading room: tranquil ambiance, comfortable furnishings, a rug and cozy accents, good lighting and shelving that showcases your book collection.
PHOTO: JAMES RIVER MEDIA
Learn to Love Math
Finding and furnishing your nook
The quest for a serene spot for a reading nook can take you into unlikely places. For children, try reinventing a bedroom closet as an enchanting story time getaway. After folding closet clothing into a chest of drawers, you can fashion a reading oasis with poufs, fluffy throw pillows and blankets and gentle lighting. Spark your child’s imagination by painting the walls in bright colors or wallpapering them with whimsical patterns evoking storybook themes. Shallow bookshelves that display book covers, like those you see in libraries and bookstores, will simplify the book choice for the day.
When planning your reading nook, measure and make the most of your square footage. If you have extra space at the end of a built-in bunk bed, add a custom-made cushioned bench, storing book crates below and installing soft lighting above. Transform a window seat into a cozy reading nook ensconced within pretty curtains and illuminated by sunlight. In your playroom or den, pitch a canopy or tent for a magical hideaway decorated with bean bags, a string of twinkling lights and a small bookcase. Don’t forget a cushion for your family’s fourlegged furry friend!
For adults, you can integrate reading nooks into almost any room without dominating the space. Some rooms lend themselves to tranquil reading nooks better than others. Nestle a comfortable leather armchair on a cozy rug in a bedroom niche or by the bedroom fireplace, positioning a softly glowing floor lamp, side table and bookcase nearby. In a living room, study or sunroom, design a beautiful reading nook that embellishes your home’s décor. Your reading oasis might boast a plush sofa, a chaise lounge, twin club chairs or single armchairs, upholstered in patterns, textures and colors that enhance your home’s design. Anchor seating with side tables bearing handsome lamps and add an ottoman or coffee table for books and beverages. While it’s a busy hub and not exactly a relaxing oasis, a kitchen with shelving for cookbooks and a table to perch them upon for jotting recipes will inspire the cooks in your house over the holidays.
Shelving that showcases books
Whether DIY or tailor made, bookshelves marry function with style. A bookcase not only stores and spotlights your book collection, but it serves as a focal point in a room. Shop for beautiful shelves in a wide assortment of styles at local furniture stores. If you’re on a budget, Ikea Billy Bookcases are affordable DIY shelving options that come in a variety of sizes and prices beginning as low as $25. At a higher price point, the Ikea Hemnes collection features adjustable shelving, glass-door cabinets and storage drawers. If you’re on an even tighter budget, visit thrift shops or neatly stack well-made wicker crates for your books. You’ll create attractive yet affordable bookshelves that beg for a vase of flowers and a comfy reading chair.
Organizing your collection
With thoughtful organization, your book collection can be both aesthetically pleasing and accessible. Begin by separating paperbacks from hard-cover books, which need more shelving support. Arrange your books alphabetically by author or genre. For aesthetic purposes, consider grouping them in rainbows of color and according to height, with the tallest bookending each shelf. Winnow your book collection so it consists of your most treasured books and donate used ones to your public library or other charitable organization. When you downsize your collection, you’ll have space on your shelving to display artwork, framed pictures and collectibles that add interest and warmth to your room. With the popularity of multiple-purpose flex spaces in interior design, home reading nooks are enjoying a renaissance. In these tranquil spaces, you don’t have to be an English major to experience the joy of reading. ✦
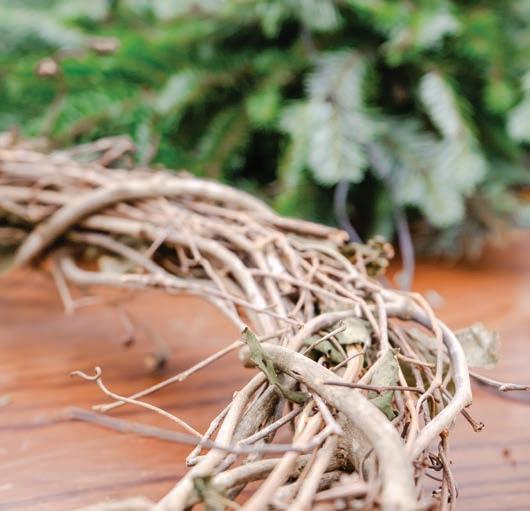
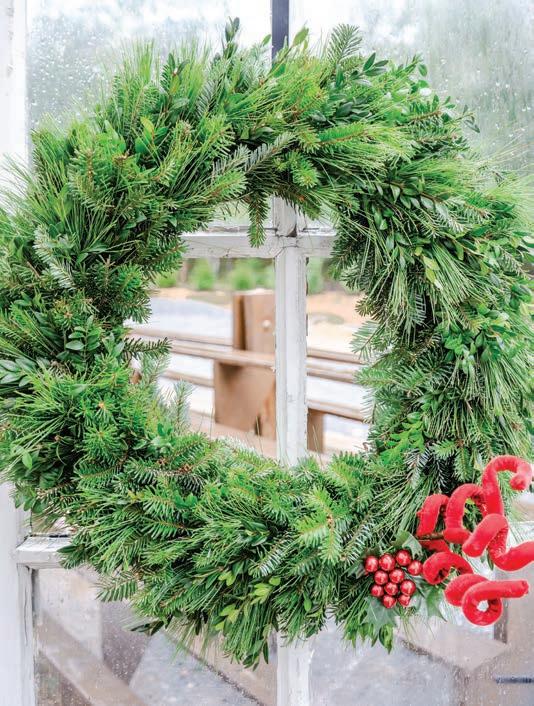
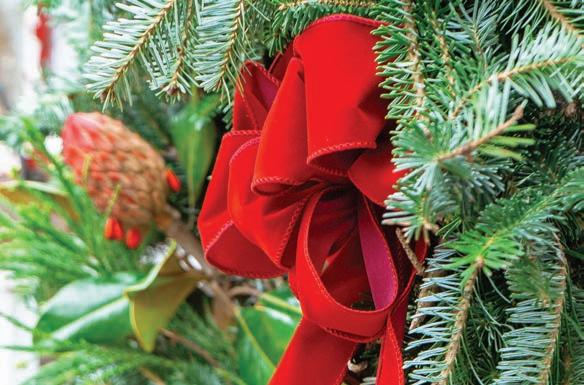
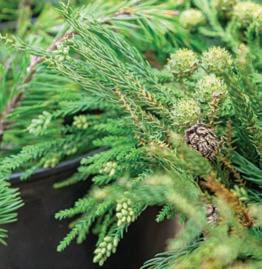
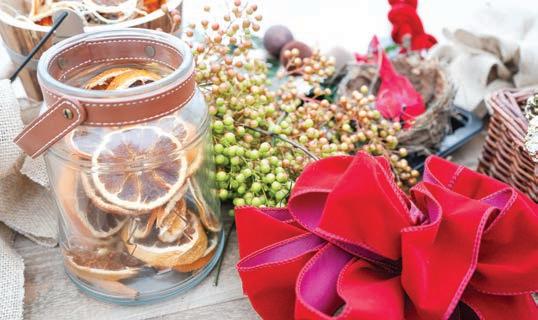
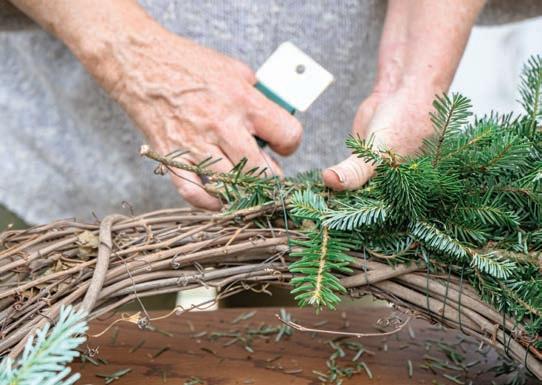
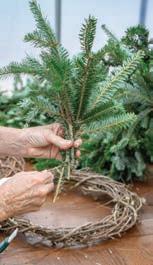
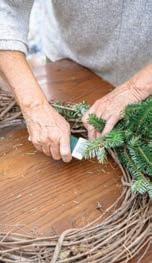
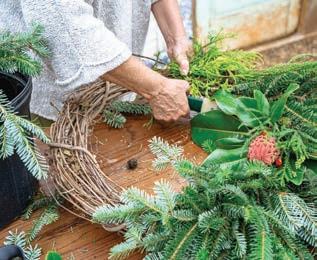
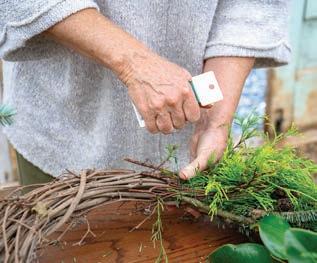
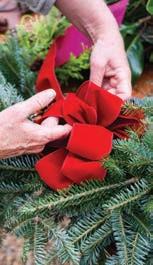
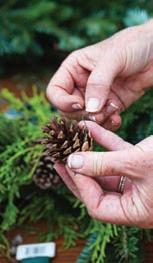
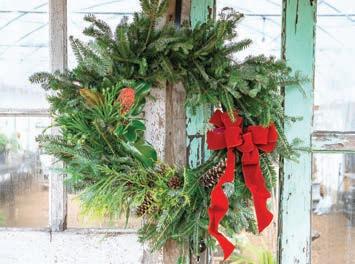
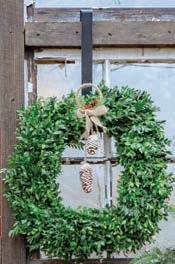
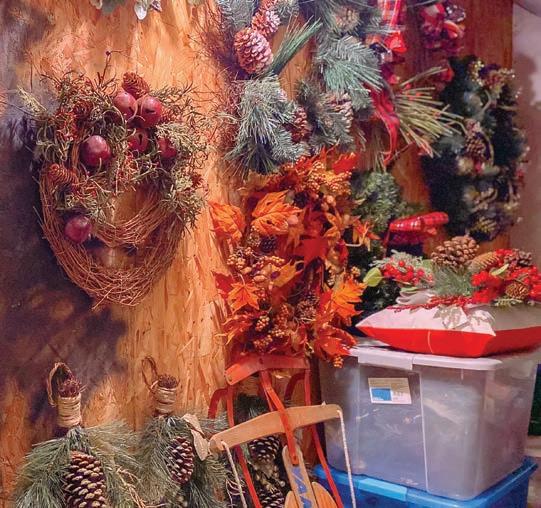
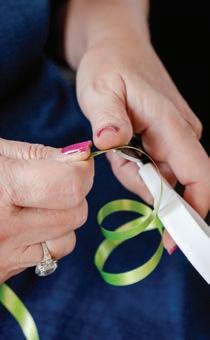
Wreath making
Welcome your holiday guests with a handmade wreath
BY GINNY SMITH
Photography by James River Media
Like a beautiful bow is an invitation to open a package, a wreath on a front door welcomes visitors with an expression of creativity, personal style and celebration. A fun hobby for crafters of all skill levels, wreath making can be as simple or as complex as the crafter desires.
Dating back to ancient Greece and Rome, wreaths were used to symbolize victory and honor. In church history, wreaths were used to tell a story. For instance, advent wreaths symbolize God’s endless love with a circular shape and four candles to represent the four weeks leading up to Christmas. Today, wreaths are important pieces of home décor that showcase a variety of holidays and celebrations and also provide an avenue for individual expression.
Care to Meet Your Needs
Types of wreaths
“Wreaths can be used for any holiday or occasion or can be given as gifts,” says Mary Gribbin, owner of Erin Springs, a local business that sells holiday trees and wreaths. “A lot of people put wreaths on their front doors at Christmas time, but you can also bring wreaths indoors and place them over a mantle or hang them on a wall. Wreaths can also be used as a memorial,” continues Gribbin. “We created a beautiful memorial with 40 wreaths that we placed on stands and displayed in a cemetery. Wreaths are also used on military days to honor veterans.”
Any celebration, from birthdays, weddings and baby showers to retirement parties and other farewells, is a worthy excuse to build a wreath. “They become very personal,” notes Gribbin. “Everybody’s is different and can be customized for the season. Some people even use the same base, but make a new wreath for each season.”
A wreath with pinecones and fall leaves welcomes autumn into the home while a white wreath with cranberries is a perfect addition to the snowy winter season. Satin flowers say hello to spring, and a wreath with seashells of different shapes and sizes can remind you of that special summer vacation.
With a little creativity, you can make memorable decorations for the holiday season and throughout the year.
Materials needed
The materials used to make wreaths are limited only by the imagination of the wreath maker. To build a simple holiday wreath, you will need a wreath base, greenery and decorative accents. Tools such as wire cutters, scissors, pliers and hot glue guns are essential.
For the base, you can choose from a variety of materials including a wire frame, a foam form, a straw form or a grapevine base. Popular choices for greenery, especially during the Christmas season, are white pine, Frazier fir, boxwood and magnolia.
“You can choose fresh or artificial greenery,” says Gribbin. “A wreath on your front door will stay fresh through January. If you bring it inside, you can spritz it with water to keep it looking good and smelling nice.”
Once you choose the base and the greenery, add the decorative accents to the wreath: ribbons and bows, fresh or dried fruit and flowers, cinnamon sticks, herbs, pinecones, acorns, feathers, seashells or other items from nature, ornaments, figurines, and even battery-operated twinkle lights. Simply match the accents to the celebration, and add your own personal touch to your design.
In historic Colonial Williamsburg, wreaths are often donned with fruits. “If you choose to have any kind of fresh berries, just spray them lightly with hairspray first to keep them looking nice,” recommends Gribbin. “I have a dehydrator and love to dry fruit to add to the wreath.”
The design for the wreath can be basic or detailed. Once you choose what you want for the base, the greenery and the accents, lay out your selections and begin building your wreath.
“You don’t want to overwhelm the wreath,” notes Gribbin. First, “attach the greenery to the base with green wire.” Then, choose a few pieces for color and highlights. I try to add things that you can get outside during that time of year. A lot of people like to add bows to finish the wreath.”
Pinterest is full of tutorials for making your own bows, ranging from simple to more difficult. Of course, you could always purchase an inexpensive bowmaker as well.
Most importantly, don’t be afraid to experiment with the design. Mix and match colors and textures. Think outside the box: try painting pinecones or twigs to add that extra flash of personality. Take a walk around your neighborhood and see what speaks to you — nature is inspiring! Enjoy the creative process.
1
Lay a small bundle or bouquet of greenery on your base and wrap floral wire around it several times to keep it in place.
4
Add decorative pieces to your wreath with wire, pins, clips, floral tape or glue.
2
Add another bundle, overlapping the previous bundle, and secure that with floral wire.
5
3
Continue adding bundles until your wreath is full and to your liking.
Hang your wreath with fishing line for a seamless look or use ribbon for more color and texture. You could also hang your wreath as you would a picture or purchase an actual wreath hanger that is designed to slip over your door.
Storing an artificial wreath
While some people like to reuse the base for each season and just swap out the accents, others like to have separate seasonal wreaths. To keep your artificial wreath the same for next year, you have to store it in a way that protects against damage. For those who have a storage area or a garage, the wreaths can be hung on the wall in see-through bags. Or, put them in clear bags and use ribbon to attach them to hangers and place them in a closet or on a rolling rack. You could also store them in a cardboard box and cover them with tissue paper. Of course, purchasing plastic or canvas wreath containers to keep them safe throughout the seasons is another option for safely storing your wreath.
Whether they are displayed during the holidays, used for special occasions or incorporated into our décor, wreaths are decorative, meaningful home accents that we can enjoy throughout the year. Crafting your own wreath is a fun, festive experience that could become your own holiday tradition. ✦
First things first Keep fire safety a top priority this season
BY MITZI BIBLE
The winter months are the peak time for house fires with heating systems called into action. Add in the risks from candles, holiday cooking, lights and live greenery, and there’s even more reason to be vigilant this season.
With the help of your local fire authority, HOME shares some tips for protecting your house and your loved ones from fire dangers.
Keep it clear
According to the National Fire Protection Association (NFPA), half of all home heating fires occur in December, January and February. The other nine months of the year, it’s easy for us to grow careless and allow household items to pile up next to our
heating units — a major contributor to house fires, says Becky Smith, Battalion Chief Fire Marshal with Roanoke Fire-EMS. Smith is in her third year as Fire Marshal, after more than 21 years in the department.
She advocates for the 3-foot rule around any type of heat source — including heat registers, vents and even hot water heaters.
“You have to think about the older houses with radiator-style heat and baseboard heat or kerosene heaters. Keep clothing and all items away.”
She also proposes an annual service checkup before turning on your heating unit and calling a chimney sweep before using your fireplace.
“We can all get the creosote cleaning logs, but I think it’s always good to have a professional company come clean it first.”
Almost half of home decoration fires in December are started by candles.
Keep candles at least 12 inches away from anything that burns. Consider using battery-operated candles.
Make sure your tree is at least 3 feet away from heat sources like fireplaces, radiators, space heaters, candles or heat vents.
A dry tree can burn very hot and very fast. Get rid of your tree when it is dry.
Read manufacturer’s instructions for the number of light strands to connect.
Half of all home heating fires occur in December, January and February.
Plug only one heat-producing appliance (like a space heater) into an electrical outlet at a time.
Source: NFPA
Keep it handy
Every house should be equipped with fire safety products. Starting with fire extinguishers, Smith says everyone should have one in their kitchen (she stores hers under the sink). She also keeps one on hand in her basement near her furnace and in her garage, where she stores her mower and gas.
In addition to the traditional fire extinguisher, fire suppressant now comes in simple-to-use aerosol cans (brands like Fire Gone, StaySafe, First Alert, or Kidde Flame Out). They use a water-based agent that is safe around food, kids and pets, and cleanup is easy.
Also on the market are rangehood fire suppressors, taking the same concept from those required in commercial kitchens to battle grease fires on your home stove. Brands like StoveTop FireStop and Auto-Out are small canisters attached by magnet to the area under your rangehood (one can per two burners). When flames get to a certain height, the suppressors are automatically activated. “They work really well, and some elderly communities and apartments will install them, even though they’re not technically required because it’s not commercial cooking,” Smith says.
According to the National Safety Council, cooking remains the leading cause of U.S. home fires, and of those, most are started by oil and grease overheating. Smith says people tend to panic and make the mistake of putting water on the flames, which only makes them spread more. “Put the lid on the pan. It will suffocate the fire. If you take its oxygen away, it will die out,” Smith says. (The same goes for an oven fire; keeping the door closed is your best defense.)
Element makes a compact fire extinguisher in tube form (about the size of a road flare) that’s easy to use and doesn’t leave a messy residue. There are also emergency fire blankets that work by smothering the flames.
Smith says these newer products are meant as a first defense on small fires but shouldn’t replace a standard fire extinguisher, which you should always have nearby.
Working smoke detectors are a must. Today, they come in basic styles to smart detectors connected through an app that will send notifications to your phone. Smith says smoke detectors should be installed in each bedroom, in the hallways upstairs and downstairs, but not right outside a bathroom because steam can often set them off.
As extra protection for your fireplace, Smith says use metal or glass screens. You can also use a fire-resistant mat, or hearth rug to help catch stray embers or ashes.
If you’re using an electric, portable heater, Smith recommends the kind that will automatically turn off if it gets knocked over. For multi-story homes or apartments, you may want to invest in an escape ladder, available at hardware stores or online. They come in different lengths, and it is recommended to buy the reusable kind (although more expensive, it is helpful because your family can practice setting it up and walking safely down it).
Keep it smart
Here are some more tips to exercise fire safety in your home:
n Don’t burn paper in a fireplace; it can float up the chimney, igniting the creosote deposits in the flue.
n Don’t burn green wood , only seasoned wood. Due to its high-water content, green wood can cause large amounts of creosote to rapidly build up in your chimney. Creosote buildup is the leading cause of chimney fires.
n Put ashes in a metal container with a lid and take it outside, 10 feet away from your house, on a hard surface (not grass), then douse it with water.
n Candles can make a room feel cozy, but people often leave them unattended. Get in the habit of doing a room search every night to check for burning candles and blow them out.
n Create and practice escape plans. Get the children involved by asking them to draw a map for each room. (The American Red Cross suggests two escape routes from every room.)
n Use appropriate cords for exterior holiday lighting (not the white, green, or brown strands with no surge protection). Smith says it’s important to read manufacturer’s recommendations when you buy a surge protector, and check the cord for damage before you use it. Don’t run extension cords under carpets or anywhere near water.
n Close all bedroom doors at night.
n Don’t go back in. Smith says they often see people re-enter their house after escaping a fire. Her advice: close the door, and don’t go back for a phone or other items.
n Plug only one heat-producing appliance (like a space heater) into an outlet at a time.
Although data from the U.S. Fire Administration shows residential house fires are decreasing (by 4 percent from 20132022), remain vigilant. As you fire up your furnace, fireplace or electric heaters, it’s the perfect time to talk fire safety with your family. ✦
PHOTO: U.S. FIRE ADMINISTRATION
Jingle ‘BELL’
BY KENDALL ATKINS LIVICK
all the way to impromptu
gift mastery
The holiday season brings with it many surprises more beautiful than anything conjured up by a sugar plum fairy. Yet there’s a certain unwelcome surprise that can happen during those 12 days of Christmas: the dreaded one-sided gift. It could be an old childhood friend stopping through town, your handyman or the neighbor down the street. Someone will give you an unanticipated token of affection. Never knowing when it will happen can turn the “most wonderful time of the year” into a daily game of Rudolph roulette with every social interaction.
This calls for a four-ingredient acronym! When it comes to preparing gifts for unexpected scenarios, Jingle BELL all the way! Fill your Santa sack and never again feel like a reindeer in headlights.
BUNDLED BEAUTY
Thanks to YouTube and TikTok tutorials, gift prep with all the jingle bells and whistles is very approachable these days. Taking a few minutes to learn how to properly measure wrapping paper, curl ribbons with a pair of scissors or stuff tissue paper in an artful way, can really take your gift giving to the next level. Even something as universal as an Amazon gift card can appear aesthetically customized with a sprig of faux holly or curlicue ribbon tucked in the card.
Expert tips
n Store packaging materials organized by type in a specific place you’ll remember like a cedar closet or attic. Bows, ribbons and tissue paper can be stored in clear containers. Bags can be stored upright with the nesting approach, in which smaller ones fit inside larger ones.
n Once your extra gifts are prepared, place a sticky note on the bottom of each with a small descriptor — just remember to remove them before handing off the package.
n The best time to gather wrapping materials and anything Christmas inspired in general, are the days immediately following Christmas. Gather all materials that are still intact for reuse, and then head to stores and stock up on all the mark-downs in preparation for the next year.
n When it comes to floral packaging add-ons, keep it faux. Not only will they hold up, but some people are allergic to fresh greenery.
n If you have a way with words, consider handwriting a little poem or thoughtful Christmas wish in each card (a message that is meaningful but could work for anyone).
PHOTOS: JAMES RIVER MEDIA
Happy Holidays!
ELFISH ENTHUSIASM
Christmas elves evoke childlike joy and mischievous humor. You may have already resorted to this style of gag gifting after years of exchanging presents with your fatherin-law — a man of simple desires and a loyal fan of one sports team. How many Virginia Tech Hokie-themed beverage containers and articles of clothing does one man need? Let’s face it, sometimes gifts are more about cheap thrills than treasured keepsakes. Those inflatable light-up reindeer antlers on Grandpa’s head — for which the cousins took aim during a hearty game of plastic ring toss? Well, they might not live to see another year, but the hilarious memories and pictures will circulate for a lifetime. The thing about hot dog-flavored candy canes, socks shaped like animal paws and burritomimicking throw blankets, is that they disarm the opener. Like an elf with a twinkle in your eye, you’ll revel in the thrill of the hunt and the reactions that follow.
Expert tips
n Throughout the year, consider stockpiling items that stand out to you in the front clearance sections of the big box stores. Anything neat that inspires curiosity or a chuckle can be saved as a novelty gift.
n Group budget-friendly small gifts together by theme. For the wordsmith recipients, compile low-cost crossword puzzle booklets, free books in good condition from local little libraries and silly joke book collectibles from stores like Five Below and Dollar General. This piggybacks on the bundling theme, as it also features skillful curation.
PHOTOS: JAMES RIVER MEDIA
LABORS OF LOVE
Do you have a special talent that showcases your individuality? Quilting? Painting? Crafting? Baking? Shearing your farm-raised llama and hand-knitting wool socks? If so, this type of gift is a no-brainer. You’re likely already creating special gifts for the folks on your list, so assuming that your passion isn’t too time-consuming, make several extras.
Expert tips
n If items aren’t specific to the Christmas season or perishable, they can be gifted throughout the year for any occasion. Examples include landscape paintings, sewn fashion accessories or blankets, soaps and jewelry.
n To keep the creative process from feeling like a chore, make a day of it. It can be part of your typical Christmas season, a random day in September or part of “Christmas in July.” Spend the day immersed in your passion while sipping hot chocolate and watching your favorite Christmas movie.
LOCAL LOOT
If you’re short on crafting talent or time, no worries! With local loot, you pass along someone else’s creations. If you’re proud of where you live and wish to support small
mom-and-pop shops, farmers and local artisans, give gifts that celebrate your community. Festivals, art and craft expos and farmers markets are the best places to find treasures like paintings, pottery, woodwork, candles, treats and more.
Expert tips
n Festival finds can be gathered all year round, especially when it comes to crafts and pottery.
n Food and beverages are best purchased and/or prepared as close to the holidays as possible (with the exception of freeze-dried candy, properly sealed snacks with far-off expiration dates, or something like fine wine that ages well).
n Be sure to strike up a conversation with the artist about the inspiration or origin of source materials. Passing along the story behind the gift is half the fun.
Final tip
At the height of the season, keep your extra gifts in an accessible place like your handbag or the trunk of the car. From there, you can easily choose and grab an appropriate choice on the fly. No longer a reindeer in headlights, you are now taking the reigns as a savvy Santa with a few tricks up your red velvet sleeve. That’s a wrap … with a bow on top! ✦
PHOTO COURTESY OF BAILEY BROWN
PHOTO: JAMES RIVER MEDIA
Playwright Oscar Wilde noted “imitation is the sincerest form of flattery.” This famous epigram runs in my head as the winter holidays approach. I want my Thanksgiving dinner to match a Saveur magazine cover and my house to transform into a wonderland. I imagine the aroma of pumpkin-scented candles wafting in the air. Amaryllis bulbs bloom gracefully in silver bowls, and fresh flowers nestle in greenery on our dining table. Outside, sparkling white lights drape the maple tree. All flawlessly accomplished while everyone maintains their goodwill and charm.
Reality sets in once I start dragging boxes down from the attic. Ah, the holiday spirit lives not in our attic clutter. If I knew how to utilize any of the myriad forms of technology we own, I would play Bob River’s “The Twelve Pains of Christmas.” Those scenes are more true to our house. In order to stop the madness, I usually abandon the struggle by leaving the house in search of holiday glamor elsewhere.
Visiting local shops embellished with seasonal wares, attending music concerts or relaxing to the rhythmic dancers of “The Nutcracker” relieves stress and inspires me to head home and tackle the decorating chores. There are plenty of exciting activities in our Valley to encourage the holiday spirit. Some are old favorites, and some are new finds.
This year I plan to catch the 43rd annual Holiday Parlor Tour of Homes in Old Southwest, which highlights a unique historic Roanoke neighborhood. These homes are decked out in holiday splendor to raise funds for the restoration of the Alexander-Gish House in Highland Park, which Old Southwest Inc. has maintained since 1982. At the end of the tour, there is music at the Alexander-Gish House (a more than 190-year-old cabin) and refreshments. Doesn’t that sound lovely?
HOLIDAY PARLOR TOUR OF HOMES
When: Saturday, Dec. 7 from 5-9 pm and Sunday, Dec. 8 from 1-5 pm
Tickets: oldsouthwest.org/ parlor-tour-of-homes
Hopefully, these old Victorian beauties adorned in holiday ornaments and greenery will encourage me to come home and bejewel ours. “Unpacking boxes of decorations is joyful,” I repeat endlessly in my head. Perhaps, like in fairy tales, the Christmas villages will pop out of their tissue paper nests and dance to adorn the fireplace mantels and tables. If not, maybe magic in the air will entice the CD player to ring out “Deck the Halls.” Music gets everyone moving. It inspires table setting and extra chairs to come up from the basement. There are place cards to write and flowers to arrange.
The kitchen fills with delicious tastes of holidays past, the familiar whirl of the Kitchen Aid mixer, and I break into a rhythm. Soon snickerdoodles will be in the oven and cooling on the counter. I will brew a cup of tea, build a fire and keep the music going so everything falls into place. At least the family dinner will happen with spirited conversation, and that is the most important part of the holiday.