ZIP InstallationPosStop Guide


Each unit comes with a ZIP 2-year warranty, and includes…
[1] Glass fibre-reinforced plastic platform
[1a] Cradle
[1b] Chain bucket
[1c] Right-hand tree attachment holes
[1d] Outer left-hand tree
attachment holes
[1e] Inner left-hand tree
attachment holes
[1f] Ramp attachment angle
[1g] Ramp attachment lip
[1h] Three 35mm levelling TEK screws
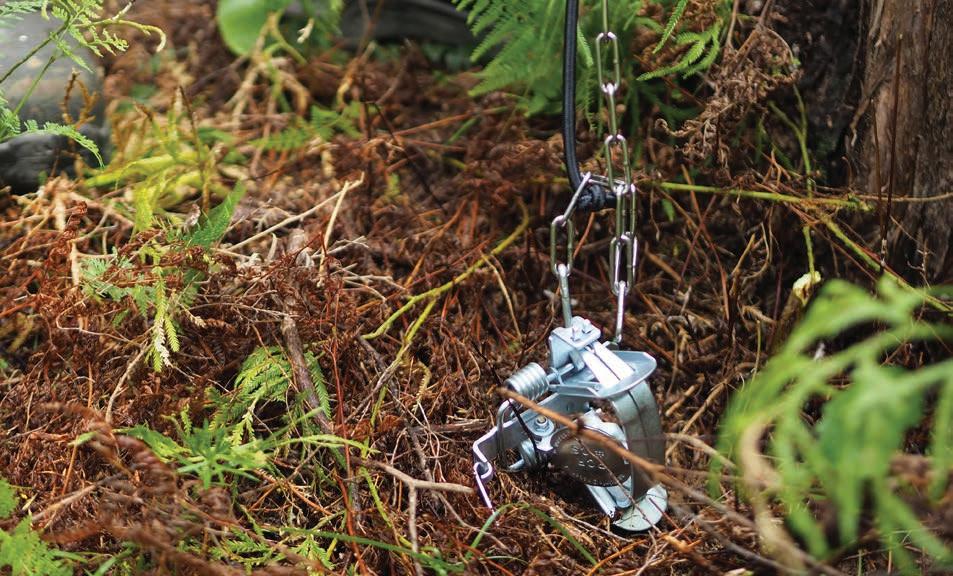
[2] High grade steel, zinc-coated PCR No. 1 Leg-hold Trap
[2a] Dog
[2b] Levers
[2c] Jaws
[2d] Treadle plate
[3] Adjustable galvanised steel chain
[3a] Bungee
[4] White corflute visual lure to attract possums to the trap
[5] Galvanised nail
[6] Four 14G tree attachment TEK screws
(2×75 mm and 2×100 mm, to enable installation on different tree types)
[7] Two 12G, 35mm ramp attachment TEK screws

You will need…
[8] 3/8″ hex nut setter
[9] 5/16″ hex nut setter

[10] A high torque (60Nm+) electric drill driver with cross-brace or an electric impact driver is recommended. Note that use of a low-torque drill may require pre-drilling of holes in the tree using a long 3.5mm drill bit (not pictured)
[11] Tape measure
[12] 8mm spanner
[13] 10mm spanner
[14] Eye protection
[15] Gloves
[16] Hammer
Optional, but highly recommended to increase catch rate by up to 20%...
[17] 150cm length of 100mm x 25mm
H3.2 treated timber to create a ramp to the trap platform
[18] Hand saw
[19] Pencil
1. Select a tree on which to mount your trap platform. Clear low branches, debris, and small plants in a 1.5m radius from around the tree to improve lure visibility and prevent caught animals becoming hidden, tangled, or hung up.
Minimum diameter: 15cm
Open-branched trees with good visibility are best. Use hard/smooth barked trees (e.g. mahoe, mapou), and ramps, to improve catch rates. Avoid all tree ferns as native birds can sometimes climb the rough bark to reach the trap.

2. Attach ramp [17], if using, to trap platform [1] using two 35mm TEK screws [8].
This is most easily done with the ramp flat on the ground. If the ramp needs to be shortened to achieve a secure and horizontal platform: see step 4.

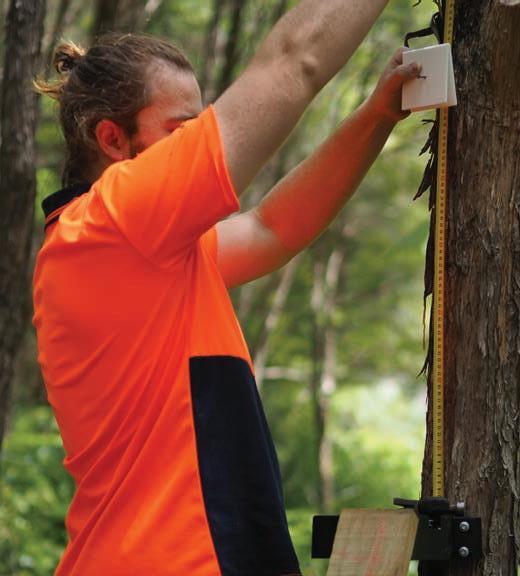
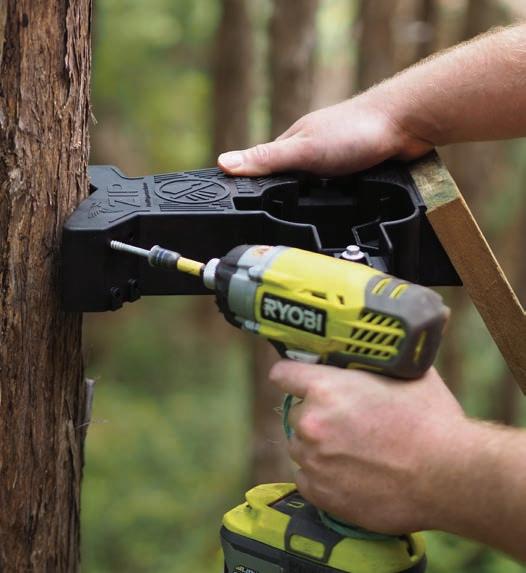
3. Attach the trap platform to the tree trunk by driving long TEK screws [6] through tree attachment holes [1c, 1d &/or 1e] so that the top of the trap platform is at least 110cm above the ground.
Take care to ensure that the trap platform is horizontal. Horizontal traps are more effective at catching possums and this also ensures that the correct ramp angle (60°) is maintained to prevent any ground-dwelling birds from accessing the trap.
Do not over-tighten TEK screws, as this will put tension on the trap platform, decreasing service life.
If the tree has a broad trunk (>20 cm diameter), use right-hand tree attachment holes [1c] and outer left-hand tree attachment holes [1d]

If the tree has a narrow trunk (<20 cm diameter), use right-hand tree attachment holes [1c] and inner left-hand tree attachment holes [1e]
If the trunk leans forward (towards the platform), attach platform to tree using upper tree attachment holes, then use 1-2 additional TEK screws in lower holes to adjust platform to horizontal.


If the trunk leans backward (away from the platform), attach platform to tree using lower tree attachment holes, then use 1-2 additional TEK screws in upper holes to adjust platform to horizontal.
Remember: The platform should sit horizontal, regardless of the angle of the tree.
Remove the ramp and attach the trap platform to the tree at the desired point. Measure the required ramp length by holding it against the ramp attachment angle [1f], with the ramp end on the ground, and mark it for cutting just above the ramp attachment lip [1g]. Cut with a handsaw. Marking the cut above this lip ensures that the ramp will definitely be long enough to reach and sit firmly on the ground. Possums are more likely to climb the ramp if it is stable.


4. If the ramp is too long because of uneven/ sloping ground, it will need to be cut.
5. Fasten chain [3] to trap platform using one levelling TEK screw [1h], so that the trap [2] is just able to touch the ground at its lowest point beneath the platform, without stretching the bungee [3a].

If the chain is too long it can be easily shortened. Remove the back levelling screw, insert it through the appropriate chain link, and screw it back into the trap platform.

6. Attach visual lure [4] to tree trunk approx. 60cm directly above trap platform using galvanised nail [5]. Clear any branches above visual lure to ensure visibility from all angles and prevent caught possums becoming entangled.


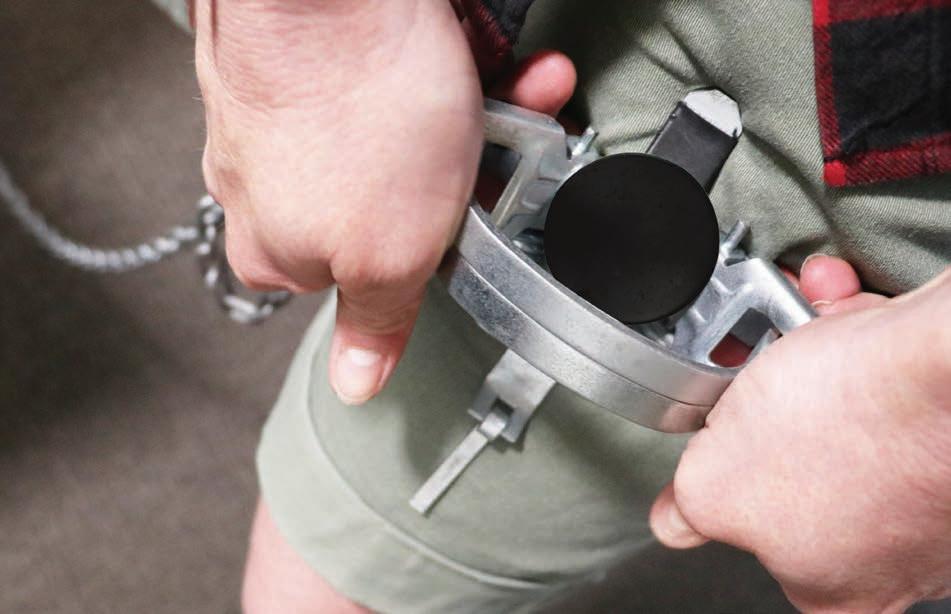
7. Set leg-hold trap.
Before setting, ensure the dog [2a] is pointing away from the trap mechanism, and away from yourself.
Use the bases of your thumbs to separate the levers [2b] to their fullest extent. This will require some force, and you may need to brace the trap against a solid surface, e.g. your knee.


Whilst maintaining pressure on the levers:
i. Separate the trap jaws [2c] so that they are lying flat.
ii. Flick the dog over the corresponding jaw and align with the notch at the back of the treadle plate [2d]. You may need to lift the treadle plate slightly to hold the dog in place.
If the dog doesn’t reach the back of the treadle plate notch, you can adjust this by using a pair of strong pliers to gently bend the upright on the trap to which the dog is attached.


exclamation-circle
Ensure your fingers and thumbs are clear of the jaws, before slowly releasing the pressure on the levers.
Take care to only handle the trap by the ends of the levers while it is set.
We recommend test firing each trap before leaving it live, to make sure it triggers correctly without jamming.

8. Place the trap in the cradle [1a], and adjust the levelling screws so that it sits flat and stable.


The trap should sit flush in the cradle so that the chain is contained neatly in the chain bucket [1b] below. You may need to move the chain and bungee around in the bucket slightly to help the trap sit flat.


