6 minute read
Appendix C: The command-line interface
While you can manage most of the software on a Raspberry Pi through the desktop, some can only be accessed using a text-based mode known as the command-line interface (CLI) in an application called Terminal. Most users will never need to use the CLI, but for those who want to learn more, this appendix offers a basic introduction.
MORE INFO
Advertisement
This appendix is not designed to be an exhaustive guide to the Linux command-line interface. For a more detailed look at using the CLI, visit rpf.io/terminal in a web browser.
Loading the Terminal
The CLI is accessed through the Terminal, a software package which loads what is technically known as a virtual teletype (VTY) terminal, a name dating back to the early days of computers when users issued commands via a large electromechanical typewriter rather than a keyboard and monitor. To load the Terminal package, click on the raspberry icon to load the menu, choose the Accessories category, then click on Terminal.
The Terminal window can be dragged around the desktop, resized, maximised, and minimised just like any other window. You can also make the writing in it bigger if it’s hard to see, or smaller if you want to fit more in the window: click the Edit menu and choose Zoom In or Zoom Out respectively, or press and hold the CTRL key on the keyboard followed by + or .
The prompt
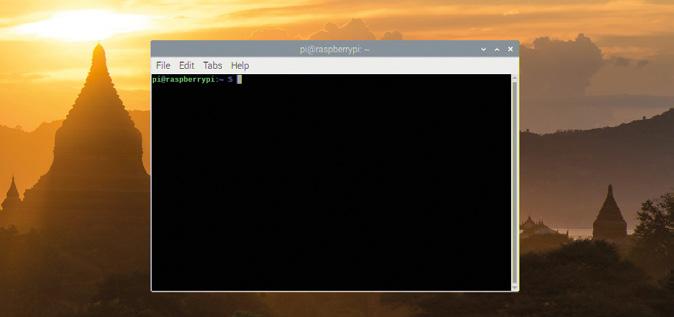
The first thing you see in a Terminal is the prompt, which is waiting for your instructions. The prompt on a Raspberry Pi running Raspbian looks like this:
pi@raspberrypi:~ $
The first part of the prompt, pi, is your username; the second part, after the @, is the host name of the computer you’re using, which is raspberrypi by default. After the ‘:’ is a tilde, ~, which is a shorthand way of referring to your home directory and represents your current working directory (CWD). Finally, the $ symbol indicates that your user is an unprivileged user, meaning that you need a password to carry out tasks like adding or removing software.
Getting around
Try typing the following then pressing the ENTER key:
cd Desktop
You’ll see the prompt change to:
pi@raspberrypi:~/Desktop $
That shows you that your current working directory has changed: you were in your home directory before, indicated by the ~ symbol, and now you’re in the Desktop subdirectory underneath your home directory. To do that, you used the cd command – change directory.
CORRECT CASE
Raspbian’s command-line interface is case-sensitive, meaning that it matters when commands or names have upper- and lower-case letters. If you received a ‘no such file or directory’ message when you tried to
change directories, check that you had a capital D at the start of Desktop.
There are four ways to go back to your home directory: try each in turn, changing back into the Desktop subdirectory each time. The first is:
cd ..
The .. symbols are another shortcut, this time for ‘the directory above this one’, also known as the parent directory. Because the directory above Desktop is your home directory, this returns you there. Change back into the Desktop subdirectory, and try the second way:
cd ~
This uses the ~ symbol, and literally means ‘change into my home directory’. Unlike cd which just takes you to the parent directory of whatever directory you’re currently in, this command works from anywhere – but there’s an easier way:
cd
Without being given the name of a directory, cd simply defaults to going back to your home directory. The final way to get back to your home directory is to type:
cd /home/pi
This uses what is called an absolute path, which will work regardless of the current working directory. So, like cd on its own or cd ~, this will return you to your home directory from wherever you are; unlike the other methods, though, it needs you to know your username.
Handling files
To practise working with files, change to the Desktop directory and type the following:
touch Test
You’ll see a file called Test appear on the desktop. The touch command is normally used to update the date and time information on a file, but if – as in this case – the file doesn’t exist, it creates it.
Try the following:
cp Test Test2
You’ll see another file, Test2, appear on the desktop. This is a copy of the original file, identical in every way. Delete it by typing:
rm Test2
This removes the file, and you’ll see it disappear.
WARNING!
Unlike deleting files using the graphical File Manager, which stores them in the Wastebasket
for later retrieval, files deleted using rm are gone for good. Make sure you type with care!
Next, try:
mv Test Test2
This command moves the file, and you’ll see your original Test file disappear and be replaced by Test2. The move command, mv, can be used like this to rename files.
When you’re not on the desktop, though, you still need to be able to see what files are in a directory. Type:
ls
This command lists the contents of the current directory, or any other directory you give it. For more details, including listing any hidden files and reporting the sizes of files, try adding some switches:
ls -larth
These switches control the ls command: l switches its output into a long vertical list; a tells it to show all files and directories, including ones that would normally be hidden; r reverses the normal sort order; t sorts by modification time, which combined with r gives you the oldest files at the top of the list and the newest files at the bottom; and h uses humanreadable file sizes, making the list easier to understand.
Running programs
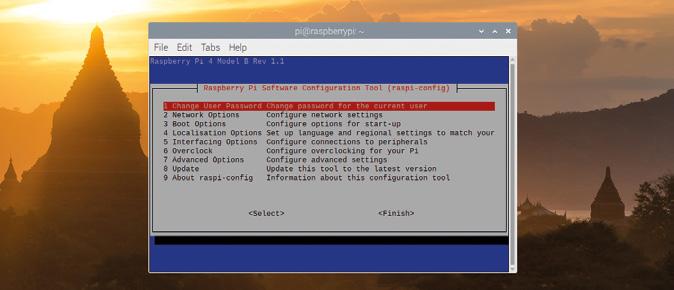
Some programs can only be run at the command line, while others have both graphical and command-line interfaces. An example of the latter is the Raspberry Pi Software Configuration Tool, which you would normally load from the raspberry icon menu.
Type:
raspi-config
You’ll be given an error telling you that the software can only be run as root, the superuser account on your Raspberry Pi. It will also tell you how to do that, by typing:
sudo raspi-config
The sudo part of the command means switch-user do, and tells Raspbian to run the command as the root user.

You’ll only need to use sudo when a program needs elevated privileges, such as when it’s installing or uninstalling software or adjusting system settings. A game, for example, should never be run using sudo.
Press the TAB key twice to select Finish and press ENTER to quit the Raspberry Pi Software Configuration Tool and return to the command-line interface. Finally, type:
exit
This will end your command-line interface session and close the Terminal app.
Using the TTYs
The Terminal application isn’t the only way to use the command-line interface: you can also switch to one of a number of already-running terminals known as the teletypes or TTYs. Hold the CTRL and ALT keys on your keyboard and press the F2 key to switch to ‘tty2’.

You’ll need to log in again with your username and password, after which you can use the command-line interface just like in the Terminal. Using these TTYs is handy when, for whatever reason, the main desktop interface isn’t working.
To switch away from the TTY, press and hold CTRL+ALT, then press F7: the desktop will reappear. Press CTRL+ALT+F2 again and you’ll switch back to ‘tty2’ – and anything you were running in it will still be there.
Before switching again, type:
exit
Then press CTRL+ALT+F7 to get back to the desktop. The reason for exiting before switching away from the TTY is that anybody with access to the keyboard can switch to a TTY, and if you’re still logged in they’ll be able to access your account without having to know your password!
Congratulations: you’ve taken your first steps in mastering the Raspbian command-line interface!


