


Smart manufacturing and assembly are becoming standard in industries and displacement sensors are revolutionizing the way products are processed. Displacement sensors can measure thickness, width, level difference, disparity, curve, and evenness of target objects by detecting the amount of displacement in target objects. In actual applications, displacement sensors can be used to measure the level of air pressure in tires to check the height of automobiles during quality control, detect foreign objects on conveyor belts, check the finish quality of products, and more. Stable and accurate measurement is possible regardless of the material or shape of targets, offering an ideal solution for line quality control across diverse industrial environments.

Main Features
Maximum resolution: 1 ㎛ (vary by model)
Interconnection of up to 8 sensor amplifier units: Mutual interference prevention function and auto channel sorting
ㆍVarious calculation functions supported (addition, subtraction, average)
Various filter functions for stable measurement (movement average, differential, median)
Auto sensitivity adjustment (1-point, 2-point teaching)
Easy maintenance with detachable sensor head/amplifier unit
ㆍDedicated software provided (atDisplacement)
IP67 protection structure (IEC)
Diffuse reflective type
ㆍReference distance: 30/65/100/300/600 mm
Accurate measurement with minimal influence from target color or material
Regular reflective type
Reference distance: 30/65/100 mm
ㆍStable measurement of reflective or transparent material
Brackets for different installation angles

*Regular reflective type
Capable of Measuring up to 1 m

The *BD-600 model is capable of measuring up to 1 m suitable for in harsh environment including high temperatures, and also features easy measurement of width and step of thick steel plates.



Accurate Displacement Measurement on Various Materials
The sensors can accurately detect various target materials including black/white paper, stainless steel, rubber, PCB, etc. The regular reflective type allows stable measurements on reflective and transparent materials.

Calculation Function
Calculated measurements from 2 or more sensors can be used to measure thickness, level difference, surface disparity, and evenness of targets. Addition, subtraction, average calculations are supported.

Movement average, differential, and median filters allow for accurate and stable correction in measurement values in the event of sudden changes from mechanical noise or other variables.

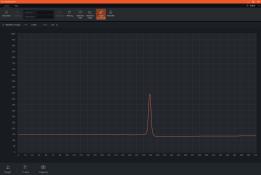
Dedicated software ‘atDisplacement’ offers user-friendly interface with live data, life graphs and wave graphs for easy monitoring of various measurement values in real-time. Set values can be immediately checked during the setting.

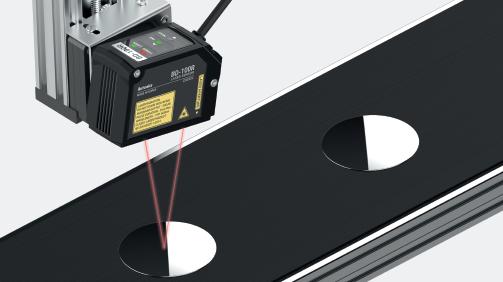
Check for evenness or presence of transparent objects with the regular reflective type.
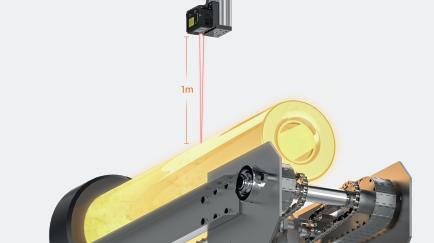
Measure up to 1 m even in harsh environment including high temperatures.
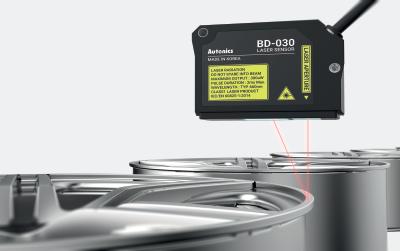
Evenness
Check for evenness or wear of targets by measuring the distance of the target.
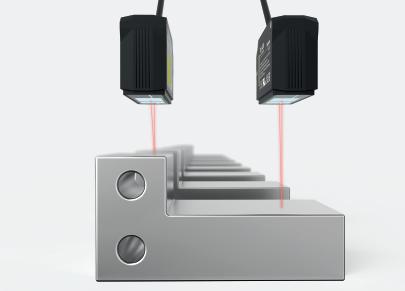
Level Difference
Check the level difference of targets using calculations from multiple sensors.
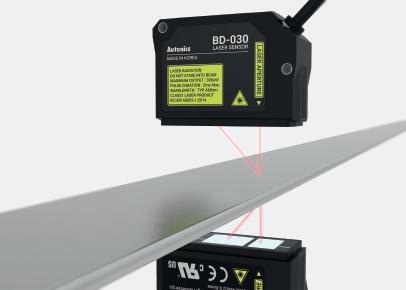
Height Thickness
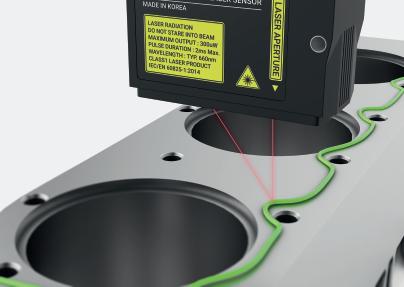
Check for size disparity, curves, or vibration on targets by measuring the height of the target.
Check the thickness of targets using calculations from multiple sensors.
Maximum 1 ㎛ Resolution for stable and precise measurements
Maximum 0.1 % Full Scale Linearity for high accuracy measurements
Maximum 0.05 % of Full Scale Temperature Property for minimal impact from temperature change
Max 330 μs Measurement Cycle for detection of fast moving targets
Measuring up to 1 m for in harsh environment including high temperatures
Measurement of Reflective or Transparent Materials for stable measurement

*Regular reflective type
 BD-300
BD-600
BD-100(R)
*
01)
[Conditions]
Spot diameter (reference)
diameter (far)
01) When measuring mirror in stop state at the reference distance with belows [Conditions] reference temperature 25℃ reference distance response time 1
02) The rated measurement range guarantees linearity
03) Measurement error for linear displacement of white matte paper in the rated measurement range 04)
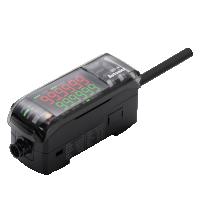
Up to 8 amplifier units (BD-A1) can be interconnected. Various functions are available including calculation, emitter/receiver optimization, zero-point setting, and auto-sensitivity adjustment.
Supported amplifier Amplifier unit (BD-A1) 01) 02)
Power supply From the amplifier unit (BD-A1)
Operation indicator Power indicator (red) Laser emission indicator (green) NEAR/FAR indicator (green)
Insulation resistance ≥ 20 MΩ (500 VDCᜡ megger)
Noise immunity Square shaped noise by noise simulator (pulse width: 1㎲) ±500V
Dielectric strength Between the charging part and the case: 1,000 VACᜠ 50/60 Hz for 1 minute
Vibration 1 5 mm amplitude at frequency of 10 to 55Hz in each X Y, Z direction for 2 hours
Shock 300 m/s2 (≈ 30 G) in each X Y, Z direction for 3 times
Ambient illumination ≤ 10,000 ㏓ incandescent lamp
Ambient temperature -10 to 50 ℃ Storage: -15 to 60 ℃ (no freezing or condensation)
Ambient humidity 35 to 85%RH, Storage: 35 to 85%RH (no freezing or condensation)
Protection structure IP67 (IEC Standards, except connector of extension cable)
01) and communication converter (BD-C) 02) communication converter (BD-C)
Separately
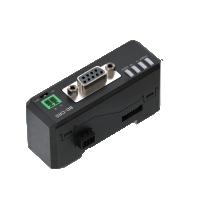
Model BD-CRS 01
The BD-C communication converter allows RS232C and RS485 communication with PLCs, PCs, analog control devices, and other host devices.
Power supply ᜡ)
Communication Protocol Modbus RTU
Connection type RS-232C, RS-485
Communication speed 9600, 19200, 38400, 115200 bps (default)
Function Executes every BD-Series feature sets parameter and real-time monitoring by external device (Master)
Protection structure IP40 (IEC standard)
Material Case: PC
Accessory Side connector, Connector for RS485
Approval
01) later