7 minute read
EFFECTS TOOLKIT

from photoshopuser232020
by baranovmir2

So what reflects off the eye? In fact, what reflects off any reflective surface? Light! And what does light do? It brightens up stuff. Therefore, when we place an image on the eye as a reflection in Photoshop, it can only brighten the surface. Reflections on the eye don’t darken the eyes, so choosing an image for the reflection that has a bright light source will help to create a more natural reflection.
Advertisement
In this article, we’ll learn how to use the Screen blend mode to create realistic reflections in the eyes. Why Screen? Because it’s a blend mode that brightens. So without further ado, let’s get started!
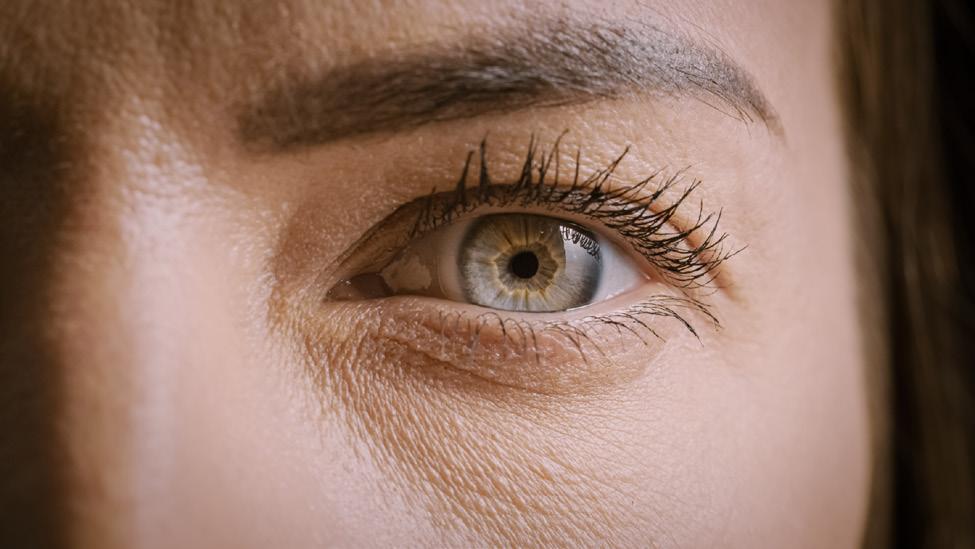
STEP ONE: OPEN THE EYE IMAGE
Let’s start by opening an image of an eye. Make sure that the eye doesn’t already have a lot of complex reflections; otherwise, it might disturb the image we’re going to add. If you want to follow along with the photo used here, you may license the full-resolution version from Adobe Stock, or download the JPEG preview for free by clicking the Save to Library button here.
If you’re using your own image, go to File>Open, locate your image, and then click Open, or if you’re working in Application Frame, go to Finder (PC: File Explorer), locate your image, and drag-and-drop it into Photoshop. If you downloaded the image from Adobe Stock, you can load it from your Libraries panel (Window>Libraries) by doubleclicking it. To make it easier to work with the preview image, increase the resolution of the practice file. (We normally don’t recommend enlarging images, but this is only for practice purposes.) Go to Image>Image Size, turn on the Resample checkbox, select Preserve Details 2.0 from the Resample drop-down menu, set the Width to 2,000 pixels, and click OK.
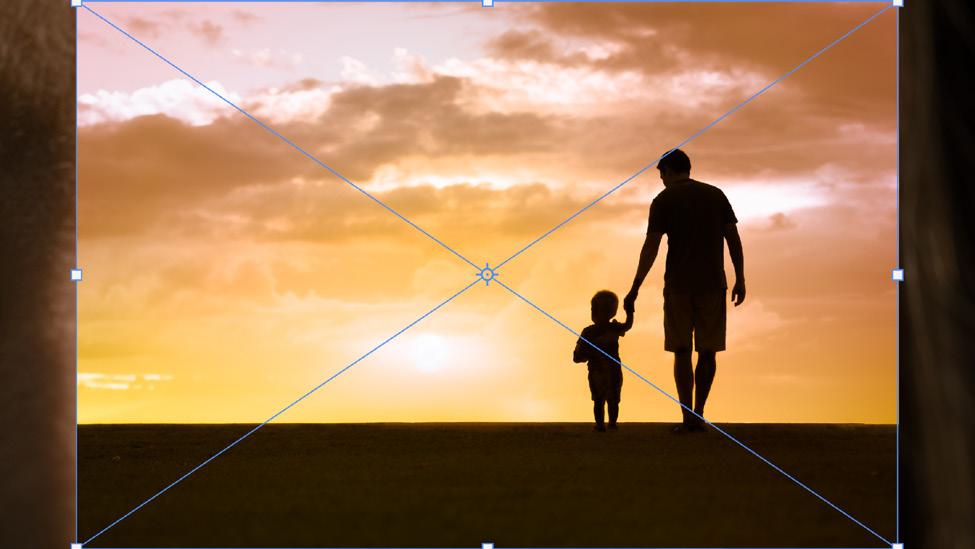
STEP TWO: PLACE THE REFLECTION IMAGE
Locate the image that you wish to add as a reflection. We’re using a silhouette of a father and child since it’s backlit and looks like a great light source. You can license or download the preview version of this image from Adobe Stock by clicking here.
Open the image in Photoshop, switch to the Move tool (V), and drag-and-drop the image inside the canvas of the eye image. Press Command-T (PC: Ctrl-T) for Free Transform. If you downloaded the Adobe Stock image, you can drag-and-drop it directly from the Libraries panel, and it will automatically have the Free Transform handles around it.
With the transform controls, adjust the size and position of the image so it covers roughly the iris of the eye. Don’t press Enter yet to commit the transformation because we want to shape the image according to the eye.
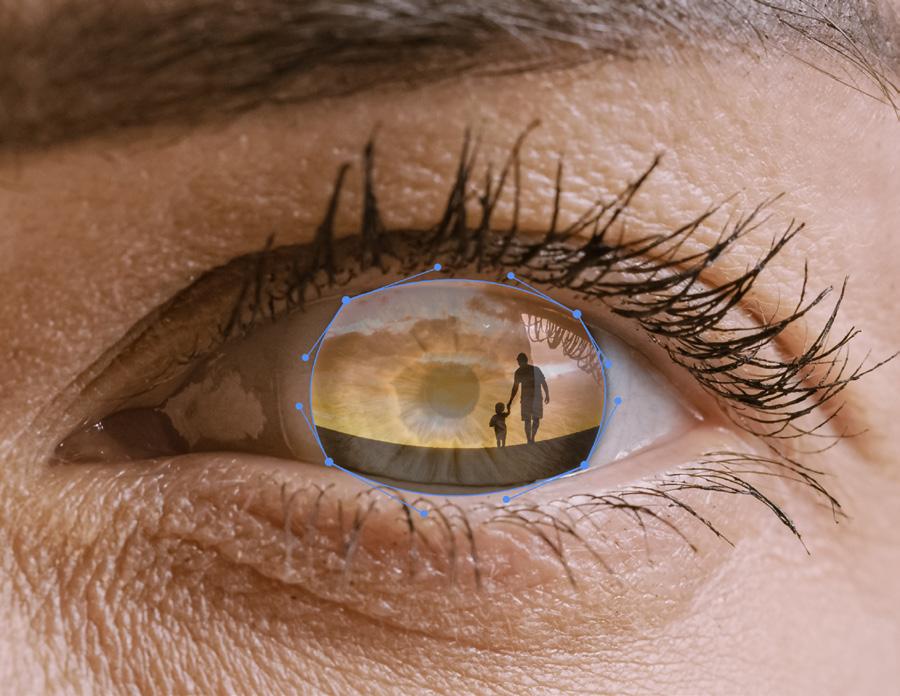

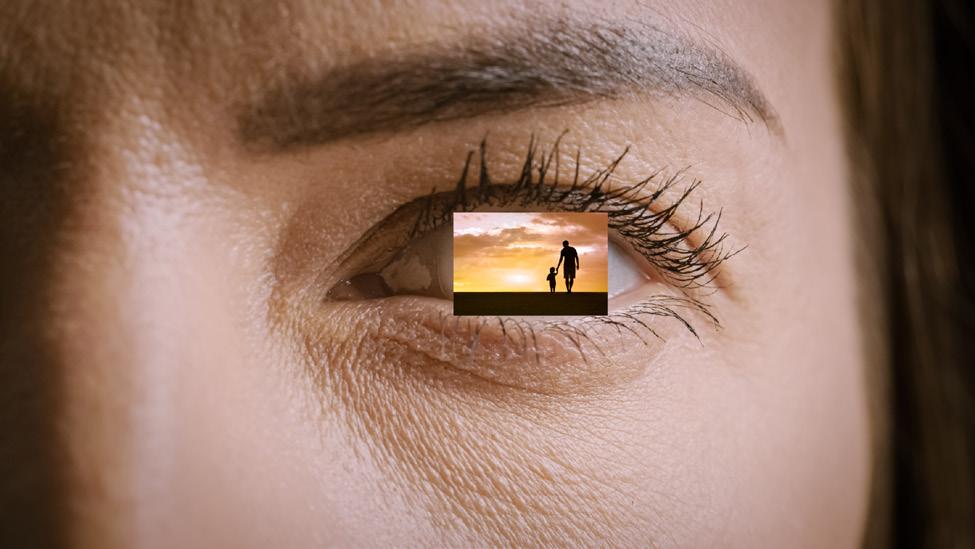
STEP THREE: WARP THE REFLECTION
Before warping, we need to be able to see the eye for reference, so temporarily decrease the Opacity of the father and son layer to 50% in the Layers panel. Right-click inside the Free Transform bounding box, and choose Warp.
Adjust the corner points according to the bulge in the eyes, as shown. You can also experiment with moving the handles attached to the corner points to adjust the bulge further. Press Enter once you’re done.
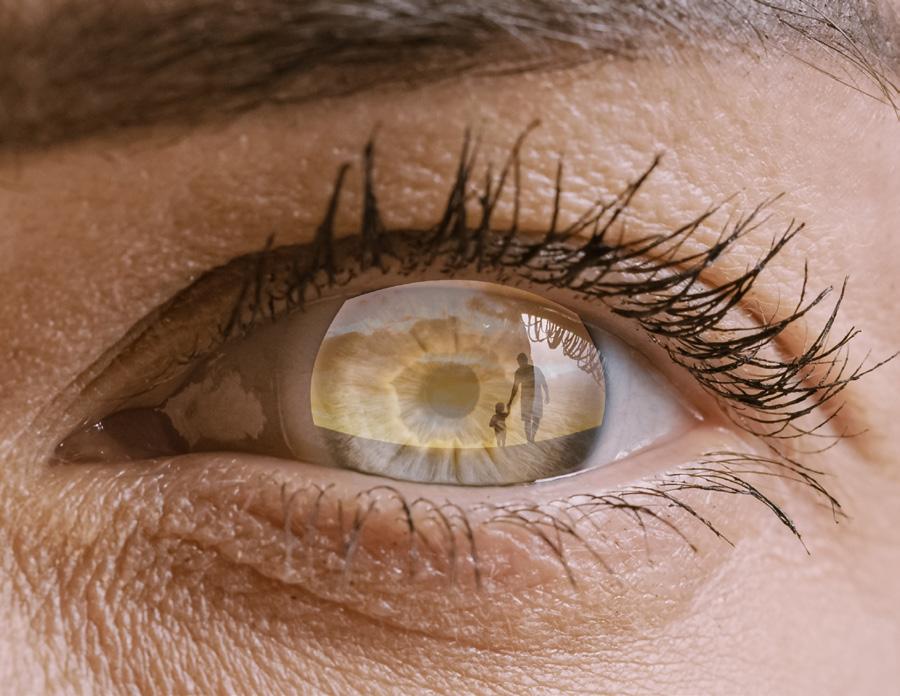
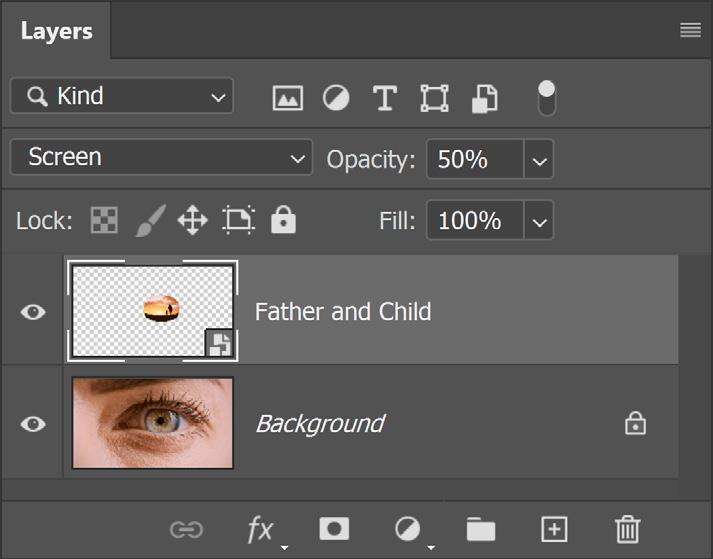
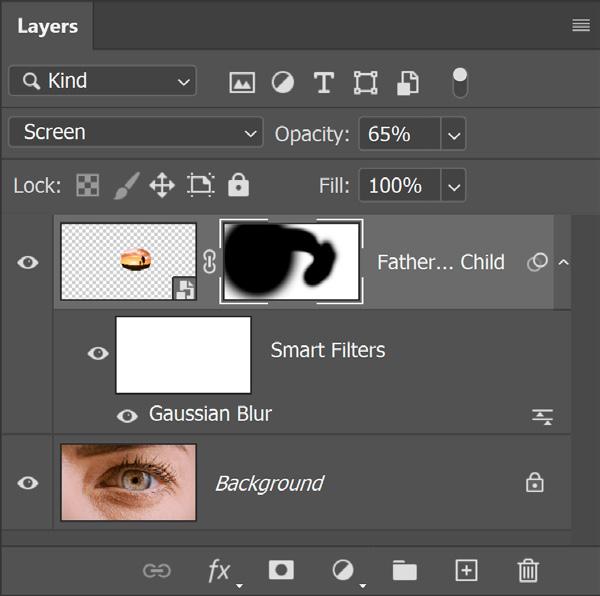
STEP FOUR: CHANGE THE BLEND MODE
Double-click the name of the reflection image in the Layers panel, and rename it “Father and Child.” Change its blend mode from Normal to Screen near the top left of the Layers panel so the reflection only brightens the eye.

STEP FIVE: ADD A BLUR
To make the reflection look a little more realistic and not too sharp, we need to blur it just slightly. Go to Filter>Blur>Gaussian blur, set the Radius to 1 pixel or less, and click OK.
STEP SIX: MASK THE REFLECTION
With the Father and Child layer selected, click on the Add Layer Mask icon (circle in a square) at the bottom of the Layers panel. Switch to the Brush tool (B) and press D then X to set black as the Foreground color. With a soft round brush, paint away any unnecessary areas of the reflection on the mask.
Important: Increase the Opacity of the Father and Child layer. For this example, let’s set the reflection to 65%.
STEP SEVEN: CREATE A LEVELS ADJUSTMENT LAYER
To add more punch and take away the dark areas from the reflection image, click on the Create New Adjustment Layer icon (half-black/half-white circle) at the bottom of the Layers panel, and choose Levels.
In the Properties panel (Window>Properties), click on the clipping mask icon (the first one on the left at the bottom). This will limit the adjustment just to the Father and Child layer. Drag the left shadows slider to the right. For this example, we dragged it to 100.
Because the Levels is making the reflection too saturated, let’s change the blend mode of the Levels adjustment layer to Luminosity, so it doesn’t alter the color.


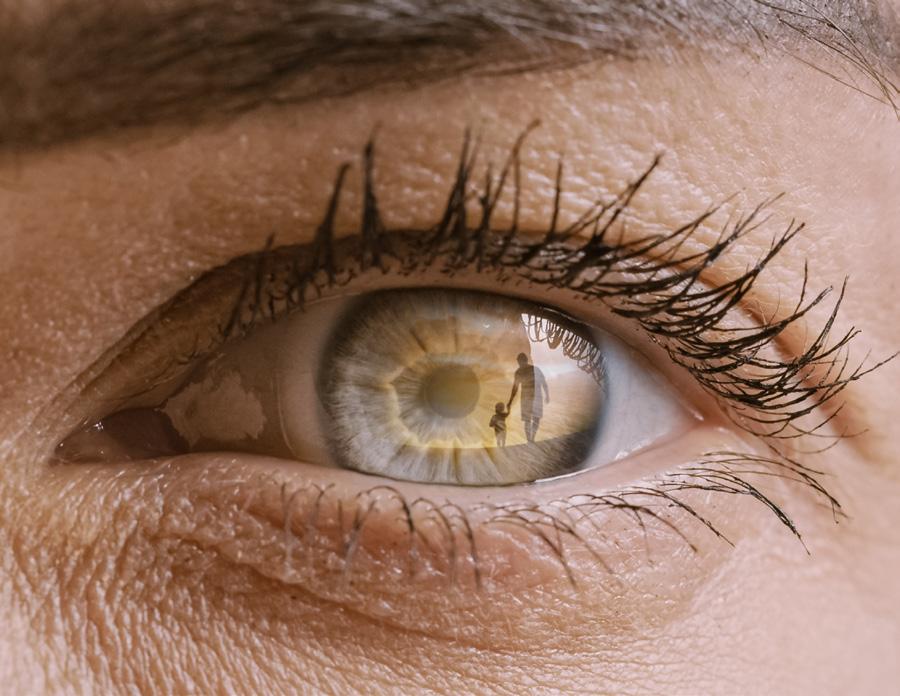
STEP EIGHT: COLOR GRADE THE EYES TO MATCH THE REFLECTION
Click on the Background layer in the Layers panel to make it active, and then click on the Create New Adjustment Layer icon again and choose Curves. Click to create two points on the curve, and drag the points to decrease the midtones and the highlights as shown here.


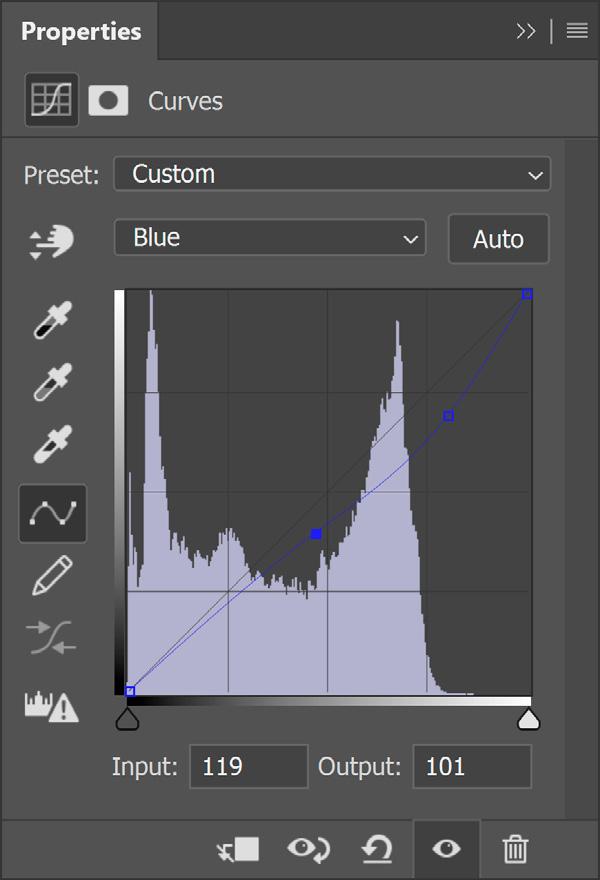

To bring up more yellows, select the Blue channel in the drop-down menu in the Properties panel of the Curves adjustment layer, and decrease the blues in the highlights as shown here.
Similarly, in the Red channel, add reds in the highlights as shown here .
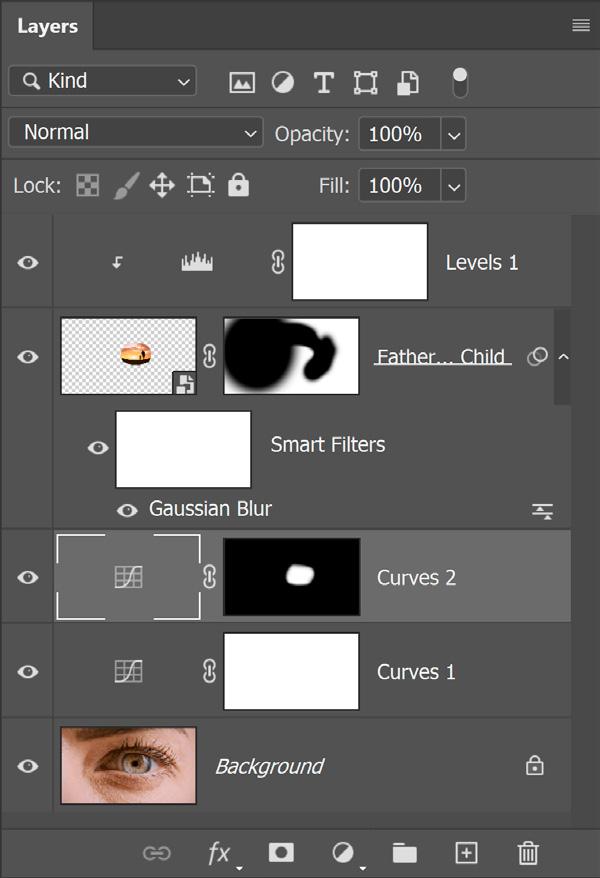
To add more punch to the iris, create one more Curves adjustment layer. In the RGB channel, drag the bottom-left slider to the right and stop where you begin to lose important details (we used an Input of 25 for this example).
Click on the layer mask thumbnail of Curves 2, and press Command-I (PC: Ctrl-I) to invert the mask to black, hiding the Curves effect on the layer. With a soft, round brush and white as the Foreground color, paint on the iris to reveal the Curves effect.

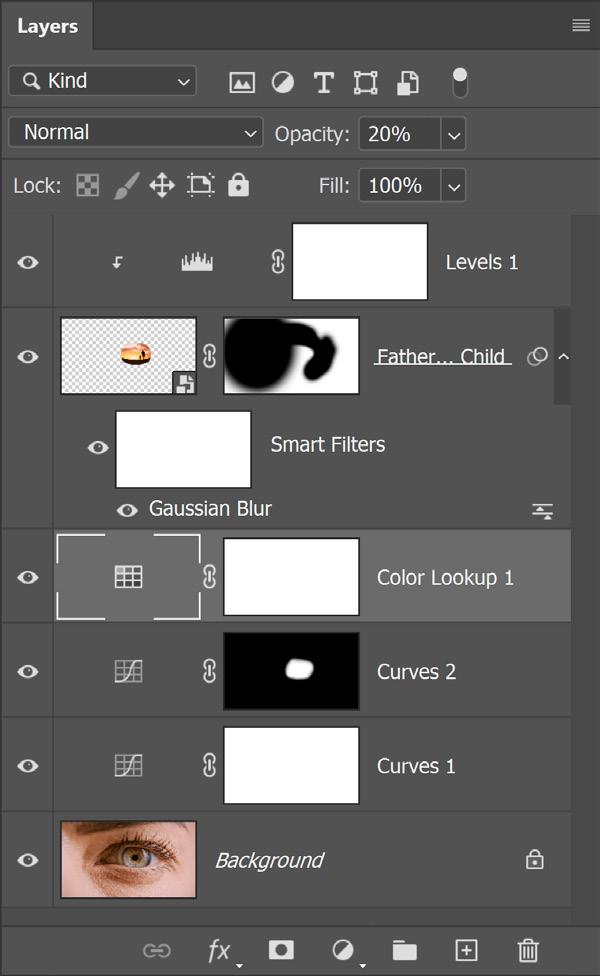
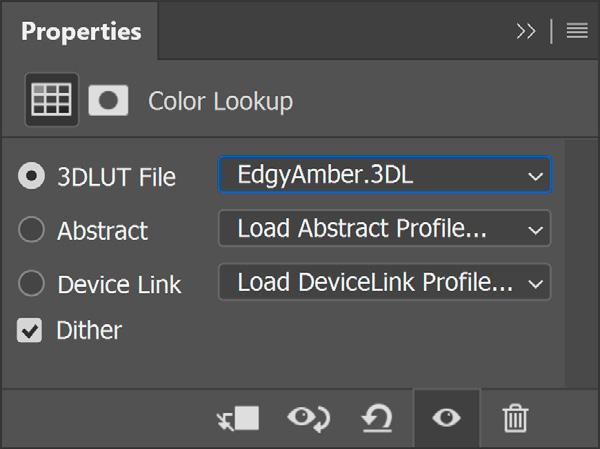
Additionally, you can add a Color Lookup Table. Click on the Background layer to make it active, then click on the Create New Adjustment Layer icon, and choose Color Lookup. From the 3DLUT File dropdown menu in the Properties panel, select EdgyAmber. Set the layer Opacity to 20%.
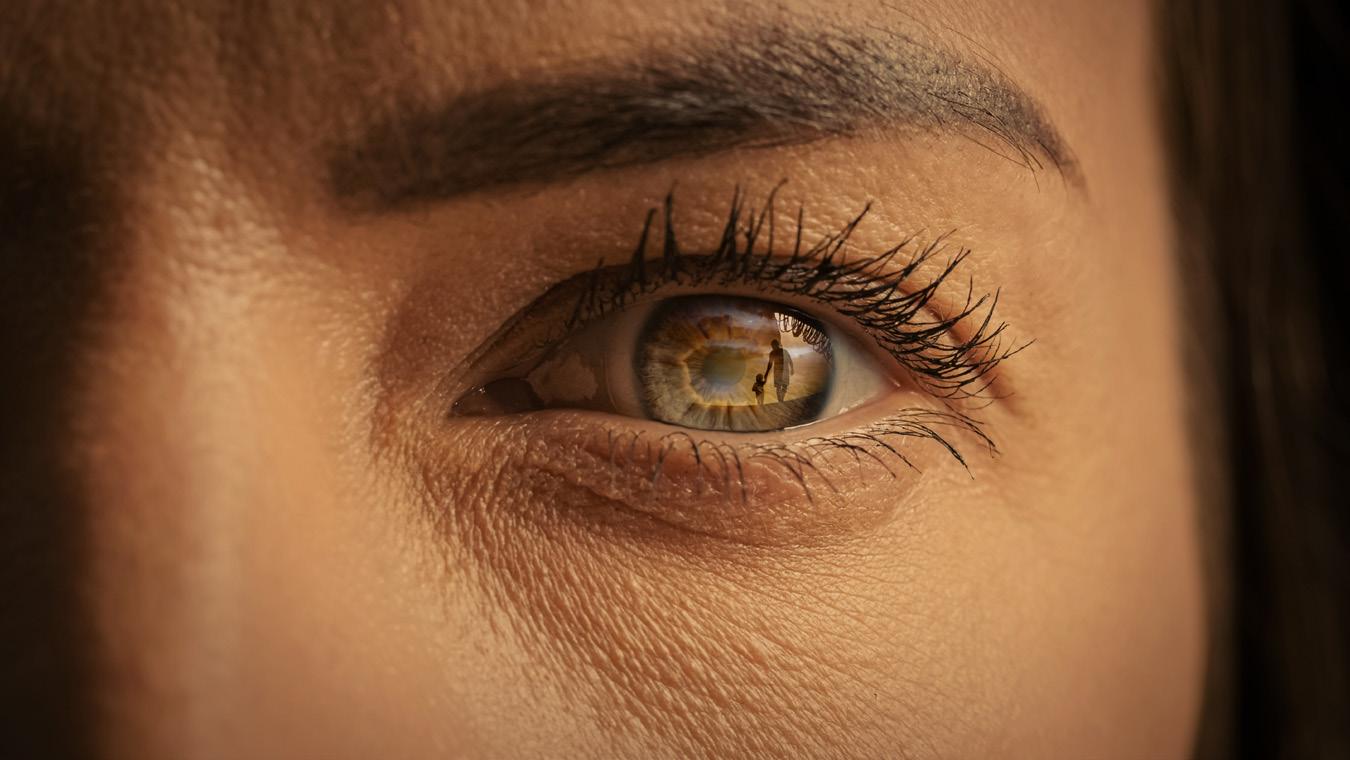
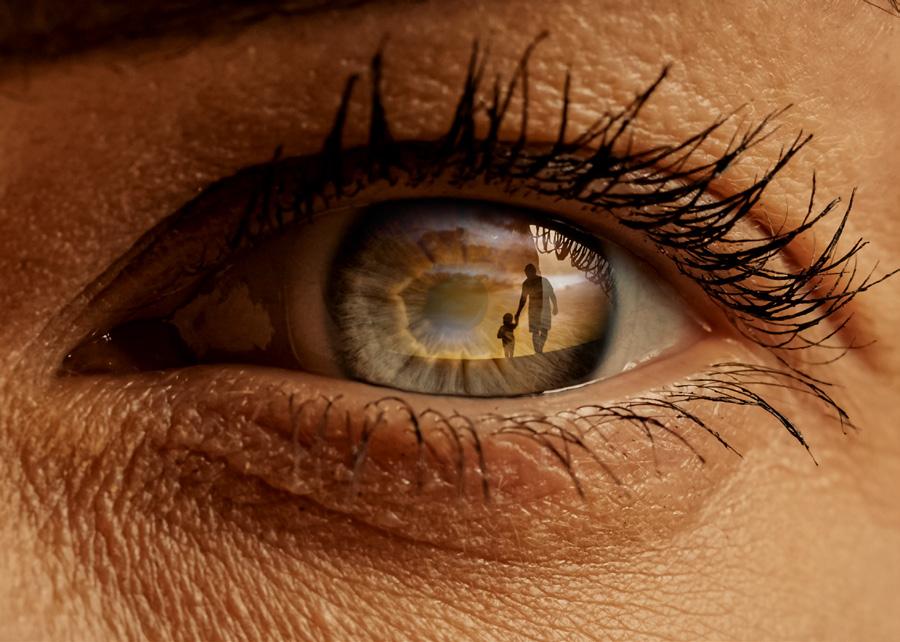
When it comes to adding effects in Photoshop, understanding the concept of how light works goes a long way. As we connect our understanding with the concepts of Photoshop, we can create our own steps once we visualize the effect that we wish to achieve. Here, we wanted to create a reflection on the eye.
Now, when you look closely at pictures of eyes with natural reflections, you’ll notice that the only thing those reflections do is brighten. Using that same understanding, we chose the Screen blend mode so that the reflection only brightened in Photoshop. We also worked to match the color of the reflection and the eye in general. n

Before