
8 minute read
PHOTO EFFECTS
from photoshopuser232020
by baranovmir2
KRISTINASHERK >Photo Effects TWO AMAZING WAYS PHOTOSHOP IS USING AI TO MAKE YOUR LIFE EASIER!
Photoshop just got a lot smarter! Back in Photoshop CC 2018, Adobe debuted their Select Subject command, which revolutionized the way many people start their selection process. This process has now been fine-tuned and works even better thanks to Adobe Sensei, Adobe’s machine learning engine.
Advertisement
Prior to the June release of Photoshop CC 2020 (Version 21.2), Adobe’s machine learning was able to broadly select portraits in images, but it always required the second step of jumping into the Select and Mask workspace to refine the selection around hair and soft edges using the Refine Edge Brush tool. Now, that second step is on its way to being eradicated.
In 2018, there were only a few algorithms in play behind the scenes of Select Subject. With every update since, Adobe has been adding more algorithms to the command, making it work better, faster, and with more precision. Photoshop uses Adobe Sensei in two ways: first, the AI engine is now content-aware so it actually guesses as to what the subject is, and second it actually selects the subject. This means if Adobe Sensei thinks your subject contains hair or fur, it now uses a completely new algorithm in CC 2020 to create a much more intricate selection. Check out the difference in the Select Subject command between Photoshop CC 2019 and Photoshop CC 2020 in the examples shown here.
Original photo
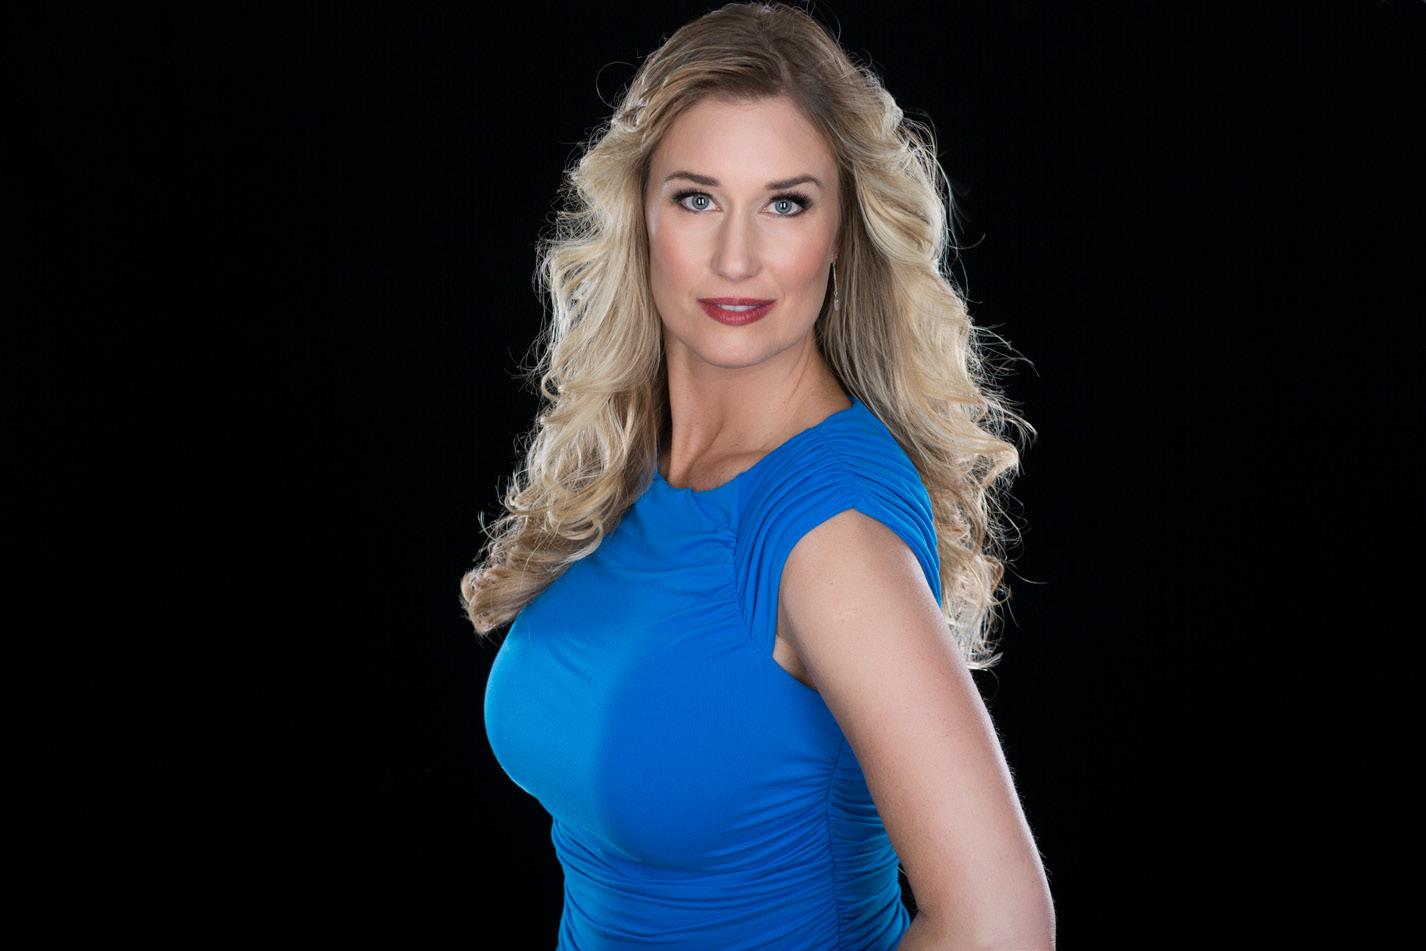
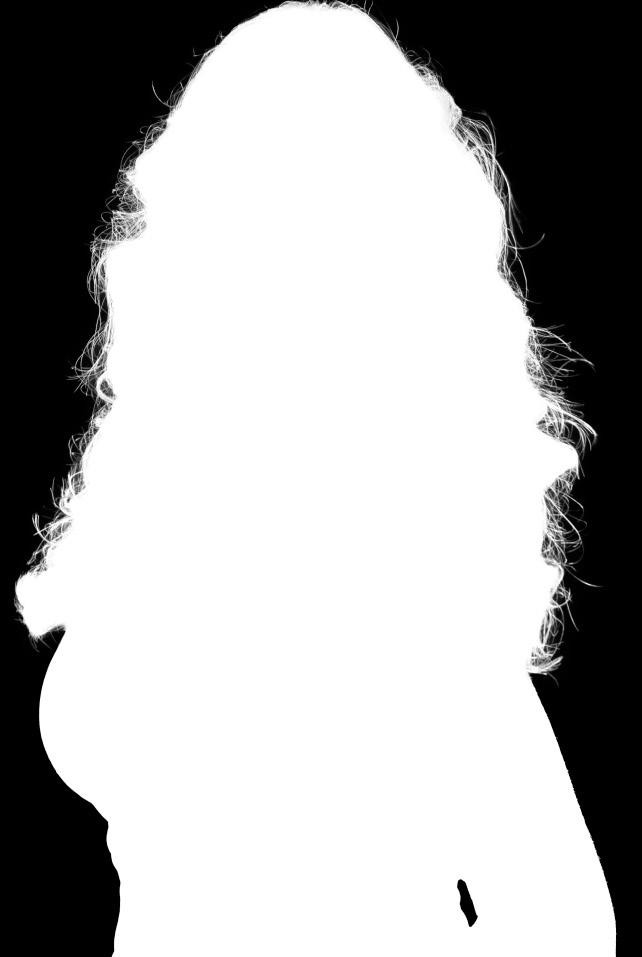
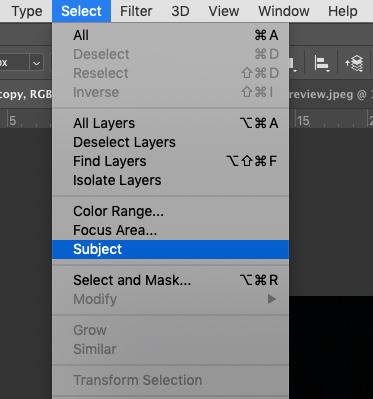
Step One: So let’s try it! Open your image in Photoshop, then use the Select Subject command, which can be accessed in one of three places. If you have the Object Selection, Quick Selection, or Magic Wand tool active (press W to activate them), there’s a button devoted to the command in the Options Bar. You’ll also find this command within the Select menu at the top of your Photoshop window. Finally, if you have an unlocked pixel layer active, you’ll find a Select Subject button in the Properties panel (Window>Properties).
Step Two: Once you’ve selected your subject (he or she is surrounded by marching ants), you still have the ability to fine-tune the selection in the Select and Mask workspace. Simply click the Select and Mask button in the Options Bar (this button will be visible with any selection tool active).
Step Three: Since our model in this example was photographed on black, we’ll choose On White (T) from the View drop-down menu in the Properties panel at the top right of the Select and Mask workspace, as it provides the most variation from the original background so we can view the changes. (Make sure the Opacity is set to 100% just below the View drop-down menu.)
As you can see, the default selection was seriously detailed and I haven’t done a thing yet to modify it! Isn’t that insane? While the selection is 70% of the way there, it still needs a little bit of help from the Refine Edge Brush tool in a few areas.
ALL IMAGES BY KRISTINA SHERK UNLESS OTHERWISE NOTED


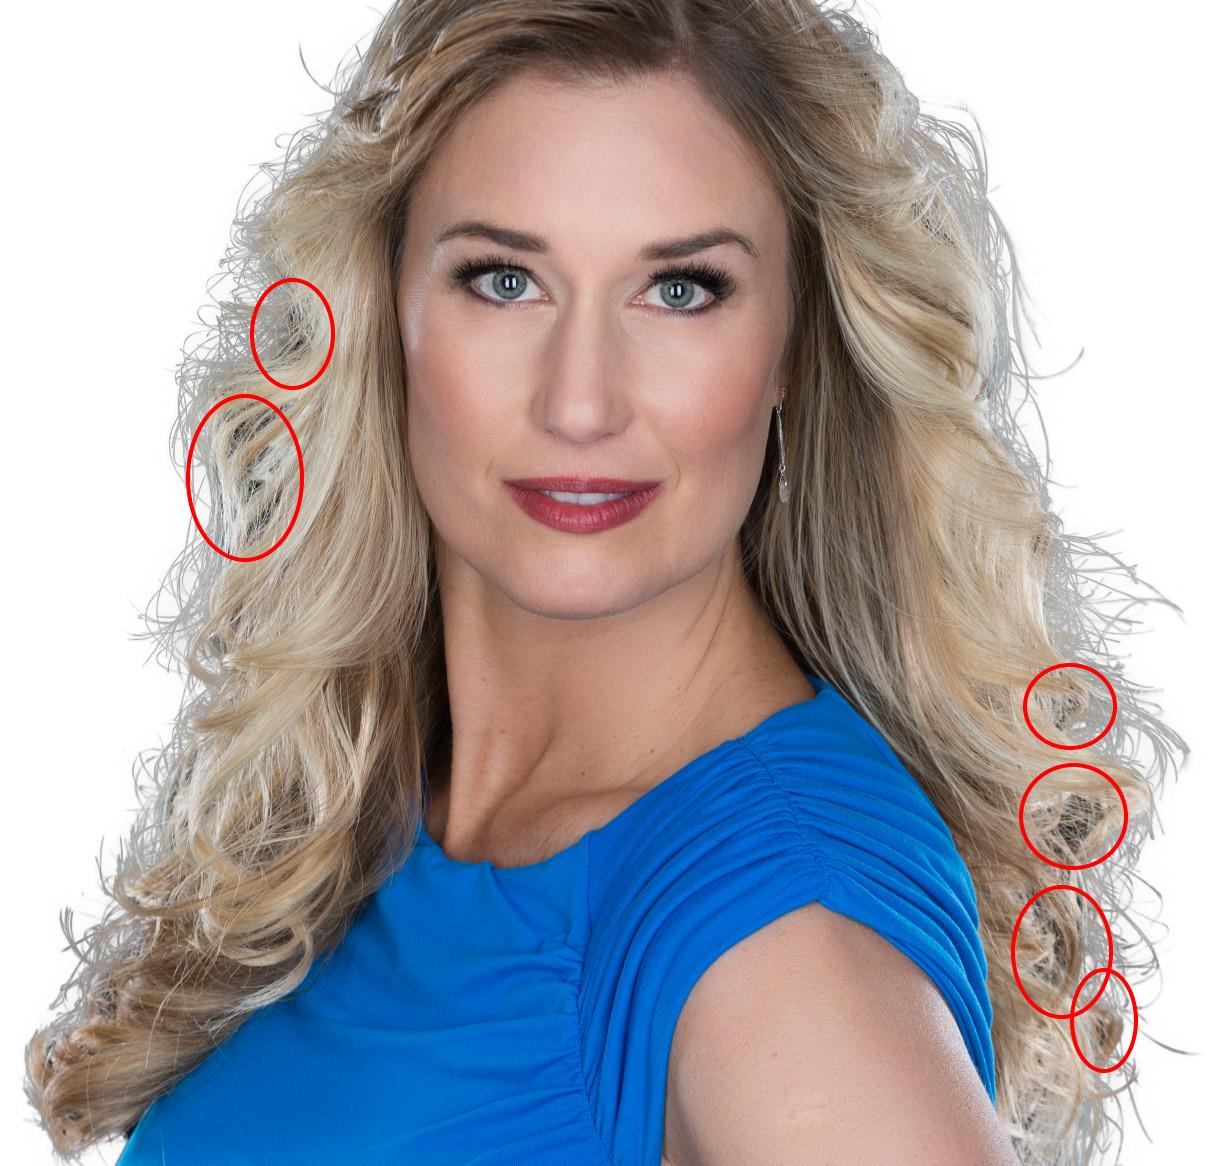
Step Four: Tap the letter R on your keyboard to activate the Refine Edge Brush, then in the Edge Detection in the Prop- erties panel, choose a Radius of 10 px and tick the Smart Radius checkbox. Anywhere we see dark black areas of the original background shining through the hair, we’ll paint over those spots with the brush. This will further fine-tune the selection.
Step Five: Our last step is to make some adjustments in the Global Refinements section, which is located about halfway down in the Properties panel. We’ll add a 1-pixel Feather, increase the Contrast to 10%, and then set Shift Edge to around –25% to move the selec- tion slightly into the hairline.
Step Six: After your selection has been adjusted in the Select and Mask workspace, Photo- shop wants to know how you want the selection to be applied to your image. You have quite a few options in the Output To drop-down menu in the Output Settings section. For this exam- ple, we’ll choose Layer Mask, and then click OK.
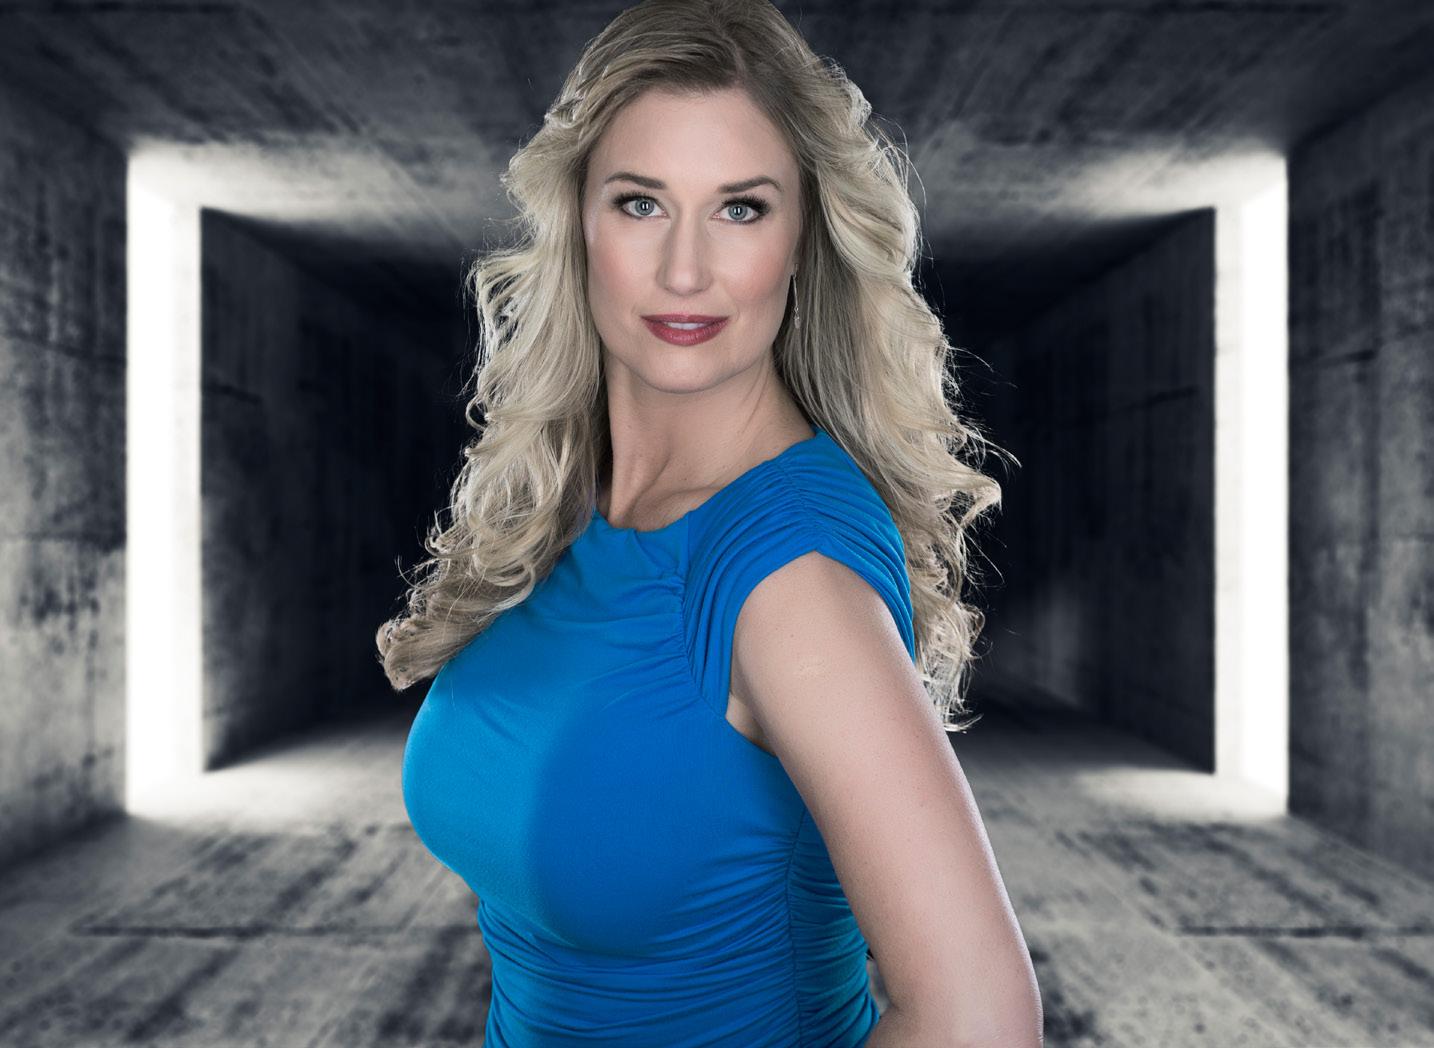
Step Seven: At this point, it’s extremely easy to change the background to anything your heart desires. As you can see from this photo, I chose a park- ing lot. I also added a little bit of a color treatment to match the model to the background (but since those two things aren’t new and they don’t require AI, I won’t be covering those modifications in this tutorial).
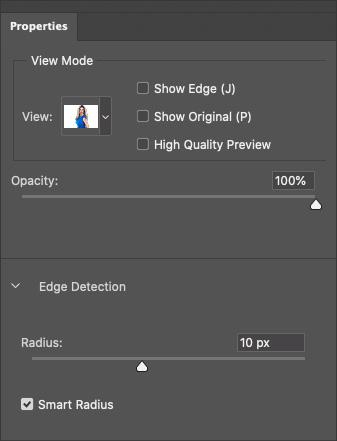
Step Four
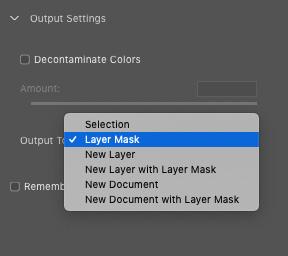
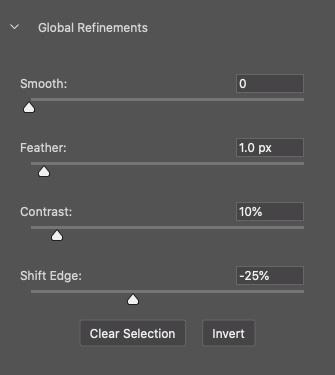
Step Five
FACE-AWARE LIQUIFY
This section will focus on how Adobe’s AI has revolutionized another engine in Photoshop, the Liquify filter. Since the implementation of Face-Aware Liquify (originally introduced in 2016), the way I use the Liquify filter has completely changed.
I can bet money on the fact that on my corporate shoots, at least one person will request one of the following: First, to add hair back to a receding hairline, which used to be one of the hardest things to do realistically in Photoshop. The second request that comes up on almost every corporate shoot is, “Can you get rid of my double chin or make my face look slimmer?” Both of these items can be easily mitigated using the Face-Aware Liquify engine.
Important Note: When dealing with clients, it’s important not to suggest any Photoshop modifications you think need to be made to their headshots. Instead, ask the clients what they would like to see improved. Being overly forthcoming about the things you think should be changed will send the wrong message, and they could become self-conscious about their appearances. And it’s one sure-fire way to lose a client!
Step One: Let’s use this image of a businessman from Adobe Stock, and pretend he has requested that we make his hairline look less receding and his face appear slimmer. If you’d like to download the low-res watermarked version of this image to follow along, click this link, log in with your Adobe ID, and click the Save to Library button. Double-click the image in the Libraries panel (Window>Libraries) to open it in Photoshop. To make it easier to work with the image, increase the resolution of the practice file. (We normally don’t recommend enlarging images, but this is only for practice purposes.) Go to Image>Image Size, turn on the Resample checkbox, select Preserve Details 2.0 from the Resample dropdown menu, set the Width to 1,920 pixels, and click OK.
CREDIT: ©Adobe Stock/Phase4Photography
Step Two: Our first step, as always, is to duplicate the Background layer by clicking on the layer in the Layers panel and pressing Command-J (PC: Ctrl-J). With the duplicate layer active, go to Filter>Convert for Smart Filters. This will convert the layer into a smart object, allowing you to modify the Liquify settings after you apply them.
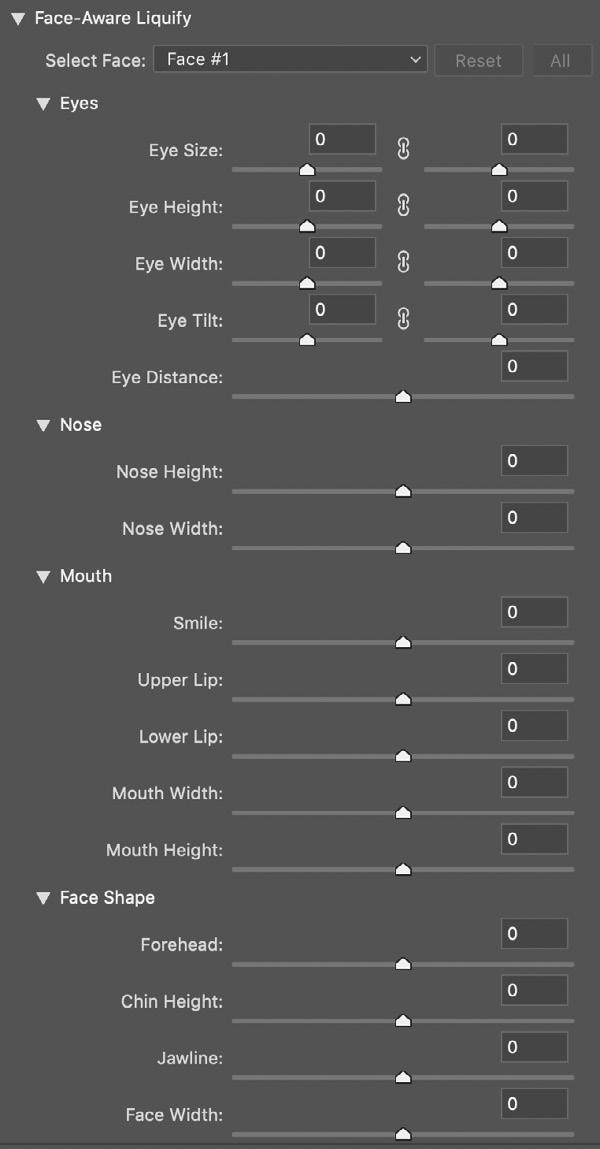
Step Three: Next, go to Filter>Liquify. When you first bring an image into the Liquify dialog, you have a tool near the bottom of the Toolbar on the left called the Face tool (A). Additionally, you have an entire Face-Aware Liquify section in the Properties panel on the right.
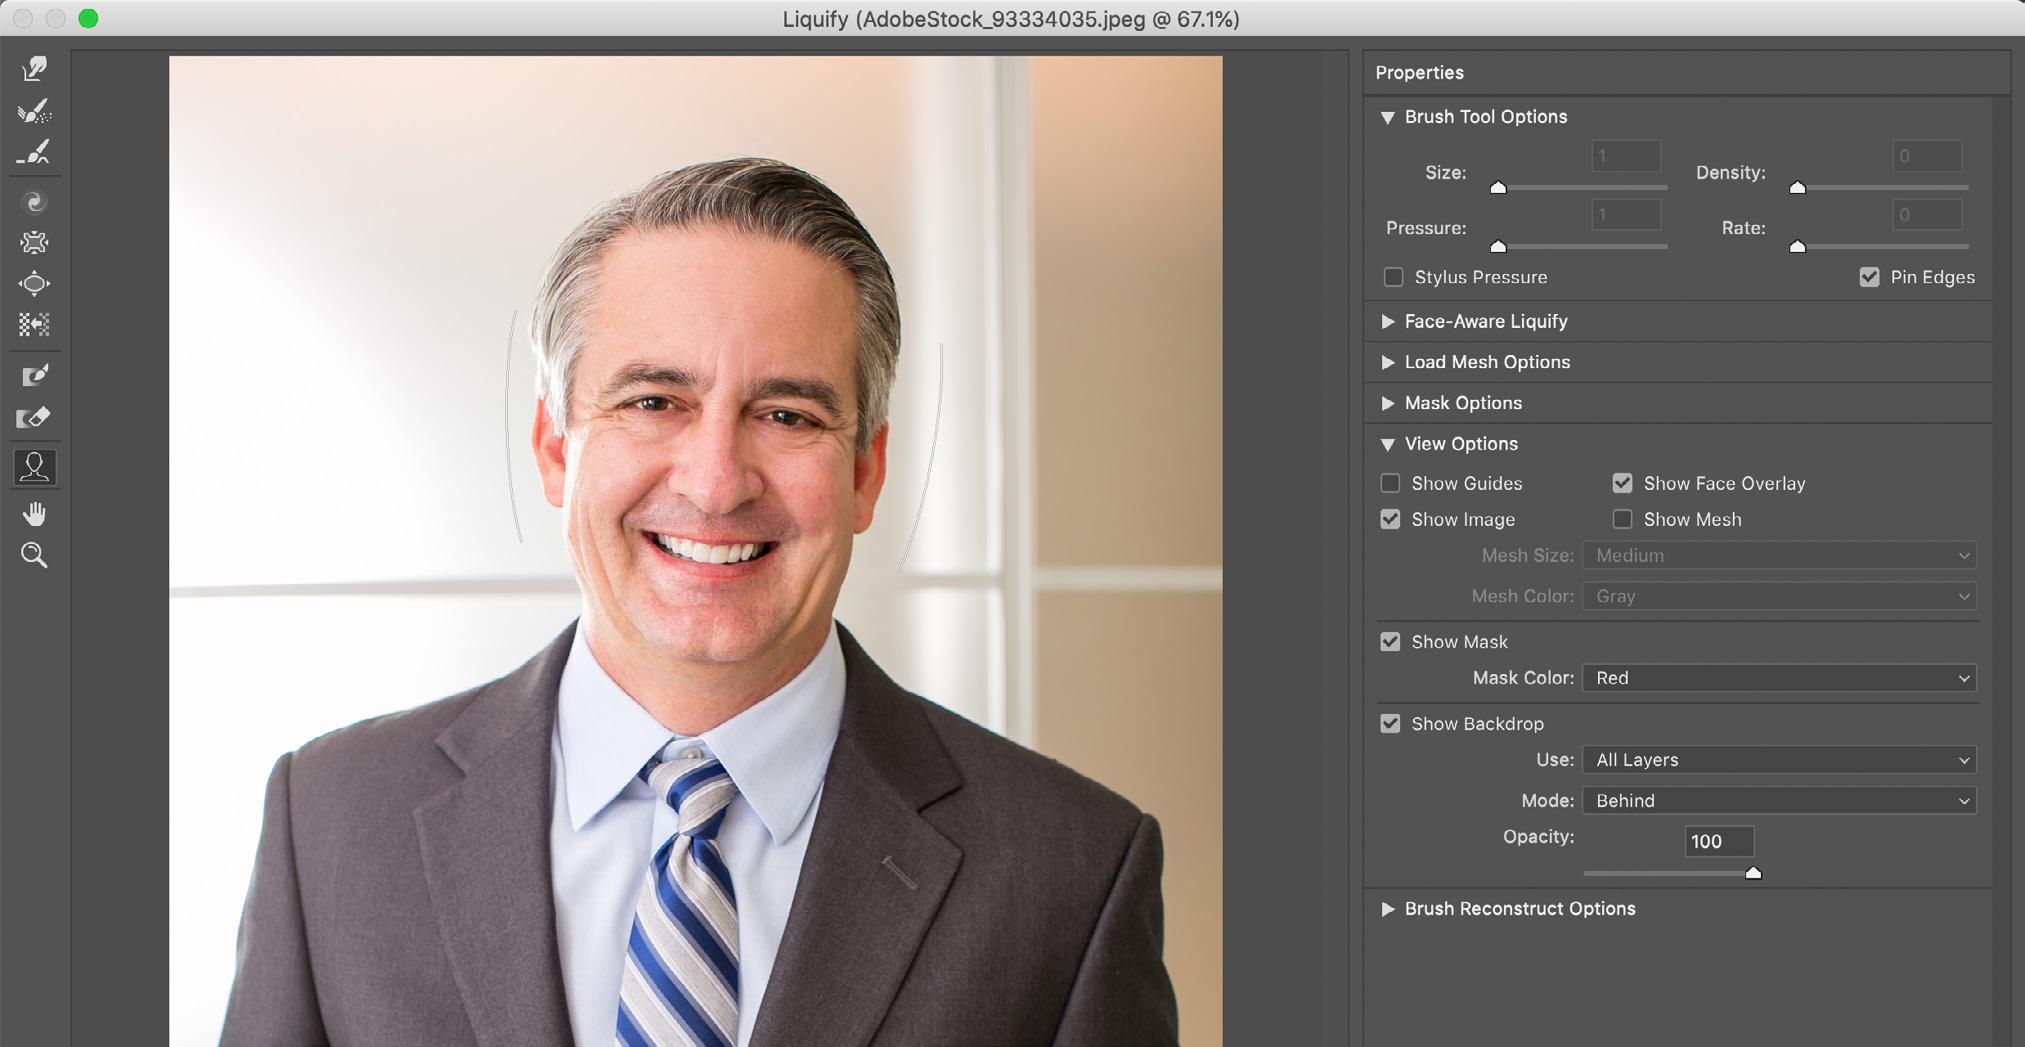
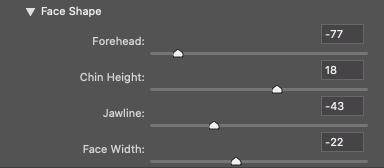
Step Four: When you activate the Face tool, you’ll see two large white curved lines appear on either side of the face. This will be true whether there’s one face or multiple faces in the image. Now expand the FaceAware Liquify section over in the Properties panel, and you’ll see just about every slider you could ever imagine for retouching a face! These include multiple sliders for the Eyes, Nose, Mouth, and Face Shape. If you hover the Face tool over different areas of the face, you can see all the different parameters you can affect. Step Five: Let’s take care of the receding hairline first. Drag the Forehead slider within the Face Shape section from 0 to –77. This will ostensibly lower the hairline and give the illusion of a fuller head of hair, in one easy, hassle-free step! Note: If the change appears as an overlay on the original face, go down to the View Options section in the Properties panel, and turn off Show Backdrop. Step Six: Next, it’s time to work on the face shape. Let’s use the other three sliders in the Face Shape section to improve the jawline. We’ll start by slightly increasing the Chin Height to 18. Then we’ll take the Jawline slider to –43 and the Face Width slider to –22. It’s as easy as that!
Two requests have been completed by moving just a few sliders. I don’t know about you but I think that’s pretty fantastic, and super easy. To appreciate this fabulous result even more, take a look at the facial features such as the eyes, nose, and mouth while you tap the P on your keyboard to preview the before and after states. These areas have only been minimally affected by the face slimming. That’s the beauty of AI technology: Photoshop recognizes facial features and smartly protects them against any morphing!
Here are closeups of the before and after images with the changes.
Before


After
Photoshop is charging full steam ahead with its AI technology and machine learning, but it doesn’t do you any good if you don’t know that these tools and possibilities exist. Be sure to play around with the latest additions to Photoshop; they’ll no doubt save you time and effort in your retouching journey. n


