


Keep busy during the holidays by getting crafty and following along with our fun and easy Crafternoon activities! Check out some of our favourites below or click here to view our entire playlist of Crafternoon videos. Each craft activity uses basic materials such as paper, scissors and glue that you might already have access to, so you can create these fun projects anytime during the holiday period!
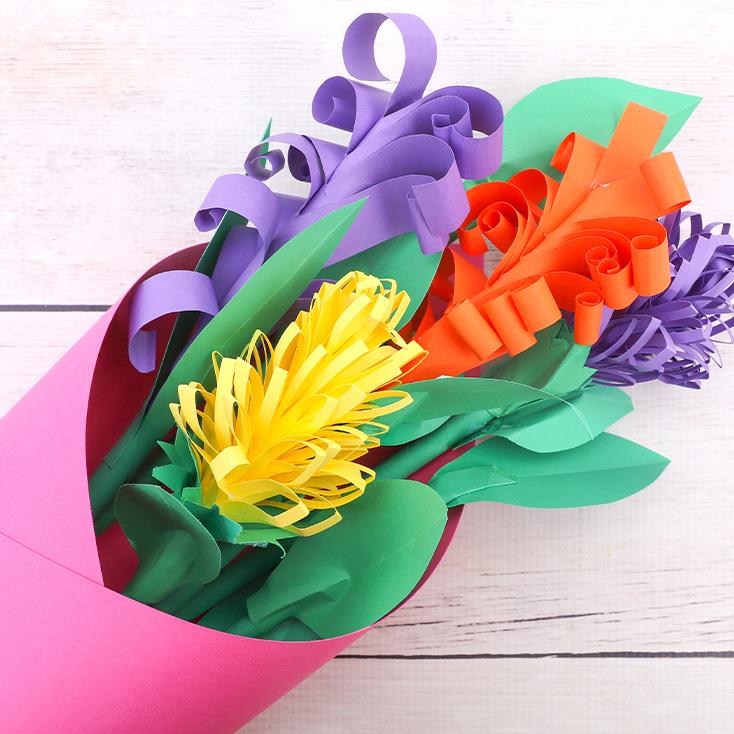
Create these Easy Paper Flowers to decorate your space or gift to someone you love. The great thing about these flowers is that they are perfect all year round and will last forever! We will show you how to make a stem, followed by two simple flower designs.
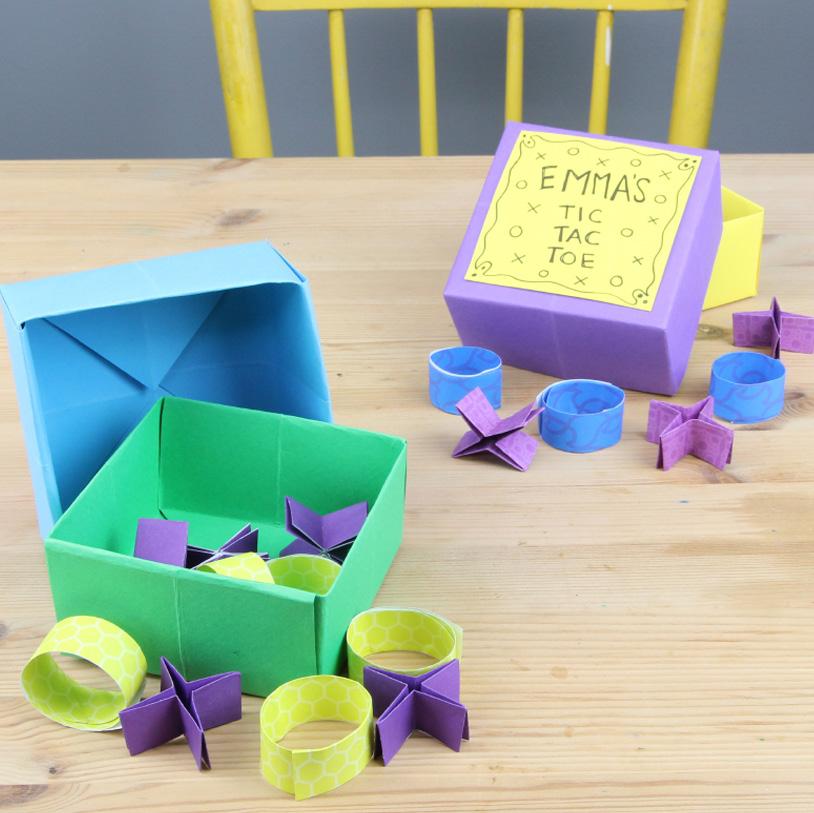
Bring the flat game of Tic Tac Toe to life with our fun and easy origami version. We’ll even show you how to create a cute little box to hold all of your pieces!
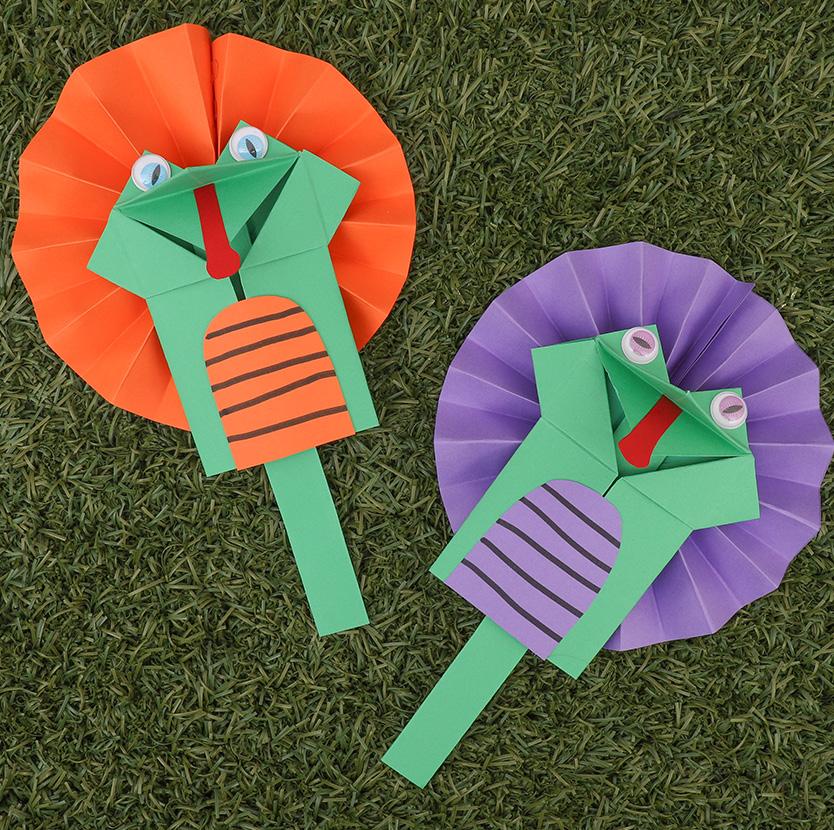
Use your origami skills to create a talking Frilled Neck Lizard Puppet! Follow our simple folding instructions to create a paper puppet with a mouth that can move up and down.
• Cardboard – White – A4 – Pack of 100 – 16288
• CleverPatch™ Triangular Coloured Markers Pack of 10 – 16232
• CleverPatch™ Coloured Pencils Pack of 12 – 20770
• CleverPatch™ Glue Stick – 40g – 13974
• Other materials required: Template (page 5) and scissors.
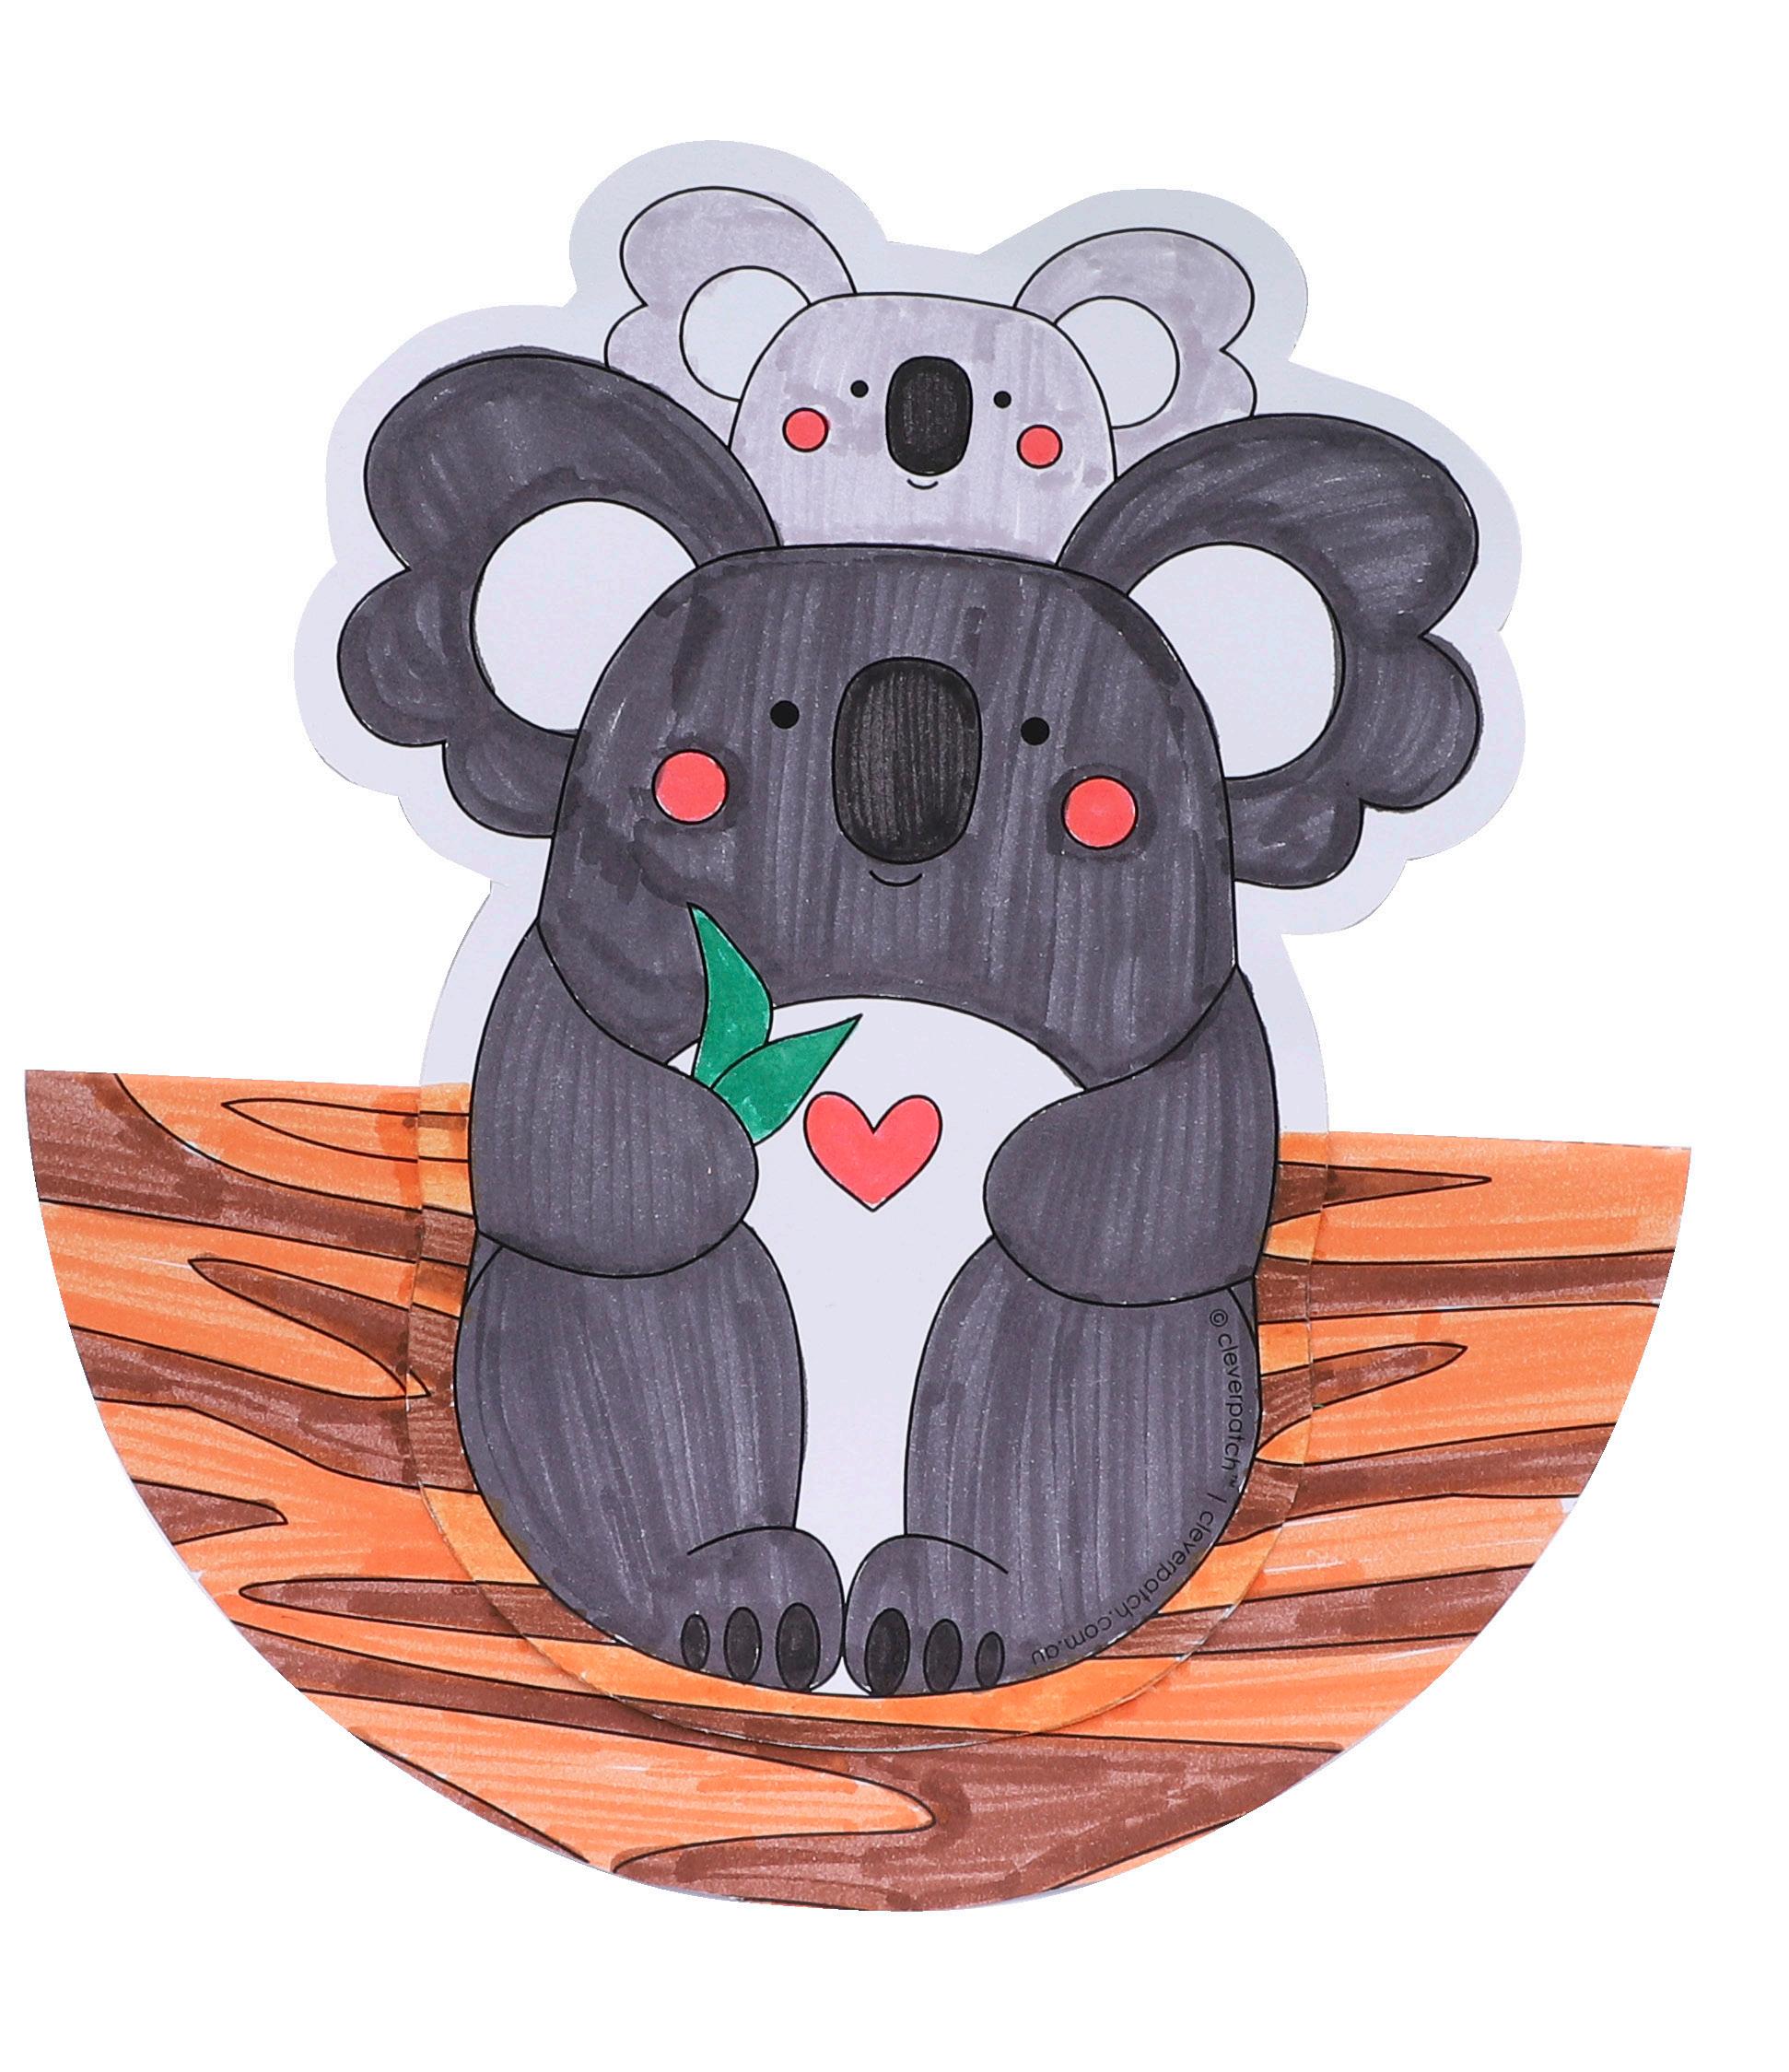
Baby koalas, called ‘joeys’, develop in their mother’s pouch for about six months. After this time, they’ll ride on their mum’s back for another six months, only using the pouch to feed and sleep!
STEP 1
Print the supplied template on page 5. We recommended printing onto cardboard to provide a sturdy surface for decorating and constructing your koalas.
STEP 2
Decorate the template using pencils or markers.
STEP 3
Using the solid grey lines as a guide, cut out the template pieces.
STEP 4
Mountain fold the circle in half along the grey dotted line. Apply glue to the back of the bottom half of the Koala piece. Line up the wood grain effect on the koala piece with the front of the circle and press together to secure. Allow to dry.
STEP 5
Your Rocking Koalas are ready to display. Open the circle base slightly so it stands by itself, then lightly tap one side to see your koalas rock! You could also write a cute message inside the circle base and use it as a greeting card for someone special.
• CleverPatch™ Cover Paper – White – A4 Pack of 250 – 16142
• CleverPatch™ Triangular Coloured Markers Pack of 10 – 16232
• CleverPatch™ Coloured Pencils Pack of 12 – 20770
• CleverPatch™ Glue Stick – 40g – 13974
• Other materials required: Template (page 7) and scissors.
All modern day sloths are tree-dwelling, suspensorial mammals, spending most of their lives hanging motionless or slowly moving between tree branches using their long, curved claws. Everything including feeding, sleeping and resting happens in the trees!
STEP 1
Print the bookmark templates provided on page 7. We recommend printing on cover paper as this provides a great surface for decorating and construction!
STEP 2
Decorate your bookmarks using markers or pencils.
STEP 3
Cut out the templates around the outer black lines.
STEP 4
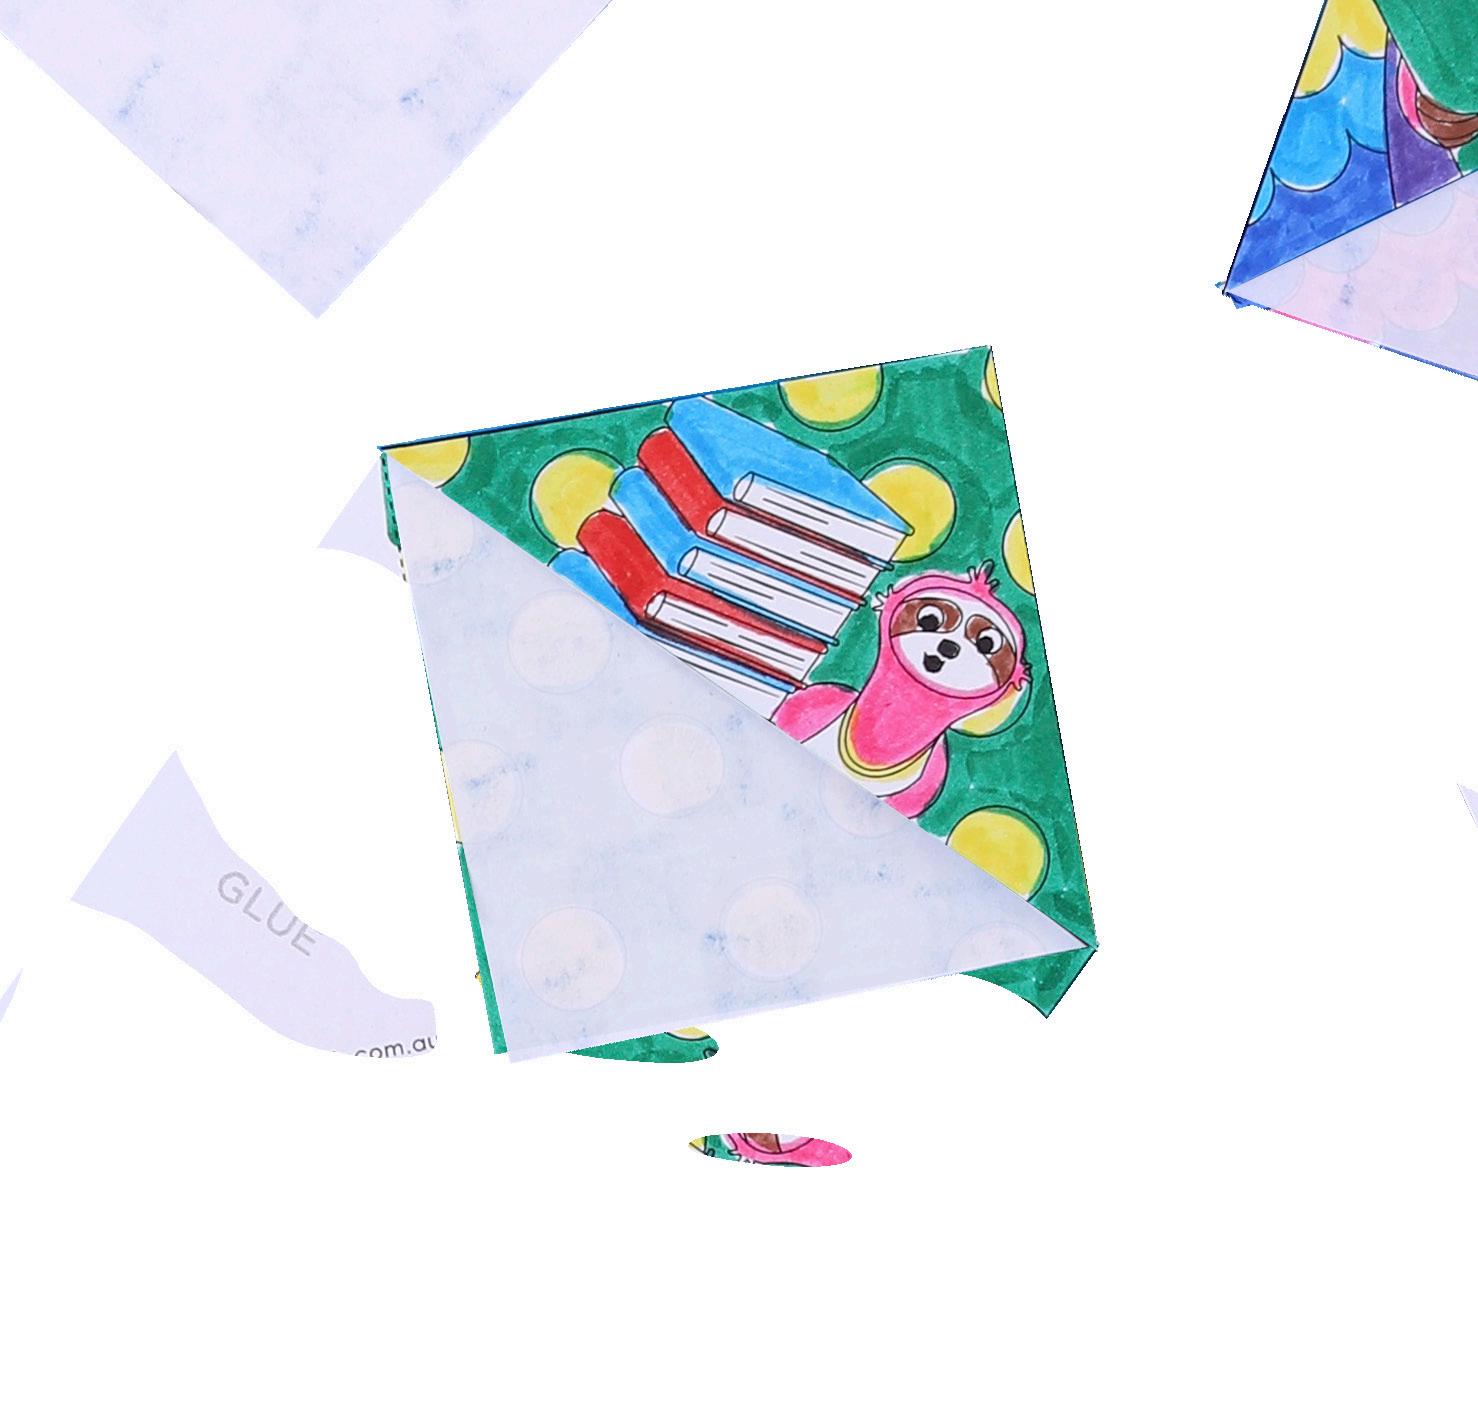
Mountain fold along the dotted lines.
STEP 5
Apply glue to the plain triangle labelled ‘Glue’ and fold over the base. Fold the triangle with the design over the top of the glue and press to secure in place. Allow to dry.
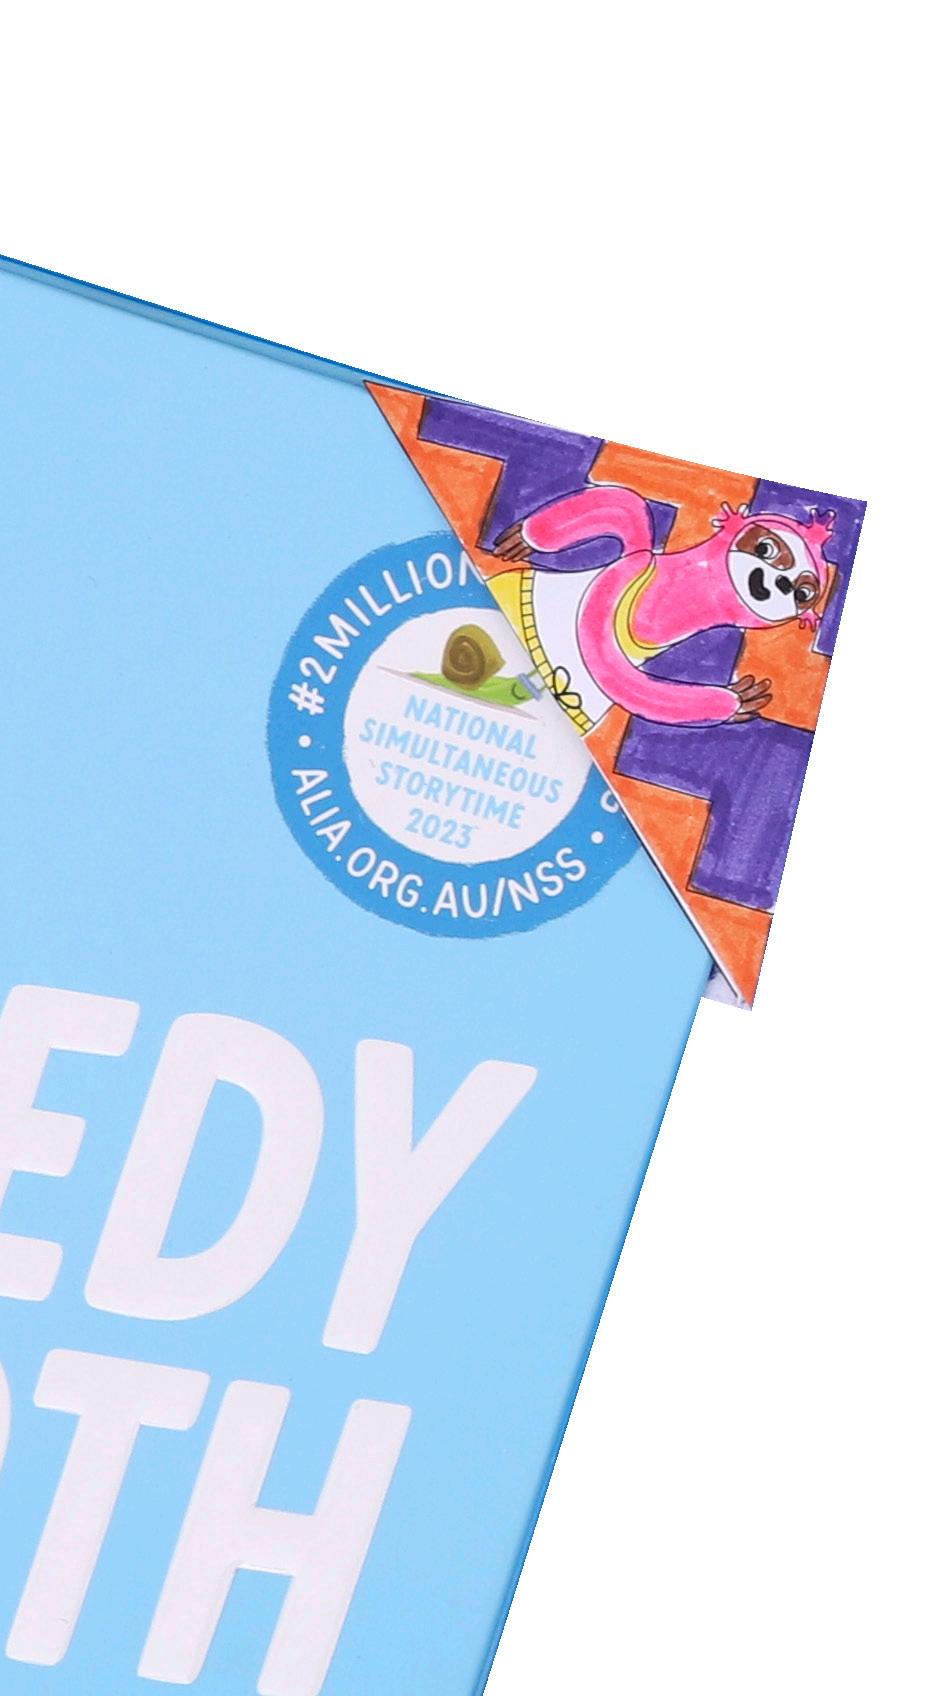
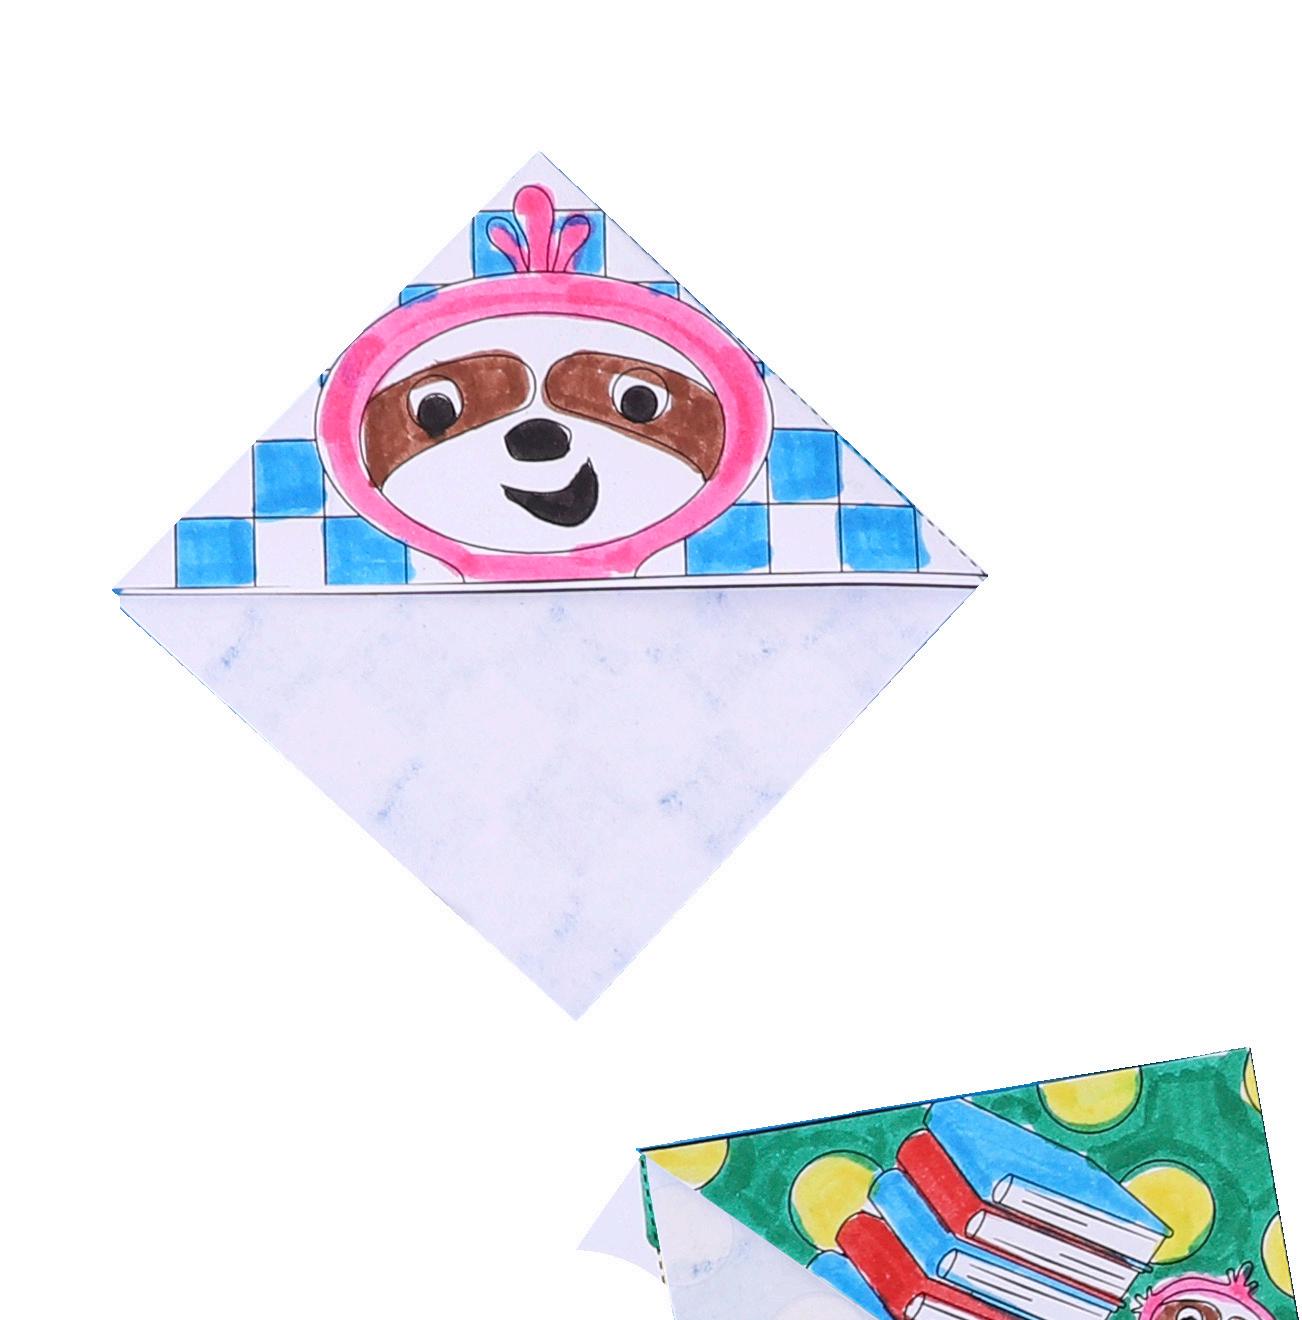
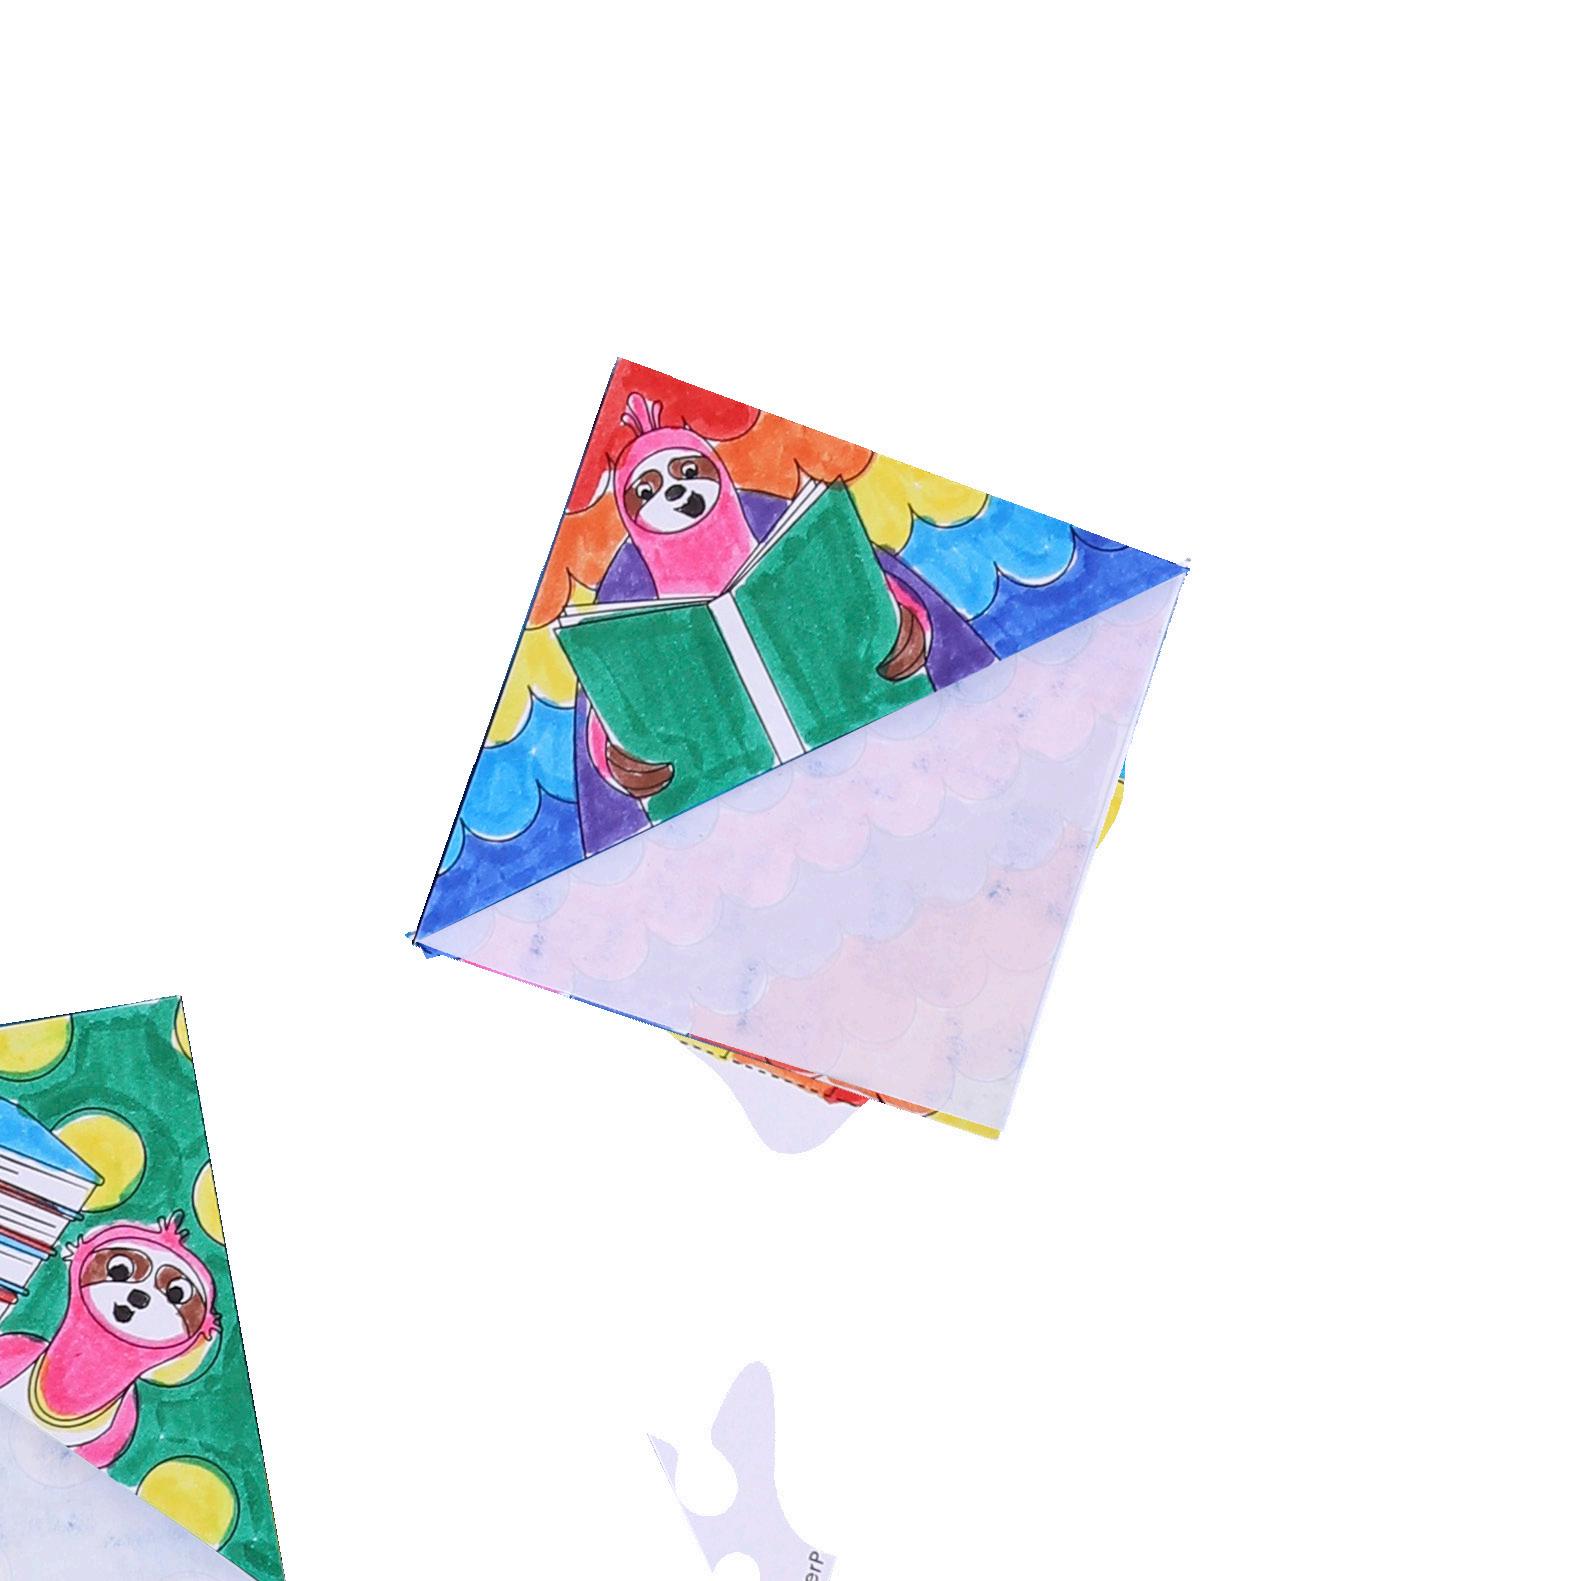
STEP 6
Your Sloth Corner Bookmarks are now ready to use!
Sloth Corner Bookmark Templates
Based on ‘The Speedy Sloth’ by Rebecca Young and Heath McKenzie, published by Scholastic Australia.
• CleverPatch™ Cover Paper – White – A4 – Pack of 250 – 16142
• CleverPatch™ Triangular Coloured Markers – Pack of 10 – 16232
• CleverPatch™ Coloured Pencils – Pack of 12 – 20770
• Other materials required: Template (page 9) and scissors.
STEP 1
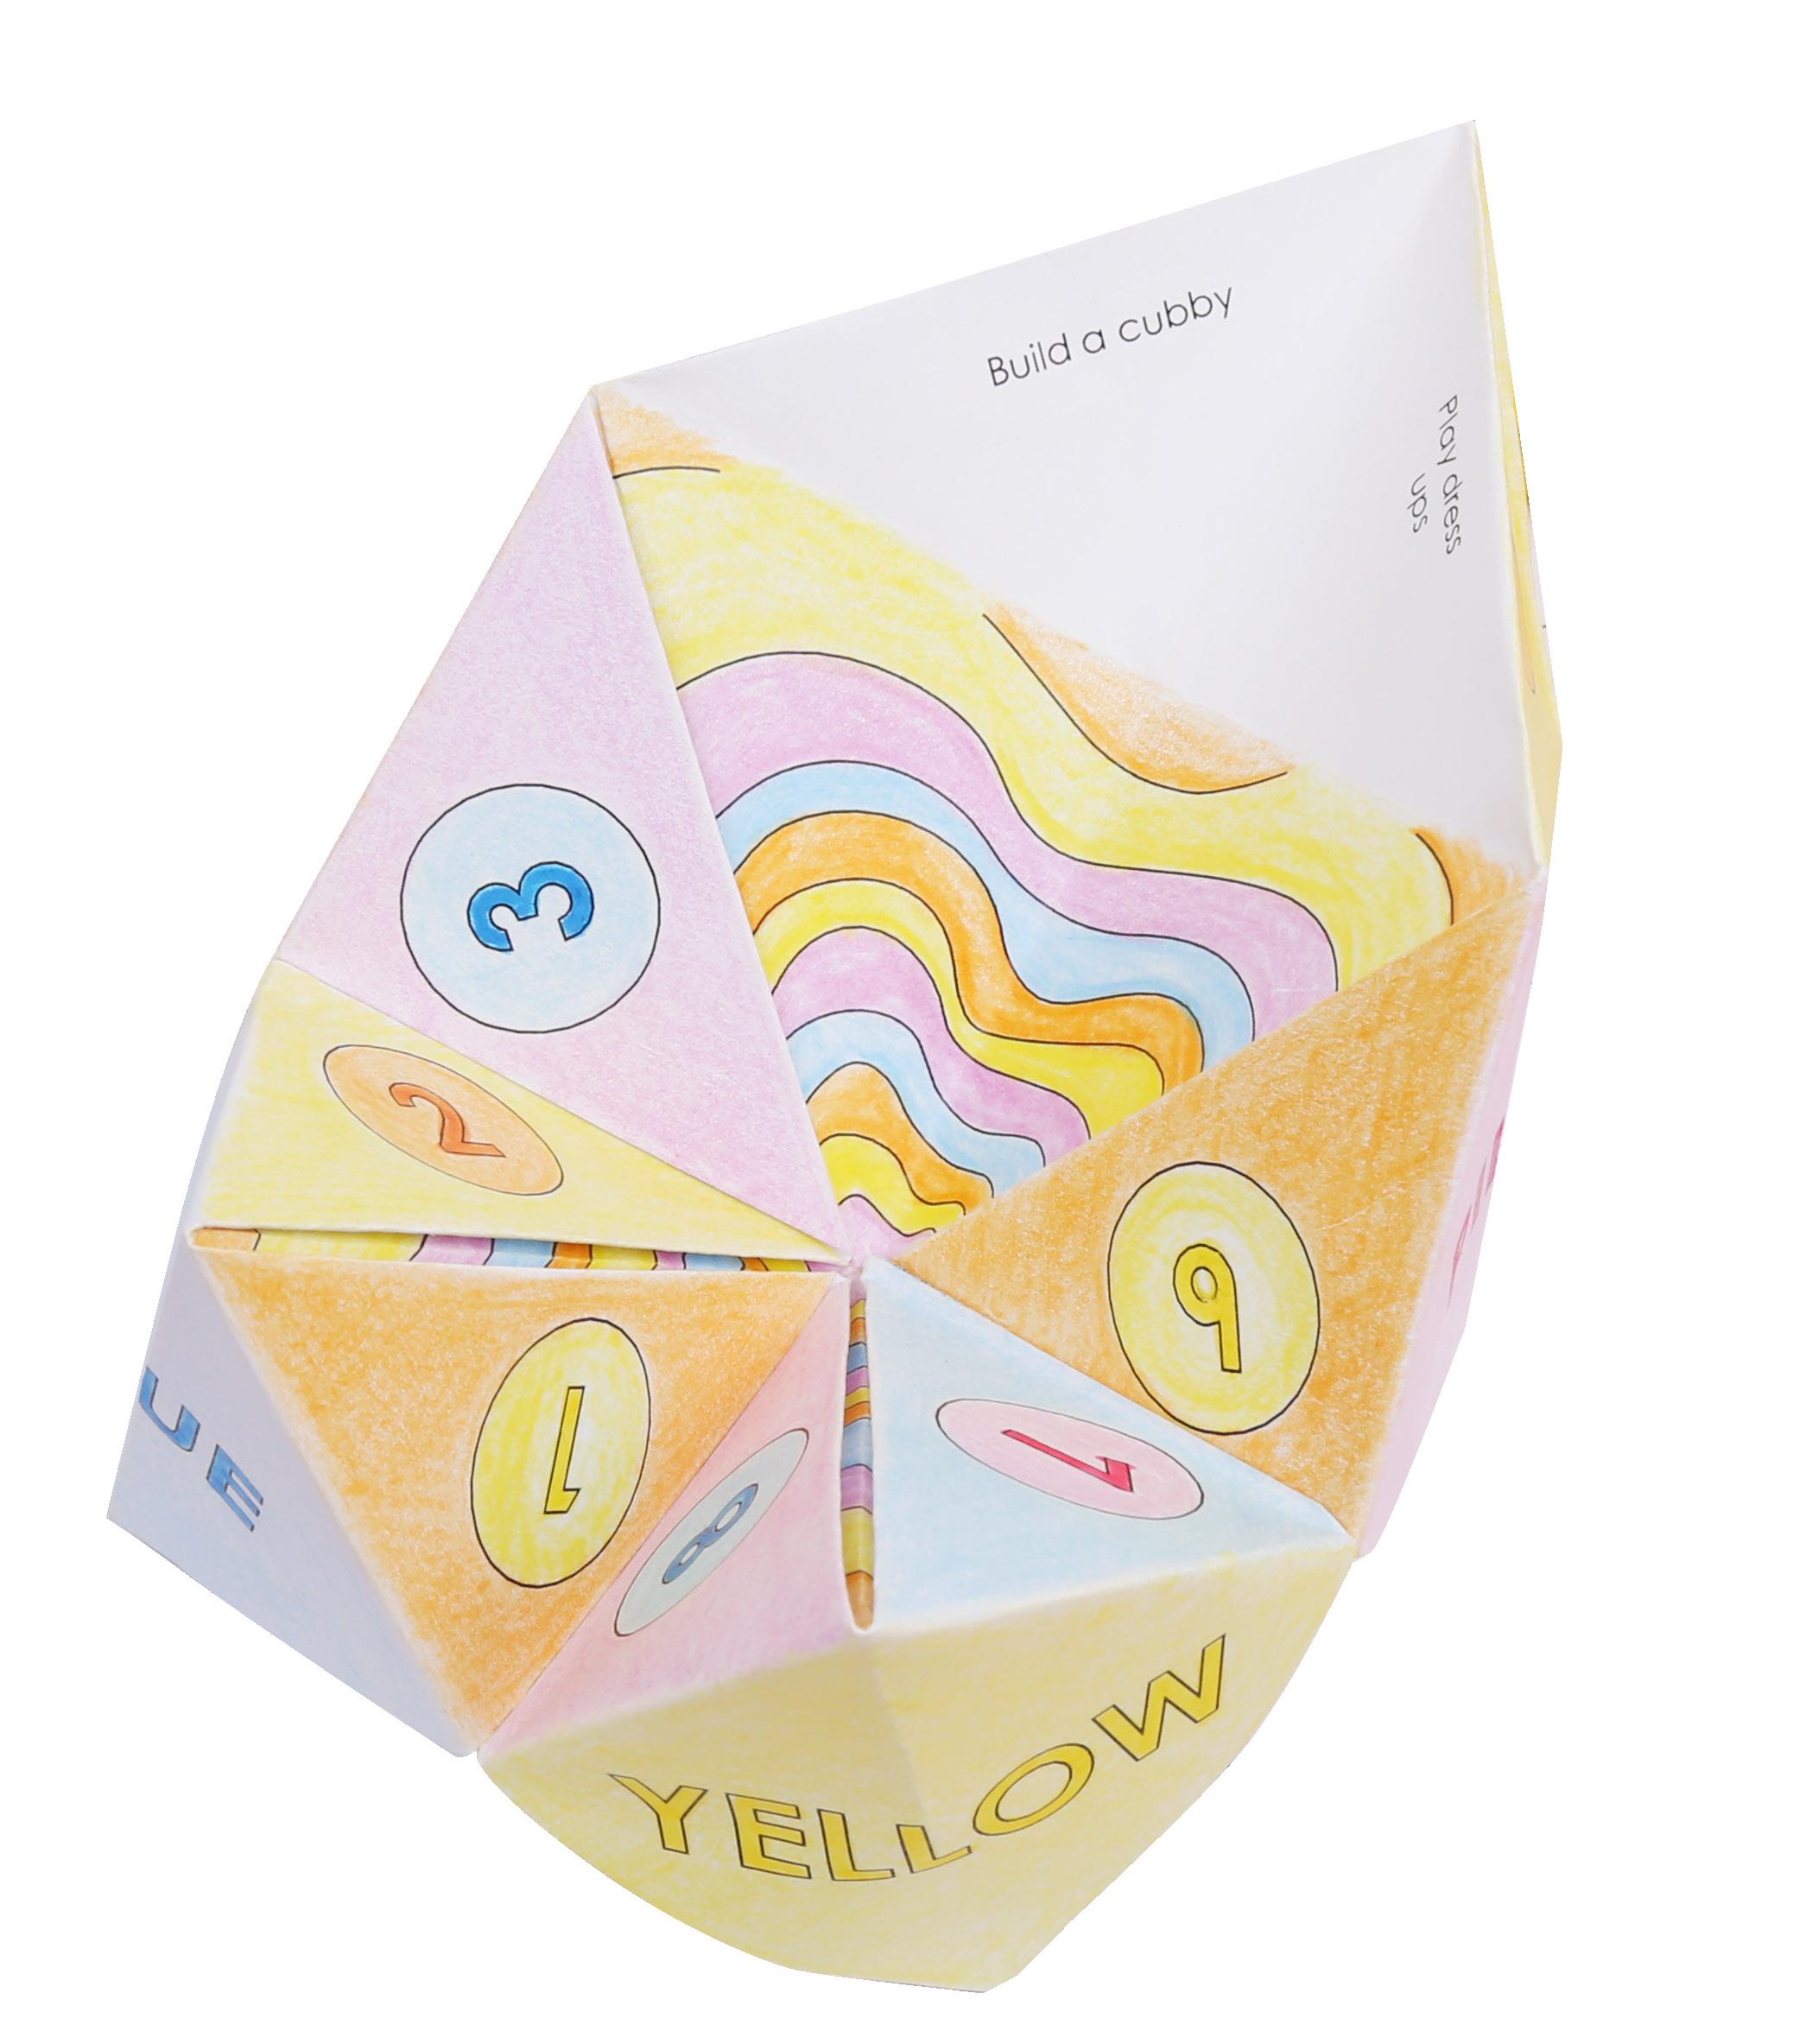
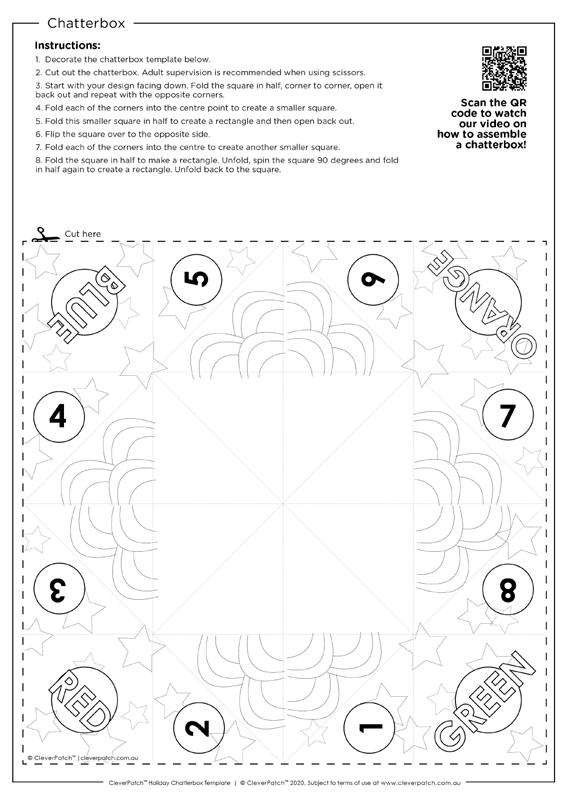
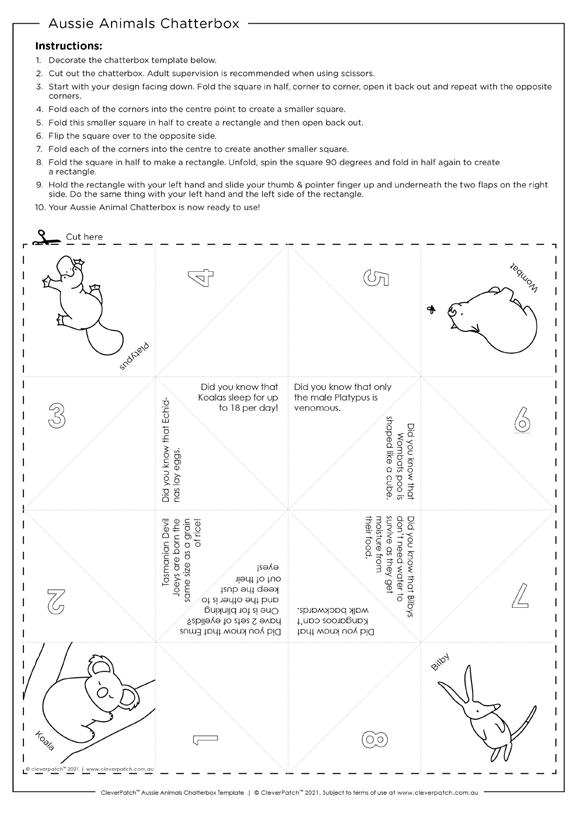
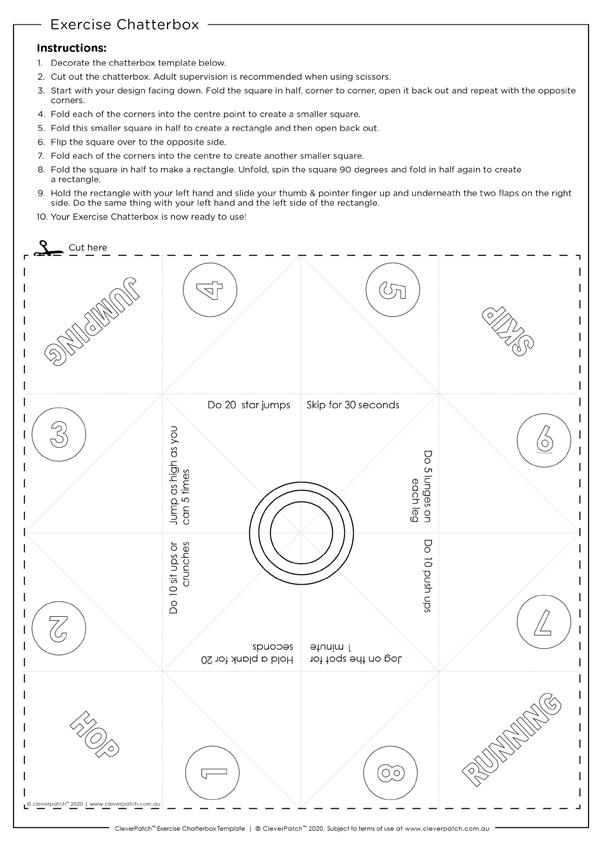
Print the template on page 9. We recommend printing on cover paper as this provides a great surface for creating your Chatterbox. Alternatively, you can create your own Chatterbox design using a square piece of paper.
STEP 2
Decorate your Chatterbox using markers or pencils then cut out along the dotted lines
STEP 3
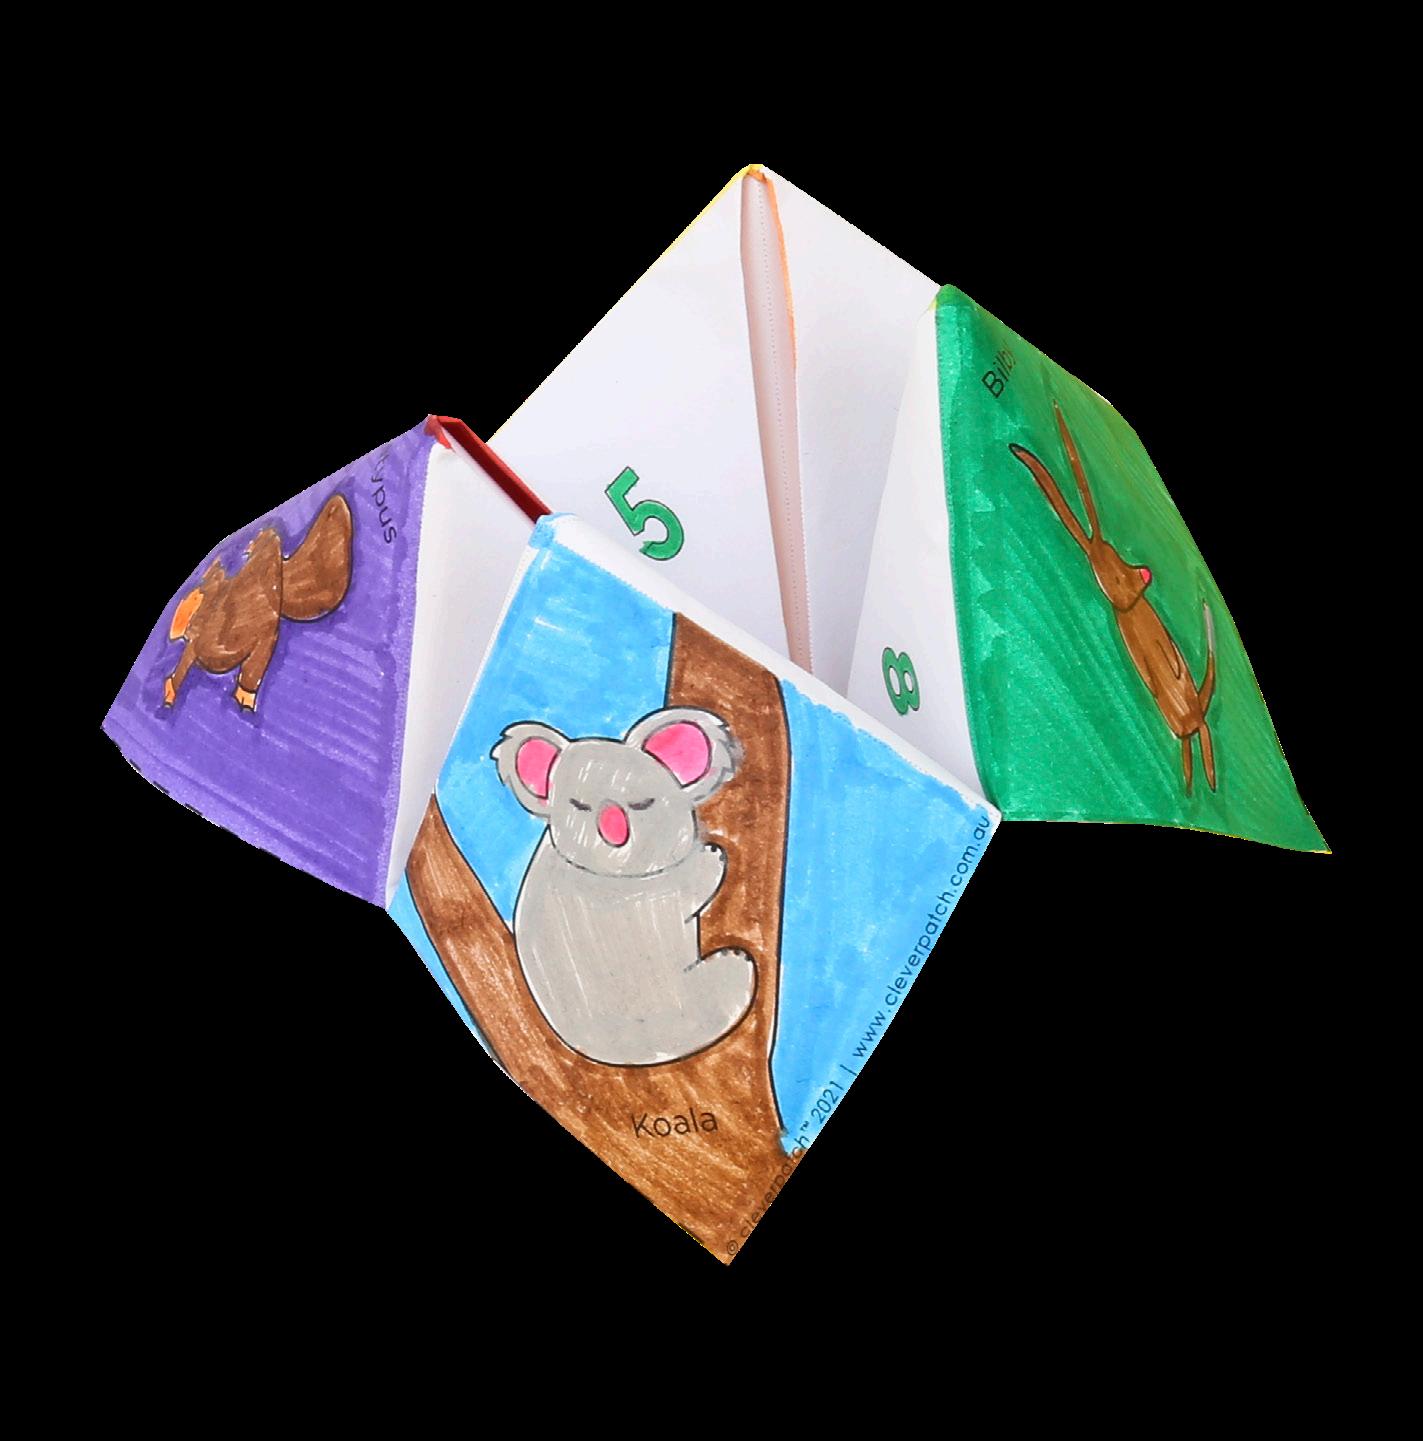
Start with your design facing down. Fold the square in half, point to point to make a triangle then unfold. Repeat with the opposite points of the square.
STEP 4
Fold each of the corners into the centre point to create a smaller square.
STEP 5
Flip the square over to the opposite side. Fold each of the corners into the centre to create an even smaller square.
STEP 6
Valley fold the square in half to make a rectangle. Unfold, spin the square 90 degrees and fold in half to create a rectangle again.
STEP 7
Now the folds have been made, hold the rectangle with your left hand and slide your right thumb and pointer finger up and underneath the two flaps on the right side. Wiggle your fingers and the paper should bend inwards.
STEP 8
Do the same thing with your left hand on the left-hand side of the rectangle. Your Chatterbox is now ready to use!
We have loads of free chatterbox designs you can download. Click here to find more!

• CleverPatch™ Cover Paper – White – A4 Pack of 250 – 16142
• CleverPatch™ Triangular Coloured Markers Pack of 10 – 16232
• CleverPatch™ Coloured Pencils Pack of 12 – 20770
• Paper Fasteners – Pack of 100 – 11243
• Other materials required: Template (page 11) and scissors.
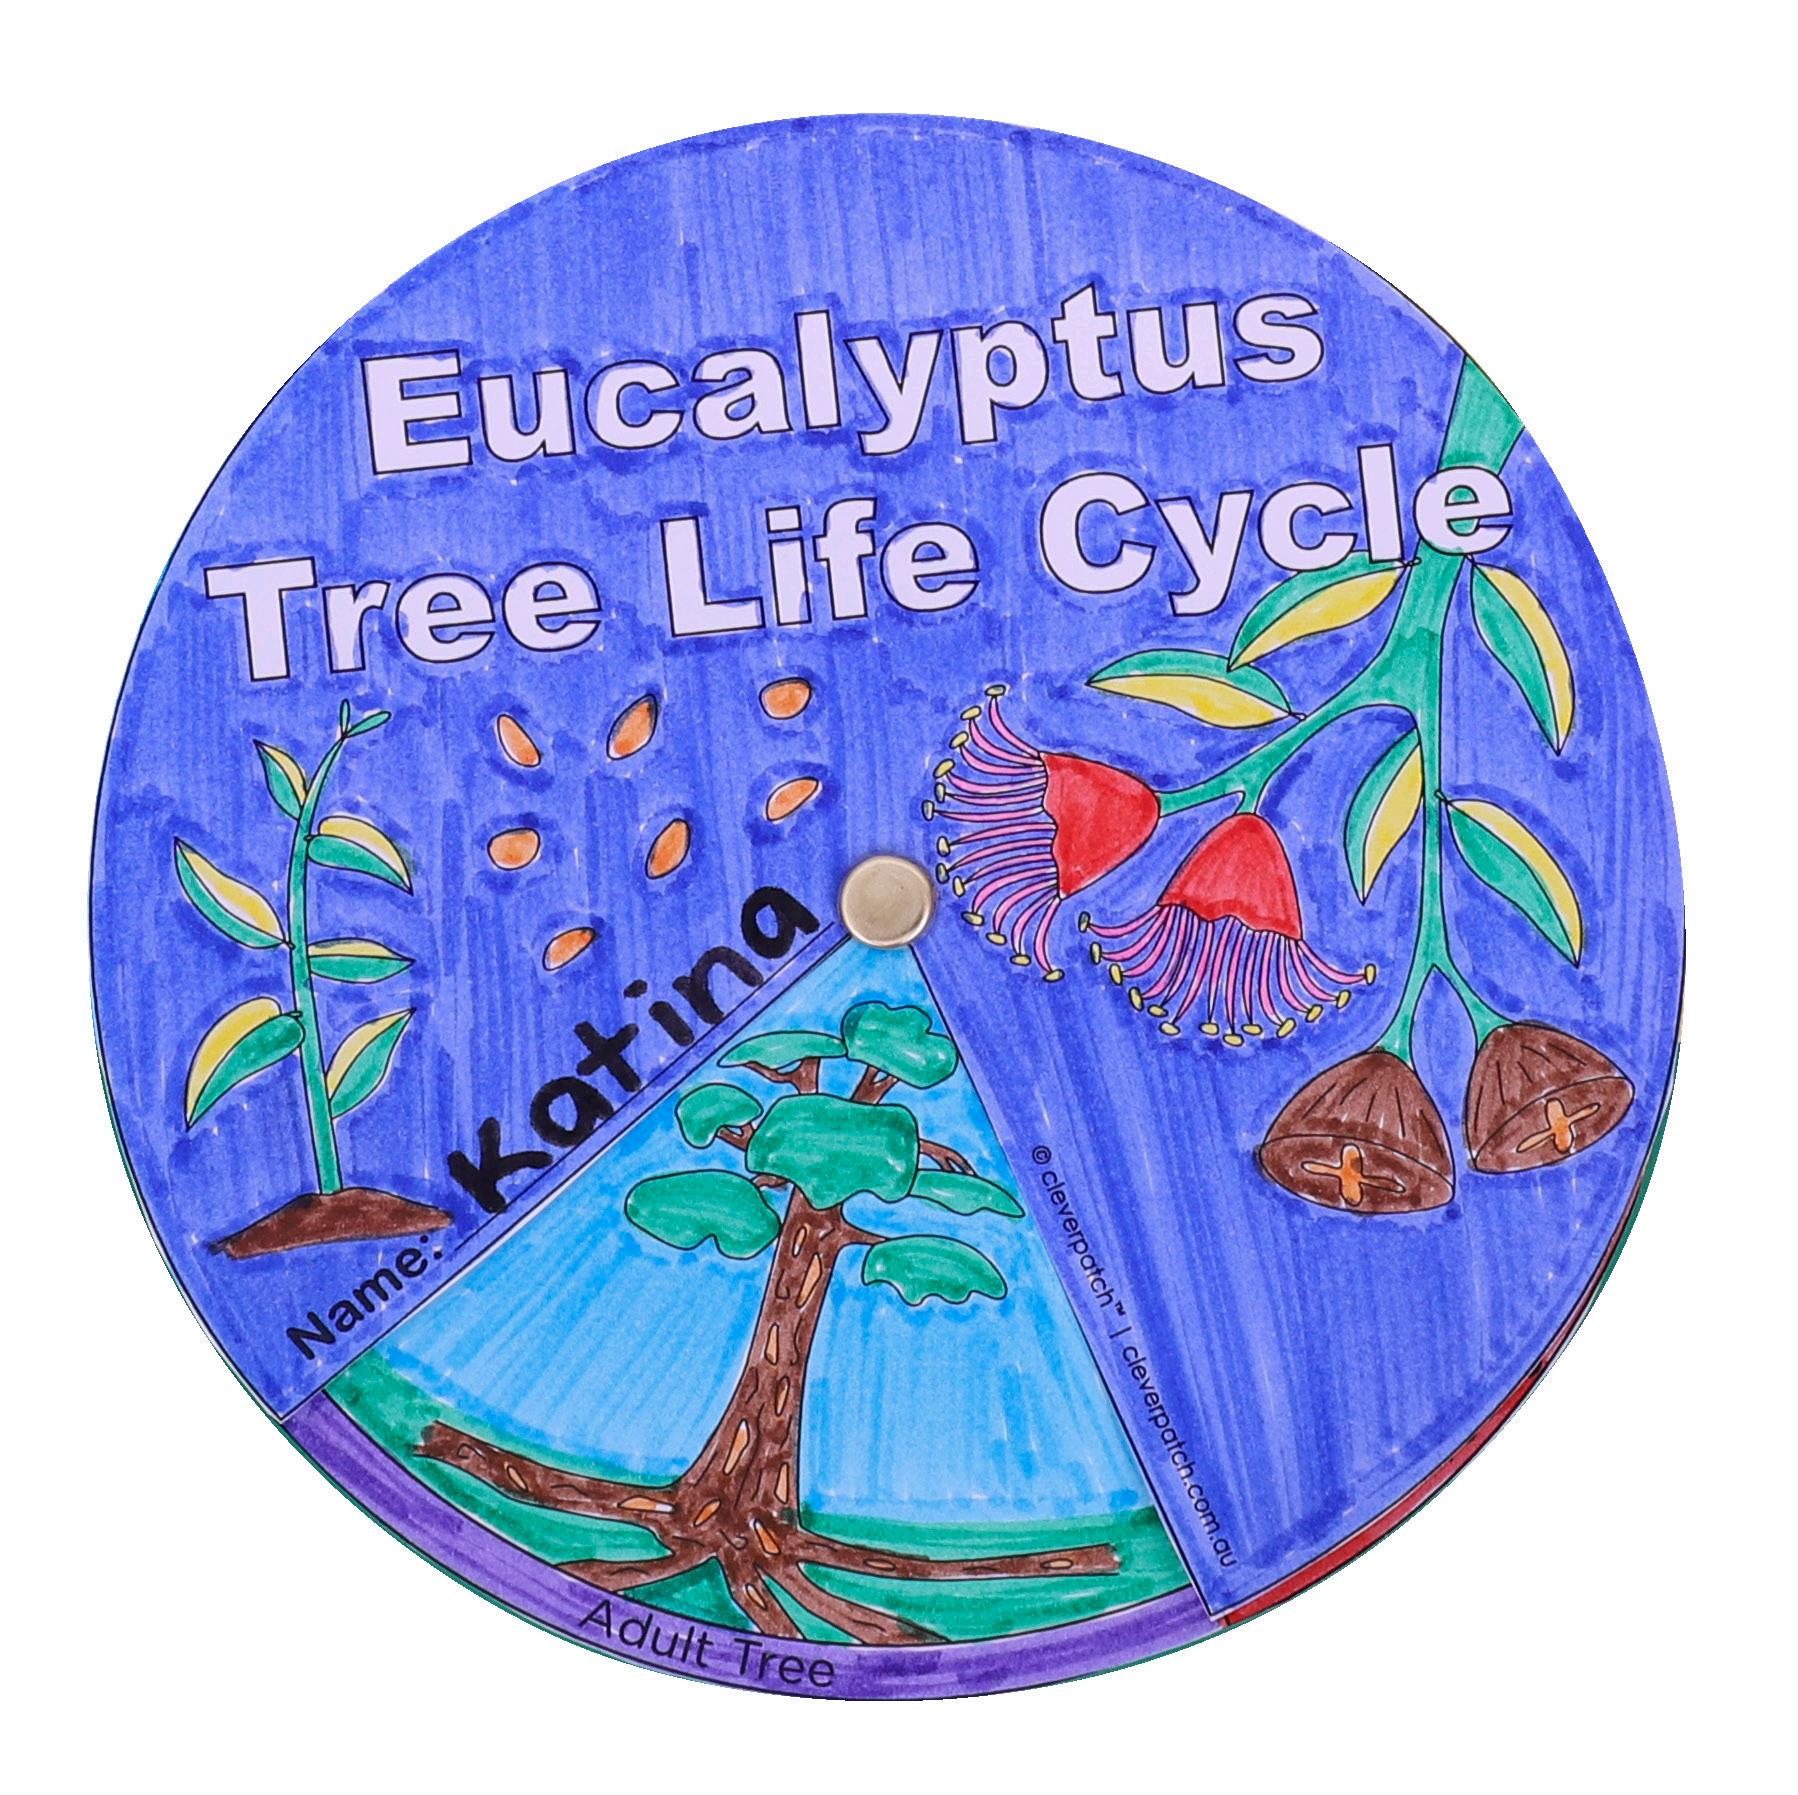
Eucalyptus is also called a gum tree because of the sticky rubbery substance that flows from the injured bark. The fruit of eucalyptus is called gum nut. They are non-edible and their flowers have no petals. Moreover, the valves at the end of the fruit open to release waxy, yellow-brown seeds.
STEP 1
Print out the template provided on page 11 onto cover paper as this provides the best results for creating your life cycle.
STEP 2
Decorate and cut out the two wheels on the template.
STEP 3
Align the wheels on top of each other, making sure the wheel with your name is on top. Push a paper fastener through the grey dot in the middle of both wheels and secure.
STEP 4
Your Eucalyptus Tree Life Cycle is now ready to use. Spin your wheel to reveal each stage of a Eucalyptus Tree’s Life!

• CleverPatch™ Cover Paper – White – A4 – Pack of 250 – 16142
• CleverPatch™ Triangular Coloured Markers Pack of 10 – 16232
• CleverPatch™ Coloured Pencils – Pack of 12 – 20770
• CleverPatch™ Glue Stick – 40g – 13974
• Other materials required: Template (page 13) and scissors.
Bears exhibit playful behaviour along with their strength and ferocity. Bear cubs engage in play activities such as wrestling, climbing trees, and chasing each other. It not only helps them develop their physical abilities, but also strengthens social bonds within their family groups.
STEP 1
Print the template provided on page 13. We recommend printing onto cover paper as it is thicker than copy paper and will provide a great surface for creating your card.
STEP 2
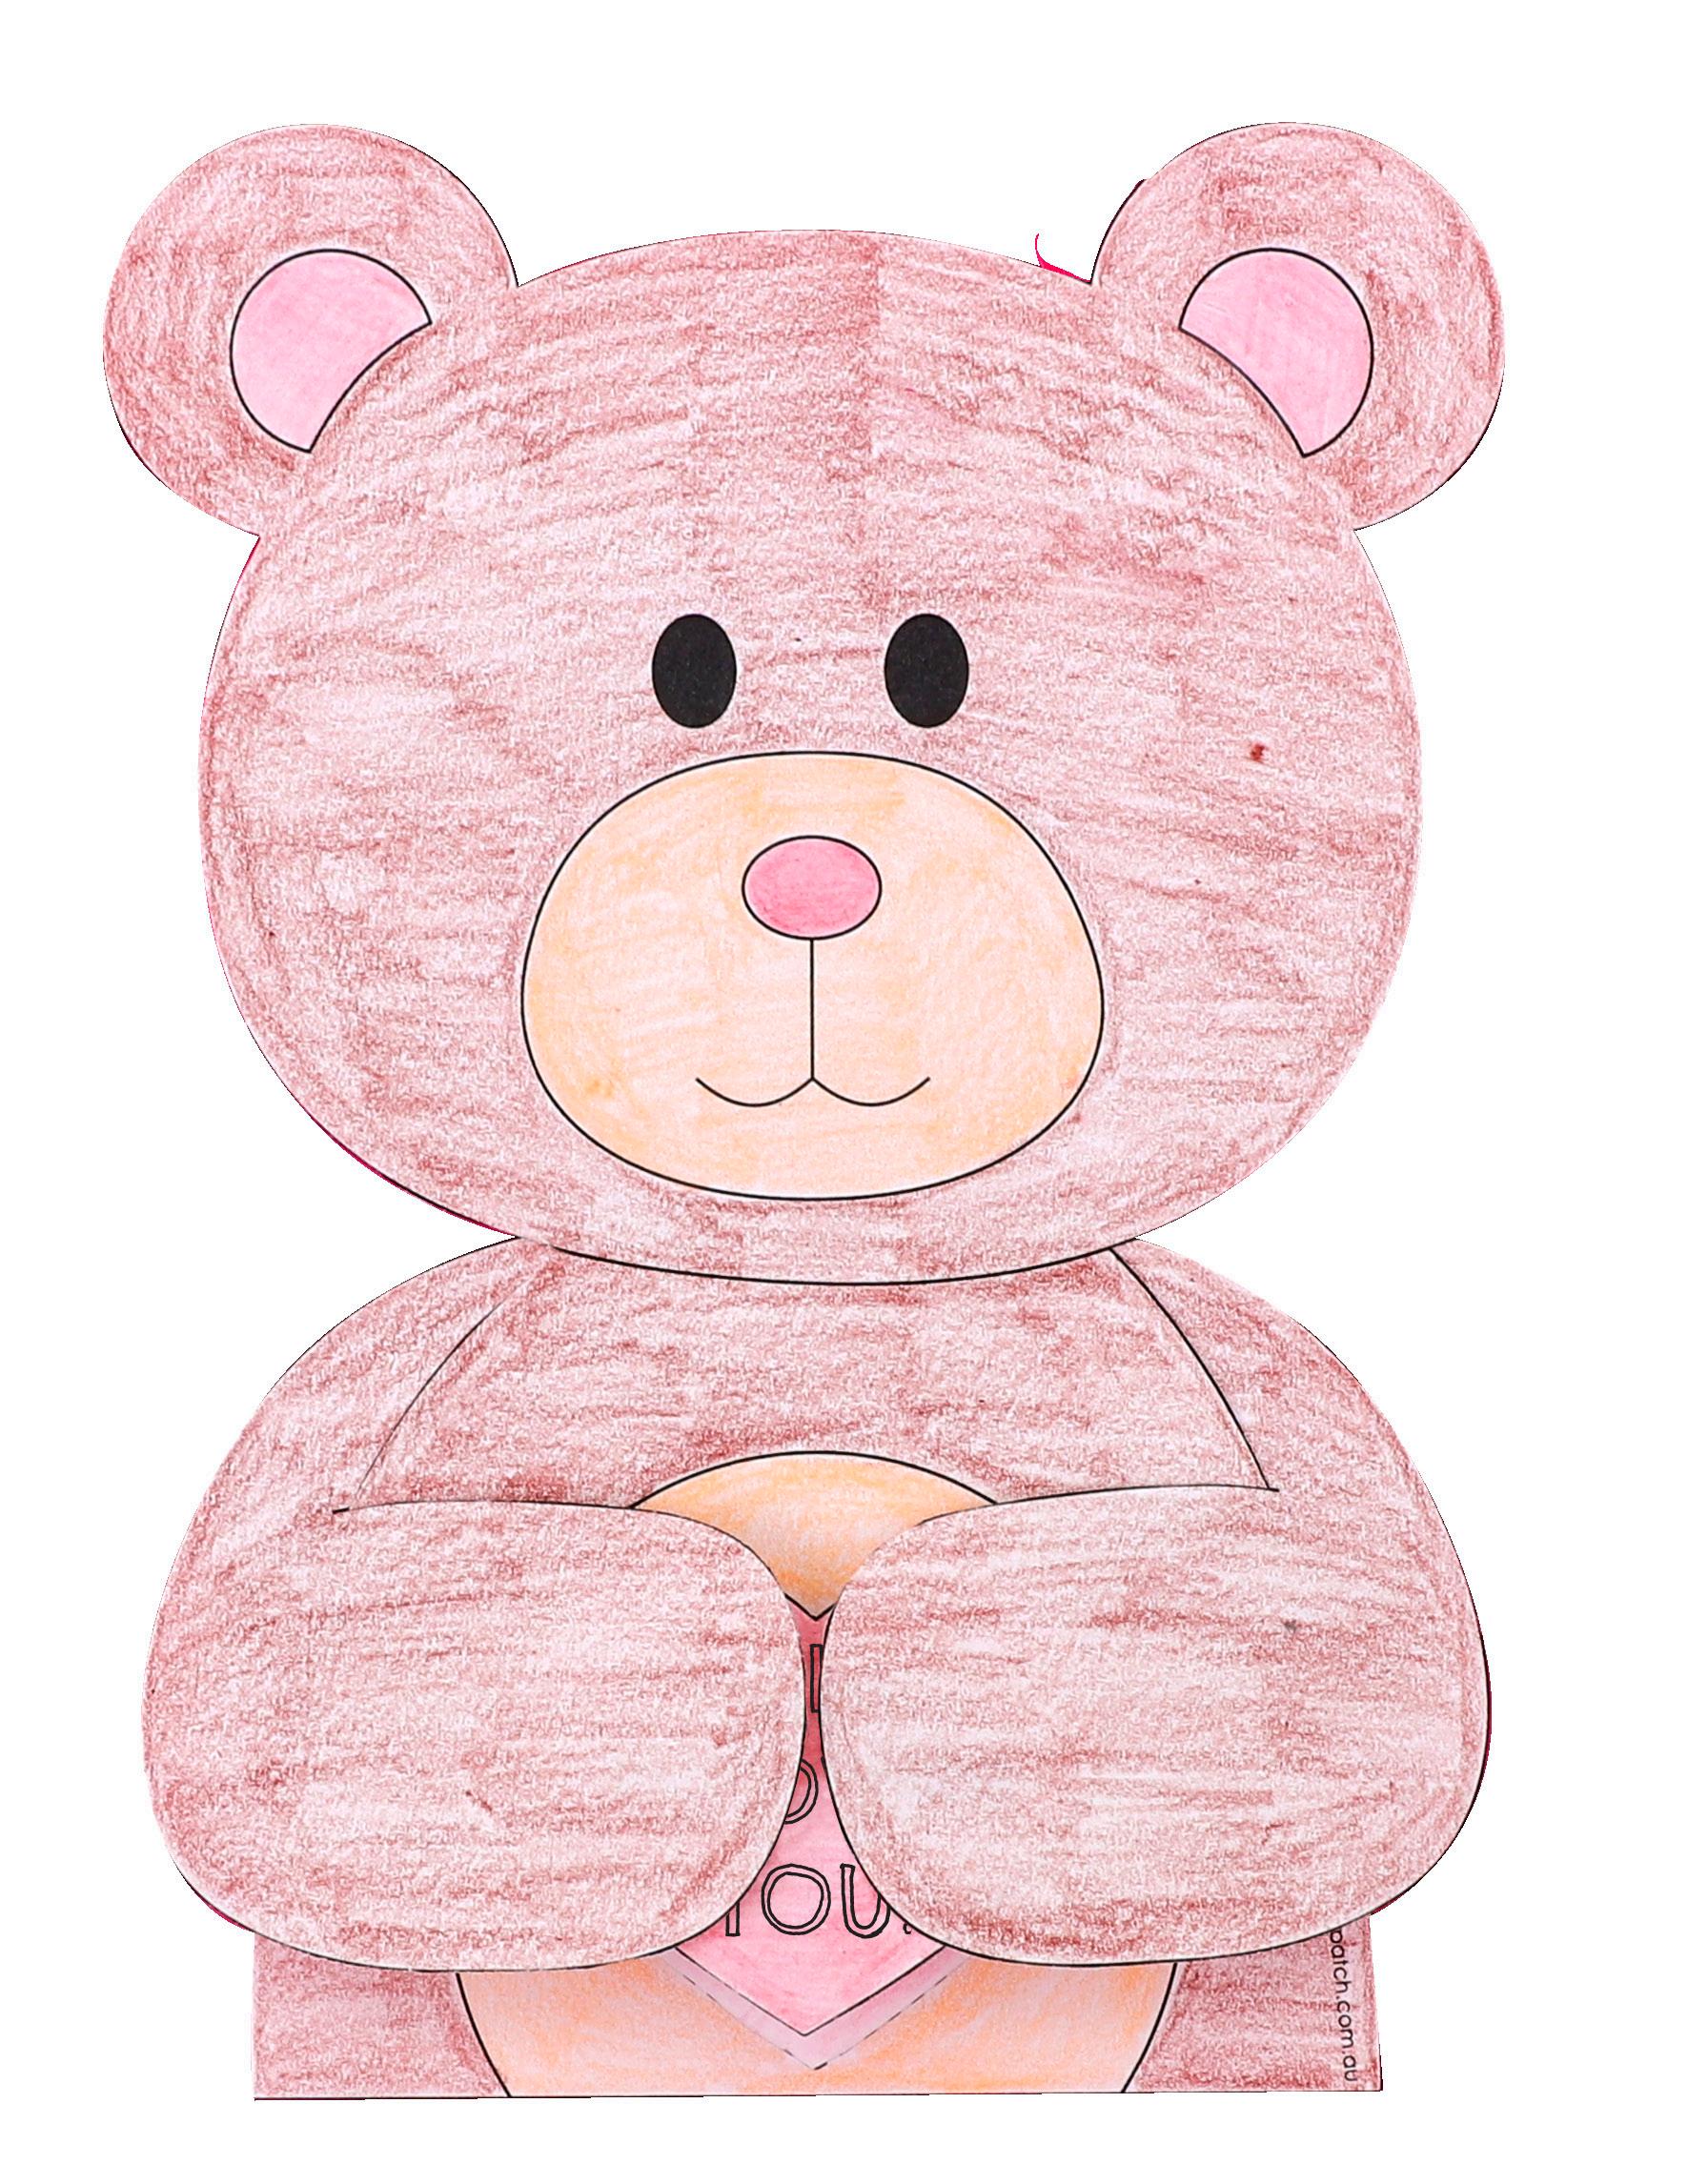
Decorate the template pieces using pencils or markers.
STEP 3
Cut out the bear shape.
STEP 4
Cut out the hearts, then fold along the dotted lines so that the printed message is on the outside. Don’t forgot to cut out the diamond shape between the two hearts as well! Place glue on the plain back of the hearts, then stick onto the dotted line heart on the bear’s tummy. Allow to dry. Write a message on the inside of the hearts.
STEP 5
Cut out the bear’s arms, making sure you cut all the way around the solid black lines! Slide the arm piece over the bear’s body so the arms are at the front. Use glue to secure to the back of the bear. Allow to dry.
STEP 6
Your card is now ready to give to your favourite person. Lift the bear’s arms to reveal the hearts and your message inside!
