Rulebook


2 © 2022 Compass Games, LLC. TABLE OF CONTENTS 1.0 Introduction ................................................ 3 2.0 Maps 3 3.0 Units .............................................................. 7 3.1 Regiments 3.2 Vessels 3.3 Protected Harbor Defense 3.4 Leaders 4.0 Strategy Cards .............................................. 10 5.0 Sequence of Play - Spring, Summer and Autumn Seasons .................................. 11 6.0 Sequence of Play - Winter Season .............. 15 7.0 Movement Overview .................................. 16 8.0 Land Movement ........................................ 17 9.0 Embark ......................................................... 18 10.0 Commodore Transfer .................................. 18 11.0 Bateaux Movement ..................................... 18 12.0 Naval Movement ......................................... 19 13.0 Disembark ................................................... 21 14.0 Entering Hexes Occupied by Enemy Units or Enemy Controlled Fortifications ......... 21 15.0 Evade ........................................................... 22 16.0 Siege Warfare .............................................. 23 17.0 Combat Overview ....................................... 24 18.0 Land Combat ............................................... 26 19.0 Naval Combat .............................................. 32 20.0 Cutting out Boarding ................................. 37 21.0 Depots and Supply ..................................... 37 22.0 Wider War with the United States (WWUS) ............................... 43 23.0 Victory Point Phase 43 24.0 Index 45 25.0 Credits 47 COMPONENTS 2, 22” x 34” Maps 1, 8.5” x 11” Map 340 5/8” Counters 104 US Strategy Cards 102 British Strategy Cards 14 Combat Cards 2 Two-sided Player Aid Cards Terrain Chart 2 Land/Naval Combat Displays 7 Two-sided Scenario Cards 1 One-sided Scenario Card Rule Book Playbook 4 White Six-Sided Dice 4 Black Eight-Sided Dice Box and Lid
1.0 INTRODUCTION
Europe had been engaged in a war with Napoleon’s France for nearly ten years when the United States thought the time was right to pluck the jewel of Canada from the Crown of one of the mightiest powers on Earth, Great Britain.
1812! War on the Great Lakes Frontier is a game that simulates The War of 1812 fought between The United States of America and The British Empire on the Great Lakes frontier that lay between the United States and Canada.
This is a two-player game with either player commanding the land and naval forces of The United States or of Great Britain.
1.1 Abbreviations
The abbreviations used throughout this rule book are defined on their first occurrence and are referenced in the Index.
1.2 The Dice
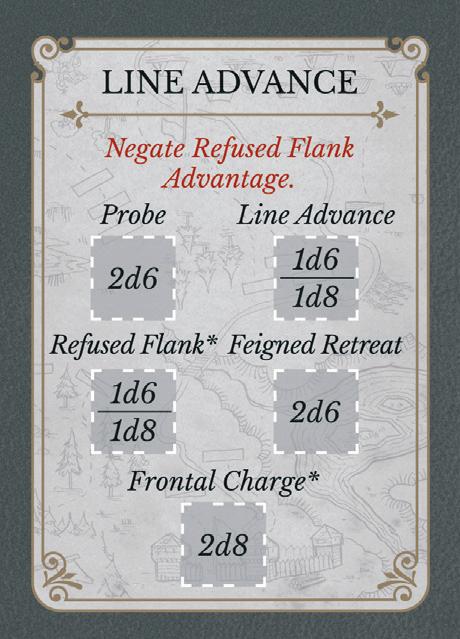
The rules indicate the number and type of die to be rolled using this format:
1d6 indicates one six-sided die is rolled

2d6 indicates two six-sided dice are rolled
1d8 indicates one eight-sided die is rolled
2d8 indicates two eight-sided dice are rolled
1.3 Friendly/Enemy
Throughout this Rulebook and the Playbook, these terms are defined as follows:
1.3.1
Friendly
All US units and US Depots are friendly to the US player.
All British units and British Depots are friendly to the British player.
2.0 MAPS
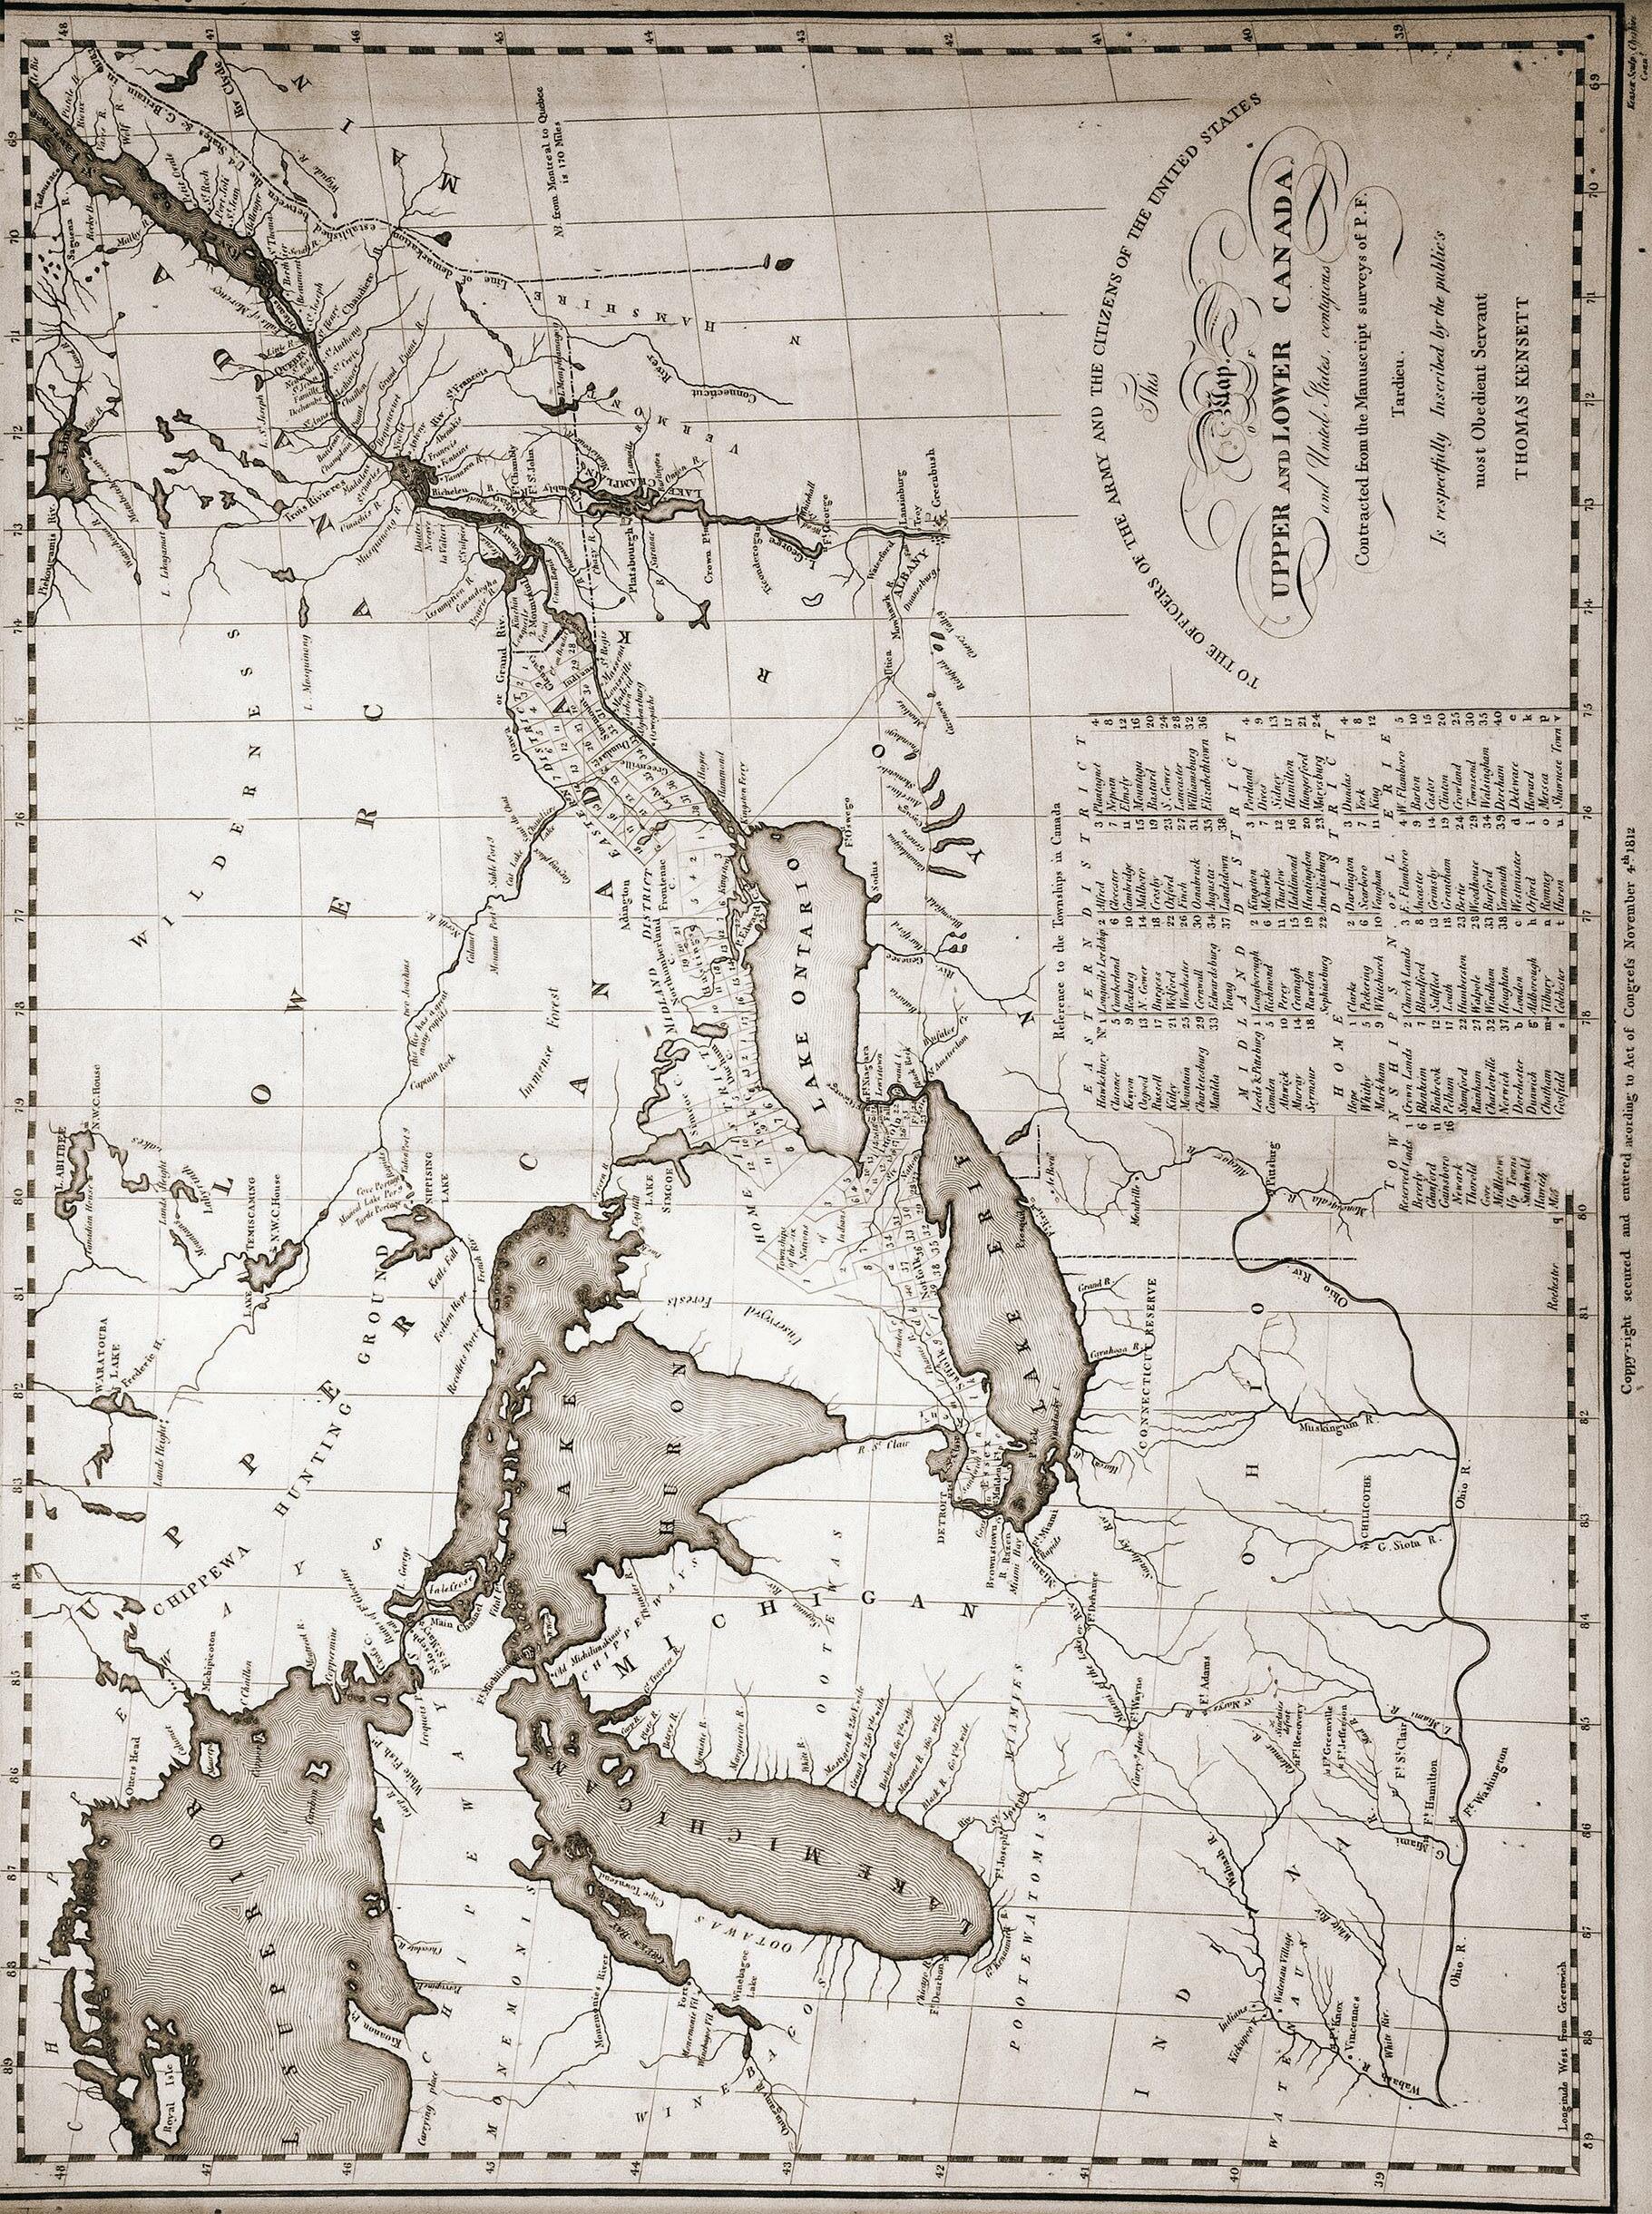
The East and West maps depict Lakes Erie, Ontario and Champlain, the provinces of Upper and Lower Canada and portions of the states of Vermont, New York, Pennsylvania, Ohio, Indiana, and Michigan where a majority of the battles in The War of 1812 occurred.
2.1 Game Scale
2.1.1 Each map hex is approximately 55.5 square miles.
DESIGNER’S NOTE: The size of Lake Huron requires the portion of the Lake around Fort Mackinac and Fort St. Joseph to be depicted at a larger scale. As action at these two forts is usually generated by Event Cards, this difference does not affect gameplay.
2.2 Hexes
A hex for game purposes is any forest, water, or settlement hex. Forested areas have been positioned to channel movement based on the historical axis of advance of the US and British Armies.
Lake and river hexes represent the Great Lakes and some of the navigable waterways feeding and linking them that existed at the time of the War.
PLAYER’S NOTE: Refer to the Terrain Chart for the description of each Terrain type. Also, refer to the Map for the description of settlement icons and values.
2.2.1 Clear Terrain Yellow hexes represent an area that has been cleared, settled, and contains a road network.
1.3.2
Enemy
All US units and US Depots are the enemy to the British player.
All British units and British Depots are the enemy to the US player.
Clear terrain hexes are areas with more room to deploy and command troops. Major engagements were fought in whatever clearing there might be.
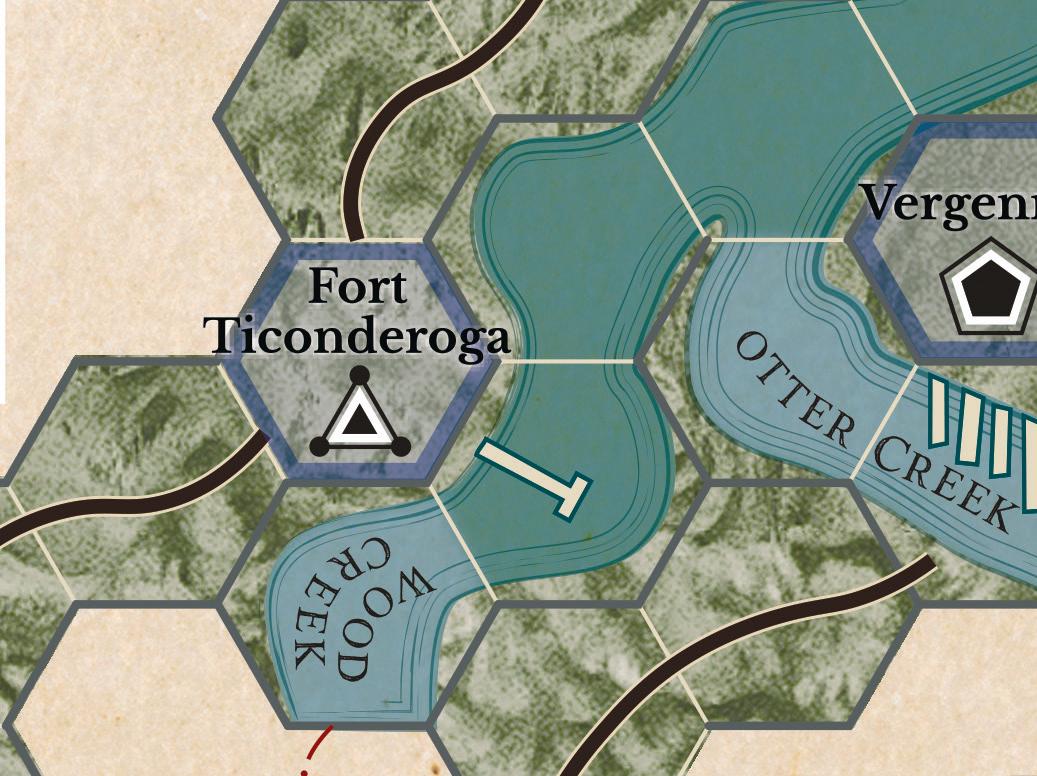
2.2.2 Smaller Settlement Terrain Grey hexes containing a settlement icon represent towns, villages, and forts in wilderness areas. For game purposes these are considered Forested Terrain.
2.2.3 Forested Terrain Gray-Green hexes represent the dense, wilderness forest of the Great Lakes frontier.
2.2.4 Water Terrain Teal and Light Blue hexes represent the Great Lakes and the river tributaries feeding into the Lakes.
2.2.5 Event Created Forts Six Event Cards instruct the player to place a fort counter in a designated location. When placed, the fort is considered to share the terrain of the existing hex.
a. US forts and Event Cards: Ft. Meigs (12), Ft. Stephenson (13), Ft. Ontario (48), and Ft. Moreau (81).
© 2022 Compass Games, LLC.
War on the GREAT LAKES FRONTIER
3
2.2.6 Harbor Hex
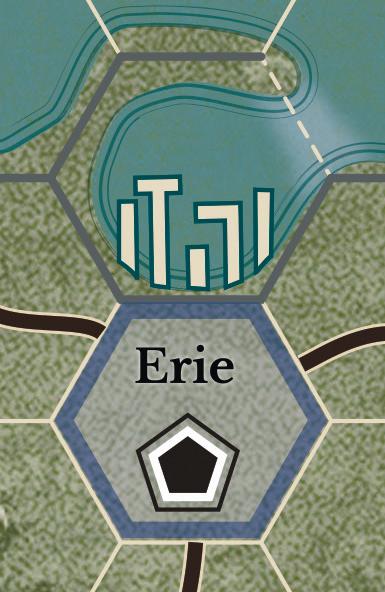
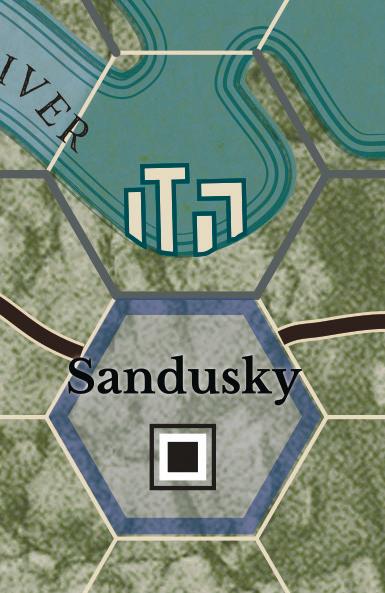
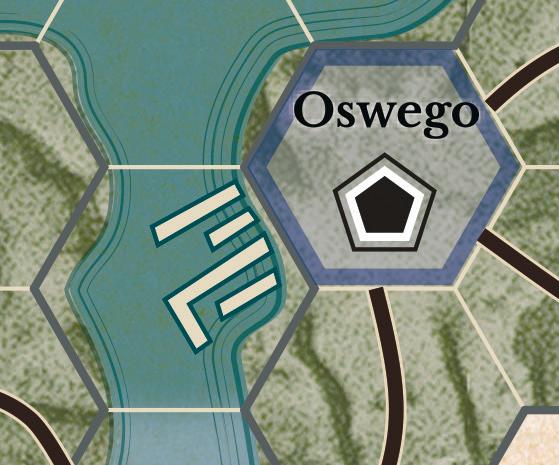
A place along the coast where vessels may find shelter from rough water by a natural or man-made breakwater. Connected to a port, the harbor hex provides commodores and vessels entrance (and exit) to the connected port. The harbor hex is the lake or river hex connected to the port hex that displays the port’s dock symbols (the straight, white bars) that indicate the capacity of constructed or unconstructed vessels that may occupy the port.
The example shows 4 docks for a port capacity of 4 vessels.
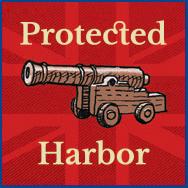
2.2.7 Protected Harbor Hex
A Protected Harbor is a harbor connected to a port that has a fortification and in which the Protected Harbor Defense (PHD) has not been destroyed (See 3.3).
[EXCEPTION: Harbors connected to forts placed by a Special Effect are not Protected Harbors.]

2.2.8 Sand Bar at Presqu’Il Bay
The hex-side that the Erie harbor hex and the connected lake hex have in common (See 12.3; 19.4.4).

Friendly commodores and ships crossing the Presqu’Il Sand Bar pay 4 RMP. Gunboats pay 2 RMP.
2.2.9

Port Hex
Although the Maps depict a port as a “land hex,” for game purposes, this hex includes the docking facilities (wharves, and warehouses) for vessels to load/unload troops and suppies as well as shipyards for construction and repair of vessels. The dock images in the connected harbor hex indicate the maximum number of ships that can be stacked in the port hex.


2.2.10
Connected Hexes
Two land hexes are connected only if they share a common hexside.
A land hex is connected to a lake or river hex only if they share a common hex-side.
Two lake or river hexes are connected only if their shared hex-side is lake or river.

DESIGNER’S NOTE: Lake Huron and the St. Clair River are directly connected.
Two hexes are connected by road only if a road intersects their shared hex-side.
2.2.11 Ferry
A ferry is a means of conveying troops and supplies between two land hexes separated by one or two river hexes. Each river hex is considered to be a ferry hex.


In any ferry hex, roads are considered to extend from every hexside to every other hex-side. Therefore, the ferry “landing” does not need to be a road-end hexside.
The ferry crossing can be one or two river hexes with a 1 RMP cost to enter each river hex and the Cost of Terrain of the landing hex.
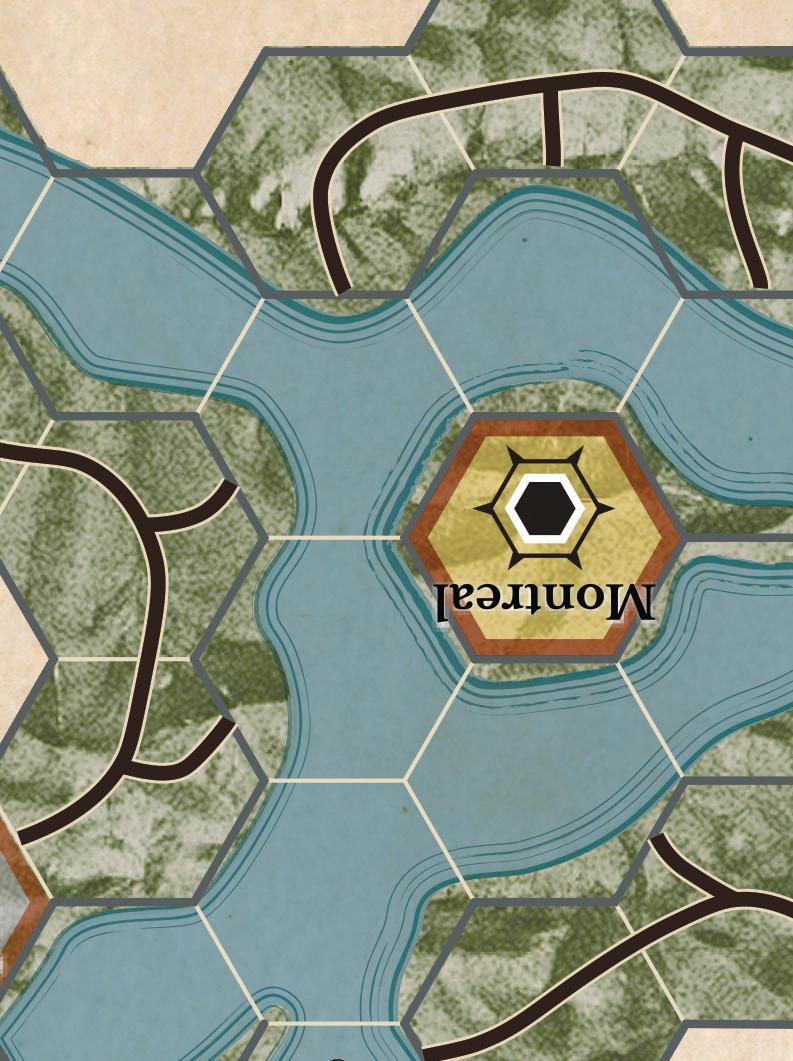
As a city settlement, Montreal has roads available from each of its six hexsides. Illustrated are some of the several possible 1-hex and 2-hex crossings to and from Montreal.
Restrictions on Ferry movement: see 8.4 and 8.5.

4
© 2022 Compass Games, LLC.
b. British forts and Event Cards: Garrison House (40) and Ft. Wellington (55).
2.3 Non-Hexes

War on the GREAT LAKES FRONTIER
2.3.2
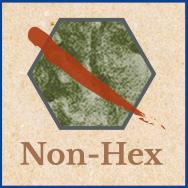
Any bone colored hex, waterfall/rapids, island or peninsula is a non-hex and is not considered a hex for game purposes.
A non-hex cannot be entered by any unit and a non-hex is not included when calculating distances nor when determining supply.

Non-Hex Area
2.3.1 Island and Peninsula

An island and a peninsula are any green hex-side features shared by two lake or river hexes. These are considered non-hexes.
The Road to Sackett’s Harbor
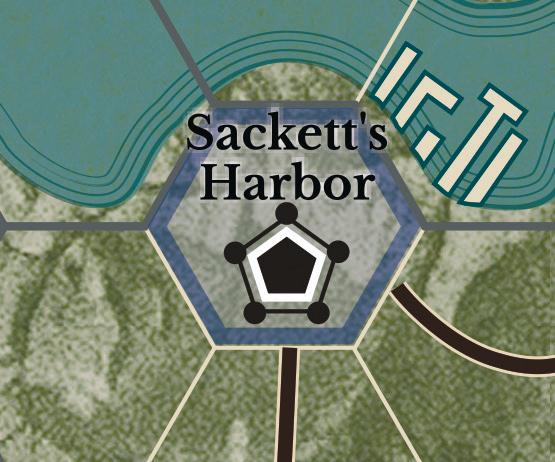
The three hexes marked “The Road to Sackett’s Harbor” are considered non-hexes until US Event Card #26: The Road to Sackett’s Harbor has been played for the Special Effect during the Event Segment.


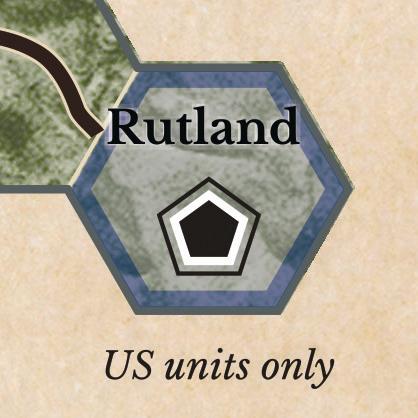
2.3.3 Rutland is considered a nonhex to British units only.


2.4 Line of Communications (LOC)
LOC is a path of connected road or ferry hexes that are free of enemy units, enemy depots, enemy protected harbors, and enemy controlled settlements.


None of the hexes in the path may be connected to a hex occupied by an enemy regiment nor an enemy ship, unless a friendly regiment, friendly vessel, or a friendly controlled fortification also occupies that path hex.
During a Siege (See 16.0), enemy regiments INSIDE the besieged fortification have no effect on friendly LOC.
LINE OF COMMUNICATIONS EXAMPLE:
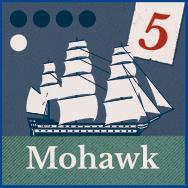
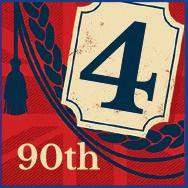
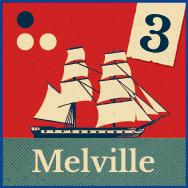
With the 90th regiment in the hex opposite the USS Mohawk, the HM Brig Melville in Port of Kingston has a LOC to the British Supply Depot in Prescott.

5
© 2022 Compass Games, LLC.
Peninsula
Island
2.5 Stacking
Stacking occurs when more than one unit (See 3.0) occupies a hex. The owning player may stack the units one on top of the other in any desired order. A single regiment or single vessel is not considered a stack, even if that unit is within a stack.
2.6 Control of Settlements and Lake Control
The control of settlements and lakes effects supply, LOC, Victory Points (VP), and some Special Effects.
[
EXCEPTION: Commodores, officers, or regiments being transported by a vessel must be placed under the vessel counter (See 9.1 and 12.6.2).]
PLAYER’S NOTE: A stack that does not include an officer for regiments or a commodore for vessels is not considered a “unit” for Unit Activation (See 5.4.1).
A stack of units without a leader cannot be “Activated.”
However, a single unit within the stack can be “Activated.” Additional units in a stack can be individually “Activated” only if a Strategy Card granting > 1 Operation Point (See 4.0) is being played.
2.5.1 Both players may inspect all units on the map at all times.
2.5.2 An unlimited number of regiments may occupy any land hex.
2.5.3 The number of regiments that may Evade INSIDE a fortification is equal to the Winter Quarter Value (WQV) of that hex (See 6.2 and 15.0).
2.5.4 An unlimited number of vessels may occupy a lake hex or river hex.
a. Each port is assigned a number of dock symbols as shown in its connected harbor.
b. This is the maximum number of constructed or unconstructed vessels that may occupy that port at the end of any Unit Activation, Operation Point Segment, Event Segment, Reinforcement Phase, or Winter Season. Any vessels above that limit are eliminated and removed from the map (owning player’s choice).
2.5.5 Officers and Commodores
An unlimited number of officers or commodores may occupy any hex.
a. An unlimited number of officers or commodores may Evade INSIDE a fortification.
2.5.6 A Stack in Combat
a. A stack that does not include an officer for regiments or a commodore for vessels cannot move into an enemy occupied hex to engage in Combat.
b. A stack that does not include an officer for regiments or a commodore for vessels that is attacked may defend in Combat or choose to Evade as a stack prior to Combat or as a result of Combat (See 15.0).

To control a hex in enemy territory, at least one friendly regiment must occupy that hex.
[EXCEPTION: NAW; See 2.6.3.c]
2.6.1 Control of a Settlement Britain controls all hexes in British Territory that the US does not control.
The US controls all hexes in US Territory that Britain does not control.

PLAYER’S NOTE: The hexside color of all major and minor settlements indicates which side controls that settlement at the beginning of all scenarios: Red for British; Blue for US.
Players do not need to garrison a regiment at fortifications within friendly territory; the presence of a guarding garrison is implied
a. If friendly regiments gain control of a port that contains constructed enemy vessels, those enemy vessels are immediately placed in the connected harbor and must engage in Combat, as the attacker, any friendly vessel occupying that harbor.
b. If friendly regiments gain control of a port that contains unconstructed enemy vessels, those enemy vessels are immediately eliminated and removed from the map.
c. Fortifications must be surrendered before control can be changed. If an enemy fortification is surrendered to a friendly player, the friendly player has all of the benefits of that fortification.
2.6.2
Control of a Lake
A player controls a lake if he controls a port connected to that lake and the sum of the modified Hull Damage (HD) value of his vessels occupying the lake hex, or a river or port connected to the lake, is greater than the modified HD sum of the enemy player’s vessels.
a. HD Modifiers
i. HD value of vessels occupying a lake hex on a Lake count 2X. [EXCEPTION: Not a harbor of a connected friendly controlled port.]
ii. HD value of vessels occupying a port, a harbor of a friendly controlled port, or a hex of a connected river count 1X.
iii. HD value of unconstructed vessels is always 0.
iv. The HD value of all vessels is 1x if White Squalls was played for the Event during the preceding Event Segment.
DESIGNER’S NOTE: The Detroit River is not considered to be connected to Lake St Clair for this rule. The St Clair River is not considered to be connected to Lake Huron for this rule.
6
© 2022 Compass Games, LLC.
War on the GREAT LAKES FRONTIER
2.6.3 Settlement and Lake Control Restrictions
a. Vessels may never control a port.
b. Leaders alone never control a hex.
c. Native American Warrior (NAW) regiments alone may only control Detroit, a village, a fort, or a hex with no settlement.
2.6.4 Neutral Hexes
All hexes of Lake Ontario, Lake Erie, Lake Champlain, Lake Huron, Lake St Clair, Detroit River, St Clair River, Niagara River and the Upper St Lawrence River are neither US nor British territory and are always considered neutral hexes.
3.0 UNITS
The counters in the game represent the infantry formations, naval warships and military leaders of the US and British armed forces that fought in the engagements around and on the Great Lakes.


Units consist of regiments, vessels, PHD, officers, and commodores.


3.1 Regiments
Regiments are divided into three types: Regulars, Militia, and NAW.
3.1.1 Distinguishing Combat Units
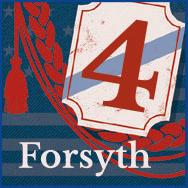
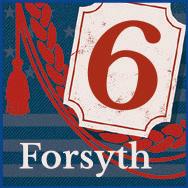
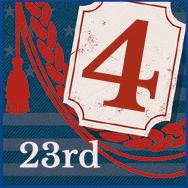
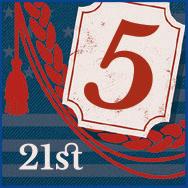
a. Regulars of the American and British armies are distinguished by the braid and tassel on their counter and the Combat Value on a rectangular shield.
3.1.2 Combat Value and Unit Scale
The number on the upper right corner of the regiment counter indicates the unit’s Combat Value. Each point is proportional to the number of men in the regiment, the quality of leadership, and the type of regiment.

a. Regular Infantry 1 point = 125 soldiers

b. Militia 1 point = 200 soldiers
c. NAW 1 point = 100 warriors
3.1.3 Regiment ID
The regiment’s historical identification is located on the bottom of the counter.
3.1.4 Full-Strength and Reduced-Strength Combat Values
All regiment counters are double-sided. One side shows the FullStrength Combat Value.
The reverse side shows the Reduced-Strength Combat Value, usually a lower value.
A diagonal bar is a visual reminder that a regiment is at ReducedStrength.
b. Militia regiments are distinguished by the frontier fringe on their counter and the Combat Value on a round shield.

3.1.5 Indicating Step Losses On Regiments
When a regiment suffers a step loss flip the regiment counter from its Full-Strength side to its Reduced-Strength side.
A regiment already on its Reduced-Strength side that suffers a step loss is eliminated and removed from the map.
3.2 Vessels
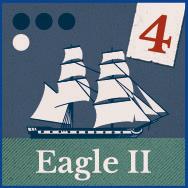
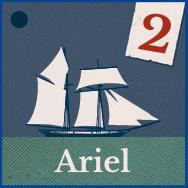
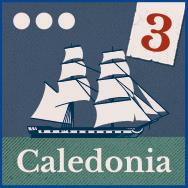
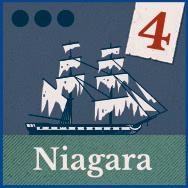
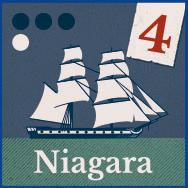
The types of vessels included in the game are Ship of the Line, Frigates, Corvettes, Brigs, Schooners, and Sloops. The name of the vessel is located across the bottom of the counter.
3.2.1 In game terms, “vessel” applies to either of two groups:
a. Gunboat: A vessel identified by a Hull Damage (HD) value of 2.
b. Ship: A vessel identified by a HD value of 3, 4, or 5.
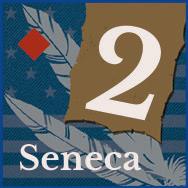
c. NAW units are distinguished by the feathers on their counter and the Combat Value on a tan rectangle.
DESIGNER’S NOTE: Historically, NAW were not divided into regimental formations. However, they are defined as “regiments” in this game.


DESIGNER’S NOTE: Although some of the vessels represented were not “ship rigged,” they will be referred to as ships.
3.2.2 Vessel Ratings
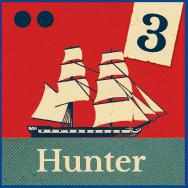
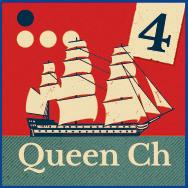
Each vessel is rated by two qualities: Gun value and the HD value. The qualities of each vessel are shown on the vessel counter.
a. Gun value is an abstract measure of the firepower from the vessel’s historical number of guns, the broadside weight, the accuracy of the shot, and the crew’s morale, training, and skill in handling the vessel’s weapons.
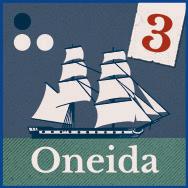
i. Each vessel counter has a combination of white and black cannonballs indicating the number of 6-sided
© 2022 Compass Games, LLC.


7
die, 8-sided die, or a combination of both that will be rolled when the ship fires a broadside.

• For each black cannonball indicated, 1d8 is to be rolled.
• For each white cannonball indicated, 1d6 is to be rolled.
b. The HD value is the number in the rectangle on the vessel’s counter and represents the size of the vessel and its ability to withstand damage.

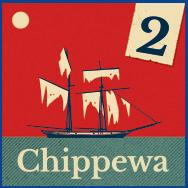
c. As a vessel suffers hits during an engagement, the damage is indicated on the Naval Combat Display. As the damage increases, the vessel transitions from Full-Strength to Reduced-Strength indicated by flipping over the counter (See 19.4.1.a).
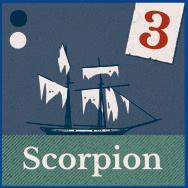
i. A vessel at Full-Strength is depicted with full sails.
ii. A vessel at Reduced-Strength is depicted with tattered sails.

Front Back Front Back
a. The officer’s portrait and family name are on the counter.
b. Seniority Star: officers show 1 to 3 stars to the left of their portrait (See 5.4.1.a.i).

c. Attack Die Roll Modifier (DRM): The number above the Seniority Stars.
d. Defense DRM: The number beneath the Seniority Stars.
e. NAW Leader Tecumseh, a member of the Panther clan of the Shawnee, shows the clan’s Panther symbol in place of the Seniority Stars.

f. The reverse side of some officers may indicate a restriction on their arrival.
Brigadier General Alexander Macomb may arrive on-board upon the play of Event Card #87: Alexander Macomb


Commodore Oliver Hazard Perry may arrive during or after the Spring of 1813.


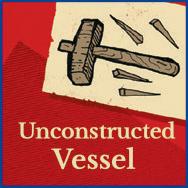
3.2.3 Unconstructed Vessels
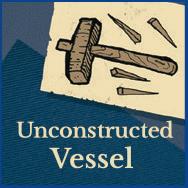
When a vessel is unconstructed, its counter is covered by an “Unconstructed Vessel” counter.
HD value of unconstructed vessels is always 0.
3.3 Protected Harbor Defense (PHD)
In Combat, a PHD counter is placed on the Reserves column of the Naval Combat Display (See 2.2.7 and 19.3.2.e).
a. The HD value and Gun value is similar to that of a vessel (See 3.2.2). The values for a PHD are determined by the number of docks assigned to the harbor:
Number of Docks HD Value Gun Value 1 or 2 2 1d8 3 or 4 3 2d8 5 or 6 4 3d8
b. A PHD, destroyed or not, is always repaired when the port becomes friendly controlled and the connected harbor is free of enemy vessels.
3.4 Leaders
Leaders represent the various notable Army Officers and Naval Commodores that led the US and British armed forces during the War.
3.4.1 Officers
Officers only command regiments and have the following values, capabilities, and restrictions depicted on their counter.

3.4.2
Commander and Subordinate Officers
If there is only one friendly officer in a hex, that officer is the commander.
If two or more friendly officers are in the same hex, the officer with the most Seniority Stars is referred to as the commander.
[EXCEPTION: Neither Wilkinson nor Hampton may be subordinate to the other.]
a. All other officers are referred to as subordinate officers.
b. If the officers have an equal number of stars, the owning player may choose which one is commander and the remaining are the subordinate officers.
3.4.3 Commodores
Commodores may only command vessels and have the following values, capabilities, and restrictions depicted on their counter:
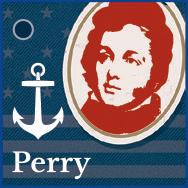
a. The commodore’s portrait and family name are on the counter.
b. The commodore counter shows an Anchor symbol in place of a Seniority Star.
c. Above the Anchor symbol is a black or white cannonball. When on-board a vessel, a maximum of one commodore may add an additional die to that vessel’s broadside rolls.
d. Similar to a vessel, a black cannonball indicated on the commodore counter adds 1d8 to the vessel’s broadside rolls; a white cannonball adds 1d6.
© 2022 Compass Games, LLC.
8
3.4.4
War on the GREAT LAKES FRONTIER
Commander and Subordinate Commodores
If there are two commodores occupying the same hex, the owning player may choose either as the commander.
In Land Combat, all commodores are subordinate to all officers.
3.4.5
Assignment of Commodores
Commodores are assigned permanently to a Lake:
a. Perry and Barclay are assigned to, only enter ports on and move vessels on Lake Erie, Lake St Clair, Lake Huron, and connected rivers.
b. Yeo and Chauncey are assigned to, may only enter ports on and move vessels on Lake Ontario and connected rivers.
c. Downie and MacDonough are assigned to, may only enter ports on and move vessels on Lake Champlain and connected rivers.
d. Pring and Elliott, when the Special Effect is played with British Card #18: Daniel Pring or US Card #23: Jesse Elliott, are assigned to either Lake Erie, Lake Ontario, or Lake Champlain, at the friendly player’s choice. Pring and Elliott may be transferred and assigned to a new lake by Commodore Transfer (See 10.0).
e. If a commodore occupies a port that has been “Burned” or “Dismantled” and there is no friendly vessel, the commodore is immediately placed at any friendly controlled, non-Isolated port that is on the commodore’s assigned Lake.
If no friendly port exists, the commodore is kept off-map until a port becomes available and then is immediately placed at that port.
DESIGNER’S NOTE: Various settlements can be “Burned” or “Dismantled” by the play of Special Event Cards throughout the game.
For example US Card #36: The Burning of… and British Card #80: The Dismantling Ft. Joseph. Settlement Burned counters are provided to mark these locations.

3.4.6 Special Units with Restricted Movement
Some officers and regiments, marked with a colored diamond to the left of the Combat value, have special movement limitations or placement rules that override normal game rules.
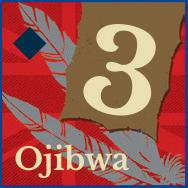
a. The Ojibwa NAW regiment may never enter the St Clair River. The Restricted Movement diamond on the Ojibwa counter is Dark Blue
If the Ojibwa regiment is forced to Evade into the St Clair River, the regiment is eliminated and removed from the map.
b. The Seneca NAW regiment may never move further than ten connected hexes from Buffalo. The Restricted Movement diamond on the Seneca counter is Dark Red.
If the Seneca regiment is forced to Evade greater than ten hexes from Buffalo, the regiment is eliminated and removed from the map.

c. The Odawa NAW regiment may never enter US territory. The Restricted Movement diamond on the Odawa counter is Light Green
If the Odawa regiment is forced to Evade into US Territory, the regiment is eliminated and removed from the map.


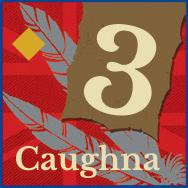
d. The Caughnawaga NAW and the Quebec and Montreal Militia regiments may never voluntarily move further than ten connected hexes from the city of Montreal nor may they enter a hex in US territory.

The Restricted Movement diamond on these counters is Dark Yellow.
If any if these regiments are forced to Evade more than ten hexes from Montreal or into US Territory, the regiment is removed from the map until the next Reinforcement Phase.
i. The Caughnawaga is placed, at its current strength, as a Reinforcement in Beauharnois.


ii. The Quebec Militia or the Montreal Militia is placed, at its current strength, as a Reinforcement in Quebec or in Montreal.

e. The Potawatomie NAW regiment is only activated by the play of British Card #10: Siege of Ft. Wayne. The Restricted Movement diamond on the Potawatomie counter is White

If the Potawatomie regiment is forced to leave Ft. Wayne, the regiment is eliminated and removed from the map.
f. De Rottenburg may never enter US territory. The Restricted Movement is noted on the reverse side of the counter.


If De Rottenburg is forced to Evade into US Territory, De Rottenburg is removed from the map until the next Reinforcement Phase and placed as a Reinforcement in Quebec or Montreal.
© 2022 Compass Games, LLC.
9
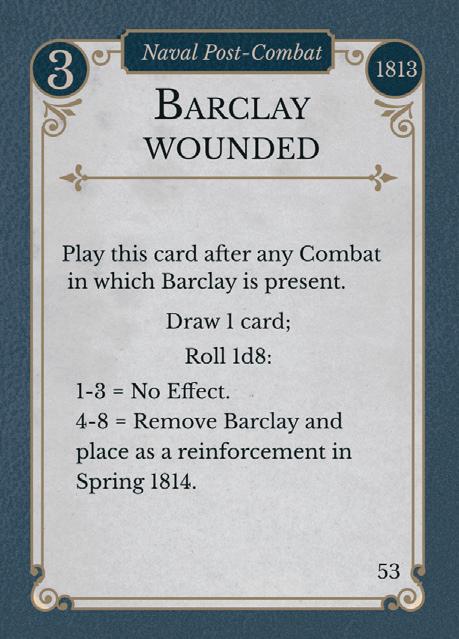
4.0 STRATEGY CARDS
These cards are used to organize the play of the game, to move and to build units, or, through the card’s Special Effects, to trigger certain “Historical Events” that occurred during in the War.

4.1 Reading the Strategy Cards
4.1.1 The US and British decks of Strategy cards are:
a. Divided by year and nationality
b. Rated for Operation Points
c. Organized by Card Type
d. Have a unique Card Title and Number
e. Assigned a Card Special Effect.
4.1.2 The Operational Point Value (OP) is located in the upper left hand corner of each card.
4.1.3 The Card Type is located in the upper center of the card and indicates the function of the card. The Card Types are Event, Combat and Reaction.
4.1.4 The cards are grouped into separate decks for each year of the War. The year the event occurred is located in the upper right hand corner of the card.
4.1.5 The Card Title is on the center of the card.
4.1.6 The Card Identification Number is located in the lower right corner of the card and is used to differentiate between cards:
a. 1812 Deck: US 1-30, British 1-29
b. 1813 Deck: US 31-63, British 30-69
c. 1814 Deck: US 64-102, British 70–102
d. Special scenario cards: US 103, US 104
4.1.7 The card Special Effect outlines the rules, effects, and restrictions necessary to implement the Special Effect.
4.1.8 “Attack on...” cards follow these unique rules, as they are not printed on the card itself.
a. If the target port on the Card Title is enemy controlled and not occupied by a friendly unit, the friendly player may move any friendly commodore or vessel to any shore hex (See 12.0 and Terrain Chart) that is connected to the card’s target port.
i. The friendly commodore or vessel must occupy a nonIsolated port(s) in friendly territory or its connected harbor.
ii. The friendly commodore or vessel must be able to trace a path of connected lake or river hexes free of enemy vessels and enemy protected harbors.
b. The friendly vessels must engage in Combat any enemy vessels or PHD that occupy that shore hex.

c. If the enemy vessels Evade (See 15.3) or they are sunk and removed from the map, and if any PHD is destroyed, the friendly player may move any officer or regiment [EXCEPTION: NAW units] to the card’s target port and Combat any enemy regiments that occupy that target port:
i. The friendly officer or regiment must occupy a nonIsolated port(s) in friendly territory.
ii. The friendly officer or regiment must be able to trace a path of connected lake or river hexes free of enemy vessels and enemy protected harbors.

d. Any attacking Regular or Militia and accompanying officer that subsequently Evades must use Evade by Sea (See 15.5).
4.2 Playing a Strategy Card
Depending on the Card Type, there are three different ways that a Strategy card may be played during the Action Phase: Action, Combat, or Reaction. A player may only perform one of those possible functions per card played.
4.2.1
Action
When a card is played for Action, the player is granted a number of Operation Points equal to the OP value listed on the card and he may then choose between:
• Unit Activation (See 5.4.1.a)
• Siege Warfare Activation (See 5.4.1.b)
• British Depot Activation (See 5.4.1.c)
• Construct Vessel (See 5.4.1.d)
• Repair Vessel (See 5.4.1.e)
• Restore Regulars (See 5.4.1.f)
• Construct Supply Depot (See 5.4.1.g)
Each action costs 1 OP. If the OP value is > 1, the player may choose the same or different action(s) up to the card’s OP value.
If the card is an Event card, after the player has spent all of the granted OPs, he optionally performs the card’s Special Effect in the Event Segment (See 5.4.3).
© 2022 Compass Games, LLC.
10
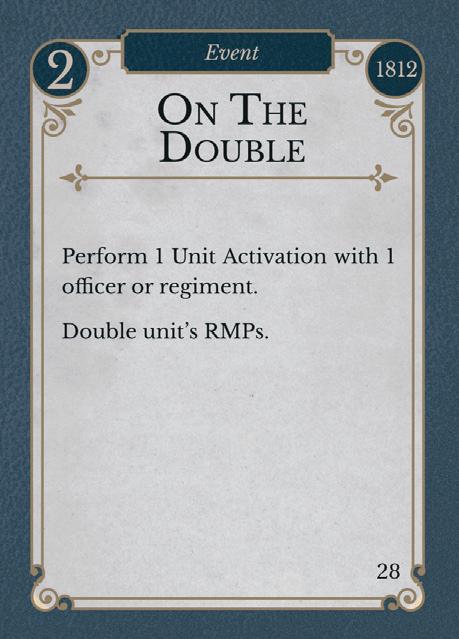
OP Point Value Card Type Year Card Title Card Identification Number Special Effect
War on the GREAT LAKES FRONTIER
4.2.2 Combat Cards
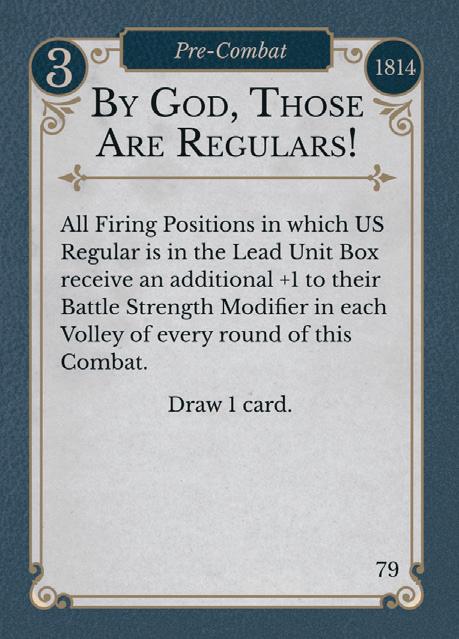
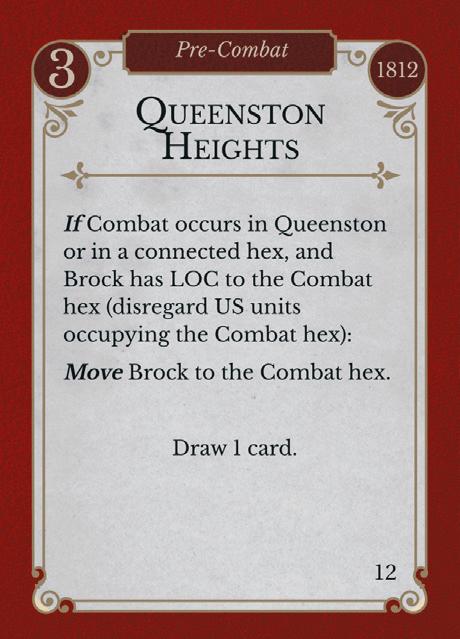
Divided into “Pre,” “Post,” and possibly “Naval” Combat and may only be played for the Special Effect during any corresponding Combat as outlined on the card.

Follow the instructions on the card.
DESIGNER’S NOTE: The instructions always take precedence over any game rule, so it is possible that some Special Effects allow a move that is not allowed by the rules.
4.2.3 Reaction Cards
Reaction cards may only be played for the Special Effect during the enemy player’s Action Phase as outlined on the card.
5.0 SEQUENCE OF PLAY
SPRING, SUMMER & AUTUMN SEASONS
The Sequence of Play outlines the structure and order in which game-play progresses in the Spring, Summer, and Autumn Seasons.
5.1 First Player Determination Phase
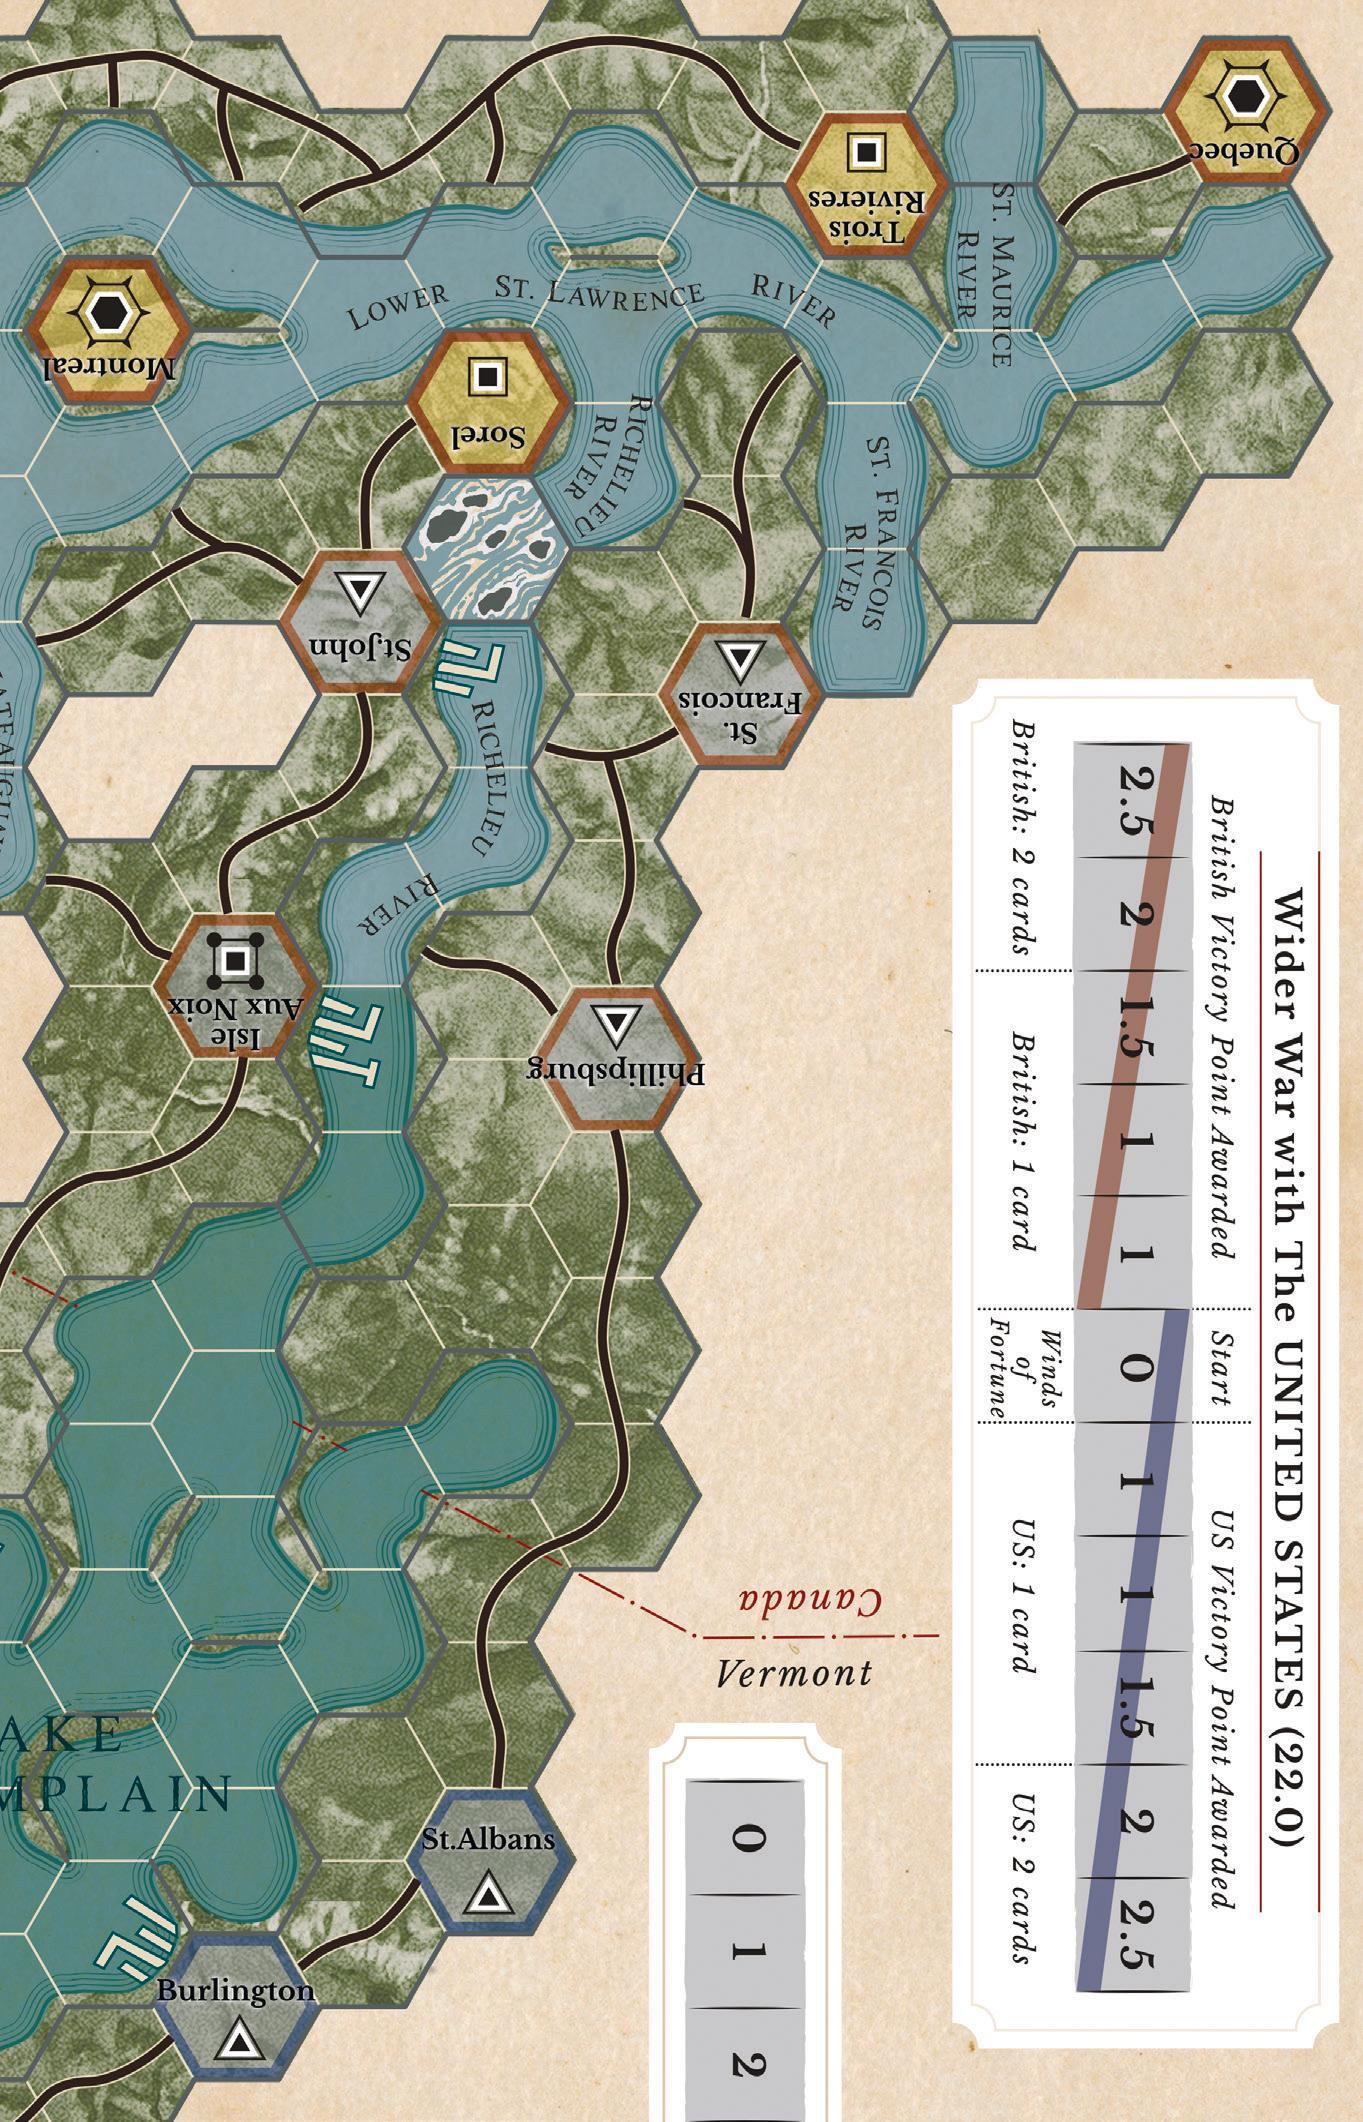
Each Season, the First Player of the Action Phase is determined by the position of the Wider War with the United States (WWUS) Marker. If the WWUS Marker is on a box with a Blue diagonal stripe, the US player is the First Player and the British player is the Second Player. If the WWUS Marker is on a box with a Red diagonal stripe, the British player is the First Player and the US player is the Second Player.


Proceed to Reinforcement Phase (See 5.2).
EXAMPLE: The WWUS counter is on the 1 US space. The US player may discard 1 card during Winds of Fortune (See 5.3.2) and will receive 1 VP if the scenario has ended (See 23.1.2.j).


The friendly player may play one Reaction card during each enemy Unit Activation and one Reaction card during each enemy Event Segment to interrupt the enemy player’s activation or Special Effect.
Once the action has moved on to the next OP expenditure, card play, or dice roll, it is too late to play a Reaction card that will affect the previous action unless stated on the Special Effect.
Gaming etiquette is required to ensure the friendly player receives an adequate opportunity to play a Reaction card before play progresses past that point.
Follow the instructions on the card.
DESIGNER’S NOTE: The instructions always take precedence over any game rule, so it is possible that some Special Effects allow a move that is not otherwise permitted by the rules.
5.2 Reinforcement Phase
Reinforcements arrive at the beginning of the Season with the British player placing his units on the map in their appropriate hex. The US player then places his units on the map in their appropriate hex.
Each player’s Reinforcement Schedule shows the Season and Year of arrival for each unit in the game and the hex in which the unit is to be placed.
All units scheduled to arrive during the Reinforcement Phase of a certain Season must be placed during that Season or that reinforcement is lost for the game [EXCEPTION: Commodores (See 5.2.4)].
Following the placement of any reinforcements, proceed to Dealing Cards and New Year Deck Preparation Phase (See 5.3).
5.2.1 British Depot Placement
During each Reinforcement Phase, the British player may place up to two depots from off-map into Quebec. These depots may be subsequently moved during British Depot Activation (See 5.4.1.c).
© 2022 Compass
11
Games, LLC.
The British player is restricted to a maximum of four depots on the map at any one time, therefore, he may destroy and remove from the map any British Depot(s) in order to place a new British Depot(s) in Quebec during the same Reinforcement Phase (See 21.1).
PLAYER’S NOTE: During this Phase, the British Player may place two depots in Quebec. During Operation Point Segment 5.4.1.g “Construct Supply Depot,” at the cost of 1 OP/Depot, the British may place one depot in Quebec and the US may place one depot in a US controlled settlement in US territory that is in full supply.
5.2.2
Regiment and Officer Reinforcement Placement

The hex in which all reinforcements are placed must be in full supply and not “burned.”

5.2.3
Vessel Reinforcement Placement
All vessels arrive on the map marked with an Unconstructed counter in a friendly controlled port that is not occupied by enemy regiment.
At the end of Reinforcement Phase the port may only be occupied by a sum of constructed and unconstructed vessels equal to or less than the number of docks assigned to that port.
Vessels may be eliminated and removed from the map at the owning player’s choice in order to place reinforcements.

5.2.4
Commodore Reinforcement Placement
If the hex of the indicated arrival of a friendly commodore is occupied by enemy units, the commodore is not brought into the game until one of those hexes becomes free of enemy units and is not Isolated. The commodore is then immediately placed in the hex.
5.3
Dealing
Cards
and
New Year Deck Preparation Phase
In all Spring Seasons of 1812, 1813, and 1814, each player is dealt seven cards from their appropriate “Nationality” and “Year” draw decks.
In all Summer and Autumn seasons of 1812, 1813, and 1814, each player is dealt eight cards from their appropriate “Nationality” and “Year” draw decks.
The deck is never reshuffled. If a player is allowed to draw a card and there are no cards left in their draw deck, that player loses that card draw.
5.3.1
New Year Deck Preparation
If it is the Spring of a new year, the appropriate “Year” deck for each player is shuffled separately to create a new US (Blue) draw deck and British (Red) draw deck for the new year.
5.3.2 Winds of Fortune
Depending on the location of the WWUS Marker, the player may be granted a free discard of one or two cards after drawing his hand. The player then draws a like amount of replacement cards from the draw deck. (See 22.1.3)
Following the preparation of the deck for the next year, proceed to Action Phase (See 5.4).
5.4 Action Phase
The First Player must play a single Strategy card of his choice and perform these Segments in the following order:
5.4.1 Operation Point Segment
a. Unit Activation 1 OP/unit
• Officer
• Commodore
• Regiment or Vessel without Leader b. Siege Warfare Activation 1 OP c. British Depot Activation 1 OP d. Construct Vessels 1 OP/vessel e. Repair Vessels 1 OP/port f. Restore Regular 1 OP/Regular g. Construct Supply Depot 1 OP/Depot
5.4.2 Block Event Segment
5.4.3 Event Segment
5.4.4
End-of-Game Determination Segment
The Second Player may interrupt the First Player by the play of Reaction card(s) which may modify the First Player’s choice.
After the First Player has completed all the Action Phase Segments, the Second Player then must play a single Strategy card of his choice and perform the Action Phase segments in the same manner as the First Player.
The First Player may also play Reaction card(s) that could modify the Second Player’s choice.
The players continue playing cards alternating back and forth.
A player may optionally Pass and not play a card if, at the beginning of that player’s Action Phase, he has less cards than his opponent.
If the enemy player has no cards and the friendly player does, the enemy player performs a Pass Option and plays no card at all.
If neither player has cards in his hand, or if the enemy player performs a Pass Option, proceed to Endof-Game Determination Segment (See 5.4.4) to determine if play continues or if the game ends.
5.4.1 Operation Point Segment
The player is granted a number of OPs equal to the OP value of the card. Each OP is spent individually, one at a time and cannot be saved beyond the current Operation Point Segment.
A unit may only be “Activated” once per Operation Point Segment.
PLAYER’S NOTE: In the Unit Activation Segment of the Action Phase, the active player may spend 1 OP to move a unit. The player makes a 2d6 die roll to obtain the RMP for that unit.


The RMPs are now spent as the unit moves.
Players may use the Record Track on the East Map and on the 1-Map Scenario Set-Up Cards to keep track of the OPs and RMPs spent.
© 2022 Compass Games, LLC.
12
War on the GREAT LAKES FRONTIER
After the available OPs have been spent, proceed to Block Event Segment (See 5.4.2).
a. Unit Activation
Spending 1 OP for Unit Activation allows a single unit to move (See 7.0).
The chosen, single unit is declared to be “Activated” and must complete its entire Unit Activation, movement, and possibly engage in Combat before another unit may be chosen for Unit Activation.
An activated leader(s) and single unit or a stack of activated units moving with that leader(s), are allowed to enter an enemy occupied hex and engage in Combat.
Any unit that participates in a Unit Activation is considered to have been “Activated” during an Operation Point Segment.
i. Officer
Activating an officer, or the commander (See 3.4.2) if more than one officer is present, provides a more efficient way of moving regiments than moving individual regiments without an officer.
When a friendly commander is “Activated,” he may also move any number of subordinate officers and a number of friendly regiments equal to or less than the Commander’s Activation Limit.
Commander’s Activation Limit:
• 3 Seniority Stars: 15 regiments
• 2 Seniority Stars: 10 regiments
• 1 Seniority Star: 5 regiments
During his movement, a commander is allowed to pickup and move any officer subordinate to him allowing the commander to immediately increase his Activation Limit by 5 regiments per subordinate officer (See also 8.2 and 8.3).
A subordinate officer may be “Activated” and move as its own commander.
Tecumseh can activate any number of NAW regiments and a single British Regular.
DESIGNER’S NOTE: Officers may never “Activate” vessels.
If Tecumseh is a subordinate officer, the five extra regiments a commander is allowed to “Activate” must all be NAW regiments.
Any subordinate officers or regiments moved with an activated leader is considered to have been “Activated” during this Operation Point Segment.
ii. Commodore
Activating a commodore, or the commander (See 3.4.4) if more than one commodore is present, provides a more efficient way of moving vessels than moving individual vessels without a commodore.
Activation Limit and Restrictions:
• Commodores can “Activate” an unlimited number of commodores and vessels.
• Commodores may only perform a Unit Activation if a vessel occupies the same hex as the commodore.
• Commodores may never “Activate” regiments.
iii. Regiments or Vessels Without Leaders
Individual regiments or vessels “Activated” alone and not by a leader or commodore may never pick-up other units during movement.
[EXCEPTION: An Activated ship may perform Naval Transport (See 12.6) ]
Units moving without a leader engage in Combat independently even if combating the same hex during the same Operation Point Segment.
If a Strategy Card grants the player > 1 Operation Point, an additional unit(s) can be “Activated” using 1 OP per unit. Each unit must roll their RMP separately and is not allowed to move together nor to Combat the same hex together (See 7.0).
b. Siege Warfare Activation
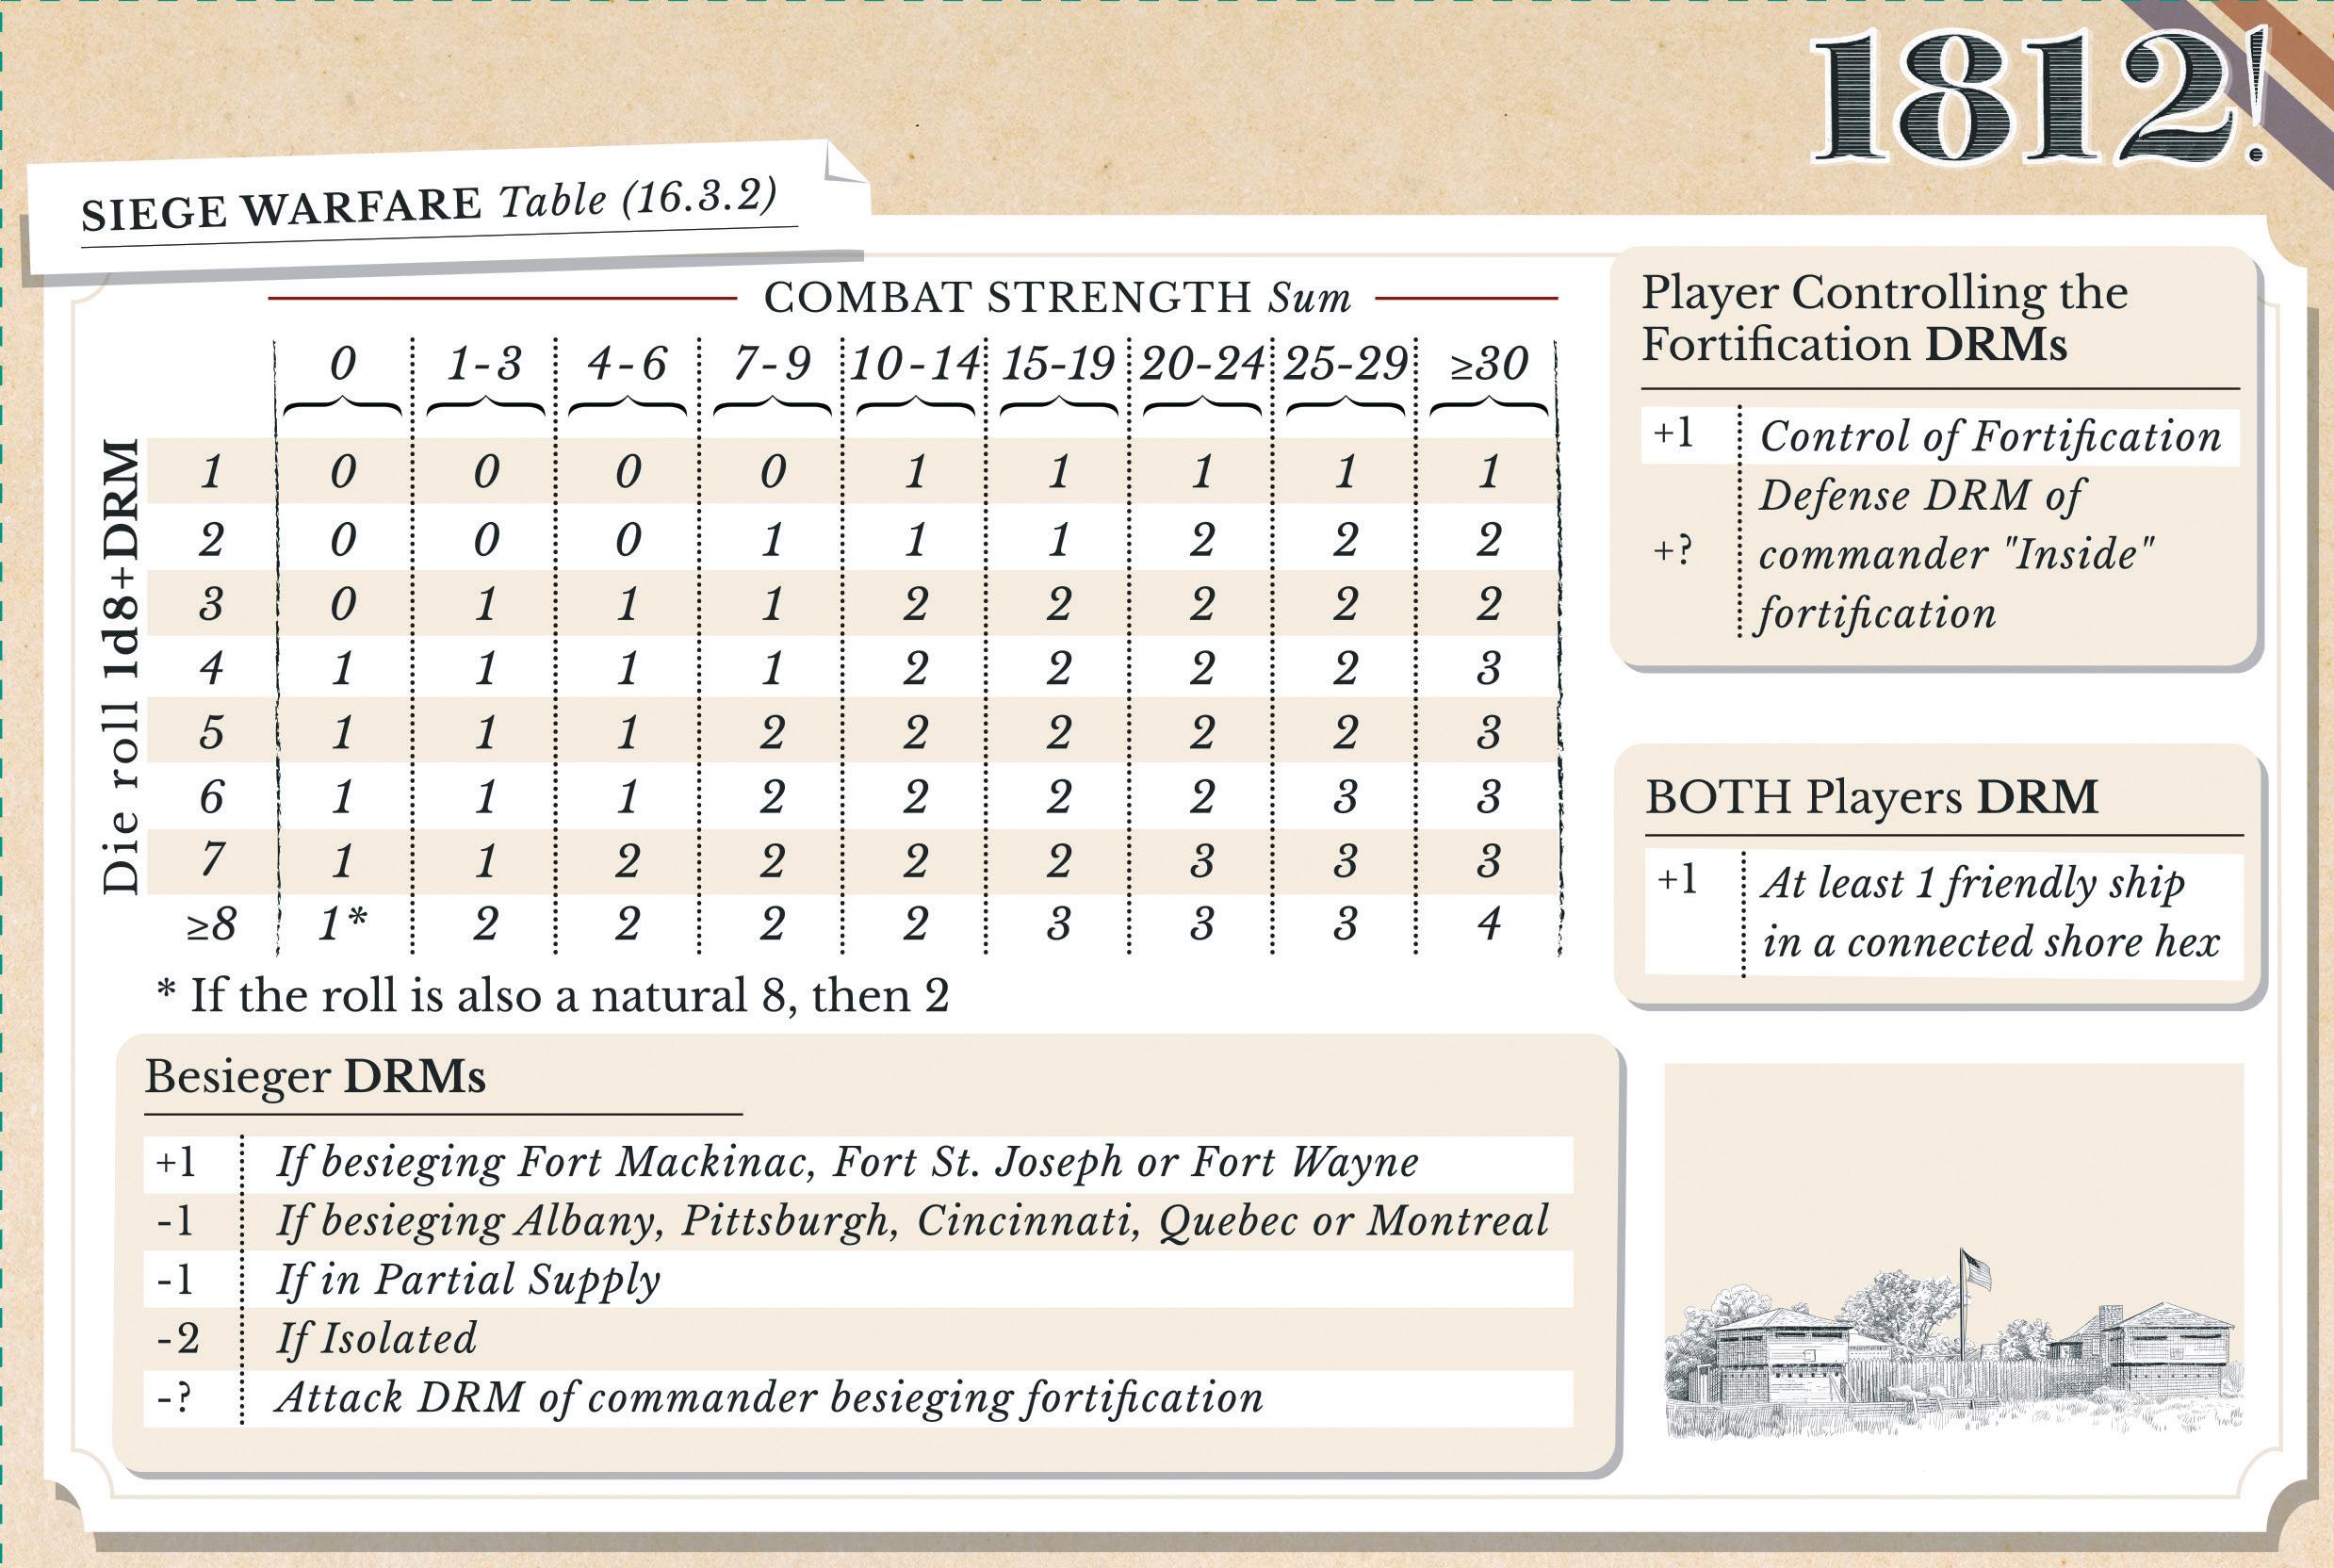
It costs 1 OP to conduct Siege Warfare against an enemy controlled fortification (See 16.0).
Any or all friendly officers or regiments, at the friendly player’s choice, that begin the Siege Warfare Activation segment occupying the same hex as an enemy controlled fortification with a previously placed Siege counter may be “Activated” and participate in an Assault on Enemy Fortification (See 16.3).
A hex may be subject to Siege Warfare Activation more than once per Action Phase.
Any officer or regiment that participates in a Siege Warfare Activation is considered to have been “Activated” during an Operation Point Segment.

c. British Depot Activation
The British player may spend 1 OP to “Activate” all British Depots for movement.
Each British Depot may then perform Land Movement or Bateaux Movement (See 8.0 and 11.0).
Any British Depot moved during a British Depot Activation is considered to have been “Activated” this Operation Point Segment.
d. Construct Vessel
Both players must construct their vessels in order to be able to use them. Vessels on the map marked with an “Unconstructed Vessel” counter may be constructed in any order the owning player chooses.

Each OP spent will remove the unconstructed counter from one vessel. The vessel being constructed must be in a port that is in full supply.

13
© 2022 Compass Games, LLC.
The British player must remove one depot per vessel constructed. The supplying depot must be able to trace a LOC of ≤ ten hexes to vessel being constructed.
That depot may not have been “Activated” this Operation Point Segment.
[EXCEPTION: The British player may construct HMS Caledonia without removing a depot.]
Any vessel that has been constructed is considered to have been “Activated” this Operation Point Segment.
DESIGNER’S NOTE: During the War, a Naval Arms race developed as both sides vied to build vessels. With timber easily available from the forested land and without the need for the durability and the capacity for provisions required by ocean-going vessels, the fleets on the Great Lakes could be quickly constructed with an emphasis on maximizing fire power.
e. Repair Vessels
A port may receive 1 OP to repair vessels.
The port receiving the OP must be in full supply and in friendly territory.
All repaired vessels that occupy that port are flipped to their Full-Strength side.
The British must remove one depot per repairing port. The supplying deport must be able to trace a LOC of ≤ ten hexes to the repairing port depot.
That depot may not have been “Activated” this Operation Point Segment.
Any vessel that has been repaired is considered to have been “Activated” this Operation Point Segment.
f. Restore Regular
Players may spend 1 OP to restore a Regular flipping the counter from its Reduced-Strength side to its FullStrength side.
The Regular must be in a settlement in friendly territory and in full supply.
The British player must remove one depot per restored Regular. The supplying depot must be able to trace a LOC of ≤ ten hexes to the restored British Regular.
That depot may not have been “Activated” this Operation Point Segment.
Any Regular that has been restored is considered to have been “Activated” this Operation Point Segment. Regulars that have been eliminated and removed from the map may never be restored.
g. Construct Supply Depot
Each player may use 1 OP to construct one Supply Depot (See 21.1).
The US player may place one depot from off-map into any US controlled settlement in US territory that is in full supply and is not occupied by a depot. The US player

is restricted to a maximum of four depots on the map at any one time. The US player may destroy and remove from the map any US Depot in order to place a new US Depot during the same Construct Supply Depot.
PLAYER’S NOTE: US Depots cannot be moved once placed (See 21.1.2).
The British player may place one depot from off-map into Quebec. The British player is restricted to a maximum of four depots on the map at any one time. The British player may destroy and remove from the map any British Depot in order to place a new British Depot during the same Construct Supply Depot (See 5.2.1).
Any depot placed is considered to have been “Activated” this Operation Point Segment.
5.4.2 Block Event Segment


If the Strategy card played at the beginning of the Action Phase (See 5.4) is an Event card, after all OPs granted by the card have been expended, the enemy player may optionally announce that he will:


a. “Block” the play of that Special Effect ignore the Event Segment and proceed to the End-of-Game Determination Segment (See 5.4.4).
i. The US player may “Block” one British Event Segment per Season.

ii. The British player may “Block” one US Event Segment per Season.

b. On the map, place the US and British Block Available/ Block Used counters to indicate the current status.
c. If the Event Segment is not “Blocked,” proceed to the Event Segment.
5.4.3 Event Segment
If the Event card’s Special Effect is not “Blocked,” the player may choose to perform that Special Effect following the instructions on the Event card.
© 2022 Compass Games, LLC.
14
War on the GREAT LAKES FRONTIER
b. Sudden Death In All Scenarios
DESIGNER’S NOTE: The instructions always take precedence over any game rule, so it is possible that some Special Effects allow a move that is not allowed by the rules.
Proceed to the End-of-Game Determination Segment.
5.4.4 End-of-Game Determination Segment
The End-of-Game is dependent on the initial selection of a 1-Map or a 2-Map Scenario, and the Starting/Ending Season for the selected Scenario.
If it is not the chosen Ending Season and either player still has at least 1 card in their hand, proceed to the enemy player’s Action Phase (See 5.4).
If it is not the chosen Ending Season and neither player has at least 1 card in their hand, proceed to the Turn Record Segment (See 5.4.5).
If it is the chosen Ending Season and both players have ≥ 1 card in their hands, then proceed to the End-of-Game Conditions.
a. End-of-Game Conditions—Summary
i. 2-Map Scenario
At the conclusion of every Event Segment of the selected Ending Season, the friendly player will roll 1d6.
• The game CONTINUES If the number rolled is: ≤ the number of Strategy cards in the friendly player’s hand; and
≤ the number of cards in the enemy player’s hand. Proceed to the enemy players Action Phase (See 5.4).
• The game ENDS If the number rolled is: > the number of Strategy cards in the friendly player’s hand; and > the number of cards in the enemy player’s hand. Proceed to the Victory Point Phase (See 23.0).
ii. 1-Map Scenario
The Scenario Special Rules will define the Ending Season. At the conclusion of the Event Segment of that Ending Season, the friendly player will roll 1d8. Optionally, in all scenarios, players may roll 1d6 to possibly play a longer game.
• The game CONTINUES If the number rolled is: ≤ the sum of Strategy cards in both the friendly player’s hand and in the enemy player’s hand. Proceed to the enemy players Action Phase (See 5.4).
• The game ENDS If the number rolled is: > the sum of Strategy cards in both the friendly player’s hand and in the enemy player’s hand. Proceed to the Victory Point Phase (See 23.0).
If the British control Albany, Pittsburgh or Cincinnati, the game ends and the British player immediately wins the game.
If the US controls Quebec, the game ends and the US player immediately wins the game.
5.4.5 Turn Record Segment
If the conditions for End-of-Game are not met, move the Season marker one box to the right on the Turn Record Track and begin the next Season.
Proceed to First Player Determination Phase (See 5.1).
The Scenario will continue until the end of the agreed upon Scenario Ending Season.

5.5 Victory Point Phase
If conditions for the End-of-Game are met, proceed to Victory Point Phase (See 23.0).
6.0
SEQUENCE OF PLAY WINTER SEASON
The Sequence of Play outlines the structure and the order in which game-play progresses in the Winter Season.
PLAYER’S NOTE: US and British commanders were well aware of the hardships their forces would encounter during the harsh winters of the Great Lakes frontier. During the Autumn Season, before the onset of winter, players are encouraged to strategically prepare winter quarters to lessen the impact of winter attrition. Infantry units should be moved to settlements with a substantial WQV. The British should use British Depot Placement (See 5.2.1) to allocate two depots that can be subsequently moved during British Depot Activation (See 5.4.1.c). The British also have the option of the Construct Supply Depot segment (See 5.4.1.g) using 1 OP to construct one depot.
The US has fewer options and may only build one depot in each Construct Supply Depot segment. US depots cannot be moved.
6.1 Besieger Evade Phase
Sieges are abandoned during the Winter Season. All British besieger officers or regiments must Evade then all US besieger officers or regiments must Evade (See 15.0 and 16.1).

Proceed to Winter Attrition Phase.
6.2 Winter Attrition Phase
6.2.1
Winter Quartering Value (WQV)
The WQV of a hex is equal to the Victory Point value of the hex (See 23.0 and Terrain Chart).
US and British Supply Depots increase the WQV of a hex by 4. Forts increase the WQV of a hex by 2.
15
© 2022 Compass Games, LLC.
[EXCEPTION: Event created forts increase the WQV of the hex by 4 when the US controls Fort Meigs, Moreau, Ontario or Stephenson and when the British control Fort Wellington or Garrison House.]
a. For non-settlement hexes, “Burned” settlements and “Dismantled” settlements the WQV is 0.

b. For Isolated settlements, the WQV is reduced by 1.
6.2.2 If the number of regiments that occupy a hex exceeds the hex’s WQV, those regiments will suffer 1 step loss. The number of regiments affected is equal to the difference between the hex’s WQV and the number of friendly regiments occupying the hex.
The player affected by the loss has the choice of which regiment in that hex suffers the step loss. However, no regiment may suffer more than 1 step loss.

Vessels, leaders and regiments using Naval Transport and depots do not suffer any effects of Winter Attrition.
Proceed to Vessels Return to Port Phase (See 6.3).
EXAMPLE: The WQV of a hex is 4 and six regiments occupy this hex. Two of those regiments, owning player’s choice, will suffer 1 step loss.
6.3 Vessels Return to Port Phase
With the onset of winter, all vessels that occupy a lake or river hex must be moved individually, ignoring any PHD or enemy vessels, to the closest (in connected river and lake hexes) friendly controlled port in friendly territory. It is the owning player’s choice of a destination port if the distances to the ports are the identical.
[EXCEPTION: If the closest port is Detroit, Black Rock, Willoughby, Fort George, Fort Erie, or Fort Niagara, the player owning the vessel may ignore that port.]
However, a port’s capacity is limited by the number of docks depicted in the port’s connected harbor hex. The sum of the constructed vessels and unconstructed vessels must be ≤ the number of docks assigned to that port.
If the player owning the vessels moves enough vessels into a port to equal the number of docks assigned to that port, the player must select as the new destination the next, closest, friendly controlled port in friendly territory. When the capacity of the new destination port is reached, this process is repeated.
If no port in friendly territory exists, the player owning the vessel may select the closest friendly controlled port in enemy territory until the sum of the constructed vessels and unconstructed vessels exceeds the number of docks assigned to that port.

Friendly commodores may be moved with any vessel with which
the commodore is stacked.
6.3.1 Any vessel that does not occupy a port at the end of Vessels Return to Port Phase is eliminated and removed from the map.
6.3.2 Commodores on an eliminated vessel are placed at any friendly controlled port that is not Isolated, and is on the commodore’s assigned Lake. If no qualifying port exists, that commodore is kept off-map until one becomes available then he is immediately placed.
Proceed to Free Vessel Repair Phase.
6.4 Free Vessel Repair Phase
All vessels on their Reduced-Strength side that are not Isolated and occupy a port in friendly territory are immediately repaired and flipped to their Full-Strength side.
Proceed to Prevost Winters in Luxury Phase.
6.5 Prevost Winters in Luxury Phase
If Canadian Governor Sir George Prevost is not Isolated, the British player must place Prevost as a reinforcement in Quebec or Montreal.
Proceed to Remove US Supply Depot Phase.
6.6 Remove US Supply Depots Phase
Eliminate and remove from the map all US Supply Depots.
Proceed to Winter Turn Record Phase.
6.7 Winter Turn Record Phase
Move the Season marker one box to the right from the Winter Season to the Spring Season of the following year.
Proceed to Sequence of Play Detail-Spring, Summer and Autumn Seasons (See 5.0).
7.0
When
MOVEMENT OVERVIEW
• Disembark—See 13.0
Units may use only one of these movement types per Unit Activation.
16
© 2022 Compass Games, LLC.
a unit performs a Unit Activation, that unit may choose one of these six types of movement: • Land Movement—See 8.0 • Embark—See 9.0 • Commodore Transfer—See 10.0 • Bateaux Movement—See 11.0 • Naval Movement—See 12.0
War on the GREAT LAKES FRONTIER
EXCEPTION: Units may use Disembark during the same Unit Activation that the unit used Bateaux or Naval Movement.]
[
8.1 Movement Costs
Friendly officers and regiments pay:
A unit may only be “Moved” once per Operation Point Segment. Movement is always voluntary.
7.1 Rolled Movement Points (RMP)
When a unit performs Land Movement or Naval Movement, the RMPs granted to that unit are equal to the sum of 2d6.

7.1.1 Each RMP is spent individually and one at a time.
7.1.2 RMPs may not be transferred from a unit to another unit.
7.1.3 RMPs not used in the current Unit Activation are lost.
EXAMPLE: In the Unit Activation Segment of the Action Phase, the active player spends 1 OP to move a unit. The player rolls a 2d6 result of 7 (3, 4) for that unit.
The unit has 7 RMPs to spend as it moves. Players may use the Record Track on the East Map or the 1-Map Scenario Set-Up Card to keep track of the RMPs spent in Land or Naval movement.


8.0 LAND MOVEMENT
8.0 Land Movement
Only officers, regiments, and British Depots may use land movement. Units using land movement may only move over land or ferry hexes.
An officer, regiment, or British Depot using land movement is considered to have been “Moved” this Operation Point Segment.

8.1.1 4 RMPs when moving from hex to hex and the connected hex-side is not crossed by a road.
8.1.2 1 RMP when moving from hex to hex and the connected hex-side is crossed by a road.
8.1.3 4 RMPs when an infantry unit or naval vessel enters a hex occupied by an enemy infantry or naval vessel and the enemy does not Evade.
8.1.4 4 RMPs when entering a river hex occupied by an enemy vessel to perform a Cutting out Boarding (See 20.0).
8.2 A commander may pick-up an officer or regiment in the hex it occupies or along its movement path. A commander may drop-off an officer or regiment, keep moving, and continue to pick-up and drop-off an officer or regiment as long as the commander does not exceed his RMPs and his corresponding Activation Limit.

[EXCEPTION: An “Activated” officer may not pick-up an officer to whom the “Activated” officer would be subordinate.]
8.3 Dropping-off and picking-up officers or regiments does not cost any RMPs.
8.4 Friendly officers and regiments may not use a ferry that is connected to a hex occupied by an enemy ship unless that ferry hex is also occupied by friendly vessel, or the friendly officer and regiment will perform a Cutting out Boarding against one of those enemy ships.
8.5 Friendly officers and regiments may not use a ferry that is also an enemy protected harbor unless that ferry hex is occupied by a friendly vessel.
Officers or regiments using Land Movement are eliminated and removed from the map if at the end of its Unit Activation that officer or regiment occupies a river or lake hex.

LAND MOVEMENT EXAMPLE:
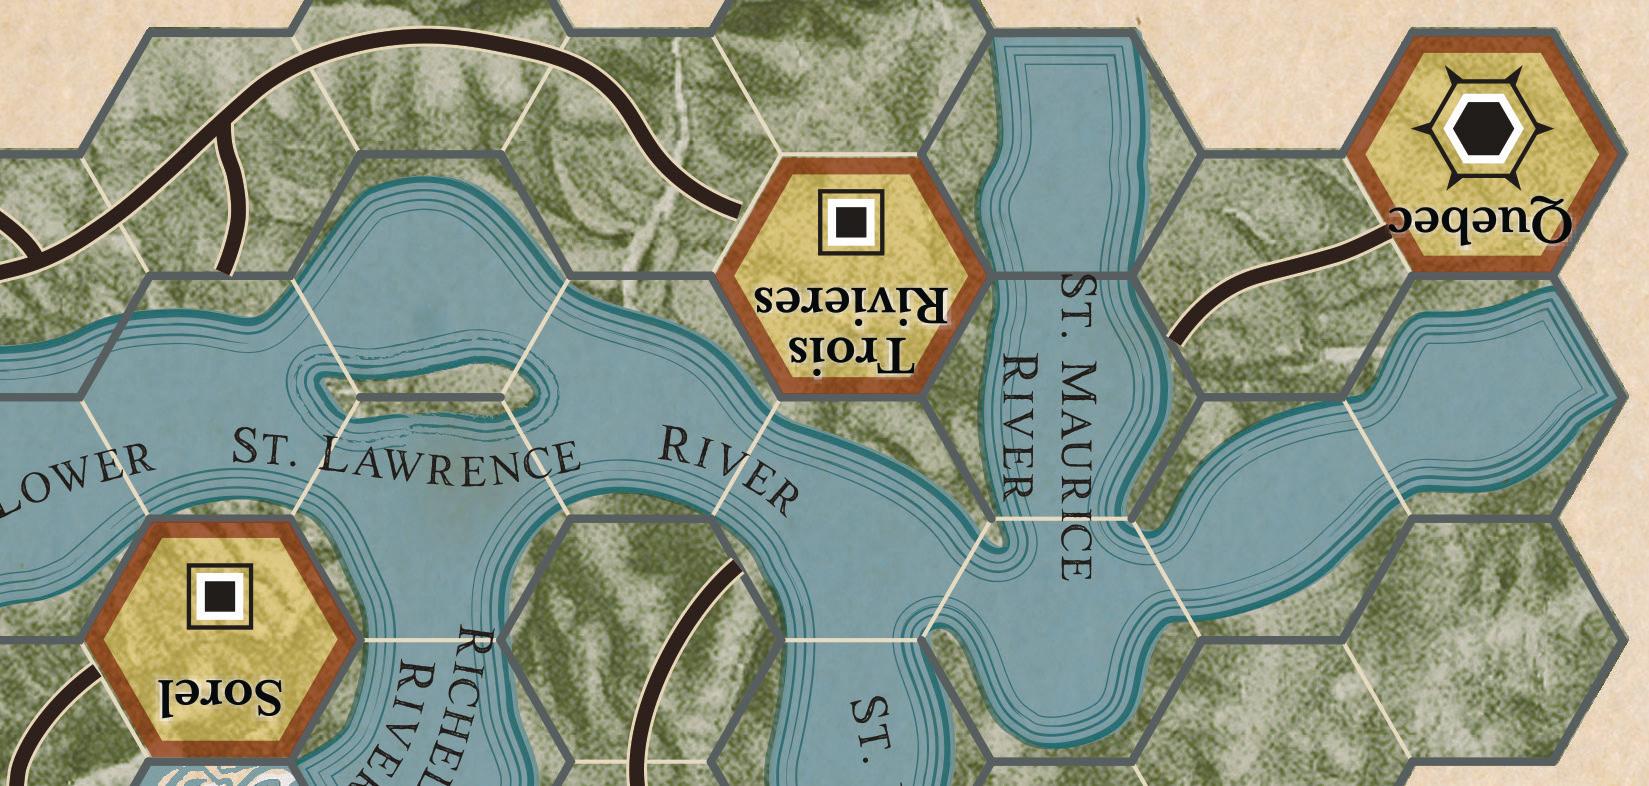
The British perform a Unit activation with the 6th regiment in Quebec and roll a 2d6 result of 10 (4, 6) for 10 RMPs. Using a combination of roads and ferries at 1 RMP each with 4 RMPs to Enter a Hex Occupied by Enemy Units the total cost to enter Sorel is 9 RMPs.
An Evading unit vacates the hex before the moving unit enters. If the US 23rd regiment Evades, the cost to enter Sorel is 1 RMP for a total of 6 RMPs and the 6th may continue moving and expending RMPs.
© 2022 Compass Games, LLC.
17
1 2 3 4 5 9
9.0 EMBARK
If friendly officers or regiments occupy a settlement (even if “Burned” or “Dismantled”) that is connected to a shore hex occupied by friendly ship, that player may assign each of those officers or regiments to Embark on one of the friendly ships.
9.1 Place the counter(s) under the ship to indicate the unit has embarked on the ship.
9.2 No vessel may exceed its carrying capacity (See 12.6.1).

9.3 In a subsequent Operation Point Segment, the player may activate the transport vessel for Naval Movement (See 12.6).
9.4 Officers and regiments that have embarked are considered to have been “Moved” this Operation Point Segment.
PLAYER’S NOTE: NAW may not Embark.
10.0 COMMODORE TRANSFER
A friendly commodore may be moved from a port that is not Isolated to a friendly controlled port that is also not Isolated on the commodore’s assigned Lake (See 3.4.5).
A commodore that has performed Commodore Transfer is considered to have been “Moved” this Operation Point Segment.
[EXCEPTION: British Daniel Pring and US Jesse Elliott may be transferred to any Lake.]
11.0 BATEAUX MOVEMENT
Bateaux Movement is movement along shore hexes. Friendly officers, regiments or British Depots attempting Bateaux Movement must occupy a settlement connected to a shore even if the settlement is “Burned” or “Dismantled.”
PLAYER’S NOTE: US Depots are not eligible to use Bateaux Movement (See 21.1.2).

BATEAUX MOVEMENT EXAMPLE:
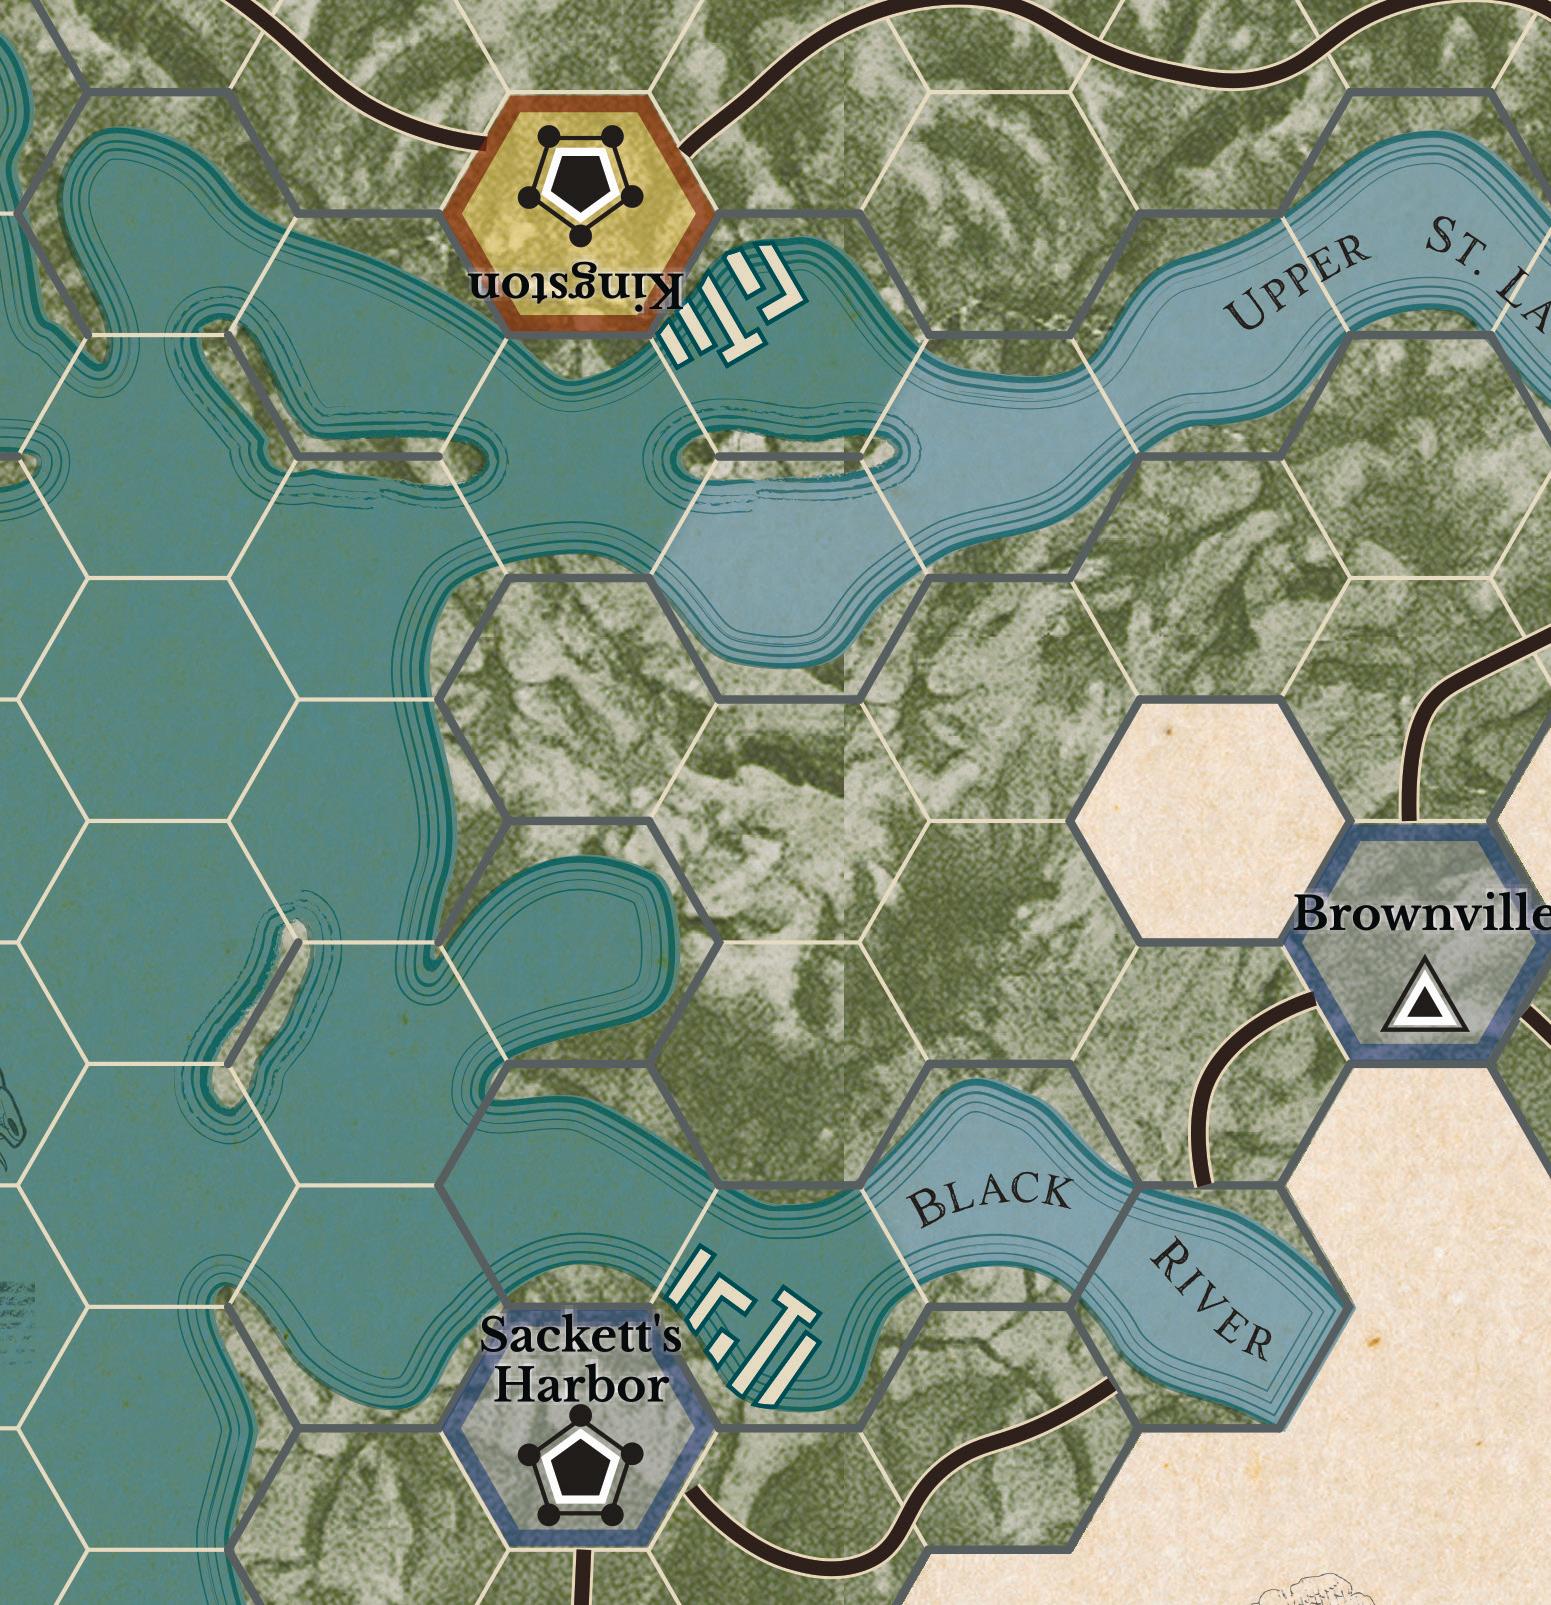
The British Glengarry regiment may bateaux, without the need to roll for success (See 11.1), to either Sackett’s Harbor, black path, ignoring the US 14th regiment (See 11.7.2) or to the hex the US 23rd regiment occupies, red path, but no further along the Upper St Lawrence River (See 11.7.3).

At the conclusion of either movement path, the British regiment Disembarks (See 13.0) into a US controlled land hex. The British regiment may now:

Engage in Combat with the US 23rd regiment (See 15.2).


Avoid Combat if the US regiment Evades (See 14.1 “Entering Hex Occupied by Enemy” and 15.2 “Evade Restrictions”).

Besiege Sackett’s Harbor. The presence of a guarding garrison is implied (See 16.3.3.a and accompanying Designer’s Note).
© 2022 Compass Games, LLC.

18
1 2 3 1 2 3 4 5
War on the GREAT LAKES FRONTIER
DESIGNER’S NOTE: The questionable and dangerous status of any road network in the Great Lakes frontier rendered movement by land extremely difficult. The rules for Bateaux Movement simulate both sides quickly adapting to troop movement and resupply via water routes on the Lakes.
11.1 If only one regiment, any number of officers, or one British Depot are attempting Bateaux Movement, the move succeeds.
11.2 If 2–5 regiments and any number of officers are attempting the move, a 1d8 die roll determines success. If the units will Disembark into a hex occupied by enemy units, apply a -2 DRM.
11.3 If ≥ 6 regiments and any number of officers are attempting the move, a 1d6 die roll determines success. If the units will Disembark into a hex occupied by enemy units, apply a -2 DRM.
11.3.1 If the roll is ≤ 1, the attempt to move fails.
11.3.2 If the roll is ≥ 2, the attempt to move succeeds.
11.4 If the move succeeds, the friendly officers or regiments may move ≤ 15 connected shore hexes.
11.4.1 Officers or regiments using Bateaux Movement must Disembark (See 13.0) at the end of Bateaux Movement.
11.4.2 If forced to Evade, the officer or regiment using Bateaux Movement is placed back in the last land hex it occupied.
11.5 If the move fails, the officer or regiment does not move and remains in the hex it currently occupies. Proceed with the Action Phase.
11.6 An officer or regiment attempting Bateaux Movement, regardless of success or failure, is considered to have “Moved” this Operation Point Segment.

11.7 Restrictions on Bateaux Movement.
11.7.1 Friendly officers or regiments using Bateaux Movement may not enter an enemy protected harbor unless the harbor hex contains a friendly vessel and the PHD is destroyed.
11.7.2 Friendly officers or regiments using Bateaux Movement may not enter a lake shore hex connected to a settlement which is occupied by an enemy regiment unless that shore hex contains a friendly vessel. If a friendly vessel is not present, the officers or regiments using Bateaux Movement must engage one of those enemy regiments in Combat (See 14.1).
11.7.3 Friendly officers or regiments using Bateaux Movement may not enter a river hex connected to a hex that is occupied by an enemy regiment unless that river hex contains a friendly vessel. If a friendly vessel is not present, the officers or regiments using Bateaux Movement must engage one of those enemy regiments in Combat (See 14.3).
11.7.4 Friendly officers or regiments using Bateaux Movement may not enter a shore hex connected to a hex that is occupied by an enemy ship unless that shore hex also contains a friendly vessel.
11.7.5 An officer or regiment using Bateaux Movement is eliminated and removed from the map if at the end of its Unit Activation it occupies a river or lake hex.
12.0 NAVAL MOVEMENT
During Naval Movement, only commodores and constructed vessels may move over lake, river, or port hexes. Commodores may only perform Naval Movement if accompanied by a vessel throughout the entire Naval Movement.
Ships using Naval Movement may also perform Naval Transport (See 12.6).
A commodore or vessel using Naval Movement is considered to have been “Moved” this Operation Point Segment.
Unconstructed vessels may not move.
12.1 A commodore may pick-up a commodore or vessel in the hex it occupies or along its movement path. A commodore may drop-off a commodore or vessel, keep moving, and continue to pick-up and drop-off a commodore or vessel as long as the commodore does not exceed his RMPs.
12.2 Dropping-off and picking-up a commodore or vessel does not cost any RMPs.
12.3 Moving on Lake or River Hexes
Friendly commodores and vessels pay 1 RMP when moving through hexes connected by a lake or river hex-side.
[EXCEPTION: Friendly commodores and vessels entering a hex occupied by an enemy vessel pay 4 RMPs. Friendly commodores and ships crossing the Presqu’Il Sand Bar pay 4 RMP; Gunboats pay 2 RMP.]
12.4 Entering or Exiting a Port
A commodore and vessel may only enter or exit a friendly controlled port and only through its connected harbor.
Friendly commodores and vessels pay 1 RMP when entering or exiting the harbor connected to a port, then pay 1 RMP when entering or exiting a friendly controlled port through the port’s connected harbor.
In order for a commodore or a vessel to enter a port, the port must be friendly controlled and neither “Burned” nor “Dismantled.”
If a friendly controlled port is also a fortification, the friendly commodore or vessels may enter the port even if an enemy unit occupies that port.
12.4.1
Ending a Unit Activation in a Port
A vessel may only end a Unit Activation in a port if the total number of vessels that occupy that port hex is ≤ the number of docks assigned to the port.
© 2022 Compass
19
Games, LLC.
Vessels may be eliminated and removed from the map at the owning player’s choice in order to allow a vessel to end its Unit Activation in a port.
12.5 Vessels Permitted On River Hexes
Only Gunboats and the USS Oneida may occupy a river hex.
[EXCEPTION: Any vessel may occupy a hex on Otter Creek and on the Upper St Lawrence, Detroit, St Clair, Richelieu, and Niagara Rivers.]
DESIGNER’S NOTE: The USS Oneida was specifically designed to operate in these shallow waters.
12.6 Naval Transport
Naval Movement includes the transport of friendly officers or regiments on friendly ships over lake or river hexes.
12.6.1
Carrying Capacity
a. Ships: 1 regiment.

b. Gunboats: 0; may not carry a regiment.
c. Officers or commodores transported on any type of vessel do not affect that vessel’s carrying capacity.
12.6.2 If the activated friendly ship(s) begins its activation occupying a port or it enters a port during movement, the friendly player may assign a friendly officer or regiment occupying that port to the ship. The officer or regiment counter is placed under the ship’s counter to indicate the assignment. The officer or regiment is subsequently moved with that ship.
12.6.3 Only one regiment may be assigned to any one ship. A regiment may be reassigned to another ship only in a port.


12.6.4 A ship may pick-up or drop-off an officer or regiment along its movement path. The ship may continue to move and continue to pick-up or drop-off an officer or regiment as long as the ship does not exceed its RMPs nor its corresponding Carrying Capacity
[EXCEPTION: Embark (See 9.0) and Disembark (See 13.0)].
12.6.5 Dropping-off and picking-up officers or regiments does not cost any RMPs.
12.6.6 An officer or regiment using Naval Transport is considered to be in full supply.
12.6.7 An officer or regiment using Naval Transport is considered to have been “Moved” this Operation Point Segment.
NAVAL MOVEMENT EXAMPLE:
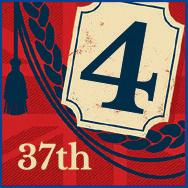
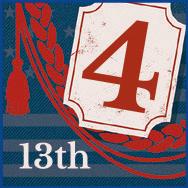
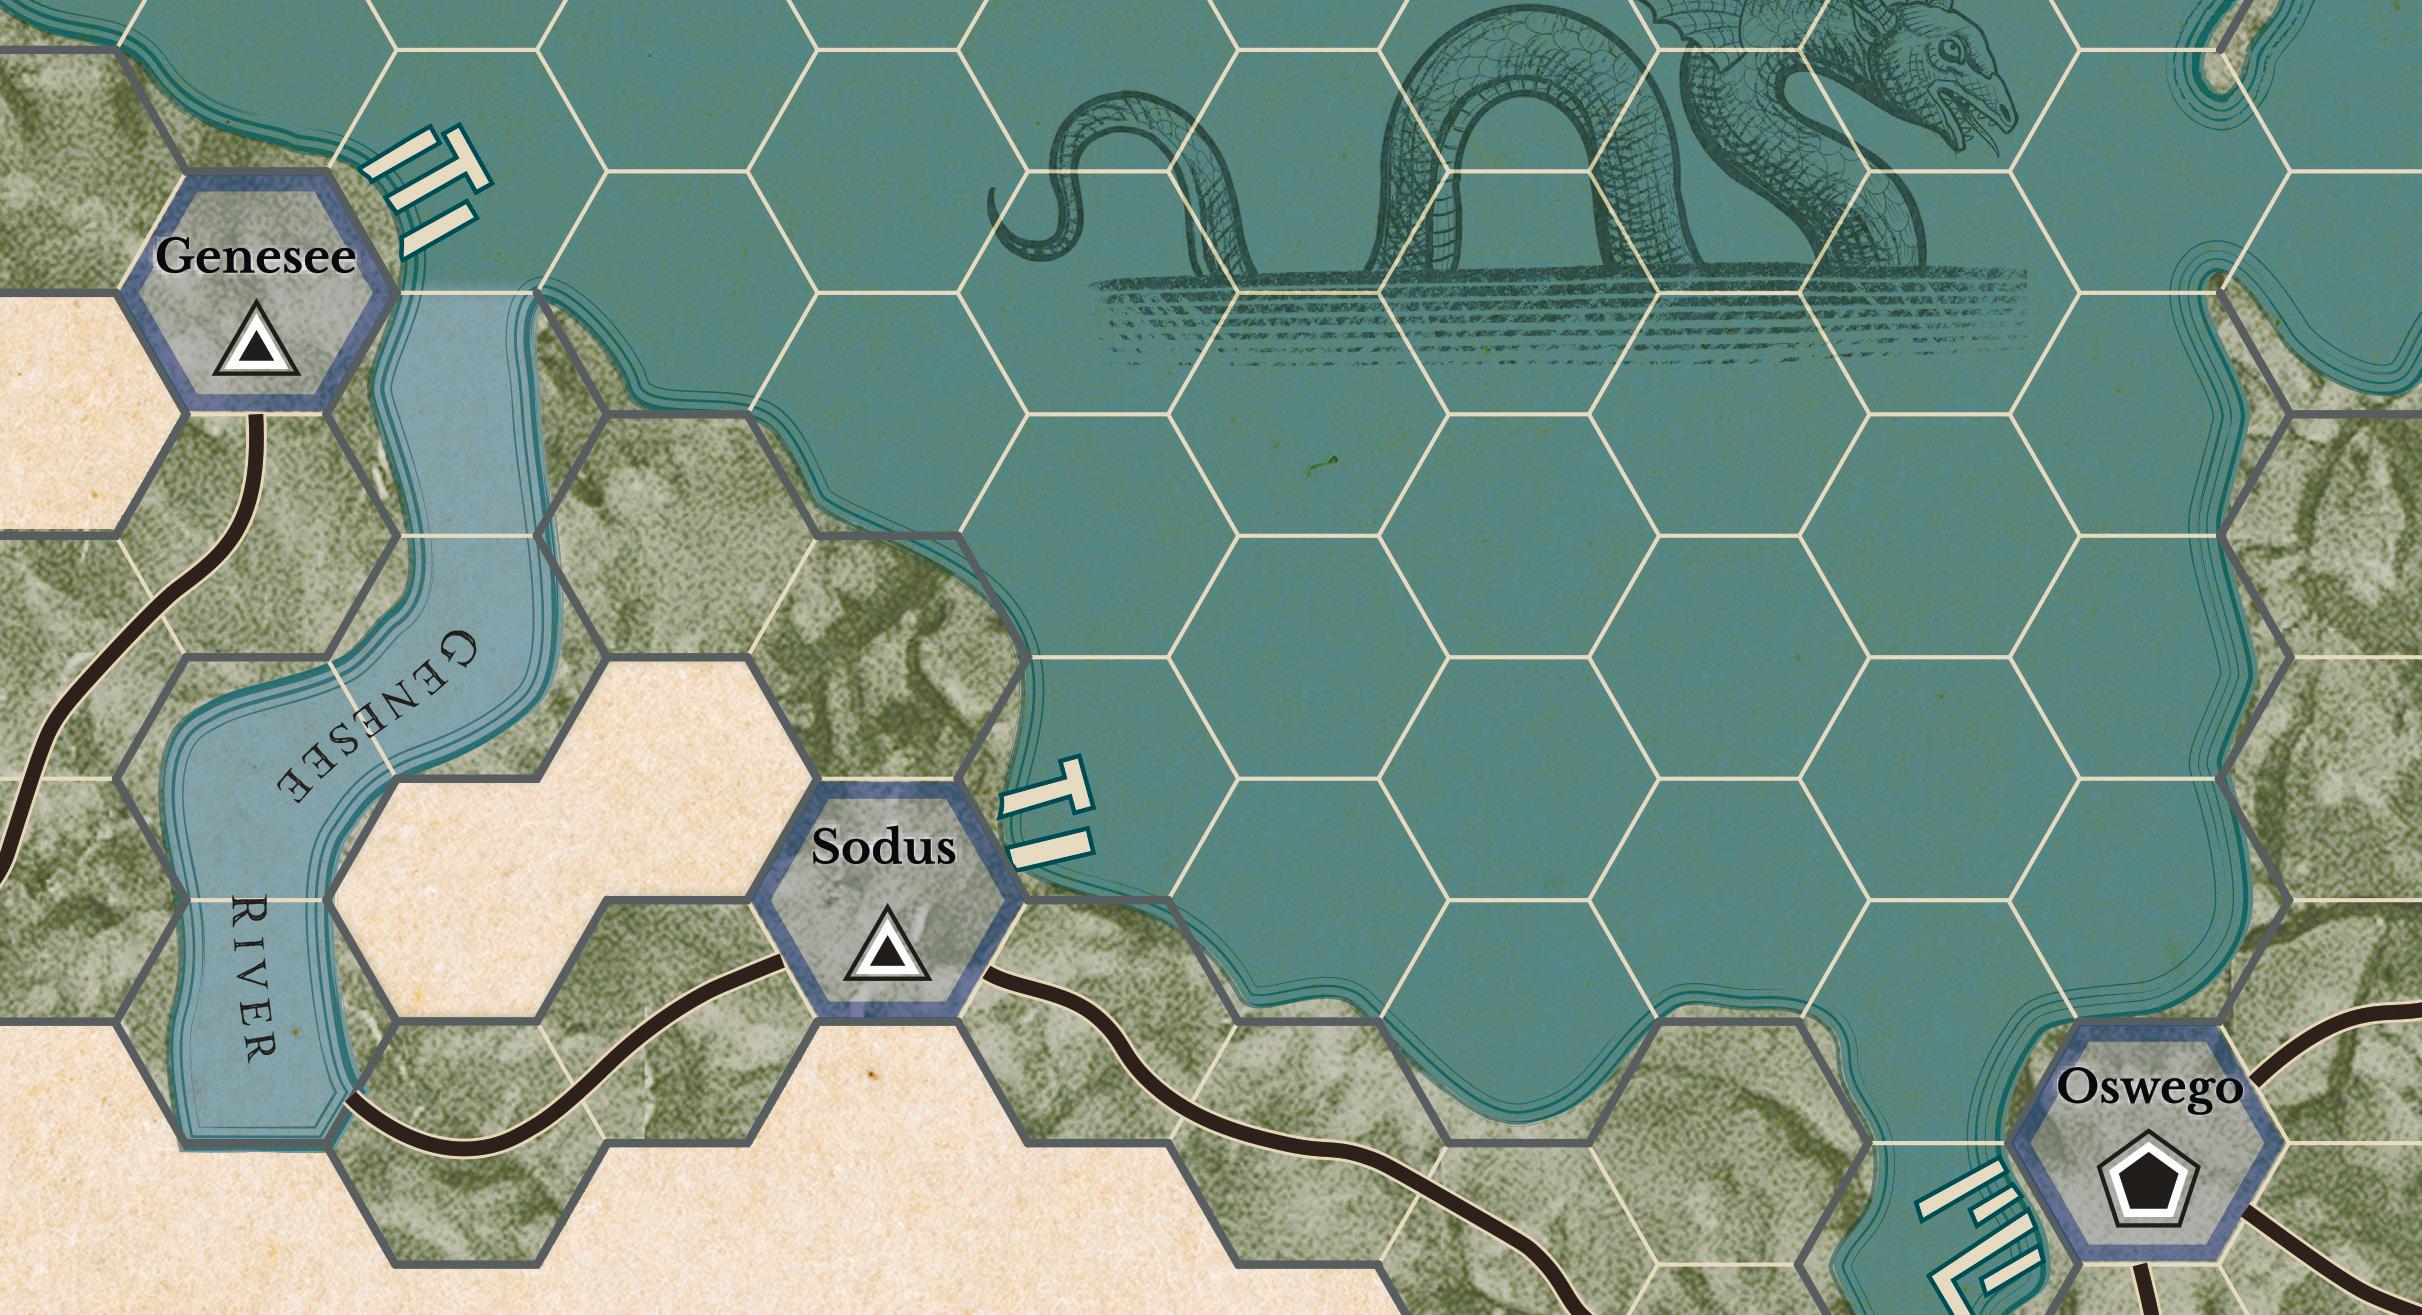
The US player performs a Unit Activation with USS Mohawk in the Port of Genesse and rolls a 2d6 result of 12 (6, 6) for 12 RMPs. The Mohawk moves into Genesse’s connected harbor, to the harbor at Sodus, and into the Port of Sodus. Here Mohawk picks-up the US 13th regiment and moves back into the Lake. Mohawk ends movement in the shore hex connected to Oswego. As there are no enemy vessels in this shore hex, the 13th Disembarks into Oswego at 0 RMP (See 13.0). Unless the British 37th regiment Evades, the US 13th will engage that unit in Combat (See 14.1 and 18.2.4.c). The Mohawk’s remaining 1 RMP is lost. The Mohawk may not move after Disembark.
© 2022 Compass Games, LLC.

20
1 2 3 4 5 6 7 8 9 10 11
War on the GREAT LAKES FRONTIER
12.6.8 Any officer or regiment using Naval Transport is eliminated and removed from the map at the end of Naval Combat if the transporting vessel is captured or the vessel is destroyed.
12.6.9 NAW regiments cannot be moved by Naval Transport.
13.0 DISEMBARK
Disembark consists of repositioning friendly officers or regiments moved by Naval Transport, Bateaux Movement, or Special Effect from a shore hex into a connected land hex. The shore hex must be free of enemy vessels. Further, an enemy PHD, if present, must be destroyed.
The cost for Disembark movement is 0 RMP even if into an enemy occupied hex.
If the officer or regiment using Disembark occupies a lake hex, that officer or regiment must Disembark into a settlement, even if “Burned” or “Dismantled.”
Neither the ships, officers, nor regiments may move after Disembark.
13.1
Evade Following Disembark
If the friendly officers or regiments using Naval Transport movement Evade from Combat following a Disembark, they must follow the Evade by Sea (See 15.5).
13.2 If using Bateaux Movement, the Evading friendly officer or regiment is placed back in the last land hex that officer or regiment occupied.
14.0
ENTERING HEXES OCCUPIED BY
UNITS OR ENEMY
[EXCEPTION: Units INSIDE a fortification may not join in the Combat.]
Further movement in this Unit Activation is not allowed.
14.1.1
Evade and Terrain Cost
If an enemy officer or regiment Evades as a result of a friendly officer or regiment entering the hex the enemy officer or regiment occupied, that hex is not considered to be “occupied by enemy units.” The Terrain movement cost is considered to be equal to the Terrain cost had the enemy officer or regiment not occupied the hex.
The friendly officer or regiment that caused the Evade may continue moving and possibly entering additional enemy occupied hexes until they have expended all of their RMPs.

14.1.2
Fortifications
If there is an enemy fortification in the hex, any enemy officers or regiments, up to the WQV of that hex, may automatically Evade INSIDE the fortification and await Siege Warfare.
Place a Siege counter on the hex.
Any remaining enemy officers or regiments occupying the hex must then Evade.
14.2 Friendly Regiment Entering a Port Occupied by Only Enemy Vessels
If a friendly regiment enters a port hex occupied only by enemy naval vessels, and the port is not an enemy controlled fortification, that port hex is not considered to be “occupied by enemy units.”
Any moving officers or regiments do not have to stop movement. [EXCEPTION: After Disembark (See 13.0)].
Constructed enemy vessels are immediately placed in the port’s connected harbor and engage in Combat any friendly vessels that occupy that harbor.
Unconstructed enemy vessels are eliminated and removed from the map.
14.2.1 Fortifications
FORTIFICATIONS
A friendly unit may enter a hex occupied by enemy units provided the moving unit pays the 4 RMPs cost to enter that hex [EXCEPTION: Following Disembark].
14.1 Friendly Regiment Entering a Hex
Occupied by an Enemy Regiment
When a friendly officer or regiment enters a hex occupied by an enemy regiment(s), the enemy regiment has the option to immediately Evade.
If the enemy regiment does not Evade, the friendly unit(s) must stop movement and engage the enemy unit(s) in Combat.
If there is an enemy fortification in the hex, at the enemy player’s option, some or all enemy vessels may be placed in the connected harbor and engage in Naval Combat any friendly vessels that may occupy that harbor. Unconstructed enemy vessels are uneffected.
Place a Siege counter on the hex.
14.3 Friendly Regiment Entering a River Hex Occupied by Enemy Vessels
Friendly officer(s) and Regular(s) using Land Movement may enter a river hex that is occupied by an enemy vessel.
The friendly unit(s) must perform a Cutting out Boarding (See 20.0).
Further movement in this Unit Activation is not allowed.
© 2022 Compass Games, LLC.
21
CONTROLLED
ENEMY
14.4 Friendly Vessel Entering a Hex Occupied by an Enemy Vessel
When a friendly vessel enters a hex that is occupied by an enemy vessel(s), the friendly vessel must stop movement and engage in Naval Combat against any occupying enemy vessels.
The friendly vessel may possibly move with any remaining RMPs following the Combat.
14.5 Friendly Vessel Entering an Enemy Protected Harbor
If a friendly vessel enters an enemy protected harbor, the friendly vessel must stop movement and engage in Combat against the PHD in addition to any enemy commodore(s) or vessel(s) that may occupy that harbor.
The friendly vessel may possibly move with any remaining RMPs following the Combat.
14.6 Friendly Vessel Entering a Harbor Connected to an Enemy Controlled Port Occupied by Enemy Vessels
If a friendly vessel(s) enters a harbor connected to a port that is occupied by an enemy vessel(s), the enemy commodore(s) and vessel(s) may immediately be placed in the harbor and engage in Combat against the friendly vessel(s).
Any enemy vessel already occupying that harbor and any PHD may join in the Combat.
14.7 Officers Alone in a Hex
A friendly officer with no accompanying friendly regiment(s) may not enter a hex occupied by an enemy unit(s), depots, nor a hex that is also an enemy controlled fortification.
Friendly leaders must immediately Evade prior to any Combat if they occupy a hex with an enemy regiment and a friendly regiment does not occupy that hex.
14.8 Commodores Alone in a Hex
If a commodore with no accompanying friendly unit occupies a hex with an enemy unit, the commodore is immediately placed at any friendly controlled, non-Isolated port that is on the commodore’s assigned Lake.
If no friendly port exists, the commodore is kept off-map until a port becomes available and then is immediately placed at that port.
15.0 EVADE
Under certain conditions, a player may evade an enemy unit by repositioning a friendly unit without playing a card or spending RMPs.
DESIGNER’S NOTE: Evade is not considered movement.
15.1 Evade Overview
15.1.1 The player owning the Evading units must move those units 1 to 3 connected hexes away from the “Original Hex.” Each hex entered must be further away, by connected hexes, from the Original Hex.
15.1.2 If one unit chooses to Evade, or must Evade, all friendly units that occupy the same hex, the Original hex, must also Evade into the same hex [EXCEPTION: Fortifications (See 14.1.2 and 14.2.1)]
15.1.3 If a unit cannot Evade into a legal hex, it is eliminated and removed from the map.
15.1.4 Depots may never Evade, except to move INSIDE a fortification.
15.2 Officers and Regiment Evade Restrictions
Evading officers or regiments may not Evade into or through a hex that is occupied by an enemy officer, regiment, depot (constructed or unconstructed), commodore, or vessel.

Evading officers or regiments may not Evade into or through an enemy controlled fortification unless it is besieged. Enemy units INSIDE a fortification do not effect Evade.
A friendly officer or regiment may only Evade over an enemy protected harbor if a friendly vessel occupies the harbor.
Officers or regiments may not Evade into or through a lake hex nor end Evade occupying a river hex unless those officers or regiments are using Evade by Sea (See 15.5).
If there is no legal hex for the officer or regiment to occupy, or if they cannot be placed INSIDE a fortification after an Evade, that officer or regiment is eliminated and removed from the map.
Attacker Evades from Combat
If the attacker Evades from Combat, the first hex the attacking officers or regiments enter must be the last hex that those officers or regiments occupied prior to Combat.
Defender Evades from Combat
If the defender Evades from Combat, the officers or regiments that evade may never enter the hex from which the attacking officers or regiments entered Combat.
Evade Into a Hex in Enemy Territory
A fully supplied friendly regiment may only Evade into a hex in enemy territory if in doing so it shortens its LOC, by RMPs, to its supply source.
© 2022 Compass Games, LLC.

22
War on the GREAT LAKES FRONTIER
A partial supplied friendly regiment that Evades into a hex in enemy territory suffers one step loss.
If more than one regiment Evades, only one of those regiments, friendly player’s choice, suffers a one step loss at the end of the Evade.
Every friendly regiment that Evades into an Isolated hex in enemy territory suffers 1 step loss. If an officer alone with no regiment(s) Evades into an Isolated hex in enemy territory, the officer is eliminated and removed from the map.
15.3
Commodore and Vessel Evade Restrictions
Friendly commodores and vessels may only Evade over lake, river or friendly controlled port hexes.
Furthermore, commodores may only Evade with a vessel.
Friendly vessels may Evade into hexes that are occupied by enemy vessels or enemy protected harbors and must then engage in Naval Combat as the “Defender.”
[EXCEPTION: Vessels may not Evade into hexes occupied by enemy vessels nor an enemy protected harbor when boarders are repelled, or after capture, the vessels are eliminated and removed from the map (See 19.4.7.b).]
Commodores or vessels forced to Evade onto or through land hexes, except ports, are placed at any friendly controlled port that is not Isolated, and is on the commodore’s assigned Lake. If no qualifying port exists, he is kept off-map until one becomes available then placed immediately.
15.4 Presqu’Il Sand Bar Restriction
Ships may not Evade over the Presqu’ll Sand Bar (See 2.2.8).
15.5 Evade by Sea
Friendly officers or regiments may Evade by Sea only if those officers or regiments begin the Evade occupying a settlement, even if “Burned” or “Dismantled,” that is connected to a shore hex and there are friendly vessels occupying the connected shore hex with the proper Carrying Capacity for Naval Transport (See 12.6)
The player using Evade by Sea may eliminate and remove from the map regiments in order to meet the Carrying Capacity of the ships.
The first hex the officer or regiment must Evade into must be the hex containing the ship. The next one or two more hexes must be connected lake or river hexes chosen by the player and accompanied by the vessels as if by Naval Transport.
The officer or regiment will be considered to be using Naval Transport following the Evade by Sea.
PLAYER’S NOTE: NAW units may not Evade by Sea.
16.0 SIEGE WARFARE
To gain control of an enemycontrolled fortification a friendly regiment(s) must conduct Siege Warfare against that fortification. The fortification can be a settlement hex with a fort or a hex with an Event generated fort.
16.1 Establishing the Siege
To establish a Siege on an enemy controlled fortification, there must be at least one friendly regiment, the “besieger,” occupying that fortification hex at the end of the regiment’s Unit Activation.
Place a Siege counter on the fortification hex.
Unlike regular Combat, Siege is not mandatory and friendly regiments may conduct a Siege against an enemy controlled fortification hex indefinitely [EXCEPTION: Winter Seasons (See 6.1)]
For Supply situation of officers and regiments INSIDE a fortification, refer to 21.3.1.
16.1.1 Maintaining
the Siege
To maintain a Siege at least one friendly regiment must be occupying the hex at all times. If any step loss, Evade, or movement of a regiment causes the fortification hex be to free of friendly regiments, remove the Siege counter from the hex.
16.1.2 Relieving the Siege


When an enemy regiment attempts to relieve a Siege by engaging the friendly besieger in Combat, enemy officers or regiments INSIDE the fortification may not join in that Combat.
If the enemy relieving regiment subsequently Evades, any enemy officers or regiments INSIDE the fortification must remain INSIDE the fortification.
16.2 Officers and Regiments Sally from INSIDE of a Fortification
If both players have officers or regiments occupying a besieged fortification hex, the besieged officers and regiments INSIDE the fortification may not exit that fortification hex unhindered. They must “sally” from the fortification and engage the besieging units in Combat [EXCEPTION: See 16.2.6 below]
16.2.1 Sallying officers or regiments are considered Isolated for this Combat.

16.2.2 Officers may not sally without a regiment.
16.2.3 In Determining Battle Strength for this Combat, the sallying officers and regiments are considered to be “occupying” a River Terrain hex and the besieger is considered to be occupying a Clear Terrain hex. (See 18.4.3).
23
© 2022 Compass Games, LLC.
16.2.4 If the besieging officers and regiments Evade as a result of the Combat caused by the sally, conduct their Evade as normal.
16.2.5 If the sallying officers and regiments Evade as a result of the Combat, the sallying units are placed back INSIDE the fortification.
16.2.6 The besieged fortification is in a port hex. Using Naval Movement, vessels friendly to the besieged officers and regiments may enter the besieged port or its connected harbor and perform Naval Transport or Evade by Sea (See 15.5).
16.3 Assault on Enemy Fortification
The besieger conducts an assault on an enemy controlled fortification during a Siege Warfare Activation.
16.3.1
Restrictions
To conduct Siege Warfare during an Action phase, a Siege counter must have been placed in a previous Action phase and the player controlling the besieger officers or regiments must conduct a Siege Warfare Activation during their Operation Point Segment.
Besieger officers or regiments in Quebec, Albany, Pittsburgh or Cincinnati may only roll on the Siege Warfare Table if the officers or regiments were in full supply when the Action Phase began.

16.3.2
Calculate Siege Combat Strength and DRM
In the first phase of Siege Warfare, the besieger officers and regiments, and the officers and regiments INSIDE the fortification each calculate their Siege Combat Strength by finding the sum of the Combat Strength of their respective regiments.
Each player consults the Siege Warfare Table on the Player Aid Matrix to determine their applicable DRM.
16.3.3
Determine Siege Warfare Table Results
In the second phase, each player rolls 1d8 adding any DRM found on the Siege Warfare Table.
Each player cross references their Siege Combat Strength, along the top, with the modified die roll, along the left side, to determine the number of step losses the enemy player suffers.
Siege Warfare die rolls are simultaneous.
a. Step Loss
All number outcomes on the Siege Warfare Table are step losses suffered by the enemy player.
The regiment that suffers the step loss is selected by the player owning the unit.
If the fortification is in friendly territory, the fortification provides 1 step loss and 0 Combat Strength to the defending friendly player. The friendly player will only suffer that step loss if there is no regiment INSIDE the fortification to suffer a step loss.
DESIGNER’S NOTE: Players do not need to garrison a regiment at fortifications within friendly territory; the presence of a guarding garrison is implied.
If this fortification is besieged by an enemy force, the
fortification will roll on the 0 column of the Siege Table and may suffer 1 step loss before surrender.
b. Surrender and Change of Control
An enemy controlled fortification will surrender and change control to friendly besieger if either of these two instances occur.
i. The number of enemy regiment and fortification steps are reduced to 0.
[EXCEPTION: If the fortification is friendly controlled and in friendly territory and both players have been reduced to 0 steps, the fortification does not “Surrender” and the friendly player retains control of the fortification.]
ii. In a single Siege Warfare Activation, the regiments INSIDE the fortification suffer step losses greater than the step losses suffered by the besieger.
[EXCEPTION: Quebec, Albany, Pittsburgh and Cincinnati only surrender if reduced to 0 steps.]
c. If the result is “Surrender,” the besieging player gains control of the fortification hex.
Any Event Card designated Fort counters, enemy depots, officer, or regiments INSIDE the fortification, and any unconstructed vessels in the fortification hex are immediately eliminated and removed from the map.
Any constructed vessels are immediately placed in the connected harbor and engage in Combat any friendly vessels that may occupy that harbor with no PHD for either player.
d. If the result is other than “Surrender,” control of the hex does not change.
17.0 COMBAT OVERVIEW
Combat occurs when friendly units and enemy units occupy the same hex. If Land Combat and Naval Combat occur during the same OP play, the Naval Combat is resolved first.
The three types of Combat engagements in 1812! are described in the following rules:
• Land Combat—Combat between US regiment(s) and British regiment(s)—See 18.0
• Naval Combat—Combat between US vessel(s) and British vessel(s)—See 19.0
• Cutting out Boarding—Combat between friendly regiment(s) and enemy vessel(s)—See 20.0
© 2022 Compass Games, LLC.

24
War on the GREAT LAKES FRONTIER
16.3.4 SIEGE EXAMPLE:
The British regiment 2/41st (Combat Strength: 3) under Riall (Defense DRM: 1) occupy Fort Ticonderoga.

Previously, the US moved the USS Eagle II into Fort Ticonderoga’s harbor.
In the following Turn, the US moved the 21st and 22nd regiments onto the Fort hex and placed a Siege Warfare counter on the Fort.
The British choose not to Evade.

In the current turn, the US spends 1 OP for Siege Warfare and begins their Siege with the 21st regiment (CS: 5) and the 22nd regiment (CS: 5) under Pike (Attack DRM: 1).


Both sides calculate their total Siege Combat Strength:
US: CS = 10 (5 + 5) plus a +2 DRM (Pike Attack DRM 1 + Eagle II DRM 1)


British: CS = 3 plus a +2 DRM (Control of Fortification DRM 1 + Riall Defense DRM 1)


The US rolls a 1d8 under the 10-14 column obtaining 6 (1d8: 4: plus DRM +2).

The British simultaneously roll a 1d8 under the 1-3 column obtaining 9 (1d8: 7 plus DRM +2).
The US player chooses both regiments to each suffer 1 step loss.
The British player chooses the 2/41st to suffer 2 step losses and it is eliminated. With the elimination of the British regiment, the US takes control of Fort Ticonderoga. Riall is eliminated and removed from the map.

© 2022
25
Compass Games, LLC.
18.0 LAND COMBAT
When a friendly land unit(s), (the attacker), enters a hex occupied by an enemy land unit(s) (the defender), and the enemy unit(s) does not Evade, the friendly unit(s) must end its movement and immediately engage the enemy unit occupying the hex in Combat.
RMPs not used by the attacker prior to entering the hex for Combat are lost.
A hex may be the subject of more than one Combat per Action Phase as long as all OPs are paid.
18.1 Sequence of Land Combat:
The sequence of Land Combat outlines the structure and order in which Land Combat must be followed:
18.2 Deployment in Battle Line and Choice of Combat Posture
18.3 Play of Pre-Combat Cards
18.4 Volleys and Rounds
18.5 Land Combat Interphase
18.6 Play of Post-Combat Cards
18.2 Deployment in Battle Line and Choice of Combat Posture
Each player secretly places each of his officer(s) and regiment(s) in one of the three different Boxes as determined by the Terrain in which the Combat takes place, and by the Firing Position and Combat Box Initial Placement Priority.
A Combat Hex counter is provided to mark the originating hex of the attacking and defending officer(s) and regiment(s).


Proceed to Play of Pre-Combat Cards (See 18.3).
18.2.1 Land Combat Display
Each player is provided a Land Combat Display on which to deploy their officers and regiments for Combat.
The East and West Maps have areas designated for placement of the Combat Displays.
Each player’s Land Combat Display contains:
a. 3 Firing Positions (Left, Center, and Right)
i. Lead Regiment Box
ii. 3 Support Boxes
b. 1 Reserve Box
c. 1 Routed Box
d. 1 Officer Box
18.2.2 All regiments in the Combat must occupy a Lead Regiment Box, a Support Box, the Reserve Box, or the Routed Box.

a. Lead Regiment Box
Only one regiment may occupy each Lead Regiment Box.
b. Support Box
Only one regiment may occupy each Support Box in the Left, Center, and Right group of Support Boxes.
Each Regular, Militia and NAW in the Support Box has a Support Strength equal to 1.
c. Reserve Box
An unlimited number of regiments may occupy the Reserve Box.
d.
Officer Box
All officers must occupy the Officer Box.
An unlimited number of officers may occupy the Officer Box.
18.2.3
Firing Position and Combat Box Initial Placement Priority
Players place all their regiments in the Reserve Box then move their regiments to Lead Regiment Boxes and Support Boxes with the following restrictions:
a. Players must first move a friendly regiment from the Reserve Box to the Lead Regiment Box of the Center Firing Position.
b. Players may move a friendly regiment from the Reserve Box to the Lead Regiment Box of the Left Flank Firing Position and to the Right Flank Firing Position.
c. Players may move a friendly regiment from the Reserve Box to the Support Boxes of the Center Firing Position.
i. Players may move a friendly regiment from the Reserve Box to the Support Boxes of the Right Firing Position but only if there is a regiment in the friendly Lead Regiment Box of the Right Flank Firing Position.
ii. Players may move a friendly regiment from the Reserve Box to the Support Boxes of the Left Firing Position but only if there is a regiment in the friendly Lead Regiment Box of the Left Flank Firing Position.
18.2.4
Position Strength and Terrain Effects on Combat
Consider the terrain of the hex in which the Combat is taking place, except when the attacker is entering Combat following a Disembark or from a river hex.
a. Clear Terrain (See 2.2.1)
Both players may occupy 1 to 3 Support Boxes in each Firing Position.
The Position Strength of each Left, Center, and Right Firing Positions is the sum of the Combat Strength of the regiment in the Lead Regiment Box and the Support Strength of up to three regiments in the same named Support Boxes.
EXAMPLE: The Position Strength of the British Center Firing Position is 7: 4 (Combat Strength of the 37th regiment) plus 1 each for the three regiments in the Center Support Box.
© 2022 Compass Games, LLC.
26
War on the GREAT LAKES FRONTIER

18.2.3 EXAMPLE: The deployment of British and US regiments in the Combat Boxes with Clear Terrain

NOTE: British counters are inverted for this example.


b. Smaller Settlements and Forested Terrain (See 2.2.2 and 2.2.3)

Both players may only occupy 1 or 2 Support Boxes in each Firing Position.
The Position Strength of the Left, Center, and Right Firing Positions is the sum of the Combat Strength of the regiment in the Lead Regiment Box and the Support Strength of up to 2 regiments in the same named Support Boxes.
EXAMPLE: Assume this deployment is in Forested Terrain. Only Prescott and the 89th regiment can be placed in the Center Support Box.

The Position Strength of the British Center Firing Position is 6: 4 (Combat Strength of the 37th regiment) plus 1 each for only two regiments in the Center Support Box.


c. Disembark and River
If the attacker enters Combat following a Disembark or enters from a river hex, the Position Strength of the attacking regiments in the Left, Center, and Right is the Combat Strength of the regiment in the Lead Regiment Box.

The attacker may not occupy any Support Boxes. The defender follows the rules covering the terrain they occupy.
EXAMPLE: The Position Strength of the British Center Firing Position is 4: 4 (Combat Strength of the 37th regiment). The British cannot place units in any Support Boxes.
27
© 2022 Compass Games, LLC.
18.2.5 Choice of Combat Posture
Each player consults the Combat Posture Matrix on the Player Aid and secretly chooses one of five different Combat Postures listed below.
PLAYER’S NOTE: Corresponding Posture cards are provided for the attacker and the defender to choose and hold out as a note until the player is ready to declare posture and present their battle line.

Each Combat Posture provides the player an advantage.
a.

b.

Line Advance Advantage
The friendly player choosing Line Advance may negate the enemy players Refused Flank Advantage.
Probe Advantage
The friendly player choosing Probe may negate the enemy players Frontal Charge Advantage or Feigned Retreat Advantage.
the side of the Combat Posture Matrix) to determine the attacker’s and defender’s Combat Posture Battle Dice.
18.3 Play of Pre-Combat Cards
Both players may play, from their hand, a maximum of one PreCombat card.

The attacker plays his Pre-Combat card before the defender plays his Pre-Combat card.
Follow the instructions on the card after both cards have been played.
Proceed to Volleys and Rounds
c.
d.
Refused Flank Advantage

The friendly player choosing Refused Flank receives a +2. Battle Strength Modifier if the enemy player qualifies for a Flanking Volley Battle Strength Modifier.
Feigned Retreat Advantage
The friendly player choosing Feigned Retreat receives a +1 Battle Strength Modifier to the Center Firing Position if the friendly player also qualifies for a Flanking Volley Battle Strength Modifier.
e.
Frontal Charge Advantage

The friendly player may opt to repeat Volley for a second time prior to Combat Interphase.
f. Revealing of Battle Line and Combat Posture
After both players have deployed their battle lines and chosen their Combat posture, both players simultaneously reveal Battle Lines and announce their Combat Posture.
The players then cross reference the attackers chosen Combat Posture (across the top of the Combat Posture Matrix) with the defenders chosen Combat Posture (down
18.2.5
EXAMPLE:
Attacker Combat Posture:

Line Advance vs. Probe
Battle Dice: 2d6
18.4 Volleys and Rounds
Combat is conducted in Rounds. Each Round is composed of multiple volleys.
18.4.1 Volley
a. The Center Firing Positions simultaneously fire one volley at each other.
b. The attacker’s Right Flank Firing Position and the defender’s Left Flank Firing Position simultaneously fire one volley at each other.

Defender Combat Posture: Probe vs. Line Advance
Battle Dice: 1d6 and 1d8
© 2022 Compass Games, LLC.
28
War on the GREAT LAKES FRONTIER
c. The attacker’s Left Flank Firing Position and the defender’s Right Flank Firing Position simultaneously fire one volley at each other.
18.4.2
Volley Procedure
Each player calculates the Battle Strength for the regiment(s) in the Firing Position.
a. The Battle Strength is the sum of the Combat Posture Battle Dice (See 18.2.5.f) and any of the applicable Battle Strength Modifiers described below in 18.4.3—18.4.8 and on the Player Aid.
b. The Difference between the friendly Battle Strength and the enemy Battle Strength is calculated subtracting the lower from the higher to obtain the result of the volley.
i. If the Difference is 0, there is No Effect.
[
EXCEPTION: When the defender is in Clear Terrain or the attacker has entered from River Terrain or following a Disembark, attacker suffers 1 step loss (See 18.4.3).]
ii. If the Difference is 1–9, the side with the lower Battle Strength suffers 1 step loss to the regiment occupying the Lead Regiment Box.
iii. If the Difference is ≥ 10, the side with the lower Battle Strength suffers 1 step loss to the regiment that occupies the Lead Regiment Box. A second step loss is also suffered and may come from any regiment in the Combat.
18.4.3 Clear Terrain, River Terrain or following Disembark
For Combat that occurs in a Clear Terrain hex, if the attacker entered that Combat from a River Terrain hex or after a Disembark, and the Difference between Battle Strengths is 0, then the attacker’s regiment occupying the Lead Regiment Box suffers 1 step loss.

18.4.4
Flanking Volley
During a volley by the Center Firing Position, if a friendly regiment occupies the Right Flank Firing Position and no enemy regiment occupies the enemy Left Flank Firing Position, the friendly player may add to the Center Firing Position Volley +2 for the regiment occupying the Lead Regiment Box of the Right Flank Firing Position and may add +1 per regiment occupying any Support Box of the Right Flank Firing Position.
During a volley by the Center Firing Position, if a friendly regiment occupies the Left Flank Firing Position and no enemy regiment occupies the enemy Right Flank Firing Position, the friendly player may add to the Center Firing Position Volley +2 DRM for the regiment occupying the Lead Regiment Box of the Left Firing Position and add +1 DRM per regiment occupying any Support Box of the Left Flank Firing Position.
CONTINUING THE 18.2.3 DEPLOYMENT EXAMPLE:
The Position Strength of the British Center Firing Position is 10: 4 (Combat Strength of the 37th regiment), plus 1 each for the three regiments in the Center Support Box, plus 2 for the Flanking Volley provided by the unopposed Quebec Militia in the Left Flank Firing Position, and plus 1 for Meuron regiment in the Left Support Box.
18.4.5
Tecumseh Leads the Shawnee
If the Shawnee NAW is in the Lead Unit Box and Tecumseh is in the Officer Box and not the commander, Tecumseh may add his Attack/Defense DRM to each volley of every round of this Combat.
18.4.6 Offshore Support
If at least 1 friendly ship occupies a shore hex connected to the Combat hex, that player receives a +1 DRM to each volley of every round of this Combat.
18.4.7 Reserve Advantage
If the difference in the number of regiments in the US Reserve Box and the British Reserve Box is 2 or more, the player with more regiments in their Reserve Box receives a +1 DRM to each volley of every round of this Combat.
18.4.8 Partial Supply and Isolation
A unit will have a -1 DRM if it is in Partial Supply.
A unit will have a -2 DRM if it is Isolated.
When the attacker is tracing supply during Combat, the first hex traced through must be the hex from which the attacker entered Combat.
When the defender is tracing supply during Combat, the first hex traced through may be any hex except the hex from which the attacker entered Combat.
Neither the attacker officers or regiments nor the defender officers or regiments are considered when tracing supply during Combat.
18.4.9 See the Continuing Example of Deployment on Next Page
18.4.10 Complete Round
The first round of Combat is complete after units in the Lead Regiment Box of the Right, Center, and Left Firing Positions have conducted one volley apiece.
Proceed to the Land Combat Interphase.
a. If either player chose the Combat Posture Frontal Charge, that player may now choose to perform a second Round of Combat, repeating Volley and Rounds (See 18.4).
b. After the second round is complete, proceed to Land Combat Interphase.
©
29
2022 Compass Games, LLC.
18.4.9 CONTINUING THE 18.2.3 EXAMPLE: Both are in Clear Terrain and in Full Supply.


In this Volley Segment, the British (the attacker) choose Line Advance and have a total of +10 DRM in the Center Firing Position (Combat Strength of regiment in the Lead Unit Box = +4; +1 per regiment in the Center Support Boxes = +3; Flanking Volley: Left Flank Position = +2; Left Flank Support Box = +1).
The US (the defender) chooses Probe and has a total of +7 DRM in the Center Firing Position (Combat Strength of regiment in the Lead Unit Box = +4; +1 per regiment in the Center Support Boxes = +1; Reserve Box Advantage is 2 or more = +1; Officer Defense DRM = +1). Calculating the Difference, the British have a final +3 DRM (10 – 7) and the US a final DRM of 0 (the final DRM is applied only to the player with the higher, final DRM). The British roll a 2d6 result of 10 (4, 6) +3 DRM yielding a 13 Battle Strength. The US rolls a 1d6 result of 3 and a 1d8 result of 7 +0 DRM yielding a 10 Battle Strength
The Difference between Battle Strengths is calculated subtracting the lower from the higher to obtain the result of the volley. The Battle Strength Difference in this volley is 3 (13 – 10). This results in the US player’s regiment in Lead Regiment Box of the Center Firing Position suffering 1 step loss. The US 18th regiment is flipped to its Reduced-Strength side.


With the Center Volley complete, the British Right Flank and US Left Flank exchange volleys. The British (Line Advance) have a total of +5 DRM in the Right Flank Firing Positon (Combat Strength = 5). The US (Probe) has a total of +6 in the Left Flank Firing Position (Combat Strength = 4; Reserve Box Advantage is 2 or more = +1; Officer Defense DRM = +1). Calculating the Difference, the US has a final +1 DRM (6 – 5) and the British a final DRM of 0 (the final DRM is applied only to the player with the higher, final DRM).
The British roll a 2d6 result of 2 (1, 1) +0 DRM yielding a 2 Battle Strength. The US rolls a 1d6 result of 4 and a 1d8 result of 8 +1 DRM yielding a 13 Battle Strength.
The Battle Strength Difference of 11 (13 – 2) requires the British Right Flank Strength to suffer 1 step loss to the regiment in the Right Lead Regiment Box. The Voltigeurs regiment is flipped to its Reduced-Strength side. A second step loss is also suffered by any regiment in the Combat. The Prescott regiment is flipped to its Reduced-Strength side completing this round of Combat.


© 2022 Compass Games, LLC.


30
1 1 1 1 1 1 1 2 4 4 4 5
War on the GREAT LAKES FRONTIER
18.5 Land Combat Interphase
Land Combat Interphase is conducted in three steps and must be followed in this order:
18.5.1 Evade Check
18.5.2 Adjusting the Battle Line
18.5.3 End-of-Combat Check
18.5.1
Evade Check
Both sides secretly choose to Evade or to continue Combat. Both sides then simultaneously reveal their decision.
PLAYER’S NOTE: Corresponding Evade and Combat cards are provided for the players to choose and hold out as a note until they are ready to reveal their decision.

a. If both the attacker and defender declare they will continue Combat, proceed with Adjusting the Battle Line (See 18.5.2).
b. If the attacker declares he will continue Combat and the defender declares he will Evade, the defender must Evade ending the Combat.
The attacker remains in the Combat hex and may not move any further this Unit Activation.
Proceed to Play of Post-Combat Cards (See 18.6).
c. If the attacker declares he will Evade and the defender declares he will continue Combat, the attacker must Evade and may move no further this Unit Activation.
Proceed to Play of Post-Combat Cards (See 18.6).

d. If both the attacker and defender declare they will Evade, the Combat is over.
The attacker must Evade followed by the defender Evading. The attacker may not move any further this Unit Activation. Proceed to Play of Post-Combat Cards (See 18.6).
PLAYER’S NOTE: Fortifications
If there is a friendly fortification in the hex, any friendly officers, regiments or depots, up to the WQV of that hex, may Evade, INSIDE the fortification and await Siege Warfare.

Any remaining friendly officers or regiments occupying the hex Evade.
18.5.2 Adjusting the Battle Line
Both players may make limited changes to their Battle Line. All of the following actions may be taken in any order and as many times as desired, British player first followed by the US player.
a. Players may move regiments from any Lead Regiment Box to the Routed Box.
b. Players must move a regiment from a Support Box into
the Lead Regiment Box of same named Firing Position if there is no regiment in that Lead Regiment Box.
c. Players may move any regiment from the Reserve Box to the Lead Regiment Box of any Firing Position.
d. If there is a regiment in the Lead Regiment Box, players may move regiments from the Reserve Box to any Support Box allowed by the Terrain.
e. After adjusting battle lines, players proceed to End-ofCombat Check.
18.5.3 End-of-Combat Check
Combat ends if one player does not have a regiment in the Lead Regiment Box of the Center Firing Position. That player must Evade and the opposing player remains occupying the Combat hex.
a. Combat also ends at the completion of any round in which both players have no regiment in the Lead Regiment Box of the Center Firing Position, in this case the attacker must Evade and the defender remains occupying the Combat hex.
b. If Combat ends by Evade or End-of-Combat Check, proceed to Play of Post-Combat card.
c. If Combat does not end return to Volleys and Rounds (See 18.4).
18.6 Play of Post-Combat Cards
At the completion of all Combat, both players may play a maximum of one Post-Combat card.
The attacker plays his Post-Combat card before the defender plays his Post-Combat card.
The Special Effect is considered to be played prior to any Evade.
Follow the instructions on the card after both cards have been played.
Combat is now complete, proceed with the remainder of the Action Phase.
Return to Operation Point Segment (See 5.4.1).
31
© 2022 Compass Games, LLC.
19.0
NAVAL COMBAT

When a friendly vessel(s), (the attacker), enters a hex occupied by an enemy vessel(s) or by a PHD, (the defender), the friendly vessel(s) must stop movement and immediately engage in Combat the enemy vessel(s) occupying the hex.
PLAYER’S NOTE: A PHD does not Evade (See 19.5.2.b). See also 14.5 and 14.6 for rules governing a friendly vessel(s) entering an enemy controlled harbor.

At the conclusion of the engagement, if the friendly vessel(s) survives, it may continue movement expending any remaining RMPs (See 14.4).
A hex may be the subject of more than one Naval Combat per Action Phase as long as all OPs are paid.
Supply is not considered during Naval Combat.
19.1 Sequence of Naval Combat
The Sequence of Naval Combat outlines the structure and order in which Naval Combat progresses and must be followed:
19.2 Play of Naval Pre-Combat Cards
19.3 Deployment of Vessels in Battle Line
19.4 Broadsides and Rounds
19.5 Naval Combat Interphase
19.6 Play of Naval Post-Combat Cards
19.2 Play of Naval Pre-Combat Cards
Both players may play from their hand, a maximum of one Naval Pre-Combat card. The attacker plays his Naval Pre-Combat card before the defender.
Follow the instructions on the card after both cards have been played.

Proceed to Deployment of Vessels in Battle Line.
19.3 Deployment of Vessels in Battle Line
Both players place each friendly commodore and vessel in either a Lead Vessel column or the Reserves column, as determined by the Vessel Initial Placement Priority (See 19.3.2).
19.3.1 Naval Combat Display
Both players are provided a Naval Combat Display on which to deploy their commodores and vessels engaged in Combat.
Any officer or regiment using Naval Transport is placed under the vessel carrying those units.
There is one vessel Reserves column and an unlimited number of Lead Vessel columns although only Lead Vessel columns A through J are shown on the Naval Combat Display.
All commodores and vessels engaged in the Combat must occupy either a Lead Vessel column or the Reserves column.
PLAYER’S NOTE: In the unlikely event both players are committing > 10 vessels to the Combat, they may improvise to provide the additional columns.
A Combat Hex counter is provided to mark the originating hex of the attacking and defending commodore(s) and vessel(s) counters that the players move to the Naval Combat Display card.

a. Lead Vessel Column
Only one vessel may occupy each Lead Vessel column.
b. Vessel Reserves Column
An unlimited number of vessels may occupy the Vessel Reserves column.
The PHD counter is always placed in this column.
c. Vessel Damage
Sections
The boxes under the Lead Vessel and the Reserves columns contain Vessel Damage Sections 1 through 5. The Vessel Damage Sections mark the progressive damage a vessel receives in Combat.
If the die roll is greater than the HD value of the target vessel, or the value of the PHD, a hit is scored. Move the vessel or PHD counter to the next higher Damage Section box.
An unlimited number of vessels may occupy any Damage Section box of the Vessel Reserves column.
19.3.2 Naval Combat Box Initial Placement Priority
Players must place each of their vessels and PHD on the Combat Display under the following restrictions:
a. The vessel with the highest HD value is placed in Lead Vessel column A; the next vessel with same or lower HD value is placed in Lead Vessel column B. Continue placing vessels in this order through the remaining C through J columns.
If more than one friendly vessel has the same HD, the friendly player determines the placement column.
© 2022 Compass Games, LLC.

32
War on the GREAT LAKES FRONTIER
b. If a player has a vessel in a Lead Vessel column and there is no opposing vessel in the same lettered Lead Vessel column, that vessel is moved to the Reserves column. That is, a friendly vessel must occupy the Reserves column if no enemy vessel occupies the same lettered Lead Vessel column.
c. When the vessel is initially placed, if it is on its FullStrength side, place the vessel in the Lead Vessel column, Damage Section 1 box.
d. If a Gunboat (See 3.2.1) is on its Reduced-Strength side, place it in Damage Section 2 box.


If a Ship is on its Reduced-Strength side, place it in Damage Section 3 box.

e. A PHD counter is placed in the Reserves column, Damage Section 1 box.
f. Each commodore is assigned to a vessel of the owning player’s choice and placed on top of that vessel.

PLAYER’S NOTE: A PHD, destroyed or not, is always brought to full HD value when the port becomes friendly controlled and the connected harbor is free of enemy vessels (See 3.3.b).


With all vessels deployed, proceed to Broadside and Rounds.
19.4 Broadsides and Rounds
Naval Combat is conducted in Rounds. Each Round is composed of multiple Broadsides.


19.4.1 Broadsides
Opposing vessels in the same lettered Lead Vessel column fire once at each other.
Broadside fire is simultaneous. [EXCEPTION: Any vessel may fire at the PHD in the Reserves column instead of firing at the same lettered Lead Vessel column.]
a. Broadsides Procedure
Each friendly vessel in a Lead Vessel column and the enemy vessel in the same lettered Lead Vessel column fire

19.3.2 EXAMPLE: Deployment of commodores and vessels on the Naval Combat Display


NOTE: British counters are inverted for this example.


© 2022 Compass Games, LLC.

33
simultaneously at each other by rolling the number and type of dice equal to the vessel’s guns (See 3.2.2.a).
The player compares the natural die roll of each die used to the HD value of the target vessel or PHD.

As firing is simultaneous, all damage is recorded after both vessels have fired.
i. If the die roll of any die used is ≤ the HD value of the vessel or PHD there is No Effect.
ii. If the die roll of any die used is > the HD value of the vessel or PHD, one hit is scored. Move the vessel or PHD to the next higher Damage Section box.
iii. When a ship on its Full-Strength side enters Damage Section 3 box, flip the ship counter to its ReducedStrength side.
iv. If a Gunboat on its Full-Strength side enters Damage Section 2, flip the counter to its Reduced-Strength side.
v. A vessel is removed for possible capture if that vessel occupies the Damage Section box equal to its HD and suffers another hit.
vi. A PHD is destroyed if the PHD occupies the Damage Section equal to its HD and suffers another hit.

Repeat the Broadside Procedures for each remaining vessel engaged in this Combat.
19.4.2
PHD Fire
After all Broadsides have been taken, any PHD in the Reserves column may fire at an enemy vessel in any Lead Vessel column or at any vessel in the Reserves column (See 3.3 for PHD Gun Value and HD Value).
19.4.3 Reserve Fire
After any PHD Fire, each friendly vessel in the Reserves column may fire at an enemy vessel in any Lead Vessel column or at the PHD.
19.4.4
The Presqu’Il Sand Bar
Any friendly ship that enters Combat by directly crossing The Sand Bar at Presqu’Il Bay suffers -1 to that friendly ship’s HD in each Broadside of that Combat (See also 15.4).
19.4.5 Complete Round
One Round of Naval Combat is complete after all same lettered Firing Positions have conducted one Broadside each, and any

19.4 EXAMPLE - FIRING ON BROADSIDES AND ROUNDS: [Hits on US vessels are noted in blue, on British vessels in red.]
HMS Queen Charlotte (HD 4): 1 black cannonball and 3 white cannonballs = 1d8 (rolling 2) and 3d6 (rolling 3, 5, 8).

In addition, Commodore Barclay: 1 white cannonball = 1d6 (rolling 6).

US Brig Niagara (HD 4): 3 black cannonballs and 1 white cannonball = 3d8 (rolling 1, 3, 7) and 1d6 (rolling 2).


US Brig Niagara, taking 3 hits, is moved to Damage Section 4 and flipped to its Reduced-Strength side. HMS Queen Charlotte taking 1 hit is moved to Damage Section 2.
19.4.3
EXAMPLE - RESERVE FIRE:
HM Schooner Chippewa: 1 white cannonball = 1d6 (rolling 5).

US Brig Niagara taking 1 hit is moved to Damage Section 5. As this Damage Section equals one more than the Niagara’s HD value, it is removed for possible capture (See 19.4.7).
To determine the outcome of the capture attempt, the friendly player rolls 1d6. There are no modifiers. The roll is 5: the Colors are struck and the vessel captured. Replace the Niagara’s counter with the HM Brig Niagara on its Reduced-Strength side. Evade is not required as no US vessels remain in this hex.
© 2022 Compass Games, LLC.
34
War on the GREAT LAKES FRONTIER
PHD Fire and any Reserve Fire have been conducted.
Check for Mutual Destruction and for possible capture.
19.4.6 Mutual Destruction
Occasionally, the friendly and enemy vessels in the same lettered Lead Vessel column are both removed for possible capture in the same broadside.
Players compare the HD values of their vessels:
a. If the difference in HD values is 2 or more, the vessel with the lesser HD value is removed for possible capture (See 19.4.7) and the vessel with the greater HD is placed on its Reduced-Strength side in the Damage Section equal to its HD value.
b. If the difference in HD values is 1, the player with the vessel having the lower HD value rolls 1d6 and the player with the greater HD value rolls 1d8.
+1 DRM if a commodore is assigned to the vessel.
If the difference in HD values is 0, both players rolls 1d6.
+1 DRM is added to the die roll if a commodore is assigned to the vessel.

The vessel owned by the player rolling the lower sum is removed for possible capture (See 19.4.7) and the vessel owned by the player rolling the greater sum is placed on its Reduced-Strength side in the Damage Section equal to its HD value. If the sums are equal, reroll.
19.4.7 Vessel Capture
The friendly player rolls 1d6 applying the following DRM for each enemy vessel that was removed for possible capture.
a. DRM:
–1 If any commodore is assigned to the vessel being captured.
b. Results:
i. Modified roll is ≤ 1, the boarders are repelled. If the hex is occupied by enemy vessels or PHD then the vessel must immediately Evade into a hex not occupied by enemy vessel(s) nor by a PHD. If it cannot Evade, it is eliminated and removed from the map.
ii. Modified roll is 2–4, the vessel is burned by the captors, eliminated, and removed from the map.
iii. Modified roll is ≥ 5, the Colors are struck and the vessel is captured.
c. If the capture attempt is successful, replace the current vessel counter with its counterpart in the colors of the captor and on its Reduced-Strength side.
19.4.8 Commodore Casualty
If a commodore is assigned to a vessel that is captured, eliminated, or vessel in which the boarders are repelled, the commodore escapes. The friendly player may assign him to a different friendly vessel of his choice that is in this Combat during the End of Naval Combat Check.
If all friendly vessels in this Combat have been sunk or captured, the commodore is placed at any friendly controlled, non-Isolated port that is on the commodore’s assigned Lake.
If no friendly port exists, the commodore is kept off-map until a port becomes available and then is immediately placed at that port.
19.5 Naval Combat Interphase
Naval Combat Interphase must be followed in this order:

19.5.1 End of Naval Combat Check
19.5.2 Naval Evade Check
19.5.3 Adjusting the Naval Line of Battle
19.5.1 End of Naval Combat Check
Any commodore that was a Commodore Casualty is now assigned to a different vessel in this Combat.
If the attacker has at least one vessel remaining in this Combat and the defender has no vessels in this Combat, the Combat is over.
The attacker may continue movement with any remaining RMPs. If the defender has at least one vessel remaining in this Combat and the attacker has no vessels in this Combat, the Combat is over.
Proceed to Play of Naval Post-Combat Cards (See 19.6).
If neither of these conditions apply, proceed to following Naval Evade Check.
19.5.2 Naval Evade Check
Both players secretly choose to either Evade or to continue Combat.
DESIGNER’S NOTE: Corresponding Evade and Combat cards are provided for the players to choose and hold out as a note until they are ready to reveal their decision.
a. Their choices are revealed simultaneously with these possible results:
i. If both the attacker and the defender declare they will continue Combat, proceed to Adjusting Naval Line of Battle.
ii. If the attacker declares he will continue Combat and the defender declares he will Evade, the defender must Evade.
The attacker may continue movement with any remaining RMPs following the play of Naval PostCombat card.
Proceed to Play of Naval Post-Combat Card (See 19.6).
iii. If the attacker declares he will Evade and the defender declares he will continue Combat, the defender remains occupying the Combat hex. The attacker must Evade
35
© 2022 Compass Games, LLC.
and may move no further this Unit Activation.
Proceed to Play of Naval Post-Combat Cards (See 19.6).
iv. If both the attacker and the defender declare they will Evade, the Naval Combat is over.
The defender will Evade and the attacker remains occupying the Combat hex and may not move any further this Unit Activation.
Proceed to Play of Naval Post-Combat Cards (See 19.6).
b. Evade and the Protected Harbor Defense
The PHD never Evades.
If the vessels friendly to a PHD Evade, the enemy vessels must continue to engage the PHD in Combat until it is destroyed or the attacking enemy vessels Evade.
19.5.3
Adjusting the Naval Line of Battle
When Adjusting the Naval Line of Battle follow these steps in the order listed.
a. If an enemy vessel does not occupy the same lettered Lead Vessel column as the friendly vessel, move that friendly vessel to the Reserves column.
b. Both players move all vessels from the Reserves column into the vacant Lead Vessel columns placing the vessel with the highest HD value in Lead Vessel column closest to A; continue placing vessels in this manner through the remaining vacant columns.
If more than one friendly vessel has the same HD, the friendly player determines the placement Box.
c. If an enemy vessel does not occupy the same lettered Lead Vessel column as the friendly vessel, return that friendly vessel to the Reserves column.
d. If a player has a vessel in the Reserves column, the player may swap a vessel in a Lead Vessel column with a vessel having an equal or greater HD value in the Reserves column.
e. At the end of Adjusting the Naval Line of Battle, for each occupied Lead Vessel column there must be an opposing vessel in in the corresponding Lead Vessel column. All other vessels that cannot be placed in a Lead Vessel column must be placed in the Reserves column.
f. When moving vessels from column to column, they are always moved into the same numbered Damage Section that they currently occupy.
g. Proceed to Broadsides (See 19.4.1) to continue the Combat.

19.6 Play of Naval Post-Combat Cards

Both players may play a maximum of one Naval Post-Combat card.

The attacker plays his Naval Post-Combat card before the defender plays his card.
Follow the instructions on the card after both cards have been played but prior to any Evade.
Naval Combat is complete, proceed with the remainder of the Action Phase
Return to Operation Point Segment (See 5.4.1).
© 2022 Compass Games, LLC.

36
20.0
CUTTING OUT BOARDING
Cutting out is a boarding attack by men in small boats usually at night and against an unsuspecting and anchored vessel.
If an enemy vessel occupies a river hex that is not an enemy protected harbor, any friendly officer and Regular (the attacker) using land movement spend 4 RMP (See 8.1.4) to move into that hex, and engage that enemy vessel in Combat. The officer accompanying the Regular does not add his Attack value to this attempt.
20.1 For each attacking Regular in the Combat, the player owning the Regular chooses the target enemy vessel if more than one.
For each separate attack, the attacking and defending players roll 1d6 with the following DRMs:
20.1.1 The player owning the Regular: + the Regular Combat Strength

20.1.2 The player owing the vessel: +1 If the vessel is carrying a regiment +1 if the vessel is a ship + vessel’s HD value
20.2 Results:
20.2.1 If the modified rolls are equal, there is No Effect.
20.2.2 If the modified die roll of the player owning the Regular is > the modified die roll of the enemy vessel, the enemy vessel is removed for possible capture (See 19.4.7).
20.2.3 If the modified die roll of the player owning the enemy vessel is > the modified die roll of the player owning the Regular, the Regular suffers one step loss.
20.3 After one roll for each attacking Regular, the attacking officers and Regulars are placed back in the last land hex that they occupied and may move no further this Unit Activation.
Proceed with the Action Phase. Return to Operation Point Segment (See 5.4.1).
21.0 DEPOTS AND SUPPLY


Depots and Supply measure the logistical capabilities of the United States of America and the British Empire.
21.1 Depots
Depots represent the build-up of material needed to outfit the various regiments and vessels and to maintain their combat capabilities.
21.1.1 British Depots
a. Placed in Quebec during the Reinforcement Phase (See 5.2).
b. May be moved once placed.
c. Maximum of four British Depots on the map at any one time.
21.1.2 US Depots
a. Placed in any US controlled settlement in US Territory that is in full supply during the Construct Supply Depot segment (See 5.4.1.g).
b. May not be moved once placed.
c. Maximum of four US Supply Depots on the map at any one time.
d. At the end of the Winter Season, all US Supply Depots are eliminated and removed from the map (See 6.6).
21.1.3
Increase of WQV
A US or British Supply Depot within a hex increases the WQV of that hex by 4.

Additional depots in the same hex do not increase the hex’s WQV beyond 4.
21.1.4 Restrictions on Depots
a. British Depots may be moved by Land Movement or Bateaux Movement but must always end their movement occupying a settlement or they are eliminated and removed from the map.
b. US Depots may never move.
c. A depot may not Evade, except to move INSIDE a fortification.
d. A depot is not a unit.
e. Depots do not need supply. Depots do not suffer Winter Attrition.
f. If an enemy unit occupies a hex with friendly depot and there is no friendly regiment in the hex, the depot is immediately eliminated and removed from the map.
[EXCEPTION: The depot is not eliminated if it is INSIDE a fortification.]
37
War on the GREAT LAKES FRONTIER © 2022 Compass Games, LLC.
21.2 Supply
The Special Effect of some Strategy Cards may require the state of supply to be checked.
Supply is checked each time a player:
• Places reinforcements (See 5.2.2)
• Constructs or repairs a vessel (See 5.4.1.d-e)
• Restores a Regular (See 5.4.1.f)
• Constructs a US Supply Depot (See 5.4.1.g and 21.1.2)
• Evades in enemy territory (See 15.2)
• Performs a Volley (See 18.4.8)
There are three states of supply; Full Supply, Partial Supply and Isolated.
There are different rules for British supply and US supply.
PLAYER’S NOTE: For British units, the LOC of the Full and Partial Supply Paths is measured by connected hexes.
For US units, the LOC of the Full Supply Path is measured in RMPs and the Partial Supply Path is measured in connected hexes to Albany, Cincinnati or Pittsburgh.
21.2.1 British Supply
a. Full Supply
A British officer or regiment is in full supply if that officer or regiment is able to trace a LOC of any length from the hex the officer or regiment occupies to Quebec (See 2.4).
b. Partial Supply
A British officer or regiment is in partial supply if that officer or regiment can trace a path of connected land or ferry hexes of any length from the hex the officer or regiment occupies to Quebec or York, even if York or Ottawa is “Burned.”
If tracing to York, York and Ottawa must be British controlled and neither can be occupied by a US unit.
Any British officer or regiment that occupies a settlement connected to a shore hex may include in this path ≤ 10 connected lake or river hexes only if the first hex of this path is the connected shore hex and the last hex of this path is connected to a British controlled settlement in British territory.
Partial Supply Path Restrictions:
i. None of the hexes can be occupied by a US unit, US Depot, nor be a US protected harbor.
ii. None of the hexes can be connected to a hex occupied by a US ship nor a US regiment unless that hex is also occupied by a British unit.
c. Isolated
A British officer or regiment is Isolated if it is in neither full supply nor in partial supply.
21.2.2 US Supply
a. Full Supply
A US officer or regiment is in full supply if it is able to trace a LOC of no more than 20 RMPs from the hex the officer or regiment occupies to any of the following locations:
i. Albany, Pittsburgh or Cincinnati
ii Fort McArthur, Fort Meigs or Fort Stephenson
Fort McArthur, Fort Meigs and Fort Stephenson must have a LOC of ≤ 20 RMPs to Cincinnati.
iii. Rome
Rome may not be “Burned.” It must have a LOC of ≤ 20 RMPs to Albany.
iv. Erie
Erie must have a LOC of ≤ 20 RMPs to Pittsburgh.
v. Depots
A Supply Depot that is in full supply.
A strategically placed Supply Depot in Plattsburgh can extend the range of a US push into Canada towards Montreal/Quebec.
EXAMPLE: A strategically placed Supply Depot in Plattsburgh can extend the range of a US push into Canada towards Montreal/Quebec.
DESIGNER’S NOTE: Counters for; Rome, Erie and Fort McArthur have been provided as a visual reminder to the US player of the above rule. These counters are not considered US Supply Depots.
Place the counters in the hex when the hex is in full supply and remove when the corresponding hex is not in full supply.
b. Partial Supply

A US officer or regiment is in partial supply if it can trace a path of connected land or ferry hexes of any length from the hex the officer or regiment occupies to Albany, Cincinnati or Pittsburgh.

Any US officer or regiment that occupies a settlement connected to a shore hex may include in this path ≤ 10 connected lake or river hexes provided the first hex of this path is connected shore hex and the last hex of this path is connected to a US controlled settlement in US territory.
Partial Supply Path Restrictions:
i. None of the hexes can be occupied by a British unit, a British Depot, nor be a British protected harbor.
ii. None of the hexes can be connected to a hex occupied by a British ship nor a British regiment unless that hex is occupied by a US unit.
c. Isolated
A US officer or regiment is Isolated if it is in neither full supply nor partial supply.
21.2.3 Hex Supply
The rules to supply a hex follow the same rules as supplying a friendly unit of that nationality. The hex must be free of enemy units unless those enemy units are INSIDE a fortification being besieged.
38 © 2022
Compass Games, LLC.
War on the GREAT LAKES FRONTIER
21.3 Special Supply Conditions
In some cases, an officer or regiment may be subject to special supply conditions.

21.3.1 Any officer or regiment INSIDE a fortification that contains a Siege marker is considered to be Isolated.
a. EXCEPTION: If a fortification is also a port and qualifies for full supply or partial supply, the units INSIDE may ignore the effects of besieger officer or regiment tracing a supply line through the protected harbor to the units INSIDE the fortification.
b. EXCEPTION: Any US officer or regiment occupying; Albany, Cincinnati or Pittsburgh is in full supply even if INSIDE the fortification.
c. EXCEPTION: Any British officer or regiment occupying Quebec is in full supply even if INSIDE the fortification.
21.3.2 Any US officer or regiment that occupies Fort Mackinac or Fort St. Joseph is considered to be in partial supply if the harbor is free of a British vessel(s) and Detroit is US controlled and in full supply. Otherwise the US officer or regiment is Isolated.
21.3.3 Any British officer or regiment that occupies Fort Mackinac or Fort St. Joseph is considered to be in partial supply if the harbor is free of a US vessel(s) and York and Ottawa are British controlled even if either York or Ottawa is “Burned.” Otherwise, the British officer or regiment is Isolated.
21.3.4 All officers or regiments assigned to ships during Naval Transport are always in full supply.

39
© 2022 Compass Games, LLC.
21.4 Examples of Supply Path


21.4.1 Full Supply Example

Both British regiments, the Scots and 16th Regulars, are in full supply.


The green path () indicates the supply path that qualifies for Full Supply, the regiment has a LOC with Quebec.

40 © 2022 Compass Games, LLC.
War on the GREAT LAKES FRONTIER


21.4.2 Partial Supply Example
If the British 16th regiment is removed then the British Scots regiment is in partial supply. The red path () indicates supply paths that qualify for Partial Supply.

41
© 2022 Compass Games, LLC.
21.4.3 Partial Supply Example


The British Scots regiment is now Isolated. The black path () indicates supply paths that are Isolated.


42 © 2022 Compass Games, LLC.
22.0
War on the GREAT LAKES FRONTIER

WIDER WAR WITH THE UNITED STATES
Wider War with the United States (WWUS)
The events of the War of 1812 spread across the United States from the eastern seaboard to the land west of the Mississippi, from the Great Lakes to New Orleans. Battles were fought on the Atlantic and Pacific Oceans and the Caribbean waters.
The Wider War with the United States Points represent the different theaters of the War, not depicted on the map, which may have affected the events along the Great Lakes.
22.1.3 Winds of Fortune
If the WWUS Marker is in a box that allows a player to discard one or two cards after the hand draw, that player may discard the number of cards indicated on the WWUS Chart. The player then draws a like amount of replacement cards from the draw deck.
23.0 VICTORY POINT PHASE
The Victory Point Phase occurs only after the conditions for Ending-the-Game are met.
23.1 Each player will attempt to win the game by accumulating Victory Points (VP) through friendly control of settlements in enemy territory, friendly control of the Great Lakes, or through the WWUS Track.
Each side will calculate the sum of their VPs to determine whether the United States of America or the British Empire is victorious: 23.1.1 The player with the higher VP sum is the victor.

22.1 Event Cards for WWUS Points
22.1.1 WWUS Points are awarded for the play of specific Event Cards. Those Event cards that award WWUS Points detail the amount of points scored on the card.
EXAMPLE:
US card #4 USS Constitution vs. HMS Guerriere
22.1.2 WWUS Points are noted and tracked as they occur as per the Special Effect.
Players mark their points by moving the WWUS marker on the WWUS Track located on the East Map.
a. Each British WWUS Point moves the marker one box to the left. The British-flag side of the marker is used if the box has a Red diagonal stripe.
b. Each US WWUS Point moves the marker one box to the right. The US side of the marker is used if the box has a Blue diagonal stripe.
c. If the result of an Event card would move the WWUS Marker off the end of the WWUS Track, the result is ignored.
a. If the scores are equal:
i. The player controlling Lake Ontario is the victor.
ii. If neither player controls Lake Ontario, the player controlling Lake Erie is the victor.
iii. If neither player controls Lake Erie, the player controlling Lake Champlain is the victor.
iv. If neither player controls Lake Champlain, the game is a draw.
23.1.2 Victory Points are granted to the US and the British player as follows:

a. 1 VP for control of Lake Huron
b. 3 VPs for control of Lake Erie
c. 3 VPs for control of Lake Champlain
d. 6 VPs for control of Lake Ontario
e. 2 VPs for the British if the British player destroyed Fort Meigs
f. 2 VPs per Village or Fort in enemy territory that is friendly controlled
g. 4 VPs per Town in enemy territory that is friendly controlled
h. 6 VPs per City in enemy territory that is friendly controlled i. 8 VPs for the US if the US player controls Montreal
j. +x VPs for the player with the WWUS Marker on their side of the WWUS Chart, red for British and blue for US. Players receive VPs equal to the number under the WWUS Marker.
k. Refer to the Playbook 1.3 and the Scenario Set-Up cards for additional VPs awarded for the selected Year, Starting Season and Ending Season.
© 2022 Compass Games, LLC.
43
23.2 Isolated Settlements and VPs

Isolated settlements are worth 0 VP.
23.3 “Burned” and “Dismantled” Settlements
An enemy village or fort that has been “Burned” grants the friendly player 2 VP, regardless of which player controls that village or fort at the end of the game.
a. If Fort Malden has been “Dismantled,” it is worth 0 VP.

b. If Fort St. Joseph has been “Dismantled,” it is worth 0 VP.

23.4 An enemy town that has been “Burned” grants the friendly player 4 VPs, regardless of which player controls that town at the end of the game:
23.4.1 If Buffalo is “Burned,” the British player is granted 6 VPs, regardless of which player controls Buffalo at the end of the game.
23.4.2 If York is “Burned,” the US player is granted 6 VPs, regardless of which player controls York at the end of the game.
23.5 When to Consider VPs
All the above VP conditions are considered at the end of the game, control of VP hexes during the game and later lost are not considered.
44
© 2022 Compass Games, LLC.
War on the GREAT LAKES FRONTIER
24.0 INDEX
Note: For multiple references, the primary section is in bold text.
Abbreviations, Definitions and Symbols:
• ≤ —Less than or equal to; ≥ —Greater than or equal to
• < —Less than; > —Greater than
• DRM Die Roll Modifier—The number(s) added or subtracted to a die roll.
• HD—Hull Defense: 3.2.2.b
• Enemy—All US units and US Depots are the enemy to the British player.
All British units and British Depots are the enemy to the US player: 1.3.2
• Friendly—All US units and US Depots are friendly to the US player.
All British units and British Depots are friendly to the British player: 1.3.1
• LOC—Line of Communication: 2.4
• Natural Die Roll—The number printed on the up-side of the die when rolled.
• NAW– Native American Warrior: 3.1.c; 3.4.6; 5.4.1.a.i; 9.4; 12.6.9; 15.5
• OP—Operation Point: Player Aid; 4.1; 4.2.1; 5.4.1
• Reg’t—Regiment: Strategy Cards
• PHD—Protected Harbor Defense: Player Aid; 3.3; 19.4.1.vi
• RMP—Rolled Movement Point: Player Aid; 5.4.1; 7.1; 8.1
• VP—Victory Point: 23.0
• WQV—Winter Quarter Value: 6.2; 14.1.2; 18.5.1.d (PLAYER’S NOTE); 21.1.3
• WWUS—Wider War with the United States: 22.0
Anchor Symbol–Commodore: 3.4.3.b
“Attack on…” Strategy Card: 4.1.8
Bateaux Movement: Player Aid; 5.4.1.c; 11.0; 13.2
Bateaux Movement Restrictions: 11.7

Battle Strength:
• Difference: Player Aid; 18.4.2
• Modifiers: Player Aid; 18.4.3-.8
Broadsides Procedure: 19.4.1
Card Types (Combat, Event, and Reaction): 4.1.3
Capacity of Port: 2.5.4; 12.4.1
Carrying Capacity:
• Bateaux: 11.0
• Vessels: 12.6.1
Colored Diamond on Special Land Units: 3.4.6
Combat Box—Initial Placement:
• Land: 18.2.3
• Naval: 19.3.2
Combat Posture: Player Aid; 18.2.5
Combat Strategy Cards: 4.2.2 Combat Values: 3.1.4 Commander:
• Infantry: 3.4.2
• Naval: 3.4.4 Commodores: 3.4.3
• Assignment to a Lake: 3.4.5; 6.3.2; 14.8; 19.5.1
• Casualty: 19.4.8
Control Of:
• Lake: 2.6.2
• Restrictions on Control: 2.6.3
• Settlement: 2.6.1
Connected Hexes: 2.2.10 Cost of Action: 4.2.1
Cutting Out Boarding: Player Aid; 8.4; 20.0 Disembark: 13.0
DRM for Leaders:
• Officers—Attack: 3.4.1.c
• Officers—Defense: 3.4.1.d
• Commodores—Cannonball: 3.4.3.b Depots: 21.1
• Construct Supply Depots: 5.4.1.g
• Maximum Number of British Depots: 5.2.1; 5.4.1.c; 21.1.1
• Maximum Number of US Depots: 21.1.2 Destruction (of vessels), Mutual: 19.4.6 Dice: 1.2
End-of-Game Determination: 5.4.4 Embark onto a Vessel: 9.0 Entering a Hex:
• Commodores alone in hex: 14.8
• Friendly Regiment Entering River Hex Occupied by Enemy Vessels: 14.3
• Friendly Vessel Entering an Enemy Protected Harbor: 14.5
• Friendly Vessel Entering Harbor Connected to Enemy Controlled Port Occupied by Enemy: 14.6
• Friendly Vessel Entering Hex Occupied by an Enemy Vessels: 14.4
• Harbor and connected Port: 12.4
• Occupied by an Enemy Regiment: 14.1
• Occupied Only by an Enemy Vessel: 14.2
• Officers alone in hex: 14.7
45
© 2022 Compass Games, LLC.
Evade: 15.0
• Evade by Sea: 15.5
• Evade Check–Land Combat Interphase: 18.5.1
• Evade Check–Naval Combat: 19.5.2
• Evade INTO Fortifications: 14.1.2; 14.2.1; 18.5.1.d PLAYER’S NOTE
• Evade Restrictions–Commodore/Vessel: 15.3
• Evade Restrictions–Officers/Regiment: 15.2
• Evade Restrictions–Presqu’Il Sand Bar: 15.4
• PHD never Evades: 19.5.2.b

Event Strategy Cards: 4.0; 22.1
• Block Event Segment: 5.4.2
• Event Segment: 5.4.3
Ferry: Terrain Chart; 2.2.11; 2.4; 8.4; 8.5 Flanking Volley: 18.4.4
Full Strength/Reduced Strength
• Regiments: 3.1.4; 16.3.3
• Vessels: 3.2.2; 19.4.1
Gunboats: 3.2.1.a Gun Value–Vessel: 3.2.2.a
Harbor: Terrain Chart; 2.2.6 Hull Damage (HD):
• Constructed Vessels: 3.2.1; 3.2.2
• Modifiers for Lake Control: 2.6.2
• PHD: 3.3.a
• Unconstructed Vessels: 3.2.3
Isolated (See also Not Isolated): (Br) 21.2.1.c; 21.3.3; (US) 21.2.2.c; 21.3.2
• Battle Strength Modifier: 18.4.8
• Evade into Isolated Hex in Enemy Territory: 15.2
• INSIDE Besieged Fortification: 21.3.1
• Sallying officers/regiments: 16.2.1
• WQV for Isolated Settlements: 6.2.1.b
• VPs for Isolated Settlements: 23.2
LOC—Line of Communications: 2.4
Movement: Player Aid; Terrain Chart
• On Land: 8.1
• On Lake or Rivers: 12.3
Mutual Destruction–Vessels: 19.4.6
Native American Warriors: 3.1.1.c; 3.1.2.c

• See also: 2.6; 2.6.3; 3.4.6; 5.4.1.a.i; 9.4 (PLAYER’S NOTE); 12.6.9; 15.5 (PLAYER’S NOTE); 18.2.2.b
Neutral Hexes: 2.6.4
Non-Hex: 2.3
• Island and Peninsula: 2.3.1
• Road to Sackett’s Harbor: 2.3.2
• Rutland (for British only): 2.3.3
Not Isolated/non-Isolated (See Isolated):
• Commodore Casualty: 19.4.8
• Commodore Placement: 3.4.5; 4.1.8.c; 14.8; 15.3
• Commodore Reinforcement Placement: 5.2.4
• Commodore Transfer: 10.0
• Commodore/Vessel placement during Winter: 6.3.2
• Prevost Winter Placement: 6.5 Officers: 3.4.1
Operational Point Value (OP): Player Aid; 4.1.1; 5.4.1 Panther symbol (Tecumseh Seniority Stars): 3.4.1.e Pick-up/Drop-Off: 5.4.1.a.i-iii; 8.2; 8.3; [Ship] 12.1; 12.2 Play of Strategy Card: 4.2
Protected Harbor Defense (PHD): Player Aid; 2.2.7; 3.3; 19.3.2.e; 19.4.2
Pre-Combat Cards:
• Land: 18.3
• Naval: 19.2 Port Hex: 2.2.9 Post-Combat Cards
• Land: 18.6
• Naval: 19.6 Presqu’Il Sand Bar: 2.2.8; 12.3; 19.4.4 Prevost (British Officer): 6.5
Quick Play Land Combat: Playbook 2.0 Quick Play Naval Combat: Playbook 3.0 Reaction Strategy Cards: 4.2.3 Repair Vessel: 5.4.1.e Repair Vessel–Free: 6.4 Reshuffle of Deck N/A: 5.3 Restricted Movement Special Units: 3.4.6
• Restricted Movement Diamond: 3.4.6
Restrictions On:
• Bateaux Movement: 11.7
• Combat Box Initial Placement: 18.2.3
• Depots: 21.1.4
• Evading by Attacker: 15.2
• Evading by Commodores/Vessels: 15.3
• Evading by Defender: 15.2
• Evading by Officers/Regiments: 15.2
• Evading by Officers/Regiments from Besieged Fortification: 16.2
• Evading by Sea: 15.5
• Evading into Hex in Enemy Territory: 15.2
• Leaders Unaccompanied by Friendly Regiment: 14.7; 14.8
• Presqu’Il Sand Bar: 15.4
• Siege Warfare: 16.2.4-6
46 ©
2022 Compass Games, LLC.
War on the GREAT LAKES FRONTIER
Rolled Movement Point (RMP): Terrain Chart; 5.4.1; 7.1; 8.1
• RMPs for Disembark: 13.0
• RMPs for Officer Picking Up/Dropping off Officer/ Regiment: 5.4.1.a.i
• RMPs for Vessel Picking Up/Dropping off: Officer/Regiment: 12.6.5 Vessel: 12.1; 12.2

Sackett’s Harbor, Road to: 2.3.2
Sand Bar: 2.2.8; 12.3; 15.4; 19.4.4
Sally [from a Besieged Fortification]: 16.2
Siege Warfare: 16.0
• Siege Discontinued in Winter Season: 6.1; 16.1
• Siege Warfare DRM: Player Aid; 16.3.2-3
• Siege Warfare Table Results: Player Aid; 16.3.3
Seniority Star–Officers: 3.4.1.b
Sequence of Play:
• Spring, Summer, and Autumn: 5.0
• Winter: 6.0
Ship: 3.2.1.b
Shore: Terrain Chart; 4.1.8; 9.0; 11.0; 13.0; 15.5; 18.4.6; 21.2
Solitaire Play and Tips: Playbook 4.0
Special Situations:
• Officer/Regiments INSIDE Besieged Fortification: 16.2
• Special Supply Conditions: 21.3
Special Units with Restrictions: 3.4.6
Strategy Cards: 4.0
Stacking of regiments and vessels: 2.5
Step Loss:
• PHD: 3.3.b
• Regiments: 3.1.5

• Second Step Loss eliminates regiment: 3.1.5
• Vessels: 3.2.2.c; 19.4.1
• Winter Attrition: 6.2.1
Subordinates:
• Army Officers: 3.4.2; [Tecumseh] 5.4.1.a.i
• Naval Officers: 3.4.4
Supply Paths, Examples of: 21.4
Supply—Required Check of Supply Status: 21.2
Tecumseh: 3.4.1.e; 5.4.1.a.i; 18.4.5
Terrain Description: Terrain Chart; 2.2; 2.3
• Effects on Combat: 18.2.4; 18.4.3
Unit Defined: 3.0
Unit Activation (Operation Point Segment): 5.4.1.a
Victory Points: 23.1; Playbook 1.2.3
• Burned/Dismantled settlements: 23.3
Vessel Damage Points: Playbook 3.3.3; 3.3.4; 3.3.5
Vessels: 3.2
• Capture: 19.4.7
• Carrying Capacity: 12.6.1
• Constructed: 2.5.4.b; 2.6.1; 5.4.1.d; 14.2
• Permitted On River Hexes: 12.5
• Repair: 5.4.1.e
• Unconstructed Vessel: 3.2.3; 5.4.1.d See also: 2.5.4.b; 2.6.1.b; 2.6.2.a.iii; 5.2.3; 6.3; 12.0; 14.2; 16.3.3.c
Volley and Rounds Procedure: 18.4
Wind Gauge: Playbook 3.3.2
Winds of Fortune: 5.3.2; 22.1.3
Winter Attrition Step Loss: 6.2.2
Winter Quartering Value (WQV): 6.2.1
• Exceed WQV Step Loss: 6.2.2
• Non-settlement Hexes, Burned/Dismantled Settlements: 6.2.1.a
25.0
Play
Development Assistant: Rich Jennings
47
© 2022 Compass Games, LLC.
Ken Repel
Ken Repel, Larry Repel
Designer: Iván
Layout:
CREDITS Designer:
Developers:
Graphic
Cáceres Booklet
Knut Grünitz
Contributors: Gilbert Collins, David Corbett
Historical Commentary Editor: Laura Rigwood
Testers: SFC Bob Fischer, Bruce Maxwell, Carl Copeland, Charles Font, Dan Janezick David Corbett, Eric Girardi, Greg Hanna, Jonathan Kay, Ken Repel, Kevin Rohrer, Kostas Nikolaidis, Larry Repel, Lee Hanna, Mike Hemstreet, Neal Repel, Robert I. Girardi, Thomas Cadenhead, Tim Allen, Tim Repel


48 © 2022 Compass Games, LLC.
