


1.0 Introduction 2 2.0 Definitions ................................. 2 3.0 Game Components .................. 4 4.0 Sequence of Play ....................... 4 5.0 Friendly Card Phase ................. 5 6.0 Markers - General .................... 6 7.0 Friendly Order Phase 7 8.0 Characters ............................... 11 9.0 Enemy Order Phase ............... 13
10.0 Enemy Orders 15 11.0 Terrain ................................... 18 12.0 Line of Sight (LOS) & Spotting.................................. 20 13.0 Firing ..................................... 21 14.0 Weapons ................................ 22 15.0 Melee 24 16.0 Wounds.................................. 25 17.0 Morale .................................... 25
18.0 Smoke 27 19.0 Morale, Rally, Troop Quality, and Wound Morale Checks 27 20.0 Off Board Artillery ................ 28 21.0 Night & Illumination ........... 29 22.0 Wind Counter & Optional Rules 30 23.0 Scenarios & Victory Points . 30 Index ............................................... 32

Combat! is a solitaire game of man-to-man combat in the 20th century. The player controls Friendly forces and attempts to complete a scenario against Enemy forces that are controlled by the game system. At the start of each turn the player plays 1 card from his hand to the Initiative track. This card determines the initiative values for each of the player’s friendly teams and may have other effects depending on the card. After this the player assigns orders to each character on his side. This determines the actions that the character can take this turn. Once the friendly characters have orders assigned to them, the player draws an Enemy AI Card for each Alerted Enemy Character. These cards determine the Initiative value for each Enemy Team and the Order that they receive. The Order determines the actions that an Enemy Character will take that turn.
The game turn is then played through in 4 Impulses. From the lowest initiative value to the highest, each Team activates in turn and each Character (Friendly and Enemy) performs the action specified on its Order counter. All Teams will act on Impulse 1 before moving to Impulse 2, then Impulse 3 and finally Impulse 4. At the end of the turn all Orders are removed and the played cards are returned to the respective decks.
Note 1: There is no stacking limit in the game.
Note 2: The Squad-2 initiative markers are there for future use - if 2 squads are in play - or if you wish to use both squads in a homemade scenario.
Version 1.20 These rules have been updated as of September 26, 2021 (a red highlight indicates changes from version 1.0)
Activate During the Action Phase each Team will ‘Activate’ and then each Character in turn will be ‘Activated’ and will perform any action required by his order, make spotting checks if required and may Duck Back at the end of his activation.
Board
Character
D6
D10
The Playing Surface. This will be made up of one of more Maps.
The basic unit in the game which represents a single man.
A standard six-sided die.
A ten-sided die numbered from 0-9.
Enemy Forces and units belonging to and controlled by the game system.
Friendly Forces and units belonging to and controlled by the player.
Impulse
Each Turn of the game is broken down into 4 Impulses. All Characters will act on Impulse 1 before moving to Impulse 2, etc.
Initiative Value The numerical value on a Friendly or Enemy Card that determines the order in which teams will activate [see Rule 5.0].
LDR Range
The Leadership Rating of the Character. This is the distance in hexes from a Leader that he may influence.
LOS Line of Sight. A straight line free of obstacles drawn from hex center to hex center such that one Character may spot another.
Map An individual map section. One or more maps will make up the Board.
Morale Check (MC) A Check that must be taken under certain circumstances - usually when being shot at. Failure of this Check can cause a Character’s morale to fall [see Rule 19.0].
Morale State
An indicator of the psychological state of a character. There are seven different Morale States that a character may be in. These are, from positive to negative: Berserk, Aggressive, Bold, Normal, Cautious, Shaken and Rout.
Player You – the person playing the game.
Rally Check (RC) An attempt to Rally, i.e. improve the Morale State of a character [see Rule 19.0].
Squad All of the Friendly characters will be organized into a squad. The Squad consists of three Teams.
Team Each side’s characters are divided into teams which are used to organize movement order. Friendly Teams are Able, Baker and Charlie. Enemy Teams are Red, Yellow, White and Blue.
Troop Quality Check (TQC)
Similar to a Morale Check but used when a Character is performing certain actions [see Rule 19.0].
Troop Quality (TQ) A number representing the combat effectiveness of an individual Character.
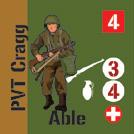
Turn An entire run through of the Sequence of Play from Step 1 to Step 5 [see Rule 12.0].
Weapon Skill (WS) A number representing a Character’s skill with a particular weapon. This number may be modified by the Target’s Order, Target’s terrain and the weapon being used. A die roll less than the modified weapon skill is usually a hit [see Rule 13.0].
Wound A possible effect of a successful hit.
Wound Morale Check (WMC)
A type of Check that is taken whenever a Character is Wounded. Similar to a Morale Check but the Morale penalty is higher [see Rule 19.0].
Soldat German Soldier
Lt. German Leutnant (Lieutenant)
Obfr German Obergefreiter (Lance Corporal)
Hptm German Hauptmann (Captain)

Officer Lt. and Hptm.
NCO Obfr.
Anytime that a Character’s chance of success (against TQ or WS) is less than zero there is still a chance of success.
The initial die roll must be a zero.
To confirm success, make a TQC. The TQ for this check is modified by the value less than zero that the initial chance of success was (see example below).
To gain a Morale State increase (for rolling zero) the shot must actually hit – not a MC.
If the chance of success is so low that the modified TQ becomes less than 0 then it is an automatic failure.

A Friendly Character fires his M1 Garand at an Enemy Character with Hide Orders in some rocks 5 hexes away.
The Friendly Character has a WS of 3 and a TQ of 4.
There is no WS modifier for this range with an M1 Garand but a Hide Order in Rocks is -4. The Friendly Character therefore has a modified WS of -1. To hit he must roll a zero and then confirm the hit with a TQC modified by the initial hit chance (-1). The Player must therefore roll a 3 (4 - 1) or less to pass the TQC and confirm the hit.
© 2022 Compass Games, LLC.
Each game of Combat! 2nd Printing contains:
• 1 Rule Book; updated
• 1 Scenario Book; updated
• 6 Sheets of improved Counters - 2 at One Inch and 4 at 5/8 Inch
• 4 Player Aid Cards & Displays:
∙
• 4 Maps at 25 x 38 inches each, with updated artwork:
∙ The Farmhouse
∙ The Village
∙ The Hill
The Hedgerows
∙
One Impulse/Turn track - 8.5 x 11
One Display Mat - 8.5 x 11
One Spotting & Terrain Chart, double-sided Weapons Chart - 11 x 17
• 2 Decks of Cards:
• 2 Ten-Sided and 1 Six-Sided Dice
• 1 Box and Lid Set
a) If the Player does not currently have any cards in his hand he may draw one card from the Friendly Orders Deck [see Rule 5.1].
b) The Player then adds any cards, to his hand, placed aside in the previous turn after a successful Plan Order performed by a Friendly character [see Rule 7.12].
c) Cards in excess of 5 are discarded – Player’s choice.
d) The Player must now play one card from his hand to the Initiative Track [see Rule 5.1].
e) If the Friendly Order card played has the word “Event” on it then the Player immediately rolls 1D10 and consults the Scenario Event List [see Rule 22.0].
a) The Player now assigns Orders to each of his Characters [see Rule 7.0].
a) If Playing a Large Battle [see Rule 9.2], draw one card for each Enemy Team and apply it to all Enemy Characters of that Team. Place each card as it is drawn in the appropriate box on the Initiative Display [see Rule 9.1].
b) Draw one Enemy Order Card for each Alerted Enemy Character and, if it is the first card drawn for a particular Team, place it in the appropriate box on the Initiative Display [see Rule 9.0]. Assign the appropriate Order to the Character as each card is drawn.
c) Complete the Initiative Order Track according to Initiative Values [see Rule 9.0].
a) In Initiative order resolve the Orders of each Character in the first Team on the Initiative Order Track for Impulse 1 [see Rule 9.1].
Each Character in turn performs phase i), ii) and iii) below until all Team Characters have been Activated.
i) Perform the action as required on the activated Character’s Order Marker [see Rule 5.1.1]. If the activated Character is an Enemy Alerted Character without an Order, then instead of performing an action it draws a card and receives an Order. It will act on this in the following Impulse.
ii) Make Spotting Checks as required [see Rule 12.0]. These are performed for the active Friendly or Enemy Character regardless of whether it is Alerted or not.
iii) The just activated Friendly Character may choose to Duck Back [see Rule 7.19].
b) Moving left to right, activate each team on the Impulse Order Track as above.
c) Repeat for Impulses 2-4.
a) All Grenades now explode – perform Damage Rolls [see Rule 14.2].
b) Make a TQC for each Character with the Skill of MEDIC currently in a hex with a wounded Character [see Rule 7.14].
c) Make a TQC for each Friendly Character that has a Plan Order and if successful place any generated cards to one side (they are not yet in your Hand) [see Rule 5.1].
d) Add or remove Smoke Counters as required [see Rule 18.0].
e) Any Waiting Characters within 3 hexes and LOS of an Alert Enemy Character are now Alerted. Place an Alert Marker on them.
f) Remove all Orders. Reset the Initiative Track.
g) Place Enemy Cards that are on the Initiative Track in the Enemy Discard pile.
h) Place the Friendly card that is on the Initiative Track in the Friendly Discard pile.
i) Reset the Impulse Marker to Impulse 1.
j) If this is the last turn, check the Victory conditions – END OF GAME.
k) Set the Turn Marker to the next Turn.
l) Return to Step 1.
pandagm.com


Combat! uses 2 decks of Cards – Friendly Cards and Enemy Cards. Friendly Cards are held in hand by the Player and are either played to the Initiative Track or used for their ‘Discard’ ability. Enemy Cards are used to allocate orders to Enemy Characters.
Step 1 a) If you do not have any cards in your hand, you may draw a single Card. This is the only way to acquire new cards other than using the Plan Order [see Rule 7.12].
Step 1 b) During this Step add any card(s), acquired from planning and placed to one side last Turn, to your hand.
Step 1 c) Maximum hand size is 5 cards. Place any cards in excess of 5 (your choice) in the Discard Pile.
Step 1 d) You must now play one card to the Initiative Display.
Step 1 e) If you play a card with the word “Event” on it, resolve the event [see Rule 22.0].
There are three types of Friendly Cards: Discard Cards, Order Cards and Event Cards. Examples of Discard and Order Cards are shown below.
The main things to be aware of are the Initiative values and the card text


Initiative Values: There are three of these and they apply to the 3 Teams that make up your Squad.
Initiative is determined in order from low to high. In other words, the Team (Friendly or Enemy) with the lowest Initiative will get to act first during each Impulse.
Card: 88 X 63mm
Bleed: 3mm
Margin Trim Bleed
Card Text: This determines additional effects that occur during the turn.
Discard Cards do not have any effect (other than Initiative Values) when played to the Initiative Track. They may, instead, be discarded during a turn to use the effect described in the text.
Order Cards always apply the text when played to the Initiative Track and they have an immediate effect.
Each turn the Friendly Player (You) MUST play a single card from his hand to the Initiative Track. This helps to determine the order that teams perform their actions. A single card’s initiative values will be used for all 4 Impulses of a turn.
There are only 2 ways to receive new cards: If at the start of a turn you have no cards in your hand, you may draw one card.
A Friendly Character who successfully performs a PLAN order [see Rule 7.12] will add cards equal to the Character’s LDR.
Cards generated by PLAN orders are kept to one side and only added to your hand after Step 1 a) is resolved at the start of the following turn.
Example: At the start of Turn 5 you play your last card to the Initiative deck – you now have no cards in your hand. During turn 5 you perform a Plan Order with one of your characters with an LDR Value of 1. At the end of Turn 5 [Step 5 c)] you make a TQC for the Friendly character with a Plan Order and pass. You draw one card and place it to one side.
At the start of Turn 6 you may add a new card from the Deck to your hand as you do not currently have any cards in your hand. After this is done, add the card that was placed to one side at the end of the previous turn to your hand, giving you 2 cards in total. You must play one of these to the Initiative Track on Turn 6.
Card: 88 X 63mm


Bleed: 3mm
‘Friendly’ – shows that this is a card belonging to the Friendly card deck.
‘Initiative’ – Below this are the words ‘Able’, ‘Baker’ and ‘Charlie’ and 3 numbers. These refer to the Initiative level for each Team the Player is controlling.
‘Discard’ or ‘Order’ – Which type of Friendly Card it is.
‘Lucky Bounce’ – This shows the effect of Discarding the Card [see Rule 5.1].
‘Close Call - MC’ – The wound effect. This one shows a near miss requiring a Morale Check.
‘4’ & ‘46’ – The number of the card.
‘Bad Wound’ - this text is used only when drawing for Wounds [see Rule 16.0].
© 2022 Compass Games, LLC.
Corner Radius: 3mm
Corner Radius: 3mm
Card: 88 X 63mm
Order cards that are played to the Initiative Track generally have an effect for the whole turn. If the Order Card states an effect on a random character in a Team, the player assigns equal values to the members of the team and rolls 1D6 to determine the specific Character.
pandagm.com
Example: The player plays card 25 – an Order Card which contains the text, “Trip – 1 Random Friendly Character from Able Team may only be given a Hide Order this turn”. The player immediately assigns values as follows:
1-2 = Sgt Taylor
3-4 = Pvt Crowe


5-6 = Pvt Cragg
He then rolls a D6 and rolls a 4. This means that Pvt Crowe may only be given a Hide order this turn.
pandagm.com
Corner Radius: 3mm
Some Order Cards specify a Friendly or Enemy Event. Roll immediately on the appropriate table in the scenario and after resolving the Event place the Order Card on the Initiative Track.
pandagm.com
If not played for Initiative, they may be played at ANY time, although many of them will only have an effect when appropriate.
For Example: Card 42 specifies “Medical Marvel – Play to auto pass a Medical Roll”. This card would have no effect unless you were about to make a Medical Roll.
Margin
Trim Bleed Bleed: 3mm
The other Event Cards (one Friendly and one Enemy) behave slightly differently. Whenever one of these cards is drawn for any reason (start of turn, successful Planning, wound card) pause the game and roll on the appropriate table. Then place the card in the Discard pile and shuffle the Discard pile and the Draw pile together to form a new Draw Pile. Then draw a replacement card.
If one of these cards is drawn as part of a player’s initial hand, discard it and draw another card. Once you have collected your opening hand, reshuffle the Friendly Deck and Discard piles together before the start of play. Do not roll for an event in this situation.
As well as playing them as a normal card to the Initiative Track, Discard Cards may also be played for a one-off effect. If played to the Initiative Track the player will not be able to use them for their one-off effect.
Margin Trim Bleed Bleed:
Corner Radius: 3mm
Card: 88 X 63mm
There are 2 types of Event Card: those with Initiative values and those without. They also come in Friendly and Enemy varieties.
pandagm.com



Cards that specify Initiative Values are normal Order Cards (see Friendly Card 46 here). When played to the Initiative Track, roll immediately on the appropriate table located in the scenario (Friendly Event or Enemy Event as appropriate).
Card: 88 X 63mm




Corner Radius: 3mm pandagm.com Margin Trim Bleed Bleed: 3mm
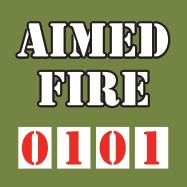
Order markers have four numbers running along the bottom. These represent what the Character can do on each of the four Impulses.

• A ‘0’ (in any color) means that the Character may not move or fire this Impulse. It may still spot and Duck Back as usual.
• A ‘1’ (black #1) means that the Character MUST move 1 hex during its activation.
• A ‘1’ (blue #1) means that the Character MAY move 1 hex during its activation.
Margin Trim Bleed Bleed:
• A ‘1’ (red #1) means that the Character MAY fire if it has a loaded weapon and a known target in LOS.
• A ‘2’ (black #2) means that the Character MUST move 2 hexes during its activation. It may not enter the same hex twice during a single activation.
Corner Radius: 3mm
© 2022 Compass Games, LLC.
‘
-A’ means All


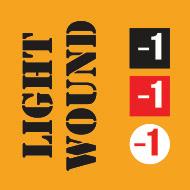
The white number in a black box is the modifier to the Character’s Leadership Rating. A value of ‘-A’ means that the character has no Leadership Rating.


The white number in the red box is the modifier to the Character’s Troop Quality.
The red number in a white circle is the modifier to the Character’s Weapon Skills. A value of ‘-A’ means that the character may not fire any weapons.


The black numbers (4/3, 6/5, 1, 2/3, 5) on the markers shown below are the direction order for enemy soldiers - they are discussed in rule 9.0 and then under each appropriate move order 10.04, 10.05 etc.
After selecting and playing a Friendly Card to the Initiative Track, the Player now assigns Orders to all Friendly Characters. Every Character must receive an Order. Should you forget a character and then realize during a later Phase, the Character is automatically given a Hide Order. If an Order specifies that a Character moves, then it MUST move on that Impulse. Should a Character wish to stop moving then it must Duck Back [see Rule 7.19].

Each Order is described below.
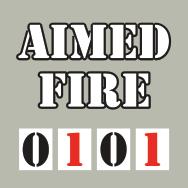
The most accurate of the Fire Orders, this Order will be given on many occasions. The Character that it is given to is not required to have a target when the order is given. In this case it is treated as a form of opportunity fire as the Character covers the ground in front of it. The Order has the numbers 0-1-0-1 on it.
This means that on Impulse 1 the Character does not do anything in the Action Phase step a (i). E.g. it may not move or shoot on the first phase. It may still Spot in step a (ii). In step a (iii) it may remove this order and change it to Duck Back [see Rule 7.19].
On Impulse 2 the character MAY fire at a single visible, known target. The target must be visible and known from the start of the Impulse. If the Character does not have such a target it will do nothing. Again it may Spot or Duck Back.
Impulse 3 is treated the same way as Impulse 1 – no movement or firing.
The U. S. rifle, caliber .30, M1l, is a self-loading shoulder weapon. It is gas operated, clip fed, and air cooled. It weighs approximately 9 pounds and the bayonet an additional pound. The ammunition is loaded in clips of eight rounds. Bandoleers of ammunition for this rifle have six pockets with a total of 40 rounds and weigh 3-1/4 pounds each.
The principal characteristic of the weapon is its mechanical operation which enables the individual rifleman or group of riflemen to deliver a large volume of accurate fire upon any designated point or area within range.
Designed by Canadian-born inventor Cantius Garand in 1932, the rifle was adopted as the M1 by the US Army in 1936, entering production at Springfield Armory the following year with deliveries beginning in 1938. When the war commenced Win chester was also contracted to produce the rifle. By the close of the war, over 4 million rifles had been produced.
“In my opinion, the M1 rifle is the greatest battle implement ever devised.”
-Letter from George S. Patton to Springfield Armory
On Impulse 4 the character MAY fire at a single visible, known target. If it does not have such a target it will do nothing. Again it may Spot or Duck Back.
To resolve any Firing see Rule 13.0.
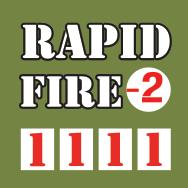
A less accurate version of Aimed Fire – the firer is concentrating more on putting a maximum number of rounds down range and less on accuracy. This order is not available to all Weapons [see Rule 14.0] – such as bolt Action Rifles.

Rapid Fire has 1-1-1-1 on the marker signifying that a Character with this order will fire each Impulse if it has a visible, known target. As with Aimed Fire, this order may be given without a visible, known target and will be triggered should one become available later in the turn.

Spotting and Duck Back may occur in each Impulse as normal.
The -2 on the right hand side of the counter shows that a shooting Character is at -2 WS when firing.
© 2022 Compass Games, LLC.
Also known as Covering Fire, this aims to suppress the target rather than to hit it.
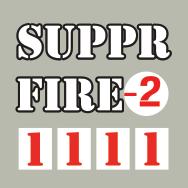
The counter has 2 sides as some weapons may only use Slow Suppressive Fire (mainly bolt action rifles). Suppressive Fire has 1-1-1-1 on the marker, signifying that a Character with this order will fire every round if it has a visible, known target.
Slow Suppressive Fire has 0-1-0-1 on the marker, signifying that a Character with this order will fire on Impulses 2 and 4 if it has a visible, known target.


These orders may be given without a visible, known target and will be triggered should one become available during the turn. Spotting and Duck Back may occur in each Impulse as normal. The advantage of this type of fire is that no Order/Terrain effects apply to each shot. Range and Wound effects still apply normally. The disadvantage is that a successful hit will automatically result in only a Morale Check for the target.
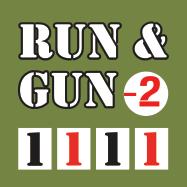
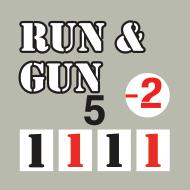
A combination of movement and fire. Run & Gun has 1-1-1-1 on the marker. Not necessarily firing from the hip but more a short dash followed by a hasty shot.
On Impulse 1 the Character with this order MUST move 1 hex in any direction. It MAY Spot and Duck Back as usual.
On Impulse 2 the Character MAY shoot if it has a visible, known target. If it does not have a visible, known target it MUST move instead. It MAY Spot and Duck Back as usual.
On Impulse 3 the Character with this order MUST move 1 hex in any direction. It MAY Spot and Duck Back as usual.

On Impulse 4 the Character MUST shoot if it has a visible, known target. If it does not have a visible, known target it MUST move instead. It MAY Spot and Duck Back as usual.
The -2 on the right hand side of the counter shows that a shooting Character is at -2 WS when firing.
The most cautious of the move orders. This marker has 0-1-0-1 on it. This means that the Character with this order MAY move one hex on Impulse 2, MUST move one hex on Impulse 4 but can do nothing on 1 and 3. On all 4 impulses the Character may Spot or Duck Back as usual.
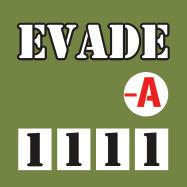
The -A on the right hand side of the counter shows that a Character with this order is unable to fire for the duration of the Order (no Weapon Skill).

A move Order that maximizes a Character’s defense but prevents any firing. This marker has 1-1-1-1 on it. Each Impulse a Character with this order must move 1 hex in any direction. It may Spot and Duck Back as usual.
The -A on the right hand side of the counter shows that a Character with this order is unable to fire for the duration of the Order.
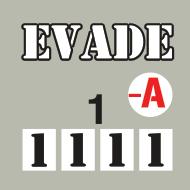
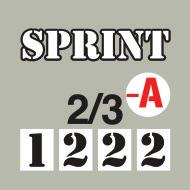
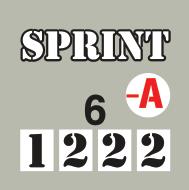
A move order that maximizes speed at the cost of defense and firing. This marker has 1-2-2-2 on it. A Character with this order MUST move 1 hex on Impulse 1 and 2 hexes on Impulses 2, 3 and 4. A Character with this order may enter Rough Terrain Types but the Character MUST then Duck Back at the end of the Impulse.
Characters with this Order may Spot and Duck Back as usual.
On Impulses 2, 3 and 4 the Character may move 1 hex and then choose to Duck Back. In other words, it is not forced to move both hexes if it Ducks Back after the first hex.

The -A on the right hand side of the counter shows that a Character with this order is unable to fire for the duration of the Order.
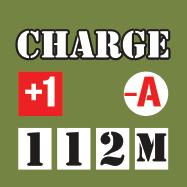
A movement order given with the intention of attacking an Enemy Character in melee. This marker has 1-1-2-M on it. This Order may only be given to a Character if it has a visible, known target within 4 hexes. In other words, to give this order there must be a Known, Enemy Character that the Friendly Character is capable of reaching with this order. Note that a Character can enter an enemy-occupied hex with any movement order but it receives a TQ bonus if charging [see Rule 15.0].
On Impulse 1 the Friendly Character MUST move 1 hex. If it enters a hex with an enemy Character, it discards this order and replaces it with a Melee Order [see Rule 15.0].
On Impulse 2 the Friendly Character again moves a single hex. If it enters an enemy-occupied hex it keeps the Charge Order.
On Impulse 3, if it is not already in an enemy-occupied hex, the Friendly Character moves two hexes. If it enters an enemyoccupied hex after moving a single hex, it stops moving. If it enters an enemy-occupied hex it keeps the Charge Order.
If, because of enemy movement, the Friendly Character is unable to enter an enemy-occupied hex by the end of Impulse 3 then the Friendly Character MUST automatically change its order to Duck Back.
During Impulse 4 the Friendly Character must melee any one enemy Character in its hex. It receives a bonus of +1 to its TQ for this attack [see Rule 15.0].
The -A on the right hand side of the counter shows that a Character with this order is unable to fire for the duration of the Order.
This order enables a Friendly Character to throw a Grenade at a known Enemy Character. This marker has 0-1 1 1 on it. This order may be given only if there is a known, Enemy Character within 4 hexes of the Friendly Character. The Enemy Character does not have to be in LOS. When placing this Order also place a Grenade Target Marker on the target hex.
On Impulse 1 place a Grenade Marker on the Friendly Character. From this point on the Grenade is ‘live’.
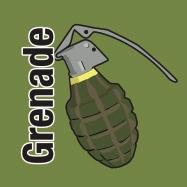

On Impulse 2 the Friendly Character has the option to EITHER move a single hex OR take and pass a TQC to move the Grenade Target Marker 1 hex. The Grenade Target Marker cannot be moved further than 3 hexes from the Friendly Character throwing the Grenade. The Character can do nothing else (other than spot) this Impulse. If the TQC is failed then the Character MUST move 1 hex closer to the Grenade Target Marker if the marker is currently 4 hexes away.
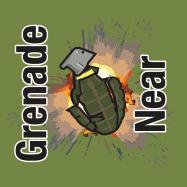

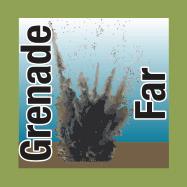

On Impulse 3 the Friendly Character will throw a Grenade up to a maximum range of 3 hexes. Place the Grenade marker in the target hex and remove the Grenade Target Marker. Roll 1D10. Add 3 to the result if the target hex is not in LOS of the throwing Character. If the final result is 9 or more, the Grenade will scatter 1 hex in a random direction. Roll 1D6 for direction and place the Grenade Explosion Marker in the resulting hex. Then make a roll against the thrower’s Grenade WS for each Character in the hex with the grenade. Normal Order/Terrain modifiers apply to this roll. A successful roll places a Grenade Near marker on the Character. A failed roll places a Grenade Far Marker. During Impulse 4 the Friendly Character MAY move an additional hex – this is optional.
The Grenade will explode at the end of the turn [see Rule 14.2].
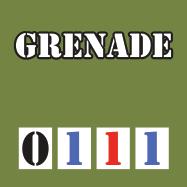
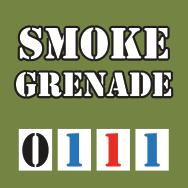
This marker has 0-1 1 1 on it. A Smoke Grenade works in a similar manner to a Grenade with the following differences:

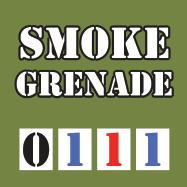
No known Enemy Character within 4 hexes is required to throw a Smoke Grenade.
Before placing this order, the Friendly Character must pass a TQC. If the roll is failed, the Character must select a different order. It may not reroll for Smoke Grenade availability until the next turn.
No Grenade Target Marker is placed; the Player is free to place the Smoke Grenade in any hex within three hexes of the throwing Character on Impulse 3.
Once the final target hex has been determined do not roll against the thrower’s Grenade WS (no Grenade Near/Far Marker and no Damage rolls).
See the rules on smoke for the effect of a Smoke Grenade [Rule 18.0].
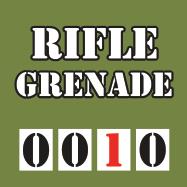
This marker has 0-0-1-0 on it. As with a Smoke Grenade, a Character must pass a TQC in order to receive this order. A Rifle Grenade Order also requires a known, Enemy Character within LOS and range [see Rule 14.0]. When placing this Order also place a Rifle Grenade Target Marker on the target hex.
The Friendly Character may not move on the first 2 impulses or on Impulse 4 but may still Spot or Duck Back.
On Impulses 1 and 2 the player may move the Rifle Grenade Target Marker 1 hex in any direction by passing a TQC (as long as the new hex is still within range). Failure means they cannot move the Rifle Grenade Target Marker.
Note that Rifle Grenades do not ‘Arm’ (the act of firing it arms the Grenade). If the Character is forced to Duck Back prior to firing on Impulse 3 the order is simply removed. Rifle Grenades also have a Range Modifier [Rule 14.0] and fire like other Weapons.
On Impulse 3 the Friendly Character will fire the Grenade up to its maximum range. Place the Grenade Marker in the target hex and remove the Rifle Grenade Target Marker. Roll 1D10. Add 3 to the result if the target hex is not in LOS of the firing Character. If the final result is 9 or more, the Grenade will scatter 1 hex in a random direction. Roll 1D6 for direction and place the Grenade Marker in the resulting hex. Then make a roll against the firer’s Rifle Grenade WS for each Character in the hex with the grenade. Normal Order/Terrain modifiers apply to this roll. A successful roll places a Grenade Near marker on the Character. A failed roll places a Grenade Far Marker. The Rifle Grenade will land and explode immediately (note that this is different from a regular grenade).
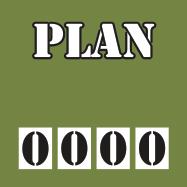
This marker has 0-0-0-0 on it. Normally a player may only receive new Order Cards if he has no cards in his hand at the start of a Turn.
The Plan order allows the player the possibility to draw additional Cards. Certain Characters have a Leadership Rating (LDR). These Characters may perform a Plan Order. A Character with this order may not move during any Impulse but may Spot or Duck Back as normal.
At the end of the turn during Step 5 c) the Player makes a TQC for each Character with a Plan order. For each Character that passes the TQC, the player draws a number of cards equal to that Character’s LDR. These cards are placed to one side. They will be added to the player’s hand during Step 1 b) of the following turn.
Example: Sgt Taylor has an LDR of 3 as shown by the white number in the black box. If Taylor takes a Plan Order and passes a TQC during Step 5 c) by rolling a 6 or less, then the Player will receive 3 cards. These cards are placed to one side until Step 1 b) of the following turn.
© 2022 Compass Games, LLC.
This marker has 0-0-0-0 on it. During the course of the game a Character may find itself with a Low Ammo or a No Ammo marker [see Rule 13.0 – Step 8]. The Reload Order allows the Character to remove either of these markers.
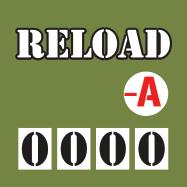
A Character may not fire if it possesses a No Ammo Marker.
At the end of the turn any Friendly Characters that still have this Order may remove any Low Ammo or No Ammo marker they have.
The -A on the right hand side of the counter shows that a Character with this order is unable to fire for the duration of the Order.

This marker has 0-0-0-0 on it. This Order may only be given to a Character with Medic Skill who is in the same hex as a Wounded Character (Friendly or Enemy) at the start of the Turn.
A Character receiving Medical Aid may only be given the following Orders: Hide, Rally or Plan.
At the end of the current Turn make a TQC for the Character with Medic Skill. If successful, flip the Wound Marker to its Bandaged side. A Character may only perform Medical Aid on a single wound per turn.
The -A on the right hand side of the counter shows that a Character with this order is unable to fire for the duration of the Order.

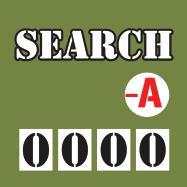
This marker has 0-0-0-0 on it. This Order may be given in order to Search Captured Enemy Officers or the scenario special rules may specify other uses.
If searching a Captured Enemy Officer then, at the start of the turn, there must be such an Enemy Character in the same hex as the Friendly Character performing the search. At the end of the Turn make a TQC for the Friendly Character. If successful, place a Papers Marker on the Friendly Character. These are usually worth Victory Points at the end of the Game [see Rule 22.0].
The -A on the right hand side of the counter shows that a Character with this order is unable to fire for the duration of the Order.
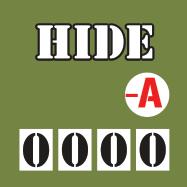
This marker has 0-0-0-0 on it. This Order allows the Character to gain the best defensive benefit from the Terrain it occupies. No movement or firing is allowed.
A spotted Friendly Character may become Hidden if it fulfills all of the following conditions [see Rule 18.0]:
• It has a Hide Order;
• It is in cover;
• It is not in LOS of a Known, Enemy Character; and
• It passes a TQC at the end of the turn.
The -A on the right hand side of the counter shows that a Character with this order is unable to fire for the duration of the Order.
This marker has 0-0-0-0 on it. This Order is used to increase the Morale state of a Character. It may only be given to Characters with a Morale State of Cautious or lower [see Rule 17.0].
At the end of the Turn make a RC for a Character with this Order; this check is modified by Wounds but not Morale State. The Character also receives a bonus of +1 (max +1) to its TQ for this roll if it is within Leadership range of a Friendly Leader. Adjust the Character’s Morale state according to the roll.
Natural 0 = Increase Morale State by 2 (not to Berserk)
<= TQ = Increase Morale State by 1 (not to Berserk)
> TQ = No effect
Natural 9 = Decrease Morale State by 1
Note: If a Friendly Character has a Morale State of Rout then it may only be given a Rally order if it is in cover, out of the LOS of all Known, Enemy Characters and it passes a TQC (unmodified). If it fails, it must be given a movement order and move in direction 5 and/or 6 [see Rule 9.3]. If it enters a cover hex out of the LOS of all Enemy Characters, it may take a TQC; if the Character passes this TQC, it may switch to Duck Back.

The -A on the right hand side of the counter shows that a Character with this order is unable to fire for the duration of the Order.
This marker has 0-1-0-1 on it. This Order is used to carry another Friendly Character. In order to receive this order, a Character must start the Turn in a hex with another Friendly Character. The Character being carried loses any Order that it had and both Characters are now considered to have Carry/Drag Orders. Both Characters move on the Initiative of the carrying Character.
The -A on the right hand side of the counter shows that a Character with this order is unable to fire for the duration of the Order.
This Order is special in that it may not be selected during the Friendly Orders Phase. There are 3 ways this Order is placed:
1. Any Friendly Character may remove its Order and replace it with a Duck Back Order at the end of any Impulse in which it was active – Step 4. a) iii).
2. If a Friendly Character fails a MC, its Order is immediately replaced with Duck Back.
3. If a Friendly Character is hit by Enemy Fire, then its Order is immediately replaced with Duck Back (note that this does not happen in Melee).
The next time that a Character with a Duck Back Order is activated it MUST flip the Duck Back Order to the Hide side.
Note: if the Duck Back is placed on Impulse 4 it will simply be removed during the End Phase [Step 5d)] and not flipped.
There are two types of Characters – Friendly and Enemy.
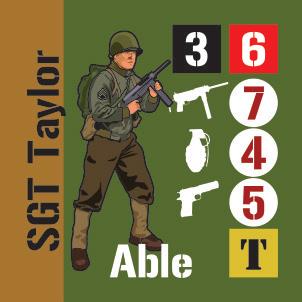
3 – Some Characters have a Leadership Value (LDR). In this example Sgt Taylor has a Leadership of 3. This is used when performing a Plan Order [see Rule 7.12] or another Character is performing the Rally Order [see Rule 7.17].

6 – The Troop Quality of the Character.
A picture of the Character
The name of the Character
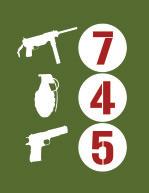
Weapons Skills - These are the Character’s weapon skills and are used when resolving an attack [see Rule 13.0]. Characters will have different skills depending on the weapons they are armed with.
M3 – SMG —> 7
Grenades —> 4 .45 Pistol —> 5
TOUGH – There are 2 additional Skills that Characters may have – Tough and Medic. Tough enables a Character to draw an additional card when wounded [see Rule 16.0]. Medic enables a Character to perform the Medical Aid Order [see Rule 7.14]. Some Characters will have neither of these skills.

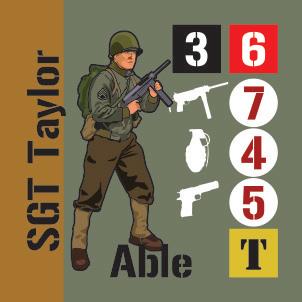


Able – This is the Team that the Character belongs to. Sgt Taylor is part of ‘Able’ Team. Teams are Able, Baker and Charlie.
Each Friendly Character is double-sided and shows the Character as either Hidden or Spotted. Each scenario will specify whether Characters are Hidden or Spotted at the beginning of a scenario. Hidden Friendly Characters may become Spotted by an Enemy Character for a variety of reasons [see Rule 12.0]. Spotted Characters may become Hidden if they have a Hide Order, they are in cover and they pass a TQC at the end of the turn. Note: The default for Friendly Characters is always Hidden. Future scenarios may specify otherwise.


Front = Spotted

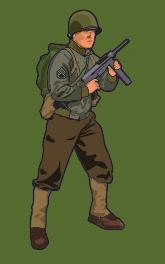


A picture of the Character
The name of the Character
14 – The Character’s ID Number.
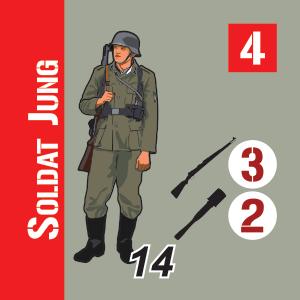
Back = Hidden
4 – The Troop Quality of the Character.
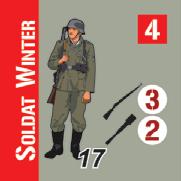
Weapons Skills - These are the Character’s weapon skills and are used when resolving an attack [see Rule 13.0]. Characters will have different skills depending on the weapons they are armed with.
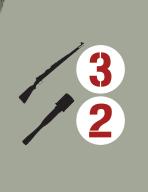
Kar 98k —> 3 Grenades —> 2

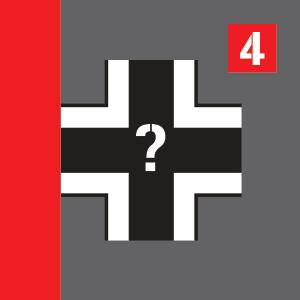
Team – In this example the Rifleman is part of the Red Team. Teams are Red, Blue, White and Yellow.

Each Enemy Character is double sided and shows the Character as either Known or Unknown. Each scenario will specify whether Characters are Known or Unknown at the beginning of a scenario. Unknown Enemy Characters may become Known when they are spotted by a Friendly Character [see Rule 12.0].
Front = Known
Back = Unknown
FRIENDLY Characters are controlled by the player and ENEMY Characters are controlled by the game system.pandagm.com
Card: 88 X 63mm
Bleed: 3mm
Margin Trim Bleed
The Player plays card 06 to the Initiative Track in the Friendly Card Phase. All firing this turn (Friendly or Enemy) will suffer a -1 to the firer’s WS rating.
Card: 88 X 63mm pandagm.com
Margin Trim Bleed Card: 88 X 63mm pandagm.com






Margin Trim Bleed
Corner Radius: 3mm
When drawing for the Enemy forces during the Enemy Card Phase, the cards to the right were drawn.
For Initiative values the Friendly Teams will use the numbers at the top left corner of the Friendly Order Card. (4, 24, 60



The Enemy Teams will use the number at the bottom right corner of their cards (3, 7, 23, 63).

pandagm.com



If using the Large Battles Rule, these will be the only Enemy Cards drawn. If not playing with the Large Battles rule, these will be the first cards drawn for each of the 4 Enemy Teams.
The Teams Initiative Markers are placed on the Initiative Track as shown below. In each Impulse the Blue Team will act first, followed by Able Team, then White Team, Yellow Team, Baker Team, Charlie Team, and lastly Red Team. This order will be reset every turn when fresh Orders are assigned.
NOTE: Spaces 8, 9 and 10 are to allow for possible future expansion.

Card: 88 X 63mm
Margin Trim Bleed Card: 88 X 63mm
Margin Trim Bleed
pandagm.com


Corner Radius: 3mm
Corner Radius: 3mm
Card: 88 X 63mm
For each Enemy Character draw an Enemy Initiative Card during this phase and place the appropriate Order Marker on the Character. If it is the first card drawn for a Team, place it in the box on the Initiative Display corresponding to the Team’s symbol and color. If no cards are available in the deck, then shuffle the discards back into the main deck.
pandagm.com
For each Alert Enemy Character read the line on the card corresponding to the Morale state [see Rule 17.0] and Cover [see Rule 11.0] of the Character. This will specify an Enemy Order to give to the Character. Place the appropriate Enemy Order Marker on the Character. Example: on card 37 shown here, an Enemy Character with Normal Morale in Open Terrain would receive a Sneak 5/6 Order.
The number in the brown circle at bottom right of the card, is the Initiative value of the Team that drew the card - 25 in the example shown.
Note that the first card drawn for a particular Team will be the Initiative value used by that Team for the turn.
Even if a Team has no Alert Characters on the board you still draw a card for that Team and use that Initiative value.
When this is completed, adjust the sequence of Team Initiative Markers on the Initiative Track according to the Enemy and Friendly Initiative Cards in play. Place the Team Initiative Marker of the Team with the lowest Initiative in Box 1 – they will act first in all upcoming Impulses. Arrange the remaining Initiative Markers in numerical order with the highest number in box 7. This Initiative Order will be used for the entire turn.

If a scenario specifies that it is a large battle, do not draw an Order Card for each enemy Character. Instead draw a single card for each Team, assign Orders to each member of that Team from the same card and then place the card in the box on the Initiative Display corresponding to the Team’s symbol and color.
When this is completed, adjust the sequence of Team Initiative Markers on the Initiative Track according to the Enemy and Friendly Initiative Cards in play. Place the Team Initiative Marker of the Team with the lowest Initiative in Box 1 – they will act first in all upcoming Impulses.



Large Battle Example [9.2]


pandagm.com


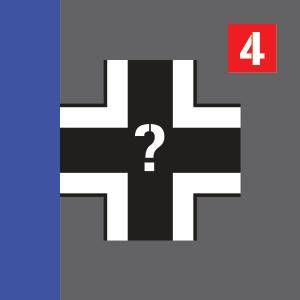
Note: if there had been a spotted Friendly Character within 4 hexes he would have had to make a Grenade Check.
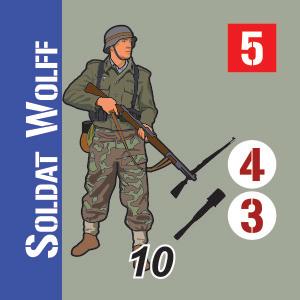
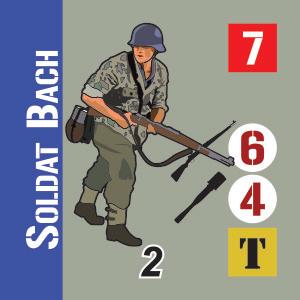
Soldat Wolff and Soldat Bach both have Bold morale (the default) and are in the open. They both receive Sprint - 6 orders.
Note: when they Sprint, the first hex that they enter on Impulse 1 will be hedgerows. Hedgerows are considered to be Rough terrain and therefore both Characters will Duck Back after entering.
Finally, the Unknown Enemy in hex 14.10 has Bold morale and is in cover. He will receive a Run & Gun - 5 order.
Card: 88 X 63mm
Margin Trim Bleed
Corner Radius: 3mm
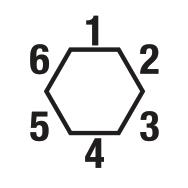
Each scenario will specify the location and facing of the Directional Compass Marker. This will specify 6 different directions and is used to control the movement of Enemy Characters. When an Enemy Character is activated to perform a move Order (Sprint, Evade, etc.) it will move in the direction specified on its Order Marker that corresponds with the same numbered direction on the Directional Compass. If the Order has 2 directions specified, e.g. 5/6 then the Enemy character will move in the first listed direction on Impulses 1 and 3 and move in the second listed direction during Impulses 2 and 4.
Example: An Enemy Character has an Order of Evade 3. On each Impulse that Character will move one hex in direction 3; a total of 4 hexes.

Example: An Enemy Character has an Order of Evade 5/6. On Impulse 1 that Character will move one hex in direction 5. On Impulse 2 that Character will move one hex in direction 6. On Impulse 3 that Character will, again, move one hex in direction 5. Finally, on Impulse 4 that Character will move one hex in direction 6; a total of 4 hexes.
Some scenarios (e.g. Scenario 10) require more than 1 directional marker. Four are provided so that scenarios can be created where enemies are moving (generally) in 4 directions.
If an Enemy Character enters Terrain that is not defined as Open [see Rule 11.0] and has a LOS [see Rule 12.0] to a Spotted Friendly Character, it must make a TQC (not Modified by Wounds and Morale [see Rule 19.0]). The TQC is taken in Step 4 a) iii of the SoP.
If it passes, it will change its Order to Duck Back at the end of its Activation this Impulse. If it fails, there is no effect.
This rule does not apply if the Enemy Order is Run & Gun, Grenade or Charge, or if the Enemy Character has a Morale State of Berserk.
Each scenario will specify which Board edge is the Friendly Board edge and which is the Enemy Board Edge. The other two sides of the Board are considered Neutral.
An Enemy Unit may move freely off the Enemy Board Edge. If the Character was Routed when it exited the Board then the Friendly Player may receive Victory Points [see Rule 22.0].
An Enemy Unit may move freely off the Friendly Board Edge. The Player may lose Victory Points if this happens [see Rule 22.0].
If an Enemy Character has an Order that would cause it to move off a Neutral Board edge, you will need to check the Order:
1. If the Order would mean that the Character would attempt to exit via a Neutral Board Edge for the rest of the turn, change the Order to a Duck Back Order.
2. If it would be possible for the Character to move, during a later Impulse, such that it would not exit the Board then the Character will not perform any action this Impulse. It will move again when it can move and stay on the Board.
Example: An Enemy unit has the Order Evade 1. On Impulse 1 it
moves adjacent to the top of the Board. On Impulse 2 it would be required to move off the map. As it would continue to attempt to move off the map during Impulses 3 and 4, the Order is removed and replaced with a Duck Back Order.
Example: An Enemy unit has the Order Evade 5/6. On Impulse 1 it moves adjacent to the top of the Board. On Impulse 2 it would be required to exit the Board (Direction 6). Because the Character would still be capable of further movement on a later Impulse, it does nothing this Impulse. On Impulse 3 it will move in Direction 5.
Some Enemy Orders will also have the letters C or G next to them. These stand for Charge and Grenade respectively. Before assigning an Enemy Character an Order, check to see if there is a Spotted Friendly Character within 4 hexes (Note that no LOS is required). If there is, and the Order has one or both of these letters, you must make a TQC for that Enemy Character.
• If the Enemy Character passes and the Order specifies a C, then the Enemy Character will receive a Charge Order instead of the Order on the card.
• If the Enemy Character passes and the Order specifies a G, then the Enemy Character will receive a Grenade Order instead of the Order on the card.
• If the Order has both a C and a G next to it, perform a TQC for the first letter listed.
■ If the Character passes, apply that Order.
■ If the Character fails, make a TQC for the second letter and if it passes assign that listed Order.
■ If the second TQC is also failed, the normal Order is given to the Character.
The scenario will specify whether the Enemy are Prepared or Unprepared. Prepared Enemy Characters are ready for the Friendly Characters and will draw an Order as soon as they are Alerted (see below). Unprepared Enemy Characters only draw an Order at the start of their next activation.
Enemy Characters may be Alert or Waiting.
The scenario will specify the default state for all Characters starting on the Board. A Character in Waiting state is considered to have No Order if fired upon [see Order/Terrain Chart].
If the default state is Alert then all Enemy characters will activate as normal. They will never return to Waiting state.
A Waiting Character will become Alert if any one of the 8 conditions below is satisfied:
1. A weapon is fired within 10 hexes of the Waiting Enemy Character.
2. When activated, it has a LOS to a Spotted Friendly Character [see Rule 12.0].
3. Another Enemy character within 3 hexes is hit by Firing.
4. An Alert Enemy Character enters the same hex.
5. A Grenade, Rifle Grenade or artillery attack explodes within 5 hexes.
6. At the end of the Turn the Character is within the LDR Range of a Known, Alert Enemy Officer or NCO.


7. There is a Melee within 3 hexes.
8. At the end of the turn there is an Alert Enemy Character within 3 hexes.
9. After an Enemy Character successfully spots a Friendly Character. See rule 12.0: If it is revealed as a Dummy Character, it is removed. If not, it is flipped back to its Unknown side and has an Alert marker placed on it if not already Alert.
The moment an Enemy character becomes Alert, place an Alert marker on that Character.
Note: a Character in a Waiting State will never receive an Order.
When an Enemy Character becomes Alerted:
If the Enemy State is PREPARED:
• Immediately draw an Enemy Order Card and apply it to the newly Alerted Character.
• Do not use the Initiative value on the card – the Team’s Initiative has already been set at the beginning of the turn.
• Place the card in the Discard pile.
If the Enemy State is UNPREPARED:
• As above but do not draw the Order card until the next Impulse when that Character would be activated.
• When the Order is placed the Character will not begin acting on it until the following Impulse.
If a Friendly Character enters a hex with an enemy character in a state of waiting:
• The Enemy Character is flipped (if necessary) and is now Alerted. If the Enemy Character is Unprepared, then the next time they activate they will not get to act.
Example: A Friendly Character enters a hex containing an Unprepared, Waiting Enemy Character late on Impulse 1. The enemy is immediately flipped to its revealed side and is now considered Alert. A Melee marker is placed in the hex. During Impulse 2 the Enemy Character gets to activate first but will NOT act this impulse as he was Unprepared.
These are double-sided Markers used to record the Alert/Waiting State of Enemy Characters.
A Player may either place Waiting Markers on all Characters and then remove them when they become Alert or leave the Markers off of the Board and only place them when Characters become Alert.
I usually leave the markers off and place Alert Markers until there are more Alert Characters than Waiting Characters. Then I place Waiting Markers on those Characters still in that State and remove all of the Alert Markers.
When an Enemy Character is assigned an Order place the appropriate Marker on the Character.
Note: there are different Versions of certain Enemy Orders that involve movement (Sprint, Run & Gun, Evade, and Sneak). If an Enemy Character receives a movement order that it is incapable of fulfilling due to wounds then it will receive a slower movement order that it is capable of fulfilling in the order – Sprint, Run & Gun, Evade and Sneak.
These will have different movement directions on them and dictate the direction that the Character will move.
When an Enemy Team is Activated you Activate each member of that Team from the top of the map to the bottom. If 2 or more Enemy characters have the same Row number, you Activate the Enemy Character closest to a Friendly Character first. If equally close, choose randomly to determine which Enemy Character Activates first.
If an Enemy Character enters Terrain that is not defined as Open [see Rule 11.0] and it has a LOS [see Rule 12.0] to a Spotted Friendly Character, it must make a TQC (NOT Modified by Wounds [see Rule 16.0] and Morale [ see Rule 17.0]). If it passes, it will change its Order to Duck Back at the end of the Impulse. If it fails, there is no effect.
Each Order is described below.
10.01
This Order works in the same way as the Friendly version.
This Order can be given even if the Character has no Spotted, Friendly Characters in LOS. If the Enemy Character has a Spotted, Friendly Character in LOS during Impulse 2 or 4 of its Activation it must fire.
To resolve any Firing see Rule 13.0.
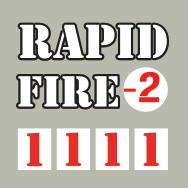

This order is not available to all Weapons [see Rule 14.0] – mainly Bolt Action Rifles. If this Order is due to be given to a Known, Enemy Character armed with a Slow Weapon then replace it with an Aimed Fire Order.
10.03
This Order works in the same way as the Friendly Player equivalents. The counter has 2 sides as some weapons may only use Slow Suppressive Fire (mainly bolt action rifles).
10.04
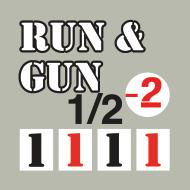
The Enemy Character will move 1 hex in the first direction listed. If it has a target on Impulse 2 it will fire with a -2 modifier. If it doesn’t have a target it will move 1 hex in the second direction listed. It will move again on Impulse 3 in the first direction and then on Impulse 4 either fire (if it has a target) or move 1 more hex in the second direction.
Example: An Enemy Character with the Order Run & Gun
© 2022 Compass Games, LLC.
would move 1 hex in direction 1 on Impulse 1. If it had a target on Impulse 2 it would fire, otherwise it would move 1 hex in direction 2. On Impulse 3 it would move in direction 1 again and finally, on Impulse 4, it would either fire or move in direction 2.
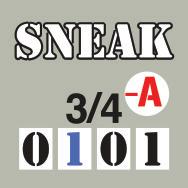
If 2 direction numbers are on the Order, the Enemy Character will move 1 hex in the first direction listed on Impulse 2 and 1 hex in the second direction listed on Impulse 4.
Example: A Sneak 5/6 Order would cause the Enemy Character to move 1 hex in direction 5 on Impulse 2 and 1 hex in direction 6 on Impulse 4.
The -A on the right hand side of the counter shows that a Character with this order is unable to fire for the duration of the Order.

Enemy Characters with this Order will move 1 hex in the direction listed first on Impulses 1 and 3 and 1 hex in the second direction on Impulses 2 and 4.
Example: An Evade 3/2 Order would cause the Enemy Character to move 1 hex in direction 3 on Impulse 1, 1 hex in direction 2 on Impulse 2, 1 hex in direction 3 on Impulse 3 and finally 1 hex in direction 2 on Impulse 4.
The -A on the right hand side of the counter shows that a Character with this order is unable to fire for the duration of the Order.

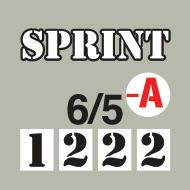
Enemy Characters with this Order will move one hex in the direction listed first on Impulse 1, two hexes in the second direction on Impulse 2, two more hexes in the first direction on Impulse 3 and, finally, two hexes in the second direction listed on Impulse 4.
Example: A Sprint 5/4 Order would cause the Enemy Character to move one hex in direction 5 on Impulse 1, two hexes in direction 4 on Impulse 2, two hexes in direction 5 on Impulse 3 and finally two hexes in direction 4 on Impulse 4.
Sometimes this Order will require an Enemy Character to try and enter Rough Terrain [see Rule 11.0]. If this happens then you will need to check the Order:
• If the Order would mean that the Character would attempt to enter Rough Terrain for the rest of the turn, the Character enters the Rough terrain and then replaces the Order with a Duck Back Order.
• If it would be possible for the Character to move, during a later Impulse, such that it would not enter Rough Terrain then the Character will not perform any action this Impulse. It will move again when it can move and enter a different hex.
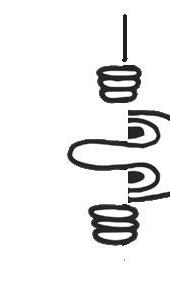
Example: An Enemy Character has the Order Sprint 1. On Impulse 1 it moves adjacent to a Rocky Hex. On Impulse 2 it would be required to enter the Rocky hex. As it would continue to attempt to enter this terrain during Impulses 3 and 4, on Impulse 2 the Character enters the Rocky hex and the Order is removed and replaced with a Duck Back Order.
Example: An Enemy Character has the Order Sprint 5/6. On Impulse 1 it moves adjacent to a Rocky Terrain hex. On Impulse 2 it would be required to enter this Rocky hex (Direction 6). Because the Character would still be capable of further movement on a later
Impulse, it does nothing this Impulse. On Impulse 3 it will move in Direction 5.
The -A on the right hand side of the counter shows that a Character with this order is unable to fire for the duration of the Order.

This Order can be given to an Enemy Character only if it passes a Charge Check [see Rule 19.0]. It will use all movement to try and enter the closest hex with a Friendly Character. If several Friendly Characters are equally close, the target will be the Friendly Character with the lowest TQ; in the event of a tie, choose randomly.
Note: an Enemy Character can enter a Friendly-occupied hex with any movement order but it receives a TQ bonus if charging [see 15.0].
On Impulse 1 the Enemy Character must move 1 hex. If it enters a hex with a Friendly Character, it discards this order and replaces it with a Melee Order [see Rule 15.0].
On Impulse 2 the Enemy Character again moves a single hex. If it enters a Friendly-occupied hex it keeps the Charge Order.
On Impulse 3 the Enemy Character moves two hexes. If it enters a Friendly-occupied hex after moving a single hex, it stops moving but keeps the Charge Order. If not, it moves a second hex in order to try to enter a Friendly-occupied hex; if it does so, it keeps the Charge Order.
If, because of Friendly movement, the Enemy Character is unable to enter a Friendly occupied hex by the end of Impulse 3 then the Enemy Character automatically changes its order to Duck Back at that point.
During Impulse 4 the Enemy Character must melee any one Friendly Character in its hex. It receives a bonus of +1 to its TQ for this attack if it still has its Charge Order [see Rule 15.0].
The -A on the right hand side of the counter shows that a Character with this order is unable to fire for the duration of the Order.
When entering hexes, the Enemy Character uses the following priorities if two or more hexes are equidistant:
i) “Best” (hardest to be hit in) terrain
ii) Randomly
This order can be given to an Enemy Character only if it passes a Grenade Check during Enemy Order placement [see Rule 19.0].
When an Enemy Character receives a Grenade Order place the Grenade Target Marker at the same time as you place the Enemy Grenade Order. If that hex is empty when the grenade explodes the it just makes smoke (although adjacent Characters will still take a MC).
On Impulse 1 the Enemy Character arms the grenade. It will not do anything other than Spot and/or Duck Back. Place a Grenade Marker on the Enemy Character and a Grenade Target Marker on the closest Friendly Character within 4 hexes (chosen randomly if more than one).
On Impulse 2 the Enemy Character will move a single hex but only if the Character’s Grenade Target Marker is four hexes
away or the one-hex move would place the Enemy Character adjacent to the Character’s Grenade Target Marker in a Building hex. If neither of these is true, the Enemy Character will not move. If the Enemy Character does not move, and there is no Friendly Character in the hex with the Grenade Target Marker, move the Grenade Target Marker one hex. The hex moved to must be closer to a Friendly Character.
On Impulse 3 the Enemy Character will throw the grenade up to a maximum range of 3 hexes. Place the Grenade Marker in the target hex and remove the Grenade Target Marker.

Then roll 1D10. Add 3 to the result if the target hex is not in LOS of the throwing Character. If the final result is 9 or more the Grenade will scatter 1 hex in a random direction. Roll 1D6 for direction and place the Grenade Explosion Marker in the resulting hex. Then make a roll against the thrower’s Grenade WS for each Character in the hex with the grenade. Normal Order/Terrain modifiers apply to this roll. A successful roll places a Grenade Near marker on the Character. A failed roll places a Grenade Far Marker.
During Impulse 4 the Enemy Character will move 1 hex if it is currently in an Open hex. It will move in either Direction 2 or Direction 3 and will move to cover if possible. If both hexes in Directions 2 and 3 are the same (both open or both cover), choose randomly.


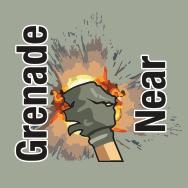
The Grenade will explode at the end of the turn [see Rule 14.2].

Note: If the Enemy Character is forced to Duck Back before throwing the Grenade on Impulse 3 and the grenade is live, place a Grenade Close Marker on the Character and a Grenade Far Marker on all other Characters in the hex (he has dropped the Grenade at his feet). This also applies to Friendly Characters who are forced to Duck Back before throwing an Armed Grenade.
If an Enemy Character has a No Ammo marker [see Rule 13.0 – Step 8] on it when activated and the Order card specifies a Fire Order (Aimed Fire, Rapid Fire, Suppressive Fire or Run & Gun), the enemy Character will automatically receive a Reload Order instead.
At the end of the turn any Enemy Characters that still have this Order may remove any No Ammo marker they have.

The -A on the right hand side of the counter shows that a Character with this order is unable to fire for the duration of the Order.
An Enemy Character running out of ammo during a turn and with no other weapons (other than grenades) will automatically Duck Back at the end of the Impulse. Enemy Characters with a Morale Level of Berserk do not automatically reload but must move according to the rules on Berserk until they are no longer Berserk.
The Enemy Character with this Order is hunkering down and may do nothing else this Turn.
The -A on the right hand side of the counter shows that a Character with this order is unable to fire for the duration of the Order.

An Enemy Character may receive this Order in 2 ways:
1. It may be given this Order by the Order Cards.
2. It may receive this Order if it has a Morale State of Rout, is in cover, out of the LOS of all Spotted, Friendly Characters and it passes a TQC (unmodified). If it fails, it must be given a movement order and move in the direction specified in the Rout Section of the Order Card [see Rule 9.1].
At the end of the Turn make a RC for the Character with this Order (modified by Wounds and current Morale State). Adjust their Morale state according to the roll.
Natural 0 = Increase Morale State by 2 (not to Berserk)
<= TQ = Increase Morale State by 1 (not to Berserk)
> TQ = No effect
Natural 9 = Decrease Morale State by 1
The -A on the right hand side of the counter shows that a Character with this order is unable to fire for the duration of the Order.
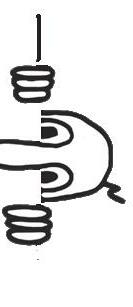

This Order is special in that it may not be selected during the Enemy Orders Phase. There are 4 ways this Order is placed:
1. Any Enemy Character will remove its Order and replace it with a Duck Back Order at the end of any Impulse in which it enters Cover, has a LOS to a Spotted, Friendly Character and passes an unmodified TQC [see Rule 19.0]. This will also apply to Routing Enemy Characters.
2. If an Enemy Character fails a MC, its Order is immediately replaced with Duck Back.
3. If an Enemy Character is hit by Friendly Fire, then its Order is immediately replaced with Duck Back (note this does not happen in Melee).
4. The Character enters Rough terrain with a Sprint order. The next time that a Character with a Duck Back Order is activated it must flip the Duck Back Order to the Hide side. Note that if the Duck Back is placed on Impulse 4 it will simply be removed during the End Phase [Step 5f] and not flipped.
The “Steel Pot” was adopted in 1941, replacing the World War I era M1917 helmet. More than 22 million M1 helmets would be manufactured by the end of World War II. With a steel thickness of 1/8-inch, its weight, inclusive of liner and chinstrap, was approximately 2.85 pounds.

Terrain is divided into 2 main categories – Open and Cover. This is important for Enemy Character movement and a few other rules.
Cover is defined as any Terrain type listed below (Exception: Field); Open is any other Terrain.
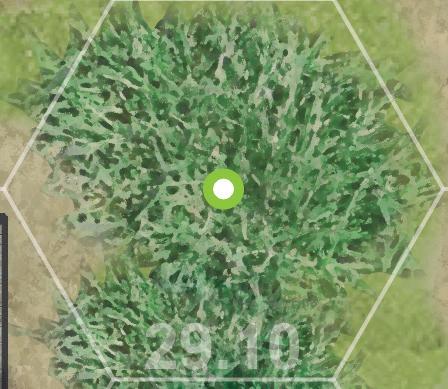

Cover can also be classified as Rough Terrain. Units that enter this terrain with a sprint order MUST switch it for a Duck Back Order at the end of the Impulse.
A hex with any type of smoke in it is always considered Cover.
If only one of the hexes contains LOS blocking terrain then the LOS is NOT blocked.
Rocks are Rough Terrain. Rocks are a size ½ obstacle and block LOS. If a Character in a Rocks hex has certain orders (Hide, Rally or Reload) then the maximum result that can be obtained against it by direct fire is a Morale Check. Exception: This does not apply to OBA or Grenades.

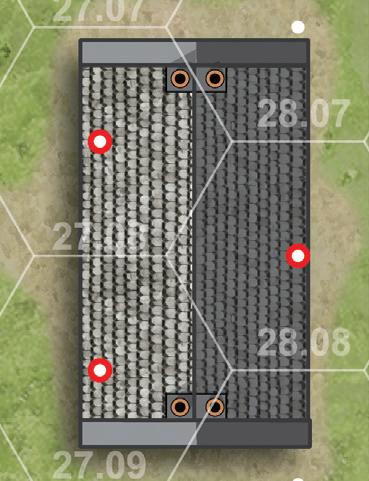
Building hexes are identified by a White center circle with a red border. Buildings are Rough Terrain. Buildings are a size 1 obstacle and block LOS. If a Character in a Building hex has certain orders (Hide, Rally or Reload) then the maximum result that can be obtained against it is a Morale Check. Exception: This does not apply to Grenades thrown into the Building hex from a range of 1 hex.


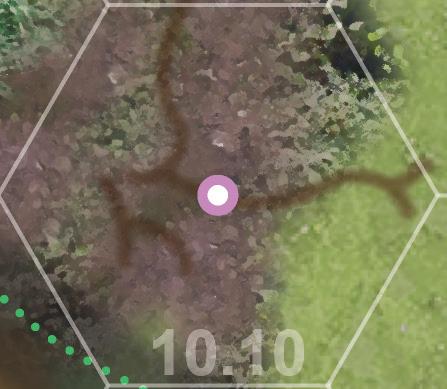
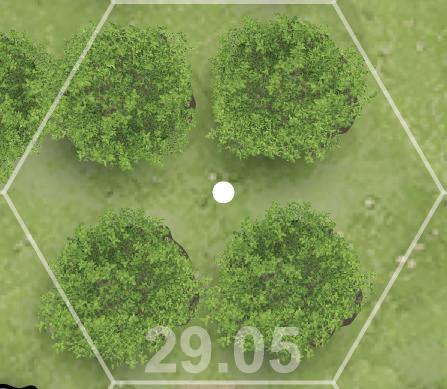
Any hex containing 1 or more Trees is considered a Trees hex. Trees are not Rough Terrain. Trees are a size 1 obstacle and block LOS if the LOS passes through a tree graphic such that the tree can be seen on both sides of a thread stretched between the center of the start and end hexes of the LOS.
Marsh is Rough Terrain. Marsh is a size ½ obstacle and blocks LOS.
Hedgerows are Rough Terrain. Hedgerows are a size ½ obstacle and block LOS. On the Order/Terrain and Spotting Charts, Hedgerow is referred
to as “Hedge.” Note that the Terrain Chart refers to Bocage as well add Hedgerow. Bocage will appear in Combat! 2.
11.06
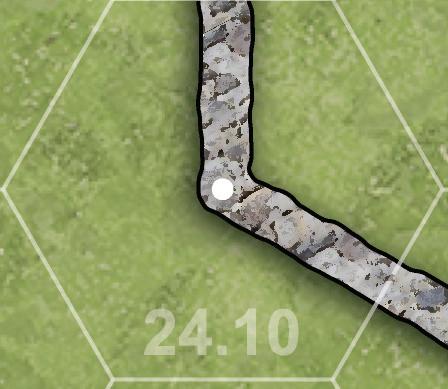
Walls are Rough Terrain. Walls are a size ½ obstacle and block LOS.
Long Grass is a size ½ obstacle and blocks LOS in certain circumstances. Long Grass blocks LOS if either of the two Characters involved have Sneak, Hide, Rally or Reload Orders and the LOS passes through a Long Grass hex.

Depressions are a size -½ obstacle and do not block LOS. However, there is no LOS into or out of a Depression hex if the Character in the Depression hex has Sneak, Hide, Rally or Reload Orders. Exception: A LOS always exists to adjacent hexes or if the LOS can be traced through a series of connected Stream/Depression hexes. Note the green dotted line and number “-½”.
11.09 Stream Streams are Rough Terrain. Streams are a size -½ obstacle and do not block LOS. However, there is no LOS into or out of a Stream hex if the Character in the Stream hex has Sneak, Hide, Rally or Reload Orders. Exception: A LOS always exists to adjacent hexes or if the LOS can be traced through a series of connected Stream/Depression hexes.
Streams are treated as Depressions and use that line on the Order/ Terrain and Spotting Charts.
11.10
Orchards are a size 1 obstacle and block LOS. Note the 4 tree symbols in each hex.
11.11
Logs are a size ½ obstacle and block LOS in certain circumstances. Logs will block LOS if either of the two Characters involved have Sneak, Hide, Rally or Reload Orders and the LOS passes through the Log Graphic.
11.12
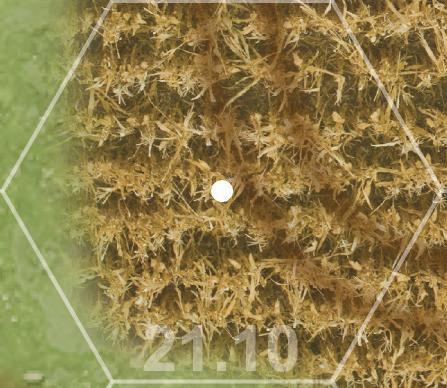
Note that a Field is Open Terrain but has its own line on the Order/Terrain Table [see Rule 13.0 – Step 2]. Fields are a size 0 obstacle and do not block LOS.
Line of Sight Example [12.0, 12.1]
Soldat Berger is in hex 27.08 which is a Level 3 Hex.
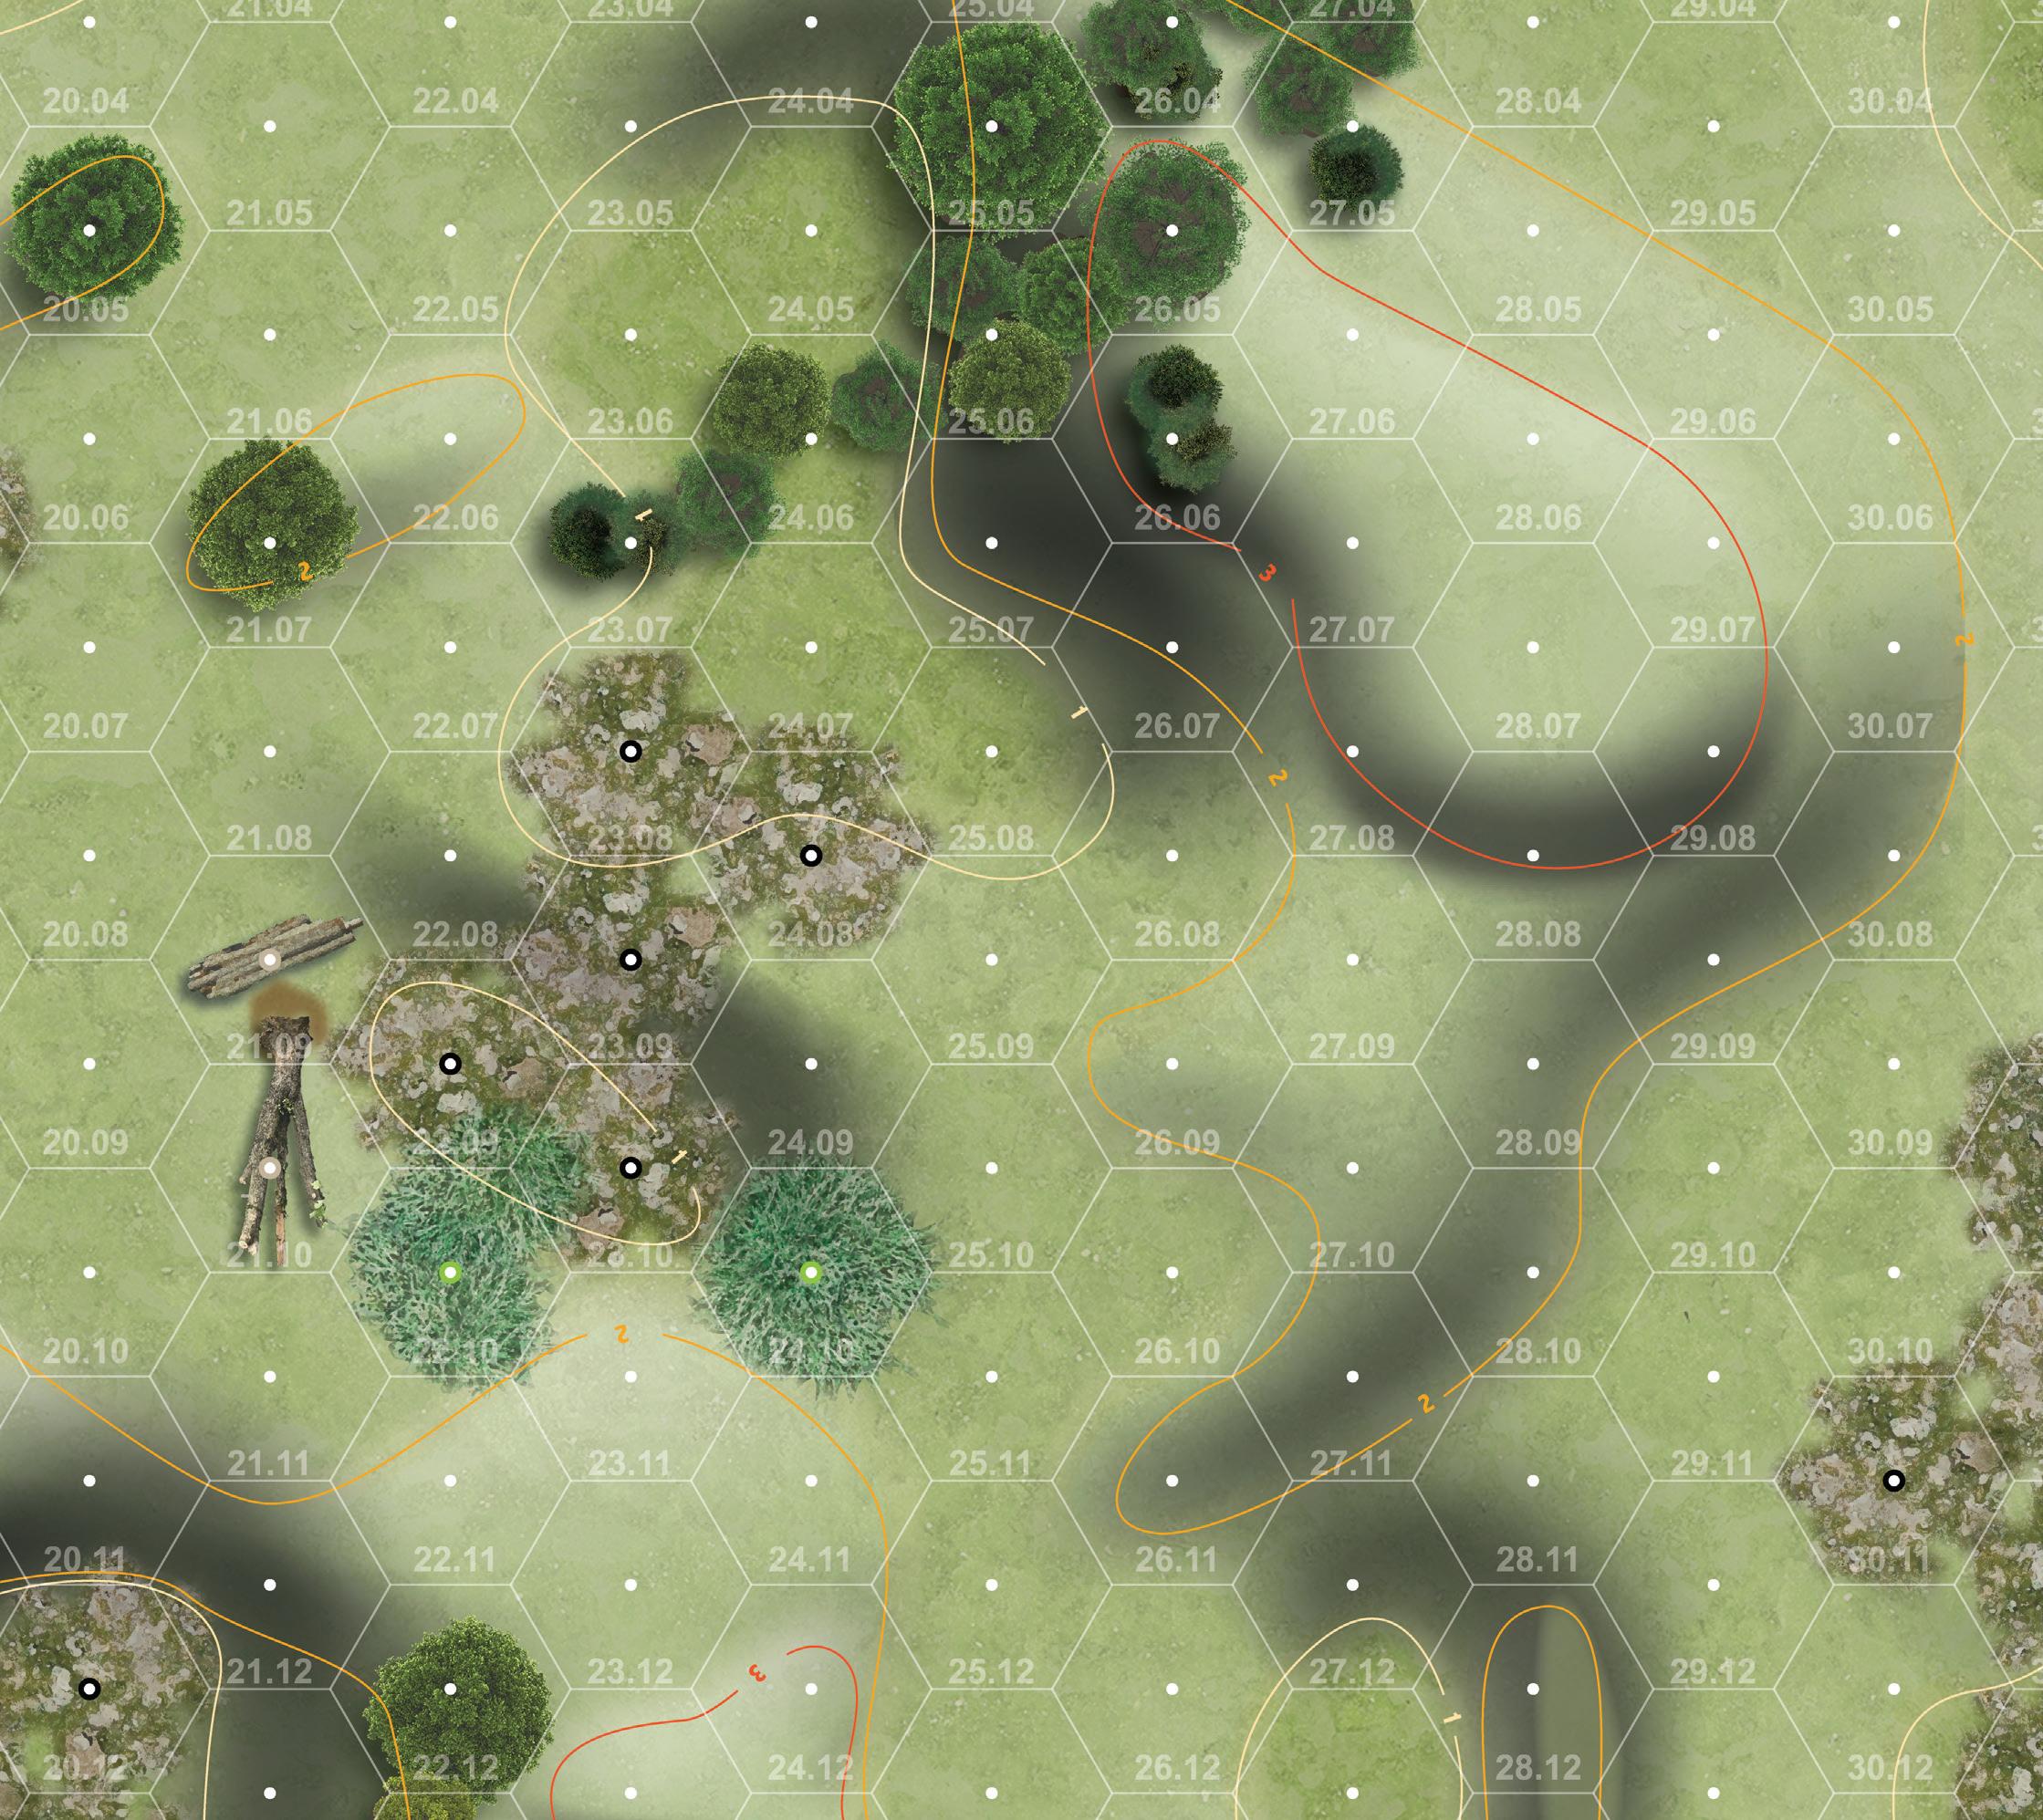
He does have a LOS to hex A. Hex B has an overall height of 1 (Level 0 hex + size 1 tree) and will create 1 blind hex as it is 3 hexes from Soldat Berger. This is reduced to zero because of the 2 Level difference in heights. Hex 23.06 can also been seen because of this.
He does NOT have a LOS to hex B. Hex 25.07 creates a single Blind Hex.
He does have a LOS to hex C. Hex 22.07/22.08 does not create a Blind hex as they are only created to lower level hexes.
He does have a LOS to hex D, as the LOS is down a Continuous slope.
He does have a LOS to hex E. The one blind hex is reduced to zero because of the 2 height advantage over hex 24.09.
He does have a LOS to hex F. No blind hexes are created by hexes 22.11 and 23.11 because they are the same height as hex 21.12.
He does NOT have a LOS to hex G. The LOS passes through hex 26.09 which creates a blind hex. This is not reduced as the height difference is only 1.
He does have a LOS to hex H. The LOS crosses no obstacles.
He does NOT have a LOS to hex I. Hex 28.09 creates a blind hex.
For scenarios set in June-August treat fields as having an “S” for LOS (i.e. they block LOS if the firer/spotter or the Target has Sneak, Hide, Reload, or Rally orders) while in scenarios set outside of those months they do NOT block LOS.
11.13
Foxholes are usually placed via a scenario special rule. Foxholes are a size 0 obstacle and do not block LOS.
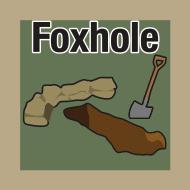
Foxholes are treated like Depressions; that is, no LOS if the Character in the Foxhole has Sneak, Hide, Rally, or Reload orders.
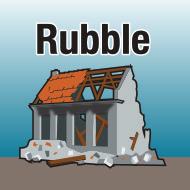
Rubble is usually placed via an artillery hit on a building hex [see rule 20.0]. Rubble is Rough Terrain. Rubble is a size ½ obstacle and does block LOS.
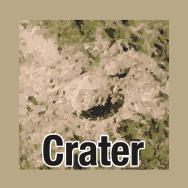
A Crater is Rough Terrain. Craters are a size 0 obstacle and do not block LOS.
Craters are treated like Depressions; that is, no LOS if the Character in the Crater has Sneak, Hide, Rally, or Reload orders.
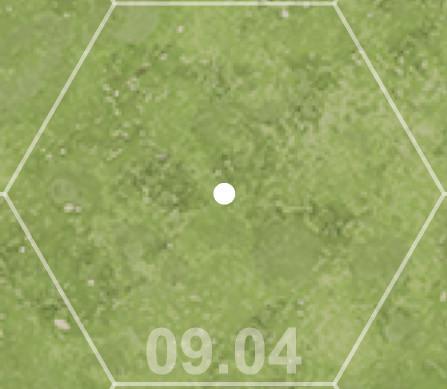
Note: Gardens (e.g. The Farmhouse map, hex 29.08) are treated as Open Ground.
11.17
Note the yellow topographic line and the number “1”, the top of which points to the higher level.
11.18
Note the orange topographic line and the number “2”, the top of which points to the higher level.
11.19
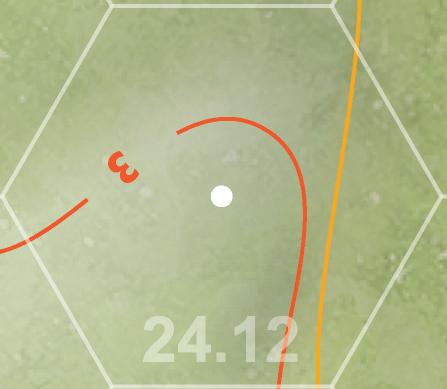
Note the red topographic line and the number “3”, the top of which points to the higher level.
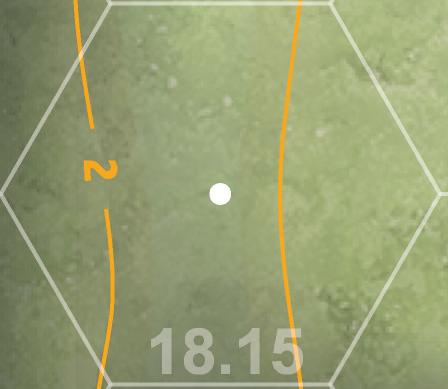
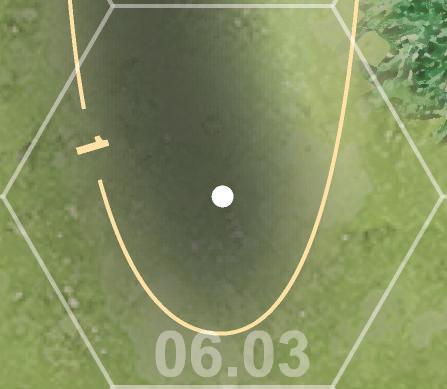
Note: The shadows and highlights in the map art are there for visual effect only - use the topographic lines to determine where the elevation actually changes for purposes of tracing LOS
LOS is defined as being able to draw a straight line from the center of the Spotter’s hex to the center of the Target’s hex without crossing any Blocking Terrain. The terrain in the Spotter’s and the Target’s hex is ignored for this trace.
If a Friendly Character becomes spotted it is immediately flipped to its Spotted side.
If an Enemy Character becomes spotted it is immediately flipped to its Known side.
If an unknown Enemy Character spots a Friendly Character, the Enemy Character is flipped to confirm that it is not a Dummy (which would be removed) and is then flipped back to its Unknown side. This does not affect its Alert status.
1. Count the range from the Spotter to the Target. Count the Target’s hex but not the Spotter’s.
2. Cross reference the Target’s Order with the Terrain it occupies on the Spotting Table. This will give a modifier to the Spotter’s TQ.
3. Apply any modifier required for the range calculated above [see Spotting Table].
4. Apply any modifiers required for Wounds but not Morale.
5. Make a TQC using the modified TQ of the Spotter.
6. If successful, the Target is spotted.
When a Friendly Character is activated it may make Spotting Checks for each Unknown Enemy Character it has a LOS to. Once an Enemy Character has been Spotted it stays that way for the remainder of the game.
When an Enemy Character is activated it may make Spotting Checks for each Hidden Friendly Character it has a LOS to and will make this check regardless of whether it is Alerted, Waiting, Known or Unknown. If currently Unknown and it successfully spots a Friendly Character, it is momentarily flipped to confirm that it is a real Character. If it is revealed as a ‘Dummy’ Character, it is removed. If not, it is flipped back to its Unknown side and has an Alert marker placed on it if it is not already Alert.
Level is defined as a whole number between 0 and 5 (inclusive). The base Level of a map is considered to be 0 unless specified otherwise in the scenario.
Size is defined as a number between ½ and 2 and may be a whole number or a fraction. It is applied to Terrain. For example, Trees are considered to have a Size of 1.
Height is defined as a number between -½ and 7 and is the sum of the Level of a hex and the Size of the obstacle. For example, a Size 1 tree on a Level 1 hill would have a Height of 2.
The terrain in a hex is ignored, for LOS purposes, if spotting or firing into or out of the hex. Exception: Depressions and Streams.
© 2022 Compass Games, LLC.
Intervening Terrain blocks LOS as described in the LOS rules. Some Terrain only blocks LOS if the firer/observer or the target have certain Orders: Sneak, Hide, Reload or Rally.
The hex behind the obstacle (from the higher Character’s perspective) is considered a Blind Hex and may not be seen if it is a lower height than the obstacle.
To see over an obstacle either the firer/observer or the target must have a Height advantage over the obstacle.
The hex behind the obstacle (from the higher Character’s perspective) is considered a Blind Hex and may not be seen if it is a lower height than the obstacle. The number of Blind Hexes created will increase with range:
Range to obstacle Blind Hexes
1-5 1 6-10 2 11-15 3 16-20 4 21-25 5 26-30 6 Etc. Etc.
The number of Blind hexes is reduced by 1 for each value of the Height difference greater than 1. For example, a Character on a Level 3 hill looking over a Height 1 obstacle will have no Blind Hexes out to range 5, 1 from 6-10 hexes etc. A Height difference of ½ does not reduce blind hexes.
A Character in a Depression or Stream hex with Sneak, Rally, reload or Hide Orders is considered to be out of LOS of all Characters except those who are adjacent (2 hexes away if the spotter is at Level 2, 3 hexes away if at Level 3, etc.) or who can trace a LOS to the Character through other Depression or Stream hexes only.
A Character on a hill may see over an adjacent hill hex that is of a lower level without creating blind hexes (Continuous Slope).
To Fire, a Friendly Character must have:
a) A Fire Order (Aimed, Rapid, Suppressive or Run & Gun);
b) A LOS to a Known, Enemy Character; and
c) Sufficient range with the Weapon being used [see Rule 14.0].
Enemy Characters with a Fire Order will choose their target as follows:
1. The easiest target to hit;
2. The closest Friendly Character;
Ties are resolved by random selection. If there is more than one Friendly Character in the target hex then each shot will be fired at a random target.
During an Impulse where a Character is required to Fire, follow this procedure:
1. Count the range from the Firer to the Target. Count the Target’s hex but not the Firer’s.
2. Cross reference the Target’s Order with the Terrain it occupies on the Order/Terrain Chart. This will give a modifier to the Firer’s WS. Exception: Not for Suppressive Fire.
3. Apply any modifier required for the range based on the Weapon used [see Rule 14.0]. This also modifies the Firer’s WS.
4. Apply any modifiers to the Firer’s WS due to Wounds and Morale.
5. Roll 1D10.
6. If the roll is equal to or less than the modified WS then the shot has hit; otherwise the shot misses.
7. If the roll was a natural 0 then increase the firer’s Morale State by 1 (Not to Berserk).
8 If the roll was a natural 9 then the shot automatically misses. In addition, place a Low Ammo Marker on the Firing Character unless it already has a Low Ammo Marker, in which case flip this to the Out of Ammo side. Characters Firing pistols are immune from this rule; pistols never run out of ammo (in game terms).
9. Note that some Order/Terrain combinations will limit the effect of a hit to a MC. If this is not the case, draw a Friendly Player Card and consult the result in the red, wound bar [see Rule 5.1].
Some Weapons have a ROF greater than 1. For each ROF specified on the Weapon Card the player rolls 1D10 to hit as above. These should be rolled one at a time as the Weapon may run out of ammo mid-burst.
Example: Sgt Taylor opens fire with his M3 - Grease Gun on an Enemy Character charging towards him. The M3 - Grease Gun has a ROF of 3 so the player will roll for 3 shots.
The first roll is a 9 – an automatic miss and a Low Ammo Marker is placed on the Sergeant. The second roll is also a 9 so as well as missing, the Low Ammo Marker is flipped to its Out of Ammo side. The third die is not rolled as the weapon is out of ammo.
Some weapons allow the player to select the number of shots fired. This must be done prior to rolling the dice.
If an Enemy Character fires a weapon with multiple ROF settings, it will always use the highest number.
When a Hidden Friendly Character fires a weapon or throws a grenade while in LOS of an Enemy Character (check Unknown Enemies to confirm they are real if necessary) then they are flipped to their Spotted side.
The only way a Spotted Friendly Character may flip back to its Hidden side is via rule 7.16.
When an Unknown Enemy Character fires a weapon or throws a grenade while in LOS of a Friendly Character they are flipped to their Known side.
The only way an Enemy Character may flip back to its Unknown side is via rule 10.11.
© 2022 Compass Games, LLC.
Maximum Range of the weapon


Distance from target when firing Firer’s WS modifier based on distance from target Rate of fire


Example: Shown above is the M3 Grease Gun. It is a Submachine Gun Weapon Type, with a Maximum Range of 12 hexes, and a Rate of Fire of 3. If it was being fired at a target that was 9 hexes away there would be a -2 modifier to the Firer’s WS.
For the sake of this example both Enemy Characters (Wolf and Winter) have been given Grenade Orders.
On Impulse 1 neither Enemy Character will move but both will have Grenade Markers placed on them.
Should they get shot before they can throw them in Impulse 3 the grenade will fall to the ground and explode at the end of the turn.
On Impulse 2 Soldat Wolff will move 1 hex towards Pvt Brubaker because he starts at a range of 4 hexes and a Grenade can only be thrown 3 hexes. Both hexes 14.06 and 14.07 are closer. If one of the two hexes had cover and one was open then he would move into the cover hex. As both hexes are open the Player rolls 1D6 with a 1-3 being hex 14.06 and a 4-6 being hex 14.07. Soldat Winter does not move as he is already 3 hexes away.
Some Weapons are Slow, such as the KAR 98K shown here.
Characters may not use a Rapid Fire Order with a Slow Weapon.
If a Rapid Fire Order is assigned to an Enemy Character with a Slow Weapon, it will be immediately replaced with an Aimed Fire Order. Note that an unknown but Alert Enemy Character with a Slow weapon may be assigned a Rapid Fire Order but this order will be replaced as soon as it is known that the Enemy Character has a Slow weapon.
Any Character using Suppressive Fire will use the Slow Suppressive Fire side of the Marker.
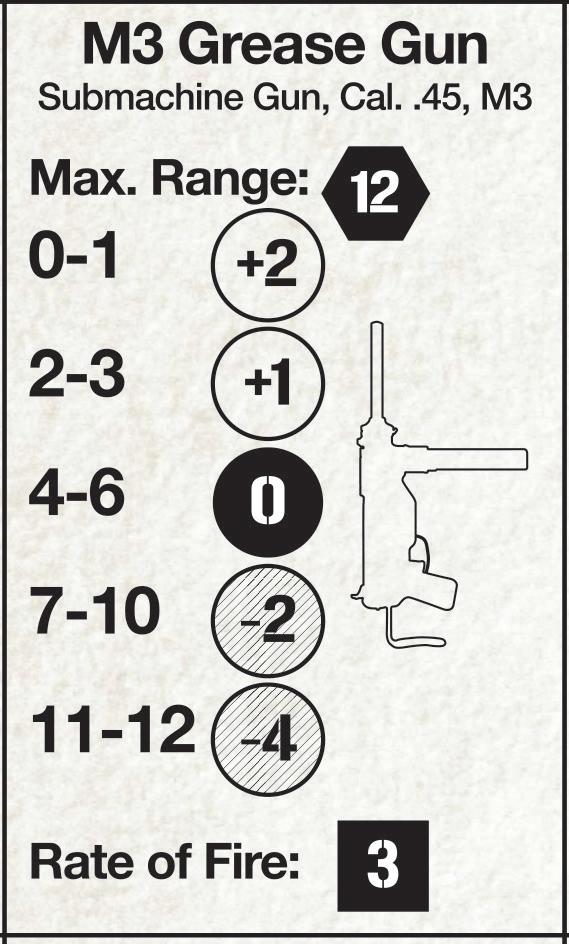

There are other Weapons that are Heavy or even Very Heavy. A Character using a Heavy Weapon will have an additional -2 WS penalty if performing a Run & Gun Order and cannot be issued a Sprint Order.

A Character using a Very Heavy Weapon cannot be given a Run

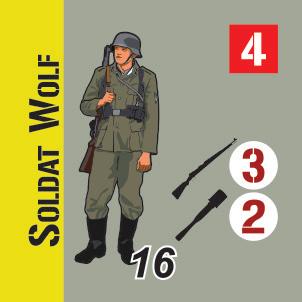


On Impulse 3 both Enemies will throw their grenades and the Player rolls 1D10 for each. Anything but a roll of 9 or more will result in the Grenade landing in the hex targeted. If the Player rolls a 9 he will then roll a D6 and scatter the grenade into an adjacent hex in the direction rolled.
Assuming the grenade lands in a target hex occupied by a Character the Player then rolls against the Enemies Grenade WS. In both cases above this is a 2 or less. If successful then place a Grenade Near marker on the target and if not a Grenade Far Marker. Note that if multiple Characters are in the target hex the Player will roll for each and more than 1 character may end up with a Grenade Near or Grenade Far Marker.
At the end of the Turn the Grenades will explode. For each Character with a Grenade Near Marker the Player will roll 1D10 3 times. A roll of 3 or less (modified by the targets’ Order/Terrain) will cause a hit. For each Character with a Grenade Far Marker the Player will roll 1D10 once. A roll of 2 or less (modified by the targets’ Order/Terrain) will cause a hit. After rolling for hits a smoke Marker will be placed in each hex.


& Gun or a Sprint Order. A Character carrying a Very Heavy Weapon without an Assistant may move only with a Sneak Order [see Rule 14.3].
Impulse 2: Either a) the Grenade Target Marker moves, or b) the Character moves, and if so, must move closer to the Grenade Target Marker (see rules 7.09 and 10.09).
Impulse 3: Roll 1D10 to hit the hex - the only modifier is +3 if the hex is out of LOS. On rolls of 9+ the grenade rolls 1 hex in a random direction.
Weapon Name
Maximum Range Damage Rolls3 Near/1 Far
Frag Roll Target Number 4 Near/2 Far
Smoke Markers to be placed
Example: Shown above is the US Mk II Fragmentation Grenade (left side of display). It has a Maximum Range of 3 hexes. For Damage, 3 dice are rolled for Near and 1 die is rolled for Far. The Frag Target Number for each roll is 4 Near and 2 Far. One Smoke Marker is placed for this grenade.

Max. Range: All Grenades have a range of 3 hexes.
Weapon Name: The name of the weapon being used.
Damage: The number of rolls to make for a Character under a Grenade Near Marker (3), or Grenade Far Marker (1).
Frag: The target number for each roll made. If the roll is equal to or less than the Frag number, then 1 hit is scored on the target. The left number is for Grenade Near (4) and the right for Grenade Far (2). This number is modified by the Order/Terrain of the defending Character.
Smoke: The number of Smoke Counters that will be placed [see Smoke – Rule 18.0].
Grenades explode at the end of a turn [Step 5a] and all damage rolls are made at that point (Exception: Rifle Grenades explode in Impulse 3 when they are fired). Grenades have no chance of causing a Crater or creating Rubble in a Building hex.
IMPORTANT: Any character in or adjacent to a Grenade when it explodes must take a MC, whether they are wounded or not. If they fail this, they will Duck Back. If a Character has a Grenade Near or Grenade Far marker on them and they leave the hex they currently occupy then remove the marker.
Pre-Impulse: When assigning orders a Character may receive a Grenade order. When the order is given you must place a Grenade Target Marker on a hex within a 4 hex range. This applies to Friendly or Enemy Characters.
Impulse 1: Place a Grenade Marker on the Character that is throwing the grenade. From this point the grenade is “live.”
Then make a WS roll using the thrower’s Grenade WS for each Character in the hex where the grenade lands. Modify by the Order/Terrain of the target. Success = place a “Grenade Near” Marker on that Character. Fail = Place a “Grenade Far” Marker on that Character.
Impulse 4: During Impulse 4 a Friendly Character with Grenade orders MAY move an additional hex; this is optional.
During Impulse 4 an Enemy Character with Grenade Orders will move 1 hex if it is currently in an Open Ground hex. It will move in either Direction 2 or 3, and will move to cover if possible. If both hexes into which the Character can move are the same (both Open or both cover), choose randomly.

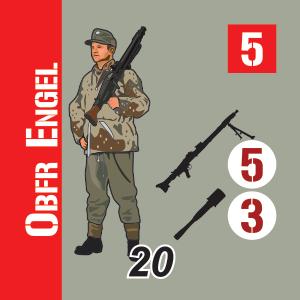
Turn End: At the end of the turn make a number of 1D10 rolls equal to the blast rating of the grenade. Each roll must be equal to or less than the Frag Rating of the grenade in order to score a hit on those with Grenade-Near or Grenade-Far markers. For each hit, draw a card and apply the noted wound.
Any survivors in or adjacent to the Grenade when it explodes now take a MC. If a Character fails MC (due to grenade explosion) at the end of a turn, then they start the next turn with a Duck Back order. This will flip to a Hide order when the character is activated on Impulse 1.
General: Note that nothing MUST move unless the distance between the throwing Character and Target Marker is 4 hexes. The range at Impulse 3 must be 3 hexes or less. Additionally, to move the Target Marker, a TQC must first be passed. So, if the Character is 4 hexes away from the Grenade Target Marker and he fails the TQC, he MUST move closer since the range for grenades is 3 hexes.
The Order/Terrain Modifier for a building hex in Impulse 3 is set to 0 if a grenade is thrown from an adjacent hex, no matter which orders the target has.
Grenades / Artillery ignore (M) on the Order/Terrain Chart and may always cause wounds.
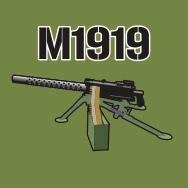
Enemy Characters will not target a hex with a grenade if that hex contains another Enemy Character.
A Character has a Grenade-Far Marker placed on them when they enter a hex containing a live, thrown grenade. The GrenadeFar marker is removed if that Character leaves the hex.
Friendly Belt-Fed Weapons are represented by their own counter and must be assigned to a Character to move or fire.
Enemy Belt-Fed Weapons are ‘built in’ to the counter.
To be used effectively there need to be two Characters in the hex with the Belt-Fed Weapon. The Character with the higher TQ is called the ‘Operator’. The other Character is called the ‘Assistant’.
When firing the weapon, the TQ of the Operator is used as the WS. If no Assistant is present, the Operator’s TQ minus three (-3) is used.
Low ammo is only placed if two 9’s are rolled in a single attack (therefore four 9’s need to be rolled to go Out of Ammo). If no Assistant is present, a single 9 will trigger low/no ammo.
If no assistant is present, the Belt-Fed weapon may only be moved by the Operator using a Sneak Order.
Assistant benefits do not apply to an Enemy MG team if they are using a Run & Gun Order.
The Assistant is assumed to have the same order as the Operator. A different order may be given to move, etc. the Assistant but no benefits for an Assistant are received this turn.
The benefits of an Assistant are not gained if the Assistant is killed, or receives a Bad Wound.
If the enemy draw a Belt-Fed Weapon from the Cup they will automatically receive an Assistant who is placed in the hex with the Operator.
If an Enemy Operator is killed, or receives a Bad Wound and there is an Assistant present, then at the end of the turn the Assistant becomes the Operator and vice-versa. In other words, the Assistant takes over firing the weapon. The wound is transferred to the Assistant.
The TQ of a Character is used to fire an MG. The Gunner has a 5 next to the MG as a reminder, but it is the TQ that is used. The Assistant has an MG symbol only to show that he is part of the MG team.
• An Enemy MG Operator and Assistant will work together. They will both be considered to have the same Order. If this is a Fire Order, then only the Operator will fire and the Assistant will simply provide the benefits above. If it is any other Order, then both Characters will move, Rally, etc. together.
• If one of the Characters receives a Bad Wound then the two Characters will act independently from that point on and will be assigned their own orders.
•If an Enemy MG, with Normal or greater morale, has a LOS to a Spotted, Friendly Character then they (and their Assistant if present), will automatically receive an Aimed Fire Order unless they have either (a) LOS to 3 or more Spotted, Friendly Characters, OR (b) LOS to a Spotted, Friendly Character within 3 hexes. In both cases (a) or (b), the MG Operator (and Assistant if present) will receive Rapid Fire orders. If (a) or (b) do not apply, then draw for Orders normally.
•MG Operators (and their Assistant if present) will ignore Charge and Grenade checks.
•Note that MGs are Very Heavy Weapons. If an Enemy MG Operator / Assistant team receives a Sprint order then it will become an Evade Order with the same direction(s) on it. If the MG Operator is operating independently then a Sprint or Evade order will be replaced with a Sneak order of the same direction(s).
Example: On Turn 2 the Enemy Operator takes a hit from a Friendly Character and receives a Bad Wound. At the end of the turn the Assistant would take over firing the MG. Simply remove the Bad Wound Marker from the Operator and place it on the Assistant. In effect the two Characters have changed roles.
Example: On Turn 5 the Operator is hit and killed. At the end of the turn remove the Assistant Character and replace it with the Operator Character. In effect the Assistant has become the Operator.
Should 2 or more Characters from different sides be in the same hex at any time, immediately remove their current Orders and place a Melee Marker on the hex.
Exception: If a Character has a Charge Order and it is Impulse 2, 3 or 4, this Character keeps the Charge Order.
Exception: If one or more Characters have a Morale State of Rout then follow this procedure:
a) If a side with Characters having a Morale State of Rout also has Characters that DO NOT have a Morale State of Rout, the Characters with Rout replace their Morale State with Shaken and take part in the Melee as normal. This can apply to both sides at the same time.
b) If only one side has Routing Characters and no non-Routing Characters, then they Surrender [see Rule 17.4].
c) If both sides have Routing Characters and no non-Routing Characters, they will ignore each other and continue with their Orders.
Characters with a Melee Order will attack in melee on Impulses 2 and 4.
To make a Melee attack, a Character makes a TQC (modified by Wounds and Morale State):
• If successful, a hit is scored – draw a Wound Card [see Rule 5.1]. Characters hit in melee do not receive a Duck Back Marker but will take MCs and WMCs as normal.
• If failed, there is no effect.
A Character in a hex with a Melee Marker may not spot outside of the hex.
A Hex with a Melee Marker on it may not be fired into by either side.
If a Character wins a melee and there are no Enemy Characters in the hex, it automatically receives a Duck Back Order when it next Activates.
Characters in melee may not leave the melee hex until all opposing Characters are dead or have surrendered.
An Unspotted, Friendly Character or an Unknown, Enemy Character making a Melee attack receives a bonus of +2 to their TQ for the first attack. After this Melee attack they lose their Unspotted/Unknown status.
Whenever a hit is obtained through firing, explosion or in Melee, the player draws a Friendly Player Card to see the effect of the hit. Exception: Suppressive Fire causes an automatic MC.
Check the text in the red stripe along the card. After resolving the wound, place the card in the Discard pile. There are 4 possible results:


1. Close Call – MC


a) The target must take a MC.
2.
a) Place a Light Wound Marker on the target.
b) Remove the Target’s Order and replace it with Duck Back.
c) The Target must take a WMC.
Card: 88 X 63mm

Bleed: 3mm

being carried/dragged by another Character). They are now incapacitated.
Incapacitated Friendly Characters are not treated as Targets by Enemy Characters either for firing or for a Charge or Grenade order. Any Incapacitated Character on the map at the end of a scenario that do not have a Friendly Character within 2 hexes are treated as captured. Incapacitated Characters may not participate in Melee, and are, effectively, ignored by Enemy Characters.

This Character may now only be Carried/Dragged or be treated by another Character with a Medical Aid Order.
Should the total TQ modifier of a Friendly Character’s wounds exceed the Character’s TQ (in other words the total modifiers from wounds would take a Character’s TQ to BELOW zero) that Character is Dead – remove the Character and any Markers it had and place a Friendly Corpse Marker in the hex.
Enemy Characters are dead if the total TQ modifier of their wounds EQUALS or EXCEEDS their TQ. Replace them and their Markers with an Enemy Corpse Marker.
Note that Morale TQ Modifiers do not apply to Death or Incapacitated status, only wounds.

Corner Radius: 3mm
d) Character may not be assigned Sprint orders.
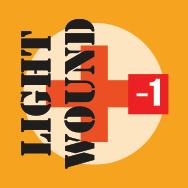

3. Bad Wound
a) Place a Bad Wound Marker on the target.
b) Remove the Target’s Order and replace it with Duck Back.
c) The Target must take a WMC.

d) Character may not be assigned Sprint, Run & Gun, nor Evade orders (so Sneak only for movement)


4. Head Wound - Dead
a) Replace the target with a Corpse Marker.

If a wound is successfully treated by someone with Medic Skill, flip the wound Marker to its Bandaged side.
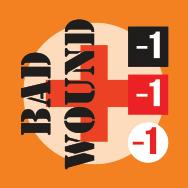
A Character with a bandaged Light Wound suffers no movement restrictions.
A Character with a bandaged Bad Wound may not be assigned Sprint orders.
Bandaged Characters do not count as “wounded” for VP purposes (another reason to bandage them).
Should the total TQ modifier of a Friendly Character’s wounds equal the Character’s TQ (in other words the total modifiers from wounds take a Character’s TQ to zero), that Character may only be given a Hide Order (or a Carry/Drag Order if
Each scenario will specify a default Morale State for all of the Characters on the Friendly and Enemy Sides. Do not place Morale Markers on Characters who are at the default Morale State.
A Character’s Morale State can rise due to:
Rolling a zero when firing (possibly confirmed with a TQC [see Rule 19.0])
Rolling a zero when taking a MC 3. A successful Rally Order
A Character’s Morale State can fall due to: 1. Failing a MC (possibly 2 levels if a 9 is rolled)
Rolling a 9 on a Rally Order
A WMC (possibly 1, 2 or 3 levels)
© 2022 Compass Games, LLC.
Each of these Morale States modifies a Friendly Character’s TQ. They have no other effect and a Friendly Character with one of these Morale States is free to select any Order within the normal rules.
Each of these Morale States modifies an Enemy Character’s TQ and is also used to determine the Order that they receive each Turn.
Berserk is a Morale State that can only be gained in one way: If a Character rolls a natural zero when rolling for a MC and has a Morale State of Aggressive.
Friendly Characters with a Morale State of Berserk may only be given the following Orders:
• Rapid Fire (Aimed Fire is allowed if the Character is armed with a Slow Weapon) if the Friendly Character has a LOS to a Known Enemy Character, OR if no LOS to a Known Enemy Character
• Charge,
• Sprint (Directions 2 or 3 only),

• Evade (Directions 2 or 3 only),
• Run & Gun (Directions 2 or 3 only),
• Melee,
• Grenade (All Optional Moves MUST be taken and must be in Directions 2 or 3).
If wounded and unable to Sprint or Evade but still with a Morale State of Berserk, a Friendly Character may Sneak (Directions 2 or 3 only) but only if they do not have a LOS to a known, Enemy Character.
If a Berserk Enemy Character is within 4 hexes of a Spotted, Friendly Character, it will automatically Charge.
Assuming that they do not Charge, Enemy Characters with a Morale State of Berserk will always move in the direction specified on the Order Card for their Team. The type of movement is as follows:
• If the Enemy Character has a LOS to a Spotted, Friendly Character and Wounds allow, it will use a Run & Gun Order in the direction specified under Berserk on the Order Card.
• If the Enemy Character does not have a LOS to a Spotted, Friendly Character, it will use the fastest move Order that Wounds will allow in the direction specified under Berserk on the Order Card.
From fastest to slowest, the move Orders are: Sprint, Run & Gun, Evade, Sneak.
Rout is the lowest Morale State. It is obtained through reductions of Morale as a result of combat.
1. A Friendly Character with a Morale State of Rout that has a LOS to a Known, Enemy Character will move in Directions
5 and 6 using the fastest possible Order from the following List: from fastest to slowest – Sprint, Run & Gun, Evade, Sneak. The Character may not voluntarily Duck Back during the Turn.

2. A Friendly Character with a Morale State of Rout that does not have a LOS to a Known, Enemy Character and is in Cover will make a TQC and if successful the Character may select a Rally Order. Should it fail the TQC or if the player decides not to Rally, the Character will move as 1 above.
1. An Enemy Character with a Morale State of Rout that has a LOS to a Spotted, Friendly Character will move in the direction specified under the Rout Line on the Enemy Order card for the Character’s Team using the fastest possible Order from the following List: from fastest to slowest – Sprint, Run & Gun, Evade, Sneak.
2. An Enemy Character with a Morale State of Rout that does not have a LOS to a Known, Enemy Character and is in Cover will make a TQC and if successful the Character MUST select a Rally Order. Should it fail the TQC, the Character will move as 1 above.
Should a character with a Morale State of Rout ever be in a hex with a Character from the other Side, it will Surrender if there are no non-routing Characters from its own side.
Remove the Rout Marker and replace it with a Shaken Marker. Also remove the current order of the Character from the other side and replace it with a Guard Order. The Guard Character is considered to have No Order if fired upon this Turn. It is now considered a Guard until another Character from its side starts the Turn in the same hex and takes over the Guard duties. Once a Character has surrendered it can no longer be the target of Firing or Melee by the Guarding side (it may still be hit by its own side if the hex is fired upon in an attempt to remove the guard).
A Friendly Guard may only be given certain Orders: Evade, Sneak, Rally, Plan or Hide.


An Enemy Guard will use Evade if possible (or Sneak if wounds prevent Evade) to move in the direction specified under Rout for its Team. If it leaves the board, the Friendly Character that it is Guarding is considered to be captured.
Surrendered Characters are considered to have the Order of their Guard and move with their Guard.
Should a Character with a Morale State of Rout be in a hex with a Character from the other side but there are also non-Routed Characters from its own side in the hex then remove its Rout Marker and replace it with a Shaken Marker. This Character will take part in any Melee in the hex.
If a Character who has surrendered ever finds itself in a hex without a Guard, it will Automatically receive a Duck Back Order. At the start of the next turn it will draw (Enemy) or choose (Friendly) an Order normally.
© 2022 Compass Games, LLC.
If an Enemy Character is Ordered to fire into a hex with a Friendly Guard and an Enemy Character, it will only do so using Aimed Fire. If this is not possible due to Weapon limitations, it will treat the hex as a non-target and fire elsewhere if possible.
A Friendly Character may abandon Guard Status by receiving a Sneak, Evade, Run & Gun or Sprint Order.
The Enemy Character will receive no Orders this Turn. Draw normally on the following Turn.
A Friendly Character may also abandon Guard Status by receiving an Aimed Fire or Rapid Fire Order.
As soon as either of these fire Orders are placed draw an Enemy Card and check the ‘Rout’ direction.
Immediately move the Enemy Character 1 hex in that direction. This Enemy Character will receive Orders, as normal, in the upcoming Enemy Orders Phase.
A Berserk Character will not take prisoners. If the Berserk Character is alone with a Character of the other side who has surrendered, the Berserk Character will kill them.
If more than one Enemy Character is eligible to become a Guard, choose the one with the lowest TQ.
A friendly Character with a grenade has a Routing Enemy Character enter their hex on Impulse 2, the Friendly Character can throw their grenade on Impulse 3 and then is immediately given Guard orders. If the enemy was using Evade or Sprint Orders, then the enemy could (if moved first) exit the hex on Impulse 3 while the Friendly Character throws their grenadehe just runs through the hex and has no effect on the grenade thrower.
Any Character who is a prisoner and has a guard in their hex is treated as captured at the end of any Mission / Scenario.
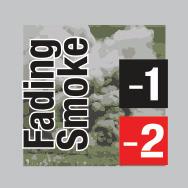
Smoke Markers are double-sided. They have the following effects:
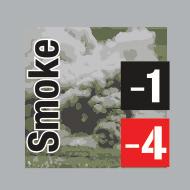
• Smoke or Fading Smoke lowers the LDR Rating of a Character in the same hex by 1.
• Any LOS traced into, through or out of a Smoke hex will be subject to a -4 modifier (WS if firing, TQ if Spotting).
• Any LOS traced into, through or out of a Fading Smoke hex will be subject to a -2 modifier (WS if firing, TQ if Spotting). These modifiers are cumulative for multiple markers.
Smoke can be placed in a variety of ways: Grenades, Smoke Grenades, Rifle Grenades and Artillery will all place Smoke.
All of these weapons have a Smoke value on their Weapon Card. Smoke is always placed it the same manner:
i) At the moment a Grenade explodes or Artillery lands, place a Smoke Marker in the hex. At the end of each subsequent Turn add 1 Smoke Marker downwind of the previous one placed.
ii) If, at the end of the Turn, Markers equal to the Smoke
Value of the Grenade or Artillery have already been placed, flip them all to their Fading Smoke side. At the end of each Turn after this remove one of the Markers (starting with the one furthest downwind) until all Markers have been removed
At certain times in the game Characters may be required to make various checks: a Morale Check (MC), a Rally Check (RC), a Troop Quality check (TQC) or a Wound Morale Check (WMC).
All of these Checks are rolled against a Character’s TQ rating. This is usually modified by the effects of Wounds and the Character’s current Morale State. Sometimes an unmodified or partly modified TQC must be made. These are mentioned in the relevant rules sections.
Die roll Effect
Natural 0
Increase Morale 1 Level
<= Character’s Troop Quality No Effect
> Character’s Troop Quality Reduce Morale 1 Level
Natural 9 Reduce Morale 2 Levels
Die roll Effect
Natural 0
Increase Morale 2 Levels (not Berserk)
<= Character’s Troop Quality Increase Morale 1 Level (not Berserk)
> Character’s Troop Quality No Effect
Natural 9 Reduce Morale 1 Level
Also used for Charge and Grenade Checks
Die roll Effect
<= Character’s Troop Quality Pass
> Character’s Troop Quality Fail
Die roll Effect
Natural 0 No Effect
<= Character’s Troop Quality Reduce Morale 1 Level
> Character’s Troop Quality Reduce Morale 2 Levels
Natural 9 Reduce Morale 3 Levels
See a Smoke example on following page.
© 2022 Compass Games, LLC.

In this example a Grenade, an 81mm Mortar and a Smoke Grenade have landed during Turn 1. The 81mm mortar explodes during the turn and has a Smoke Marker placed on it. The Grenades will explode at the end of Turn 1 and have Smoke Markers placed on them then. So at the end of Turn 1 each hex will have a Smoke Marker.
At the end of Turn 2 each Grenade, Smoke Grenade, Artillery Marker will compare the number of Smoke Markers with its Smoke Rating.


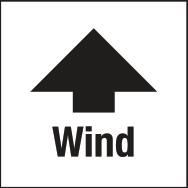



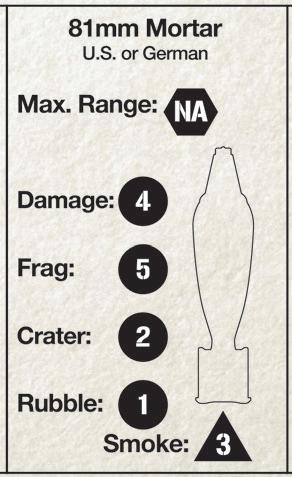




The Mk 2 Grenade has a Smoke Rating of 1 and already has 1 Smoke Marker so this will be flipped to its Fading Smoke side. The Other 2 Markers have Smoke Ratings higher than the 1 Smoke Marker on each so will both have an additional Smoke Marker placed in the direction of the wind (hexes 15.08 and 14.08).
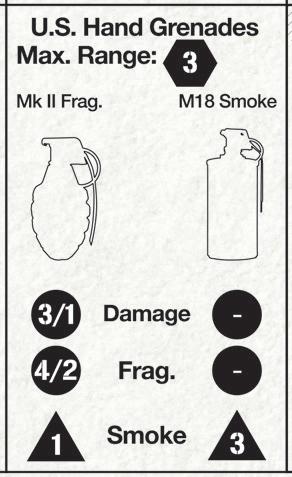


At the end of Turn 3 the Grenade in hex 16.08 will have the Fading Smoke Marker and the Grenade Marker removed. The 81mm Mortar and the M18 Smoke Grenade will have an additional Smoke Marker placed in hexes 15.07 and 14.07 respectively.
At the end of Turn 4 the Smoke Markers from the 81mm Mortar Marker and the Smoke Grenade will be flipped to their Fading Smoke side.
Starting on Turn 5 the furthest Marker will be removed.
Off Board Artillery attacks are generated by Random Events during the game and are out of the control of the player. When an Off Board Artillery attack is generated the Event will have the following attributes:
• The type of fire (60mm, 81mm, 105mm, etc.). In this case, Friendly 81mm mortar fire.
• The number of attacks that you roll for. For each attack roll 1D10 for the Initial Hex number and place an artillery Marker of the appropriate size in the hex.
• Scatter 1D6. For each attack now roll 1D6 for the direction and the appropriate die or dice as specified in the Event. Artillery will attack all characters in the final hex.
Maximum Range Weapon Name Damage Rolls5 in hex/2 adjacent
Frag Number 5 in hex/3 adjacent
Crater Roll 4 in hex/0 adjacent Rubble Roll 5 in hex/0 adjacent
Smoke Markers to be placed
An 81mm Mortar Strike has been rolled on the Friendly Random Event Table (in the Scenario Book).
The Player rolls 1D6 to see how many artillery strikes are received. For the sake of this example he rolls a 1.
He then rolls 1D10 and gets a 9. An 81mm Mortar Marker is placed in hex 12.10.


The Event specifies a scatter of 1D6. Therefore the Player rolls 1D6 for the direction and 1D6 (the specified distance) for the distance.
Assume that he rolls a 2 for direction and a 3 for distance. This means that the artillery Marker will end up in hex 15.09.
The Player now consults the Weapon Display for the 81mm mortar.
If the attack had landed in a building hex the player would roll 1D10 to see if it was rubbled. It would rubble on a roll of 1 or less.
As it is not a building hex the Player rolls to see if a crater is formed. He would need to roll 2 or less for this to occur.
If the hex was occupied the Player would make 4 rolls (Damage Rating) needing a 5 or less to inflict a wound. This last roll would be modified by the Order/Terrain of the target.
Finally a Smoke Marker is placed in hex 15.09.
Example: Shown above is the 105mm Howitzer. Its Maximum Range is N/A (not applicable). For Damage it receives 5 attack rolls within the target hex and 2 for all adjacent hexes. The Frag Number is 5 in the target hex and 3 for adjacent hexes. The Crater Rating for this weapon is a 4 unless it lands in a building, in which case the Rubble rating is used, which is also a 4. Finally, 4 Smoke Markers are placed for this weapon.
Weapon Name: The name of the weapon being used.
Max. Range: The Maximum Range the weapon can be used at. Range is not applicable for Off Board Artillery and is marked N/A.
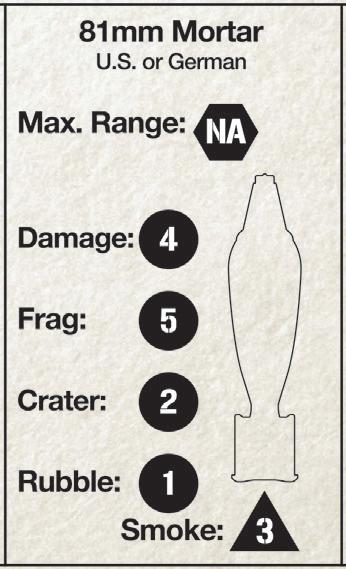
Damage: This specifies the number of attacks made by the Artillery against each occupant of the hex.
Frag: For each attack a die roll equal to or less than the Frag number is a “hit”. This number is modified by the Order/Terrain Chart like any other attack.

Crater: After completing all attacks roll 1D10 – if the result is equal to or lower than the Crater rating then place a Crater Marker in the hex. This hex is now treated as Crater Terrain. Do not make this roll if the artillery lands in a Building hex.
Rubble: If the Artillery landed in a Building hex then do not roll for Crater. Instead roll 1D10 and compare it with the Rubble rating. A die roll equal to or less than the Rubble rating places a Rubble Marker in the hex. All occupants of the hex are killed –
Roll 1D6 – Then roll 1D10 that many times and place an 81mm Mortar marker in each hex rolled. Scatter 1D6.

Roll Hex # 0 20.07 1 27.11 2 20.14 3 27.16 4 30.12
Roll Hex # 5 28.07 6 19.14 7 24.13 8 23.06 9 12.10
replace them with Corpse Markers.

Smoke: This number determines the number of Smoke Markers to be placed [see Rule 18.0].
Some Artillery is large enough to affect adjacent hexes as well as the target hex. There are now two values for the Damage, Frag, Crater and Rubble ratings separated by a slash:

• The number to the left of the slash specifies the values to be used for the target hex.
• The number to the right of the slash specifies the values to be used for each hex adjacent to the target hex.
IMPORTANT: Any character in or adjacent to any OBA when it lands must take a MC whether it is wounded or not. If it fails this, it will Duck Back.
A scenario special rule or option may set the engagement at night. The rule or option will specify the maximum range that Spotting and Firing can occur (Exception: see Illumination below). It will also specify any modifiers to Spotting and Firing.
Example: At the start of the game roll 1D6 and add 2. This is the maximum range that a target can be seen. There is an additional -2 to all spotting chances beyond range 2 and all firing beyond range 2.
Some scenarios will allow for the use of flares or have OBA fire as Illumination.
Flare markers may be specified as being available and will be allocated as per the scenario rule. On other occasions flares will be fired by random event.
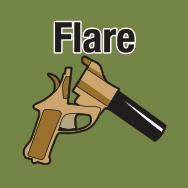
A Flare fired by a Friendly Character may be fired a maximum of 6 hexes. An Aimed Fire Order is required to fire a flare. On Impulse 2 place the flare marker anywhere within range and roll for scatter. The Character that fired the flare then immediately receives Duck Back Orders.
Unless otherwise specified in the scenario, flares will scatter 1D6-2 hexes. A Flare will flip to its Illumination side after scatter.
All hexes within 3 hexes of an Illumination marker count as daylight, i.e. no -2 modifier to Spotting or Firing, and may be seen from any hex with an unblocked LOS.
At the end of each turn AFTER the one in which it was fired, roll 1D10. On a roll of 8 or 9 remove the Illumination marker. If the Illumination marker is not removed, move it 1 hex in the direction of the wind marker.
Roll 1D6, place the Wind marker in any convenient place on the map and face the wind arrow in the corresponding direction on the Directional Compass.
Optional Rule 1:
If an Enemy Soldier is about to fire and his chance of hitting reduces his WS to below zero (0) then he must first make a TQC. If he fails, he will fire otherwise he does nothing
Optional Rule 2:
For Enemy Characters with a default Morale Level of Normal only: An Enemy Character, in cover and with a LOS to a Known Friendly Character at the start of the Enemy Card and Order Phase must make a TQC. If they pass, then they are given a Rapid-Fire Order unless they have a Slow Weapon in which case, they will be given an Aimed Fire Order. If they fail, then they will draw an Order as usual.
Optional Rule 3:
Firing on a hex occupied by more than one Character: 1. Occupied by multiple Opposing Characters.
a. Enemy Characters will fire on the Friendly Character who is easiest to hit. If this results in more than 1 available target, the actual target will be chosen by random selection.
b. Friendly Characters may choose their target if firing from 5 or fewer hexes away. If firing from more than 5 hexes away, then the target will be chosen by random selection.
2. The target hex is occupied by both Friendly and Enemy Characters.
a. To fire at a hex with both Friendly and Enemy Characters the firing Character must have an Aimed Fire Order, use a weapon with a ROF of 1 and be at a range of 5 hexes or less.
Enemy Characters closer than 6 hexes will fire on the Character who is easiest to hit. If this means that there is more than 1 possible target, then the actual target will be chosen by random selection. Friendly Characters may choose their target otherwise the target is chosen by random selection. Note: No Characters may fire or throw grenades into a melee hex.
Instead of drawing Enemy Order Cards during the Enemy Card and Order Phase just draw a single card to determine each Enemy Team’s Initiative. Only draw and place Orders for a specific Character when that Team is activated or when an Enemy Character that does not yet have an Order is fired upon. This helps increase the fog of war by preventing the player from possibly knowing everything the enemy will do until he commits to a course of action on Impulse 1. It also spreads the ‘job’ of placing Enemy Orders.
All scenarios are laid out in a similar format.
1. Date: June 1944 Rough date of the scenario.
2. Location: France Err...the location of the battle.
3. Map: The Farmhouse Map or Maps to use.
4. Enemy Forces – Place the following Enemy Characters into the Cup: The numbers of each enemy Character, of each of the 4 teams, that will be placed in the Cup at the start of the game. All enemy forces will be drawn from the Cup.
5. Setup – Draw Enemy Characters from the Cup and place, face-down, in the following hexes: One at a time draw an Enemy Character from the Cup and place them in the hexes specified.
6. Friendly Forces (See Setup Instructions below): The make-up of friendly forces. To obtain the exact Characters in your squad roll 1D6 and consult the table below:
Each scenario will specify:
1. Which Event Table to use – either the Generic Attack and Defense ones or scenario-specific ones.
2. The Enemy Default Alert Level – Waiting or Alert.
3. The Enemy Default Morale Level – Shaken, Cautious, Normal, Bold or Aggressive.
4. If the Enemy are – Unprepared or Prepared.
© 2022 Compass Games, LLC.
5. The Friendly Default Morale Level – Shaken, Cautious, Normal, Bold or Aggressive.
6. The Player’s Starting Hand Size.
7. The location of the Compass counter and the hex that the ‘1’ Arrow points towards.
8. Friendly Character setup information.
9. The Game Length in Turns.
Able: Sgt Taylor, Pvt Cragg, Pvt Brubaker
The player will gain or lose victory points for certain actions specified in each scenario. At the end of the game the player counts up his points and checks them against the table provided.
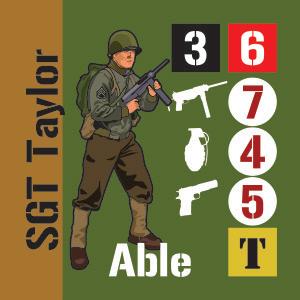
Example:
15+ Superb Victory – a commendation for this action has been noted in the soldier’s 201 files
1
Baker: Pvt Johnson, Pvt Peters, Pvt Miller
Charlie: Cpl Thomas, Pvt Butterman, Pvt Walsh, Pvt Stubbs, Pvt Kowalski, Pvt Temple
Able: Sgt Mayfield, Pvt O’Connell, Pvt Crowe
2
3
Baker: Pvt Goldstein, Pvt Donahue, Pvt Woodruff
Charlie: Cpl Stinson, Pvt Connor, Pvt Dougless, Pvt Lozano, Pvt Maloney, Pvt Meeks
Able: Sgt Taylor, Pvt O’Connell, Pvt Brubaker
Baker: Pvt Johnson, Pvt Donahue, Pvt Woodruff Charlie: Cpl Stinson, Pvt Butterman, Pvt Dougless, Pvt Stubbs, Pvt Maloney, Pvt Temple
Able: Sgt Mayfield, Pvt O’Connell, Pvt Brubaker
4
Baker: Pvt Goldstein, Pvt Peters, Pvt Miller
Charlie: Cpl Thomas, Pvt Connor, Pvt Walsh, Pvt Lozano, Pvt Kowalski, Pvt Meeks
Able: Sgt Taylor, Pvt Cragg, Pvt Crowe
5
Baker: Pvt Johnson, Pvt Peters, Pvt Miller
Charlie: Cpl Thomas, Pvt Butterman, Pvt Dougless, Pvt Stubbs, Pvt Maloney, Pvt Temple 6
Able: Sgt Mayfield, Pvt Cragg, Pvt Crowe
Baker: Pvt Goldstein, Pvt Donahue, Pvt Woodruff
Charlie: Cpl Stinson, Pvt Connor, Pvt Walsh, Pvt Lozano, Pvt Kowalski, Pvt Meeks
12-14 Good Victory 9-11 Just scraped the win 6-8 Not Good Enough 1-5 Poor Performance <=0 Court Martial “-A” in Black Square: No Leadership (“Minus All”) “+” or “-” in Red Square: DRM for Troop Quality Check “+” or “-” in White Circle: DRM for Weapon Skill
© 2022 Compass Games, LLC.
Action Phase 4
Aggressive 3, 25, 26, 30, 31 Alert/Waiting 14, 15 Artillery 23, 27, 28, 29
Bandages 25
Berserk 3, 10, 14, 17, 21, 25, 26, 27 Board Edges 14 Bold 3, 13, 25, 26, 30, 31
Friendly 5
Card Use
Enemy Card 2, 4, 12, 27, 30 Event Card 6 Friendly Card 4, 5, 6, 7, 12 Cautious 3, 10, 25, 26, 30, 31 Character 11 Character - Definition 2
Charge and Grenade Checks 14, 27 Charge (C) and Grenade Check (G) Charge and Grenade Checks 14, 27 Cover - Definition 18
D6/D10 Definitions 2
Damage Roll Grenade - Near/Far 23 Off-Board Artillery 29 Death of a Character 25 Directional Compass 14, 30
End Phase 4
Enemy Card and Order Phase 4 Enemy Character 11
Firing Procedure 21
Flare 30
Frag (Fragmentation) 23, 28, 29
Friendly Card Phase 4 Friendly Order Phase 4, 7
Grenades 23
Damage Rolls 23 Rifle Grenade 9 Smoke Grenade 9 Guard 26, 27
I Illumination 29, 30 Incapacitated 25
Initiative Track 12
L
Large Battles 12, 13 Leadership 2, 7, 9, 10, 11, 31 Line of Sight 2, 19, 20
Medic Charcter Skill 10, 25 Melee 6, 8, 10, 15, 16, 17, 24, 25, 26, 31 Morale 25
Aggressive 3, 25, 26, 30, 31 Berserk 3, 10, 14, 17, 21, 25, 26, 27 Bold 3, 13, 25, 26, 30, 31 Cautious 3, 10, 25, 26, 30, 31 Normal 3, 9, 13, 17, 24, 25, 26, 30, 31 Shaken 3, 24, 25, 26, 30, 31 Movement Order 26
Night 29 Normal 3, 9, 13, 17, 24, 25, 26, 30, 31
Orders
Aimed Fire 7, 15 Carry/Drag 10 Charge 8, 16 Duck Back 10, 17 Evade 8, 16
Grenade (G) 9, 16 Hide 10, 17 Medical Aid 10 Plan 5, 9 Rally 10, 17 Rapid Fire 7, 15 Reload 10, 17 Rifle Grenade 9 Run & Gun 8, 15 Search 10
Smoke Grenade 9 Sneak 8, 16 Sprint 8, 16 Suppressive Fire 8, 15
Papers Marker 10 Prepared/Unprepared 14
Rally Check 3, 27 Rate of Fire 21, 22 Rout 3, 10, 17, 24, 25, 26, 27 Rule of 0 3
Sequence of Play 3, 4
Action Phase 2, 4, 7
End Phase 4, 10, 17
Enemy Card and Order Phase 4, 30
Friendly Card Phase 4, 5, 12
Friendly Order Phase 4, 7 Shaken 3, 24, 25, 26, 30, 31
Smoke 4, 9, 23, 27, 28, 29
Spotting check 20 Surrender 24, 26
Teams Definition 3 Terrain
Building 17, 18, 23, 29
Crater (Rough Terrain) 20, 23, 28, 29
Depression 18, 21 Field 18 Foxhole 20
Hedgerow (Rough Terrain) 18 Level, Size, Height and Terrain 20 Logs 18
Long Grass 18 Marsh (Rough Terrain) 18 Orchard 18
Rocks (Rough Terrain) 3, 18 Rubble (Rough Terrain) 20, 23, 28, 29 Stream (Rough Terrain) 18, 21 Trees 18, 20 Wall (Rough Terrain) 18
Tough Character Skill 11
Troop Quality 27 Troop Quality check 27
V
Victory Conditions 31 W
Weapons 22
Belt- Fed Weapons 23
Grenades 4, 9, 11, 18, 22, 23, 27, 28
Slow Weapons and Heavy Weapons 22 Wound Morale Check - WMC 3, 25, 27 Wounds 5, 10, 14, 15, 17, 20, 21, 24, 25, 26, 27
Bad Wound 5, 24, 25
Close Call 5, 25
Head Wound 25 Light Wound 25