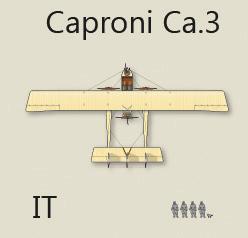
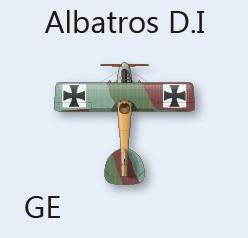
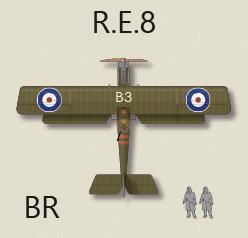
Rules of Play Rules of Play


1.0 IntroductIon
The Great War has raged in Europe for over 2 years and settled into a stalemate in the trenches. Massive loss of life results in minimal progress on the ground, as the technology of machineguns, massed artillery, and barbed wire has trumped the capabilities of soldiers with bolt action rifles. New technology has arisen, however – in the skies. Reconnaissance aircraft roam above the lines, and bombers drop bombs with impunity. The arming of aircraft to kill other aircraft has also developed, and the technological race for air supremacy has begun.
Western Front Ace is a solitaire, tactical level game placing you in command of a scout (fighter) aircraft during the second half of the First World War. Your mission is to destroy as many enemy scouts, bombers, and reconnaissance aircraft as possible, while advancing your crew quality and increasing your personal rank and awards—all while remembering you have to make it home amidst diminishing odds of survival as the war progresses.
Players will find it extremely challenging to survive an entire tour from September 1916 to the end of October 1918, at which time the game ends, as the Armistice occurs shortly thereafter. You will start with one of the aircraft available to your chosen nationality at the start of the game, but as your fame and prestige rise, more advanced fighters will be available to choose from.
The rules are numbered and presented in sets of major sections, each section divided into numerous major and secondary cases. The rules cross-reference other rules using (parentheses), so for example you will see, “Place the appropriate Ammo markers in the armaments section of your Display Mat (4.5 and 4.6.)” meaning cases 4.5 and 4.6 are related to this rule. The rules of this game have been arranged both for ease of comprehension on first reading and for ease of later reference.
IF YOU ARE NEW TO OR UNFAMILIAR WITH HISTORICAL GAMES,
DON’T PANIC! Many of the player aids are either optional, or only used infrequently, if at all during a game. The game itself plays quickly and simply once you get the hang of it. First, look at any of the aircraft Display Mats, the Combat Mat, and the playing pieces, then give the rules a quick read through. Please don’t try to memorize them. Follow the setup instructions for play and then read Section 2.0, that describes the general course of play. Section 4.0 provides the framework to help you get started. As questions arise, simply refer back to the rules. After a few minutes of play, you will find yourself becoming familiar with the game mechanics. Online game support is available. There are several options to choose from:
Visit us on the Web: https://compassgames.com
Contact us by email: sales@compassgames.com
You can also use the URL or QR code to reach Compass Games online: https://linktr.ee/compassgames

General customer service and game parts support are provided by Compass Games.
We also recommend you visit the official game discussion topic on ConsimWorld for game support, to read after action reports, and to share your play experience with others. You will find the Western Front Ace game topic by visiting talk.consimworld.com and navigating to the Western Front individual game discussion area.
Note: Throughout the rules, you will see numerous italic sections such as this one. These sections are filled with examples, clarifications, play hints, design notes, and other assorted wisdom in order to help ease you along. Blue text indicates game notes while those in brown are historical notes.
2.0 How to Play tHe game object of tHe game
The object of the game is to conduct numerous sorties as the pilot of a scout (fighter, in WW1 terms) aircraft and to shoot down as many enemy aircraft as possible. The success of each sortie is reflected by the total number of aircraft downed or any special mission completed, which can result in promotion and advancement—culminating in receiving one of many highly coveted awards, based on your nationality. You will face relentless risks as each patrol becomes more hazardous due to the passage of time and the new, and more advanced, enemy aircraft you will be engaging. The ultimate success you achieve rests considerably on the decisions you make while conducting patrols during the course of your career.
Overall victory level is determined at the end of the game based on total victories achieved (which can also be determined posthumously if you are killed in action.)
The key game components used to facilitate play are the various Aircraft Display Mats to track the status of your aircraft with tracks for your patrols and current endurance (fuel) levels, the 2-Seater Target Mat to resolve 2-seater aircraft encounters, and the Sortie Log Sheet to track the activity and success of each patrol (the term “sortie” and “Contact Patrol” are interchangeable in the game.) The various Player Aid Cards are used to resolve game functions. Some are optional to provide additional historical information.
general overvIew
In general, play revolves around conducting numerous sortie assignments and resolving any encounters until safely returning to base. Upon completion of each patrol, you assess the success achieved by consulting your Sortie Log Sheet, which may result in a promotion/award for yourself. Between sorties you may check to see if you have become eligible to fly a more advanced type of scout (fighter.) You may also need time to recuperate from any personal injury before being able to conduct your next sortie.
conductIng contact Patrols
Your Aircraft Display Mat shows the overall status of your aircraft as you fly sorties. When conducting Contact Patrols, your aircraft progresses through Travel Boxes on the mission track, or loiters in place, checking for possible encounters each time, including the possibility of a random event.
Typically encounters involve aircraft encounters, although you may encounter enemy observation balloons. For each encounter, you decide to engage in combat or attempt to avoid it. You will also record all aircraft you engage during combat on the Sortie Log Sheet, noting whether you damaged or destroyed them.
As you conduct combat, you will inflict and receive damage during dogfights. At the end of a dogfight, you must decide whether to continue on patrol or head back to base. Combat engagements against multiple enemy aircraft can be deadly if you’ve opted to fly solitary – an option given to ace pilots. Additionally, damage of any kind is serious when you consider the fragile nature of your craft, and should influence your decision on when it is time to abort your sortie. An even larger concern should be that there are no parachutes (except for Germans toward the end of the war) and getting shot down means almost certain death.
return to base
Once your aircraft completes its sortie by returning to base (after any possible final encounter in the Base Box on the Mission Track), you may receive awards or decorations, and
check to see if a more advanced type of aircraft is available. Convalescence due to wounds received may delay your next flight. Unlike other games in this series, there is never downtime for repair – due to the Contact Patrol system, you are always assumed to have a repaired aircraft ready for your next flight.
end game
Once all patrol assignments have been carried out through October 1918, the game ends. Also, should you be killed in action or be captured the game immediately ends. Whether you survive until your final sortie or not (ending October 1918), tally the total number of aerial victories to determine your level of victory achieved. Typically, to record an entire career, you will want to note all aircraft shot down, your final rank, and any awards achieved. Of course, if you have been killed, any accolades and results are recognized posthumously.
Historical Note: The term for a fighter aircraft in World War 1 was “scout.” Throughout the rules, however, the modern term “fighter” will be often used for the sake of convenience as most players will find it less confusing.
3.0 game equIPment
[3.1] aIrcraft dIsPlay mats
The 30 double-sided Aircraft Display Mats (60 aircraft) provided correspond to each aircraft type available to the seven nationalities represented. This mat helps track the status of your aircraft and systems, including available weapons and ammunition at your disposal. Select the appropriate Display Mat corresponding to the aircraft type you have selected for play. This mat is the centerpiece when conducting game play and carrying out Contact Patrols. The use of this mat is explained in the appropriate rules section. The following lists available aircraft for play by nationality: allIed Powers
British Empire:
• F.E.8
• Airco DH.2
• Sopwith 1 ½ Strutter
• Sopwith Triplane (RNAS only)
• Sopwith Pup
• Sopwith Camel
• Sopwith Dolphin
• Sopwith Snipe
• Bristol F2A
• Bristol F2B
• Airco DH.5
• S.E. 5
• S.E. 5A
• B.E. 12
• Nieuport 17
• Nieuport 23
• Nieuport 27
• Spad S.XIII
French:
• Nieuport 17
• Nieuport 21
• Nieuport 23
• Nieuport 24bis
Belgian:
• Nieuport 11
• Nieuport 23
• Spad S.VII
• Spad S.XIII
US:
• Nieuport 27
• Spad S.VII
• Spad S.XII
• Spad S.XIII
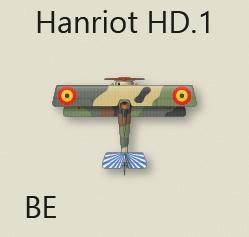
• Hanriot HD.1
• Sopwith 1½ Strutter
• Sopwith Camel
[3.3] PIlot status cHart
There are eight Pilot Status Charts [A2] – one for each of the seven nationalities and one for the British RNAS. The appropriate one should be placed to the side but within reach of the play area. The others are not needed until you play a different game with a different nationality. It is used to track skills, awards, and your pilot’s current Prestige Level, which is used to determine aircraft available for upgrade.
[3.4] tHe PlayIng PIeces
• Nieuport 17

• Nieuport 24bis
• Nieuport 28
Italian:
• Nieuport 11
• Spad S.VII
central Powers
German:
• Halberstadt D.II
• Albatros D.I
• Albatros D.II
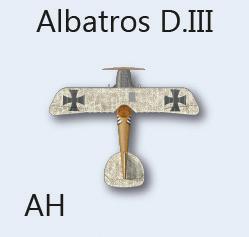
• Albatros D.III
• Albatros D.Va
• Pfalz D.III
• Pfalz D.IIIa

Austro-Hungarian:
• Hansa-Brandenburg D.I
• Aviatik D.I
• Spad S.VII
• Spad S.XIII
• Sopwith Camel
• Spad S.XIII

• Hanriot HD.1
There are 310 playing pieces in two die-cut sheets included with Western Front Ace. These playing pieces are referred to as markers and are placed on the Aircraft Display Mat to track status of your plane and crew, or on other displays. Markers are provided for individual aircraft, crew members, ammo rounds, random events, and the status of crew and systems.
Note: some extra markers (damage markers, for example)— have been printed as spare parts should any become missing or damaged.
[3.4.1] How to read tHe markers
• Pfalz D.XII
• Fokker D.III
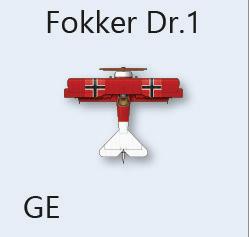
• Fokker Dr.I Triplane
• Fokker D.VII
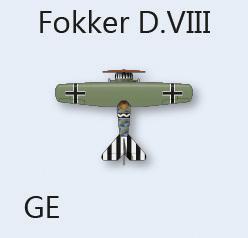
• Fokker D.VIII
Western Front Ace counter mix provides markers to track the status of your plane and for resolving engagements. These markers may include information, such as die-roll modifiers, to facilitate play. An explanation of each marker type is explained below.
[3.4.2]
Aircraft:
• Phönix D.I
• Albatros D.II
• Albatros D.III
The same type of aircraft flown by multiple nationalities each have their own separate play mat with the appropriate national symbol on it. For example, there are several mats for the Spad S.XIII.
[3.2] 2-seater & fIgHter dIsPlay mats
The 2-Seater Target Mat [B10] and enemy Aircraft Display Mats are used to resolve combat against 2-seater aircraft (recon and bombers) and enemy scouts, respectively. They should be set beside your Aircraft Display Mat during play. The use of these mats is explained in the appropriate rules section. You should sort the Aircraft Display Mats by nationality for ease of play, as you will (typically) only be engaging one enemy nationality at a time, and will either use the 2-seater combat mat or an enemy Aircraft Display Mat when conducting combat.
game markers
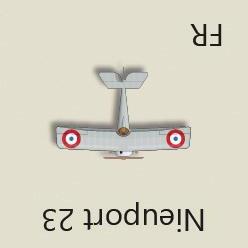
The various aircraft markers correspond to the type you have selected and are placed on the Aircraft Display Mat to track progress of your assigned sortie.
Officer Ranks:
Four numbered Officer Rank markers are provided (from 1, the lowest, to 4, the highest) for each nationality (or for the British, branch of service) to track your promotion level as a pilot.
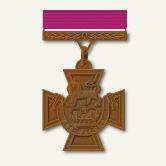
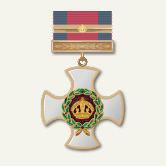


Medals & Awards:
Various awards may be bestowed on you based on your career success. Some are tied to your place of birth, if German. Although mainly for historical interest, the major game impact is that most of them raise your Prestige Level, an important game mechanic that allows you to fly more advanced aircraft as they become available.
Crew and Wingman Skills:
As you gain experience, another key game mechanic is the improvement of your pilot, wingman, and crew (if you have one of the rare scouts equipped with an observer) by the purchase of skills. These skills have a direct impact on your combat capabilities and survival. Your pilot begins the game with one experience point, granted for having graduated from Flight School.


Random Events:

While most Random Events are resolved immediately, some can be used later during play and these markers should be placed on the Aircraft Display Mat until used.

Armament:


Ammo markers represent machinegun ammo carried in your weapons and are two-sided showing either “1” or “2” ammo points. Additionally, spare drum markers represent extra ammo for your Lewis guns, if so equipped. These are also two-sided, representing one or two spare drums. Each spare drum, when used to reload your Lewis gun, gives three ammo points to that gun. Only one drum may be loaded at a time.
Damage:

Damage Markers are provided to track damage to wing struts, the tail, and any possible damage to engines and other systems. These markers are only placed on your Aircraft Display Mat when damage occurs. They have an “INOP” side for systems that are knocked out (specifically, engines and weapons.) The Gun Jam marker, while not technically damage, indicates this status if it occurs.
Crew Status:
Crew status markers are provided to track severity of injury or KIA results.

Mission Markers:
Markers are provided for your Aircraft Display Mat to show the current mission you have been assigned to perform.
Map Markers:
Markers are provided for the map (if used) to represent your currently assigned base, current Major Ground Offensives (MGO), and landing weather.

[3.4.3] game cards

3.4.3.1 tHe combat card deck
There are 60 combat cards in the game. The cards have multiple uses and a different section of the card is used
depending on the use - offensive fire, defensive fire, wingman support, rear gunner combat, etc. This deck should be shuffled at the start of every month, or as needed.
3.4.3.2 tHe HIstorIcal aces
There are 24 Historical Ace cards, used for players who wish to recreate the career of a historical pilot during the time frame of the game. Their use is mainly optional, although there is a random event in which you will have to fight one of them.
3.4.3.3 sequence of Play cards
Sequence of Play cards have been included to assist players for the first few missions (or for as long as desired) in conducting their missions. Their use is optional.
[3.5] cHarts and tables
Several 2-sided and one 1-sided Player Aid Cards are provided to facilitate game play and resolve game functions. The use of these charts and displays are explained in the appropriate rules section. Specific charts and tables are referenced by their ID in [square brackets].
When a die roll is called for, each table specifies the die roll combination necessary, which in some cases may include each die representing a different place value. In such instances, use a colored die to distinguish place values. For example, on chart [B6] for a roll of “1d6+1d6,” the first d6 represents the tens’ place value and the second d6 the ones’ place value. This means a roll of 3+4 is a “34” and not a “7.”
[3.6] tHe sortIe log sHeet
The Sortie Log Sheet is used for each game session to record your nationality and name, along with individual sortie assignments, and damaged or downed aircraft. Feel free to photocopy these sheets as needed.
[3.7] game scale
Each Endurance Box on the Aircraft Display Mat represents approximately 30 minutes of endurance in flight. Although each sortie is conducted in a day, the concept of “Contact Patrols” means that the number of sorties recorded in a month is variable. Select markers represent individual aircraft, specific crew members, and ammo rounds.

[3.8] Parts Inventory
A complete game of Western Front Ace includes the following components:
• Two full-color counter sheets (9/16-inch counters)
• One Rules Booklet with Designer’s Notes
• Twelve Player Aid Cards, 2-sided
• One deck of sixty Combat Cards
• One Sortie Log Sheet pad, 2-sided
• Thirty Aircraft Display Mats, 2-sided
• Two Patrol maps (Western Front and Italian Front)
• Twenty-four Ace Pilot cards
• One 2-Seater Mat (back-side Misc. Die Rolls)
• Six Sequence of Play cards
• Two 6-sided, one 20-sided, and one 10-sided dice
• One Game box and lid
If any of these parts are missing or damaged, please contact our licensed publisher:
Compass Games LLC/PO Box 271/Cromwell, CT 06416 USA
Phone: (860) 301-0477 | E-Mail: support @compassgames.com
4.0 game setuP
general rule
Game setup consists of selecting your Aircraft type, preparing your log sheet, and placing the corresponding Aircraft Display Mat in front of you for initial marker placement prior to conducting your first sortie. You should also have the 2-Seater Target Mat [B10] set nearby, as it will be referenced when resolving engagements against enemy 2-seaters. Nearby should be the stack of enemy Aircraft Display Mats corresponding to the nationality you are facing, as enemy fighters may also be engaged. Finally, if you choose to use a map, place either the Western Front or the Italian Front map nearby. Map use is optional, as sorties can be tracked simply on your Aircraft Display Mat.
[4.1] base assIgnment
The Player begins by rolling 1d20 on the table on page 8 to receive a starting base and nationality, then selects one of the aircraft types and/or nationality currently available for them. Alternately, you may choose the nationality and starting location and date if you desire. Game play consists of being the pilot of a single aircraft (and controlling a wingman later in the game) rather than simulating control of larger formations.
German pilots must also choose a birthplace, which affects the receipt of certain awards. These are:
• Prussia
• Saxony,
• Grand Duchy of Baden
• Bavaria
• Kingdom of Württemberg
• Principality of Lippe
• Hanseatic Cities
Hanseatic Cities include any of these three cities: Hamburg, Lubeck, or Bremen.
4.1 Base Assignment Table
[4.2] start date
[4.2.1] Your first sortie will be in September 1916 unless you choose to start later.
[4.2.2] You may choose a newer type of aircraft to fly when it becomes available, but only if you have a sufficient Prestige Level that will allow you to fly it. A player’s Prestige Level increases with awards and promotions.
[4.2.3] As an alternative to the normal setup, you may play a shorter scenario from Optional Rule (11.11) with the start date as listed.
[4.3] PrePare sortIe log sHeet
[4.3.1] Prepare a narrative of your flying career by recording the following information in the header of the Log Sheet: Nationality: this is the nation you have chosen to fly for. Name: this is name you choose for your pilot, or an actual pilot’s name if using an optional Historical Ace card.
Note: the pilot’s name has no impact on game play other than building a narrative around your career to enhance your game session or after-action reports. Optional: see Historical Ace Cards and Charts S1/S2.
[4.3.2] The Sortie Log Sheet is used to capture information about each sortie, including the aircraft you have encountered and/or downed, any wounds received, and experience gained.
[4.4] aIrcraft dIsPlay mat setuP
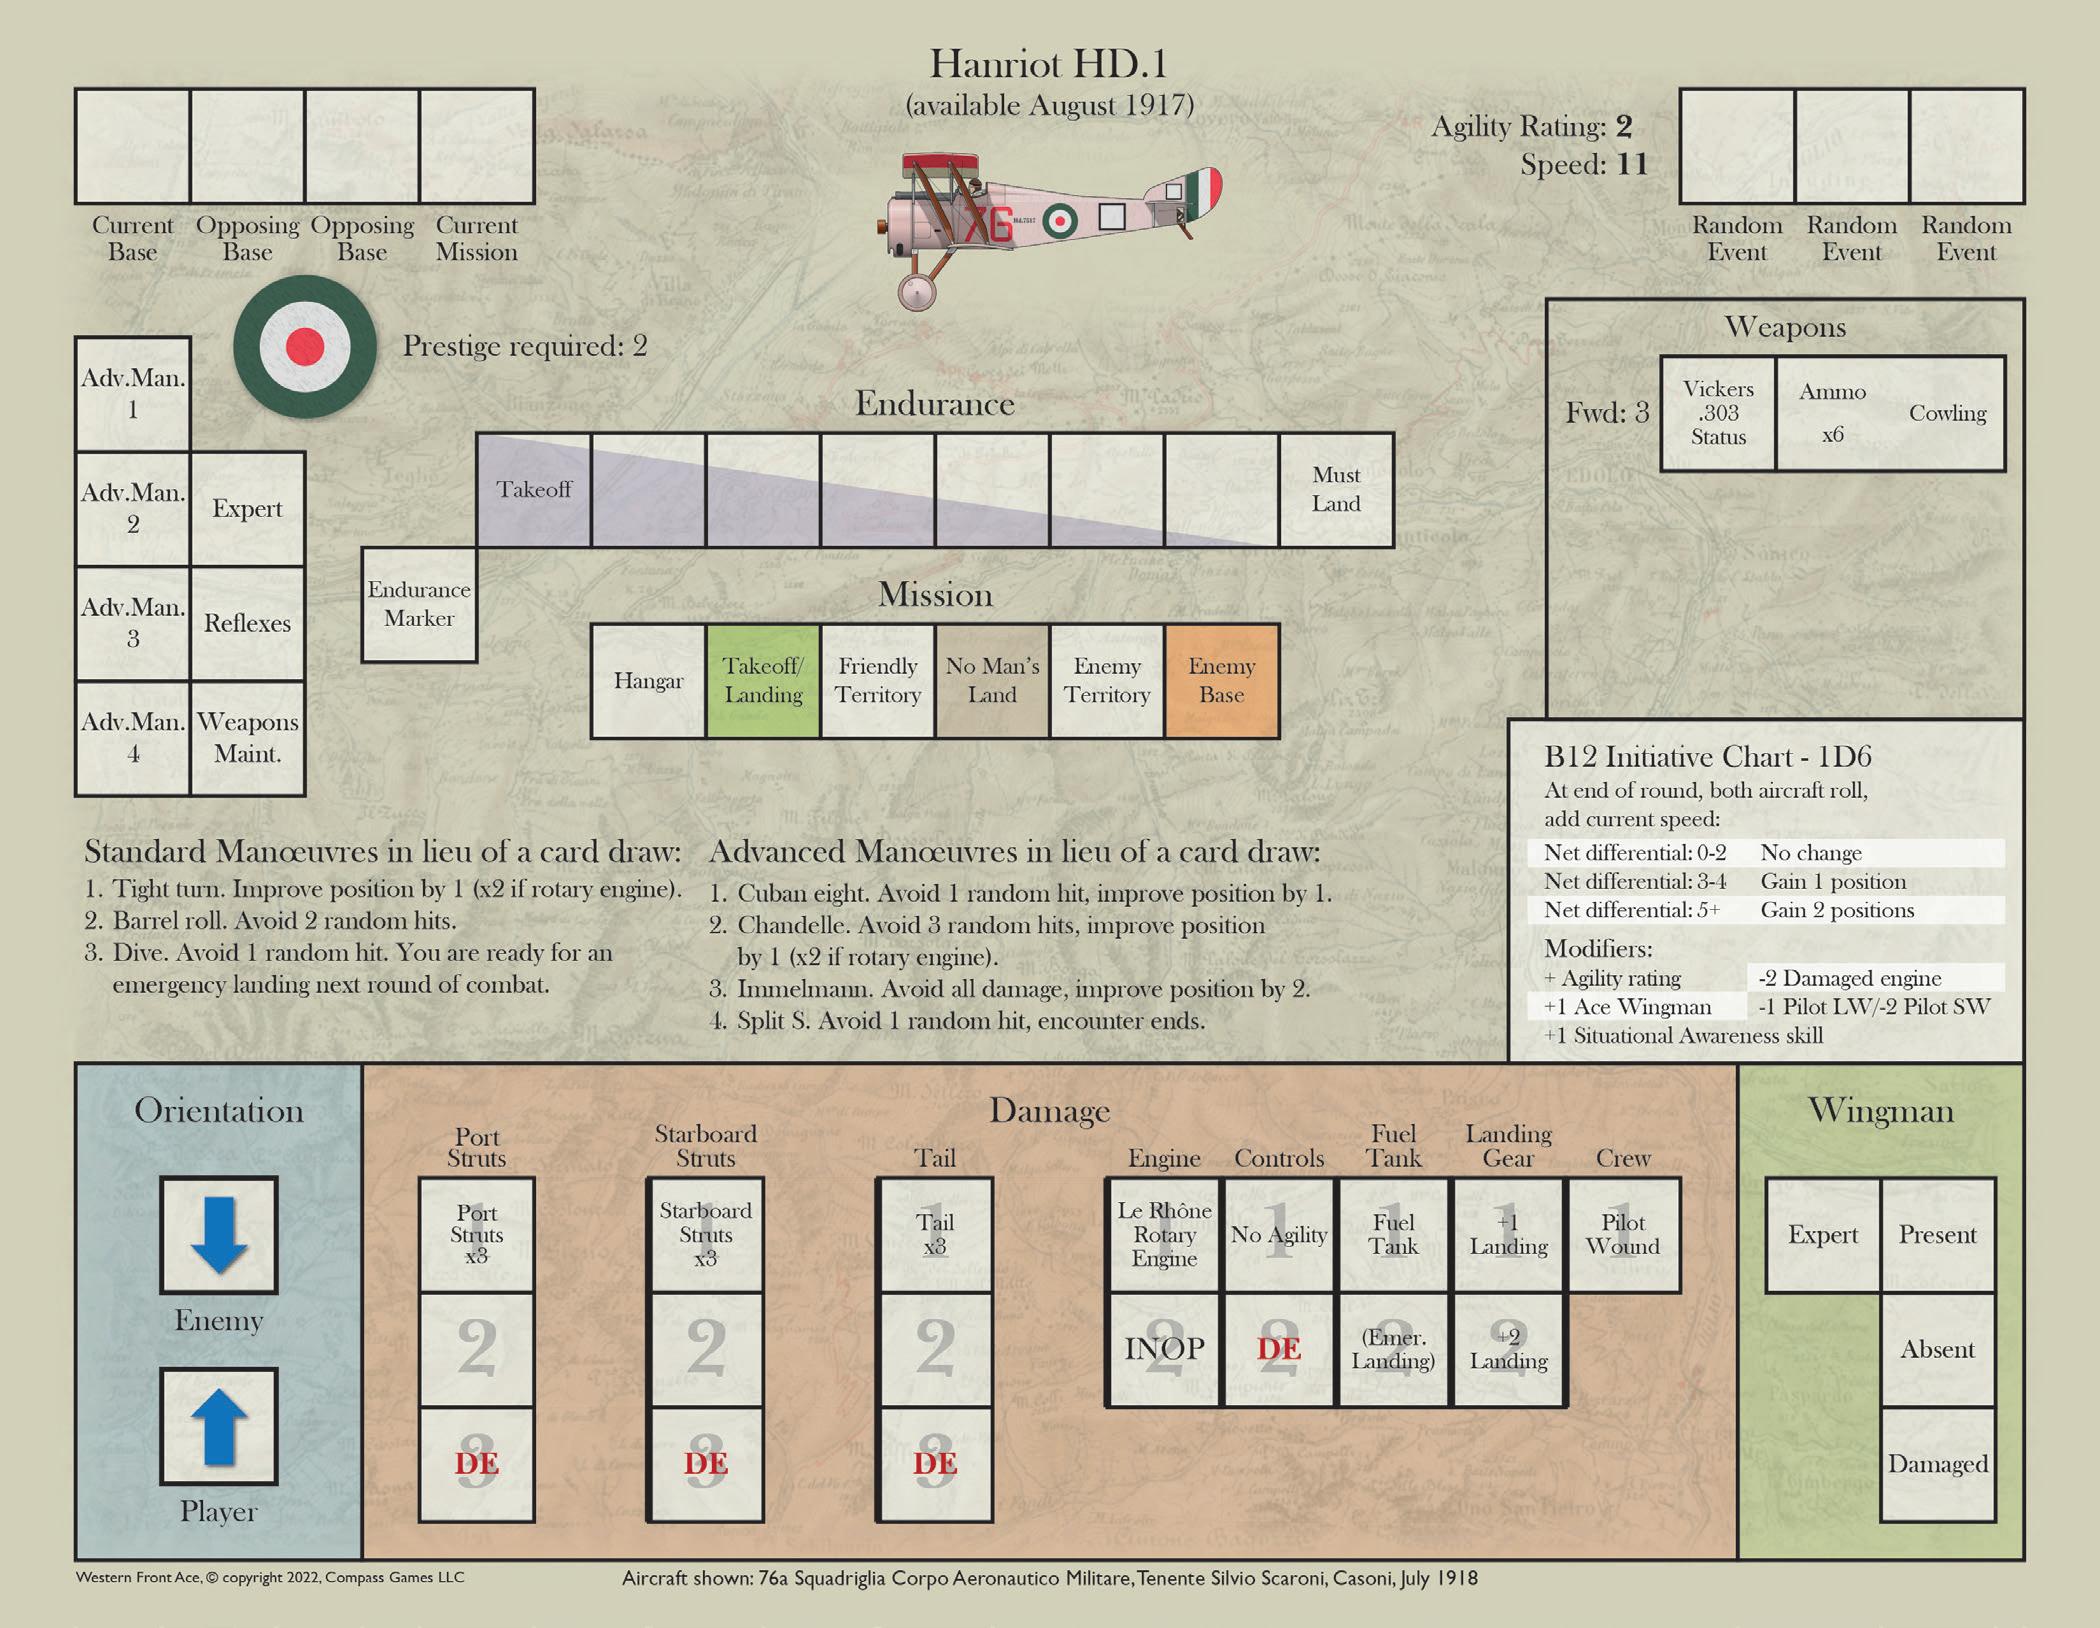
[4.4.1] Place in front of you the Aircraft Display Mat that corresponds to the type of aircraft you have selected (see example on the facing page). You will be referencing this display constantly while conducting sorties to record the status of your plane.
[4.4.2] Place the following markers on your Display Mat:
British RNAS (Royal Naval Air Service) pilots operate from St. Omer and are the only pilots allowed to fly the Sopwith Triplane. Other than having slightly different ranks and the ability to fly Sopwith Triplanes, they are “normal” British pilots in all other game regards.
Note: you can start with a more advanced aircraft later in the game, such as the taking an American with a Sopwith Camel, for example, but Americans are not available until February of 1918, which means you will not have the early months of the war to rack up more victories.
1. Place the plane marker for your type of aircraft in the Hangar box. This marker is moved along the Mission track to show your current location. (Alternatively, you may move it along the boxes on the map if you choose to use the map, which is optional.
2. Place the Wingman marker in the “Present” box if you have been promoted at least once, or have made “Ace” status, and therefore have a wingman.
3. Place a Good Luck Charm [8.5.1] of the appropriate nationality in one of the Random Event boxes. Each new pilot starts the game with one such charm.
4. Place the appropriate Ammo markers in the Weapons section of your Display Mat [4.5]. If your air-
craft, for example, has six ammo listed, that would be three markers on the “2” side, not six markers. Place the Endurance Marker in the Endurance Marker box.
5. Place any skill markers you have bought or gained in flight school on the Aircraft Display Mat or Pilot Status Chart as appropriate. Players begin the game with the “Reflexes” and “Advanced Maneuver 1” skills for free.
6. Place any active Major Ground Offensive Markers on the map. For a game starting in September 1916, these would be the Verdun and Somme markers.
[4.5] ammunItIon
Commentary: World War 1 aircraft normally had a fairly limited ammunition load, and could not be reloaded in flight, with the exception of the Allied “Lewis gun” which fired from a 97-round drum. Normally, several spare drums were carried. For balloon-busting missions, incendiary ammunition was carried, but this meant the aircraft was prohibited from engaging other
aircraft except in self-defense (and even then it was a gray area). Incendiary ammunition is not marked separately in the game; if on a balloon-busting mission, you are assumed to have it.
Procedure
1. Consult the initial Ammunition Load information next to each weapon on your aircraft.
2. Select a total number of ammunition markers that adds up to the ammunition points carried. This number is normally “6” which means three markers will be placed on the “2” ammo side. Place these markers next to the appropriate weapon(s).

3. Spare Lewis machinegun drums are not ammunition markers per se, but when used to reload your Lewis gun, turn into ammo. Each drum gives the Lewis gun three ammunition points for that gun (which would be an ammunition marker on the “2” side and another one on the “1” side.

[4.6] basIng
Players will be based at one of 21 bases throughout the game.
Historical note: There were literally hundreds of “aerodromes” in the First World War, mostly small grass strips with some huts, although some, like St. Omer and Douai, were significantly larger. The base names that were chosen are just representative of any in that area. Players should realize there are historical restrictions to the bases they can operate from.




[4.6.1]
france
French aircraft start in one of the blue-colored bases on the map (see 4.1) and will typically stay there for most, if not all, of the game. A French player may possibly re-base only to other French bases.
[4.6.2] brItaIn
British pilots start in one of the three brown bases at the north of the map, near the coast. They may later re-base to one of the other two. Starting in November 1917, in response to the Caporetto operation, a player may re-base to Vicenza Italy and fly against the Austro-Hungarians. As a final restriction, if a player chooses to fly as a RNAS pilot (Royal Naval Air Service), he must stay in St. Omer until April 1918, at which time the RFC (Royal Flying Corps) and the RNAS merged to form the RAF (Royal Air Force.) The St. Omer restriction is lifted at that time.
[4.6.3] germany
German pilots start in one of the seven grey-colored bases on the map. Guise and Doui are special in that they allow engagements versus the British or the French, depending on which direction the player flies on a sortie.

[4.6.4]
Italy
The Italians are based at either Vicenza or Udine, and only fly against the Austro-Hungarians at Trento and Trieste, respectively.
[4.6.5]
austrIa-Hungary
The Austro-Hungarians are based at either Trento or Trieste, and only fly against the Italians at Vicenza or Udine, respectively.

[4.6.6] amerIca
Starting in February 1918, the Americans begin flying from French bases. If later desired, they may re-base, but only to a different French base.
[4.6.7]
belgIum
Belgian pilots fly from De Moeren for the entire game. (They were also at De Panne, a nearby field, but we have chosen De Moeren as the representative base for the Belgians.)

Note: Players who want to fly from other fields may completely ignore the base restrictions per nationality, with the knowledge this is not historical and should be avoided.
[4.6.8] cHangIng bases and aIrcraft
You may change the base you are assigned to by losing one sortie in time and spending one Prestige Point. (Place an “R” for “reassignment” on the Sortie Logsheet.) If you wish to change aircraft types, you must spend a Prestige Point and will lose a sortie as you familiarize yourself with the new aircraft. The only requirements are that you have sufficient prestige to fly the new aircraft, and it is from your list of aircraft allowed for your nationality. Pilots may only re-base to a base that is of the same nationality (on the maps, they are brown for British, blue for French or American, grey for German, orange for Belgian, yellow for Italian, red for Austro-Hungarian) with the exception of the British to Vicenza. You may change bases and aircraft at the same time for a combined cost of two Prestige Points, but you still only lose one sortie in time.
[4.6.9] flIgHt scHool
Each new pilot attends flight school before his first sortie. Flight training is accomplished by rolling on the Flight School Chart (Chart [F3], gaining skills or skill cost reductions if successful in each section of training. A new pilot will also choose between several choices to see if extra time in physical training will give him a better chance to survive wounds, or if extra time spent studying will give him a better knowledge of the aircraft he is to fly, or perhaps he will spend extra time at the bars drinking and lead his friends into a fight, leading to a reputation for aggressiveness. After performing all flight school checks per the Flight School chart, the player is ready to begin.
Any markers received due to flight training should be placed on Pilot Status Chart as appropriate. If the Stamina marker is chosen, it may be placed directly on the Aircraft Display Mat.
5.0 How to wIn tHe game general rule
A full game consists of completing numerous sorties up to and through October 1918. The game may end early if you are killed in action or taken prisoner after crashing in No Man’s Land or behind enemy lines.
While the results of each sortie may result in promotion and awards, overall victory level is determined at the end of play based on the number of aerial victories achieved.
[5.1] endIng tHe game
[5.1.1] The game ends upon completion of your final sortie in October 1918—no sorties are conducted after October 1918.
[5.1.2] If it is determined after calculating missed sorties due to injuries that your next sortie would commence after October 1918, the game ends.
[5.1.3] The game immediately ends, regardless of date, should you be killed in action or taken prisoner.
[5.1.4] Once the game has ended, you can determine victory.
[5.2] determInIng vIctory
[5.2.1] Consult your log sheet at the end of play and add up the total number of aerial victories during your career.
[5.2.2] Based on the total number of victories against enemy aircraft (including balloons), your victory level and performance as an Ace can be determined below.
defeat
0-4
Aircraft shot down
You are a disgrace to the air service, your family, and yourself. After the war you return home and wish you had done better.
draw
5-10 Aircraft shot down
You have fulfilled your obligations to the nation and you are an ace. Book and “talkie” movie offers after the war are probably not in the cards, however.
margInal vIctory 11-20 Aircraft shot down
You have enjoyed success as a fighter pilot. You are one of the aces currently assigned to the front. Your crew respects your abilities, and Headquarters puts you in training in late 1918.
substantIal vIctory 21-40 Aircraft shot down
You are one of the top aces of the war, and have gained the respect of your peers, your crew, and commanders. You are often mentioned in the nation’s papers and are offered a high-level command by your Nation.
decIsIve vIctory 41+ Aircraft shot down
You are the scourge of the skies and the pride of your Nation. Even your enemies admire your skills. Your legendary exploits place you at the top of the flying elite and are mentioned prominently in propaganda efforts. Your peers are amazed at your steel nerves and flying skill. You retire peacefully after the war.
[5.2.3] Should you be killed in action you still (posthumously) determine your victory level. The same applies if you are taken prisoner.
6.0 sequence of Play general rule
Western Front Ace adheres to a discrete sequence of play for conducting numerous sorties. At its most abstract level, the sequence revolves around conducting patrols and returning to base. While there are no discretely numbered “game turns” as with other turn-based systems, game play is broken down into monthly increments of time, as reflected by the Log Sheet. Each month has a number of “Contact Patrols” that occur.
The following game play outline begins once an aircraft has been selected and all markers are placed on the corresponding Display Mat (4.0, Game Setup).
[6.1] game Play outlIne
Game play is conducted per the below sequence and is repeated until the game ends (5.1, Ending the Game), at which time victory is determined (5.2, Determining Victory). The precise activities performed as outlined below are covered in the appropriate rules sections.
1. At the start of each month, check to see if any Major Ground Offensive markers need to be placed or removed from the map. Then, roll 1d6 to obtain the number of “contact patrols” (sorties) the player will have in the current month. Write this on the sortie log. Ace pilots get a +1 modifier.
Historical note: Many pilots flew almost daily in World War 1 – sometimes even several times a day. However, many of these patrols had no results. The concept of “Contact patrols” is a simple way to not have to conduct numerous, uneventful missions. “Contact patrols” are merely those sorties during the month in which we assume you will have a good chance of meeting something, so therefore you take off, roll for encounters, and land. In reality, you are conducting many other patrols during the month that had no results – we just aren’t bothering to record them or hassle with them.

2. For the first contact patrol, roll on chart A1 to receive your assigned mission. (Alternatively, you may choose to volunteer to do a Balloon Busting mission.) Place the appropriate Mission marker on your Aircraft Display Mat. Move your aircraft marker from the hangar to the Takeoff Box (or place it on the base on the map) and move your endurance marker to the first box on the Endurance track on the aircraft mat. Then, move your aircraft counter either on the aircraft mat (or on the map) to any adjacent area (or stay in the same location and loiter) and burn one endurance on your aircraft mat (move one box to the right.) After each time you move or loiter (to include the takeoff box), roll for encounters. Missions require you to fly either to friendly territory, no man’s land, or enemy territory. You must attempt to at least travel (if possible) to that location. Resolve encounters via the combat rules. For purposes of encounter rolls, your base box (the Takeoff Box) is considered “friendly territory.”
Note: the use of the Western Front map (or the Italian Front map) is optional; however players will have to manually track Major Ground Offensives and the current weather. Players may simply record their sortie’s progress by moving along the track on their aircraft mat. However, players may enjoy using the map as it gives more of a geographical feel to their mission.

3. Repeat moving your endurance marker to the right and moving your aircraft (or loiter in the same spot) on the mat or map, and conduct encounters as required, until you only have one endurance box left – the one marked “Must Land.” After rolling for a possible final encounter in your base box, you land. If you are not in your base box, you must emergency land. Emergency landing in enemy territory means you have been captured if you survive the landing. If landing in No Man’s Land, you roll for your fate – you are either captured or you make it back (assuming you don’t crash and die.)
4. You may move back to your starting airfield and land at any time; you are not required to burn off all of your endurance first. You may land at a different friendly airfield as well; you are not required to land back at the field you started from. (You are assumed to refuel and shuttle back to your normal base before the next contact patrol.)
5. In the landing box, roll to land the aircraft on Chart B7 with any applicable die roll modifiers.
6. Obtain Awards, Prestige, and Experience Points.
Spend Experience Points if desired. Spend Prestige Points if desired by re-basing or upgrading to a new aircraft.
7. Repeat steps 2-6 for each contact patrol in the month. Start a new month (Step 1.) Continue in this way until shot down and killed, or until the last sortie of October 1918.
[6.2] sequence of Play cards
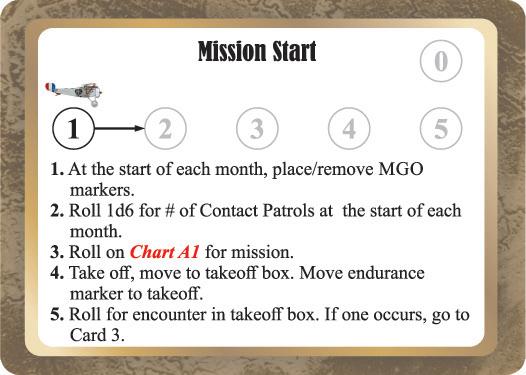
Sequence of Play cards have been included to assist players for the first few missions (or for as long as desired) in conducting their missions. Their use is optional, but should be helpful and are strongly encouraged. Card 0 is for setting up the game; it is used just once then set aside. Cards 1 through 5 guide a player through a sortie. Players should realize that the actions as listed on the cards are abbreviated/condensed, and any questions they have may require a visit to the rulebook. The full rules have priority in the case of any interpretation issues from the cards.

7.0 combat
[7.1] general Procedures
[7.1.1] wHen combat occurs
Combat is resolved for each Endurance box in which an encounter occurs. Each combat may be composed of several rounds. An encounter can also occur in your takeoff box (friendly base on the map) as it is considered friendly territory. It is considered to have occurred shortly after you’ve climbed out and gained altitude.
[7.1.2] encounters
After moving to a new location on the mat or map (or loitering in place) expend an endurance (move your endurance marker one box to the right) and then roll 2d6 for an encounter using the appropriate chart. These charts are organized by nationality, date, and location.

A player will normally fight against just one opposing nationality; however, the German bases at Douai and Guise can fight either the British or the French, depending on which direction they fly. It is the player’s choice to decide which (and therefore, which chart to roll on to determine the enemy planes he encounters.)
If there is no encounter when rolled, then nothing occurs. Move again (or loiter) and move an endurance box. Roll again for an encounter. Continue this process until you have an encounter or desire to head back and land (or are forced to land due to reaching the final endurance box.) If an encounter occurs, resolve it via the combat rules. At the end of combat, if you feel you are still airworthy, you again repeat the process of moving (or loitering) and expending an endurance box.
The use of the map is optional; players may simply track their aircraft’s progress and location on their aircraft mat. Either method plays the same. After rolling an encounter (Chart A3), roll for the specific aircraft encountered (Chart A3a, ChartA3b, or Chart A3c, depending on the nationalities involved.) At this time find the enemy aircraft mat that corresponds to your encounter, as you will use it to track damage and the status of that plane.
orIentatIons for combat:
You will now roll for starting orientation for the combat (Chart B1.) There are different starting orientations you may begin a combat in, depending on what is rolled:
• Head on: Both aircraft start facing each other.
• Advantaged: Your fighter starts head on, with the enemy aircraft starting with a sideways orientation.





• Disadvantaged: Your aircraft starts sideways to the enemy, who is head on to you.

• Out of the Sun: If you are “Out of the Sun” you will start advantaged, fire, and the enemy aircraft does not get to flip a defensive card the first round. If it occurs to you, the reverse is true.
• Tailed: This is not a starting orientation; however, it occurs during combat. The key disadvantage to being tailed is that the firing aircraft automatically inflicts one bonus “Tail” hit if any hits are scored at all.
If, after rolling an encounter, a fighter may not wish to the engage the enemy. He may attempt to avoid combat altogether for this endurance box by rolling 1d6:
• 1-2 succeeds, and combat has ended
• 3-6 results in combat occurring normally
If faster than the enemy aircraft as indicated by speed ratings on the Aircraft Display Mats, subtract one from this roll.




There are two exceptions: you may not attempt to avoid an “Out of the Sun” encounter when the enemy is “Out of the Sun.” Also, you may not attempt to avoid combat with enemy fighters when you are escorting friendly 2-seater aircraft.
[7.1.3] begInnIng combat
To begin combat, you must consider the starting orientation first. Place an aircraft marker and an enemy aircraft marker (these markers have a “top down” view) on the orientation boxes in the lower left-hand corner of your Aircraft Display Mat. If facing the enemy aircraft (either you are head on, or you are advantaged) you may shoot your forward weapons by using the appropriate firepower column at the top of the combat card you flip. The enemy aircraft will fire back if facing you, if not, he will use the defensive section of the card he flips. There are no range effects on combat between aircraft in Western Front Ace. startIng orIentatIon


Flip a card from the deck. This is the fighter’s attack card for the first round. Follow the instructions on the card as far as damage inflicted. Total the firepower from all your forward weapons and use the column that corresponds to your current firepower.


# = number of random hits
“+C” = +1 crew injury
DE = aircraft destroyed
If you are head-on, you may also choose not to fire and go defensive immediately, by either using the defensive section of your combat card, or by calling on your wingman for assistance and using that text.
If you are disadvantaged (i.e., the enemy fighter is advantaged against you) or if you are being tailed, you have three options:
• You may choose to go defensive by using the defense option of the next card you flip, or
• You may call to your wingman to assist you and use that text. You cannot do both, and you must choose one before flipping the card.
• The third option is to utilize a skill marker, if you have one available.
Your wingman cannot assist you if you do not choose that option, or if he is not present, damaged, has been shot down, or you are rank 1 (you ARE the wingman in that case.) If any of those are true, you can only use the defense option of the combat card while disadvantaged or tailed. One exception is if you have made “Ace” status – you do get a wingman option then, even if you are not yet rank 2. Flip a second card - this is the card from the enemy fighter. The only information that the enemy fighter uses if he is defensive (if he is being tailed, or is disadvantaged to you) is the defensive text section of the card. Also, in this case, if the enemy aircraft has an observer with a rear gun, he will flip another card for that gunner. On that second card, the only thing that matters is the “DEFENSIVE FIRE: X” (where X is an integer of random hits.) If the enemy fighter is either head-to-head, advantaged, or tailing you, he will shoot with the offensive (top) section of the card. An aircraft that is being tailed will suffer a bonus “Tail” hit if any hits are scored at all. This would be prevented by a defensive card that prevents all damage, or a combination of skills and/or a defensive card that reduces the amount of incoming hits to zero.
Players should note that rear guns do not use firepower per se (and hence have an asterisk), they simply inflict damage as given by the Defensive Fire section of the flipped card. Aircraft with twin rear guns inflict +1 hit IF the defensive card has at least 1 hit (“0” result cards are still zero hits, even with twin guns.)
Note: Players may wonder why there are so many “0” results for defensive fire. If a rear gun flips a “0” defensive card, there is NO defensive fire from him or ammo expended if a player. This is because, despite the fact the observer’s guns were flexible and on ring mounts, many times aircraft could attack in his “dead space” where the gun could not reach. The bottom line is, half the time there will be no defensive fire from rear guns, and half the time, there will be.
Historical Note: Players may wonder why the Albatros D.I only has a firepower rating of “4” for its twin guns. The high-set upper wing obscured vision for aiming the twin machine guns, and accordingly we have reduced the firepower to “4” instead of the normal “5” to account for this.

[7.1.4] fIrIng sequence
For all rounds of combat firing is simultaneous. (Exception: a fighter fires first if coming “Out of the Sun” for the first round of combat only, or fires first in a round if using the “Reflexes” skill.) Any changes in orientation during card play are assumed to occur after firing – if you improved by one position, for example, by having gone defensive, this does not stop the enemy from firing and giving you hits –although defensive card text may stop some or all of them.
[7.1.4.1]
Initiative Roll
At the end of each round of combat, the player will roll two dice for initiative – one for his aircraft, one for the enemy aircraft (Chart [B12] located on the Aircraft Display Mats). This roll is modified by current speed, agility, and other factors. If the differential is high enough, one of the aircraft will gain one or possibly two orientations. This is in addition to any changes made from card play. For example, for aircraft that are of equal speed and equal agility, if the player rolls a “6” for himself, and a “1” for the enemy aircraft he will gain two positions. If they were head-to-head, the player is now tailing the enemy plane. If the player had been disadvantaged, he now becomes advantaged with the 2-orientation shift.
[7.1.5]
subsequent rounds
After the first round of firing in a pass, all subsequent attack rounds again require the flipping of two new cards, one for your aircraft, and one (or two, if there is a rear gun firing) for the enemy’s aircraft.
[7.1.6]
extended burst
A pilot may risk firing an extended burst from his forward weapons (only) in order to achieve more hits. Although
this (usually) results in more damage to the enemy aircraft, it may also result in a jammed weapon or weapons. If a pilot wishes to attempt this, he must have two ammo points remaining in at least one of his forward weapons. Prepare for normal combat, then roll 2d6 after pulling a combat card (Chart [C3]):
2 Target DE (expend 2 ammo)
3 +4 hits (expend 2 ammo)
4 +3 hits (expend 2 ammo, then 1 weapon jams)
5 +2 hits (expend 2 ammo)
6 +2 hits (expend 2 ammo, then 1 weapon jams)
7 +1 hit (expend 2 ammo)
8 +1 hit (expend 2 ammo, then all weapons jam)
9 +1 hit (expend 2 ammo, then 1 weapon jams)
10 +2 hits (expend 2 ammo)
11 +1 hit (expend 2 ammo, then all weapons jam)
12 All weapons jam before any damage is done. Note that EACH firing weapon expends two points of ammo, if possible. Any extra hits inflicted are random hits. The extra hits from an extended burst only occur if at least one hit is achieved normally from the firing card. Unlike jams that occur from card play, weapon jams from extended bursts occur after firing, unless a “12” is rolled and no firing occurs.
[7.1.7] ammunItIon use and clearIng jammed weaPons
Each weapon expends one point of ammo each time it fires (exceptions: extended burst, a “0” defensive card draw, and possibly the Precision skill.) If a card is drawn and indicates a weapon has jammed, it does not expend ammo, as it does not fire. Place a “Jammed” marker on the weapon that jams (if you are firing more than one weapon, roll randomly for the jammed weapon, reduce your firepower accordingly, and fire with the reduced number.)

If a player wants to clear a jammed weapon, the player cannot draw a card or take any other action the next round – he is instead considered to be clearing the jam. Roll on chart B4. It is possible the weapon will remain jammed, in which case the procedure must be repeated in the next combat round as well. It is also possible the weapon will become “INOP”, which means no further attempts to fix it can be made this sortie. A player is not required to try to fix a jam (he may instead draw a defensive card or perform a maneuver normally) since it might be dangerous to attempt while being tailed, for example.
The Pfalz D.III is an exception to the rule for clearing jams. Due to the position of the guns under the cowling, you cannot clear jammed guns on the Pfalz D.III. The other exception to gun jam rules is the reverse situation – British Lewis guns are immune to jamming in the context of the game.
Historical Note: British Lewis guns fired from a small drum instead of a linked belt, and were exceptionally reliable. Therefore, in the game, they are IMMUNE to all jams. If chosen (or randomly chosen) to jam, there is no effect. They also are the only weapon that can be reloaded in flight, per the rules below and on chart B4.

[7.1.8] reloadIng tHe lewIs gun and tHe 37mm Puteaux
The British Lewis gun was a modified infantry weapon which fired from a 97 round drum and was used on numerous aircraft as either a primary, secondary, or observer’s weapon. It and the 37mm Puteaux are the only guns in the game that can be reloaded in flight. To reload, a pilot must have a spare drum available. Most planes have two spare drums, so the first reload will reduce that to one spare, and the Lewis gun will then have three ammo points again. The downside to reloading a forward firing Lewis is that no other action can be taken that round – the pilot is busy and cannot draw a defensive card or take any other action. It only takes a single combat round to reload. The pilot does roll for initiative at the end of a reloading round of combat, however. If reloading an observer’s Lewis gun, this is done by the observer. He accomplishes this without the aid of the pilot, who may conduct operations normally. It cannot fire the same round it is being reloaded.

The French 37mm Puteaux mounted on the SPAD XII was a single shot weapon which had to be reloaded by the pilot after each shot. The procedure is essentially the same as for reloading the Lewis gun – it takes a single round to reload, but the pilot is busy and cannot draw a defensive card or take any other action. The pilot does roll for initiative at the end of a reloading round of combat, however.

[7.1.9] balloon bustIng and ground attack
Special combat rules are used for “Balloon Busting” and “Ground Attack” missions. If on a Balloon Busting mission or ground attack mission, normal combat rules do not apply. Use the following procedure:
• Fly to No Man’s Land, resolving any encounters up to that point normally, except you may not engage enemy two-seaters, as you are loaded with incendiary/explosive ammunition and this was not permitted by the St. Petersburg Declaration of 1868 and

the Hague Convention of 1907. However, you may still defend yourself from enemy scouts (fighters) if attacked en route to the balloon. (Special note: in the rare case you are on a Balloon Busting mission, have to defend yourself from an enemy scout, and hit his fuel tank, you do automatically set him on fire.)
• In No Man’s Land, your encounter is the balloon (their locations were known.) Take AA fire per the AA rules, then attack it by flipping a card. It requires a result of 3 or more random hits to down the balloon. These are not actually rolled, just 3 or more random hits (or a DE result) downs the balloon, as you are using incendiary ammunition. After attacking, AA fire does not roll to hit – you will automatically take 1d6 in random hits.
• It is possible you may not down the balloon in the first attempt. If you did not, you may repeat the process as many times as you desire, until either you or the balloon are shot down. Subsequent passes after the first automatically result in 1d6 hits from AA before and after the balloon attack, however, as they are now aware you are there. Alternately, you may just fly off (possibly a wise choice if you’ve received significant damage from the first pass.)
• Ground Attack missions follow the same procedures as Balloon Busting in regards to AA fire before and after the strafing/bombing is conducted, although no restrictions are in place in regards to attacking two-seaters. Strafing expends two ammunition points. No card is required for this strafing attack – it is just presumed to occur and the results are not measured per se as there are no infantry targets tracked in the game. If the aircraft has an option to carry bombs, it will bomb instead (saving precious machinegun ammo.) Being loaded with bombs reduces your speed by one, your agility by two, and prevents you from choosing “tight turn” as a standard maneuver. Bombs may be jettisoned early before aerial combat begins, but then the Ground Attack mission is automatically a failure.
[7.1.10] engagIng a 2-seater
Although some 2-seaters were used as scouts (fighters) and can be chosen as such by players, the vast majority of them in the game are reconnaissance and bomber aircraft. The term “2-seater” in the game refers to these aircraft, and not to scouts (even though such scouts might technically have 2-seats.) When encountered, they act via a different set of combat rules.
[7.1.10.1] Two-seaters will always immediately go defensive in combat. They will engage with their rear guns if possible. If they become advantaged or are tailing you, they will always attempt to break off and end the engagement. If rotary-engine equipped, they will always use the “tight turn” standard defensive move when disadvantaged or tailed.
[7.1.10.2] Two-seaters have been grouped on chart B10, the 2-Seater Target Mat. The mat lists their speeds and agility for use in Initiative rolls. The firepower for their rear guns is also listed (those with twin rear guns inflict +1 hit if any hits are scored.) Their ammunition is not tracked; they are assumed always to be able to fire defensively if not damaged or jammed.
Note: A player’s rear gun, if he has one, does track ammunition, unlike non-player 2-Seaters.
Note: this is a bit of an abstraction, but testing showed that since half the time the rear guns technically didn’t fire anyway due to having flipped an odd-numbered card, it really wasn’t worth tracking the ammo for the slew of different rear guns on the 2-seaters. Gun status IS tracked if they jam or are inoperable due to battle damage, however.
[7.1.11] encounter endIng due to lack of offensIve caPabIlIty
If both aircraft have no ammo for their forward weapons, or they are both inoperative (or some combination thereof), the encounter automatically ends.

[7.2] “solItary HuntIng” combat
[7.2.1]
requIrements to solItary Hunt
A player must currently be an “Ace” (having five victories) OR must have been promoted to at least rank 2 to choose this option before starting a sortie.
[7.2.2]
general
Many of the top aces preferred to hunt completely alone, without a unit or even a wingman. The objective was to find enemy reconnaissance planes or bombers and pounce on them from out of the sun in a surprise attack. Since a single aircraft would be harder to detect than a group, this worked well. Although this netted many victories and was effective, it was not without danger, as a single fighter, alone, would have issues disengaging from a large group of enemy aircraft if he encountered them.
If solitary hunting, all engagements marked with an asterisk (*) on chart A3 automatically start with the player attacking from “Out of the Sun.”
If solitary hunting, there is no wingman present, so you may not use those abilities.
Finally, if solitary hunting and you run into a group of aircraft, disengagement becomes more difficult. If you desire to disengage, you must disengage twice against a group of 3+ aircraft, or 3 times against a 40+ formation (random event.)
[7.2.3] traPs
Sometimes other aircraft would use a lone reconnaissance plane as “bait” and set a trap. Before attacking out of the sun with the solitary hunting rules against a lone 2-seater, roll 2d6. A roll of “12” means the encounter is a trap, and the player, instead of attacking out of the sun, is attacked himself out of the sun. The original 2-seater encounter is now canceled. Roll for an attacking enemy fighter type and proceed to resolve the combat.
[7.2.4] stalkIng
Besides pouncing on unaware 2-seaters, some aces would “stalk” a spotted enemy scout aircraft. If an encounter is an enemy scout, and a lone hunting aircraft wishes to “stalk” him, give a -2 drm to the starting orientation dice roll.
[7.3] standard and advanced maneuvers
Instead of drawing a card, a player may, instead, choose to perform a standard or advanced maneuver. The main reason to do this is to avoid a random “bad” card, or to avoid a card that doesn’t help your current situation. The basic standard maneuvers are:
1. Tight Turn. Improve position by 1 (x2 if Rotary engine)
2. Barrel Roll. Avoid 2 random hits.
3. Dive. Avoid 1 random hit. You are ready for an emergency landing next round of combat. The standard maneuvers are all available to starting players and have unlimited usage during a sortie. Players may also buy skills that allow them to “learn” advanced maneuvers. These are:
• Advanced Maneuver 1: Cuban Eight (Avoid 1 hit, improve position by x 1)
• Advanced Maneuver 2: Chandelle (Avoid 3 hits, improve position x 1 (x2 if rotary)
• Advanced Maneuver 3: Immelmann (Avoid all damage, improve position x 2)


• Advanced Maneuver 4: Split-S (Avoid 1 hit and encounter ends.)
Each advanced maneuver may be used “once per sortie”, assuming the player has the skill. They must be learned in order: Maneuver 2 must be learned first before the player can learn Maneuver 3, etc. After a “once per sortie” skill has been used, flip the marker to the “USED” side to indicate it is no longer available this sortie. Players begin with the Advanced Maneuver 1 skill “for free.”
[7.3.1] antI-aIrcraft fIre (“arcHIe”) and ground fIre
Antiaircraft fire and ground rifle fire in WW1 was generally not effective against aircraft dogfighting at altitude, however, it was a problem when attacking balloons, strafing trenches, or when making an emergency landing. These rules represent such fire in a generally abstracted way.
[7.3.1.1] aa versus balloon bustIng
If on a Balloon Busting mission, roll for AA before attacking the balloon. On a 1d6 roll of “1-3” you will take 1d6 random hits in damage. After attacking the balloon, you will automatically take 1d6 in random hits (the element of surprise, if you had it, is gone.) If you want to do another pass on the balloon because you failed to down it the first try, you again automatically take 1d6 in random hits, both before and after the attack.
[7.3.1.2]
aa/ground fIre versus beIng at low altItude
If you are bombing, strafing, or have dived to escape combat or to try for an emergency landing, and are over enemy territory or No Man’s Land, roll 1d6. On a roll of “1-3” you take 1d6 random hits before conducting your ground attack or making the landing roll. If bombing or strafing, you automatically take 1d6 in random hits after your ground attack (the same procedure as balloon-busting, basically.)
[7.3.1.3]
ground attack (bombIng and strafIng)
Bombing and strafing missions are special missions in support of, or in reaction to, Major Ground Offensives. Major Ground Offensives are denoted by markers placed on the map in the appropriate No Man’s Land box for the months during which they occurred historically. If a “7” is rolled on chart A1 and your bases connects to a No Man’s Land with an active Major Ground Offensive, your mission has been changed to Ground Attack (bombing or strafing, depending on whether or not your aircraft has the capability to carry bombs.) If it does, it is a bombing mission. If it does not, it is a strafing mission. Both are identical in game terms, in so much as you must fly to the No Man’s Land sector with the active Major Ground Offensive marker. You are considered to conduct the bombing or strafing automatically upon arrival (any results are notional) but will take AA

fire before and after your ground attack. Ground attack missions do count as TWO sorties, however, for the purposes of experience point gain. Being loaded with bombs reduces your speed by one, your agility by two, and prevents you from choosing “tight turn” as a standard maneuver. You may, however, jettison the bombs before arriving at No Man’s Land, but this results in a mission failure. Strafing expends two points of ammunition (even if the player possesses the Precision skill.)
[7.3.2] wIngman abIlItIes and use
Your wingman’s job is to protect you during combat. However, at times he will be busy trying to stay alive himself, as there would typically be more than just one enemy aircraft. The wingman in the game is somewhat abstracted – he flies a notional aircraft whose damage you don’t specifically track. He can, however, wins awards, earn skills, and become an ace. The following rules govern his abilities and use.

[7.3.3] wIngman attacks on 2-seaters
You may order your wingman to attack a reconnaissance aircraft or bomber at the same time you begin your attack. Resolve this after your attack by consulting Chart [W1]. This attack is completely voluntary – you are not required to try and build up your wingman’s victories.
[7.3.4] wIngman attacks on fIgHters
You may signal your wingman to assist you. On some cards, it states the wingman will attack with a certain firepower listed. For this attack, the wingman flips his own combat card, and may use his skills to modify the result (gunnery, expert, etc.) Most importantly, the enemy does not draw a defensive card, as he is engaged with you. It is possible for your wingman to shoot down an enemy fighter this way, in which case, you automatically are considered disengaged.
[7.3.5]
exPerIence
Your wingman starts with one experience point, and gains experience at the same rate you do. He may buy several skills (see skill listing.) He may also earn awards, but these are not tracked, as he does not track Prestige, as he is always assumed to be flying the same aircraft you are, or a very similar model. If you wish to track a wingman’s awards you must do so on your Sortie Log Sheet.
[7.4]
mIssIon requIrements
Different missions have different requirements that a pilot must try to achieve. Failure to achieve at least the minimum requirements for a mission results in NO credit (experience gain) for having flown that sortie (the sortie doesn’t count.)
[7.4.1] lIne Patrols, offensIve Patrols, defensIve Patrols
Patrols require you to at least fly to a location. For a Defensive Patrol, that is friendly territory. For a Line Patrol, that is No Man’s Land. For an Offensive Patrol, that is enemy territory. Whether you engage the enemy is immaterial – what matters is your arrival there.


[7.4.2] balloon bustIng

This mission requires you to fly to No Man’s Land (the balloons would technically be on the far side, a few miles back) and at least attempt one pass on an enemy balloon. Notice you may not engage 2-seaters on such a mission, but you may defend yourself from enemy fighters. Due to their dangerous nature, Balloon Busting missions award double credit if you at least attempt one pass on the balloon (the sortie counts as TWO sorties flown, for experience gain purposes.)
Historical note: Aircraft on balloon-busting missions were armed with explosive/incendiary rounds and were forbidden by higher command from offensively engaging anything other than the balloons with them. Aircraft retained the right to self-defense.
[7.4.3]
escort
Pilots on escort duty (either bomber or reconnaissance) must escort a notional 2-seater to enemy lines and then back to base. This means if an enemy 2-seater is rolled as an encounter, you must ignore it. Enemy fighters are engaged normally, as they are a threat to your mission. Once you have engaged an enemy fighter your escort requirements have been met and all restrictions are lifted on your flight.

[7.4.4] ground attack

Pilots assigned to a Ground Attack Mission (which occurs when a “7” is rolled and the nearest No Man’s Land sector to your base has an active Major Ground Offensive marker active) must travel to No Man’s Land and conduct the attack. At No Man’s Land, no encounter is rolled for (the Ground Attack is the encounter there). The player either bombs or strafes. The strafing requires the expenditure of two ammunition markers. Ground Attack missions award double credit (they count as TWO sorties flown for experience gain purposes.) Ground Attack strafing follows the same procedures as a Balloon Busting mission in regards to


AA fire [7.3.1.2]. If forced back to base by combat before getting a chance to strafe or bomb, the player gets a failure for the mission.
[7.4.5] credIt for mIssIons In wHIcH combat Has occurred
Pilots will ALWAYS receive mission credit if they engage an enemy aircraft (or are engaged) on a sortie (exceptions: Ground Attack, Balloon Busting.)
For example, if the mission is Line Patrol, but before getting to No Man’s Land, the player’s aircraft is badly damaged in a dogfight, he may turn around and land and still get credit for the sortie, even though he didn’t arrive at No Man’s Land.
[7.5] dIsengagement
There may be times (if all forward weapons are knocked out, for example) when you will want to disengage. You may only choose to do this as your action instead of firing (you must be tailing or advantaged against the enemy fighter.)
[7.5.1] Player dIsengagement
If you are tailing the enemy aircraft, it is automatic, and the encounter ends. If you are advantaged, it succeeds on a 1d6 1-4, and fails on a 5-6. If it fails, the enemy aircraft gains one position, then that round of combat ends and you roll for initiative normally and continue combat.
You may dive to low by using the standard maneuver in order to try an emergency landing, even if disadvantaged or being tailed. However, on the turn you attempt to emergency land, you are not allowed to flip a defensive card, and the enemy aircraft shoots at you with +1 random hit. You may also receive ground fire per the AA rules. Disengaging in this way is hazardous and should only be done in an emergency. If you survive the AA fire, the fighter’s last shot, and the landing, you have landed. See the forced landing rules for your status depending on where you landed.
[7.5.2]
enemy dIsengagement
An enemy aircraft will attempt to disengage if its pilot is wounded, has all forward weapons knocked out, is out of ammunition, or has leaking fuel tanks. This action occurs instead of firing. If tailing you, it succeeds, and the combat is ended. If advantaged against you, it succeeds on a 1d6 1-4, and fails on a 5-6. If it fails, you gain one position, then that round of combat ends and you roll for initiative normally and continue combat.
[7.5.3] dIsengagement from grouPs of aIrcraft
At times, you will be engaging a group of aircraft. This has no effect on game play unless you are solitary hunting.
Normally, if you’re fighting a group of enemies, you’re with several friendly aircraft yourself, etc. If alone, refer to the rules on Solitary Hunting for disengagement (7.2.1).
[7.5.4]
successful dIsengagement
This represents escaping further action for whatever reason…be it ducking into some clouds, or just diving away from the enemy before they could react, or just slipping away due to inattention or getting lost to their vision. If a player ends combat in this manner, he cannot reengage in this endurance box. He will advance one endurance box and then decide to attempt an encounter again or head back and land.
[7.6] aIrcraft damage and landIng
If an aircraft meets its damage threshold for the airframe, either wing, tail, control surfaces, or has all engines knocked out, it is considered shot down. A fire caused by a lucky fuel tank or engine hit also results in a downed aircraft. Leaking fuel tanks force an aircraft to abort at the end of a combat. See chart [B4] for the specific impact that damage has.
A second damage result against a system already knocked out is “no effect” instead. You can only kill the pilot once, for example. However, most systems (Engines, Wing, Airframe, Controls, etc.) require multiple damage results to destroy. Against enemy aircraft, a second engine hit (knocking it out) over friendly territory and No Man’s Land results in a victory for the player. The same applies to a second fuel tank hit.
A “DE” result on the card means the aircraft is immediately destroyed. Such a result encompasses such things as bombs exploding, fuel tanks caught on fire, the entire tail section being shot off, catastrophic structural failure (which sometimes happened without any bullets required) or a wing being sawn off. When a target is destroyed, circle it on the Sortie Log sheet. Defensive cards that reduce random damage hits do not affect a “DE” result. Only card text that says “avoid all damage” would do so.
[7.6.1] damage to fIgHters

All damage is rolled randomly on Chart [B6] with effects listed on Chart [B4}. If a player receives a fuel tank or engine hit, and rolls a fire, the game ends (exception: Bailing out, [7.6.5]).
Engine damage does not preclude a fighter from finishing a combat - it only hampers combat. A damaged engine reduces speed by “2.” This has serious implications for the initiative roll at the end of each combat round. Of course, if the engine is knocked out, the fighter must immediately glide to an emergency landing. Engine damage also pre-
vents rotary engines from gaining an extra improvement in position due to cards or effects that state “Improve x 1 (x2 if rotary)“.
Bailing out. If shot down, or even if not shot down, a German pilot/crew may decide to bail out of his aircraft at the end of any round of combat if the combat is occurring from July to October 1918. Normally, this would be if you are wounded, and/or the plane is shot up enough you are doubtful you would survive the next round of combat. This choice ends combat. Roll for the pilot to parachute on chart B8.
Historical note: Parachutes, in primitive designs, existed in WW1. Despite the fact that balloon observers had parachutes, aircraft crew did not. Some historical sources state that as insane as it might sound today, leaders were concerned that if parachutes were issued, too many planes would be lost as crew would bail out at the first sign of trouble. Other sources indicate there was a more practical reason – the early parachutes were too large and bulky to easily fit in the cockpits of the early aircraft. Regardless, by the end of the war, the Germans realized that the pilots and crew were more important than the plane itself, and parachute design had advanced enough to allow the Germans to equip their pilots with parachutes for the last several months of the war.
[7.6.2]
Post combat
A player may abort his sortie after combat if he desires, due to damage. Simply move back to a friendly base by expending one endurance per area traveled, and roll for landing.
It may be possible that combat will end with you still having jammed or unloaded weapons. You are considered to have enough time to clear the jam successfully without a die roll and reload them if possible (a Lewis gun.) You may then proceed to another location, loiter, or head to home.

Once back at base, repairs on the fighter are always assumed to have occurred before the next contact patrol. However, if you had taken 6+ hits, the aircraft is considered to have been written off. You will receive a new, identical aircraft, or may use this opportunity to upgrade to a newer plane if you have a high enough Prestige Level available.
Jammed weapons and canvas hits do NOT count as a “hit” on a system.
[7.6.3]
aIrcraft loss due to battle damage
It is possible that an enemy aircraft will not make it back to base, even if you did not inflict enough damage to shoot it down before you had to break off combat for whatever reason. Use the following formula:
On a 1d10 roll of “0” (ten) or higher, a damaged aircraft will
crash before reaching home. Add +1 drm to this possibility for each of the following: The engine is damaged, or any system that is 1 point short of aircraft destruction.
Example: A plane has one engine damaged, leaking fuel tank, and three hits on the port struts that can take four. Since the port wing struts can only take four hits, that would add one, and the damaged engine adds one, as does the leaking fuel tank. This is a +3 drm. Therefore, this aircraft crashes en route home on a roll of “7” or higher on a 1d10.
You receive credit for such a victory (an aircraft crashing en route home) ONLY if this was spotted by someone - on a 1d6 roll of “1-2” you receive credit for this victory (exception: there is a Random Event which gives you credit without a die roll).
[7.6.4] landIng Procedure
Landing can be a hazardous procedure if the plane is damaged or the pilot is wounded. Total up all modifiers and roll on the Landing Chart {B7], then apply the results, if any.
[7.6.5] emergency landIng
It may be that a fighter is forced down after a combat (for example, if he runs out of endurance due to a leaking fuel tank, or if the engine is knocked out. The player may have one or two options:
1. Bailing out: If shot down, or even if not shot down, a German pilot/crew may decide to bail out of his aircraft at the end of any round of combat if the combat is occurring from July to October 1918. Normally this would be if you are wounded, and/ or the plane is shot up enough that you are doubtful you would survive the next round of combat. This choice ends combat. Roll for each crew on the Parachute Chart [B8] (only available to German pilots from July to October 1918).
2. Emergency Landing: Make an emergency deadstick landing in a field or road somewhere at +1 drm. If over enemy territory or No Man’s Land, he must first roll for AA/Ground Fire per above. He then must total up his landing modifiers and roll on chart B7. Even if he lands successfully, he will miss the next sortie (contact patrol) as he travels back to his normal base if this happens in friendly territory. In enemy territory, he is considered captured, and the game ends. In No Man’s Land, he must roll at +2 drm (there’s a lot of shell craters and trenches to avoid) and after landing, determine if he is on the friendly side or not (1d6


1-3 friendly territory, 4-6 enemy territory.) If on the enemy side of No Man’s Land, he is considered to be captured, and the game ends.
[7.6.6] rougH and crasH landIngs
A poor enough roll on the landing chart may result in a rough landing (each crew member receives a light wound) or in a crash landing (each crew member receives a woundroll for severity and the aircraft is written off as destroyed.) At the far extreme of the landing chart (a roll 16+), the aircraft is destroyed landing and all the crew are killed.
[7.6.7]
crew Injury
The fighter normally has just a pilot, but one model in the game (specifically, the Sopwith Strutter) has an observer (the rear gunner.) Each crewman’s injuries may result in lost time or replacement.
A roll that calls for an injury to the Observer (rear gunner) when one is not present is treated as “no effect.”
Three results may happen from crew injury: Light Wound (LW), Serious Wound (SW), and Killed in Action (KIA).
[7.6.8]
Injury duratIon and effects
LW: Miss one sortie. If this is any other crewman than the pilot, use a temporary crewman as a replacement. He is considered to not have any skills.
SW: If this occurs to the pilot, you must immediately break off combat at the conclusion of the current firing pass against a 2-seater, or combat against a fighter. The landing roll receives a +1 drm. After landing, roll 2d6 on the Serious Wound Resolution Chart [C2] to determine the number of sorties missed by that crewman. If this is any crewman other than the pilot, use a temporary crewman as a replacement. He is considered to not have any skills. It is possible that the replacement crewman may advance in skills enough that you would not want your old crewman back, once he is released from the hospital. You are not required to get the old crewman back, but you may if you want to. It is your choice.
KIA: If this is the observer, simply replace with a brand-new crewman for the next mission. The replacement has no skills or points. If the pilot is KIA, the game ends at that point.

[7.7] weatHer effects
The weather was obviously good enough to fly, but the distances involved means the weather when landing may be worse. The weather affects the landing roll negatively with any other result than “good” weather.
Roll for the weather on Chart [B9] before landing (or emergency/crash landing) and apply the appropriate modifier (+1 through +3) if the weather is anything other than “good.”

Note: The presence or absence of clouds, which could have other effects on combat, is mainly abstracted via the differing results of the combat cards.
8.0 crew skIlls, awards, PromotIons
[8.1] skIlls
The various crew members may increase in skill during the course of the year. For every four contact patrols (sorties) flown, regardless of victories, each crewman gains an experience point, which he may spend to “buy” skills. Sorties that are skipped due to injury, plane repair, or other reasons do not count toward gaining experience points. The skills cost different amounts of experience points to purchase. The pilot starts the game with one experience point. This is granted for graduating from flight school.
The skills confer various benefits during game play, as listed below. The cost to buy each skill is listed after the skill name in parentheses.
skIll lIst (cost):
GUNNERY (4) - [All crew] This skill gives the player an extra random hit when firing, IF any hits were scored normally when firing forward guns (for a rear gunner, when firing rear guns).

PRECISION (1) - [Pilot only/Observer only]

The pilot or observer is sparing and accurate with his bursts, so much so, that when he fires and flips an even-numbered card, he does not expend an ammo counter. This skill is not active when a player uses extended burst.
SIXTH SENSE (3) – [Pilot only] The pilot has developed an uncanny sense of impending danger. Any “DE” result on a combat card against him is instead converted to two random hits.

EXPERT (2) - [Pilot/Wingman only] A pilot may become an “expert” in his aircraft: This skill allows the player to redraw one combat card per sortie, if he desires to do so. He must use the results and/or text of the new card, even if it does less damage or gives a less desirable result. This skill must be repurchased for each new type of aircraft, with the exception of certain “families” of aircraft for which the skill applies to all members. These families are: Sopwith, Nieuport, SPAD, Albatros, Fokker.



LEADERSHIP (1) - [Pilot only] The pilot gets a -2 drm to promotion dice rolls.

A.C.M. (3) - [Pilot only] Air Combat Maneuvering allows a player to receive one less random hit when receiving defensive fire or when attacked by a fighter.

S.A. (3) - [Pilot only] Situational Awareness skill gives a “+1” to the end of turn Initiative Roll (Chart [B12] and -1 to the Starting Orientation Roll (chart [B1]).

LANDING (1) - [Pilot only] This skill allows a “-1” modifier to the landing chart.

REFLEXES (Free) - [Pilot only] This skill allows a pilot to either gain one position after the initiative roll, or to fire first in a round. It may be used once per sortie. Firing first means that any hit avoidance does NOT occur if the other aircraft flips a defensive card. Any orientation improvement (from a tight turn, for example) does still occur.

ADVANCED MANEUVER 1 (Free) - [Pilot only] Allows a Cuban Eight (Avoid one hit, improve by x 1.) It may be used once per sortie in lieu of a card draw.


ADVANCED MANEUVER 2 (2) - [Pilot only] Allows a Chandelle (Avoid three hits, improve x 1 (x2 if rotary.) It may be used once per sortie in lieu of a card draw.
ADVANCED MANEUVER 3 (2) - [Pilot only] Allows an Immelmann (Avoid all damage, improve x 2.) It may be used once per sortie in lieu of a card draw.
ADVANCED MANEUVER 4 (3) - [Pilot only] Allows a Split-S (Avoid one hit and encounter ends.) It may be used once per sortie in lieu of a card draw.
WEAPONS MAINTENANCE (1) - [Pilot/ Observer only] This skill allows the player to ignore the first (only) “Jammed Weapon” result from either extended burst or a combat card once per sortie. If both possess the skill, it applies separately for each gun.

MECHANICALLY INCLINED (2) [Pilot only] This skill allows the pilot to fine tune his engine and make other minor adjustments, resulting in a +1 increase to his speed rating.

[8.2] awards
The various awards in the game are representative of the major awards given to fighter pilots. Each award confers one
Prestige Point to a player (and also raises his prestige level by one), which he may spend at his convenience to upgrade aircraft or obtain a transfer to a new unit. There are also events which confer Prestige Points to players. Some German awards require a pilot to be from the geographical area from which the award originates. Some German, British, and French awards can be given to other nationalities, as listed.
german awards
[8.2.1] tHe wound badge
This award was given in three classes, Black, Silver, and Gold. To receive the Wound Badge in Black, the player’s pilot must have been injured during combat (not from parachuting from a stricken aircraft, or during a landing.) Keep track of a second wound by flipping the Wound Badge in Black to the “2” side. Upon receiving a third wound, the player is awarded the Wound Badge in Silver, placed on the “3” side. Track a fourth wound by flipping the Wound Badge in Silver counter to the “4” side. Finally, upon receiving a fifth wound, the player receives the Wound Badge in Gold. No further tracking is required at that point. Note that the wound badge only gives a player a single Prestige Point, NOT for each class of badge or each wound.
Historical note – the Wound Badge was first awarded in March 1918, but were awarded retroactively to wounded personnel, so players may feel free to place them “early” if they desire. It still gives a Prestige Point if the wound occurs before March 1918.

[8.2.2] tHe Iron cross 2nd class


The Eisernes Kreuz 2 (or EK2) was awarded upon downing the first enemy aircraft. It confers one Prestige Point. It is awarded to Austro-Hungarian pilots when they make “Ace.”
[8.2.3]
tHe Iron cross 1st class
The Eisernes Kreuz 1 (or EK1) was awarded upon downing a second enemy aircraft. It confers one Prestige Point. It is awarded to Austro-Hungarian pilots upon their tenth victory.
[8.2.4]
tHe eHrenbecHer (Honor beaker)

This was not a uniform award; rather a silver cup given to pilots who had proven themselves with an aerial victory. It confers one Prestige Point. Notice it will be given concurrently with the EK2.
[8.2.5] order of tHe red eagle, 3rd class, wItH crown and swords (PrussIan)
This award was rarely given to pilots. Awarded

at the player’s seventieth victory (regardless of his being Prussian or not.) It confers one Prestige Point to a player.
Historical note: This was awarded to Manfred von Richthofen upon his 70th victory – a rare honor.
[8.2.6] royal House order of HoHenzollern (PrussIan)

This award was given to Prussian officers as a sort of “intermediary” award between the Iron Cross, 1st Class, and the Pour le Mérite. Prussian pilots receive it after their tenth victory, and it confers one Prestige Point.
[8.2.7] mIlItary merIt order, 4tH class wItH swords (bavarIan)
Bavarian pilots receive this award after downing two or more aircraft in a single sortie, or any other German pilot receives it upon reaching 50 victories. It confers one Prestige Point.
[8.2.8] mIlItary order of st. Henry (saxony)

Saxon pilots receive this award after downing two or more aircraft in a single sortie; or any other German pilot receives it upon reaching 40 victories. It confers one Prestige Point.
[8.2.9] war merIt cross (PrIncIPalIty of lIPPe)
Lippe pilots receive this award after downing two or more aircraft in a single sortie; or any other German pilot receives it upon reaching 35 victories. It confers one Prestige Point.
[8.2.10] war merIt cross (grand ducHy of baden)


Baden pilots receive this award after making “Ace” status. It confers one Prestige Point (in addition to the regular Prestige Point for making “Ace.”)
[8.2.11] mIlItary merIt order (kIngdom of württemberg)

Pilots from Württemberg receive this award after downing ten or more aircraft. It confers one Prestige Point.
[8.2.12] HanseatIc cross (HanseatIc cItIes of bremen, lubeck, and Hamburg)

Hanseatic pilots (from any of the three cities) receive this award after ten victories. Any other German pilot receives this award upon reaching 20 victories. It confers one Prestige Point.
[8.2.13] Pour le mérIte
Literally “For Merit,” this highly coveted award was also known as “The Blue Max” due to its early possession by Max Immelmann, a German pilot. It is awarded to any pilot who has achieved 16 aerial victories. The Pour Le Mérite confers one Prestige Point.

Historical note: Similar to the “Knight’s Cross” of WW2, the number of victories required for the award increased as the war progressed. In early 1917 the number was 16 victories, and I have chosen that as a good number for game purposes. Although some of the other city-state and royal awards are more difficult to obtain, this was the one that was most sought after.
austro-HungarIan awards
[8.2.14]
wound medal

This is awarded to pilots who have been wounded in combat (not from a bad landing.) The first award (only) confers one Prestige Point. Each red stripe on the ribbon represented a wound.
Historical note: This was instituted in August 1917. Players may receive it retroactively for previous wounds.
[8.2.15] sIlver medal for bravery, 1st class

This is awarded to pilots after their second victory. It confers one Prestige Point.
[8.2.16]
gold medal for bravery

This is awarded to pilots who achieve three victories in a single sortie. It confers one Prestige Point.
[8.2.17] mIlItary merIt medal


This is awarded to pilots who make “ace” (five victories.) It confers one Prestige Point.
[8.2.18]
mIlItary merIt cross

This is awarded to pilots who down two enemy aircraft in a single sortie. It confers one Prestige Point.
[8.2.19] ImPerIal order of tHe Iron crown
This is awarded to pilots upon their thirtieth Victory.
brItIsH awards
[8.2.20]
wound strIPe

This is awarded to pilots who have been wounded in combat (not from a bad landing.) The first award (only) confers one Prestige Point.
[8.2.21]mentIoned In desPatcHes
Not a uniform award per se, but acknowledgment of military gallantry or heroism, published in the London Gazette. It is given to players who achieve a victory. The award confers one Prestige Point.

Historical note: After the war, it was displayed as an oak leaf device on the WW1 Victory Medal.
[8.2.22]
dIstInguIsHed flyIng cross
Starting in June 1918, this is awarded to a player for downing two aircraft in a single sortie. It confers one Prestige Point each time it is earned. Subsequent awards after the first are represented by a “bar” device.
Historical note: this award was created on 3 June 1918.
[8.2.23]
mIlItary cross

Before June 1918, this is awarded to a player for downing two aircraft in a single sortie. On or after June 1918, this is awarded to a player for downing or damaging (in any combination) three enemy aircraft in a single sortie. It confers one Prestige Point. Additional Military Crosses are represented by a “bar” device, which also confer a Prestige Point. This may be awarded once to French, Belgian, and Italian Pilots.
[8.2.24]
dIstInguIsHed servIce order


This is awarded to a player who has reached 20 victories. A “bar” device is added for reaching 30 and again at 40 victories. Each award (or bar) confers a Prestige Point. It may be awarded once to Belgian pilots.
[8.2.25]
vIctorIa cross

This is awarded to a pilot who downs or damages four aircraft on a single sortie, two of which must be victories; alternately, it may be awarded when the pilot reaches 50 victories.
frencH awards
[8.2.26]
cIted In orders
Similar to being “Mentioned in Despatches” this is not a uniform medal, simply recognition. Awarded to players after their first victory, it confers a Prestige Point.
[8.2.27]
croIx de guerre

This is awarded to a player for downing or damaging two aircraft in a single sortie (or some combination thereof.) Award levels are represented by bronze stars, silver stars, gold stars, or bronze palms; a silver palm in place of 5 bronze palms. The game uses the bronze palm version of the award (recognition at Army level.) It may be awarded multiple times, the first and second time each confers a Prestige Point (Maximum of two points). It may be awarded once to British, Italian, Belgian, and American Pilots.
[8.2.28] médaIlle mIlItaIre

This award is given to enlisted personnel, and therefore cannot be earned in the game. It is included for historical purposes as several of the Historical Ace cards have pilots who earned it before becoming officers.
[8.2.29] légIon d’Honneur

This is awarded to a pilot who reaches 40 victories. It confers a Prestige Point. It may be awarded to American and Belgian pilots.
amerIcan awards
[8.2.30] PurPle Heart
This is awarded to an American pilot who is wounded in action (not injured in a plane crash or landing.) The first Purple Heart confers one Prestige Point.

Historical note: The Purple Heart was not actually awarded during WW1, but was retroactively issued after the war starting in 1932. I have included it as it would have added to a pilot’s prestige to have survived enemy gunfire. Players should feel free to use the medal “early.”
[8.2.31] sIlver star

This is awarded to an American pilot who downs an enemy aircraft and at least damages another in the same sortie. Notice it will also earn the Croix de Guerre from France simultaneously, if that award has not already been earned. The first award confers one Prestige Point.
[8.2.32] dIstInguIsHed servIce cross

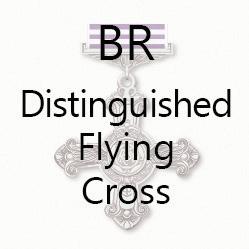
This is awarded to an American pilot who shoots down two enemy aircraft (or more) in a single sortie. A Silver Star is not simultaneously awarded; only the higher award (the DSC) is received. The first award of the DSC confers a Prestige Point.
[8.2.33]
medal of Honor

This is awarded to an American pilot who achieves 25 victories, or alternately, shoots down three aircraft and at least damages a fourth in a single sortie (good luck with that.) It confers a Prestige Point each time it is earned.
Historical note: Eddie Rickenbacker received his Medal of Honor in 1930, after one of his eight Distinguished Flying Crosses was upgraded.
ItalIan awards
[8.2.34] tHe war merIt cross

Starting in January 1918, pilots who have been active for at least one year are awarded the War Merit Cross. Alternately, it is given after one victory (or, starting in January 1918, to pilots who have at least one victory.) It confers one Prestige Point.
[8.2.35] bronze medal for mIlItary valor

This is awarded to pilots after they achieve a victory. It confers one Prestige Point.
[8.2.36] sIlver medal for mIlItary valor
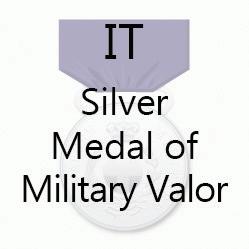
This is awarded to pilots after they make “ace” status (five victories.) It confers one Prestige Point.
[8.2.37] gold medal for mIlItary valor

This is awarded to pilots after they achieve 20 victories. It confers one Prestige Point.
[8.2.38] mIlItary order of savoy

This was awarded for a special military feat in battle. As such, in the game it is awarded to pilots who down two aircraft (or more) in a single sortie. It confers one Prestige Point.
[8.2.39] tHe order of tHe crown (ordIne della corona)

This was more of a political award than a military one per se, but could be awarded for military achievement. In the game, it is awarded to pilots who achieve 40 victories and confers one Prestige Point.
belgIan awards
[8.2.40] tHe fIre card (carte du feu)
This was not a uniform award, rather, a service document for having served under fire at the front. It is awarded in the game for returning from a mission with aircraft damage; alternately, for having damaged or shot down an enemy aircraft. It confers one Prestige Point.
Historical note: in 1934 it was retroactively converted into the “Fire Cross” which was a uniform medal.
[8.2.41] croIx de guerre (belgIan)

The Belgians, like the French, had a Croix de Guerre. This is awarded to a player for downing or damaging two aircraft in a single sortie (or some combination thereof.) It confers one Prestige Point.
[8.2.42] order of tHe crown

This is awarded by royal decree for meritorious service to Belgium. In the game, it is awarded upon a player reaching ten victories and confers one Prestige Point.
[8.2.43] order of leoPold

This is the highest award from Belgium. In the game, it is awarded to a player upon reaching his 30th victory; alternately, it may be awarded upon reaching 20 victories against balloons.
[8.3] “ace” status

Upon reaching “Ace” status (five victories) a player (from any nationality) receives a Prestige Point, is allowed a wingman, and may conduct “Solitary Hunting” if desired. Other awards may be granted upon reaching ace status, depending on the nationality of the pilot. A wingman who makes “Ace” gives the pilot a +1 drm on the Initiative Chart [B12].
[8.4] PromotIons
Pilots started as Flight Lieutenants, Leutnants, or any of several other ranks. Although in reality, many were NCOs, Western Front Ace pilots follow the officer track. In the game, each promotion confers a Prestige Point to a player.
[8.4.1]
rank effects
The positions and game abilities associated with each rank level are:
Wingman - 1st Rank. The player’s normal and lowest possible starting rank. No special abilities and no wingman abilities or tracking (you ARE the wingman).
Pilot - 2nd rank. The player is now allowed to either have a wingman, or use “solitary hunting” (even if not yet an Ace.)
Flight Leader - 3rd Rank. You are given command of a group of aircraft. This command is only relevant for role-playing purposes.
Commander - 4th Rank. You are given command of a large group of aircraft. This command is only relevant for role-playing purposes.
[8.4.2] PromotIon mecHanIcs
The first promotion is made after the third month of service and every sixth month after that.
The first promotion (only) is automatic, to the next higher rank. You have survived several months at the front. After that, a roll is required.
Promotion to the next higher rank occurs on a successful 1d6 roll of 1-4, with the following modifiers:
-1 per any award given during the period, to include non-uniform awards such as being Mentioned in Despatches or the Ehrenbecher. (total drm of -1 regardless of how many awards.)
-1 per ten victories during the period. A player may have multiple modifiers depending on how the period went.
[8.4.3] rank lIstIngs
The following are the actual ranks (and level for game purposes) for each nationality and/or branch of service. The rank counters should be placed on the A2 Pilot Status chart.
German and Austro-Hungarian:
• Leutnant (1st)
• Oberleutnant (2nd)
British RFC and RAF:
• 2nd Lieutenant (1st)
• Lieutenant (2nd)
British Naval:
• Flight Sub-lieutenant (1st)
• Flight Lieutenant (2nd)
American:
• 2nd Lieutenant (1st)
• 1st Lieutenant (2nd)
French:
• Sous-lieutenant (1st)
• Lieutenant (2nd)
Italian:
• Sottotenente (1st)
• Tenente (2nd)
Belgian:
• OnderLuitenant (1st)
• Luitenant (2nd)
• Kapitein (3rd)
• Hauptmann (3rd)
• Major (4th)
• Captain (3rd)
• Major (4th)
• Flight Commander (3rd)
• Squadron Commander (4th)
[8.4.4] conversIon to raf ranks
Starting in April 1918, the RAF was formed. Convert any RFC or RNAS pilot rank to an equal rank using RAF markers.
Historical note: This conversion has no impact on game play and is merely included for historical accuracy.
[8.4.5] re-basIng
Players get the option to re-base to a different aerodrome of the same nationality after each promotion, if desired. This normally has very little impact on game play, except that a German may wish to do it so he may encounter French instead of British aircraft (or vice versa.) Also, starting in November 1917, a British player may re-base to Vicenza Italy if he desired to encounter Austro-Hungarian aircraft. This is an exception to the normal rule of only re-basing to your nationality’s bases.
[8.5] random events
A Random Event occurs the first time a “12” is rolled, per sortie, on the encounter chart. This replaces the encounter that is listed there (should you roll a second “12” later in the sortie, the normal encounter would happen at that point.) These range from very good to very bad. Some will give a player a marker that may be used at a future point in the game (Eyewitness Corroboration, Good Luck Charm, etc.) Place this marker on the aircraft mat. Other random events will need to be processed per the text of the event (you may be attacked, etc.) After processing the random event by consulting Chart [C1], continue the sortie.
[8.5.1]
• Captain (3rd)
• Major (4th)
• Capitaine (3rd)
• Commandant (4th)
• Capitano (3rd)
• Maggiore (4th)
• Kapitein-Commandant (4th)
good luck cHarm
Each Nationality has a different good luck charm (“Touch Wood” for the British, “Bonne Chance” for the French and Belgians, “Lucky Rabbit’s Foot” for the Americans, “In Bocca al Lupo” for the Italians, and “Du Musst Schwein Haben” for the German and Austro-Hungarians.)
They are all identical in game terms in that they allow the player to reroll any single die or dice roll, or redraw a new combat card. Once declared and used, the good luck charm is expended, and the new dice roll or card must be utilized. More may be received in the future, and they may be held indefinitely until used. More than one may be accumulated. Each new pilot begins the game with a good luck charm.

[8.5.2]
random event – ace encounter
This event has you encountering (and fighting, unless you attempt to avoid combat) an enemy ace, drawn randomly

from a pool of available enemy aces of the correct nationality for that sector. If this occurs, he will be flying a plane randomly rolled from the appropriate time and nationality. This may or may not be the plane for which he was historically known to fly most often. Enemy aces have all the skills and advantages as listed on their card. They will use “Expert” to redraw a card if they pull a gun jam, or if the enemy inflicts “5” hits or gets a DE result. They will use any good luck charm to force a redraw of “5” hits, a DE result, or a roll that causes a fatal crew injury, but only if there is no “Expert” ability available (or it has been used.)
Example: It is December 1916 and you are French. You roll the Ace Encounter random event. This will be a German opponent. Since Boelcke has already been killed, you would randomly choose from Richthofen, Voss, and Udet.


[8.6] examPle of Play


Bob decides to start the game as a British pilot. He gets out the A2 Pilot Status Card (British) and sets the other A2 cards aside, as they won’t be needed. There are four


starting British aircraft with zero Prestige Level requirements, and of these, Bob chooses the B.E. 12 since he likes that it has a Vickers and not a Lewis gun as the main armament. Bob chooses to be based at Bertangles (which connects to the Somme section of No Man’s Land) and is opposite the German base at Guise. He places his “Advanced Maneuvers 1” marker on his B.E. 12 Aircraft Display Mat, along with the “Reflexes” skill marker, as all players start with those two skills. He also places an Endurance marker on the Endurance track, a B.E. 12 marker on the Mission Track in the “Hangar” box, three ammo markers in the Ammo box (each on the “2” side) and a “Touch Wood” good luck charm in one of the Random Event boxes. Now he attends Flight School (Chart F3). He fails at Gunnery Training, but Flight Training and Landing Training are both successful, so he places the “A.C.M. -1” marker on Chart A2. If and when he buys the ACM skill, it will cost one less experience point. He gets the Landing Skill for free and places that on A2 as well. For his spare time activities, he decides to “hit the books” and chooses Extra Study Time. This gives him a free Experience Point. Now that he is done with flight train-

ing, he starts the game with two Experience Points (due to Extra Study Time, instead of the normal one) and he places a “2” marker on Chart A2 in the Experience Points box. He decides to save them.


Bob places the “Somme” and “Verdun” Major Ground Offensive markers on the map. Verdun is mainly for historical interest as it will not affect him at Bertangles, but it is possible he will be tasked to support the Somme operation. He is now ready to fly his first mission.




Bob rolls on A1b (since he is an Allied Pilot) on the 1916 column and gets a “six.” This is a Line Patrol – he must at least travel to No Man’s Land for a mission success. He takes off, moves his aircraft marker on the Mission Track and his Endurance Marker on the Endurance Track, and rolls




for an encounter in the Takeoff/ Landing Box.




A “7” yields no encounter on the Friendly Lines column of A3. He moves again to the Friendly Territory box, burning another endurance, and rolls again. Another “7” indicates no encounter. He moves a third time, which brings him to the No Man’s Land box. He rolls a “5” which has a double asterisk, indicating that in Italy, it would be no encounter. But Bob is not in Italy, so it is an encounter.


He then rolls on A3a, first column to see what type of German aircraft he has run into. (Players may find it useful to locate and set aside the three Albatrosses, the Fokker D.III, and the Halberstadt D.II in advance, as these are the only German aircraft possible to encounter at this stage of the game.) He again rolls a “7”, which means he has encountered a Halberstadt D.II.


A2 Pilot Status A A2 Pilot Status


Now he checks Chart B1 for starting orientation. A roll of “4” means Bob will start the encounter advantaged. He places his aircraft marker facing ahead in the Orientation section of the Aircraft Display Mat, and the Halberstadt D.II marker facing sideways (as it starts disadvantaged due to the roll on B1.) He places three ammo counters on the Hal berstadt D.II Display Mat in the ammo section, each on the “2” side.

Bob fires. The German will automatically go defensive by drawing a card as it started disadvantaged. Bob pulls card #38 which gives him three hits for his three firepower, a good result.

The German pulls card #3, which has a “Tight Turn” for its defensive section. This gives him one position improvement.
Bob rolls three times on Chart B6 to inflict damage. He gets a “41”, “66”, and “11”, which equate to Canvas hit (no effect) a Fuel Tank Hit, and a Crew Injury.

Both the Fuel Tank hit and the Crew Injury require secondary rolls, so Bob checks Chart B4. He rolls a “5” for crew injury, so that indeed is the Pilot (had he rolled a high number, it would have been an “Observer” injury, which is no effect in this situation.) The wound severity roll yields a “6” which means Bob has luckily killed the German pilot outright, thereby scoring a victory. Out of morbid curiosity, Bob rolls to see the effect of the Fuel Tank hit but it was just a leak with a roll of “6.”

Deciding not to push his luck, even though he has five ammo points left, Bob heads back to base, since he has accomplished his mission
(as the fight took place in No Man’s Land.) He has no encounters in the Friendly Territory box or the Takeoff/Landing box (he is traveling backwards on the Mission Track at this point.) He is ready to land.
On Chart B9, a 1d10 roll of “5” yields good weather for landing, so Bob doesn’t even bother to roll on the B7 Landing Chart, as he automatically has a good landing.
Post mission, he checks the rules to see if he’s eligible for any awards, and in fact, per [8.2.20] he sees he has been “Mentioned in Despatches” which garners him a Prestige Point (and an increase in Prestige Level to “1”) both of which he marks on Chart A2. He also places the “Mentioned in Despatches” marker on A2. He is now ready for his next mission.
9.0 PrestIge level
[9.1] general concePt
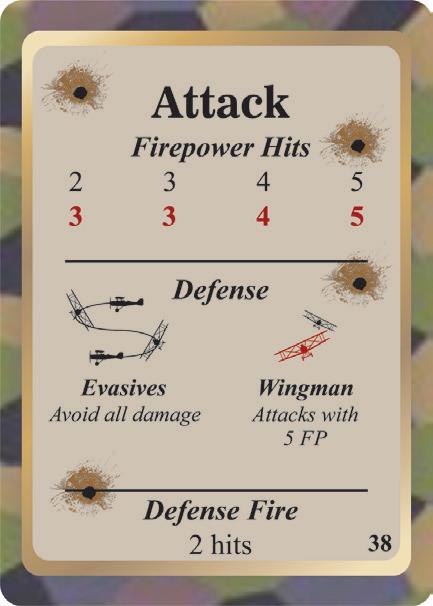

New pilots did not receive, as a general rule, the latest and most advanced aircraft to fly. These were generally distributed first to the “ace” pilots who had proven themselves. To represent this, Western Front Ace uses the concept of an overall “Prestige Level.” As a player’s Prestige Level increases, newer and more advanced types of aircraft will be available for use. The planes with a high Prestige level requirement tended to be the new types in short supply and high demand. Notice that some advanced aircraft do not have a very high prestige requirement – this merely means there were a sufficient amount of them available to even the lower ranking pilots.
[9.2] PrestIge PoInts
Every time a player receives an award of any type (and for certain other events) he receives a Prestige Point. Each one increases your Prestige Level. You also receive a Prestige Point for achieving your fifth victory (you have become an “Ace” at that time) and for each promotion. Prestige Points may be spent as follows:
• Request a new/different model of aircraft (one Prestige Point)

• Request transfer to a different base (one Prestige Point)
• Request a specific mission assignment from those currently available instead of randomly rolling (one Prestige Point)
[9.3] PrestIge level
A player’s Prestige Level starts at zero. Every time a player receives a Prestige Point, his Prestige Level increases by one. It never decreases. (This is an important concept –your Prestige Level keeps going up and never decreases, but your Prestige Points may be saved or spent as desired.) The Prestige Level is your overall Prestige within the game and is used to “unlock” more advanced aircraft. Once your Prestige Level reaches “5” it no longer needs to be tracked; that is the highest level needed to fly any aircraft.
[9.4]
PrestIge bonus for careers after 9/16
Players may wish to start the game past the normal start date of September 1916. If they do, certain nationalities will receive a Prestige Level increase from zero automatically, to allow them access to the aircraft which are currently in service. These nationalities are British, French, German, and Austro-Hungarian. Pilots in one of those nationalities start the game with a Prestige Level of 1 if beginning in 1917 or later, and a Prestige Level of 2 if starting in 1918. Prestige level adjustments for the Americans and Italians are already accounted for on the aircraft mats.
10.0 reassIgnment to a newer aIrcraft
A player may be reassigned to a newer model aircraft under certain circumstances.
[10.1]
uPgrade
If he desires a newer model of aircraft, he may simply request and receive it by spending one Prestige Point. He must have the appropriate Prestige Level to be able to fly it, however. A player loses two contact sorties in time while he familiarizes himself with the new type of plane.
[10.2]
uPgrade due to wounds
If seriously wounded, the player is automatically given a new plane for “free” (and new crew, which starts with no special abilities for any other crew) of the same type which he lost, and goes back on flight duty the next sortie after release from the hospital. Or he may choose a new type of aircraft he is capable of flying, from the standpoint of Prestige Level, but lose two sorties if doing so.
[10.3]
uPgrade due to crasH or loss
A player who crash lands his plane (and presumably survives) or otherwise loses it receives a new plane of the same type.
[10.4]
new crewman
It may be possible that an aircraft upgrade will “add” a new crew member – some aircraft had an observer, and despite
the fact they were “2-seaters” used as scouts. New crewmen arrive with no experience and no special abilities. The same applies to replacement crew for casualties. It is also possible a new plane will not have an observer - in that case, the old crewman is lost to the pilot.
[10.5] PrestIge waIver
If the player starts the game past September 1916, he may find himself in a unit flying an aircraft that has a Prestige requirement higher than zero. The requirement would be waived in that case for that particular model of aircraft and any identical replacements if he loses it. Rule [9.4] should alleviate some of the need for a waiver, however.
11.0 oPtIonal rules
[11.1] multI-Player
Despite the fact Western Front Ace is designed as a solitaire game, it can be played cooperatively or competitively by two or more players.
[11.2] cooPeratIve Play
Two players can fly in the same unit, and assist each other in encounters.
Each player will be fighting against their own fighter target. These enemy fighters will be the same type; one player rolls to determine this. However, if one player has shot down his opponent, he may assist his teammate by maneuvering against his teammate’s opponent. Each round this happens, it will improve his teammate’s position by one, occurring during the initiative roll. However, at the end of each round this happens, the assisting player must roll a 1d6. On a 1 or a 2, he will find himself starting a new combat in a disadvantaged status against a fresh enemy fighter.
[11.3]
comPetItIve Play
Two players can fly in the same or different units, and compete for the best score. If a fighter encounter occurs, the opposing player decides to use a defensive or wingman assist section of cards when playing defensively, flips all enemy cards, and also rolls for initiative.
If flying for different sides (which implies for example one of the players is German, the other British or French) the players conduct sorties normally, but sequentially as far as expending endurance boxes.
If a player moves into an area containing the opposing player’s aircraft, and rolls an encounter, he may fight his opponent’s aircraft on a 1d6 roll of 1-2. This replaces the normal encounter for that endurance box.
[11.4] ace cards
In order to add what amounts to Historical Scenarios in the game, 24 historical “Ace” cards have been included, each
representing one of the top aces of World War 1. Each card includes special instructions for its use, and a “snapshot” of the pilot’s status at the start of the game (Sep 1916.) For example, many start with victories, experience points, awards, etc. Simply adjust the Pilot and Crew Status sheet to reflect the situation, and place the Ace card on the upper left side in the box provided to allow you to refer to it as needed. You are now ready to start flying as that Ace starting (usually) in Sep 1916.

[11.4.1]
startIng base
You may start your ace at any base allowed for his nationality. Start with any aircraft available that he is permitted to fly in regard to Prestige Level.
[11.4.2]
ace abIlItIes
Each card lists the special abilities of that particular ace. If experience points are listed, you may spend them (or save them) as desired.
[11.4.3]
HIstorIcal ace vIctory
Some of the Aces listed on the cards were already near their victory totals by Sep 1916; some had not even started yet. Regardless of starting victories, you should consider your career a defeat if you do not MATCH or EXCEED the pilot’s historical total.
[11.5] PIlot fatIgue
Obviously, running nonstop operations will eventually take a toll on a pilot’s judgment, flying capabilities, and attention. Pilot fatigue includes the stress of continuous combat in addition to the physical fatigue. The following optional rules simulate this effect on the pilots.
[11.5.1]
fatIgue level
Pilot fatigue level starts at zero. Each contact sortie flown causes the pilot to gain one fatigue point. Each sortie NOT flown (for any reason) removes two fatigue points. Record your fatigue on the Sortie Log sheet. At the end of any month in which two or fewer contact sorties were flown, remove two fatigue points.
[11.5.2]
fatIgue effects
The following effects occur at different fatigue levels:

Level Effect
1-5 No Effect
6-11 Add +1 to Landing rolls
12-17 Add +1 to Landing rolls and -1 for initiative rolls
18-23 Add +2 to Landing rolls and -1 for initiative rolls
24+ Add +2 to Landing rolls and -2 for initiative rolls
[11.5.3] annual leave
A pilot may take leave (the military term for vacation time) for a week (two contact sorties.) He may do this once each year except 1916. When he returns, his fatigue level is set at zero.
[11.6] varIable PIlot qualIty
For those who want to encounter variable quality in the enemy pilots, use the following. Roll 1d6 when encountering fighter patrols:
Time: 1d6 for Quality:
Green pilots do one less random hit if they hit at all. Trained pilots are the default. Veteran pilots do one extra random hit if they do at least one hit. Ace pilots do one extra random hit if they do at least one hit, and also receive +1 on the initiative roll.
[11.7] squadron, vIctory, aIrfIeld random generators
Western Front Ace includes optional player aid cards that offer players a deeper and more detailed experience at a small cost in added complexity. These charts (S1 through S5) have been included for players who wish to add additional historical detail to their game. Charts S1 and S2 (Pilot Name Generators) can create a random name for your pilot. This can be used in lieu of the procedure listed in [4.1] to start
the game. Chart S3 (Squadron Assignment) will generate a random historical unit, aircraft type, starting date, and game airfield. This can be used in lieu of the procedure listed in [4.1] to start the game. Charts S4 (Airfield Location Generator) will determine the actual airfield where a player is based. (This has no bearing on game play, but shows the actual aerodromes that make up each game base location). Chart S5 (Victory Location Generators, Western and Italian Fronts) allow the player to create the location where any of their victories occurred in an historical location nearby. oPtIonal random generator cHarts
S1/S2 Pilot Name Generator sheets (Allied and Central Powers)
S3 Squadron Assignment Generator (Allied and Central Powers)
S4 Airfield Location Generator (Allied and Central Powers)
S5 Victory Location Generator
The game may be played with none, some, or all of these charts, depending on how much detail you want. Most of these charts are quite intuitive. You simply roll the required number of dice and a result is generated. However, the Squadron Assignment Generator is densely packed with information, and may present a little difficulty until players are used to it, so here is a quick guide:
When beginning a new campaign, you may want to randomize the pilot’s nationality, the starting date, the squadron, a unique name for your pilot, the airfield location, and eventually location data for each of your victories. This all begins with the Squadron Assignment Generator. At the bottom right of the sheet you will see the nationality randomizer. We can simply choose a nationality, but if we want to have the game engine choose our nationality, we will roll on here first:
a British pilot, we need to find the date he is assigned to a squadron. We can simply choose a start date, or we can randomize. In this example, we’re randomizing everything, so we’ll roll 3D10 on the far left column to start: we roll an 11, getting June 1917.

The result is a 3: British.
To the left of the nationality randomizer there is a sector key. The colors on each of the charts determine the sector assignment you will start with in the game. More on this later.
Above is an example of a part of the British segment of the Squadron Assignment Generator. Now that we have rolled
Next, we move on to squadron assignment. Again, we could simply choose any squadron in service (any squadron listed in any row or column up to and including the start date), or we can randomize. To randomize, we roll D6: we get a 5, so column 5. This gives us a general idea of the sector we will be assigned to – notice that this column is mostly comprised of yellow boxes, with the occasional grey box. Looking back at the Sector Key, we find that the squadron we will be assigned to is in either Arras or Ypres.

Now, there are six squadrons listed in the box between September 1916 and the current date. The red outline in the example shows these. These are the squadrons that are in service and have vacancies in June 1917. Notice two of the squadrons are in grey text: this shows a squadron that has received a newer aircraft (40 squadron has Nieuport 17s, while 8 Naval Squadron has the Sopwith Triplane). Notice also that these two squadron numbers also appear in black higher in the column with the FE8 and Sopwith Pup: since these earlier aircraft have been superseded by the grey squadron numbers, we can ignore these black squadron numbers for 40 and 8N squadrons. This leaves us with four squadrons from which to choose: 8N and 9N, both flying the Sopwith Triplane; 11 Squadron flying the Bristol Fighter; and 40 Squadron flying the Nieuport 17.
So now we choose a die that will best cover our options: in this case, with four options, we roll a D6 (on a 5-6, simply reroll). We roll a 3, which places us in 8 Naval Squadron, flying Sopwith Triplanes for the British Royal Naval Air Service on the Ypres front (gray background).
Now, since we know our nationality, we can complete our set-up by rolling for our pilot’s name on the Pilot Name Generator, and, using the knowledge that we are based on the Ypres front, we can roll on the Airfield Location Generator (see below), using the row corresponding to the
British (brown color code) and the Ypres sector (grey color code) to find the airfield our squadron is based at.
We roll a 9, so we are based at Clairmarais.
The Airfield Location Generator may also be used to generate a sector change or a change of airfield. When desired (or when necessary due to a change in the front lines), roll on this chart. Start by rolling 1D6 based on your nationality, then roll 3D6 to get the new airfield.
Example: You are flying from Bertangles airfield on the British Somme front (green coded) and it is now April 1917. Bertangles airfield is no longer in use, and your squadron must move. You roll 1D6: a 5 – still on the Somme (green coded). Then roll 3D6 on the row corresponding to the date (4/17): you roll a 4, so your squadron has moved to Foucaucourt.
[11.8] lewIs gun reloadIng
The Lewis gun fired from a 97-round drum, which, when empty, was reloaded from one of the several spare drums carried aboard. However, at times pilots would have difficulties reloading in combat, sometimes dropping the drum or fumbling with it in the heat of the moment. To represent this, at the expense of another die roll, players may use this optional 1d6 reloading check instead of automatic success: 1-5 = drum reloaded 6 = drum dropped, fumbled, etc. (Drum still not reloaded.)

[11.9] gallantry
A player may allow an enemy scout who has his forward weapons knocked out (or a 2-seater with a dead observer or tail gun inoperative) to simply escape and combat ends. After allowing this a second time (in a different dogfight) he is assumed to have gained a reputation for “Gallantry” and gains one Prestige Point and a corresponding increase in Prestige Level. Only one Prestige Point may be gained in this fashion.
A player who has his forward weapons knocked out (inoperative) may possibly receive the same treatment from the enemy on a 1d6 roll of 1-3. If this occurs, the current combat immediately ends. If the player is known for “Gal-
lantry” this courtesy is automatic.
You are not required to maintain a reputation for gallantry, and may shoot down enemy with inoperative guns after having earned it. However, you must roll a 1d6 every time you engage an aircraft with inoperative weapons. On a roll of 1-2, you lose your Gallantry reputation for the rest of the game.
[11.10] credIt for vIctorIes over enemy lInes
A player may wish to increase the game’s difficulty by requiring victories over enemy lines to be verified for credit. When you shoot down an enemy plane over enemy territory, you must roll 1d6. A roll of 3-6 means a wingman or some other pilot backs up your claim. A roll of 1-2 means nobody saw the victory and it could not be verified. Although you know you shot the plane down, nobody else does, and therefore it does not count for Ace status or awards, etc.
Over No Man’s Land, a roll of 2-6 means your claim is verified. A victory is automatically considered verified in friendly territory or your base.
A failed roll may be counteracted by the “Eyewitness Corroboration” random event marker, if you have one available.

[11.11] camPaIgn scenarIos
Players may wish to enjoy a (relatively) shorter game of Western Front Ace by playing a Campaign Scenario. These are linked to the time-frames of the Major Ground Offensive Markers in the game. These chosen battles are, to wit, the Somme, Arras, Caporetto, and the Second Marne. Play starts with the first month of the marker chosen (and in an airfield connected to the named marker) and ends on final sortie of the last month. Most are usually just a couple of months, with some just a single month. Players may choose either side and any available plane (by date, without regard to Prestige Level requirements) and start with the following:

Arras (Bloody April) 4/17 – 5/17. British (Advanced difficulty.) Base: Le Hameau. No starting benefits or skills. Victory: 7+ air victories.
Arras (Bloody April) 4/17 – 5/17. German (Beginner difficulty.) Base: Douai. Start with 4 Experience Points. Victory: 7+ air victories.
Somme 9/16 – 11/16. British or French. (Advanced Difficulty.) Base: Bertangles (British) or Mesnil St. Georges (French.) No starting benefits or skills. Victory: 7+ aerial victories.
Somme 9/16 – 11/16. German. (Moderate Difficulty.)
Base: Guise. Start with 3 Experience Points.
Victory: 7+ aerial victories.
Caporetto 10/17. Italian. (Moderate Difficulty.)
Base: Udine. Start with 2 Experience Points. Victory: 4+ aerial victories.
Caporetto 10/17. Austro-Hungarian. (Moderate Difficulty.) Base: Trieste. Start with Prestige Level 1, 1 Prestige Point, 2 Experience. Victory: 4+ aerial victories.
2nd Marne 7/18. French or American. (Moderate Difficulty.) Base: Villeneuve-les-Vertus. French start with 3 Experience Points, Americans start with 2 Experience Points. Victory: 4+ aerial victories.
2nd Marne 7/18. German. (Moderate Difficulty.)
Base: Sissone or Mars-sous-Bourcq. Start with 3 Experience Points. Victory: 4+ aerial victories.
Ground Attack Missions: For the purposes of victory, a successful bombing/strafing mission counts as 1 aerial victory.
Special Starting Contact Sorties Rule: Obviously, at the start of every Major Ground Offensive, air support will be taxed to the limit. To reflect this, there is no roll for the first month of any Campaign – you will automatically have six Contact Sorties that month. Campaigns that last for more than one month will roll normally in each following month.
12.0 game credIts
GAME DESIGN: Gregory M. Smith and Ian B. Cooper
ARTWORK: Ian Wedge, lead artist. Box and additional artwork by Bruce Yearian. Charts and rules layout by Nadir Elfarra.
SPECIAL THANKS TO: John Kranz, Ian Cowley, Glenn Saunders, Michael Eckenfels, Christopher Schall, Alex Aguila, Dale Gutt, Rembert “Chip” Jarrell, Dan Pacaldi for the Gallantry rule, and Jeremy White for the concept of Advanced Maneuvers. And a VERY special thank you to
José “Stuka Joe” Ruiz, whose concept of Sequence of Play cards was nothing short of brilliant.
13.0 desIgner’s notes
After having completed Nightfighter Ace I was pressed by John Kranz to think about doing a sequel. Making a direct end-war sequel wasn’t appealing to me -- too many Mosquito night fighters, too much jamming, too much everything Allied. I realize I said that once about Hunters and still made The Hunted but the situation is so much worse in the air.
However, adapting the system for day use seemed extremely promising, and I built Interceptor Ace to do just that. Not long after that project was essentially complete, I was intrigued by a comment on Facebook, that I should adapt the system to World War 1.
As usual . . . easier said than done! But I began to see it could be done, with a lot of work, and immediately started research. I knew right away I needed a WW1 expert to help me, and enlisted the aid of Ian Cooper, who had adapted The Hunters to WW1 as the game Raiders of the Deep. He was the perfect man for the job.
Probably the hardest part of the design was the fighter vs. fighter combat. The routines were mainly imported from Interceptor Ace, but I knew I needed to have even more of a “dogfighting” feel to the system. Additionally, I had to account for rotary engines, the extremely primitive gunnery and tendency of weapons to jam, and a literal plethora of aircraft types.
The heart of the game is the decisions players must make regarding the expenditure of their precious experience points to improve their pilots. Some are offensive-oriented, some are survival-oriented. Some are a bit subtle in their effects, and some will probably be more useful in one series of aircraft versus another. Most have been used in Interceptor Ace, but I added a few more that are maneuver-oriented, as the system is really all about dogfighting and I wanted it to feel that way. The purchase of skills, however, is a key decision. Unlike some of my other games where players can “bank” a few experience points and save up for an expensive skill, you should strongly consider buying skills as soon as possible, due to the brutal nature of WW1 air combat. Saved experience points don’t do much good if you’re dead. I think Jeremy White’s (the “Skies Above the Reich” designer) idea to add “Advanced Maneuvers” adds a lot to the tactical decision making in the game, and I can’t thank him enough for suggesting it.
Some things have obviously been abstracted a bit. I think the game would have been unworkable without Ian Cooper’s brilliant concept of “Contact Patrols.” In reality, pilots flew almost every day, and without “Contact Patrols” weed-
ing out those sorties where nothing happened, the logsheet alone would have been five pages long. This abstraction actually makes the game playable and was one of the key early decisions in the design process.
Finally, a VERY special thanks to Christopher Schall and Ian Cowley, without whom this project would not have been possible. They were both an inspiration and kept me on track, to say the least. The final thanks should rightfully go to Ian Wedge, our main artist. He went above and beyond on this one. As a WW1 aviation fanatic, he was the perfect artist for the project and we were blessed to have him, because he truly cared about having things done right, and many times corrected me on the most minute historical details.
14.0 selected bIblIograPHy
McCudden, James V.C. “Flying Fury: Five Years in the Royal Flying Corps.” Greenhill Books, 1987.
Despite the dated prose, this first-hand account by one of Britain’s top aces was just an eye-opener. Highly recommended if you can get your hands on a copy.
Clark Alan. “Aces High.” Ballantine Books, 1974.
Really nice book that combines the overall picture, personal accounts, and data.
Herris, Jack and Pearson, Bob. “Aircraft of World War I: 1914-1918.” Amber Books, 2010.
Another great reference, worth buying just for the illustrations alone.
Gilbert, Martin. “The First World War.” Henry Holt and Company, 1994.
Not much on aircraft, but a good overall reference to the entire war to place things in perspective.
Haythornthwaite, Philip. “The World War One Source Book.” Arms and Armour Press, 1992.
Good all-around reference book.
Hogg, Ian. V. “Anti-Aircraft Artillery.” The Crowood Press, 2002.
Bowyer, Chaz. “History of the RAF.” Bison Book Corp, 1977.
Decent “coffee table” book with a small section on World War 1.
15.0 HIstorIcal notes – ace cards
The following are short histories of the Ace Pilots featured on the Ace Cards. The pilots chosen for the game are by no means an exhaustive list of the top aces of the war –they are merely a representative fraction of available aces to choose from, and some were chosen so that all nationalities present in the game would have at least one ace card.
UNITED KINGDOM
Albert Ball
Albert Ball was the highest scoring British ace at the time of his death, with 44 victories. He became the first famous ace in the United Kingdom, as before the Battle of the Somme, such information was not publicized, but after the horrific losses in that battle, the government felt it would be prudent to have some flying heroes for the population to be proud of. Starting with Nieuports, he initially disliked the S.E.5, but finished flying in them, and in fact, had one specially modified to suit him. His death in 1917 was somewhat mysterious: the Germans claimed to have shot him down, but no damage was found on his aircraft and no bullet holes in his body. He had flown into a thundercloud and emerged upside-down with a dead propeller, likely a victim of vertigo. Albert Ball was only 20 years old.
William Bishop
A controversial figure, William “Billy” Bishop was a Canadian who started the war in the cavalry. He soon become convinced that fighting in the air was the best place to be. Bishop reportedly said “it’s clean up there! I’ll bet you don’t get any mud or horse shit on you up there. If you die, at least it would be a clean death.” He started as an observer but got to flight school in 1916. As a pilot, he got victories slowly at first, but accelerated as time went on, finishing the war as a Lieutenant Colonel with 72 claimed victories. Many of his flights were solo, however, and post-war investigations have cast doubts on this total. Regardless of his actual total, he was a significant and dangerous ace.
Geoffrey Bowman
Geoffrey “Beery” Bowman was a top-scoring British ace who started the war in the infantry but was assigned to the Royal Flying Corps in 1916. Starting in an Airco DH.2, his first victory was somewhat unusual, accidentally ramming a Roland C.II and barely making it back with his damaged aircraft. He finished the war in an S.E.5 with 32 victories and the rank of Major. The most notable event in his aerial career was being one of the pilots who brought down Werner Voss. He retired after the war, but was recalled at the start of World War 2, serving only two years before retiring again.
Raymond Collishaw
Another Canadian, Raymond Collishaw was first inclined to join the Royal Navy, but joined the Royal Naval Air Service (RNAS) instead. He got to the front in August 1916, flying the scout version of the Sopwith 1 ½ Strutter. After some early victories followed by sick leave due to frostbite, he returned to the front in April 1917 and flew the Sopwith Triplane, an aircraft he found “delightful.” His unit was very successful and became known as the feared “Black Flight.” He ended the war as a successful commander and well-admired.
Robert Little
The top Australian ace, Robert Little was also in the RNAS, with a career similar to Collishaw, as he started in Strutters, moved to the Triplane, and ended up in the Camel. It was in the Sopwith Triplane that his scoring dramatically took off. Curiously enough, he was known to be only an average aviator at best (having had his share of rough and crashed landings) but his strength in combat came from the fact he was aggressive and an absolute crack shot. Intercepting Gotha bombers one night, he was struck by a lone bullet that went through both of his legs. He bled to death a short time after crash-landing, with a final tally of 47 victories.
Donald MacLaren
Yet another Canadian, Donald MacLaren ended the war with an astonishing victory total of 54. What makes this singularly impressive is that he didn’t start fighting until February of 1918, meaning all his victories were achieved in just under nine months. His most notable post-war military achievement was his work in establishing the Royal Canadian Air Force, while as a civilian, he formed Pacific Airways. He died at the age of 95.
Edward Mannock
Edward “Mick” Mannock was a British ace who was working in Turkey as an engineer at the time they joined the Central Powers, and was therefore interned. He fell ill, and they repatriated him to England, thinking him unfit for service. After his recovery, he joined Royal Engineers and then the Royal Army Medical Corps, but finally ended up in the Royal Flying Corps, where he was taught by James McCudden, who said “Mannock was a typical example of the impetuous young Irishman, and I always thought he was of the type to do or die.” He went to No. 74 Squadron, where he earned many of his victories, and was then assigned as a Major to command No. 85 Squadron. He was ironically brought down by ground fire, within a week of having warned a fellow pilot about following damaged enemy planes to low altitudes. At the time of his death, he was credited with 61 victories, but this may well have been higher. He was not awarded the Victoria Cross until a year after his death.
James
McCuddenJames McCudden, V.C., started as an air mechanic, graduated to observer, and finally went to pilot training in 1916. He earned the majority of his victories in the S.E.5, having tinkered with it to improve its handling and top speed. In fact, he used his mechanical knowledge to improve many of the aircraft in his unit, No. 56 Squadron. After reaching the rank of Major and having been given command of No. 60 Squadron, he was killed in an air accident, reportedly due to engine failure. Of particular note was his memoirs,
“Flying Fury,” finished just days before his death. Published later in 1918, it remains the best personal account of World War 1 aerial combat to this day.
George McElroy
An Irishman, McElroy started as a protégé’ of Mick Mannock and ended up with 32 victories to his credit. Like many other aces, he started in the British Army but ended up assigned to the Royal Flying Corps. He was famous for being extremely aggressive, and in July 1918, tallied almost a victory a day for the entire month. Not long after his mentor, Mick Mannock, was killed by ground fire, he too fell prey to the same danger. He was one of only a handful of aviators to receive a second Bar to his Military Cross.
FRANCE
René Fonck
René Paul Fonck was the leading French and leading Allied Ace, and held the title of “Ace of Aces” with a confirmed total of 75 victories (which possibly could have been 100 victories or more, considering his unconfirmed claims.) He was known for his almost clinical approach, mathematical and precise, and was renowned for his precision while attacking. Sometimes he took as few as five rounds from his machinegun to bring down a plane. He was never wounded, although his avoidance of balloon-busting duty may have assisted him in that regard. He never was as celebrated as Guynemer by the French population, perhaps due to his personality. Even a friend of his called him a “braggart and shameless self-promoter.” Despite his character flaws, it cannot be denied he was possibly the best shot of World War 1 in the air. He survived the war and died at the age of 59.
Georges Guynemer
Georges Guynemer was France’s second leading ace, with 54 victories, and was the first to achieve 50. Born to a wealthy and aristocratic family, he started as an aviation mechanic but worked his way to flight school, finally flying in 1915 as part of Escadrille MS.3. He shot down a Gotha bomber in February of 1917, another Allied first. He was one of the pilots skilled enough to effectively use the SPAD XII and its 37mm nose-mounted cannon. Had he survived the war, it is likely he could have outperformed Fonck, but he failed to return from a mission in September 1917, and his body was later found with a bullet wound through the head.
Charles Nungesser
Charles Nungesser started the war with the 2e Regiment de Hussards, but so impressed his superiors they granted his request to be transferred to the Air Service. His first victory in 1915 is somewhat humorous: he was arrested for insubordination (he wasn’t supposed to be flying) and
then decorated with the Médaille militaire afterwards. A raucous womanizer and drinker, he was well-liked by his fellow pilots, but often in trouble for flying without permission. He had an amazing constitution: at the end of the war his list of injuries was “Skull fracture, brain concussion, internal injuries (multiple), five fractures of the upper jaw, two fractures of lower jaw, piece of anti-aircraft shrapnel embedded [sic] in right arm, dislocation of knees (left and right), re-dislocation of left knee, bullet wound in mouth, bullet wound in ear, atrophy of tendons in left leg, atrophy of muscles in calf, dislocated clavicle, dislocated wrist, dislocated right ankle, loss of teeth, contusions too numerous to mention.” Despite all that, he always managed to convince the medical authorities to let him continue flying. Ending the war with 43 victories, he remained active in aviation, and disappeared during a transatlantic flight attempt in 1927, which, had it succeeded, would have beat Charles Lindbergh’s date by two weeks.
GERMANY
Baron Manfred von Richthofen
Arguably the most famous personality of World War 1, of any nation and in any capacity, was Baron von Richthofen. The “Red Baron,” so named for his habit of painting his aircraft red, came from an aristocratic Prussian family. He started his military training at age 11 and went into the cavalry. After the initial battles, and cavalry became dismounted and regulated to duties such as dispatch running and telephone operators, he decided to switch to the air service. His brother, Lothar (40 victories,) was aggressive to a fault, but Manfred was more calculated. He met Oswald Boelcke, and this meeting obviously influenced von Richthofen greatly, as he developed a set of combat principles for the pilots in his unit known as the “Dicta Boelcke.” Not known as a necessarily skilled flier, he was more the tactician and an excellent shot. He flew various aircraft, but most frequently the Albatros and later, the infamous Fokker Triplane. He was shot down in April 1918, and there remains to this day controversy over who killed the Red Baron, but it is generally accepted now it was done by ground fire due to the angle of the wound. He fell as the “Ace of Aces” in World War 1, with 80 confirmed victories.
Ernst Udet
Ernst Udet started the war as a motorcycle messenger rider for an infantry division. After injuring his shoulder, he switched to the air service after some effort. Initially flying as an artillery observation pilot, his abilities were noticed and he was switched to fighters. He racked up 20 victories in Jasta 11, at which time Richthofen recruited him to fly with JG1 – the “Flying Circus.” Impressed with Udet, Richthofen gave him command of Jasta 11. Udet continued to obtain victories, finishing the war with 62, the second highest German ace after Richthofen himself, who
Udet idolized. Udet also had the distinction of being one of the first fighter pilots to be saved by a parachute in 1918. In World War II, he became a proponent of the Stuka dive bomber, but unhappy with the prospect of the war with the Soviet Union destroying Germany, among other things, he committed suicide in 1941.
Werner Voss
Werner Voss was a natural and skilled pilot, but began the war in the cavalry. After switching to the air service, he quickly began racking up victories. Manfred von Richthofen himself considered Voss to be his only likely rival to be the top scoring ace in the war. However, his award of the Pour le Mérite gave him a mandatory one-month leave, during which “Bloody April” occurred (April 1917) and von Richthofen jumped ahead in victories. Voss was feared and respected by the British, and was downed after a battle with no less than eight British aircraft. He died with 48 victories.
BELGIUM
Willy Coppens
Willy Coppens was Belgium’s leading ace of the war, with 37 confirmed victories and more unconfirmed. He started the war in the Motor Machine Gun Corps, but in 1915 went to Britain at his own expense to take flight training. He was one of the first pilots to embrace the Hanriot HD.1 and used it to great effect. In the span of about six months, he destroyed 34 observation balloons and three aircraft. This amazing feat made him far and away the best Allied “balloon buster” ace. On his final combat flight, he destroyed a balloon but was struck in the leg by an incendiary bullet, necessitating an amputation after landing. He survived and lived until 1986.
Edmond Thieffry
Edmond Thieffry started the war as an attaché to a Belgian general, but was captured by the Germans. Escaping on a stolen motorcycle, he made it to neutral Netherlands, where he was interned before talking his way out of it. Returning to Belgium, he began flying as an artillery observer pilot, but crashed so many planes nobody wanted to fly with him. He was therefore transferred to fighter aircraft. There he obtained several victories in the Nieuport 11 and 17, before gaining the controls of the first Belgian SPAD VII (purchased by Belgian royalty, no less.) He survived the war with 10 victories, second in total only to Coppens (but with more aircraft victories.)
AUSTRO-HUNGARY
Julius Arigi
Julius Arigi was the second-highest ranked Austro-Hungarian ace, credited with 32 victories. Early in the war, he was forced down by engine failure in Montenegro and
become a P.O.W. He managed to escape by stealing a staff car belonging to Prince Nicholas. He had the unique experience of becoming an ace on a single sortie: running into six Italian Farman aircraft, he managed to down five of them in 1916. He also has some notoriety for redesigning the tail of the Hansa-Brandenburg D.I to increase the plane’s stability, an improvement which became factory standard. In World War II he became a fighter pilot instructor for the Luftwaffe; teaching such notable pilots as Nowotny and Marseille.
Godwin von Brumowski
Born to a military family, von Brumowski started World War I as an artilleryman on the Russian Front, where he earned 2 medals for bravery. Switching to the air service, he became an ace while flying the Hansa-Brandenburg C.I, which wasn’t even a scout aircraft (fighter.) He flew the Aviatik D.I for a while but had no success in it. He finally graduated to the Albatros D.III and did exceptionally well, ending the war with 35 victories as Austria-Hungary’s leading ace. He was asked by a General to apply for the nation’s highest award. Brumowski replied, ““If I have earned this award through my service, then it should be cause enough for the Commander in Chief to present it to me. It is not my duty to ask or demand it.” As a result, he never received the award.
ITALY
Count Francesco Baracca
Born to a wealthy Italian family, Baracca started out (like many other pilots) in his nation’s cavalry. Before the war started, he learned to fly and switched to the air service. His first victory was flying in a Nieuport 11. He then flew a Nieuport 17, a SPAD VII, and finally a SPAD XIII. It seems he preferred the greater agility of the SPAD VII over the SPAD XIII, despite the latter’s greater speed and twin guns. Baracca’s personal symbol was of a black prancing horse, and it exists to this day as the symbol of the Italian automobile company, Ferrari. Baracca’s death has not been fully resolved, similar to von Richthofen, as he failed to return from patrol in June 1918 and his body was later found near the wreckage of his burned SPAD VII. He finished as Italy’s leading ace with 34 victories.
Count Pier Ruggero Piccio
Slightly older than most pilots of the First World War, Piccio was commissioned as an infantry 2nd lieutenant in 1900. He qualified as a pilot in 1913, his first command being a Caproni bomber/observation unit. He switched to fighters in 1916, was promoted to Major, and eventually commanded 91a Squadriglia (the “Squadron of Aces.”) He ended the war with 24 victories and was noted for his leadership and organizational skills. He was shot down
and captured at the very end of the war (October 1918) but in the chaos of the last few days of the war, escaped back to Italy. After the war he was the first Chief of Staff of the Regia Aeronautica (Italian Air Force.)
Silvio Scaroni
Silvio Scaroni started off as an artilleryman, but shortly before Italy joined the war joined the Corpo Aeronautico Militare as a reconnaissance pilot. In 1917, he transferred to fighters, and got his first victory in a Nieuport 17. He transitioned to the Hanriot HD.1 and achieved the balance of his 26 victories in that aircraft. Wounded in July 1918, he sat out the final months of the war while recuperating. He stayed active in aviation and served in the Regia Aeronautica in World War II as a high-ranking commander.
UNITED STATES
Frank Luke
Known as the “Balloon-Buster,” Frank Luke came from Arizona and specialized in attacking German observation balloons. During an 8-day span in September 1918, he shot down no less than 14 of them along with four aircraft, an amazing feat not duplicated by any other pilot. He was wounded by ground fire while attacking balloons September 29th, 1918. Landing his plane, he died a short distance from it as he attempted to find cover. He was awarded the Medal of Honor posthumously, and currently an Air Force base in Arizona is named after him. His final tally was 18 victories.
Eddie Rickenbacker
The leading ace of the Americans in the war, Rickenbacker finished the war with 26 victories. He was an automobile enthusiast and race car driver before the war, and his experience with autos and engines helped get him into aviation during the war. He was mentored by Major Raoul Lufbery, and commented that “all I learned, I learned from Lufbery.” He scored a few victories, but had problems with guns jamming, mental errors, and other minor issues that kept interfering with his potential. After a hospital stay, during which he reflected on his shortcomings, he emerged a more focused pilot. Furthermore, he was now flying a SPAD XIII, an aircraft that perfectly matched his skills and flying style. Victories began to increase, and he was given command of the famous “Hat in the Ring” 94th Aero Squadron. One of his eight Distinguished Service Crosses was upgraded postbellum to the Medal of Honor.


