





Cru International invites you discover two highly acclaimed international wine styles!











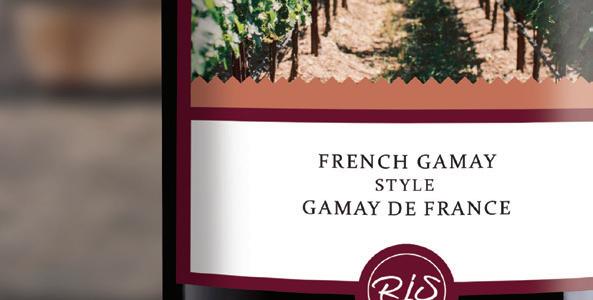
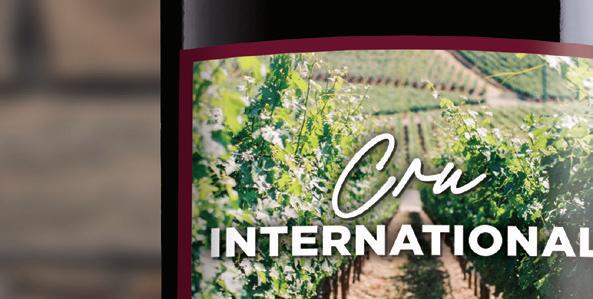


Bourbon Barrel Style brings to life full-bodied whiskey flavours all the way from Kentucky and French Gamay Style highlights the unique tastes of grapes inspired by one of the finest grape-growing regions of France.
















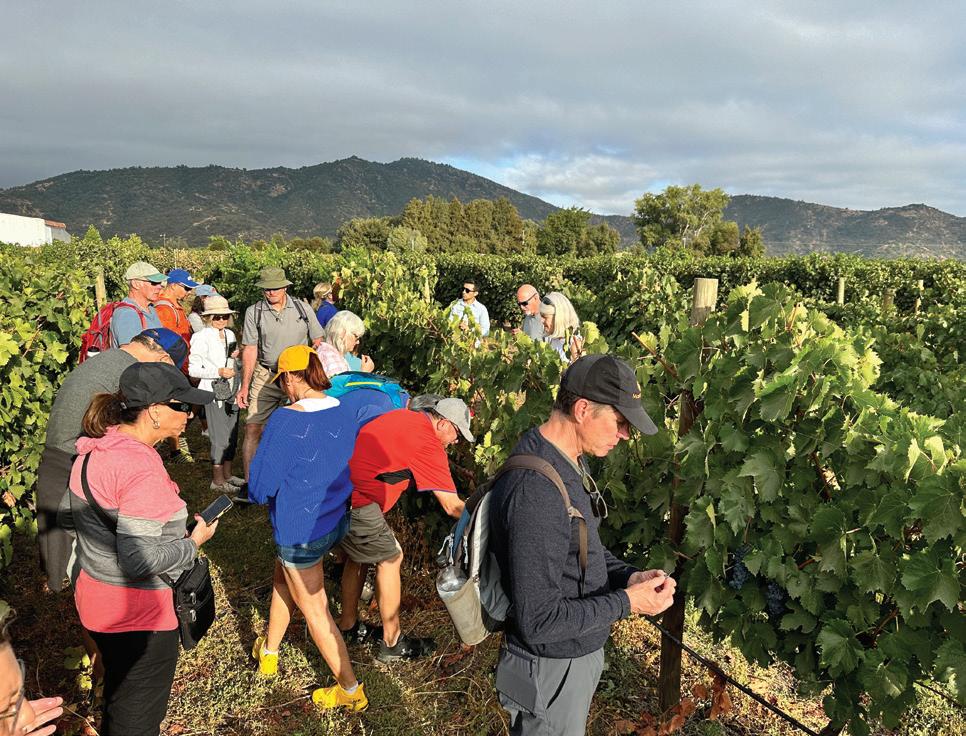
WineMaker readers and Publisher Brad Ring recently spent a week exploring beautiful wine regions in Chile and Argentina during harvest. We recap and share pictures from the adventure.
28


AWARD - WINNING FRUIT WINES
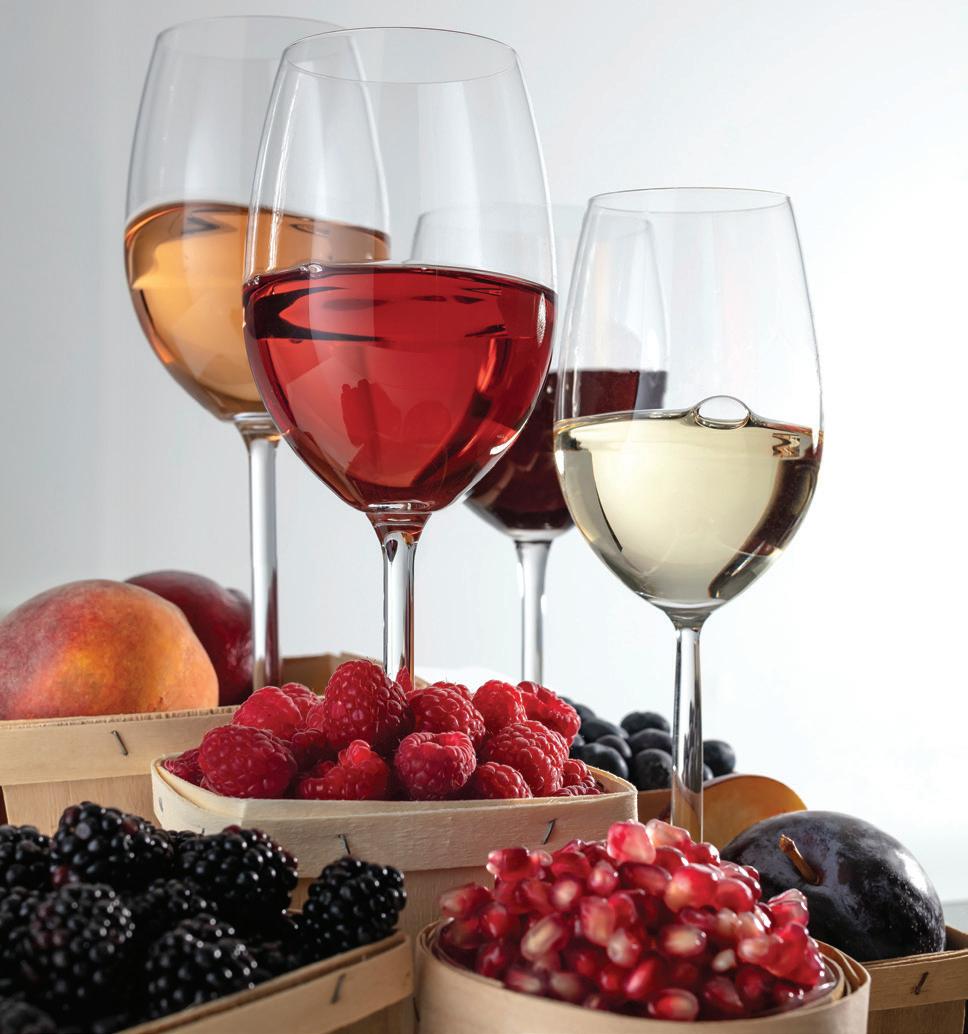


We share recipes and advice for four gold medal-winning fruit wines made by top amateur winemakers. Instead of just waiting for the grape harvest to roll around this fall, try your hand at one of these unique fruit wine recipes.
 by Ryley Hougland
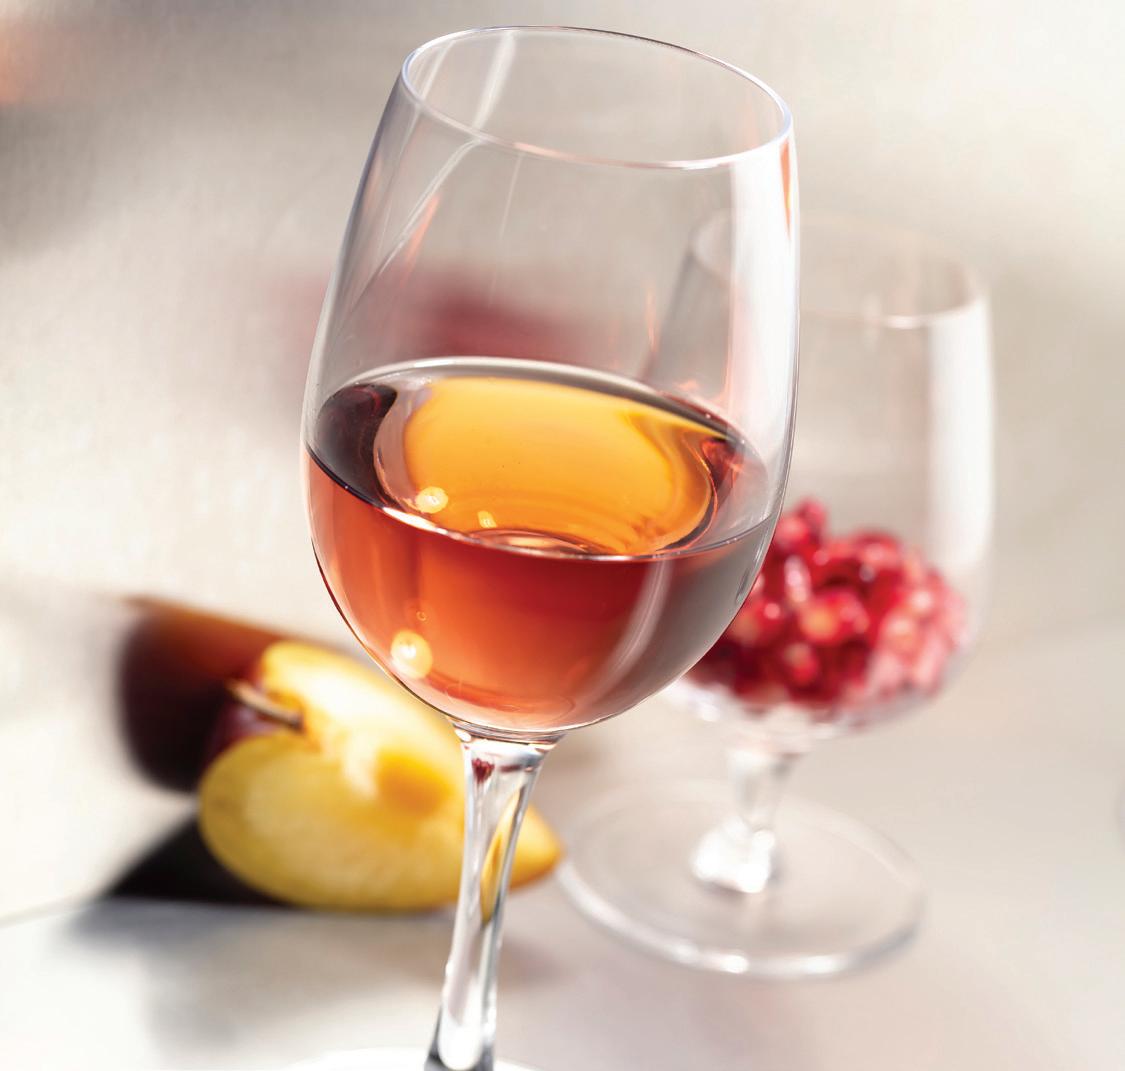
David Cohen’s dessert wines made from Finnish fruits have received top honors in competitions around the globe. Here, he shares his advice for home winemakers with access to fresh fruit and a sweet tooth to make their own post-dinner sippers.
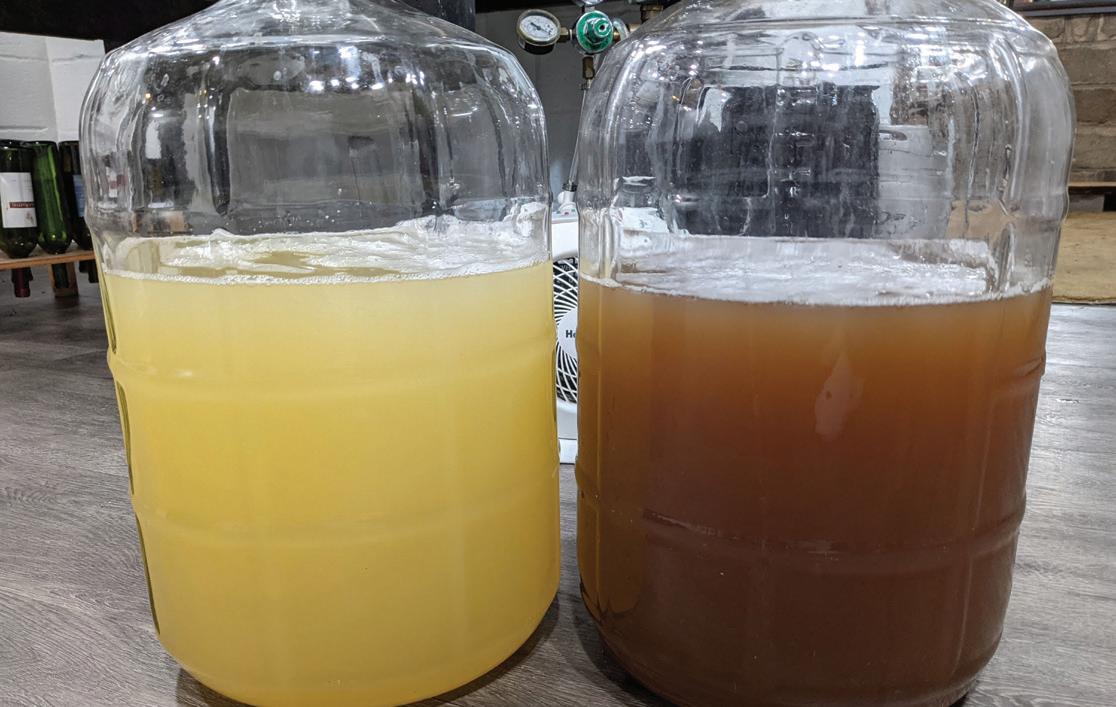
by David CohenWhile it sometimes gets a bad rap because too much oxygen can destroy a wine, oxygen is also very important to the winemaking process. Learn the six ways to use oxygen to your wine’s benefit.
 by Clark Smith

















8 MAIL

A reader shares his pleasure for a recent story we ran on making wines from the often overlooked hybrid grapes, and another looks for help bottling large quantities of sparkling wine.
10 CELLAR DWELLERS
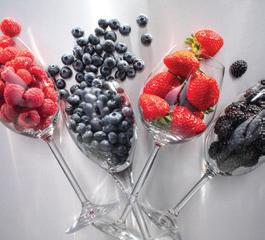
As the temperatures climb during the summer months, trees, bushes, and other perennials teeming with berries are aplenty. Get some tips on making berry wines, learn about the much beloved Marquette hybrid grape, and get the latest news, products, and upcoming events.
14 TIPS FROM THE PROS
Three pro winemakers share how they use pectic enzymes to their advantage to maximize yields, increase color and flavor extraction, and make filtration easier.
16 WINE WIZARD
The term “sacrificial tannins” is something that gets casually tossed into the winemaking lexicon by those who have been in the trade for a while . . . but what does it really mean? Get an explanation along with tips for rehydrating dry yeast and techniques to properly stabilize a fortified wine.
19 VARIETAL FOCUS

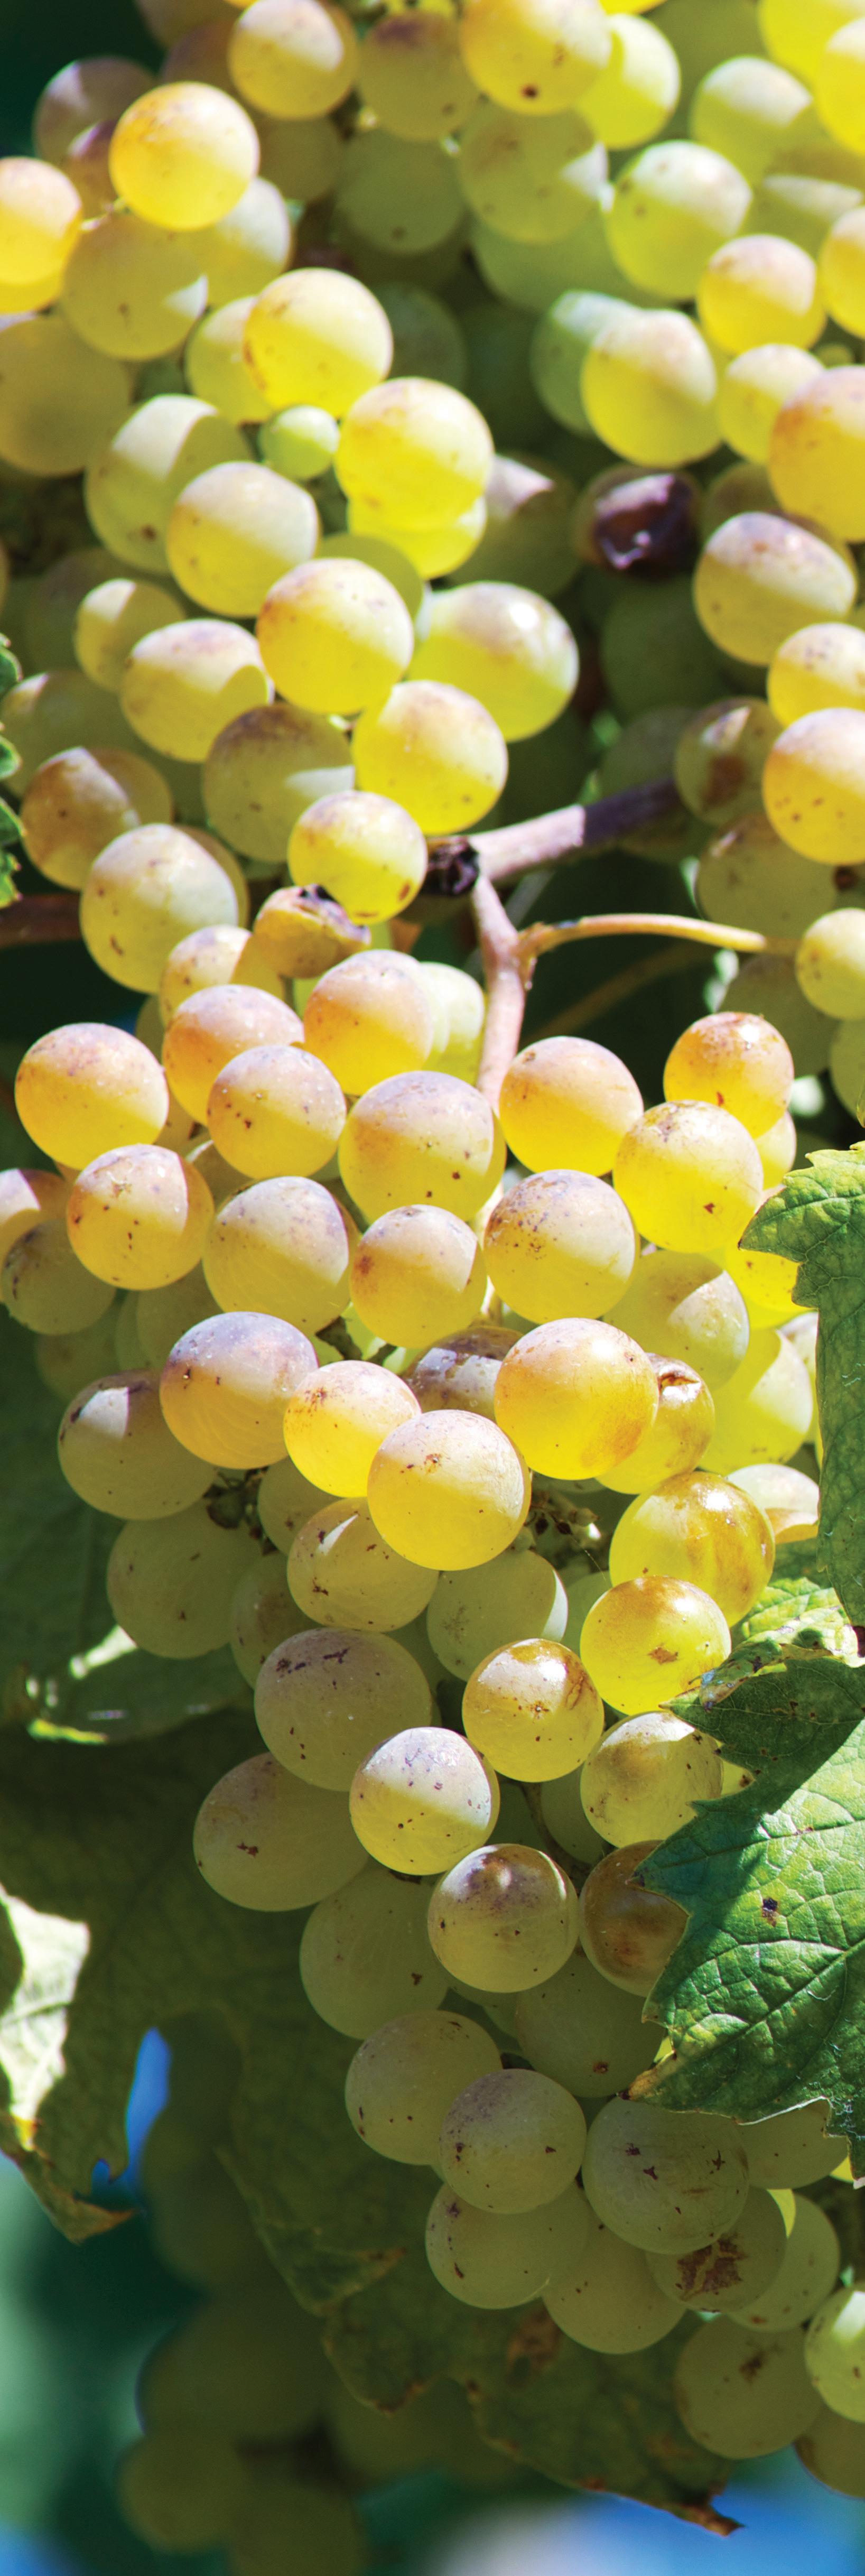
With its home along the shores of the Mediterranean Sea, this white grape is starting to find its way to the U.S. for good reason. Learn about the history, viticultural tips, and winemaking styles of Vermentino grapes.
48 TECHNIQUES
Many homebrewers of beer are unknowingly very familiar with the Charmat method to carbonate wine. If you are unfamiliar with this easy, albeit more equipment-heavy, process to produce bubbly wines, Bob Peak explains the technique.
51 BACKYARD VINES
Not every location needs to irrigate their vines every year, but for those that do, advanced planning is key. Here is a walk through the factors that need to be considered when establishing a vineyard and irrigation needs.
56 DRY FINISH
When a home winemaker moves to Finland and finds that the grape winemaking he has come to know and love isn’t feasible there, he turns to the next best thing . . . berry winemaking. Now he is making waves on a global scale.

March 18 – 26, 2024

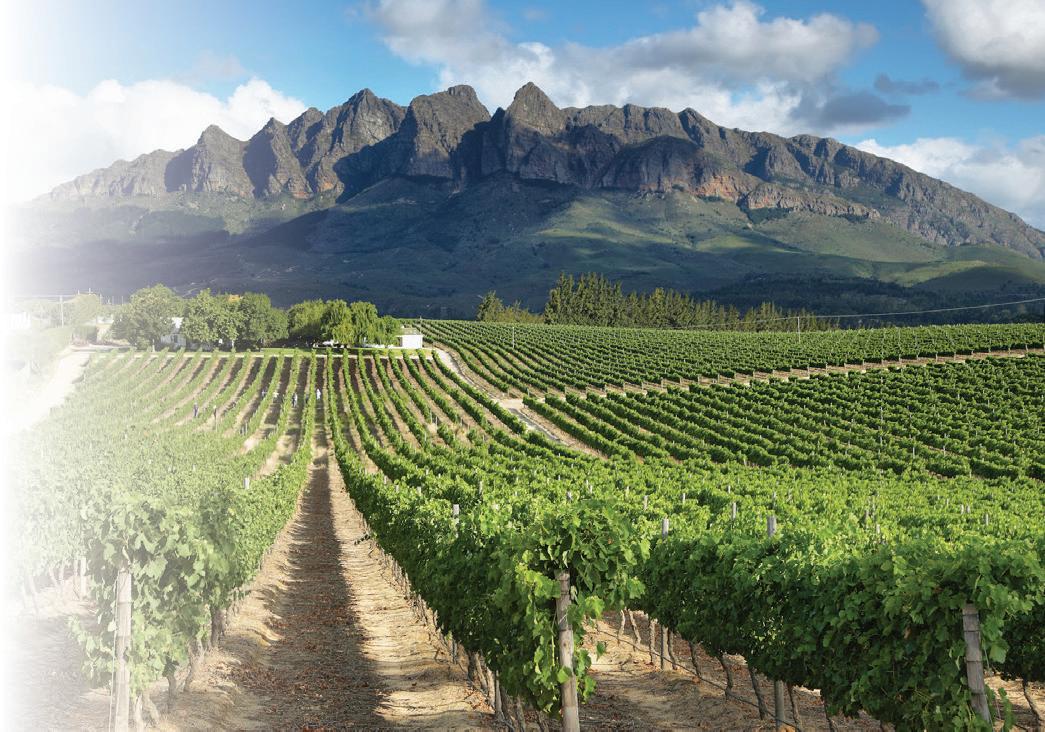
Join WineMaker Magazine in South Africa next March 18 - 26, 2024 to combine wine with a safari adventure in one epic vacation! We’ll tour the most famous wine regions of South Africa including Stellenbosch, Franschoek, Paarl, and the Cape. We’ll visit both small and large wineries meeting their winemakers and tasting the local Pinotage and many other great wines during the excitement of their Southern Hemisphere grape harvest season. Then we’ll head to Kruger National Park to seek out lions, leopards, elephants, rhinos, and cheetahs from an open Land Rover with a ranger and spotter on a thrilling, once-in-a-lifetime safari.
For more details visit: winemakermag.com/trip
EDITOR
Dawson Raspuzzi
ASSISTANT EDITOR
Dave Green
EDITORIAL INTERN
Ryley Hougland
DESIGN
Open Look
TECHNICAL EDITOR
Bob Peak
CONTRIBUTING WRITERS
Dwayne Bershaw, Chik Brenneman, Alison Crowe, Wes Hagen,
Maureen Macdonald, Bob Peak, Phil Plummer, Dominick Profaci, Clark Smith
CONTRIBUTING PHOTOGRAPHER

Charles A. Parker
EDITORIAL REVIEW BOARD
Steve Bader Bader Beer and Wine Supply
Chik Brenneman Baker Family Wines
John Buechsenstein Wine Education & Consultation
Mark Chandler Chandler & Company
Wine Consultancy
Kevin Donato Cultured Solutions
Pat Henderson About Wine Consulting
Ed Kraus EC Kraus
Maureen Macdonald Hawk Ridge Winery
Christina Musto-Quick Musto Wine
Grape Co.
Phil Plummer Montezuma Winery
Gene Spaziani American Wine Society
Jef Stebben Stebben Wine Co.
Gail Tufford Global Vintners Inc.
Anne Whyte Vermont Homebrew Supply
EDITORIAL & ADVERTISING OFFICE
WineMaker
5515 Main Street
Manchester Center, VT 05255
Tel: (802) 362-3981 Fax: (802) 362-2377
Email: wm@winemakermag.com
ADVERTISING CONTACT:
Kiev Rattee (kiev@winemakermag.com)
EDITORIAL CONTACT:
Dawson Raspuzzi (dawson@winemakermag.com)
SUBSCRIPTIONS ONLY
WineMaker
P.O. Box 469118
Escondido, CA 92046
Tel: (800) 900-7594
M-F 8:30-5:00 PST
E-mail: winemaker@pcspublink.com


Fax: (760) 738-4805
Special Subscription Offer
6 issues for $29.99
Cover Photo: Charles A. Parker/Images Plus
As the temperatures rise, I like to keep a Gamay rosé on hand for guests or myself to enjoy while sitting in an Adirondack chair in the backyard. The ideal examples are dry with balanced acidity and give nuanced aromas of strawberry, rhubarb, and cranberry –perfect for summer sipping. Plus, they pair well when we have a strawberry spinach salad or grill seafood.
I like bright, aromatic whites and rosé, chilled in a tumbler with a picnic. Try a Sauvignon Republic Sauvignon Blanc from Marlborough, NZ, or any Provence rosé, especially designated ‘Tavel.’
As I think about summer being right around the corner, I am ready to bottle what I feel is by far the best summer sipper. Rosé has grown so much in popularity over the past few years; for good reason. It is easy drinking, packed with summer berry fruit flavors, and refreshing. It pairs beautifully with BBQ and pretty much anything with a bit of spice. My favorite rosé is made from a direct crush and press of the Marquette grapes I grow. It has a nice acidity to cleanse the palate of whatever you may be eating and fills your mouth with field fruits like strawberry and raspberry. Definitely looking forward to summer. Salute!
PUBLISHER
QBrad Ring
ASSOCIATE PUBLISHER & ADVERTISING DIRECTOR

Kiev Rattee
ADVERTISING SALES COORDINATOR
Dave Green
EVENTS MANAGER
Jannell Kristiansen
BOOKKEEPER

Faith Alberti
SUBSCRIPTION CUSTOMER SERVICE MANAGER
Anita Draper
If you take as much care selecting your ingredients and crafting your country wine as grape winemakers do with theirs, you can make a wine that can hold its head high among the Cabs and Chardonnays of this world. Get advice from one of the masters of the trade.
https://winemakermag.com/article/ 5-10-tips-for-country-winemaking
MEMBERS ONLY
Perfect for after-dinner treats, dessert wines are some of the most complex wines in the world. Get tips for making your own icewine, Sherry-style, and Port-style wines at home. https://winemakermag. com/article/dessert-wines
All contents of WineMaker are Copyright © 2023 by Battenkill Communications, unless otherwise noted. WineMaker is a registered trademark owned by Battenkill Communications, a Vermont corporation. Unsolicited manuscripts will not be returned, and no responsibility can be assumed for such material. All “Letters to the Editor” should be sent to the editor at the Vermont office address. All rights in letters sent to WineMaker will be treated as unconditionally assigned for publication and copyright purposes and subject to WineMaker’s unrestricted right to edit. Although all reasonable attempts are made to ensure accuracy, the publisher does not assume any liability for errors or omissions anywhere in the publication. All rights reserved. Reproduction in part or in whole without written permission is strictly prohibited. Printed in the United States of America. Volume 26, Number 3: June-July 2023.
Dom Pérignon is a symbol of luxury engrained in pop culture. But beyond the hype, Dom Pérignon is also recognized by serious wine critics as a consistently exceptional example of the top tier of Champagnes. Get pointers from its Chef de Cave. https://winemakermag.com/ technique/622-secrets-of-dom-perignon
MEMBERS ONLY
Country fruit wines can be quite difficult to achieve the desired color, aroma, and clarity levels. Here is a look at the various enzymes typically used in grape winemaking that can also be used in fruit wines. https:// winemakermag.com/technique/1761enzymes-in-country-wines
MEMBERS ONLY
* For full access to members’ only content and hundreds of pages of winemaking articles, techniques and troubleshooting, sign up for a 14-day free trial membership at winemakermag.com














I commend Zac Brown for his fine article “Red Hybrid Grape Winemaking” in the April-May 2023 WineMaker magazine. And I thank you folks at WineMaker for devoting the space to highlight red hybrid grape winemaking. Making wine from hybrids grown here in Wisconsin can be challenging for all the reasons Zac points out, but when the wine turns out, and maybe even is recognized with an award or ribbon, it is especially satisfying to know that you have succeeded in an area where others have not traveled. Please keep these articles coming. Maybe the next one could be white hybrid grape winemaking?
Rod Kazmerzak • Sun Prairie, WisconsinWe always love hearing from readers who benefit from the stories we publish. Winemakers who live in a climate where they must rely on hybrid grapes to make wine may be a smaller audience, but they are just as important to us. The struggle that comes with making wine from hybrids can in part be due to the grapes often having numbers that aren’t as ideal as their Vitis vinifera cousins, but also because there is not as much literature available about making fine wines from these grapes. We’ll keep doing our part to help hybrid winemaking hobbyists as long as you and others who live in climates best suited for hybrid grapes keep trying their hand at turning them into wine. As a magazine based in Vermont, all of us at WineMaker understand the challenges when making wine with hybrids, but we’ve also tasted many of the success stories.


I am hoping you can provide me with a lead to where I might find bottling equipment for sparkling wine. We operate a fermenton-premises winemaking shop and our customers are looking to have their wine sparkled. We found a counter-pressure bottler that you connect to your Corney keg and CO2 bottle, but the unit isn’t very friendly to your hands as you attempt to hold it on the bottle while it is under pressure. Please let me know if you can recommend a company who may carry such a device. My hands will be eternally grateful.
Stuart Ray, Vintner’s Cellar Cochrane • Cochrane, AlbertaWe’d recommend getting in touch with XpressFill in California. We see this unit after a quick search on their site: https://www.xpressfill.com/ carbonated-beverage-counter-pressure-bottle-filler.shtml but they may have other solutions as well.

All the best bottling sparkling for your customers in an easier way!
David Cohen began his winemaking hobby making kit wines and reading WineMaker magazine 20 years ago while living in Massachusetts. He began to experiment making fruit wines from local berries after moving to Finland for work. After a couple of years of making wines that kept turning out better than he previously believed possible, he and his wife, Paola, founded Ainoa Winery. David makes the only fruit wines in the world awarded gold medals from the Oenologues de France — at tastings in Paris, Champagne, Provence, and Bordeaux.
Learn more about David’s winemaking journey in the “Dry Finish” column on page 56. And beginning on page 34, David also shares advice on making worldclass dessert fruit wines at home.


Clark Smith is one of California’s most widely respected winemakers. In addition to his own WineSmith wines, he has built many successful brands and consults for hundreds of wineries on five continents. His popular course, Fun-damentals of Winemaking Made Easy, has graduated over 4,500 winemakers to rave reviews. Winemaker, inventor, author, musician, and teacher, Smith was named the Innovator of the Year at the 2016 Innovation + Quality conference (presented by Wine Business Monthly), was named among Wine Business Monthly’s 2018 list of the 48 Most Influential People. His book Postmodern Winemaking was Wine and Spirits magazine’s 2013 Book of the Year.

Beginning on page 40, Clark counters the misconception that oxygen is the enemy of wine and details six beneficial ways to utilize oxygen to the advantage of your wine in the winemaking process
Alison Crowe is Vice President, Winemaking at Napa-based Plata Wine Partners, a 500,000+ case wine company servicing retailers, restaurant groups, and multiple wine brands. Alison holds a BS in Fermentation Science, a BA in Spanish, and an MBA from UC-Davis, is the author of The Winemaker’s Answer Book and has been writing the “Wine Wizard” column in WineMaker since its inception in 1998. She is Co-Chair of the Carneros Wine Alliance and serves on the Program Committee for the Unified Wine & Grape Symposium, the largest wine industry trade show in the Western Hemisphere. Though she makes wine on a commercial scale, Alison loves nothing more than helping the hobby- and micro-vintners achieve success and satisfaction with projects at home. She lives in Napa, California, with her husband and two young sons.
In this issue’s “Wine Wizard” column on page 16, Alison defines “sacrificial tannins” and when adding them is necessary, rehydrating yeast, and whether potassium sorbate should be added to a fruit Port-style wine.

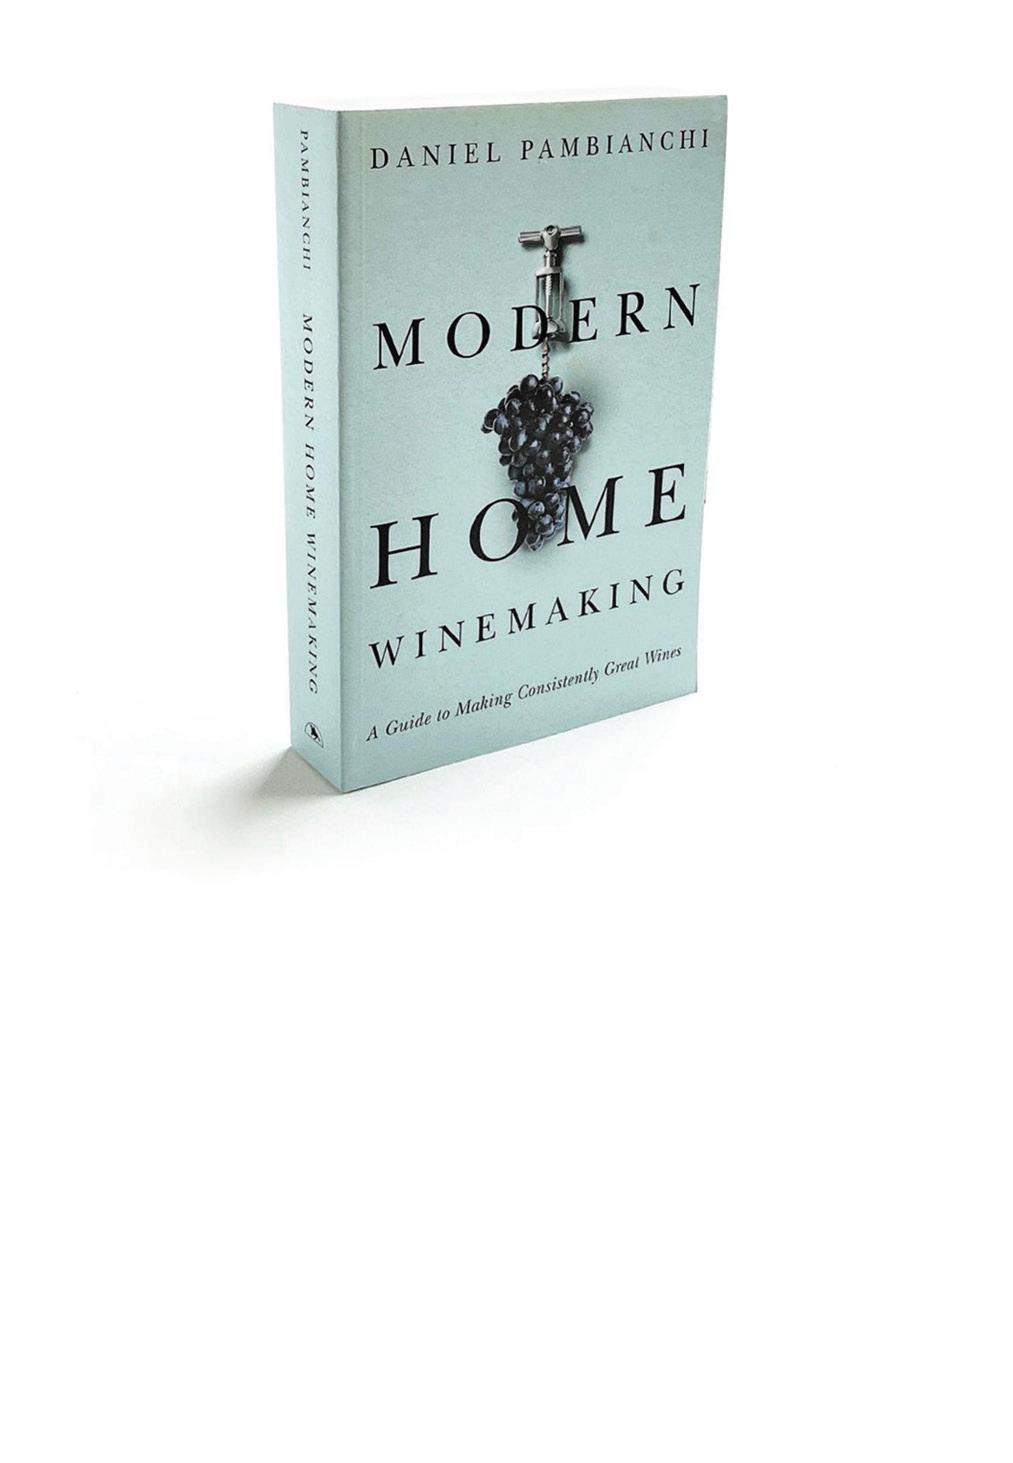
“This book contains techniques and methods for the home winemaker but would also be helpful to winemakers of any experience level from beginner to advanced commercial winemakers. It is thorough, complete, incredibly well researched, and contains the latest research on wine testing and analytical methods…this book leaves nothing out.”
– drew horton , Enology Specialist, University of Minnesota Grape Breeding & Enology Project



6x9” | illustrated | 614 pages
ISBN: 978-1-55065-563-6 $29.95 (trade paper)
ISBN: 978-1-55065-593-3 $59.95 (cloth)

Distributed by Independent Publishers Group

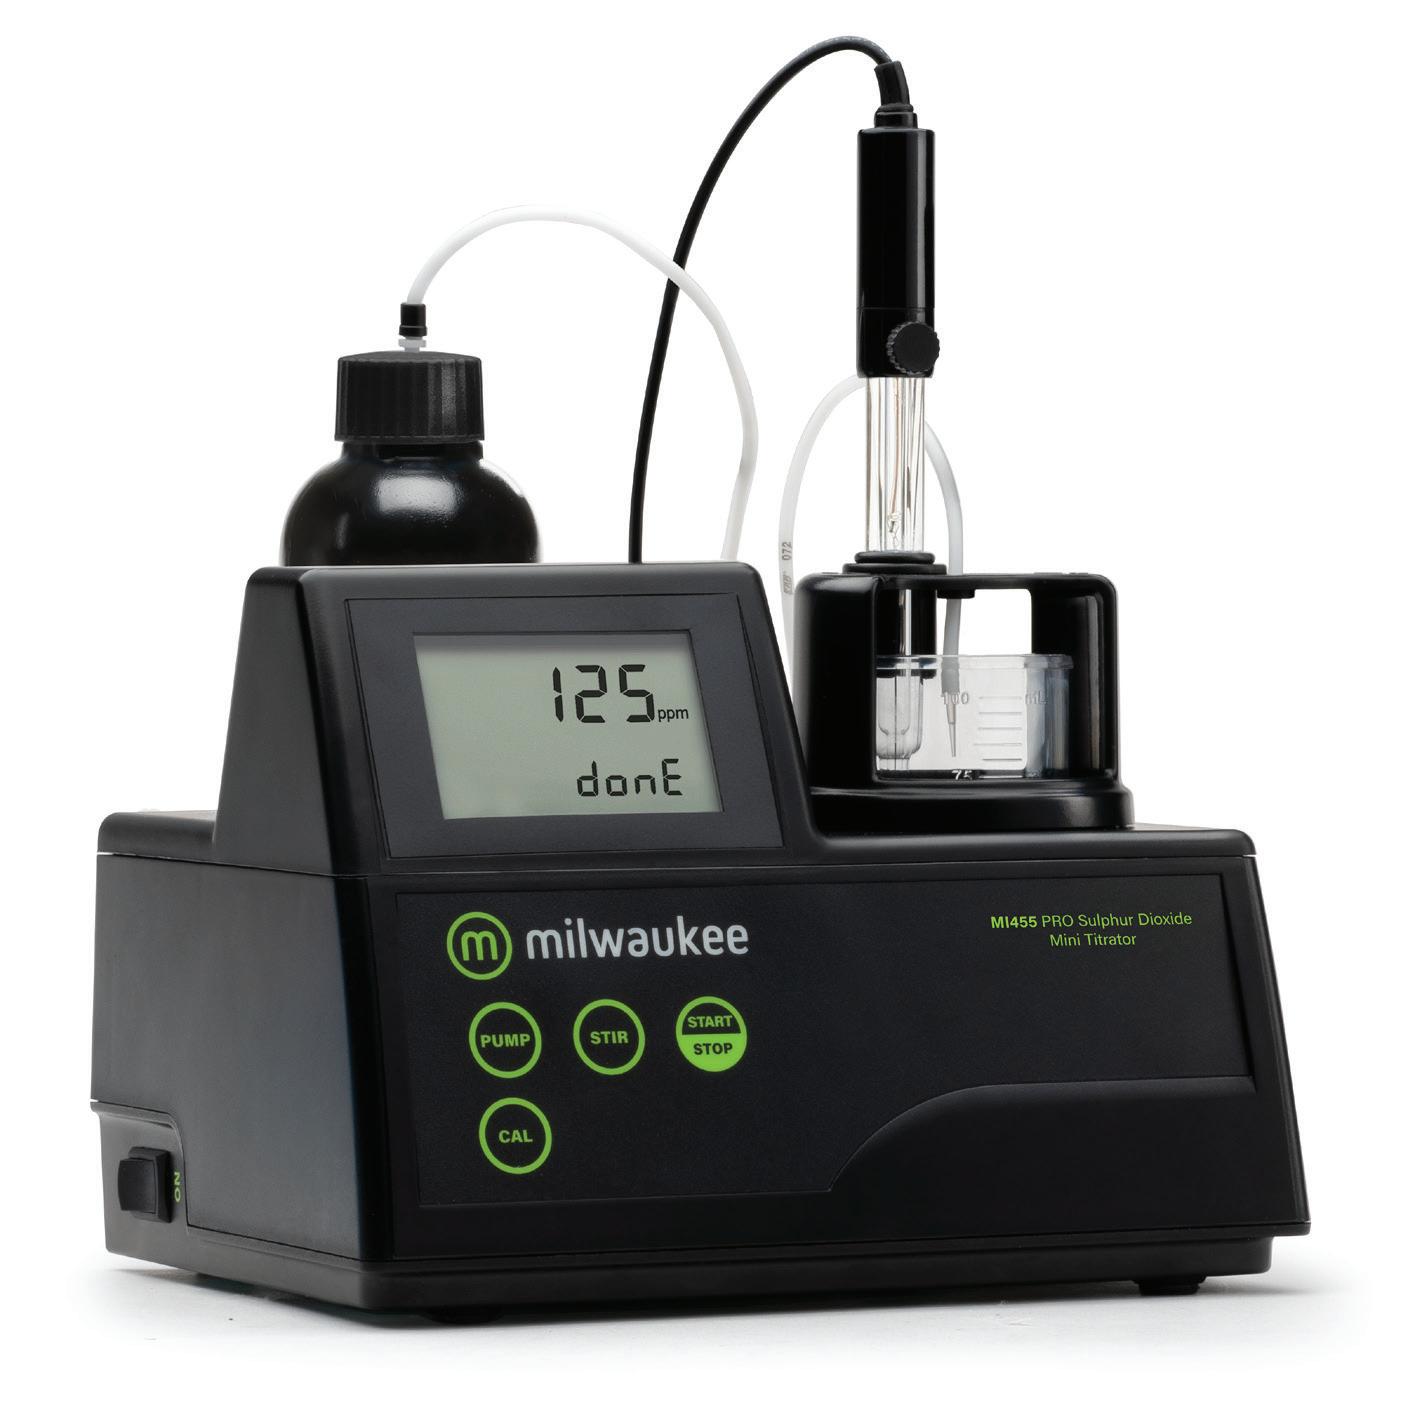
Milwaukee’s
PRO Mini


allow you to use your time more e ectively when performing titrations. The Titrators run a titration until an end-point is measured and provide the operator with a digital read-out! No more color change guessing!

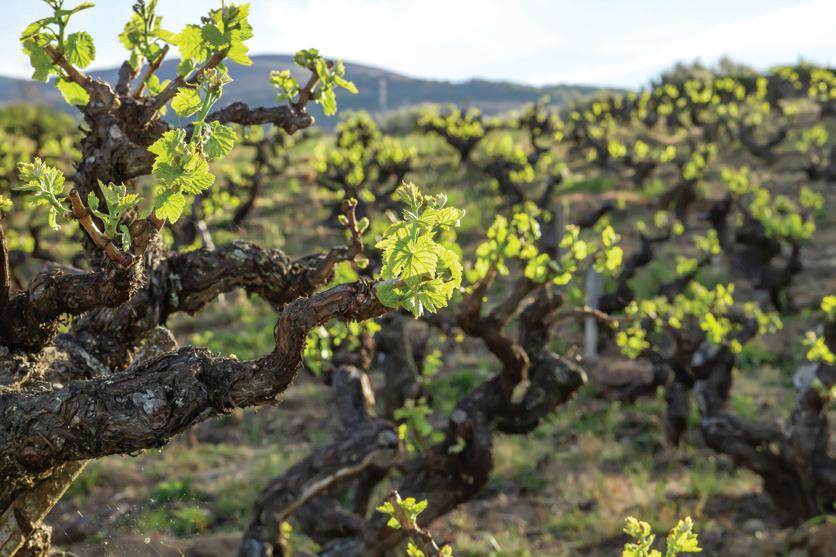
Ask oenophiles around the world where wine grapes originally came from and most will cite the south Caucasus Mountains of Georgia, Armenia, and Azerbaijan. But new research has shown that Georgia may not be the only region to domesticate the wild Vitis vinifera sylvestris. A second location 600+ miles (~1,000 km) away, near modern Israel, Lebanon, and Jordan, looks to have produced similar results domesticating the wild grape vine. Not only that, but the grapes domesticated in this region seem to be the ones that proliferated both east towards the Asian continent and west around the Mediterranean.
Using gene sequencing technology, it seems that the domestication process in the south Caucasus region near the Asian/European border did not spread far and wide like earlier thought. While the more eastern domestication process seemingly was originally intended for table grapes, it was only later used for wine production after cross breeding occurred. The study also pushed the date of both domestication dates much earlier, now thought to have happened 11,000 years ago. There are still a lot of questions that remain such as if there was some minor domestication of wild grapes prior to the full split to Vitis vinifera vinifera that science is blind to at this point. We’re sure there will be more research into this topic, but be sure to check out:
https://www.science.org/doi/10.1126/science.adg6617


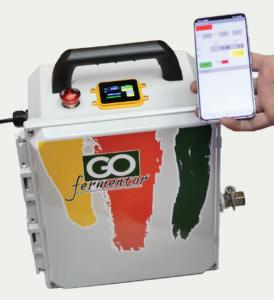
Released by the folks at GOfermentor, GOpump is intended for pumping wine or similar fluids (it is not designed to be used as a must pump). It can be used in pump mode where the delivery rate is automatically controlled at the user-set flowrate or in batch mode where a preset volume is delivered at a user-set flowrate. And finally there is a remote mode where the pump can be controlled by external device or app (Bluetooth or WiFi). A built-in totalizer based on magnetic flux sensing (no moving parts) provides an accurate estimate of total wine transferred. Controllable flow rate allows gentle or rapid transfer of wine. Flow rate is from 1 to 10 liters per minute (0.26 to 2.6 gallons per minute). It also has automatic shutdown on empty detection. http://gofermentor.com/gopump/

Home
in

on July 16 from 4–6:30 p.m. at the


There is no charge to serve your wines, but there is a $25 fee per wine in order to get them judged. Or simply come as a guest and taste others’ wines. In its 40th year, this event fundraises for the Mt. Veeder Fire Safe Council’s community outreach for wildfire safety and prevention. Serve, sip, and bid for world-class wines and gift packages, all in the name of supporting wildfire safety. More information can be found at: www.homewinemakersclassic.com

Grape & Non-Grape
Vintner’s Best Mango GOLD
SILVER


Winexpert Island Mist Black Cherry


Winexpert Island Mist Coconut
Yuzu
BRONZE
Vintner’s Best Cherry
Winexpert Island Mist Black

Raspberry Merlot

Winexpert Island Mist Blood
Orange Sangria
Winexpert Island Mist Green Apple
Riesling
Winexpert Island Mist Raspberry
Peach Sangria
Here is a list of medal-winning kits for the Grape & Non-Grape Table Wine Blend and Berry Fruit categories chosen by a blind-tasting judging panel at the 2022 WineMaker International Amateur Wine Competition in West Dover, Vermont: Our Red Star range is evolving. New names, the same tradition.



Cranberry Pinot Gris
Winexpert Island Mist White
Winexpert Island Mist Wildberry
Shiraz
Table Wine Blend Berry Fruit

GOLD
RJS Craft Winemaking Acai Raspberry
Winexpert Island Mist Blueberry


Pinot Noir
BRONZE
Vintner’s Best Cranberry
Winexpert Island Mist White


Cranberry

First introduced by the University of Minnesota, Marquette is a cold-hardy red wine grape that can withstand winter temperatures as low as -30 °F (-34 °C). Its parentage is a cross between two other hybrid grapes and is best known for producing dry, medium-bodied reds with the capacity to get Brix up to 22–26. According to the University of Minnesota, the suggested titratable acidity at harvest is roughly 11–12 g/L and a pH between 2.9–3.3. The wines it can produce are well known to be able to stand up to an extended time in barrel.
In the vineyard, Marquette has a reputation for its disease resistance with moderate resistance to black rot, Botrytis bunch rot, and both powdery and downy mildews. But it does have
some susceptibility to phylloxera. It is an early budding vine, which makes it vulnerable to late frosts. It is a later ripening variety, sometimes hanging on the vines until late September or early October. Marquette is a vigorous grower, making it well suited for soils with lower nutrient levels. High-nutrient soils will require greater spacing in order to allow the vines to spread, and an aggressive canopy management may be needed in that circumstance.
Because of the quality of wine it can produce, Ontario, Canada, added Marquette to its list of approved grapes under its VQA label in 2019. For those living in colder climates and looking to grow wine grapes, Marquette should be near the top of your list of varieties to investigate.


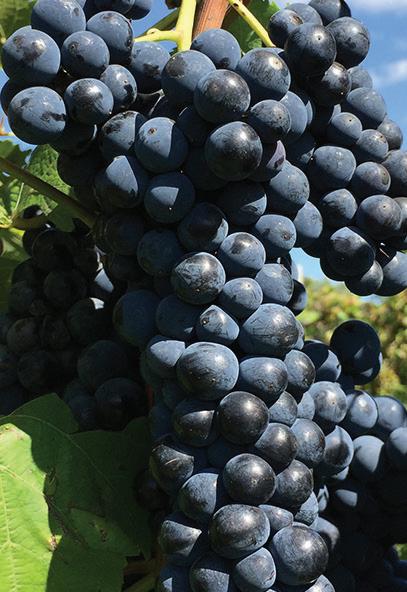
What defines a berry is akin to what constitutes a vegetable. There are two definitions, the botanical one and the traditional classifications. Take, for example, raspberries, blackberries, and strawberries; three iconic berry fruits grown in temperate climates . . . and it turns out none of them are truly berry fruits. But winemakers don’t really care about botanical definitions, much like tomatoes are still called vegetables by many in the culinary world. So for the sake of this column, many soft-skinned, pit-less fruits like those listed earlier still fall under the umbrella of berries.
Berry wines are commonly made in areas where Vitis vinifera and other wine grapes struggle to thrive. Even many grape growing regions also offer an array of fruits available for winemaking purposes. Fruits like currants, salmonberries, juneberries, gooseberries, bearberries, chokecherries, and cranberries . . . there are an abundance of berry fruits growing around the world that can be processed into wine. Berry wines are also a great option for home winemakers living where grapes are prevalent because they often ripen outside of the grape harvest timeframe; giving winemakers another season to enjoy their hobby.
Not everyone can harvest and process the amount of fruit required to produce a mid-sized, say a 5-gallon (19-L), batch of wine. There are plenty of alternatives including frozen fruit, purees, juices, and concentrates that are available for purchase if a larger volume is desired. Supplementing two or more of these options may actually be a good solution as they can provide different fruit character. Also, blending with grape wine may be a great solution when certain characteristics in a grape
wine need a boost. Blueberries in a Pinot Noir or strawberries in a Grenache rosé can prove to be fun, highly drinkable porch sippers.
A key for almost any of the traditional berry fruit wines is breaking down the cell walls of the fruit. Freezing the fruit prior to maceration is one common technique that many berry winemakers employ. The addition of pectic enzymes can also be helpful. Pectins are in the sugar family (polysaccharides) and can cause a haze in the final wine. Adding an enzyme meant to chop these polysaccharides can actually have a two-fold solution: They can break down one of the key problematic haze-causing compounds and can also increase your yield. If you’re using fresh-picked or frozen fruit, a little pectic enzyme can go a long way in crafting a stable wine.
It’s impossible to talk about berry wine production and not also discuss the need for chaptalization and for a possible acidification or deacidification as well. If you stick with typical grape wine parameters then producing a stable berry fruit wine is attainable. Starting with a sugar addition to chaptalize up to 22 °Brix is safest. Most recipes you will find call for between 2.5–5 lbs. of berry fruit per gallon (0.3–0.6 kg/L) of finished wine. The more fruit means more fruit character, less water needed, and more acidity. Starting sugar concentrations and acid levels depend upon the fruit type and variety, its growing season, and harvest date.
Targeting a pH level between 3.3–3.6 is a good goal. While there are a few exceptions, citric acid is typically the largest organic acid component in berry fruits. Winemakers should note citric acid, like malic acid, is susceptible to metabolic degradation. Also, high acidity can be counterbalanced with backsweetening.
Strawberry
A key component of strawberry wine is coaxing the flavor from the berries while retaining that character and color. The pigments that color strawberries are not that robust and prone to oxidative degradation. Adding some crushed red grapes or red grape concentrate can provide a more stable rosé hue. Strawberry wines are often crafted with a sweet character, but they don’t need to be, and actually can be quite delicious when dry. Look for fruit that has received a great deal of sun exposure, allowing them to gain that vibrant red hue from anthocyanins.
In standard greenhouse-grown strawberries you may find sugar at 9 °Brix, which should provide a great base for a strawberry wine. With the TA at 9 g/L or higher, water dilutions may require an acid addition if pH started high. Sometimes a little strawberry flavoring extract can really make the wine pop.
One of the great aspects of blueberries is the polyphenolic load found in their skins that are close to typical wine grapes. These compounds will help provide color and structure to blueberry wine. Blueberries are fairly high in sugar with ripe, high-quality fruit coming in at 14–18 °Brix. Some red grape concentrate can be added to enhance the fruitiness and bring Brix up to a more common wine range.
Raspberries can come in both red and black form and both can be utilized for winemaking. Freezing the berries prior to working with them is a great help to pulverize each berry. Expect them to ripen to 8–13 °Brix with a TA between 10–20 g/L. Also note that pressing raspberries can be a challenge due to their mushy character at this point. Go slow or add rice hulls to separate the juice from pulp.
Pectic enzymes can be a significant help to maximize yields, increase color and flavor extraction, and make filtration easier by breaking down pectin. These benefits are especially useful in making wines from fruits higher in pectin. Three pros share advice on when and why they turn to these enzymes to help in the winery.
Pectic enzymes have several uses in winemaking. Typically, they are utilized to break something down into smaller parts and/ or extract a desired compound. There are multiple formulations for different applications, so the appropriate product should be chosen based on the use. They can be used for settling of juice to increase yields at pressing or racking by breaking down the pectins so they compact, allowing the juice to be more easily separated from the pulp. They can also be used before pressing white grapes or during red fermentation to extract color and/or flavors by breaking the bond to things like polysaccharides. They can also be used to break down pectin or other filter plugging compounds so filtration can go smoother.
Care should be used in selecting the appropriate enzyme for the application as some enzymes are too aggressive to use on whole fruit and will turn the whole batch into mush that will be impossible to press or separate from the solids.
Wine made from fruit other than grapes is one of the best places to use pectic enzymes. Many fruits have more pectin in them than vinifera grapes, though hybrids tend to have more pectin than other wine grapes. That said, underripe grape varieties of all types tend to be higher in pectin as well. In the instance of fruits other than grapes, wine filtration can be near impossible without the use of enzymes in the worst cases, and even in the best cases you will get more wine through a set of filter pads with their use.
Enzymes should be added based on the recommendations of the manufac-
turer and application. That said, there are some things to be aware of when adding pectic enzymes. The first is temperature: The colder the wine or juice, the slower they will work.
Second is inhibitors: Additives such as sulfur, bentonite, and tannins can inhibit or inactivate enzymatic activity. All these things should be added separately and fully homogenized prior to the next one. Sulfur will inhibit at high rates so it will need to be mixed well first so that it is equally distributed without any pockets of high concentration as it can settle to the bottom. Bentonite will inhibit enzymes completely so you should remove the wine from bentonite prior to adding, or conversely it could be added once the desired effect has occurred to stop enzymatic activity.
Pectic enzymes as a method of clarification are not going to be as clearly obvious as traditional fining agents in that they don’t operate in the same way, so I don’t typically classify them as a fining agent. They don’t bind to anything in particular and precipitate it out, but rather break it down into smaller compounds that remain in solution.
There are times when pectic enzymes may be too effective, like if you’re doing a cold soak on white grapes before pressing. They may accelerate extraction faster than you might be used to and the wine could end up with extra astringency. But the bigger concern is misusing a very aggressive formulation before pressing and being unable to get clean pressing and separation.
As a whole, pectic enzymes can be a very effective tool depending on the desired use. Make sure that you understand what it is formulated for and what conditions it requires for efficient use.
Wine made from fruit other than grapes is one of the best places to use pectic enzymes.Brian Hosmer is the Winemaker at Chateau Chantal and Hawthorne Vineyards in Traverse City, Michigan. He holds a degree in enology and viticulture from Michigan State University.
ectinase is an enzyme that breaks the structural bonds that keep the tissue of grapes from being attacked by fungus or any other microbial threat. Once broken, the internal structure is exposed, which facilitates the extraction of juice (aka free run) and any material from the skin like polysaccharides, proteins, aroma precursors, etc.
I recommend using pectic enzymes to obtain a good yield from your grapes. Another good reason is because there is a lot of varietal character embedded in the pulp and epithelial tissue that can be extracted as well. I highly advise it for white and rosé winemaking. It will create cleaner wines with more aroma and finesse.

Since it helps with the free run of juice, I think its use is important regardless of the grape variety, so I’d recommend it for all uses and styles for economic reasons. However, the higher the varietal character of the grape, the more important its use. For example, you will need to use a more concentrated and complex cocktail of enzymes, where pectinase is one of them, for Albariño than for Pinot Gris, since Albariño has a richer and deeper varietal character. Pectinase also acts synergically with other enzymes like pectin lyases
Pectin is composed of complex polysaccharides that are present in the primary cell walls of plants.
In grapes, pectinases help break down grape pulp thereby releasing trapped juice, decreasing solids, increasing yield, and resulting in higher quality juice. Press cycles are optimized with its use and lees are more compact.
Pectinases are usually used with white and rosé juices. Red wines are fermented on their skins and are usually pumped over or punched down. These actions along with the alcohol and temperature extract the grape juice without the use of enzymes.
These enzymes are usually added at the crusher/destemmer or, if pressing whole clusters, at the press. As for dosage rates, use the manufacturer’s recommendations, using the upper limits with varieties that historically settle poorly,
and Beta-polygalacturonase. Combining them may achieve a more complete and efficient extraction of other precursors and components from the grapes.
While beneficial for most wines, you may not need to use it for matured red grapes, since their natural pectinase is released from the skin into the fermentation because of the nature of red winemaking.
As far as timing — the sooner, the better. The manufacturer of the enzyme typically gives a range for dosing, but I recommend doing a trial to see what suits your grape and sanitary conditions. Sometimes you don’t need as much as you think and sometimes it’s the opposite. Certain grapes have thicker skin that requires a higher ratio of enzymes. But it’s better not to overdo it. The importance of its usage is to help clarify but not in excess (over clarifying).
After clarification, there is a test called “alcohol pectin procedure.” It’s a very easy protocol that you can look up. You can do it on the juice before fermentation or on the wine after. If the test shows not a total depectinization, you can do another trial to see how much more enzyme you’ll need.
Compared to other methods of clarification like bentonite or gelatin, it’s more effective and creates less sediment, resulting in less loss.
like Labrusca and Muscadines.
Enzymes are proteins, so do not add them with SO2, which will denature them, nor with bentonite, which will precipitate them.
To evaluate whether an enzyme has worked and to the degree that it has worked, a winemaker will have to divide the grape pick into two lots, a control without enzyme and an enzyme-treated lot. And, because pectinases are used for optimizing pressing and cold settling, one does not get a second chance to add more enzymes. Just make a note to add more next time.
Pectinases are considered a cheap and easy way of clarifying juices. Many larger wineries will use flotation or centrifugation as faster ways of clarifying juices. Some wineries are concerned about using GMOs, but there are plenty of natural enzymes available from many suppliers.
QI HEAR A LOT OF WINEMAKERS TALK ABOUT “SACRIFICIAL” TANNINS. WHAT THE HECK IS SACRIFICED WITH TANNINS ADDED EARLY?
LARRY ROUX SYRACUSE, NEW YORKATannins, or the compounds in grapes (and oak barrels) that contribute to a pleasing sensation of astringency in red (and some white) wines, are found in grape skins and seeds. As a class of compounds, they are very important in winemaking as they are amazingly powerful antioxidants in addition to contributing in important ways to the sensorial quality of any given wine. A very tannic wine can make your mouth, tongue, and cheeks feel puckery and dry but a wine that has a balanced tannin level will have some “grip” while not being overpoweringly tannic. Big red wines like Petite Sirah and Cabernet Sauvignon will normally contain more tannins than lighter reds like Pinot Noir; the grape skin chemistry is just that different. As a result, Pinot Noirs generally feel softer on the palate but, due to their lower tannin content, might not age as long or as well as a more tannic red wine counterpart.
Proper tannin management during the winemaking process, from grape to bottle, is a skill set that can take years for winemakers to master because each variety, region, vineyard, and vintage is different. The natural tannin levels in any given red fermentation can vary greatly from one to the other. In addition to agitating the skins via punchdowns or pumpovers during the fermentation process (called “maceration”) to extract tannins, winemakers can also add tan-
nins at many points along the winemaking timeline. These tannins can be in liquid or powder form and are sourced from grape skins, grape seeds, oak wood, oak galls, and even quebracho wood (a South American tree). In addition, aging in oak barrels or using oak pieces or staves during aging are also technically a tannin addition as tannins present in the wood will get leached into the wine over time.
Intuitively, the closer a wine is to being bottled (and therefore then left to age and mellow on its own), the more careful a winemaker should be about making drastic tannin additions. Also, as my loyal readers know, I always recommend bench trials when making additions lest we go too crazy and make an addition we don’t like.
That being said, the safest and arguably best time to boost a wine’s tannin content is early on in the winemaking process, as they’ll have the most time to integrate into a wine and become a seamless supporting addition to the entire wine matrix. The term “sacrificial tannins” that you are asking about, are tannins added especially early on in the winemaking process, usually upon crushing or very soon thereafter. The idea is to add these tannins to must so that they will be oxidized early on in the winemaking process, instead of the grape skin tannins that you want to keep.
So, what gets “sacrificed” by adding sacrificial tannins? Many of the added tannins themselves. By adding extra tan-
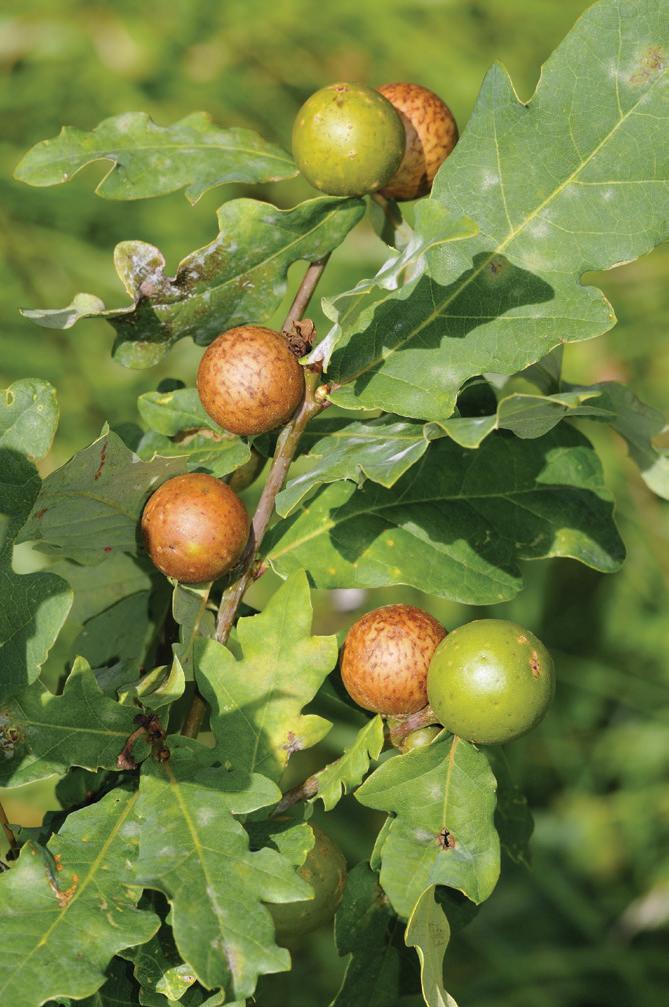
The idea is to add these tannins to must so that they will be oxidized early on in the winemaking process, instead of the grape skin tannins that you want to keep.Photo courtesy of Shutterstock.com Oak galls are one source of tannins that winemakers may consider adding at various stages, including active fermentation as sacrificial tannin.
nin at the beginning and increasing the overall tannin content in any given fermentation, both grape tannins and the added tannins will be oxidized, or sacrificed. By adding extra tannins into the mix, a greater proportion of grape skin tannins will be preserved than if you didn’t add any extra tannin. Many winemakers also feel that by adding tannins at crushing (which act as an oxygen sink) they can get away with adding less sulfur dioxide at crushing as well.
There are many different types of tannin on the market from just about every major winemaking supplier. Most are classed as “fermentation tannins,” “aging tannins,” and “finishing tannins.” Finishing tannins are intended for use within 3–6 months prior to bottling, aging tannins are supposed to be added after all fermentations are complete, and, as you may presume, fermentation tannins are meant to be added during active fermentation.
Anecdotally, I’ve found that finishing tannins are gentler, more refined, and often more expensive as they tend to be aromatic oak extracts. One can add them usually up to 6 weeks before bottling because the effect is subtle, and the molecules are smaller and “marry” with the wine much more easily than the rougher aging and fermentation tannins. I wouldn’t waste my money by putting finishing tannins into a fermentation where they may just drop out of solution over time and not
“stick” in the final wine after the tumult of the fermentation, racking, and aging process. It’s critical to always do very careful bench trials when adding anything that close to bottling.
I find that aging tannins as a class can be quite angular and, depending on the brand, can be quite rough and aggressive. It’s important to do bench trials here as well, lest you add too much of something unpleasant. Fermentation tannins (or sacrificial tannins) tend to be the simplest and the least expensive and are often the roughest tasting. They really should be used only for fermentation. Even then, I would still tend to hew to the lower range of the manufacturer’s suggested addition rate, just to be safe.
Another more nuanced way to introduce tannins into a fermentation, and a method I often employ, is to add a 50/50 mixture of toasted and untoasted fine-grain oak chips to the fermentation at the rate of about 1–1.5 g/L. My favorite brand is Radoux (they have a great mixed product called “Duofresh”) and I find that it helps preserve color, serves as an oxygen sink, and also starts the wine along its way to gain in subtle oak character. The quality of the oak is very high; these aren’t “shop floor shavings” at all. Other oak producers sell similar products — they are worth seeking out as I find them to be subtler and a little more forgiving than adding straight up tannin powders or liquids to fermentations.
QCOULD YOU PLEASE CLARIFY FOR ME ONCE AND FOR ALL, DOES DISTILLED WATER HAVE A PLACE IN YEAST REHYDRATION? I HAVE FOUND CONFLICTING INFORMATION ON THIS FROM VARIOUS WINEMAKING RESOURCES.
MARIO SARRA VIA EMAILARehydrating dried yeast is a simple and straightforward process, and one that I find to be essential when using dried yeast for winemaking purposes.
The simple answer to your question is no, do not use distilled water for yeast rehydration. Distilled water is not osmotically balanced, which means that it can actually disrupt the delicate cellular membranes of your developing yeast. Distilled water is just that — distilled. That means that water (could be tap, or from any other source) has been boiled and the resulting steam condensed back into liquid form, leaving any salts, minerals, or other dissolved solids behind. As such, the water is too clean (free of anything except molecules of hydrogen and oxygen) and since physics dictates that solutes move from an area of high concentration to low concentration, distilled water will essentially push into the cell membrane until some yeast cells burst during the rehydration process or weaken the cellular membrane. The end result could be a loss of viability in your culture, which is the exact opposite of what you want when adding yeast to a fermentation. Less than fully viable yeast increases the chances of sluggish, stuck, or otherwise compromised fermentation, which can lead to not only sweet wine (stuck fermentation) but also a whole host of other wine flaws like increased VA (volatile acidity), acetaldehyde, or
ethyl acetate production (smells like oxidized apples and nail polish remover, respectively).
While it might be tempting to use distilled water because it doesn’t contain any chlorine (which can cause TCA or “corked” defects) and if in a closed container is sterile, it may actually be better to use bottled mineral water or even your own home’s tap water, as long as it doesn’t contain any chlorine. If you suspect your water has chlorine, it’s easy to buy faucet-mounted filters from any hardware store or online. Metabisulfite can also be utilized to knock chlorine out of water. If you’re worried about your water containing microbes (i.e., it’s not sterile) you can always boil and then cool your rehydration water before using it.
No matter which water you use, always follow the rehydration protocol for your yeast strain of choice. Most suppliers have directions on their website, if not on the actual packaging. I also like to use a rehydration nutrient, which helps the awakened yeast cells get off to their best start, no matter what the must or juice conditions. An example is GoFerm (a Lallemand product sold in the U.S. via Scott Labs). A small amount of the nutrient is dissolved in the warm water you’ll use for hydration. So you can use distilled water if the nutrients are added prior to the yeast. Again, it’s important to follow the manufacturer’s instructions.
Here are some handy conversions for everyone to note (save them somewhere, because you’ll always use them no matter what part of winemaking you’re doing). The internet is also full of handy automatic calculators, but it’s always faster to have some of these memorized so all you have to do is plug them into a calculator and don’t have to be bothered to search online.

1 hL= 100 L
1 L = 1,000 mL = 0.264 U.S. liquid gallon
1 U.S. liquid gallon = 3.785 L = 3,785 mL
1 kg = 1000 g = 2.2 lbs.
1 lb. = 0.454 kg = 454 g
These conversions can make reading between different suppliers and products a little easier. Happy re-hydrating!
QWHY DO YOU NEED TO ADD POTASSIUM SORBATE TO BLACKBERRY PORT AFTER BACKSWEETENING WHEN YOU ARE ADDING BRANDY TO PREVENT REFERMENTATION? A RECIPE I HAVE FOR BLACKBERRY PORT CALLS FOR POTASSIUM SORBATE AT THE END AND THEN THE SUGAR AT A RATE OF 3 LBS. PER GALLON OF WINE (355 G/L ) THEN A PINT OF BRANDY PER GALLON (125 ML/L ). I HAVE MADE THIS FIVE TIMES WITHOUT USING POTASSIUM SORBATE THE FIRST THREE TIMES. THE FOURTH TIME I HAD SOME REFERMENTATION AND CORKS WENT FLYING. MAYBE I DIDN’T HAVE ENOUGH BRANDY. BUT WHY IS THE SORBATE NEEDED IF ENOUGH BRANDY IS ADDED?
JERRY BLACK PORTLAND, MAINEAWell, in the olden days of fortified winemaking, potassium sorbate (a potassium salt of sorbic acid) wasn’t even a thing. While sorbic acid does occur naturally in some plants (rowan berries and hippophae berries, to be exact), almost all of the world’s potassium sorbate is made in a laboratory. In addition to potassium sorbate being a relatively modern, artificial ingredient, I also object to the aroma and taste of it in wine, which gives me fake pineapple and geranium vibes. Not so great. Luckily, there are some things you can do to ensure you get a completely arrested fermentation (and no re-fermentation) the next time you attempt your blackberry Port.
When making fortified wines, a must or juice is usually started just like normal, and then high-proof alcohol (like brandy) is gradually added in order to stop the fermentation. To make sure your wine gets really and truly “stuck,” I suggest employing these traditional basics: Fermentation kinetics management, temperature control, alcohol additions, sulfur dioxide additions, sugar additions, and, eventually at the end, filtration. (Note that these are the steps to producing a more traditional Port wine where little to no sugar is added to backsweeten, rather fermentation is halted in order to leave residual sugar from the original must/juice.)
• Non-robust fermentation: Under-pitch your yeast addition rate so that you don’t have a run-away fermentation that’s hard to arrest. Similarly, don’t over-feed your fermentation with yeast nutrients at the normal dry-wine level, since some of it will not be consumed when you add your alcohol to arrest the fermentation. Both of the above will help keep your fermentation moderate and easier to stop.
• Temperature control: By keeping your temperatures modest, you help ensure the fermentation won’t take off so quickly and, as such, will be easier to control and to stop when you do eventually add the alcohol. Ferment closer to the lower recommended temperature for your given strain.
• Alcohol addition: Indeed, the higher the alcohol, the less chance you’ll have of a refermentation. Most Port-style wines are over 18% alcohol, and to be safe, I’d aim for above 20% if your grape and wine style can handle the “heat.” You can fortify with a wide variety of spirits — because you’re not making your product to be sold commercially you have a lot of leeway. The traditional Port-style wine addition is brandy or grape spirits, often aged in oak. This remains a good choice but don’t turn down fruit-flavored spirits, unoaked spirits like grappa, or even a little Bourbon, if you’re hankering to make a Bourbon-barrel-aged type final product. No matter which spirit you use, be sure to do the algebra correctly . . . and don’t forget that “proof” is twice the alcohol content, i.e., an 80-proof spirit is 40% alcohol by volume.
• Sulfur dioxide addition: Yeast is sensitive (but not as sensitive as bacteria) to sulfur dioxide, so make sure a fortified wine has enough SO2. While it won’t kill yeast, it will inhibit them to a certain extent. Aim for bottling with free SO2 between 28–35 ppm for a reasonable balance between sensory quality (it won’t be too strong) and microbial abeyance.
• Optional “finishing sugar” addition: If the flavor profile of the wine and the wine’s balance warrants it, more sugar (in the form of table sugar, grape concentrate, etc.) can be added. The additional increase in osmotic pressure will further help retard yeast and bacteria growth.
• Optional filtration: Once the fermentation is stopped you will want to press, settle, and rack like normal. Be sure you keep measuring your Brix with a hydrometer (not a refractometer because the alcohol and any carbon dioxide bubbles will interfere) to make sure you’ve really stopped it. Once the wine is racked and has settled, sterile filtration is always a great technique to employ to make sure all microbes are excluded.
At the end of the day, if you really want to use potassium sorbate, you can add it at the rate of ½ teaspoon per gallon (3.8 L) of wine.
If you could put all the wonderful wines of Italy into one room, you would think you were in heaven! We do that almost every year at this early spring trade tasting, presented by Gambero Rosso. It features all Italian wines and is aptly named Tre Bicchierri, because the wines being presented are the top wines that earned the “three glass” distinction of quality. All the top producers from the various regions of Italy are there. It’s amazing to get so many of Italy’s best wines in one place. With all the indigenous and mainstream varieties, you have to stay focused on specific wines in a tasting this size.
The first year we visited this event we decided to focus on white wines from Italy. We found an abundance of one that really stood out that day . . . a grape called Vermentino, one that I did have experience working with but had limited success with. But its true capabilities were on display here at this tasting. The world of Vermentino awaited us with many excellent examples of the variability you experience between different producers and growing areas.
The earliest mention of Vermentino in literature is in 1658 in Piemonte, where vineyards were planted with grape varieties cortese (Cortese), nebioli dolci (Nebbiolo), and fermentino (Vermentino). Some scholars believe its name derives from the root, vermene, meaning young, thin, and flexible shoots. But the word origins going back to its first appearance in the literature, fermentino, meaning “ferment” referring to the fizzy character of young white wines, supports the former hypothesis. Vermentino has become the preferred name over the last 400 or so years with no real support as to why. Its morphological and DNA profile support that it is identical to Favorita in Piemonte and
Pigato in Liguria. The Ligurian grape, Rollo, is sometimes confused with Vermentino, and both can be referred to as Rolle.
As with many grape varieties, historical records are handed down from generation-to-generation by word of mouth unless some written record exists. One hypothesis was it was introduced to Sardegna from Spain, but the variety is not found in Spain. Another places its origins in Greece or the Middle East, but no scientific evidence supports that thought either.
Grown under the various synonyms, this supposed Italian grape is also widely planted in Southern France, notably in the Languedoc-Roussillon and Provence regions where its plantings have greatly increased in recent years.
In Italian grape acreage reports Favorita and Pigato are listed separately and Italy still retains the most acreage of Vermentino in the world, although France is not far behind. Typical to French regional AOC rules it is blended with local grapes as well as Muscats, Roussanne, and Carignane Blanc (Mazuelo). It can also be a blending component in Provencal rosé wines. Outside of its home region, it can also be found in Lebanon, Australia, Texas, North Carolina, Idaho, Virginia, Oregon, and California.
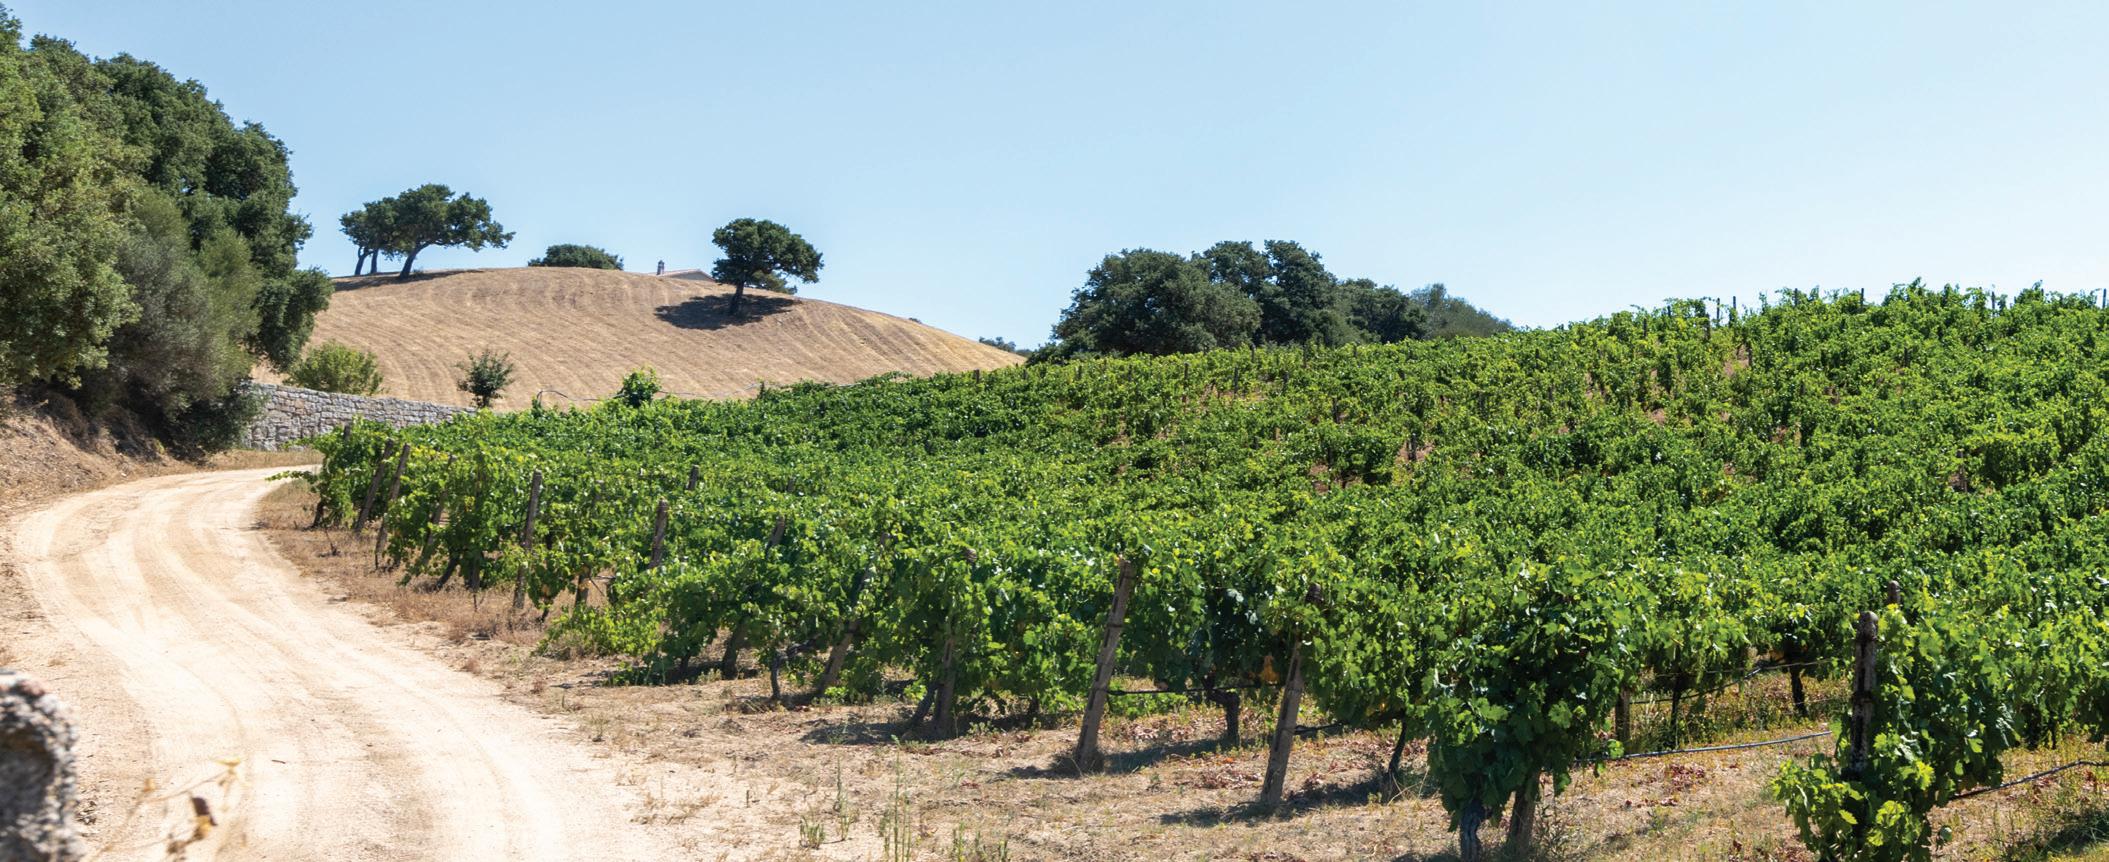
Vermentino is a white grape, very aromatic, and generally of very high quality. Viticulturally it is early budding, hence somewhat susceptible to spring frosts. It is mid-ripening and does best when grown near the sea in its native range of Italy, Southern France, the island of Corse (Fr.), and Sardegna (It.).
Vermentino grapes are thin-skinned and light in color. It is a vigorous vine that is drought-resistant and thrives in hotter climates. I have tasted Vermentino from Italy, France, and California, but
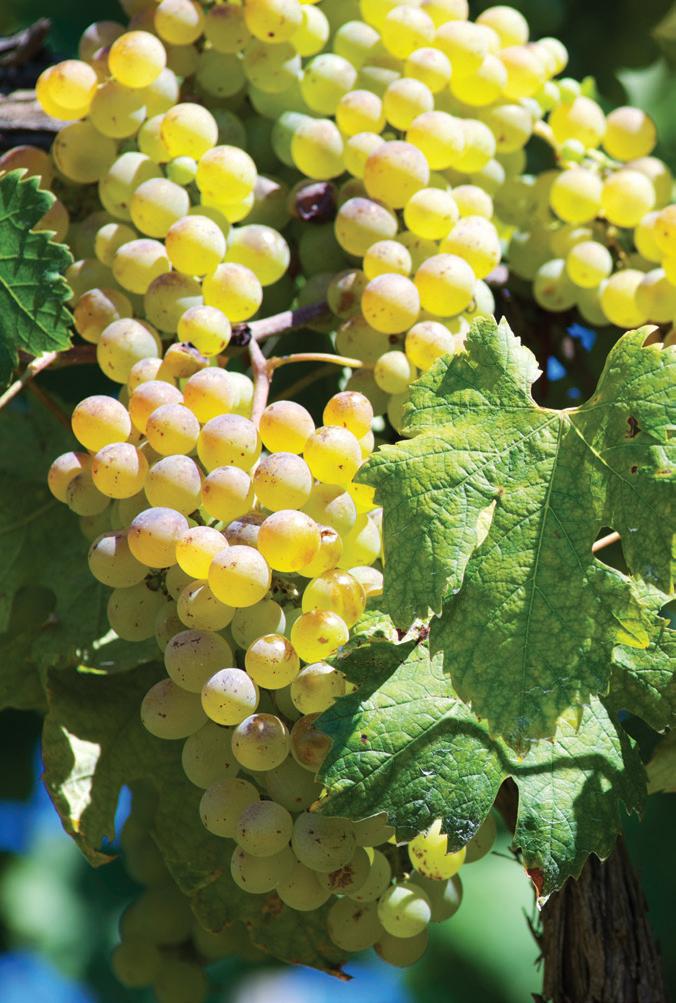
Vermentino is a white grape, very aromatic, and generally of very high quality.Photo courtesy of Shutterstock.com
100 lbs. (45 kg) Vermentino fruit
5 lbs. (2.3 kg) rice hulls
Distilled water
10% potassium metabisulfite (KMBS) solution (Weigh 10 g of KMBS, dissolve into about 75 mL of distilled water. When completely dissolved, make up to 100 mL total with distilled water.)
5 g Lalvin QA23 yeast (CY3079 can be used as a substitute)
5 g Diammonium phosphate (DAP)
5 g Fermaid K (or equivalent yeast nutrient)
Food-grade Brute bucket, about 45-gallons (170-L)
5-gallon (19-L) carboy
6-gallon (23-L) carboy
6-gallon (23-L) plastic bucket
Racking hoses
Inert gas (nitrogen, argon, or carbon dioxide)
Refrigerator (~45 °F/7 °C) to cold settle the juice (remove the shelves so that the bucket will fit)
Ability to maintain a fermentation temperature of 55 °F (13 °C). TIP: Use a 33-gallon (125-L) plastic can as a water bath. Place ice blocks in the water to maintain a relatively constant temperature.
Thermometer capable of measuring between 40–110 °F (4–45 °C) in one degree increments
Pipettes with the ability to add in increments of 1 mL
Tartaric acid (addition rate is based on acid testing results)
1. Crush and press the grapes. Mix in your rice hulls so that they are evenly dispersed with the must. Move the must directly to the press and press lightly until the juice flow diminishes. Increase the pressure of the press, taste the juice and transfer the hardest pressed juice to a separate vessel.
2. Transfer the juice(s) to a 6-gallon (23-L) bucket, keeping your fractions separate, if this is what you choose to do. During the transfer, add 3 mL of 10% KMBS solution per gallon of juice (0.8 mL/L). This addition is the equivalent of 50 mg/L (ppm) SO2. Move the
juice to the refrigerator.
3. Let the juice settle at least overnight. Layer the headspace with inert gas and keep covered.
4. Measure the Brix and acidity.
5. Adjust the titratable acidity to 6-7 g/L. If the acidity is greater than 7 g/L, consider the option of inoculating for the malolactic fermentation at the completion of the alcoholic fermentation described below.
6. When sufficiently settled, rack the juice off of the solids into the 6-gallon (23-L) carboy.
7. Prepare yeast. Heat about 50 mL distilled water to 108 °F (42 °C). Measure the temperature. Pitch the yeast when the water is 104 °F (40 °C). Sprinkle the yeast on the surface and gently mix so that no clumps exist. Let sit for 15 minutes undisturbed. Measure the temperature of the yeast suspension. Measure the temperature of the juice. You do not want to add the yeast to your cool juice if the temperature of the yeast and the must temperature difference exceeds 15 °F (8 °C). To avoid temperature shock, acclimate your yeast by taking about 10 mL of the juice and adding it to the yeast suspension. Wait 15 minutes and measure the temperature again. Do this until you are within the specified temperature range. Do not let the yeast sit in the original water suspension for longer than 20 minutes. When the yeast is ready, add it to the fermenter.
8. Add Fermaid K or an equivalent yeast nutrient.
9. Initiate the fermentation at room temperature ~65–68 °F (18–20 °C) and once fermentation is noticed, (~24 hours) move to a location where the temperature can be maintained at 55 °F (13 °C).
10. Two days after fermentation starts, dissolve the DAP in as little distilled water required to completely go into solution (usually 20 mL). Add directly to the carboy.
11. Leave alone until bubbles in the airlock are about one bubble per minute. Usually about two to three weeks. Measure the Brix every 2–3 days. If acidity is high, consider inoculating with a lactic acid bacteria culture.
12. The wine is considered dry when

you taste it and it does not taste sweet anymore. Add 3 mL of fresh KMBS (10%) solution per gallon of wine (0.8 mL/L). Transfer the wine to the 5-gallon (19-L) carboy and lower the temperature to 38–40 °F (3–4 °C). If there are any sulfide-like (rotten egg) odors, rack the wine off the lees. If the wine smells good, then let the lees settle for about two weeks and stir them up (bâtonnage). Repeat this every two weeks for eight weeks. This will be a total of four stirs.
13. After the second stir, check the SO2 and adjust to 30–35 ppm free.
14. After eight weeks, let the lees settle. At this point, the wine is going to be crystal clear or a little cloudy. If the wine is crystal clear, then that is great! If the wine is cloudy, then presumably, (if you have kept up with the SO2 additions and adjustments, temperature control, kept a sanitary environment, and there are no visible signs of a re-fermentation) this is most likely a protein haze and you have two options: Do nothing – it’s just aesthetics — or clarify with bentonite.
15. While aging, test for SO2 and keep maintained at 30–35 ppm.
16. Once the wine is cleared, it is time to move it to the bottle. This would be about six months after the onset of fermentation. Keep in mind this wine has had the malolactic fermentation inhibited (unless you opted to for an acid correction). If all has gone well to this point, given the quantity made, it can probably be bottled without filtration. Your losses during filtration could be significant. That said, maintain sanitary conditions while bottling, and you should have a fine example of a clean Vermentino.
Sulfur dioxide additions: The recipe calls for specific additions of sulfur dioxide at specified intervals. Once these scripted additions are made, you must monitor and maintain to 30–35 ppm. Adjusting as necessary using the potassium metabisulfite solution previously described or by methods of your own choosing. Testing can be done at a qualified laboratory, or in your home cellar using various commercially available kits.
in reading reviews, and with an upcoming trip planned to Texas, I am curious as to see if I can find some examples of Hill Country Vermentino varietals. Most reviews talk about it being made with all stainless fermentation and aging, something dear to my heart with such an aromatic variety. Winemakers should want to express the grape and not something around it to mask the flavors. Bonuses in the winemaking process are preserving this grape’s natural acidity by preventing the malolactic fermentation (certainly regional and stylistic dependent) and enhancing mouthfeel.
The descriptors of the flavors of Vermentino range from fragrant, mineral, floral, fruity, citrus, spicy, and tropical. The latter come about when the grapes are grown in warmer regions. But care needs to be taken to pick before the fruit acidity starts decreasing too much. Sometimes an acidity adjustment is necessary in warmer years and almost the norm in California.
My experience with these white grapes in both home and commercial settings is fruit that is grown properly does not require any extended skin contact to generate optimum aromatics. So what does it mean to properly grow this grape? Some keys to coaxing the most from the clusters while hanging in the vineyard include incidental but not direct sun exposure, good air flow through the canopy, and harvesting when the flavors are there, not necessarily the sugar.
Focusing on the winemaking side of the grape, recall that the aroma compounds are found in the skin of white grapes and therefore some skin contact is needed. I like to refer to best practices with Vermentino as incidental skin contact — just enough contact while the must is being de-juiced (the term I use instead the word press). De-juicing is the process of a series of light pressure increases in the press until the juice flow starts to decrease. Then I release the pressure, mix the must, and repeat. While easiest to do with a pneumatic membrane press, the home winemaker using a typical basket press can utilize rice hulls evenly distributed in the must
and then press normally until the juice flow starts to decline.
If you want to press firmer, switch to another receiving vessel and press harder for more yields. But make sure to treat these as two separate fractions. The firmer press may need some more attention because it will undoubtedly have a higher pH due to the hard press and longer skin contact.
I typically use one 4-cubic foot (0.11 m3) bag of rice hulls per ton (910 kg) of crushed and de-stemmed fruit (roughly 1 lb./0.45 kg rice hulls per 100 lbs./45 kg of grapes). Speaking from experience, I do not advocate for the use of enzymes as they can gum up your press process and overly complicate your day. Sure, you are going to find rice hulls in every nook and cranny of your press area, but that’s what brooms and wet/dry shop vacs are for!
Once you get your juice, allow it to cold settle overnight then rack off the grape solids (gross lees). The longer it settles the better the yield, but temperature and initial sulfur dioxide additions need to be considered. Depending on your growing region an acidity adjustment might be necessary. I am not afraid to adjust my acidity to around 6.5 g/L pre-fermentation with tartaric acid.
I use an aromatic yeast like QA 23 and ferment at a cool temperature of 54–59 °F (12–15 °C). After alcoholic fermentation is complete, I chill and add sulfur dioxide to prevent spontaneous malolactic fermentation (MLF). Certainly, if your acid is too high you could consider an MLF, but that is a stylistic choice. Keep the wine cool through the winter, stirring the lees to help with mouthfeel and bottle as the cellar warms in the spring. Voila! You have Vermentino!
At the annual Tre Bicchierri tasting, we experience many wonderful examples of what the grape variety can be all about. The Vermentino wines of Sardinia and Liguria are the benchmarks to match when you can get your hands on the grape to make in your own cellar. I long to make another Vermentino like a vintage I made in 2016. It was not a large volume that we made, but it was delicious and we can only be inspired every year when we return to this tasting and seek out the current year’s winners.
DON’T MISS OUT ON:
• 24 Big Seminars
• Group Interactive Workshops
• Tasting Party
• 8 Hands-On Winemaking Boot Camps
ADVANCED WINEMAKING
• Advanced Malolactic Techniques
• Maximizing Cold Soaks
• Willamette Valley Pinot Panel
• Post-Modern Tools to Build Wine Structure
• Crafting Age-Worthy Wines
• Making Brandy
GRAPE GROWING
• Canopy Management
• 5 Biggest Grape Growing Mistakes
• Backyard Grape Growing Q & A
GENERAL WINEMAKING
• Willamette Valley Winery Tours
• WineMaker Competition Awards Dinner
• Sponsor Exhibits
KIT WINEMAKING
• Keys to Wine Clarity
• Troubleshooting Q & A
• Award-Winning Country Fruit Winemaker Panel
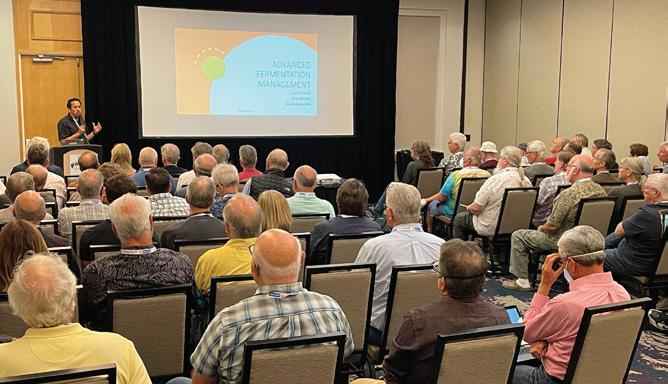
• Crafting Italian Reds
• Calibrating Wine Equipment
• Basics of Wine Analysis & Testing
• Making Limoncello & Other Citrus Liqueur
GROUP INTERACTIVE WORKSHOPS

• Advanced Kit Techniques
• Award-Winning Kit Winemaking Roundtable
WINEMAKER BOOT CAMPS
• Side-by-Side Oak Trials
• Winemaking Table Topics
• Winemaking Hot Subjects
• Willamette Valley Winemaking
MEET WITH WINEMAKING SUPPLIERS
• Advanced Winemaking from Grapes
• 2-Day Fundamentals of Modern Wine Chemistry
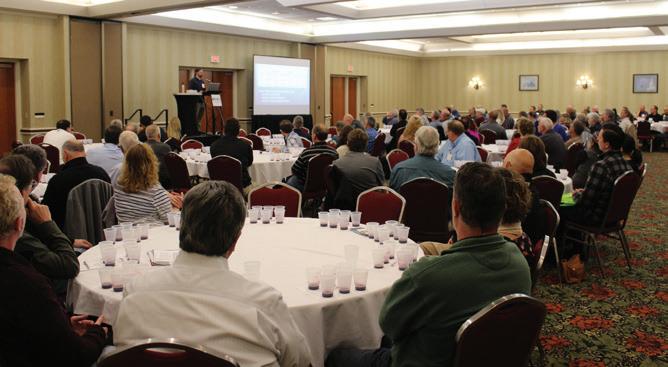
• Winemaking from Grapes
• Distilling
• Small Winery Start-Up
• Home Wine Lab Tests

• Backyard Grape Growing
• Judging & Scoring Wines
• Willamette Valley Winery Tours
As an attendee, you’ll have the opportunity to check out the latest equipment, products & supplies from many of these leading winemaking vendors Friday & Saturday.
TITLE SPONSORS
EXHIBITING SPONSORS
SUPPORTING SPONSORS
Blichmann Engineering Home Fermenter RJS Craft Winemaking Winexpert
THURSDAY, JUNE 1 • 10 AM – 4:30 PM
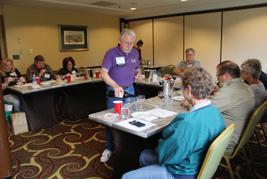
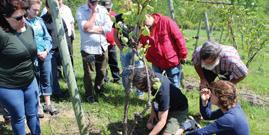
Maximize your learning by taking two different Boot Camps. Full-day, small-class Boot Camps will run pre-conference on Thursday and post-conference on Sunday from 10 AM to 4:30 PM and include lunch. Attendance is limited to just 35 people per session and do sell out. This add-on Boot Camp beyond the conference registration is a great opportunity to get an in-depth learning experience in a small-class setting and learn hands-on from experts.
ADVANCED WINEMAKING FROM GRAPES
Go beyond the basics and understand complex techniques to get the most from your winemaking using fresh grapes. This workshop intended for intermediate and expert home winemakers will tackle a range of tips: From dialing in extraction levels on the front end all the way to protecting your wine with advanced tips through bottling.
DISTILLING
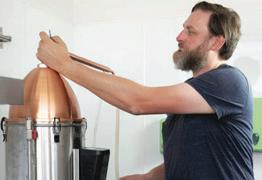
Walk through the small-scale distilling process. You’ll leave understanding the various types of small still equipment, as well as the small-scale distillation process for brandy, whiskey, rum, and gin. Get your questions answered throughout the full day as you learn the art of distillation using a small still.
WINEMAKING FROM GRAPES
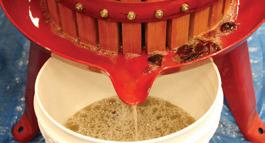
Learn all the steps of making wines from grapes including crushing and fermenting all the way to bottling. You’ll work with fresh grapes and operate the different pieces of equipment and the tests you’ll have to run on your wine.
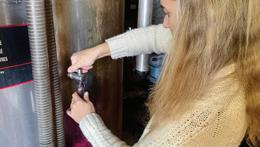
You’ll learn site selection, vine choice, planting, trellising, pruning, watering, pest control, harvest decisions plus more strategies to successfully grow your own great wine grapes.
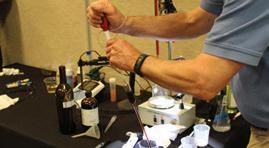
Step-by-step teaching on how to properly test your wine for sulfites, malolactic, acidity, and pH. You’ll have the chance to run these different tests yourself to give you a valuable hands-on learning experience so you can accurately run these tests on your own wine at home.
Tour several wineries as you explore the world-famous Willamette Valley and have plenty of opportunities to ask their professional winemakers your winemaking and grape growing questions. You’ll be served lunch along the way and have tastings of award-winning wines.
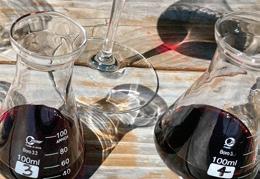
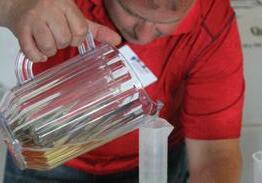
Learn on Thursday and Sunday from wine expert Clark Smith how to use wine chemistry as a practical tool to improve your winemaking. You’ll cover wine chemistry from crush to bottling and how it can inform better decisions resulting in better wine. *This 2-day boot camp includes a 550-page manual that will be a valuable wine reference for this 2-day workshop and for years to come.
Learn how to evaluate your own and other wines in the same way as a trained wine judge so you can use these skills to help your own winemaking. Gain a sensory appreciation for various common faults and how to properly use the 20-point UC-Davis judging sheet as a foundation for evaluating wines.
Walk through the steps, planning decisions, and key financial numbers you need to know if you want to open a smaller-scale commercial winery. Learn how to better achieve your dream of running your own small winery.
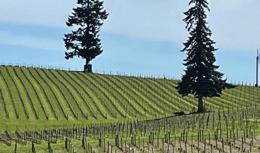
Tour several wineries as you explore the world-famous Willamette Valley and have plenty of opportunities to ask their professional winemakers your winemaking and grape growing questions. You’ll be served lunch along the way and have tastings of award-winning wines.
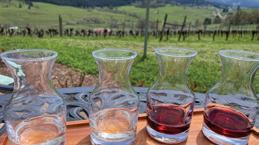
Pre-Conference WineMaker Boot Camps & Winery Tours • Thursday, June 1, 2023
Fundamentals of Modern Wine Chemistry – Day 1 of 2
10 AM – 4:30 PM
Winemaking from Grapes
Day #1 Friday • June 2, 2023
8 – 9 AM
9 – 9:15 AM
9:30 – 10:45 AM
10:45 – 11:15 AM
11:15 AM – 12: 30 PM
12:30 – 1:45 PM
–
PM
Calibrating Wine Equipment
Advanced Winemaking from Grapes
Backyard Grape Growing
Distilling
Home Wine Lab Tests
Willamette Valley Wineries Tour
Breakfast & Registration
Welcome & Introduction
Canopy Management Keys to Wine Clarity
WineMaker Exhibits
Making Brandy
Advanced MLF Techniques
Award-Winning Kit Winemaker Panel
Lunch & Keynote: Southern Willamette Valley Winemaking with King Estate
WineMaker Exhibits
–
Basics of Wine Analysis & Tests
Willamette Valley Pinot Panel
WineMaker Exhibits
WineMaker Workshop: Side-By-Side Oak Trials
WineMaker Tasting & Wine Sharing Party
DAY #2 Saturday • June 3, 2023
8:30 – 9:30 AM
9:30 – 10:45 AM
10:45 – 11:15 AM
11:15 AM – 12:15 PM
12:15 – 1:45
WineMaker Workshop: Winemaking Table Topic Talks
5 Biggest Grape Growing Mistakes


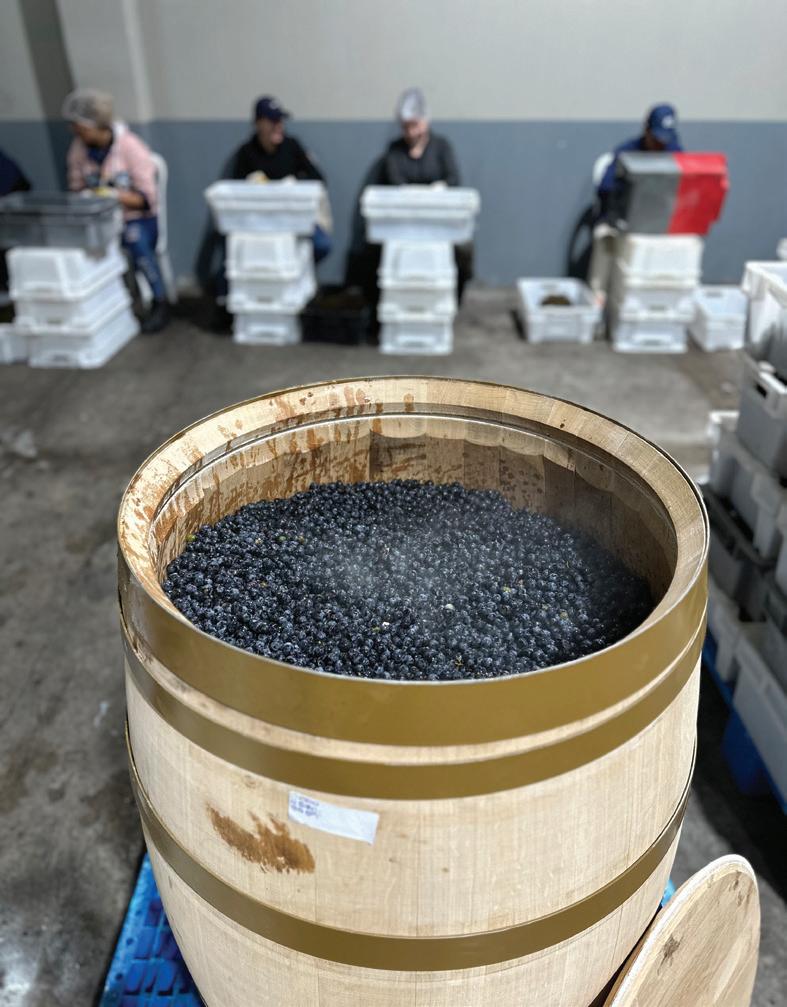
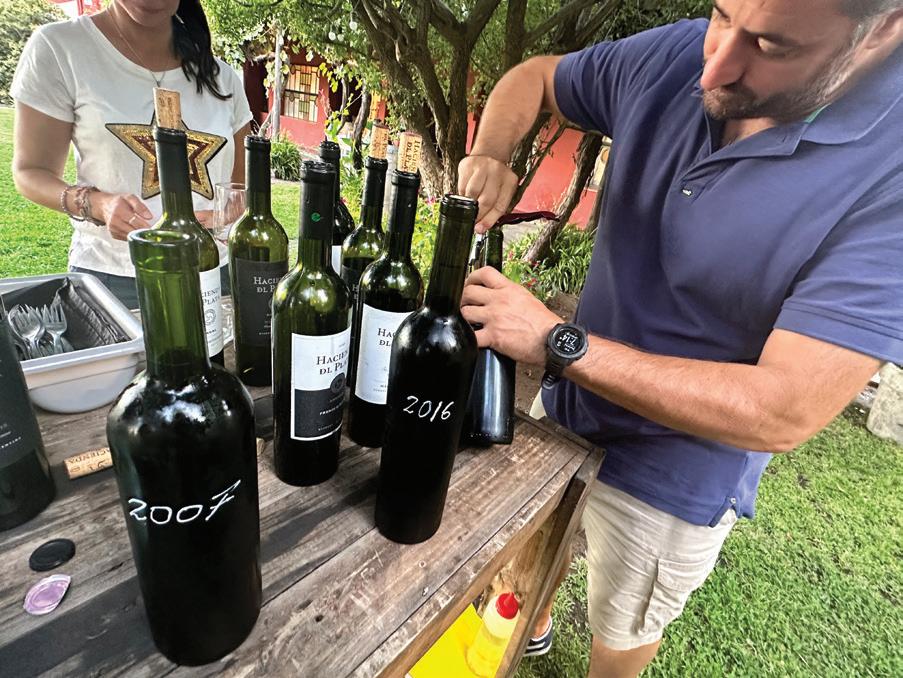
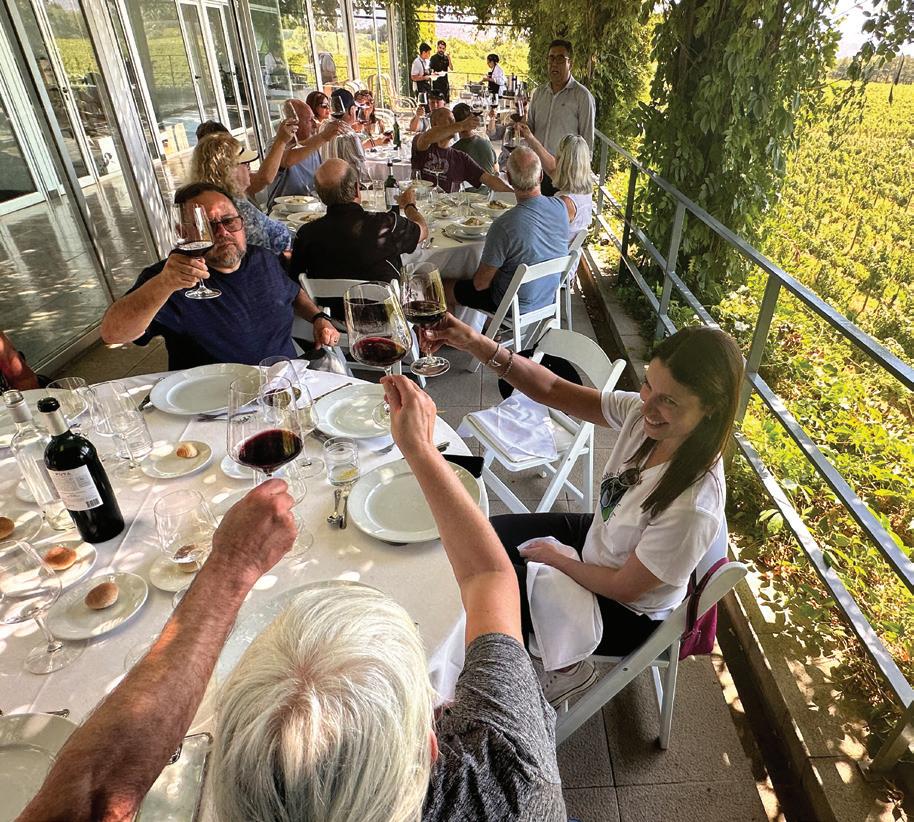
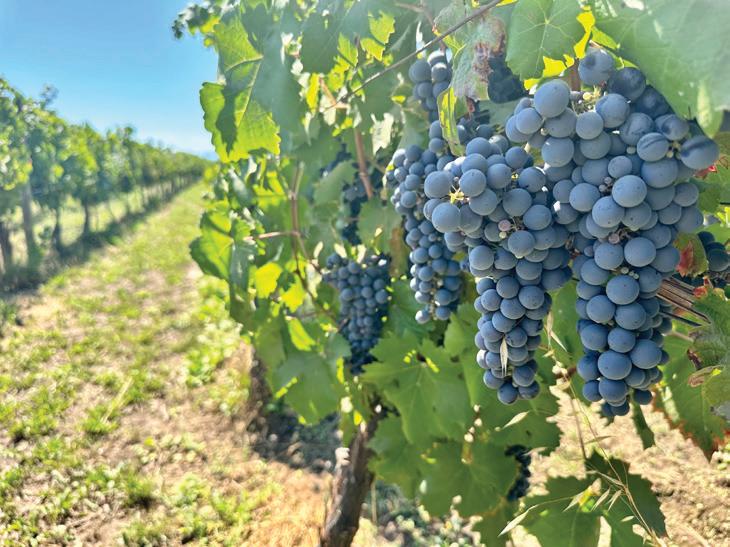


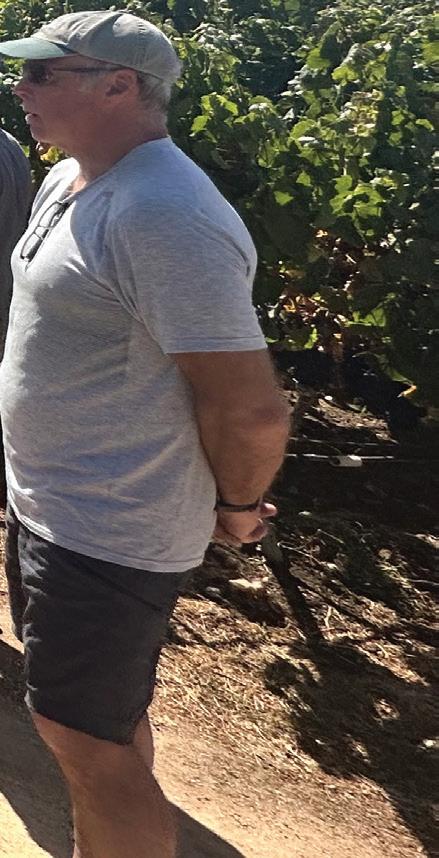
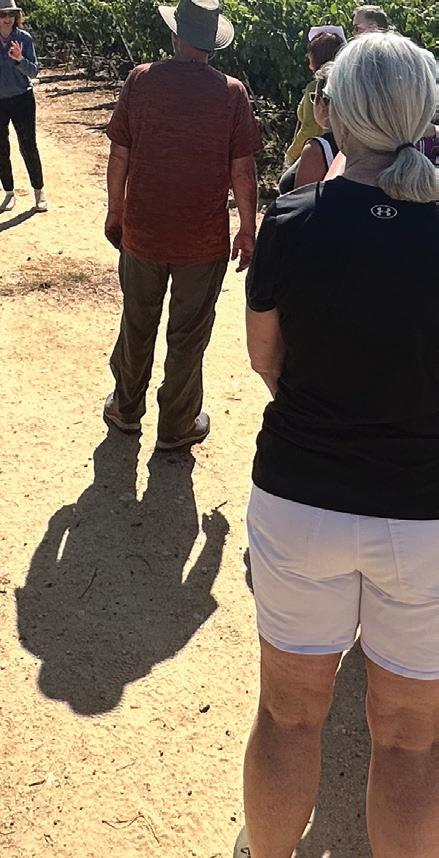
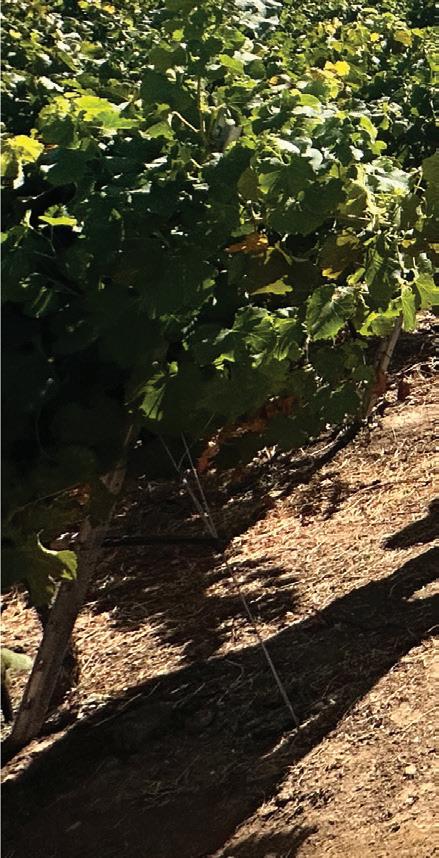


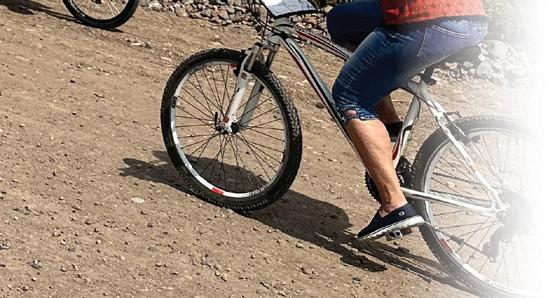
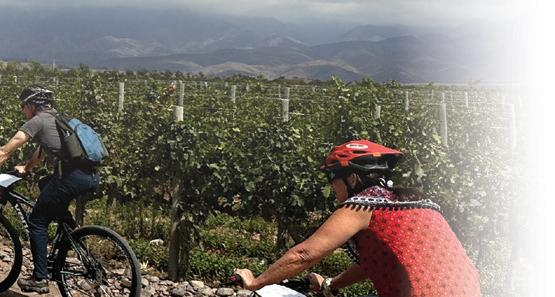
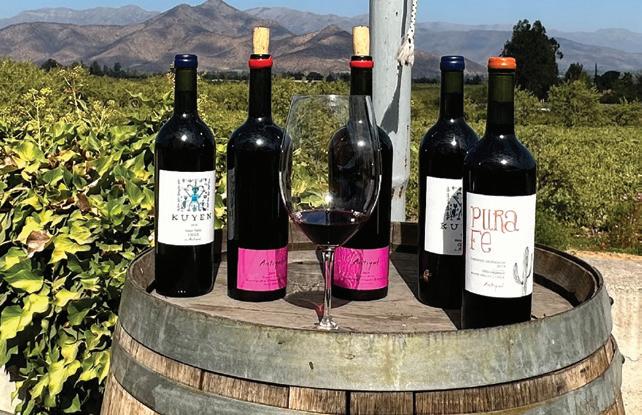
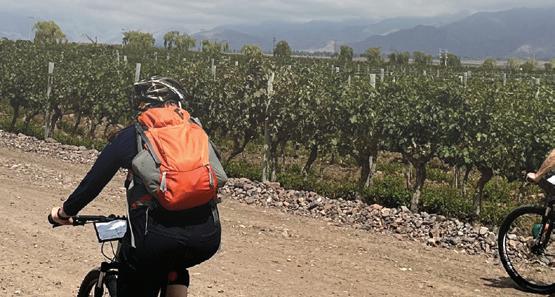
WineMaker readers and Publisher Brad Ring recently spent a week exploring beautiful wine regions in Chile and Argentina. The group experienced a South American harvest during visits to wineries on either side of the towering Andes Mountains during WineMaker’s Chile-Argentina Wine, Bike & Hike Adventure in March. We visited wineries from the large and well-known like Cono Sur in Chile to the small husband-wife-run Atillio & Mochi for a very personal tour and tasting in Chile’s Casablanca Valley. All along the way we had the chance to walk vineyard rows bursting with fruit, taste ripe grapes on the vine, and meet with local pro winemakers happy to answer questions from North American home winemakers while we enjoyed sampling their wines.
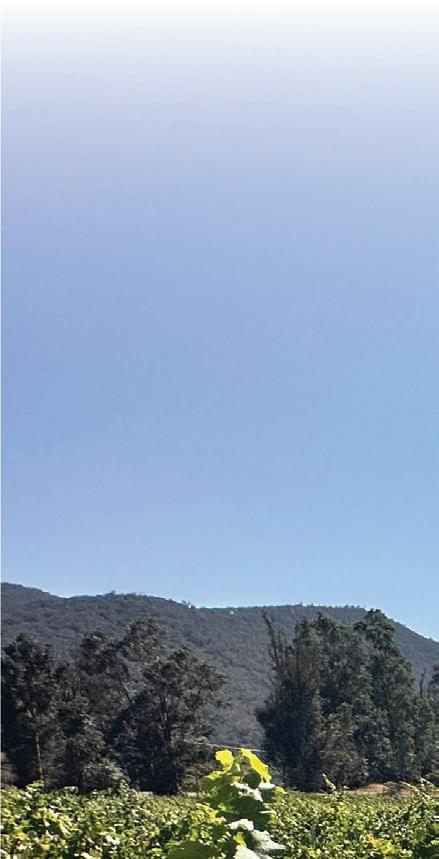
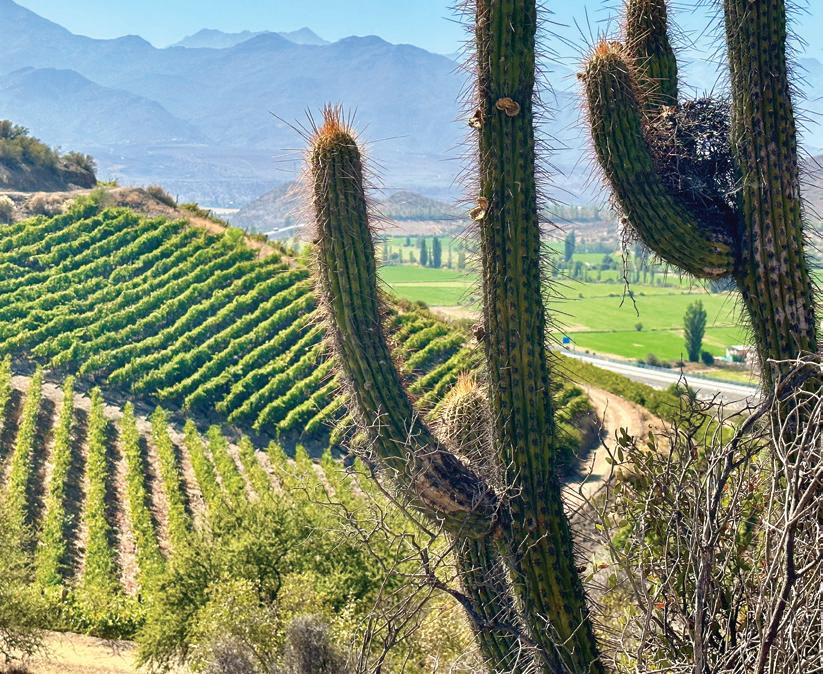
We learned the wonders of a South American asada eating like kings and queens with many of our delicious winery meals cooked a few feet away from our tables over open flame and paired with glasses of Carménère and Cabernet in Chile and Malbec in Argentina. We earned those plates of steak with scenic bike rides through endless vineyards and hikes along ridgelines covered in cacti and grapevines.
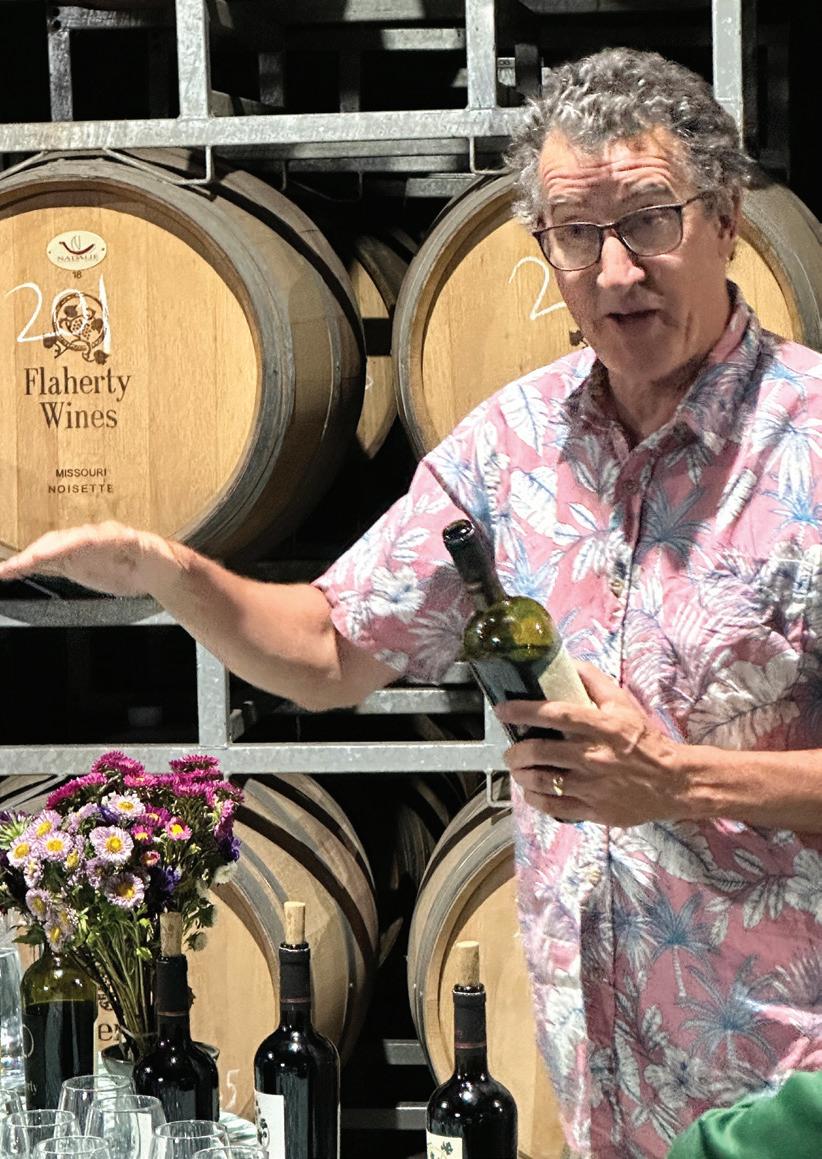
We visited in mid-March during the excitement of harvest and we were lucky enough to watch just-picked Malbec grapes being destemmed carefully by hand and moved directly into new French oak barrels for fermentation at Bodega Monteviejo in Argentina’s Uco Valley. We tasted 11 di erent grape varieties still on the vine for a truly unique side-by-side tasting experience at Viña MontGras in Chile’s Colchagua Valley. Some readers even helped with pre-dinner punchdowns at Flaherty Wines in the Aconcagua Valley of Chile.
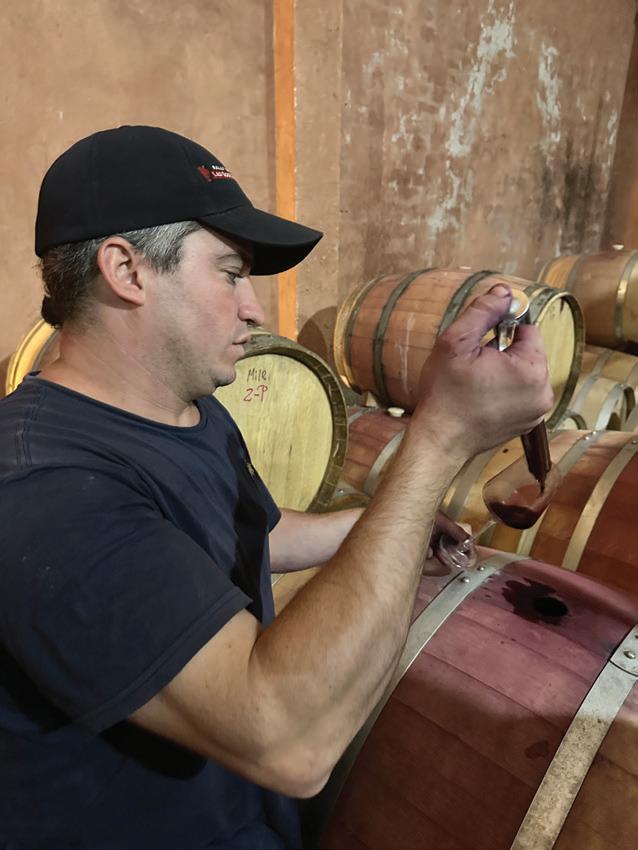
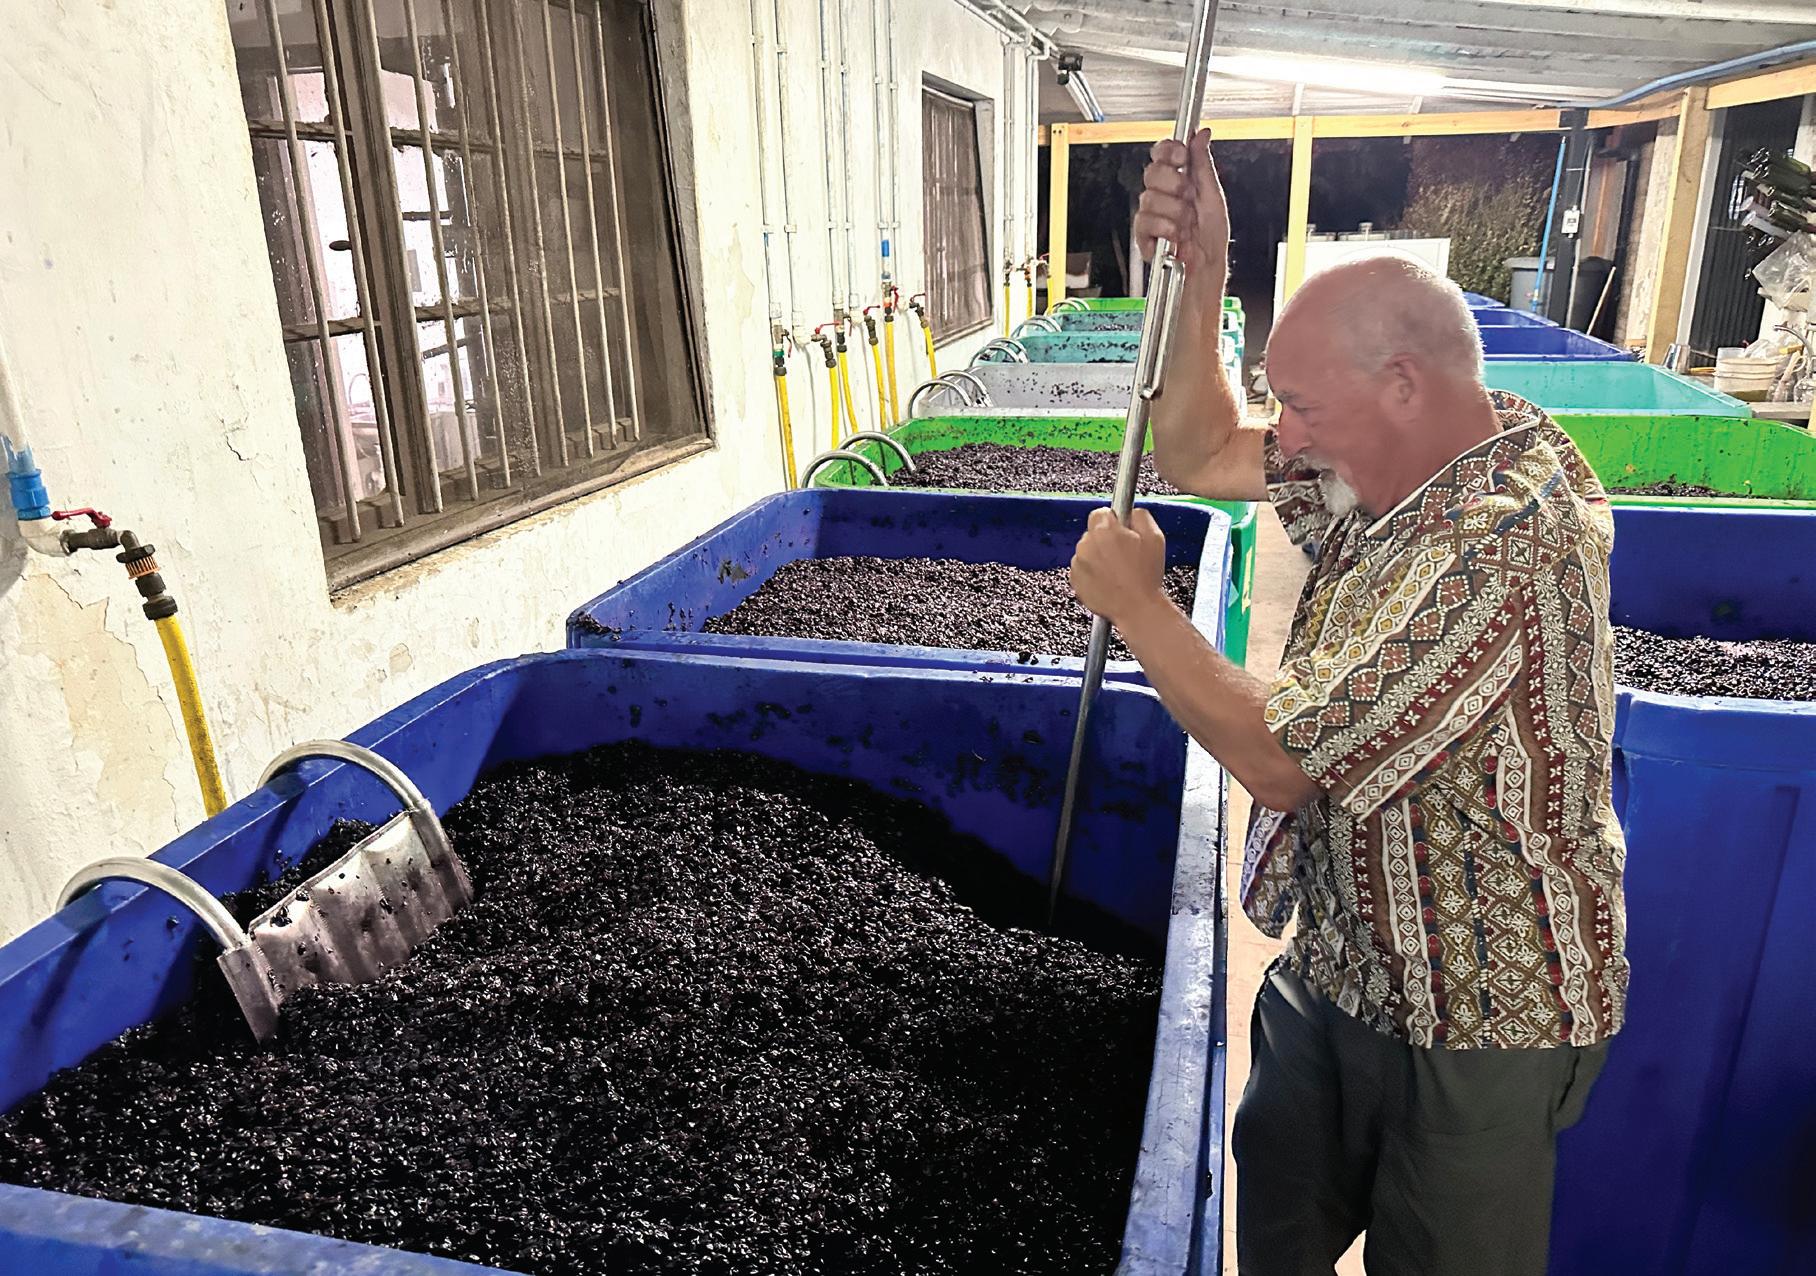
It was a treat to learn about the biodynamic vineyard of Chilean Carménère pioneer Alvaro Espinoza at his Antiyal winery, hiking to see 1,000year-old Incan petroglyphs before a tour and lunch at Viña In Situ whose logo is one of these same petroglyphs from the hillside above their vineyards, and tasting barrel samples as well as unlabeled 16-year-old Malbecs at Hacienda del Plata in Mendoza, Argentina. And it was a trip made extra special by sharing it with 18 fellow home winemakers passionate about wine and winemaking while exploring the mountains, valleys, and special culture of wine regions in both Chile and Argentina.

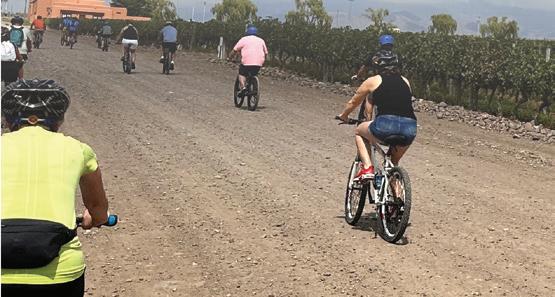
Our next WineMaker trip with space available will be a South Africa Wine & Safari Adventure next March 18–26, 2024. Details on this trip combining both winery tours and a wildlife safari can be found at winemakermag.com/ trip. We hope you can join us on a future WineMaker adventure. ¡Salud!





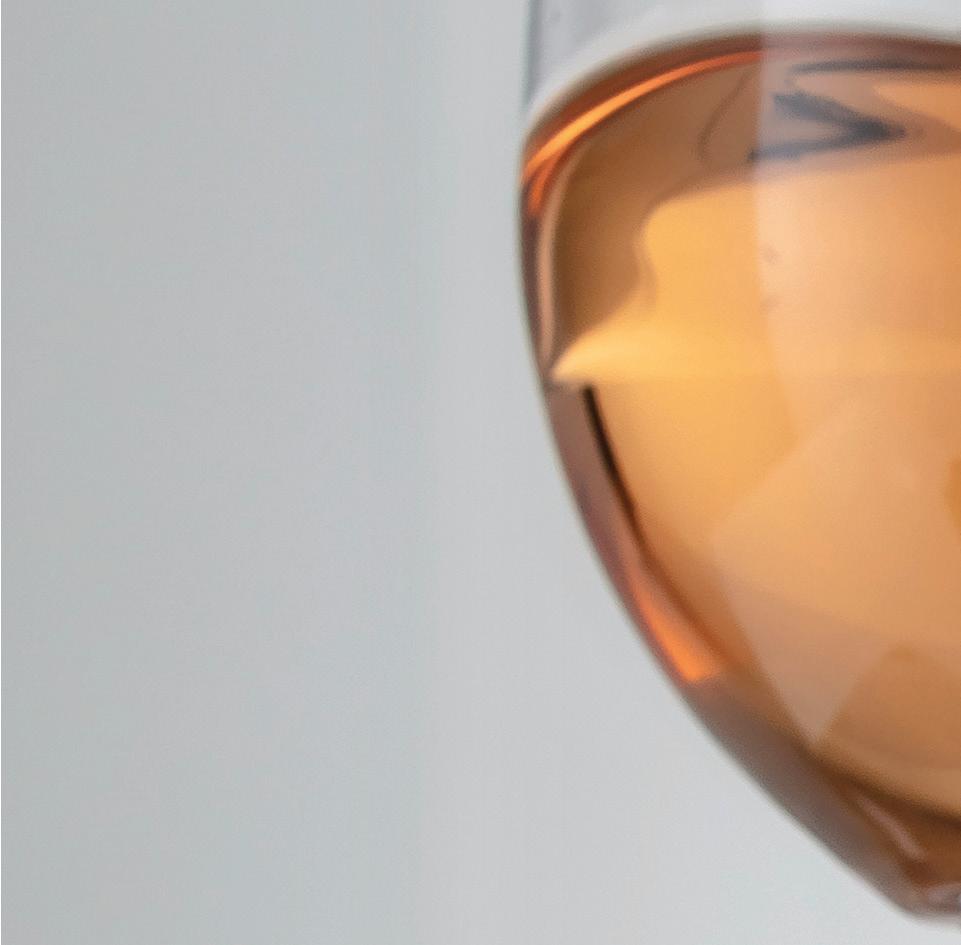
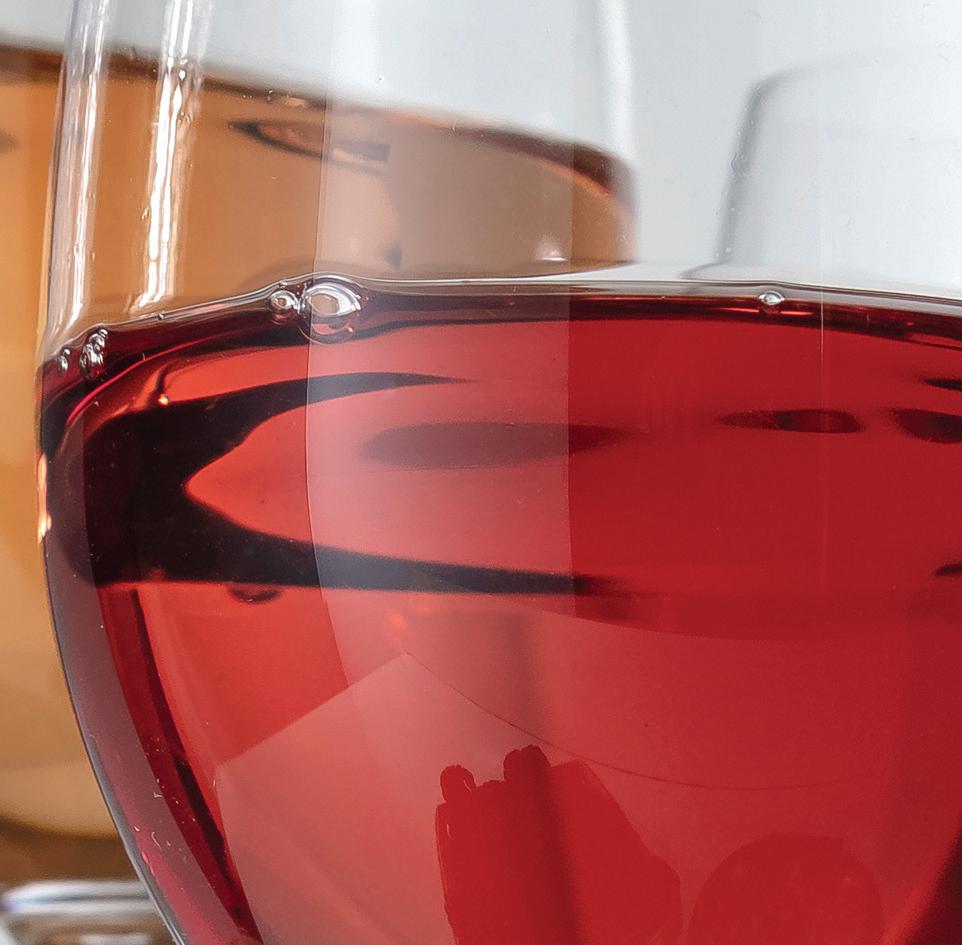

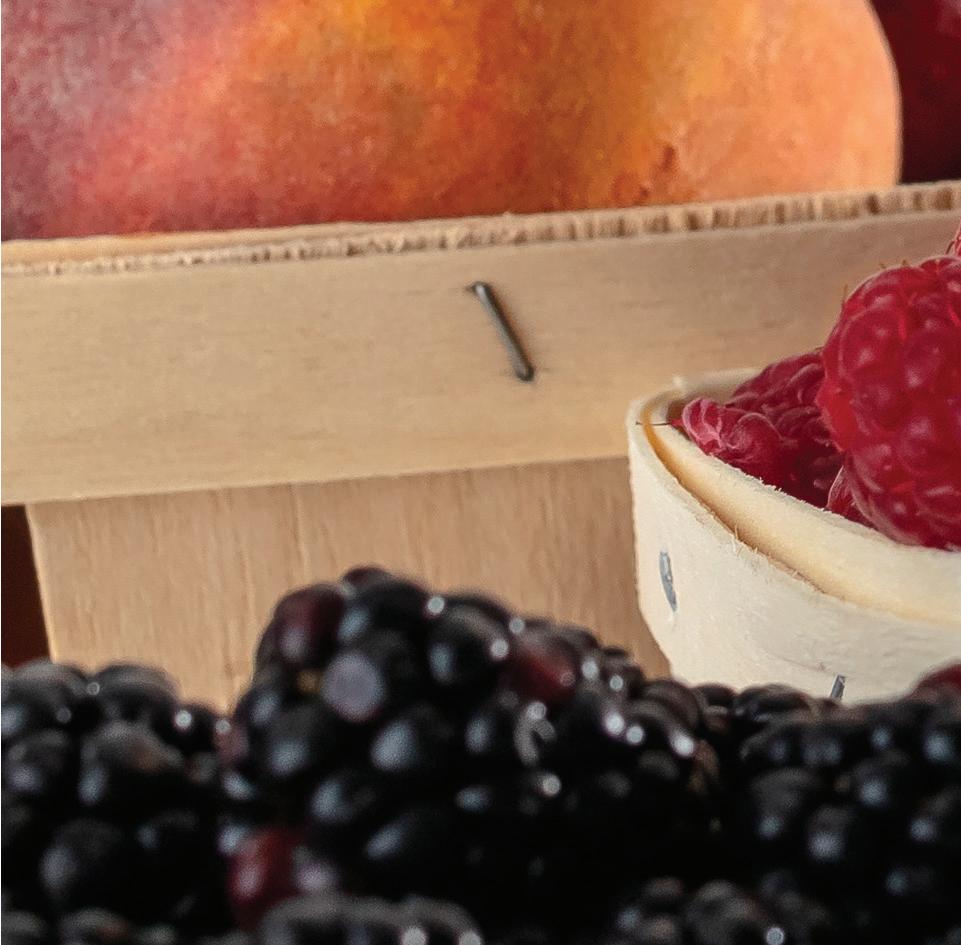
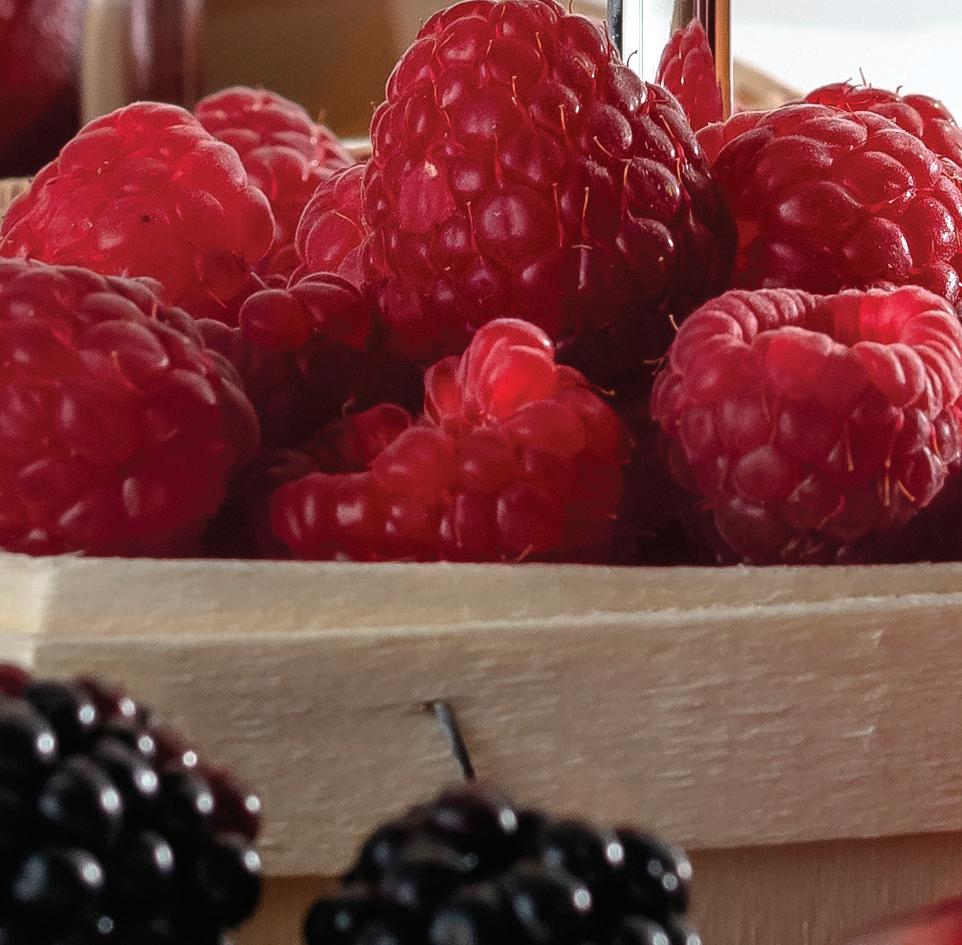
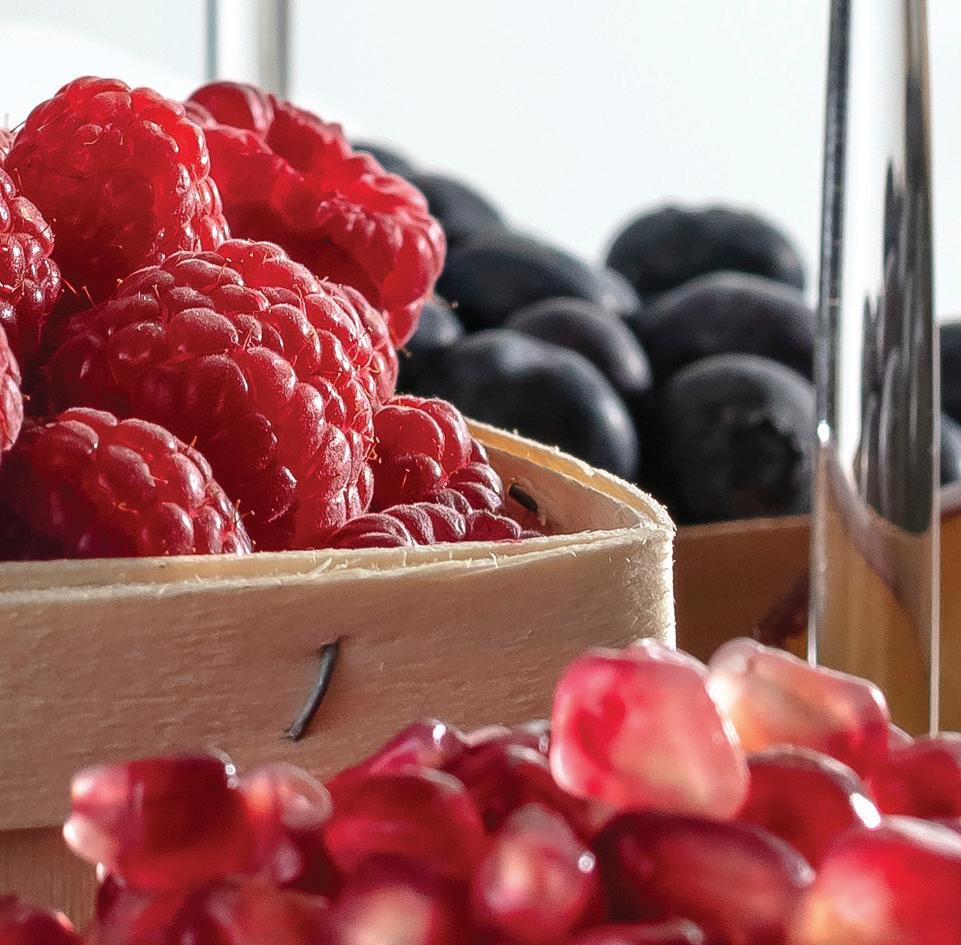

Whether it is to feed our winemaking hobby as we wait for grapes to ripen, put to use a surplus of fruit growing in the backyard, or simply because they are delicious summer sippers to enjoy on a warm evening, fruit wine should be embraced by every home winemaker. The options are nearly limitless when considering the varieties of fruit and combinations that can be made from them, not to mention dryness levels and even wine styles that can di erentiate wines from the same fruit.
No matter where you live, there is sure to be locally grown fruit that will make a tasty wine. Getting ripe fruit in season is the best place to start when considering a fruit wine recipe; because starting with excellent fruit (just like when making wine from grapes) is a key to crafting an award-winning fruit wine.

Of course, starting with great fruit only lays the foundation for a great wine. There are also unique techniques used in fruit winemaking that are less common when making wine from grapes, such as sugar additions both prior to fermentation to bring up the Brix (chaptalization) and after fermentation (backsweetening) to better express the fruit character. Methods of collecting juice, nutrient additions, and even aging techniques are also unique to fruit wines.
If you have never made a fruit wine before, the best place to start is with a trusted recipe (and then tweaking it to match the fruit you have and style you want to make). So when we thought about pulling together a collection of fruit wine recipes, our first instinct was to collect recipes we knew for a fact would make gold medal-quality wine. For that, we reached out to amateur winemakers and asked them to share their recipes that resulted in gold medals in competition and asked for their secrets. We’re excited to share four unique fruit wine recipes that are perfect for summer.
Won Gold Medal in the 2022 WineMaker International Amateur Wine Competition (Stone Fruit category)
Our winemaking journey started in 2017 when I was working on my capstone project in graduate school. I was working on my Masters of Business (MBA) in Phoenix, Arizona. My capstone project required a paper with a word count of 10,000 words, plus a presentation to the professors in the department. My graduate school experience provided the opportunity to complete the research needed on how to lay out a vineyard, determine which fruit would grow in western Kentucky, and the chronic setbacks associated with a wet climate. Two years after graduate school, my wife and I moved back to Beaver Dam, Kentucky. That’s when we decided to make our first batch of wine. Peaches were the fruit in season.
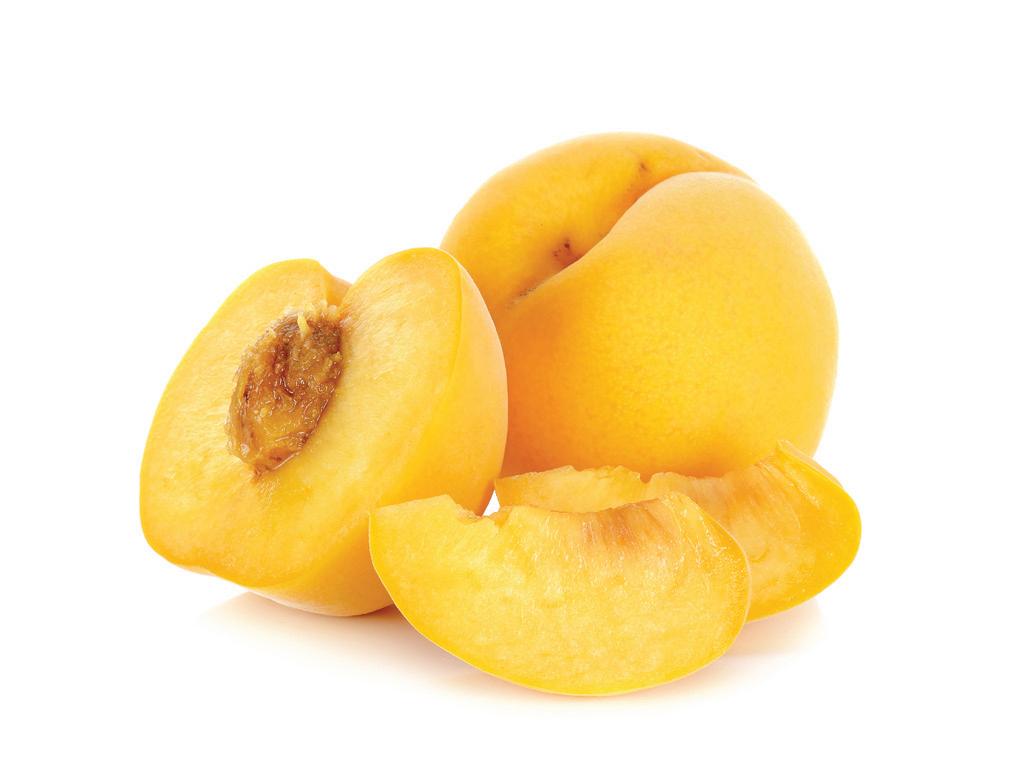
For me, there’s nothing like biting into a perfect juicy yellow peach. So, when deciding which fruit would be our medium it was easy. We wanted those enjoying a glass to have the same experience, except without having peach juice running all over their face. Our first batch of wine was started August 10, 2020 which, by the way, was poured down the sink drain. Our second peach wine was the one that received a gold medal in the WineMaker International Amateur Magazine competition in 2022. This is our recipe for that wine, which can be scaled to meet your batch size.
3 lbs. (1.4 kg) yellow peaches (halved, pitted, frozen)
2 lbs. (0.9 kg) granulated sugar Spring water (if needed to hit volume)
1.5 tsp. acid blend
1 tsp. pectic enzyme
0.25 tsp. grape tannin
0.5 tsp. yeast energizer
1 Campden tablet
0.5 tsp. potassium sorbate
LorAnn peach oil
Lalvin K1-V1116 yeast
We source yellow peaches locally around mid-June and then slice each peach in half and remove the pit by hand. Then we place them in clear freezer bags weighing approximately 3 lbs. (1.4 kg) each for one gallon (3.8 L) of wine. I suggest freezing the fruit for a minimum of 90 days, as this will aid in the fruit producing more juice when thawing out. When the 90 days is up, or whenever you’re ready to make some wine, just remove the peaches from the freezer and allow them to thaw in your fermentation vessel (we use a 5-gallon/19-L foodgrade bucket).
Add granulated sugar to the thawed peaches. Press the peaches and (if needed) add water up to one gallon (3.8 L). Add enough sugar to bring the specific gravity up to 1.090 (21.6 °Brix), which will result in a wine of about 12% ABV. This is generally around 2 lbs. (0.9 kg) of sugar, but will depend on the sugar concentration of the fruit. Take another Brix reading 24 hours after adding the sugar using a refractometer and adjust if necessary. We then add acid blend, pectic enzyme, tannin, yeast energizer, and one crushed Campden tablet and stir to mix.
Rehydrate and then pitch your yeast. We prefer Lalvin K1-V1116. Fermentation is around 65 °F (18 °C) for 12–15 days.
It’s imperative you press down the fruit cap and stir at least twice a day for the first six days. After that, stir just once a day. Once the hydrometer reads 1.000, fermentation is considered complete. Now it’s time to use a nylon mesh straining bag in a clean food-grade 5-gallon (19-L) bucket. Strain the fermented wine through the bag into the second bucket and squeeze the wine from the mesh bag. Allow the wine to rest for 24 hours so the lees settle to the bottom of
the bucket.
Siphon the wine to a sanitized carboy. We add one Campden tablet per gallon (3.8 L) at this point to preserve the natural color and protect against bacteria. We recommend cold stabilization for 30 days at 27 °F (-3 °C). You will need to rack the wine after cold stabilization is complete.
Clearing peach wine can be done several ways; we prefer to use natural aging, however, you may also use bentonite. Once the wine is clear, we add 0.5 tsp. potassium sorbate stabilizer per gallon (3.8 L) to prevent renewed fermentation from backsweetening.
Backsweetening is accomplished by making a simple syrup. We use a 1:1 ratio of granulated table sugarto-spring water. You want to bring the water to a boil, then add an equal amount of sugar. Backsweeten to taste; the sugar should help accentuate the peach flavor, but not overpower it with sweetness. This took about 10 cups of simple syrup for one gallon (3.8 L) of wine (with this addition, the resulting wine volume is a little over 1.5 gallons (~6 L). To really kick up the peach flavor, which can sometimes be dulled by fermentation, add 0.625 oz. (18.5 mL) LorAnn Peach oil 24 hours after the potassium sorbate addition. Remember, fruit wine peaks at 15 months.
I did not like wine until my husband and I took a trip to Napa, California, in 2007. A woman at St. Supéry Estate Vineyards & Winery took the time to teach me about wine. After trying a Moscato, I fell in love. I have a very curious mind so my husband bought me everything I’d need to start making my own wine. I made a few kits and then in 2011 we moved to Grand Junction, Colorado, only to find out I moved to the Grand Valley AVA haven. In 2013 I started making wine with fresh grapes and entering competitions to get honest feedback. I make a large array of wines — from Vitis vinifera varieties such as Cabernet Sauvignon and Muscat, to hybrids including Crimson Cabernet and Brianna, as well as fruit wines.
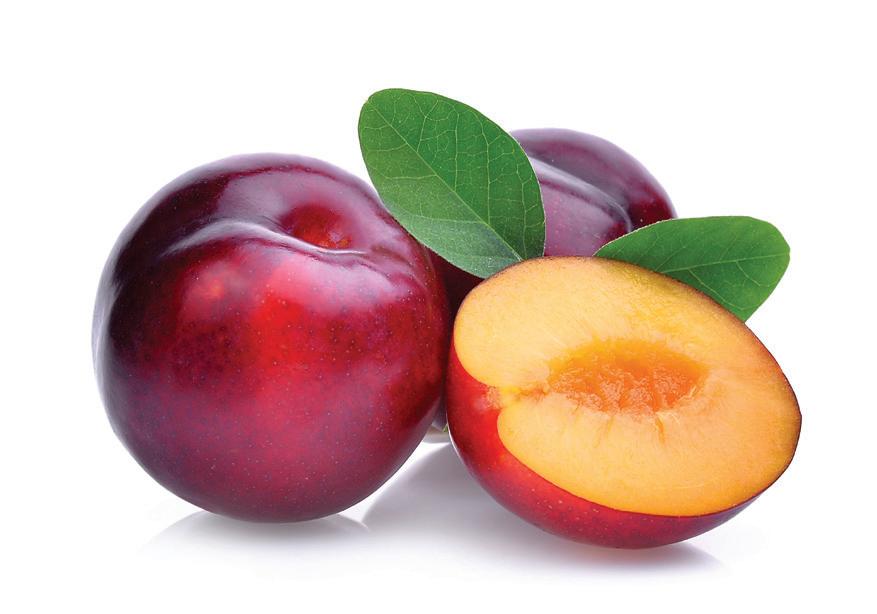
This particular wine came about after a friend with a few cherry plum trees in her yard called me and asked if I wanted some plums (she knew I made wine but also did not want to pick them up to mow around them).
After picking for half a day, I ended up with approximately 90–100 lbs. (41–45 kg) of plums. I washed them, pitted, halved, and froze them. After a couple weeks in the freezer and trying to research which yeast I was going to use, I thawed them into three separate batches using nylon mesh bags for easy extraction of fruit. Since I do not get YAN (yeast assimilable nitrogen) levels tested on my fruit wines, I count on recipes and trials. This was my first plum wine, which fortunately hit the mark on what I was looking for.
30 lbs. (14 kg) cherry plums (halved, pitted, frozen)
20 lbs. (9 kg) table sugar
~5 gallons (19 L) water
7.5 tsp. acid blend
5 tsp. pectic enzyme
5.9–9.5 tsp. Go-Ferm
(yeast-dependent)
2.5 tsp. Fermaid K
1.25 tsp. grape tannins
3.25 tsp. potassium sorbate
2.5 g diammonium phosphate (DAP) (divided for two additions)
80 ppm KMBS
Lalvin BA11, Laffort Zymaflore® Delta, or Laffort Zymaflore® VL1 yeast
This is a recipe for a single 5-gallon (19-L) batch, which I made three of at the same time as I had so many plums and used a different one of the three listed yeast strains for each one. I ended up blending the three batches together post-fermentation. Note that both Laffort strains are only sold in 500-g quantities. I love the strains and make enough that I purchase that much, but others may choose to stick with BA11 or find other yeasts to make their blends.
After thawing the plums and bagging them, I put the fruit in a bucket and added water up to 6.5 gallons (25 L), sugar, acid blend, pectic enzyme, and tannins, giving each batch equal amounts. After mixing well I added 30 ppm KMBS to each. The next day I checked my Brix levels to make sure they were all the same at 21 °Brix and adjusted as necessary. After my adjustments, I rehydrated each yeast:
Batch #1: Lalvin BA11 8 g yeast. Rehydrated yeast in 115 °F (46 °C) water with 9.5 g Go-Ferm. Added to must when the temperatures were within 20° F (11 °C) of each other.
Batch #2: Laffort Zymaflore® Delta 4.5 g yeast. Rehydrated yeast in 115 °F (46 °C) water with 5.9 g Go-Ferm. Added to must when the temperatures were within 20° F (11 °C) of each other.
Batch #3 Laffort Zymaflore® VL1 4.5 g yeast. Rehydrated yeast in 115 °F (46 °C) water with 5.9 g Go-Ferm. Added to must when temperatures
were within 20 °F (11 °C) of each other.
Each batch was fermented at 65 °F (18 °C). Twenty-four hours after yeast addition (after the lag phase) I added 2.5 tsp. Fermaid K to each batch. Since each of these yeasts had high nutrient needs I added 1.25 g DAP when each must was down to 15 °Brix.
On day five I removed the bagged fruit. By day nine the Brix was at 11, so I added the second 1.25-g DAP addition. Through fermentation, BA11 had a great flavor and beautiful nose of the plums. Delta had a little offflavor, but I wasn’t sure why. The VL1 batch had a nice plum flavor and nose, which I enjoyed better than Delta but not as much as BA11.
After each fermented to dryness, 50 ppm (or 1.64 g) KMBS was added. After racking until clear I added potassium sorbate and did sugar/acid/ finishing tannin trials and finally blending trials. All were a little high in acid so potassium carbonate was added to get acidity around 8 g/L.
The flavor on the BA11 was great just the way it was so I sweetened with sugar (I do not use simple syrup because I do not like the added water). I did finishing tannin trials with the BA11 batch but I thought it was good the way it was after lowering the acid and adding sugar. Both Batch #2 and Batch #3 trials of Laffort Quertanin Sweet proved that a 60-ppm addition was best in finishing tannin trials so 1.14 g was added to each. The BA11 batch was sweetened with 35 g/L of sugar, with the other two being sweetened with 30 g/L.
Then came the blending trials. Each one was good on its own but in the blending trial they really brought together a well rounded flavor, nose, and mouthfeel. I liked the full blending of each so I blended all 5 gallons (19 L) of each. After blending I cold stabilized at 32 °F (0 °C) for six weeks before bottling.
My love of wine began when I stayed in the small town of Gaioli in the Chianti region of Italy. Chianti led to the bigger bolder reds (I had the advantage of being able to drink lots of Chateau Petrus when it was affordable!). But age tends to mellow us and like many older “big, bold red wine” drinkers my tastes began to favor more fruitiness and acids over the years.
I started making wine in 2013 when a couple co-workers started brewing beer and invited me to join them. While I do not dislike beer, I prefer a nice glass of wine. I started with kit wines, studying what each step and each addition was meant to do. After a couple kit wines I began adjusting the kits (especially timings and dropping the fining agents and replacing them with longer bulk aging). Before long I was buying juice from local wineries, frozen pails, and ultimately began growing a small number of my own vines (Marechal Foch and Traminette).
My blueberry/blackberry wine is made from blueberries and blackberries I harvest from bushes in my backyard. The blueberry bushes were planted by an earlier owner over 70 years ago and the blackberries were provided some years ago by a helpful bird who deposited the seeds along my yard’s perimeter. When life gives you berries, make wine!
I have made 100% blueberry wine several times over the years and have found that a little watering down really made it into a wonderful summer wine. Adding the blackberries gives the wine a bit more depth and character. I was a little worried about the combination when making my first batch of blueberry/blackberry wine, but was so pleased with the outcome I don’t think I will do 100% blueberry wines again.
13 lbs. (5.9 kg) blueberries
10 lbs. (4.5 kg) blackberries
~9 lbs. (4.1 kg) table sugar
~4 gallons (15 L) water
2.5 tsp. pectic enzyme
2.5 tsp. acid blend
1 tsp. wine tannin
1 tsp. yeast nutrients
Lalvin EC-1118 yeast
5 Campden tablets (may need more to adjust SO2 levels)
2.5 tsp. potassium sorbate
Table sugar to backsweeten
STEP BY STEP
I pick my own berries and freeze them since they don’t all ripen at the same time. Freezing the berries has the added benefit of breaking down the cell walls so they give up their juice much quicker. You will want more blueberries than blackberries as blackberries have stronger flavors and can overpower the blueberry quickly. I’ve found that a 60/40 blend results in a wine that expresses both the blueberry and blackberry flavors.
Place the thawed berries in a muslin bag and add them to a fermenter. Add around 4 gallons (15 L) of water to bring the total volume in the fermenter up to 5 gallons (19 L). Make a simple syrup with the sugar and as little water as necessary and add enough to bring up the specific gravity to 1.092 (about 9 lbs./4.1 kg). With the must in the mid-70s °F (~23 °C), add the pectic enzyme, acid blend, wine tannin, and yeast nutrients. Let the mixture soak for 24 hours Rehydrate the yeast as recommended and add it to the must.
Blueberries can be difficult to get a good fermentation going as their skins contain enzymes that seem to inhibit fermentation. I have found yeast nutrient is a must when fermenting blueberries. Rehydrating the
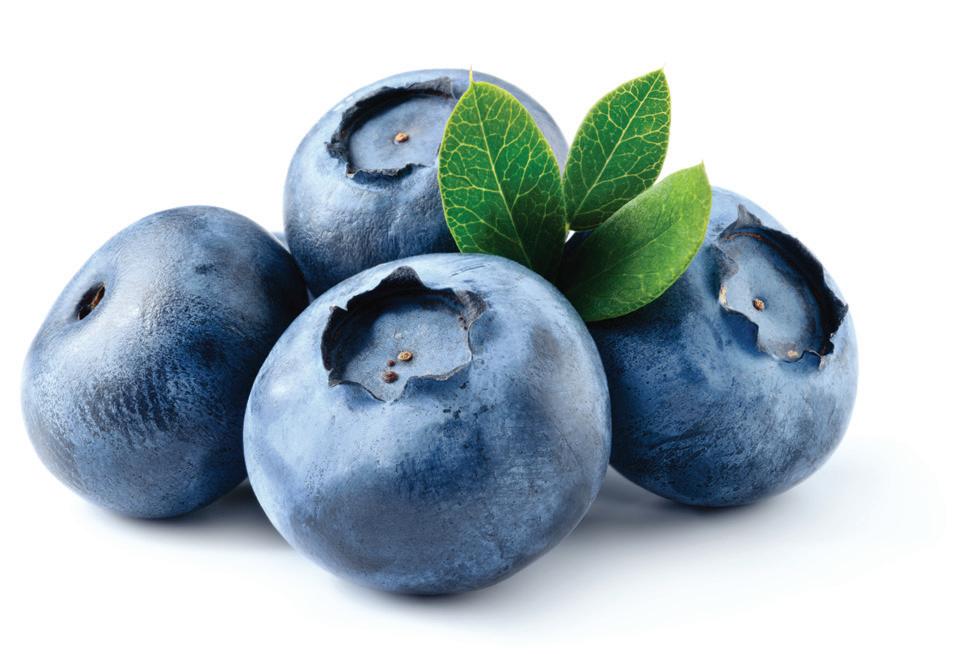
yeast prior to pitching also helps a lot.
Once fermentation is well under way (about 24–48 hours) move the must to a slightly cooler spot. My basement wine room is about 67 °F (19 °C) year-round so I move it there. Allow the fermentation to complete (mine took 17 days).
Remove the berries, pressing the muslin bags lightly to extract any remaining juice. Let the wine sit for a few hours to allow any sediment stirred up by the berry removal to settle to the bottom. Rack the wine off of the sediment and add 5 Campden tablets. Allow to sit for a month to clear.
After a month, rack off any remaining dead yeast or sediments. Test SO2 and add Campden or potassium metabisulfite to bring to 30 ppm. Degas the wine to help further clarify the wine.
After another month (or until the wine is totally clear), perform a final racking. Test for SO2 and add Campden or other potassium metabisulfite to bring back to 30 ppm. Add 2.5 tsp. sorbate and let sit for 24 hours.
Fruit/berry wines really need a little sweetness to bring out the flavor of the fruit. I do bench trials to decide what sweetness level tastes best with the berries I have. I have found backsweetening with simple syrup to bring the specific gravity back up to 1.014 tastes best to my palate.
It is important to backsweeten in stages and taste/remeasure along the way. The perception of sweetness can climb quickly and it is always easier to add more sugar than compensate for too much sweetness.
Bottle the wine once it tastes the way you like. I aged this wine eight months in bottle prior to submitting it for competition. If you are going to bulk age, do this prior to the final racking/backsweetening stage.
I got into winemaking because I had so much more fruit than I could eat. Four years ago, a colleague suggested making fruit wine and got me started. After that, I was hooked! I have loved pomegranates since I was a kid. We have three pomegranate trees in our yard – Kashmir (dark seeds with an intense sweet-tart taste), Parfianka (bright red seeds with sweet wine flavors), and Ambrosia (pale pink seeds with a light, sugary taste). To make the pomegranate wine, I mix all three together.
At a Contra Costa Wine Group (CCWG) club event, one of our members (Bob Joakimson) brought in his award-winning chocolate milano raspberry wine. One taste of it and I thought — THAT’s what I need for my pomegranates! I cornered Bob and pumped him for his recipe, and (after much experimentation) used a variation of it in this pomegranate wine. Chocolate and pomegranates are so lovely together!
1 gallon (3.8 L) pomegranate juice extracted from the seeds (Note that the juice will contain some sediment that is difficult to separate. It is easier to just leave it in the mix and rack off the must later.)
0.5 cup organic raisins
3 strong black tea bags and half cup of water
~1.75 lbs. (0.8 kg) granulated white sugar
~3 cups water
~0.5 tsp. acid blend powder
0.5 tsp. pectic enzyme
1 crushed Campden tablet
1.2 g Lysozyme (divided: 0.4 g + 0.8 g)
1.25 g Go-Ferm
Lalvin K1V-1116 yeast
1 g Fermaid K
Bentonite and Sparkolloid
1 crushed Campden tablet
0.5 tsp. potassium sorbate
1 cup brandy
1.75–2 cups sugar (depending on your sweet tooth)
0.67 cup Chocolate Milano Torani syrup
STEP BY STEP
Heat up half a cup of water and add 3 tea bags of strong black tea. Let it steep 5 minutes or more. Remove tea bags and add raisins that have been rinsed and strained. Let the raisins sit in the hot tea water until they plump up and are soft (several hours or more). Mash up or blend to make a “raisin mash.”
Dissolve the crushed Campden tablet in a small amount of water and add to the pomegranate juice in the primary fermenter. Wait 12 hours then dissolve the pectic enzyme powder in a small amount of water and mix into the must. After 12 hours, prepare the next additions.
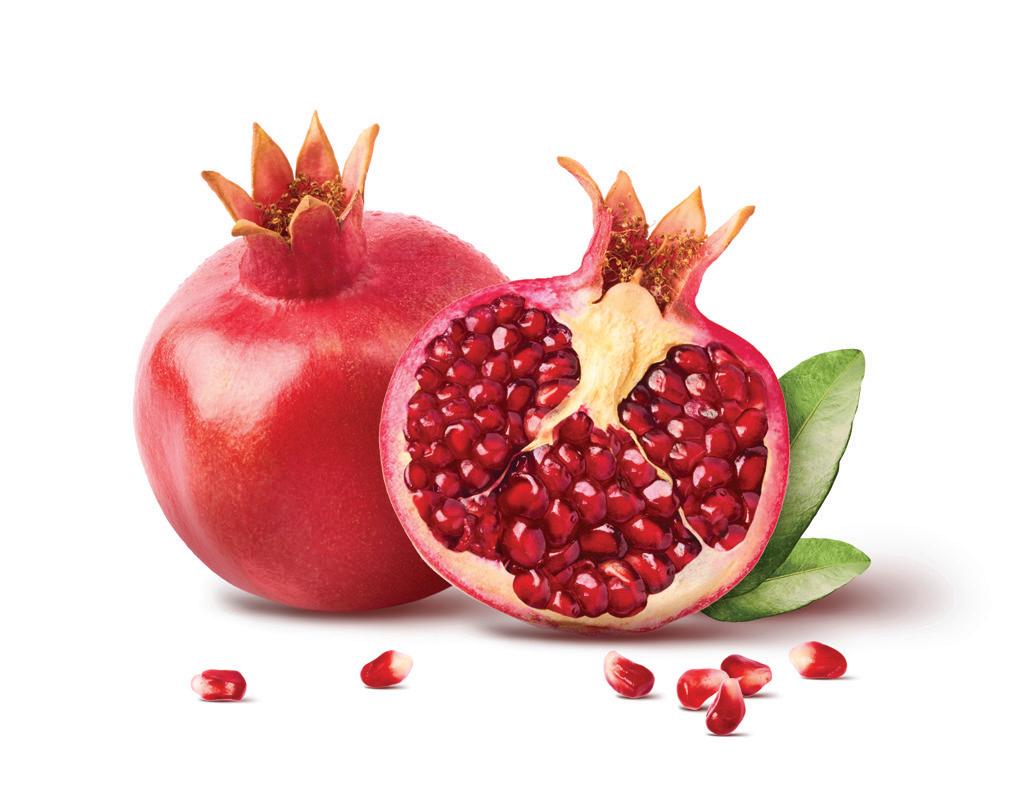
Gently sprinkle 0.4 grams of the lysozyme over a quarter cup of water and let sit without stirring. Stirring the lysozyme will cause it to form an undissolvable blob — NOT what you want! Have patience — it may take several minutes to fully dissolve.
Heat 3 cups of water until hot (120 °F/49 °C or more), and slowly add in the sugar while stirring. Keep stirring until all of the sugar is dissolved. Allow to cool and then add to the must.
Add the raisin mash to the must. Dissolve the acid blend in a small amount of water and add it to the must. Stir well and measure the Brix and pH, and adjust as needed. Aim for 21 °Brix and a pH of 3.5.
Make the yeast starter with the
GoFerm and yeast (following package directions). When ready, acclimate the yeast with a little of the must. Add the fully dissolved lysozyme to the must, stir, then pitch in the yeast and stir well. Stir daily during fermentation. After two days, dissolve the Fermaid K in a small amount of water and then stir it into the fermenting must. After another two days, dissolve 0.8 grams of lysozyme in a half cup of water (without stirring). When fully dissolved, add to the must and stir. When fermentation slows to a crawl (1–2 days later) rack into the carboy and fit with an airlock. Rack again every month or so, leaving the sediment at the bottom behind. After a few months you can fine with bentonite first, then wait another month and fine/polish with Sparkolloid. When the wine is crystal clear it is time to begin the backsweetening process.
Dissolve the crushed Campden tablet in water and add to the wine. Dissolve the potassium sorbate in water and add it to the wine. Mix, cover, and let sit for one day.
Conduct bench trials with the brandy, sugar, and chocolate Milano syrup additions. When you find the right amounts for your taste, add each to the wine. Mix and taste the wine and adjust as needed to reach that “perfect balance” (this is the tricky and fun part — invite friends over to help!). The final ABV of the wine after fortification should be around 13%. When ready, bottle the wine and serve chilled.
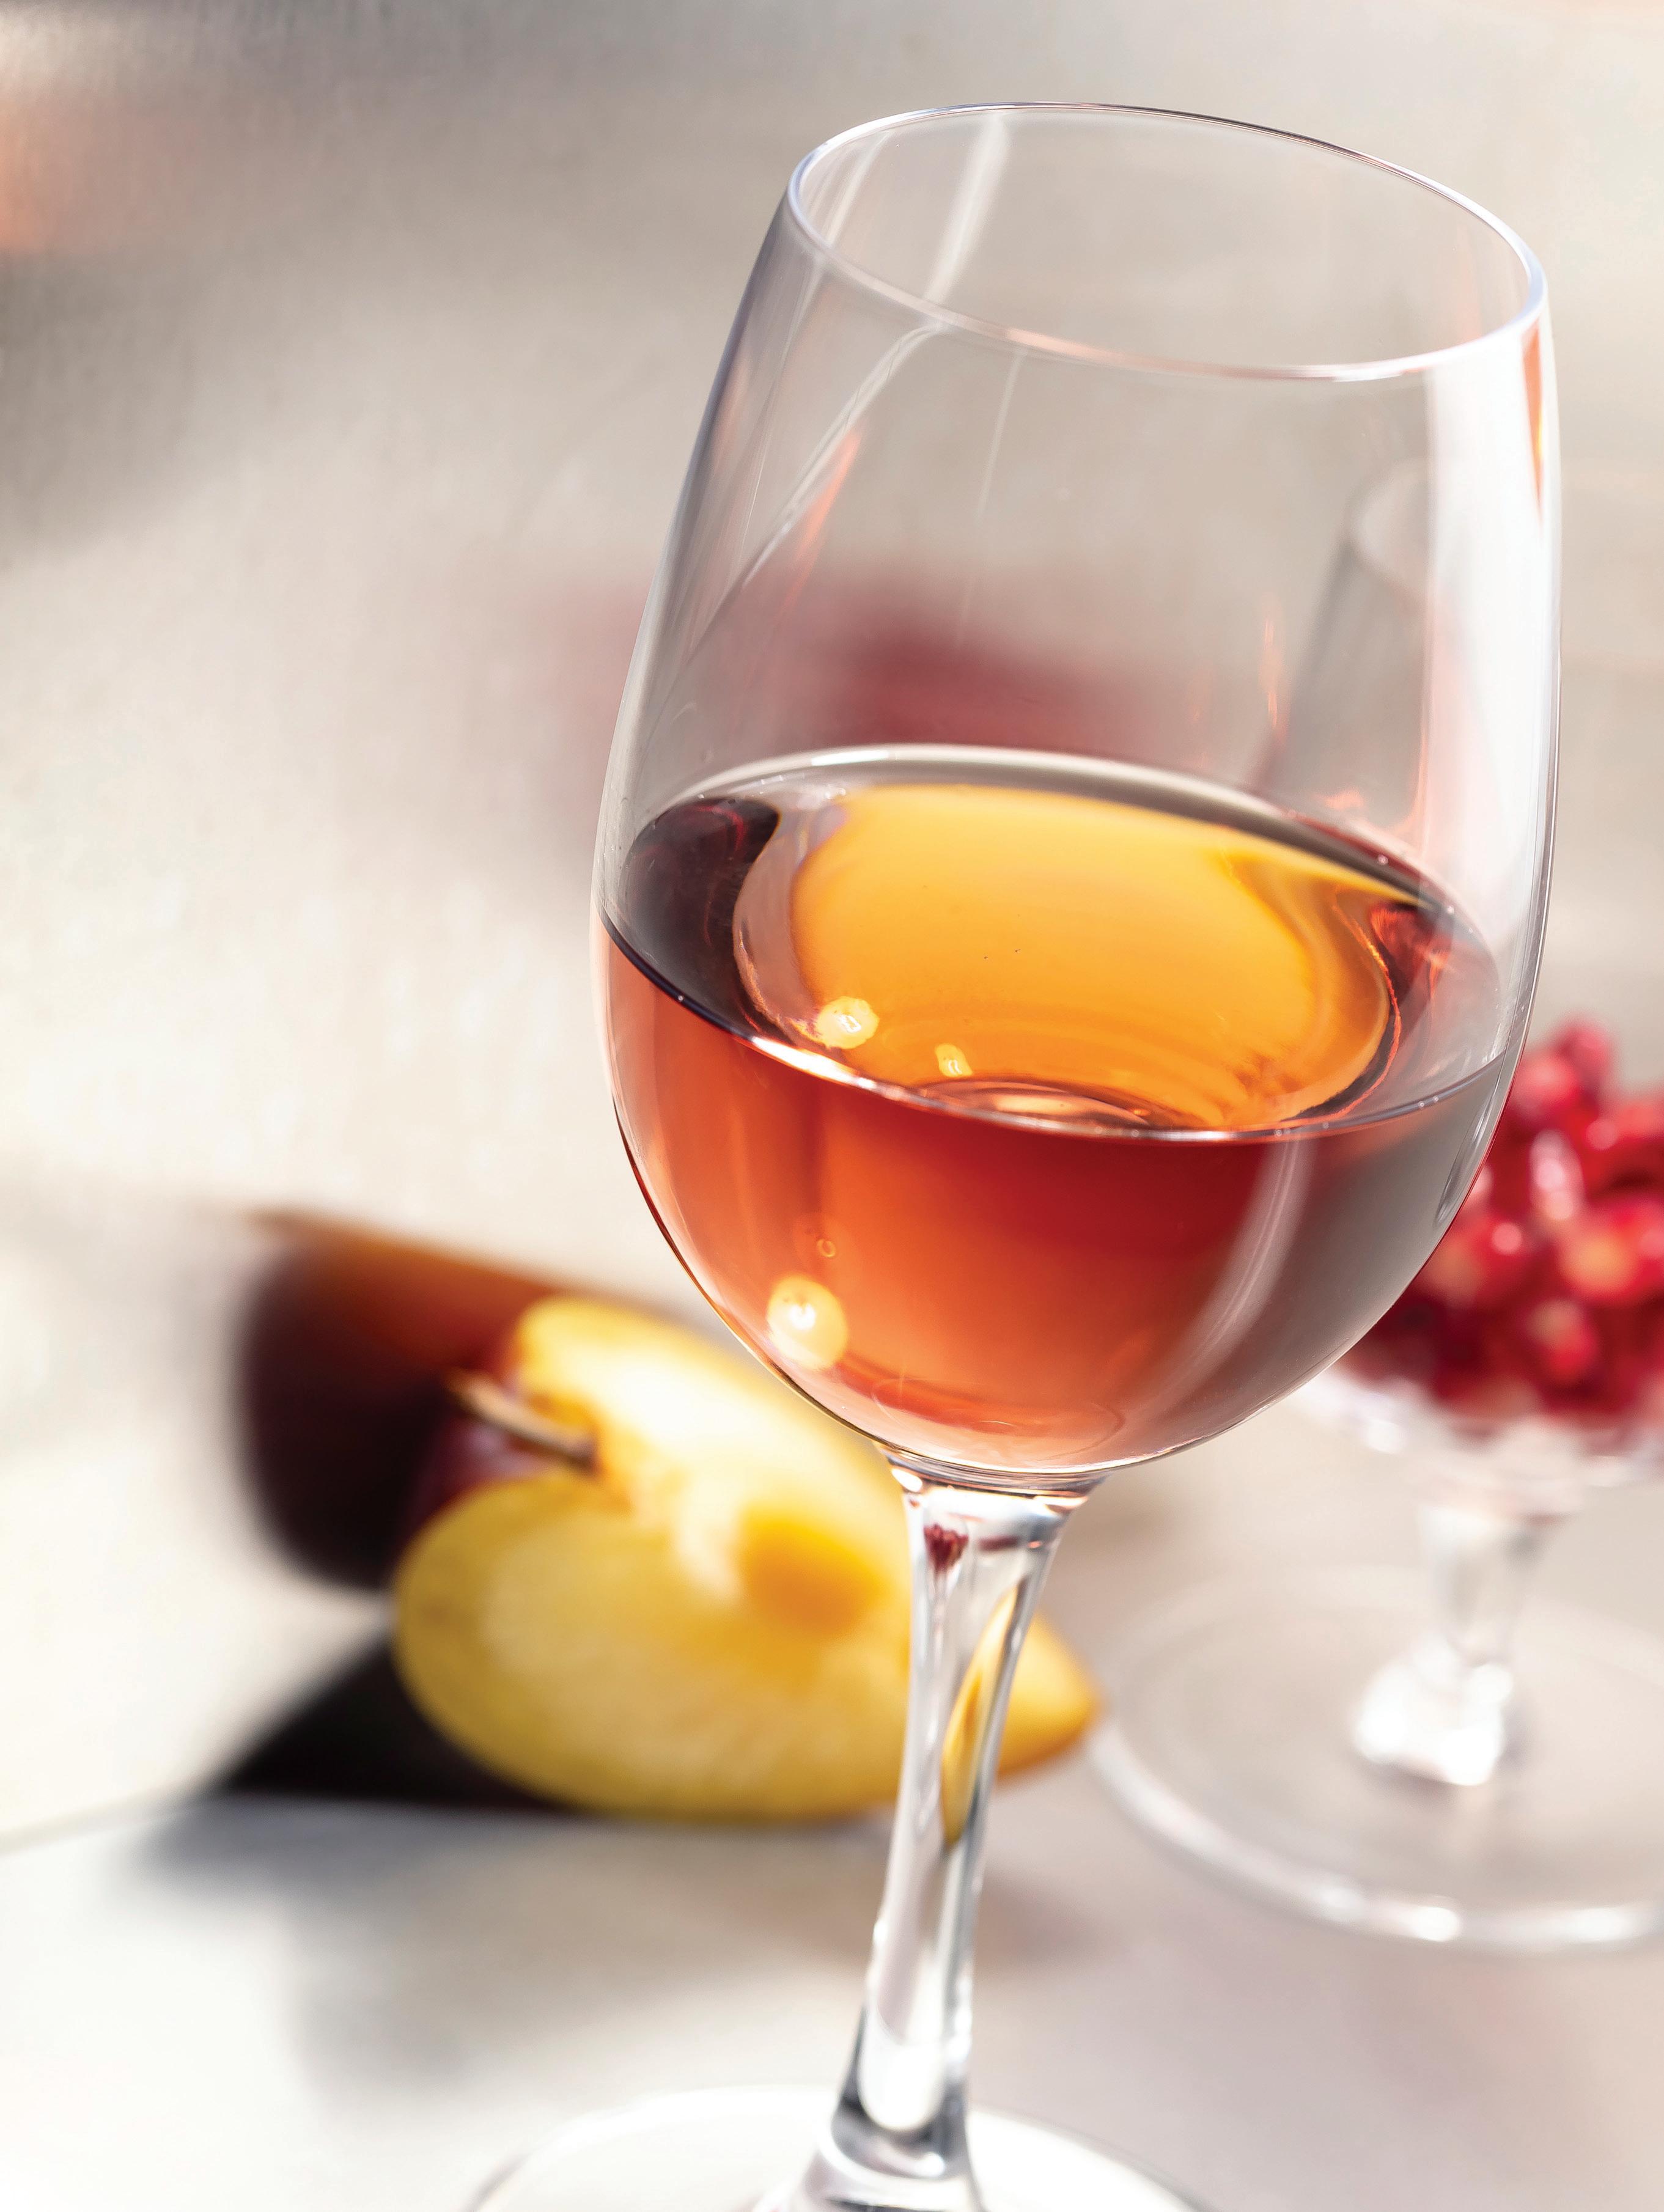
ine, by definition, is made from grapes. So wine made from other fruits isn’t technically wine (it is fruit wine). Like most winemakers over the past thousand-plus years, I used to believe that to make the best quality wines you needed to use grapes. That changed when I moved to Finland and began working with berries and other native fruits.
It turns out that if you think about your ingredients the way winemakers typically think about grapes, it is possible to make fruit wines of a quality that can compare to the best traditional wines.
After 20 years of making wines, I’ve realized there are two key rules you need to follow if you want to make the best quality wines, and these rules apply equally well to wines made from grapes or from any other type of fruit:
1. Use the best quality fruit you can find for the type of wine you want to make.

2. Don’t ruin it.
Typically, rule #1 is the harder one to follow, as the best quality fruit is really difficult to source, but it is absolutely critical if you want your wines to achieve greatness. And while the process of finding the best fruit is beyond the scope of this article, I strongly urge you to make an extra effort. I am still amazed at how often I hear people disparage fruit wines after they tried to make it using excess garden harvest because it “wasn’t eating quality.” If the fruit was inferior, wine made from it will be too.
Also, please note the “for the type of wine you want to make” part of the first rule. Don’t try to make a claret from Chenin Blanc — it won’t work. I am the winemaker at Ainoa Winery in Finland, which is best known for berry dessert wines. Why? Because the intense flavors and high acid in Finnish berries are ideal for creating incredible dessert wines but can fall short when made in other styles.
Rule #2 is the focus of this article, and for obvious reasons I will mainly talk about dessert wines.
Typically, fruit wine recipes I’ve seen start by listing how much fruit to use per gallon or liter of wine, plus how much water, sugar, yeast, yeast nutrients, acid blend, and other ingredients you need to mix in a bucket. To my surprise, I’ve often seen the exact same recipe and method recommended for different fruits, with only minor adjustments. That never made sense to me. Every wine I make — both recipe and exact method — is built from the ground up to create a balanced and delicious wine. The way I go about that boils down to a particular way of looking at things. However, it also means the advice I am giving might not be precise for any particular wine, and I apologize for that in advance.
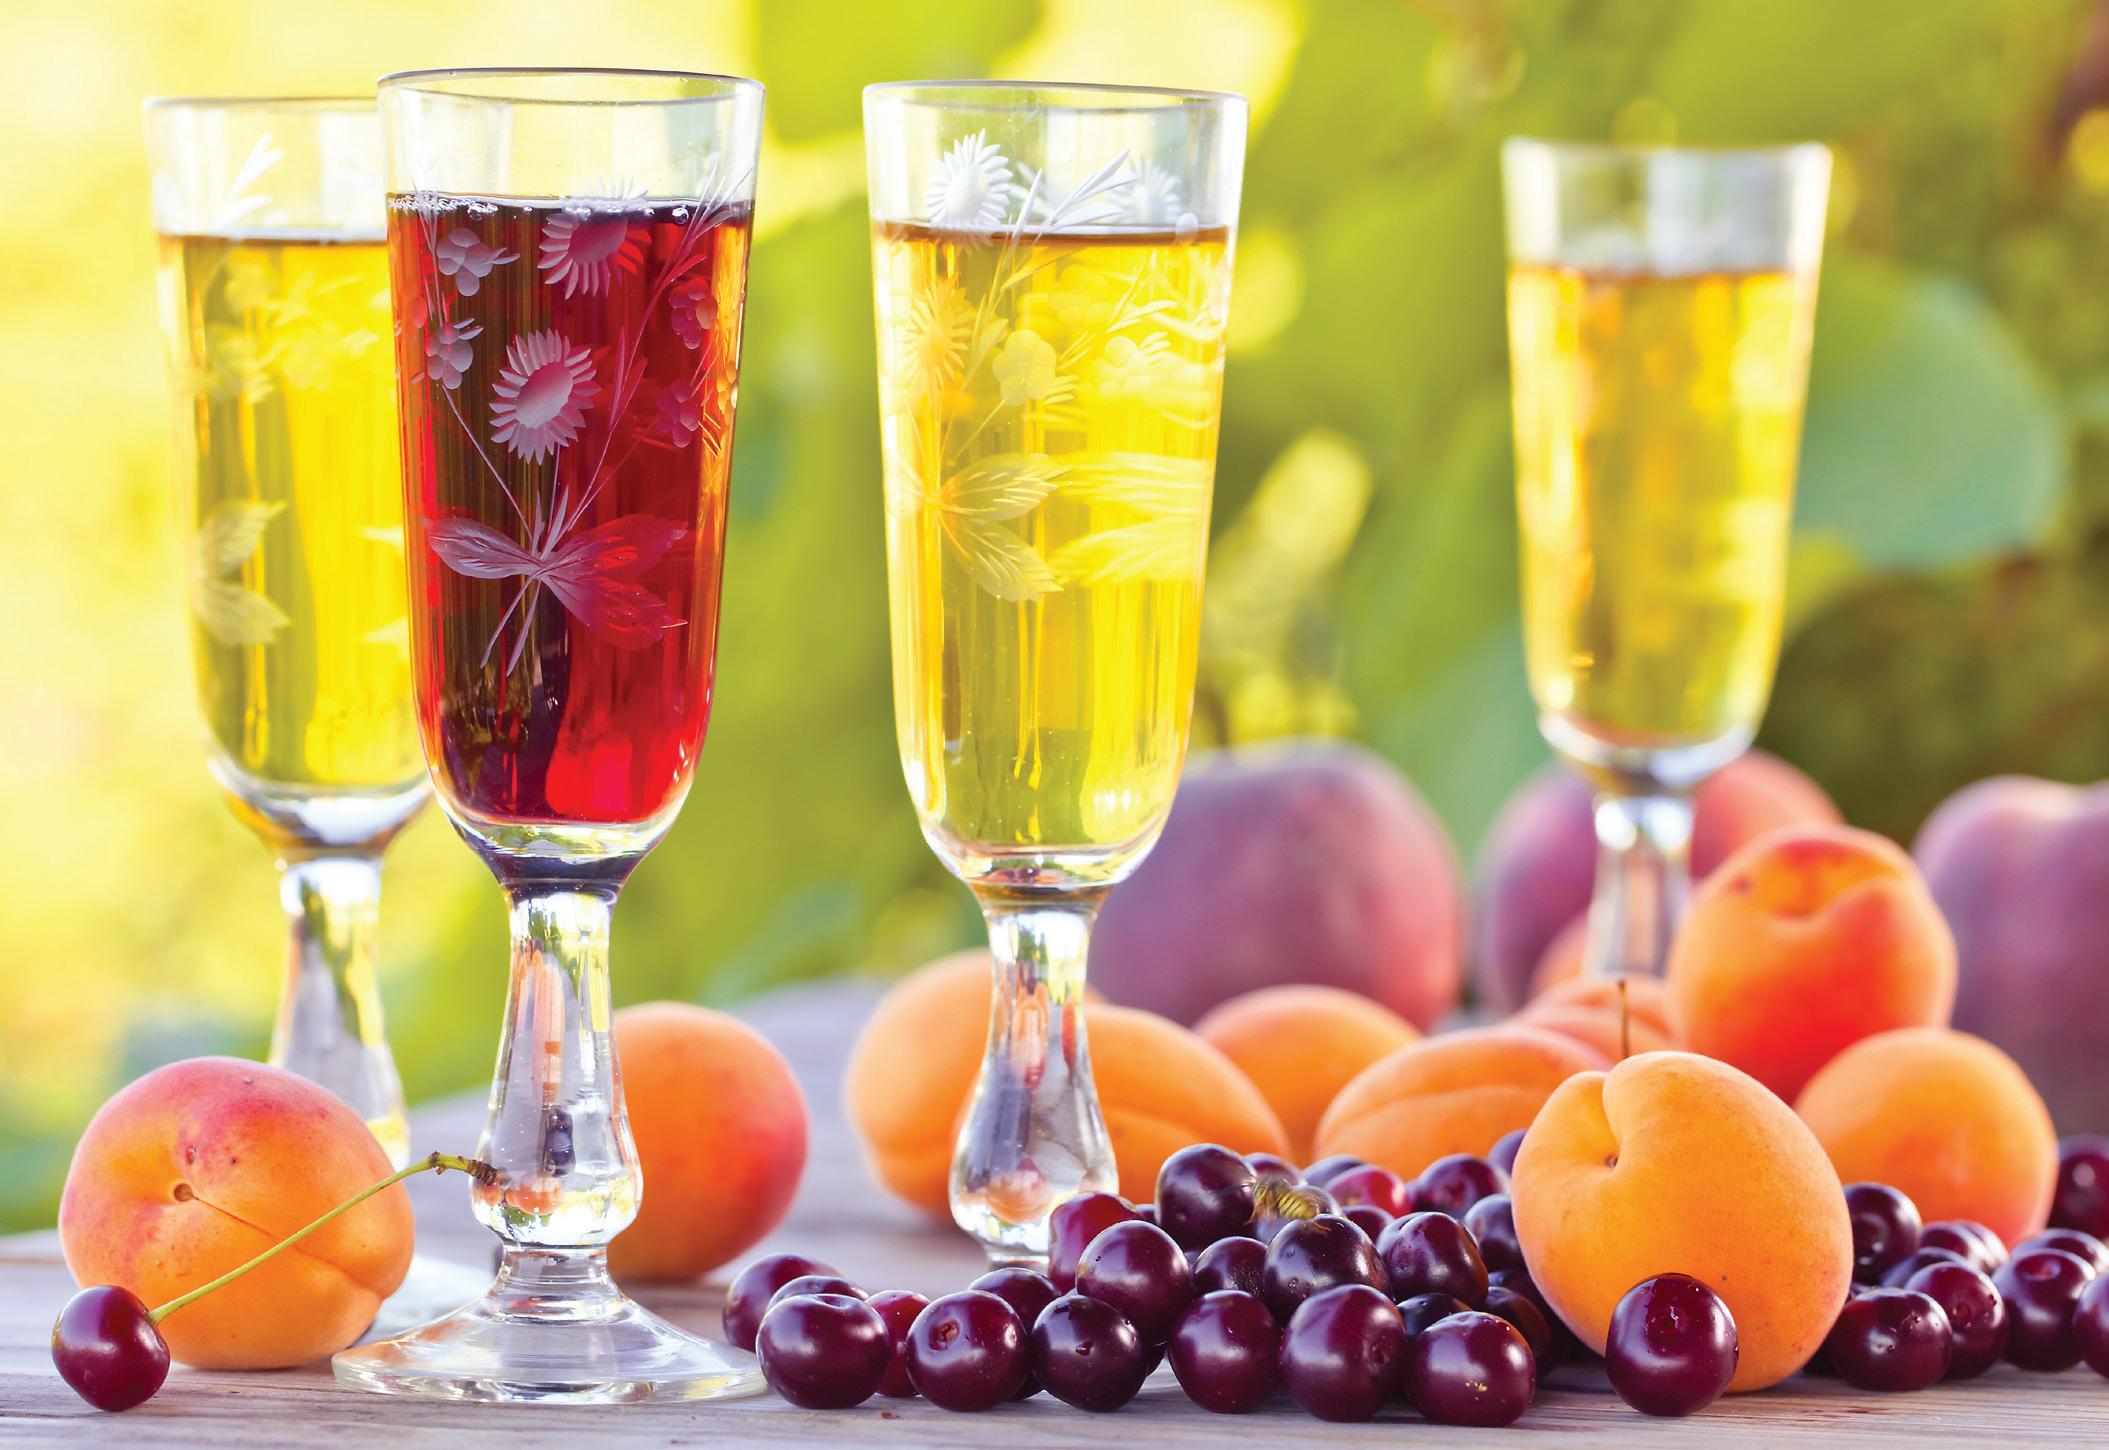
My usual starting point is fruit concentration. How many pounds of fruit to use per gallon of finished wine? How that is handled has a huge impact on the wine. With grapes, the answer is generally 2.2 lbs. (1
kg) per 750-mL bottle. With berries, I’ve found it can vary tremendously, ranging from under a pound to over two (0.5–1 kg) per 750 mL, as some berries are a lot less juicy than grapes. Other fruits can vary even more. A lot of fruit winemakers will use lower levels of fruit, but there are negative consequences in doing so. As you use a higher percentage of water, the body, taste intensity, and length of finish will decrease. The wine will also tend to be less complex. For these reasons, I usually try to minimize the water used. There are a few valid reasons though to add water to fruit wines. Sometimes the flavor intensity of the pure fruit is too much for the type of wine you are trying to make, and using some water will result in an easier drinking wine. Adding some water is also the easiest way to decrease high acid levels, and if you are going to chaptalize (add extra sugar) before fermentation to bring up the potential alcohol content, it is generally easier to mix in if you dissolve the
sugar in hot water first.
Target acid level is next once you have your fruit concentration. How much acid should you add? My answer is almost always “none,” but I tend to work with berries that naturally have moderately high acid levels. The typical titratable acidity (TA) target range for red grape wines is 6-8 g/L, and white grape wines are 7–9 g/L. For berry dessert wines, the range expands in both directions, depending on how the acid plays in the profile. Usually they end up a bit higher than for grapes; sometimes a lot higher. I’ve had wines with TA levels up to 14 g/L that have nevertheless been balanced due to the final alcohol and residual sugar levels. But sometimes you will need to moderate things. Blending with a second ingredient to push the total acidity in the direction you want is the best way to proceed. Neutralizing a portion of the acid with calcium carbonate or some other deacidifying treatment can also work. And lastly, further dilution can be considered, but
be aware of the negatives that brings.
If you are working with a fruit or vegetable that doesn’t have enough natural acidity then you will need to add some. Rather than just using acid blend, try to use acids that match the fruit’s profile. Tartaric is the main acid in grapes but is present in few other fruits. Malic acid works well for apples and a few other fruits, but citric is the main acid in most fruits and berries, so adding some lemon juice can provide that.
Alcohol and sugar are next. The “sweet” spot for fruit wine alcohol levels tend to be at or slightly lower than for grape wines, usually from 9–13% ABV, meaning starting Brix between 16–23. No fruit I work with naturally has enough sugar to get to that, so I always chaptalize. For home winemaking, I would add just enough sugar to ferment dry to the alcohol level you want (see the sidebar to the right for how this is determined). If your target style is sweet, it is easier to backsweeten the finished wine than to arrest fermentation at a target level without the right equipment.
Finally, you need to consider yeast, yeast nutrients, and additives. Some fruits are quite difficult to ferment and have compounds that naturally inhibit yeast activity. If you are working with something like that, pick a very robust yeast strain like one used for Champagne, and use high levels of nutrients. Otherwise, you can pick a strain that brings out the kind of characteristics you are looking for and use normal recommended levels of nutrients. Nutrients should be blends, not simply diammonium phosphate (DAP), as fruits may lack essential amino acids or vitamins that grapes usually have in abundance. Not all fruit have pectin, but many do and adding some pectolytic enzyme will clear out the pectin haze that would result without it.
Most of the wines I make are done using maceration of the whole fruit during fermentation. This red wine method is usually thought of as a way to extract color and tannins into the wine, but for berries there is an even
To calculate how much sugar to add for chaptalization, you need to first determine three things:
1. How much sugar is naturally present in your fruit.
2. What is the volume of wine you wish to make?
3. What is your target alcohol level?
Note that it is MUCH easier if you use the metric system (liters of wine and kg of sugar) to make this calculation.
To determine the amount of sugar in the fruit, use a refractometer and measure Brix. As Brix is a measure of the percent sugar in the fruit juice, simply multiply the weight of the fruit (in kg) by the measured Brix divided by 100. That gives you the kg of sugar present.1
Example: 10 lbs. fruit (4.55 kg) with a Brix of 6.0 has 4.55 x 0.06 = 0.27 kg (0.6 lbs.) sugar in it.
Next, calculate how much sugar in total should be present before fermentation. The first time I make a wine, I assume it will ferment to a specific gravity of 0.998, which is almost never right, but also isn’t usually very far off as many fruit wines will finish fermentation at a higher specific gravity than most grape wines achieve.1 I then calculate total sugar content needed based on a table such as detailed below:
I then calculate how much sugar total should be present before fermentation. For example:
Target volume is 5 gallons (18.9 L). Target ABV = 12, so starting Brix should be 20.5. Total sugar needed = target volume multiplied by starting Brix divided by 100. So, 18.9 x 20.5 / 100 = 3.87 kg sugar.
The amount of sugar to add is equal to the amount already in the fruit subtracted from the total amount needed. So in the example above, 3.87 kg – 0.27 kg = 3.6 kg to add (7.9 lbs.).
1 Note that these calculations ignore some minor factors and make some assumptions that may not be correct in all cases, but usually result in a value that is “close enough” for a first try. Keep detailed notes as you make a wine for the first time and it is easy to tweak things to hit your targets more precisely the next time you make the wine.
more important reason. Most of the flavor is in the skins, not in the juice, and the maceration process works to better extract those flavors. It also can extract some tannins, which will give the wine structure and prevent it from feeling like you are drinking alcoholic fruit juice. Be aware that the process details I’m about to lay out may need to be modified depending on your fruit, but to follow is a basic process I often use (adjusted for small batches):
1. Prepare fruit (chop, crush, remove pits, or anything else needed) and place in loosely filled sanitized mesh bags in a sanitized bucket. Tightly fit a lid with an airlock.
2. Dissolve sugar, nutrients, and pectinase in water, then pour this solution over the fruit.
3. Mix well, measure Brix, TA, and pH. Make adjustments if needed.
4. Pitch yeast, and make sure the temperature stays in the yeast’s recommended range throughout your fermentation.
5. When fermentation nears completion, but is not yet finished, separate the liquids from the sol-
ids. You can do this by pulling the mesh bags out of the bucket and allowing the liquid to drip out. Depending on the fruit, you might also be able to press more out by squeezing the bags with your hands. Note that “pressing” generally introduces some oxygen to the wine. If you press when the yeast is still active, the yeast will consume much of that oxygen, which will help the yeast finish more strongly and possibly reduce the chance of the wine oxidizing early.
6. Allow the fermentation to finish, then rack off the gross lees into a sanitized bucket, jug, or carboy of a size that matches the wine. Minimize headspace to prevent oxidation. Stir in 1 crushed, dissolved Campden tablet per gallon (3.8 L).
7. Allow to rest for a month or two and then rack the juice off of the fine lees.
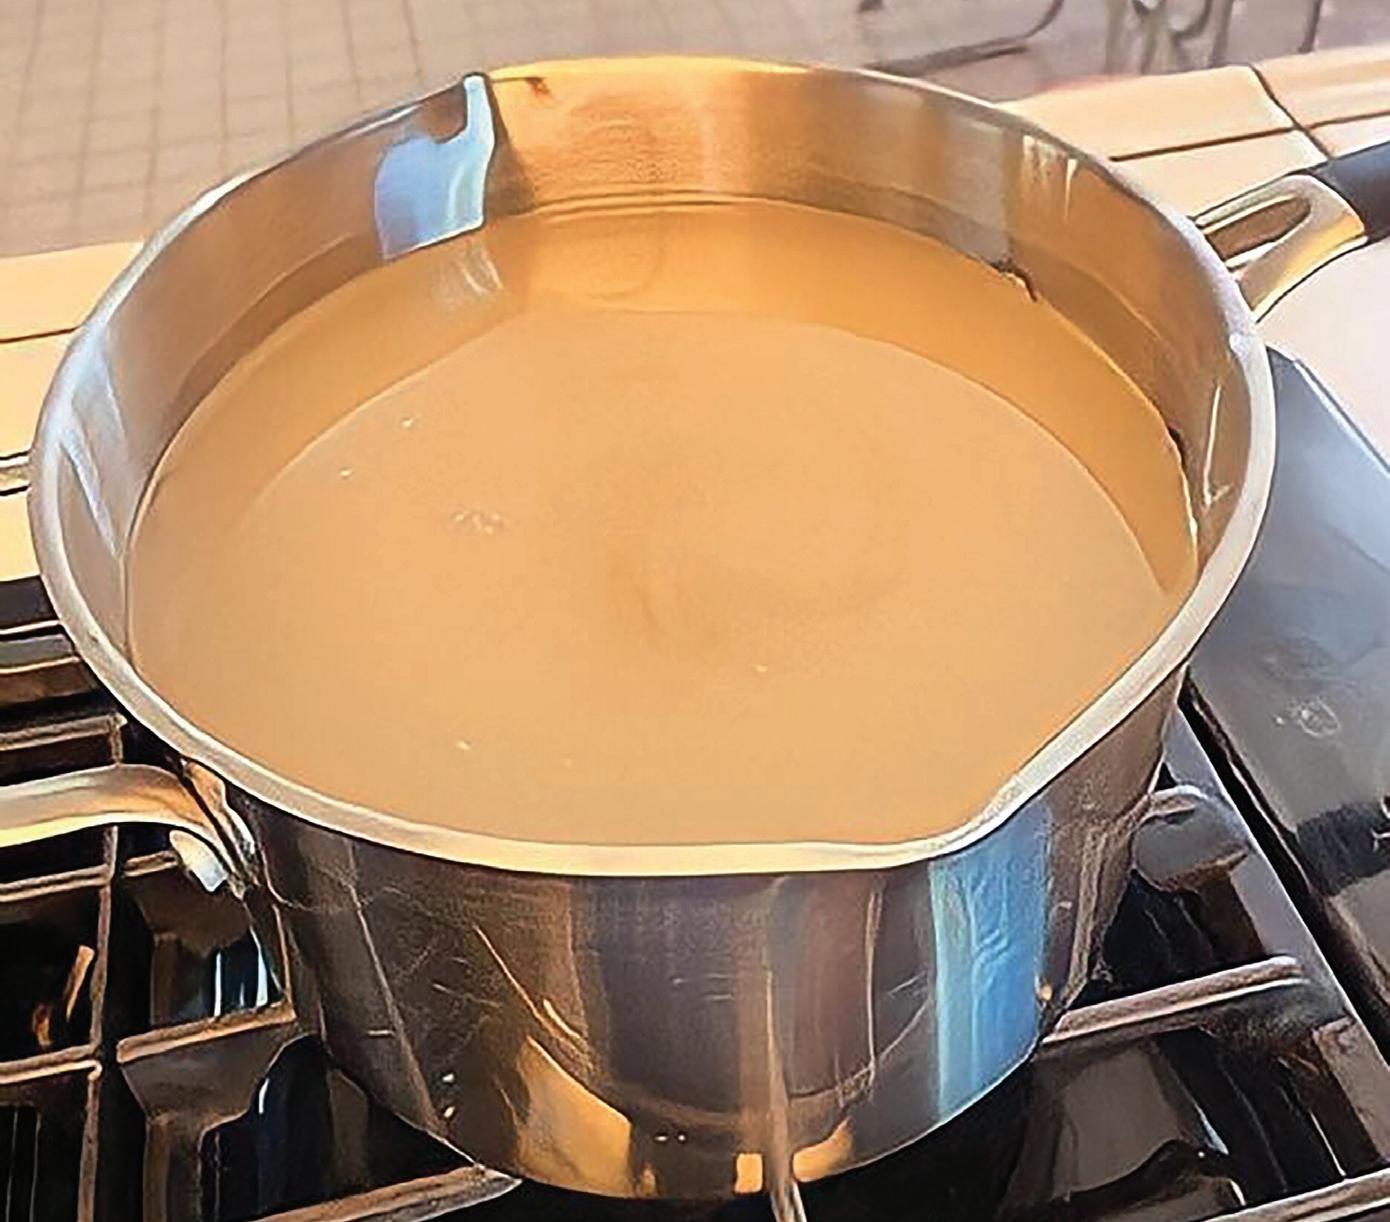
8. Allow to rest an additional one or two months. Usually another racking is needed at this point, but it is also a good time to taste a sample and determine if the wine
is mature enough for bottling. If not, then rack, add another Campden tablet per gallon (3.8 L), and leave a month or two more. When you think it is ready, proceed to the next step.
9. Backsweeten if desired. It is strongly recommended that you conduct bench trials to ensure you add the right amount of sugar. Not enough and the wine won’t be balanced, but too much is even worse. Usually wines with higher acid need more sugar. As an example, Ainoa’s dessert wines mostly range from 110–140 g/L of residual sugar.
10. Rack to a sanitized container, then fine and filter if desired. These steps are entirely optional, and typically contribute to the aesthetics of the wine more than the taste profile, but there are some wines that can benefit tremendously on the palate by filtration. It can give them a cleaner, more intense character that goes well with lighter wine styles, especially blush wines such as Ainoa’s spiced lingonberry wines or most wine cooler styles of wines.
Including a recipe for this article turned out to be difficult, as most of the fruits we use at Ainoa do not grow in North America. Cloudberries and lingonberries can be found in arctic regions, but that doesn’t help most WineMaker readers. Bilberries (a relative of blueberries) are only found in Europe, and even the raspberries and strawberries we use are varieties that are significantly different than what is found in North America. But Damson Plums (locally known as “kriikuna”) are the same.
We only make small amounts of this wine, as the fruit for it is provided to us by neighbors in our village of Miekkiö who have too much and want to see the surplus put to good use. When picked at peak ripeness, these plums make a magnificent sweet wine of about 15% ABV that is perfect to serve in the holiday season.
8 lbs. (3.6 kg) Damson plums, fully ripe but with no rot
2.5 lbs. (1.1 kg) sugar for chaptalization (fructose or granulated white sugar will work)
5 pints water to dissolve sugar
5 g Red Star Côte des Blancs yeast (a 5 g packet is enough for up to 6 gallons of wine)
10% sulfite solution. Dissolve 10 g Campden powder in enough water to make 100 mL. Store in a tightly sealed container.
Go-Ferm (or equivalent yeast starter) Use 1 g Go-Ferm per 1 g yeast.
2.5 g Fermaid K (or equivalent yeast nutrient)
1 g diammonium phosphate (DAP)
1 g bentonite
0.5 g gelatin
1 g potassium sorbate
~14 oz. sugar for backsweetening
OTHER EQUIPMENT OR NEEDS
Bucket that is at least twice as large as the recipe volume, with a gasketed hole in the lid for an airlock
1. Clean and sanitize all your winemaking tools, supplies, and equipment.
2. Slice plums and discard pits. Pits of stone fruits contain trace amounts of cyanide, and while it is unlikely to concentrate to dangerous levels in your wine, don’t take chances.
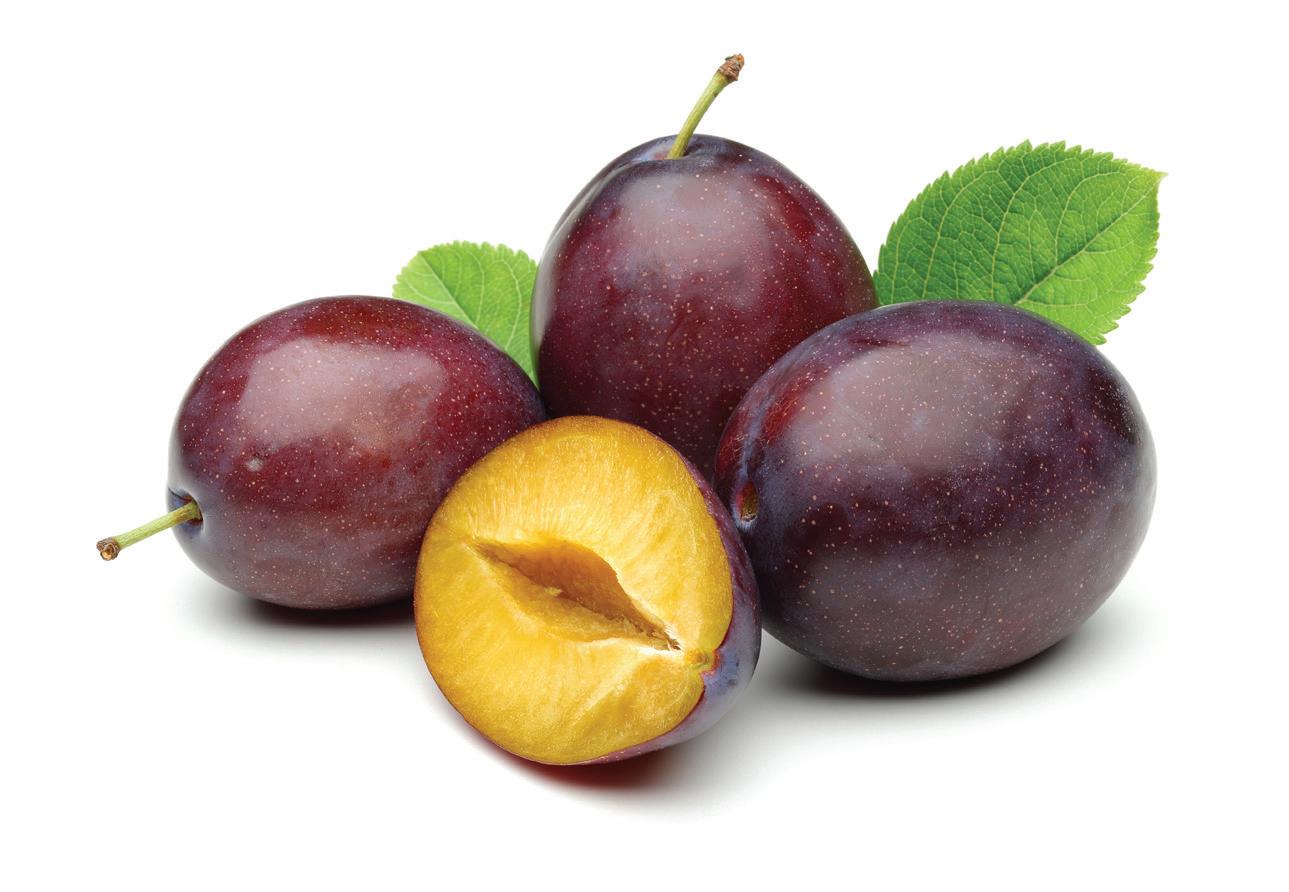
3. Place flesh (including skins) of plums in mesh bags. Fill loosely (maximum half full) as many bags as needed, tie closed and place in your fermentation bucket along with any juice.
4. Dissolve sugar in water, then mix in the Fermaid K and 3 mL 10% sulfite solution. Pour over fruit in bucket, then stir to make sure sugar water and juice are mixed.
5. Prepare the yeast. Heat 50 mL water to 108 °F (42 °C) and mix in the Go-Ferm. When temperature is approximately 104 °F (40 °C), sprinkle the yeast on the surface and then mix so no lumps remain. Wait 15 minutes, then add 15 mL of juice from the bucket. This will acclimate the yeast to the temperature of your must. Wait another 15 minutes and measure the temperature of the yeast and the temperature of the must. If the difference is more than 15 °F (8 °C), repeat with 15 mL more juice. Once the temperature difference is within 15 °F (8 °C), add the yeast to the fermenter.
6. Seal the lid on the bucket and affix airlock.
7. Monitor to determine when fermentation starts. When it does, punch down the must at least once per day, but preferably two times
8. Two or three days after fermentation starts, dissolve the DAP in a little water and mix into the fermentation bucket.
9. Monitor fermentation. When SG = 1.010 or less, “press.” This means removing the mesh bags of fruit from the bucket, allowing as much of the liquid to drip out into the bucket as possible, and then gently squeezing to get more juice but as little solids as possible. Reseal bucket and continue to monitor the fermentation.
10. When fermentation finishes (SG = 0.998 or less, and stays the same for at least two days), rack wine to a sanitized jug. Use extra jars if needed to handle more volume. Measure pH and sulfite levels, then add an appropriate amount of 10% sulfite solution using the sulfite calculator at www. winemakermag.com/sulfitecalculator (this is usually about 55 ppm/1 Campden tablet per gallon/4 L). Allow to rest
Glass jug or carboy that matches the recipe volume size, plus smaller jars to hold extra during process
Bung and airlock for the carboy
Nylon mesh fruit bag(s)
Hydrometer and measuring cylinder
Racking hoses
Ability to maintain a fermentation temperature of 60–65 °F (16–18 °C)
Scale able to measure 0.5 g increments
Pipettes with the ability to add in increments of 1 mL
pH strips or meter, sulfite measuring system
undisturbed for 4–6 weeks.
11. Rack again to remove wine off fine lees. Allow to rest for another 4-6 weeks.
12. Rack wine off any sediment, then dissolve bentonite in five times its weight of water. Mix bentonite into wine, then allow to settle for 1 week.
13. Rack off bentonite. Prepare gelatin and mix into wine. Allow to settle one week.
14. Rack off gelatin.
15. Stabilize. Dissolve potassium sorbate in 10 times its weigh of water. Add equal amounts of dissolved potassium sorbate solution and 10% sulfite solution to the wine and gently mix. Allow to rest undisturbed for at least two days.
16. Do bench test trials to determine the proper level of backsweetening sugar to add. An addition of 14 oz. per gallon (about 100 g/L) seems to work well in my experience with the fruit I use, but depending on exactly how ripe the fruit is, the perfect amount for your wine could vary.
17. Gently mix backsweetening sugar into the wine until it is fully dissolved.
18. Filter if desired, then wine is ready to bottle.
19. Enjoy! The wine will be good to drink as soon as it is bottled, but it will improve if allowed to cellar for 4–6 months. Provided it was sulfited properly, a good quality cork was used, and it is stored in a cool place, it should remain at peak condition for at least 3–5 years before it starts to show signs of decline.
(1 gallon/3.8 L)
Six ways to use oxygen to your wine’s benefit
by Clark SmithThe role of oxygen has been the subject of considerable controversy in the attempts of scientists to explain the complex process of the aging of wine. The great Émile Peynaud, a highly influential Professor of Enology at the University of Bordeaux in the second half of the 20th century, has been many times quoted that “oxygen is the enemy of wine.” What Dr. Peynaud really contended was that the problem was misunderstood from the beginning because of a basic confusion, reflected in the opposing views that “oxygen makes the wine” and “oxygen is the enemy of wine.”
In truth, then as now, few winemakers understood what he was talking about. Wine historian Harry Paul likens the situation to the wave/particle debate in physics. “However, no Bohr appeared in oenology with a theory of complementarity to explain that a single model might not be adequate to explain the observed phenomena. The fact is that the assertions apply to different types of wine and their different modes of aging.” It’s an odd coincidence that this individual should emerge from Peynaud’s very birthplace, the tiny hamlet of Madiran in southwest France.
In 1997, I found myself in a bar in Reno, Nevada, sharing a beer with a young gentleman by the name of Thierry Lemaire, freshly arrived for the American Society for Enology and Viticulture (ASEV) conference. Thierry wanted my wine technology company, Vinovation, to take on a new process his boss, Patrick Ducournau, had recently invented by the name of microbüllage, or micro-oxygenation. His ridiculous claims included that it increases body, stabilizes color, refines texture, controls sulfides, eliminates protein fining and the use of copper, diminishes pyrazines, oakiness, and Brett aromas, and enhances longevity. Yeah, right, and all my children will marry doctors?
I didn’t believe a word of it. Still, there was growing interest in this latest fad, so we decided to take on the distributor and set up a two-year study with a dozen wineries. I put a disclaimer on the websites saying we made no claim that any of this was true.
When the study was concluded, I took the disclaimer down. It worked exactly as Thierry claimed. What followed was years of intense instruction and experience with thousands of wines, eventually leading to the publication in 2013 of Postmodern Winemaking, my tribute to Ducournau’s genius.
I like to think of oxygenation as much like using a stove. You can definitely get burned if you don’t know what you’re doing. Yet skilled use of a stove is the essence of fine cuisine.
There are all kinds of ways of using the stove. I’ll make some distinctions here that are similar to the di erence between slow cooking and searing. Where you use a slow cooker to soften and tenderize a cheap pot roast cut, you sear a ribeye steak at high temperature to bring out the flavor.
Same with oxygen. Sometimes we’re trying to refine the texture, add body, and extend longevity; other times we’re trying to bring forward the aroma to display fruit and promote early release.
Enological oxygenation in its various forms presents challenges for small-scale winemaking. These com-
bined with the need to learn a sophisticated skill set means that taking on these practices will require careful attention, initial investment, and courage not so di erent from learning to cook. Some things like boiling an egg will be simple, others like poaching quenelles are trickier to learn.
While oxygen is now used by commercial winemakers throughout the world, education is lacking and the term is used to refer to practices that really are not micro-oxygenation (MOx) at all.
Accordingly, I want to begin with a discussion of terminology, distinguishing six ways to utilize oxygen beneficially in wine (see the sidebar on terminology, below).
Once we have that sorted out, I’m going to describe the six methodologies in more detail.
When we get to micro-oxygenation, I’ll clarify terms the French use for di erent types of tannin mouthfeel (Figure 1, on page 45).
Next, I’ll talk about what goals you might set for a particular wine. Then I will explain the equipment you need (and what you should avoid) and run you through some practical tips to implement these six methodologies on a small scale.
You will note in the sidebar, be-
low, that the first method is an “oxidation.” We are actually oxidizing the phenolics, though not the juice, due to the extremely rapid enzymatic action. All the other treatments are “oxygenations,” which do not oxidize the wine.
Now let’s look at each closer.
Hyperoxidation: Here we’re bringing a saturation or even three saturations of oxygen to the juice of an aromatic white or sparkling cuvée prior to fermentation.
Now, why in the world would we want to do that? Well, the white “aromatic” varieties we’re talking about have a lot of terpenes in them. Muscat, Malvasia, Riesling, Gewürztraminer, and Viognier grapes are quite delicious eating on the vine. These terpenes make them very popular with birds and bees, leading to a lot of damage to the fruit. And so, just like a banana or an apple, these varieties have developed a lot of tannin to cauterize the wounds brought about by these predators.
Unfortunately, those phenolics are going to polymerize later on in the wine and cause it to brown. Hydrogen peroxide is generated as a

Hyperoxidation: Juice stage, to remove phenolics from aromatic whites
Macro-oxygenation: Mid-fermentation, to promote yeast health
Micro-oxygenation: After dryness, slow introduction below consumption rate
• Phase 1 - Immediately after fermentation, to stabilize color
• Phase 2 - Post malolactic, to refine structure
• Phase 3 - Post barrel aging, to soften oak tannins
Clique-age: Quick blast, to polish break reduction and open the flavors
byproduct of that polymerization, which attacks terpenes, destroying freshness and oxidizing them to TDN (1,1,6-Trimethyl-1,2-dihydronaphthalene), which smells like petrol.
The solution, very popular in the Mosel, is to introduce oxygen to the fresh juice prior to any SO2 addition, causing rapid browning by the enzyme polyphenol oxidase, which can consume an entire saturation to disappear in 45 minutes. It’s common to add two additional saturations 45 minutes apart, after which protein is added to promote overnight settling.
Although initially gelatin was used, English pea protein preparations are now on the market that work better.
BSG’s Agrovin and Lamothe-Abiet’s Greenfine Must are good examples.
Instead of waiting for settling, a more common practice for winemakers is to employ flotation by air injection, and then returning in the morning to rack the clarified juice from under the compact floating cap that resembles chocolate pudding.
Sulfur dioxide (around 30 ppm) may then be added if desired prior to inoculation. Exposure to oxygen should be prevented post-fermentation to maintain freshness. Believe it or not, a lighter, fresher wine with considerable shelf life will result.
Because of their high acidity, sparkling wine producers go to great lengths to minimize tannins in their cuvées, often employing light pressing and low yields, losing as much as 40 gallons per ton (1 L per 6 kg). A large fraction can be reclaimed through hyperoxidation.
Macro-oxygenation is the injection of oxygen at mid-fermentation to raise the redox potential. Highly reduced conditions in the must can cause sluggish or stuck fermentations. A saturation of oxygen can promote yeast health and dryness. It is often accompanied by nutrient additions specifically designed for the process such as Fermaid O from Scott Labs.
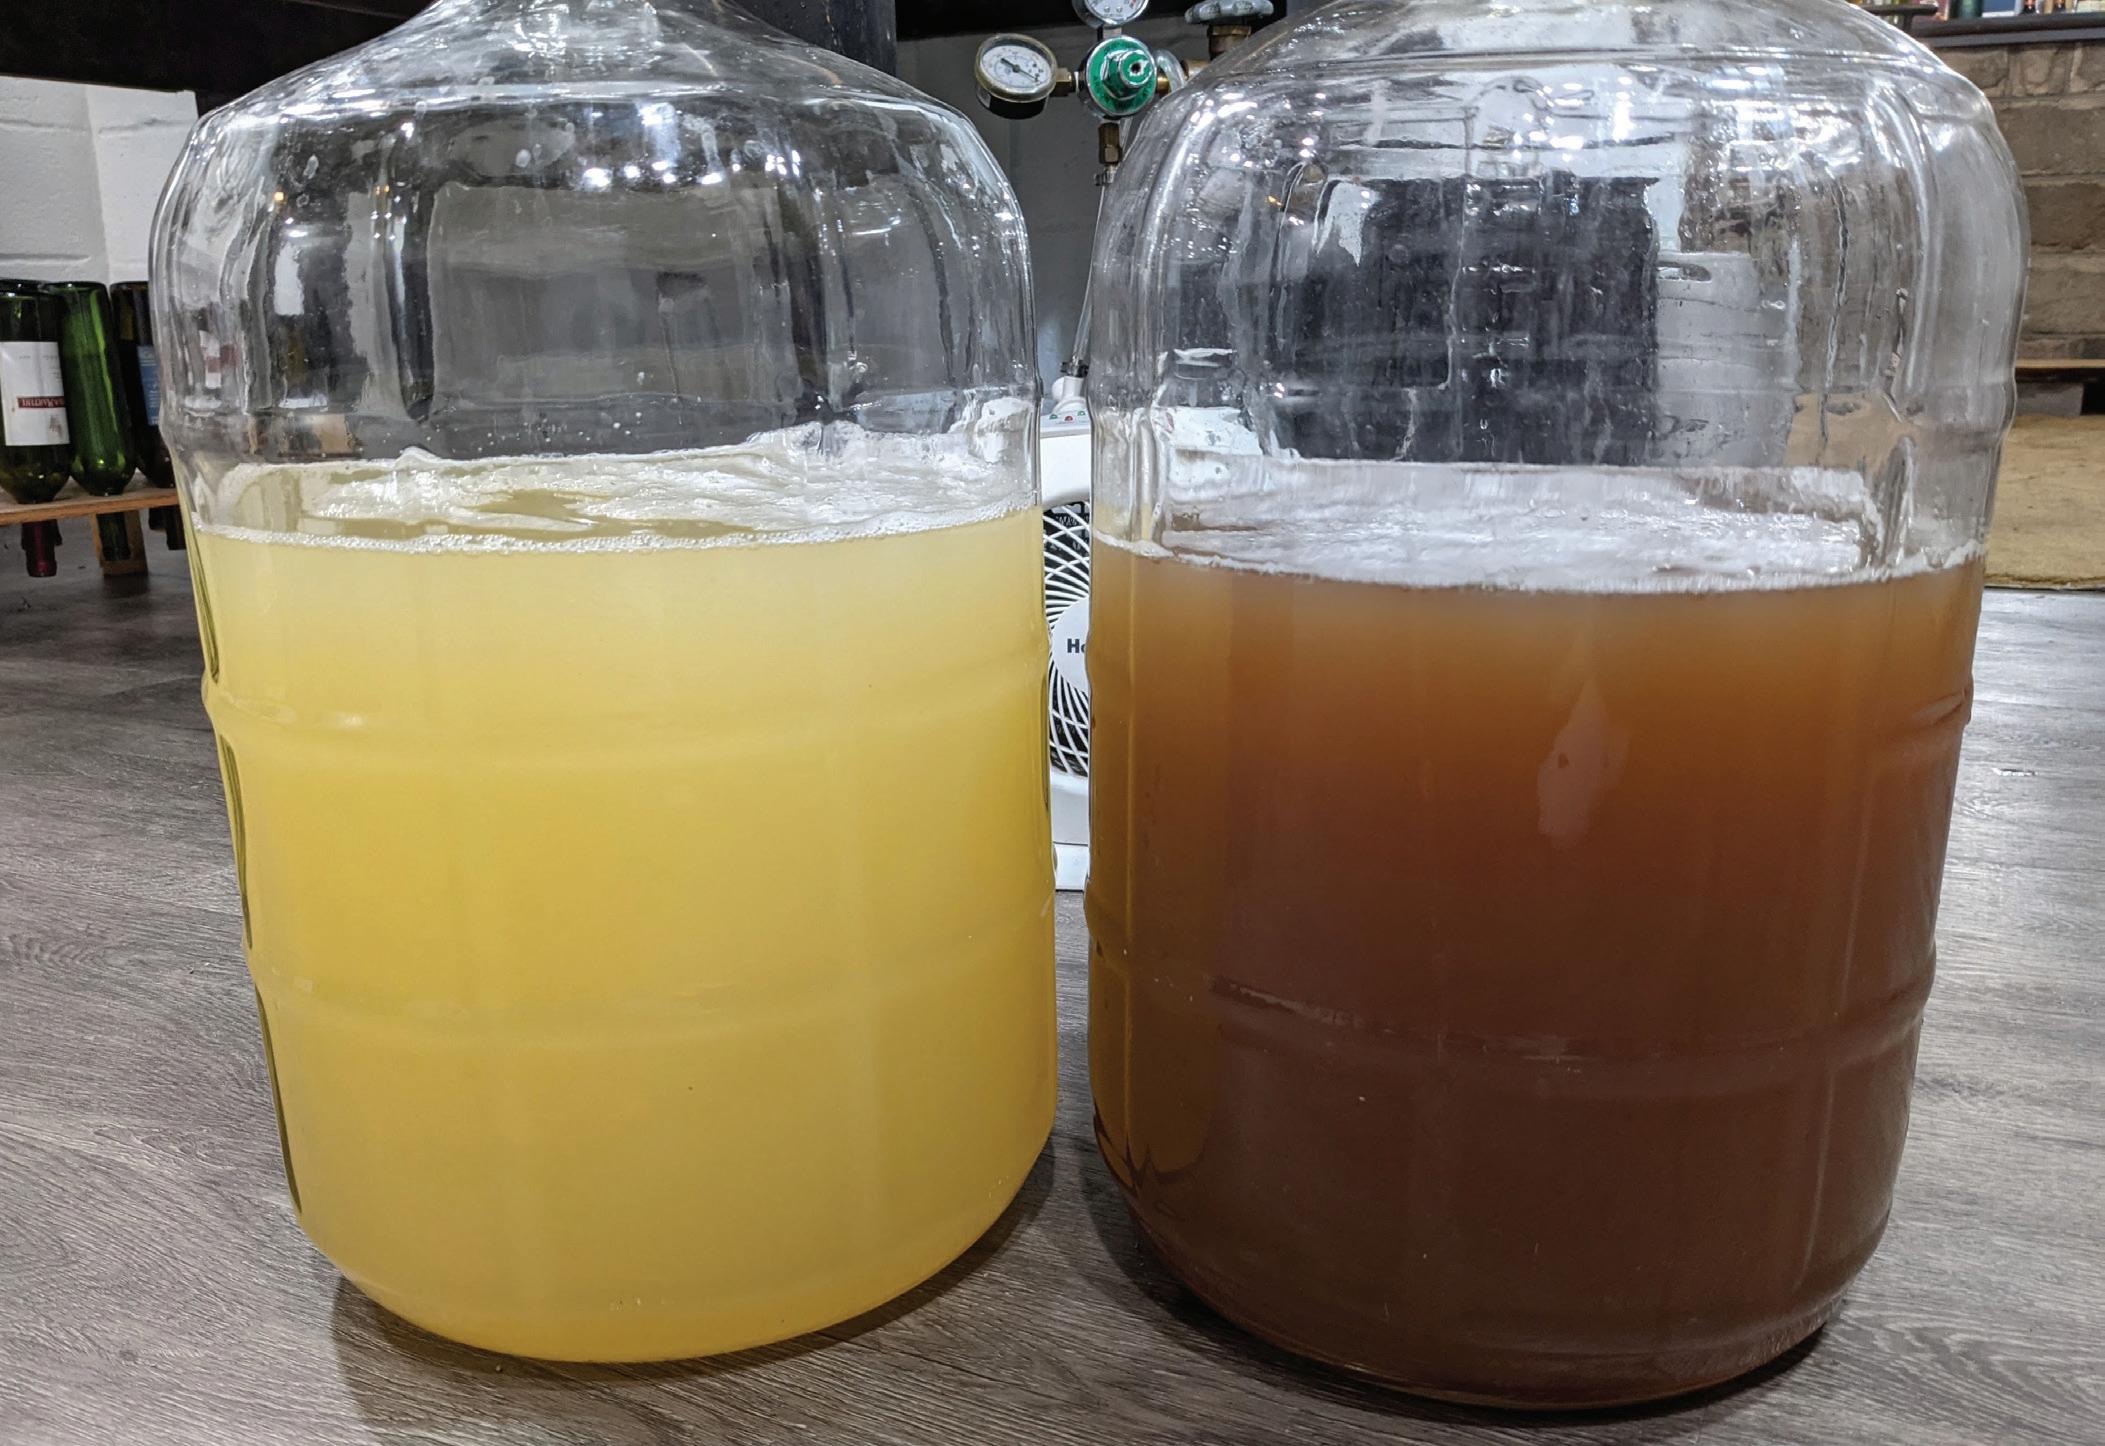
Yeasts in active fermentation gobble up oxygen with incredible enthu-
siasm — perhaps a thousand times as much as phenolic reactivity. Some winemakers perform aerative rackings on highly tannic musts in the vain hope to evolve wine structure, but this really can’t occur until fermentation is complete.
The day of dryness, we enter the world of oxygenative structuring. By definition, micro-oxygenation feeds the wine oxygen at a rate less than its ability to react it up. Its goals have much in common with (and indeed may be considered a branch of) French cuisine.
In 1825, Brillat-Savarin transformed French cuisine in his classic work, Physiology of Taste. The fundamental nature of la cuisine ever after focuses on the skillful creation of soulful structure, be it in a béarnaise sauce or a soufflé. Its essence is distilled in the dual meanings of finesse: The first meaning grace and refinement, as in English, but the second infers “fineness,” i.e. small particle size. Thus, a bisque is more soulful if
the tiny butter beads suspended in it are very small.
Transforming grape extractives into wines of fine structure is the goal of micro-oxygenation and related techniques such as exposure to oak and lees. Our goal is to create very small colloidal structures whose large combined surface area leads to refined texture, aromatic integration, soulful resonance, and graceful longevity.
If you hang around Masters of Wine, you’ll hear the term “structure” employed in another (and I think erroneous) way, to mean the interplay of sugar, acid, alcohol, and other constituents of the wine’s sensory impressions as they occur in the brain’s sensory appreciation. This so-called “structure” is not in the wine and is better referred to as “balance.”
Contrary to common belief, micro-oxygenation is not designed as a way to accelerate aging. You can accelerate aging with it, but that’s not really what it’s for. We can do some much more wonderful things if we use it in a skillful manner. To say that a micro-ox unit is a way to accelerate aging and get into the bottle quicker is
like saying that your Porsche is a really good flashlight. And it is a really good flashlight — but that’s not really what it’s for. A Porsche’s true purpose is high-performance driving. And micro-ox is really about high-performance winemaking, or as the French call it, “élevage.”
The result is homeopathic. The structures MOx creates are more reactive with the untreated wine. As we proceed, particularly in Phase 1, the wine’s appetite increases and we find ourselves increasing the dosing rate. As a result, release dates are pushed off into the future.
Red wine’s appetite for oxygen varies more than a thousand-fold over its lifetime. We measure this reactivity in mLs (or sometimes mg) of oxygen per liter of wine per month. (1.00 mL of oxygen weighs 1.42 mg.) Since a barrel imparts about 1 mL/L/ mo., we sometimes call these “barrel equivalents,” or BEs.
The main mechanism of oxidative polymerization known as the vicinal diphenol cascade was worked out by Vern Singleton at UC-Davis in 1987 and involves a second-order double
reaction, making it highly temperature-dependent. Ducournau’s team determined empirically that phenolic structuring can only be accomplished within a strict and narrow temperature zone between 59–65 °F (15–18 °C). Below this temperature, reactivity slows precipitously, while above the zone, oxidative reactions are energetically favored to the wine’s detriment.
Within micro-oxygenation, we identify three phases. Phase 1 commences just after dryness, prior to any malolactic (ML) and SO2 addition, usually lasting two to four weeks. Its primary objective is to stabilize color. The wine has a great deal of oxygen appetite at this point. Even a light red such as Pinot Noir will consume about 20 BEs, with Merlots and Cabernet Francs taking up 40–50 BEs, California Cabernet Sauvignon at 60–80, and heavyweight Petite Sirah and Tannat sometimes devouring over 100 BEs.
Things happen fast. It pays to monitor tannin status two or three times a week as the wine progresses from green, to hard, to firm, to round, to melted. Armchair enologists may find this annoying, but my
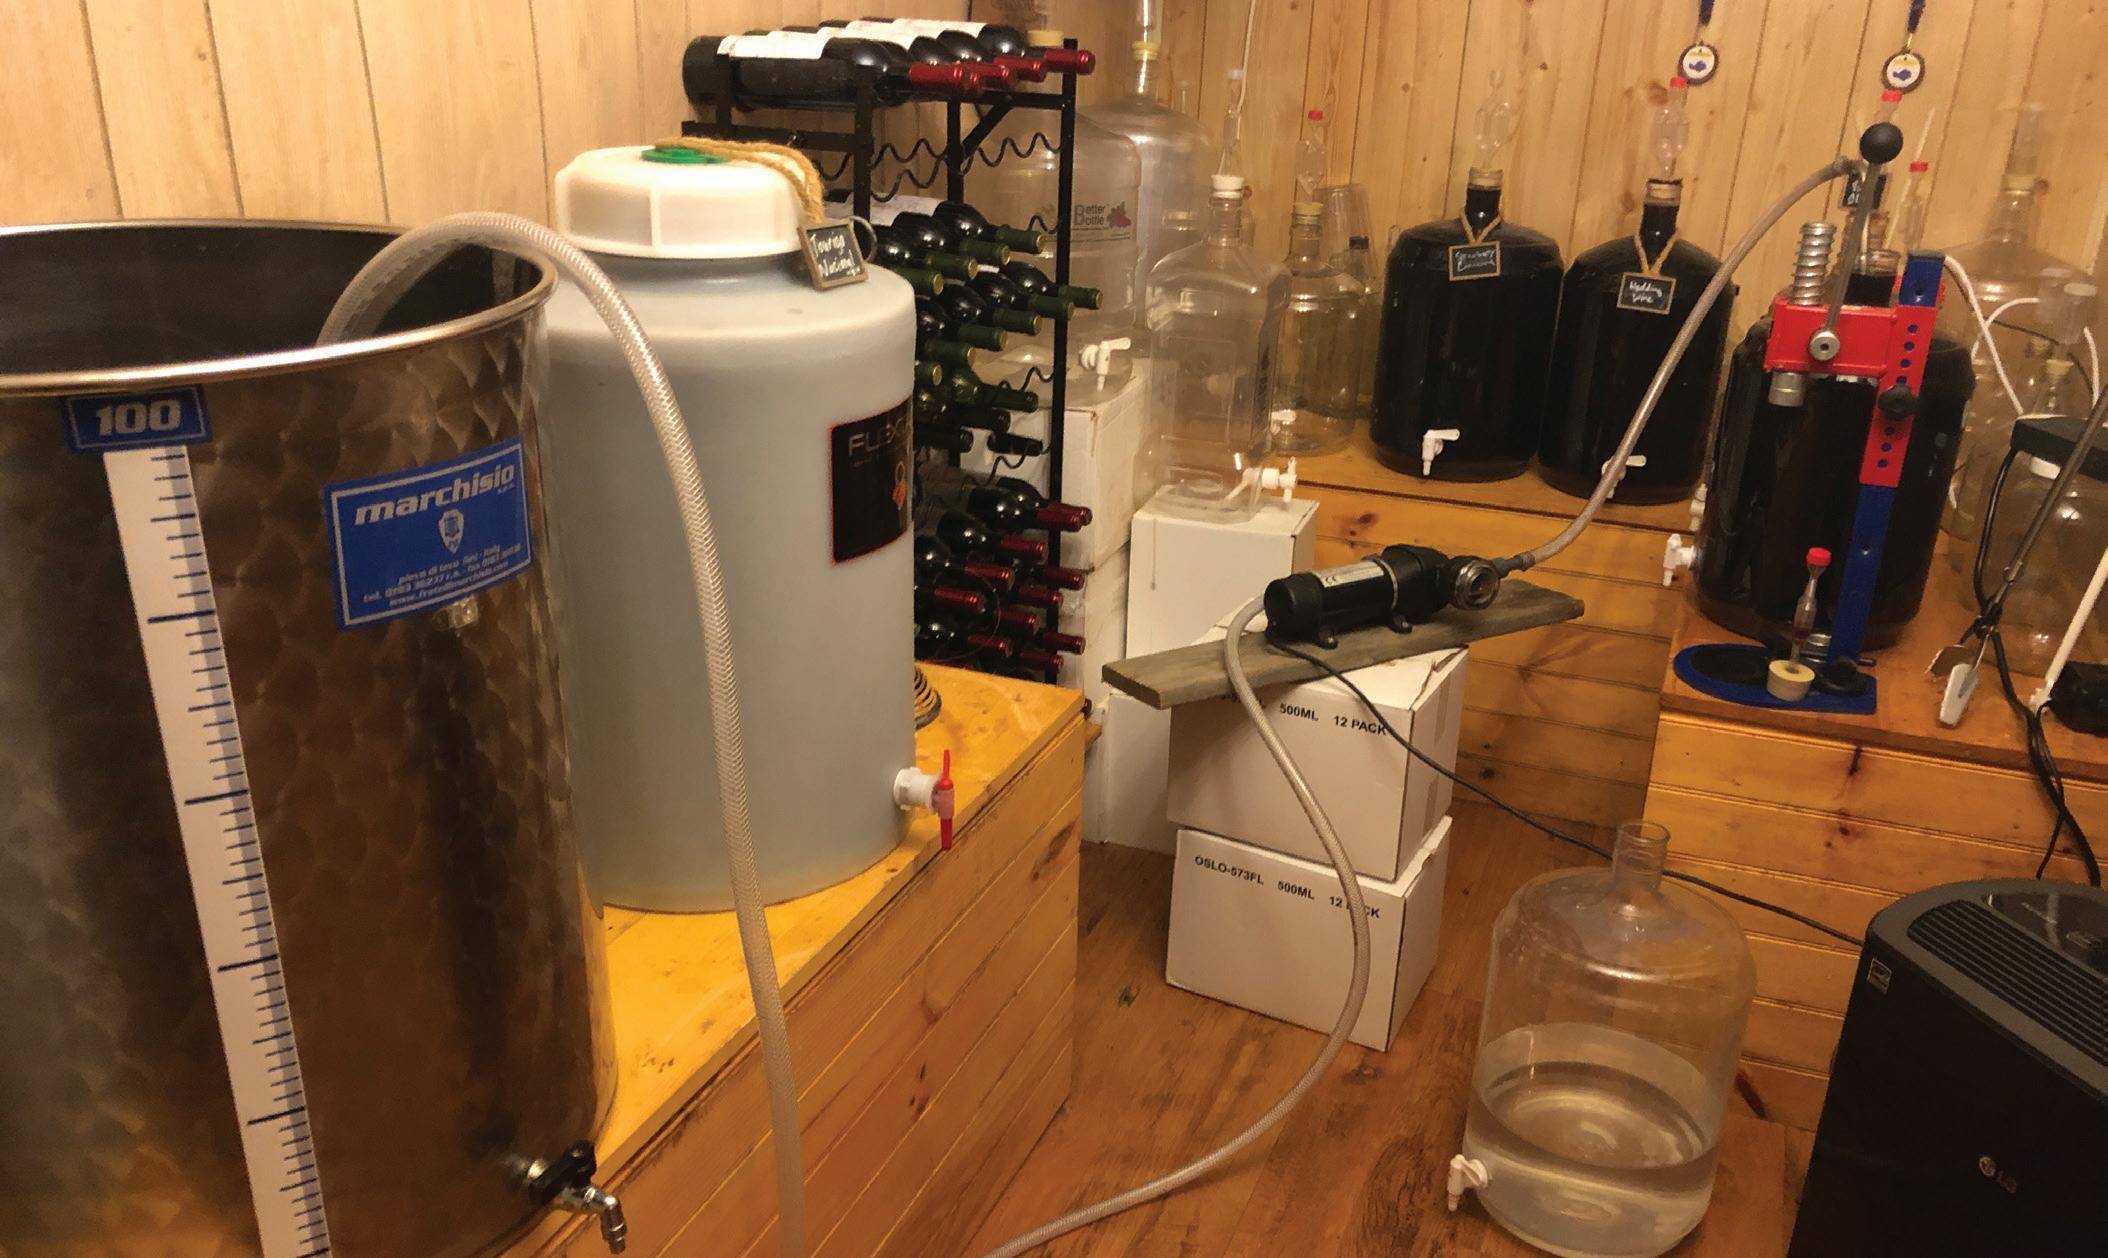
view is that being forced into regular personal conversations with a wine in its first month of life, a continual back-and-forth about what the wine can be and wants to be, is one of the strongest reasons to take on MOx. As Woody Allen put it, “80% of life is just showing up.”
We want the wine to be somewhat aromatically closed and not building dissolved oxygen (DO). Mastery of sensory assessment is the best way to steer the wine’s development during this critical period. Successful use of enological oxygen requires hands-on monitoring of tannin evolution, for which the winemaker needs training in a set of sensory distinctions.
Figure 1 depicts the terminology we translated from common French oenological terms for different tannin sensations (more precisely, astringencies resulting from the interaction of different tannin structures with salivary protein). These are literal translations, some of which I dislike, but which we employ to easily correspond to their French counterparts, since very little discussion of tannin sensory types occurs in English-speaking universities.
An exception is the Australian work of Richard Gawel, Anita Oberholster, and Leigh Francis on a 56-descriptor Mouthfeel Wheel, which we applaud while finding it a bit cumbersome for practical oxygenation work. We did, however, import their term “parching/numbing” for oak tannin. The presence of the numbing effect of the topical anesthetic eugenol that oak contains makes it relatively easy
to distinguish from the grape-derived tannin sensations. The following discussion applies principally to red wine tannins.
Green tannin (tanin verte) is the tannin found in all red wine immediately upon the conclusion of alcoholic fermentation on skins. It occurs entirely on the tip of the tongue and is grainy in nature — probably it’s the copigmentation colloids composed of monomeric phenolics and anthocyanins. Despite its name, it does not indicate under-ripeness nor vegetal flavors, so I would prefer to call it “raw tannin” were not the French term so firmly entrenched.
If such a wine is completely deprived of oxygen in youth, this graininess will spread throughout the mouth, coating the cheeks and the entire surface of the tongue and eventually will precipitate out after a few years in barrel or bottle. This we call dry tannin (tanin sec). It’s the only type of astringency that can be found on the bottom of the tongue. Home winemakers who press wines into neutral stainless or glass carboys under a blanket of inert gas will experience their wines drying out and falling apart, especially if their color is low.
If a young wine is given a discreet dose of oxygen, the grainy green tannin is replaced within a few days with hard tannin (tannin dur), which loses its graininess and is no longer present on the tip of the tongue. It seems to leap up on top of the tongue, now with a sheet-like grippiness that adheres to the roof of the mouth like peanut butter. It’s sometimes call “octopus tannin” because of its grip.
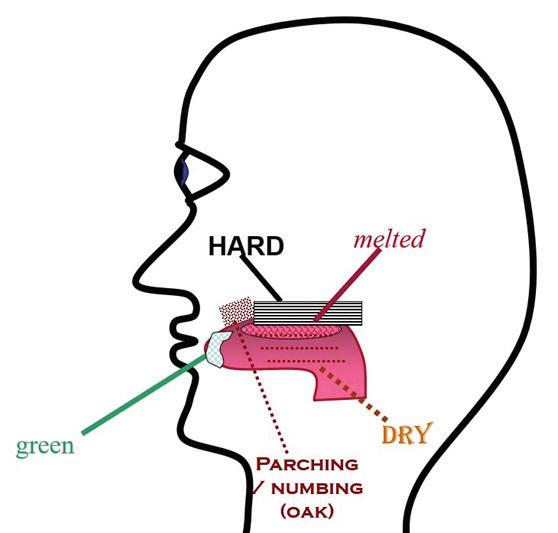
After passing through this phase, the grip will subside to firm tannin (tanin firme) and then will begin to soften from the back of the palate, converting to melted tannin (tanin fondue). When a wine is melted in back but still grippy on the front half of the tongue, this is round tannin (tannin ronde), a stage where many winemakers barrel down reserve wines to allow further resolution in barrel and in bottle. Wines for early release may be fully melted prior to bottling, particularly if screwcap closures are to be employed.
If a wine is showing excessive aldehyde or fruitiness, we turn the rate down. If the fruit is too closed or sulfides are present, we turn it up. This is called “surfing the aldehyde.” As Thierry says, “No need to dance faster than the music.”
Phase 1 is the best time to add oak alternatives containing tannin. PostML, only de-tanninized alternatives are recommended. If the wine is destined for new oak barrels, it is common practice to allow the ML to take place in the new barrels to soften the oak tannins, after which the wine is returned to tank for SO2 addition and Phase 2 treatment if desired.
Phase 2 takes place after ML is complete and SO2 is added. The purpose of Phase 2 is to refine texture, integrate pyrazines, quench sulfides and soften new oak tannins. Phase 2 work happens at a lower rate. Far from protecting the wine from oxidation, SO2 in red wine actually drops the Phase 1 rate by a factor of 12 by reversing the vicinal diphenol cascade elucidated by Singleton 92% of the time. If a Cabernet Sauvignon was taking 60 BEs in Phase 1, it can be expected to take 5 BEs in phase 2.
Changes occur more slowly in Phase 2, and one need only check the wine once every week or two. A typical run lasts two or three months, after which the wine is generally barreled down. Alternatively, it may be kept in neutral vessels such as Flextanks with oxygen porosity on one barrel equivalent with the addition of oak alternatives as desired.
Generally the time in barrels will resolve wine tannins and lower the wine’s appetite to around 1 BE, at which time it should be removed from barrel and bottled. Unfortunately, by this time the wine frequently has penetrated the stave and begun to extract increasing amounts of parching/numbing tannin. This cannot be resolved in barrels unless they are quite old.
The solution is to come back to tank and harmonize the wine with very low amounts of oxygen — a tannin haircut, if you will. This is Phase 3. It will proceed at 0.25–1 BEs and generally takes about two months.
Finally we have clique-age Clique-age is a short pulse of oxygen — the French call it “violent” oxygen — just a few seconds where we’re blasting in 1–2 ppm. Its purpose is to open the wine up and to speed its development along, rather the opposite of micro-oxygenation, which can increase the wine’s reductive strength and actually push its release date off. Here, we’re opening the wine up.
So we’re talking about a barrel treatment that’s similar to aerative racking except it’s a lot more convenient if you have a large number of barrels. We drop a diffuser into the barrel and use a handheld remote to trigger a solenoid that determines the dose. The solenoid opens up a valve allowing the oxygen to flow until the timer turns it off after 30 seconds or so. Since these gadgets were originally developed in France, the French solenoid says “clique,” and that’s where
the term “clique-age” comes from.
It’s often accompanied by an SO2 addition with a fizzy tablet to add 5–10 ppm. Plop, plop, fizz, fizz.
Hyperoxidation on a small scale is simple to perform. As with all enological techniques, pure oxygen is recommended over air. The 78% nitrogen in air keeps the bubbles large so the oxygen they contain doesn’t dissolve readily. Injection into a sintered stainless stone or other fine diffuser is recommended. Dissolved oxygen is at best monitored with a meter. If you have a Vinmetrica SC-200 or SC-300, you can add a DO meter for $199. Otherwise the Milwaukee MW600 does a good job for $250.
Flotation by air injection works most easily if you have a tank with a drain valve and a pump, or allowing for settling also works.
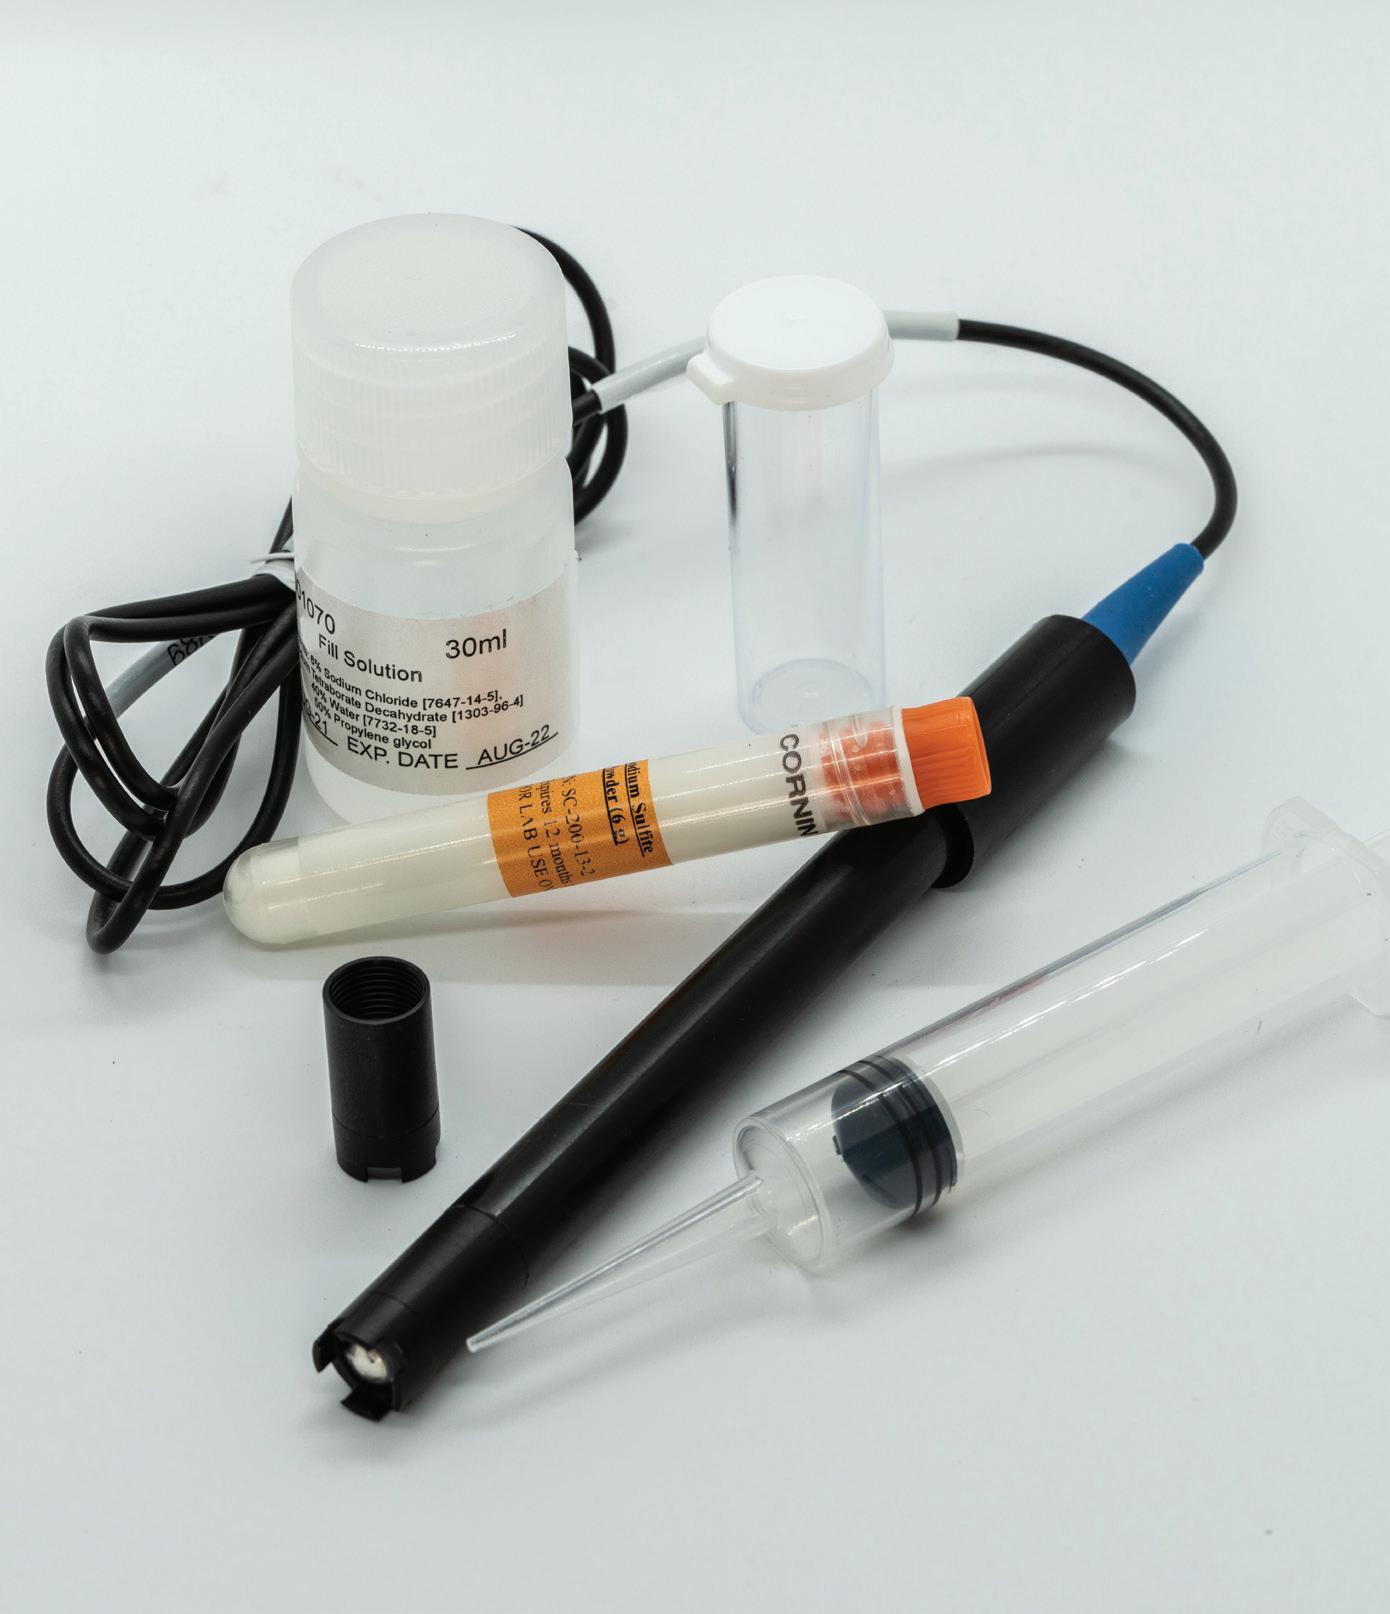
1. Hyperoxidation of juice can be accomplished by repeated splash racking over a two-hour period before SO2 is added. Clarify the brown mud with pea protein and rack off in the morning.
2. Macro-oxygenation can also be accomplished by vigorous splash racking at around 12–15 °Brix. Add 50 ppm of Fermaid O at the same time and you’ll prevent sulfides and finish cleanly.
3. True micro-oxygenation costs serious money. If you have a big Cabernet Sauvignon or Syrah that has not been field-oxidized by excessive hang time, you can stabilize color and enhance a refined structure by racking the wine every couple weeks until the wine shows aldehyde. Then let it rest and add SO2.
4. If the wine gets reductive (aromatically closed and stinky) in barrel, clique-age (oxygenative racking) is a much better choice than a copper addition.
Macro-oxygenation also works much better with pure oxygen delivered through a fine diffuser and measured with a DO meter. Although some wineries use a venturi to draw air into the must during pumpovers, this technique doesn’t work very well because the nitrogen entrains the oxygen into the headspace. The technique may entrain volatiles such as H2S, but it also strips varietal aromas. Redox meters are becoming popular among wineries that can afford them. After macro-oxygenation is complete, by contrast, air or inert gas works better than pure oxygen to float the phenolic/protein cap.
Good results in micro-oxygenation require grapes with good reactive monomeric color that have not been field-oxidized by excessive hang time (see “Determining Ripeness” in the August-September 2022 issue). These must then be extracted
into copigmentation colloids in modest alcohol with the help of monomeric phenols, a topic that needs its own article.
If I intend to run Phase 1, I will dose the must pre-fermentation with a little extra SO2 (say, 45 ppm) to stall the ML and give me the 3–4 weeks I need to complete it before ML kicks in. The turbidity caused by ML will slow the effectiveness of oxygenation as the lees react with O2 preferentially to the phenols.
Once you have a well-extracted must that has fermented to dryness, Phase 1 should commence as soon as you can get the must into the 59–65 °F (15–18 °C) range. This is most simply achieved by holding the room in this temperature range.
Regarding equipment, the bad news is it’s going to cost you about $2,000+ per tank (you can pay less for systems that don’t work). The good news is that the equipment is very durable — I have 30-year-old systems that still work fine. And running costs can be covered by your kid’s allowance.
If your vessel is over 6 feet (1.8 m) high (Flextank Dexters work well for small volumes), the best system — really the only one designed for Phase 1 work – is from Vivelys (Oenodev renamed). Unlike the sintered stones of other systems, the Vivelys diffuser uses a section of ceramic reverse osmosis membrane that produces an extremely fine microbubble and can hold backpressure for an ongoing integrity test. Unlike any other, the action of the Vivelys diffuser agglomerates tannins and suspended yeast so wines generally fall clear within 48 hours so work can proceed unencumbered.
If you’re working out of IBCs (Intermediate bulk containers) or barrels, your only choice is the Wine Grenade. It doesn’t use a diffuser, and instead pressurizes the inside of a tygon tube so oxygen diffuses directly through the plastic and into the wine. You determine the rate by the length of tubing you string together and the oxygen pressure within. It takes a lot of tubing to run Phase 1 and adjusting the dosing rate is confined to a narrow range.
If you have a tinkerer’s heart, employ it elsewhere. Of the dozens of

DIY systems I’ve come across, I have yet to see one that works.
Phase 3 MOx doesn’t really need a doser, though it’s more precise. Simply racking into a porous vessel such as a Flextank will do the job as long as it’s topped.
Similarly, clique-age has traditionally been accomplished by simply racking the wine so that it picks up some oxygen in the process.
As with training to be a chef, it
takes a few years to master enological oxygen and you’re going to make some mistakes along the way. Begin with big wines with lots of color and tannin — Petite Sirah, Tannat, Cab Sauv — that will not only benefit greatly but are almost impossible to ruin. Stay away from Pinot Noir and whites until you really know what you’re doing. Before too long, you will discover that wine is not at all what you thought it was.
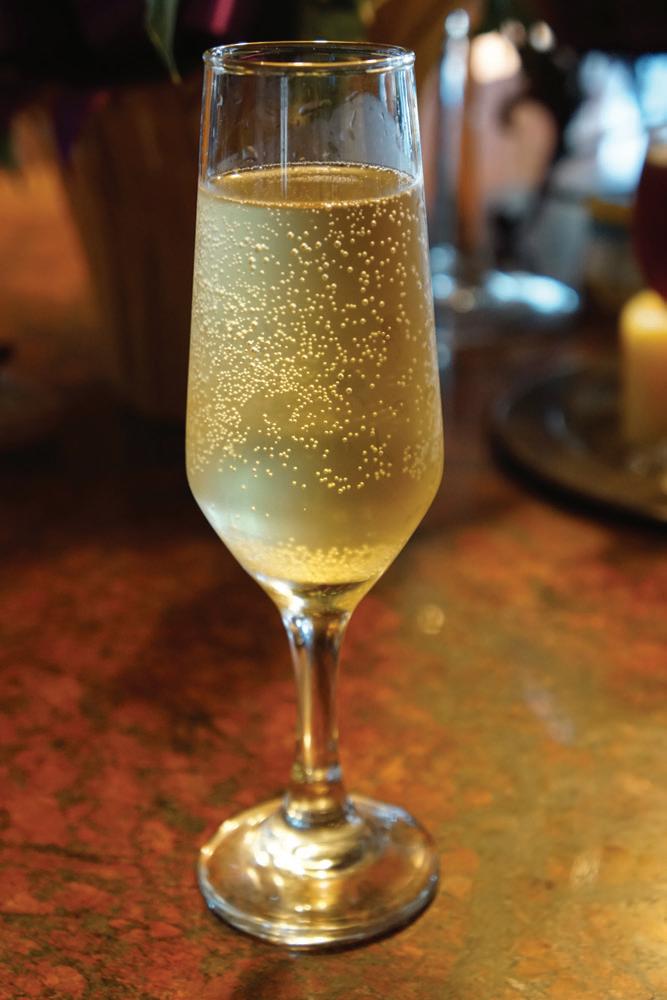
There are three fundamental methods to make sparkling wine at home. For pétillant naturel or pét-nat, all you need to do is put your newly fermented wine in a heavy pressure-resistant bottle before it is quite finished fermenting. If you do it right, you will get naturally sparkling wine that may also be cloudy. For méthode Champenoise, also known as méthode traditionnelle or the traditional method, you finish still, dry wine. Then you put it in heavy bottles, add some sugar and yeast, attach a crown cap, and let the wine ferment again to make the bubbles. While you can chill it upright at that point and call it country sparkling wine, the full traditional method has you turn the bottles upside down for a few weeks, freeze the neck of the bottle in a brine bath, then remove the crown cap and allow the yeast-filled ice plug to blow out. Top up and sweeten what’s left, cork it, and you have clear, stable traditional sparkling wine. The third major method is today’s topic: Charmat or bulk process sparkling wine. (There are subcategories, variations, and synonyms for these methods, but three is enough for our purposes.)
For the Charmat process, as in the traditional method, a dry base wine — often blended and called a cuvée — is fermented first. Instead of bottles, though, it is placed in a stainless-steel pressure tank for the addition of sugar and yeast. Cool fermentation follows, developing pressure in the tank from carbon dioxide production. The finished carbonated wine is filtered under pressure and bottled under pressure, producing a sparkling wine with less hand labor than the traditional method. While less labor allows lower prices in the marketplace, Charmat sparkling
wine can be excellent. Proseccos, for instance, are produced utilizing this method. With the right equipment and a bit of time, you can make Charmat sparkling wine at home.
To produce any sparkling wine, it is useful to review the pressure required. By comparison, draft beer is usually served at less than 15 pounds per square inch (psi) (~1 bar). Wine is called pétillant when it is pressurized to 15 to 36 psi (1 to 2.5 bar) under a carbon dioxide atmosphere. “Sparkling wine,” including Charmat and traditional method, is at higher pressure, greater than 44 psi or about three bars. For your Charmat sparkling wine you will need pressure-tolerant equipment that will work in these higher ranges.
For a complete Charmat process you will need two 5-gallon (19-L) stainless-steel soda syrup kegs, aka Corny kegs. These kegs (new and used) are readily available at homebrewing stores for dispensing homemade beer and wine. The kegs are usually rated to about 120 psi (8 bars), so quite safe at sparkling wine pressures. The kegs come in two styles known as pin-lock and ball-lock. Either will work, but you need to have all your accessories in the same style (I use exclusively ball-lock kegs). The terms refer to how the pressure attachments are secured to posts on the keg.
To pressurize your kegs, you will need a full CO2 cylinder equipped with a regulator that can deliver at least 60 psi (4 bars). You will also need a pressure gauge that is mounted on a fitting that can be attached to the gas (inlet) post of your keg, some thick-wall or reinforced vinyl tubing, and additional beverage and gas fittings for both kegs. You need a cartridge-style filter housing and a 0.45µ
For a complete Charmat process you will need two 5-gallon (19-L) stainless-steel soda syrup kegs, aka Corny kegs.Photo by Dominick Profaci
membrane filter cartridge.
For bottling your Charmat wine, you will need a device called a counter-pressure bottle filler that can be attached to your kegs, as well as heavy Champagne-style pressure bottles, a crown capper, and crown caps that fit your bottles. Instead of crown caps, you can alternatively use plastic Champagne stoppers fitted with wire cages to secure the stopper. To use cork stoppers you would need to buy or rent a Champagne floor corker (not the same as a standard floor corker) and Champagne corks with wire cages. Crown caps work well and are the easiest option.
Start with five gallons (19 L) of base wine — your cuvée. To resemble commercial sparkling wine, the blends tend to be higher in acidity and lower in alcohol content. While there are sparkling red wines, most are white or pink. Rack your wine to a sanitized Corny keg. Weigh out 20 to 25 g/L of table sugar or about 400 g total and boil it for one minute with about 400 mL of water to sanitize it. Stir the sugar into the wine and pitch a strong yeast like Lalvin EC1118, Prise de Mousse, at about two grams per gallon (0.5 g/L).
Close the keg, flush the headspace with carbon dioxide, disconnect your CO2 system, and attach your pressure gauge to the inlet (gas) post of the keg. Leave the out (beverage) fitting closed and disconnected. Place the keg in a cool location at 64 to 68 °F (18 to 20 °C). Warning: You are commencing fermentation in a sealed vessel and a dangerous rupture could occur! As fermentation begins, you will see the pressure rise on your gauge. If it exceeds 44 psi (3 bars), vent some gas by pulling the pressure relief on the keg lid. While the keg is safely rated for higher pressure, this should be high enough for a pleasant sparkling wine.
While your wine is undergoing its secondary fermentation, work on your dosage. The dosage level is the added sugar for a desired sweetness in your sparkling wine. Only the very, very driest of sparkling wines have no added sugar — they are typically called brut nature or zero dosage. More common are extra brut wines with about 6 g/L of sugar or brut with about 12 g/L. You can go sweeter with extra dry, sec, or even demi-sec with up to 50 g/L, according to your taste. Run some bench trials using a reserved portion of your base cuvée. Some sparkling wine producers add a small amount of brandy to their dosage as well. If that appeals to you, include brandy in your trials.
When your fermenting keg holds steady at your desired pressure for at least two days, you may proceed to the filtration step. Replace your pressure gauge with a gas fitting from your CO2 regulator, set to the same pressure as your keg, but begin with the gas flow shut off. Sanitize your second keg and attach the outlet side of your filter to the outlet side of the keg — you want the wine to fill the keg from the
bottom using what is ordinarily the dispensing dip tube. Boil the dosage sugar determined in your trials, cool, add brandy if using, and pour into the keg. Flush the keg with carbon dioxide and attach your pressure gauge to the gas post. Close and seal the lid.
Connect the “out” post of your full keg to the inlet side of the filter. Wine should flow immediately toward the second keg, due to the natural pressure in the first keg. Open your gas valve and push the wine through the filter. Vent gas from the second keg as needed to keep the wine flowing, but try not to lose your desired pressure. When all the wine has been transferred, disconnect all the fittings and chill the now full second keg for bottling.
There were probably yeast lees in the first keg that may clog the membrane filter. There are three things you can do to help. Before you start the project, you can remove the “out” post of your keg with a socket wrench, pull out the stainless steel dip tube, and use a hack saw to cut off ½ in. (1 cm) from the end. When re-installed, the tube will be just above the bottom of the keg and can leave the lees (and a small amount of wine) behind. Another step is to attach tubing with a plastic thumb tap to the keg before hooking up the filter. Open the tap over a waste bucket and run until the heaviest lees are out. Finally, you can filter from one keg to another through a coarse string-wound filter first, then clean everything and filter back through the membrane cartridge.
For bottling, a temperature near or slightly below 32 °F (0 °C) will help keep the gas dissolved in the wine and minimize excess foaming. Following the manufacturer’s instructions, connect your counter-pressure filler to the CO2 system and the full keg. Chill two cases of empty Champagne bottles. Use your filler to fill each bottle under pressure and quickly cap or cork.
A wing-type beer bottle capper is quick and easy. If you are using plastic corks, set the full bottle on a wooden block, begin inserting the cork, and drive it home with a rubber mallet. For Champagne corks and a Champagne floor corker, drop a cork between the jaws and set the full bottle on the platform. Pull down the arm, inserting the cork until a suitable mushroom-shaped head is left. Push the arm back up and pull the bottle down, freeing the cork through the hinged plate. For either plastic or cork stoppers, install a wire cage and give it six half-turns to hold the cork down. Wires are not needed for crown caps. Now fill another 23 bottles and you have two cases of Charmat sparkling wine! Chill and enjoy.
If that sounded like a lot of work, here is a simplification. It will not be fully Charmat style, but a very close approximation. Since we are home winemakers, we can do whatever we want, which in this case is force carbonation. For this
The dosage level is the added sugar for a desired sweetness in your sparkling wine.
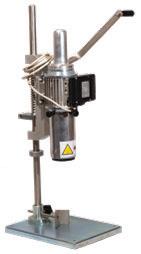
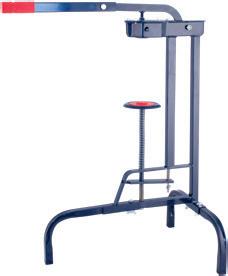
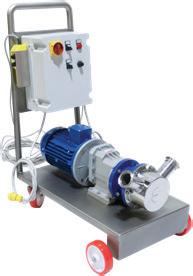
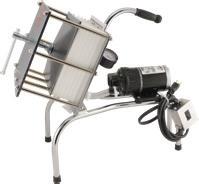


process, you still need a CO2 tank and regulator. You only need one soda syrup keg and no filter. If you want to bottle, you still need a counter-pressure filler.
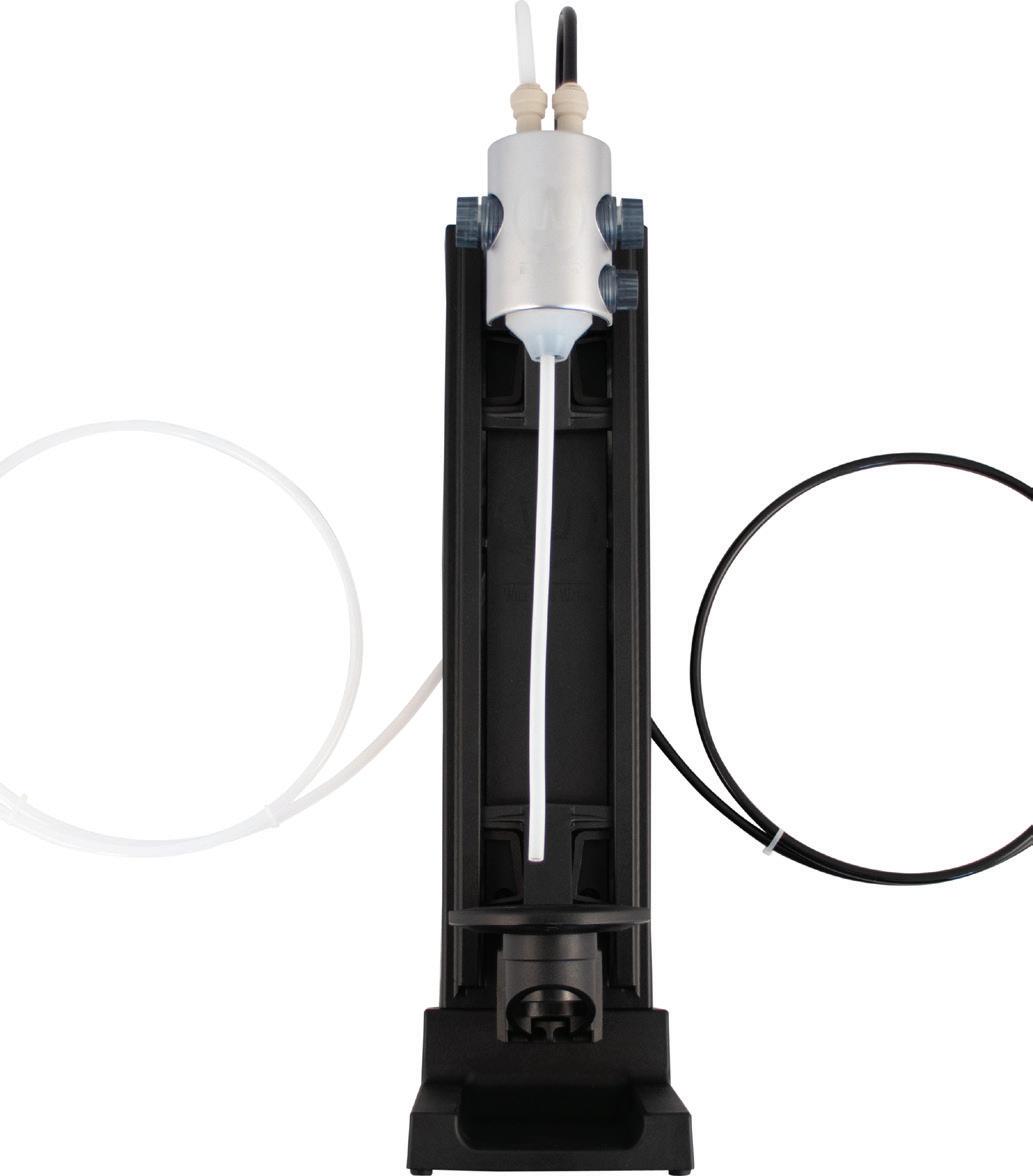
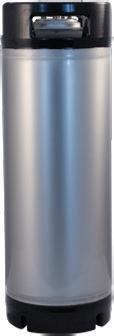
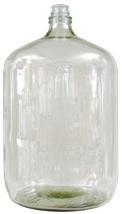
Once again, begin by making your cuvée. Do bench trials to plan your dosage by taste. Make the sugar syrup and add it to your sanitized keg. Rack in your still wine. If you will bottle the sparkling wine, add potassium sorbate stabilizer to prevent refermentation. Follow your supplier’s instructions, usually about one gram per gallon or 0.3 g/L. If you will keep your sparkling wine cold and dispense it on tap, you do not need the sorbate. The cold storage temperature will prevent fermentation.
Seal the keg and flush the headspace with CO2. Chill the keg. Attach the gas supply and set the regulator to your desired pressure. From time-to-time over the next few days, rock or agitate the keg to expedite mixing the gas into the liquid. To review systems and procedures you can use for draft sparkling wine, refer to the “Advanced Winemaking” column on kegging wine in the April-May 2023 issue.
If you want to bottle sparkling wine, the procedure uses the same counter-pressure system described above. The potassium sorbate takes the place of sterile filtration. Whether bottled or served on draft, your carbonated, slightly sweetened wine is a near relative of Charmat sparkling wine. You simply used industrial carbon dioxide instead of producing it in place through fermentation. The flavor might be slightly different, but I don’t think your guests will complain!

At the time that I am writing this column we are in the midst of the wettest year here on the Central Coast of California since 1998 (well over 30 inches/76 cm of rain in a winter!), and a lot of vineyardists and winemakers here in California are talking about water: Drought, rain, soil, irrigation . . . the resurrection of a long-lost lake. Since it’s been almost seven years since we discussed water needs in the vineyard in this column, it is a good time to check new innovation and some tried and tested strategies for using water to our greatest advantage in growing great wine.
The good news: In most temperate areas of the U.S. free of drought conditions, irrigation will not be necessary to produce ripe fruit in a backyard vineyard. If your home ground receives 20–25 in. (50–65 cm) of rain per year, you may be able to dry farm your grapes, which will erase the cost of establishing an irrigation system and can rely on just some extra hose around in case those vines need a rare drink in an extended dry, hot spell. The Eurasian grapevine requires relatively little water to produce a bottle of wine. Even in California, about 5–6 gallons (19–23 L) of water will historically produce a bottle of wine in arid conditions (12 in./30 cm of rain). With that in mind, let’s take a close look at irrigating the home vineyard so we can make a smart decision on if you need to provide supplemental irrigation and, if you do, how and when to best apply it.

Vines and water: Let’s start with a fundamental understanding of what a vine does with water, and what happens without it. A grapevine, like all plants and most animals, is a vascular system that uses liquid to transport nutrients
and life-sustaining chemicals through its vegetal tissue. Water moves through a vine by osmosis — just like a wick in a glass of water. The leaves give off water vapor vis-à-vis photosynthesis through the back of the leaves. As the vine respires, the whole spongy interior of the vine dries out and pulls more water from the root hairs into the vine’s roots, tap root, trunk, cordon arms, canes, shoots, and up to the growing tips. That fluid feeds the vines and keeps it moist and turgid, and is then respired as water vapor through the stomata found on the back of a vine’s leaves.
In drought conditions, vines have some survival mechanisms in the short term, but will droop, desiccate, shut down, and fail to ripen its crop if the drought conditions persist as dry soil at root level. It is vital to keep a grapevine healthy enough to produce ripeness and sugar in the berries, to ripen phenolically as well as simply sweetening. In order for this to happen they do require water at root level. Soil dryness between waterings is fine — even helpful to wine quality after flowering — but a vine in purely dry soil won’t last more than a month or two without shutting down and giving up on the vintage.
Vines do most of their work between 1.5- and 5-ft. (0.45- and 1.5-m) deep in the soil (although vine roots can reach more than a 100-ft./30-m deep in some soils), so the water status of a soil profile is most important in that zone. The old technology would have us put an Irrometer in the soil with ceramic tips measuring the “pull” of the dry soil against the liquid inside. I felt a bit mature looking through the modern options for soil moisture monitoring in researching this article. The soil probes I’m used to have gone the way of the cathode tube black and white television!
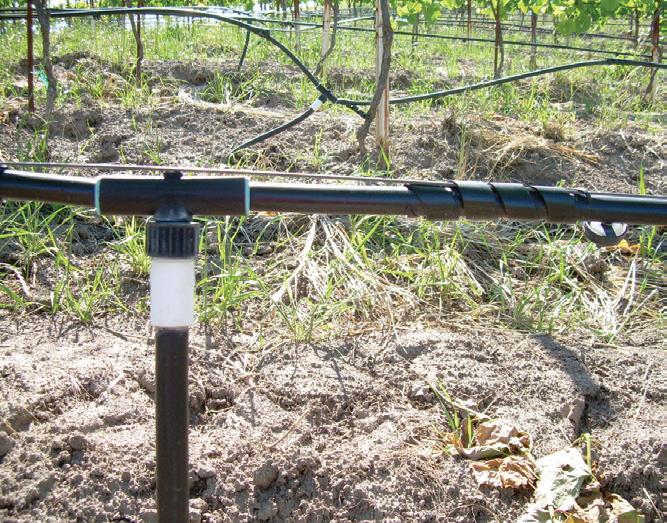 BY WES HAGEN
In most temperate areas of the U.S. free of drought conditions, irrigation will not be necessary to produce ripe fruit in a backyard vineyard.
Today we have some options and advances we can rely on to help us make informed decisions on vineyard irrigation. Let’s take a look at what’s new or improved (or not), and find the tools that are the best for our specific farming goals.
Soil moisture monitoring: From $12 to $1,500 (USD), you have hundreds of options for electronically or remotely sensing soil moisture, but there are cheaper and more hands-on ways of monitoring too. Just use a search engine to find “soil moisture monitoring” and take a look for a solution that makes sense for your budget and your location. Three depths for monitoring are recommended: 12 in., 18 in., and 24 in. (30, 45, and 60 cm); the critical depth for measuring soil wetness is 12–36 in. (30–90 cm); and I like to know when the soil dries at 12 in. (30 cm), and starts drying out at 18 in. (45 cm) to add some supplemental irrigation. Irrometers are the old analog technology but rarely fail and never need batteries or charging. If you do choose to use the old (but tried-and-true) Irrometer, make sure you do your upkeep and fill the reservoir with dyed water to keep them working.
New weather station technology that can help us determine best watering practices: Back in the early days of U.S. winegrowing and up to as recently as the 1980s, weather conditions were recorded by a few government employees and farmers for their own use. We are now in a golden age of climate science and weather reporting. For a few hundred dollars you can set up an advanced weather station in your backyard that will calculate degree growing days, rainfall totals, and even an advanced concept called evapotraspiration or EtO. EtO measures how much water is used by an acre of grasslands on any given 24-hour period.
A farmer takes this data and applies a “crop coefficient” for their specific farming needs, and water use can be dialed in precisely. For those ultra-geeks who like data and difficult math — learn to use and exploit EtO for precise irrigation. My pro suggestion: Get a weather station a few grades higher quality and price than you think you need. This is a tool that will pay for itself by allowing you to understand degree days, ripeness, rainfall, and irrigation, as well as more data to consider in tweaking your farming for quality wine.
Simply put, there are more professional weather stations at your computing fingertips than any moment in human history. And most of it is free! Between simple forecasts on NOAA (National Oceanic and Atmospheric Administration) and weather.com, to networked stations at wunderground.com, and agricultural area- and crop-specific reporting — there’s a good chance you won’t need to buy a weather station if there’s one within the mesoclimate of your home vineyard. If the weather/climate/rainfall is 90% similar where an existing weather station resides, I would use that data and let someone else worry about the maintenance.
Take the quiz, then we’ll discuss the answers. This is meant to
cut through many of the common perceptions that surround wine vineyard irrigation. It will be impossible to give you all the technical expertise to design and implement an entire irrigation system in the space allowed in this column. In the next “Backyard Vines” we will look at different types of irrigation systems so you can choose a style to fit your vineyard. Installation can be researched further in books or on the internet, and most landscape design companies can help you size the pipes, valves, and pumps that may be necessary.
1. T/F Stressing grapevines always produces superior fruit.

2. T/F Growing regions that require irrigation are inherently inferior.
3. T/F Turning the water off before harvest always improves wine quality.
4. T/F Clay soils need to be irrigated more than sandy soils.
5. T/F Mature grapevines compete with weeds for water and nutrients.
6. T/F An irrigation system for a vineyard requires expensive equipment
7. T/F All vineyards require some sort of irrigation system.
8. T/F Vines cannot tell the difference between rain and irrigation.
9. T/F Water is best applied at the base of the vine.
10. T/F The best time to install irrigation is after the trellising is installed.
Answers Discussed: As you may have guessed, the answer to all 10 quiz items above are false. Let’s take a moment on each of these to explain and discuss.
1. Healthy, mature grapevines produce the best fruit. There are regions in the world (the Rhône Valley comes to mind) where stressed vines on rocky hillsides produce intense, ripe fruit that makes beautiful wine. But let’s put that behind us for now because we do not live in those places. Let’s focus on keeping the vines healthy, viable, and alive. Sugar is produced by healthy green leaves turning sunlight, water, and nutrients into fruit. Stressed vines are more susceptible to disease, mildew, and rot. The old adage about stressing the vine is pure mythology in the New World . . . so let’s erase it from our head.
2. Winegrowing regions in the world that get adequate rainfall as to make irrigation unnecessary often espouse their superiority over arid areas that require supplemental water. The Willamette Valley of Oregon is one of those places, a region that loves to compare itself to the Cote d’Or in Burgundy. But even the Oregonians are commonly irrigating young vineyards now to make sure that their investment in young vines matures into a producing vineyard. Arid areas that commonly receive less than 10 in. (25 cm) of rainfall a year (such as Santa Barbara County, California, and eastern Washington State) clearly show that irrigation-dependent areas can produce stunning wines of world-class quality.
3. Turning the water off in the vineyard before harvest is yet another contentious issue. Letting the ground dry out will certainly hasten sugar accumulation, but most of the “Brix bump” is due to dehydration, NOT the evolution of phenolic ripeness. For those interested in making high-octane, monster wines this technique may get them the concentration they are looking for. But as an individual who likes wines with balanced fruit, alcohol, and acidity, I’m a big proponent of allowing the vine to keep green leaves through harvest. This keeps the vine from dehydrating the fruit, and a viable, live vine continues to ripen fruit naturally without dehydration.
4. The opposite is true: Clay holds water much longer than sand, so clay soils actually require significantly LESS irrigation. Clay absorbs water while sand allows it to drain. Most soils are a mix of sand, loam, and clay. To determine your soil type, check out my piece in the June-July 2020 issue “Dirt Don’t Lie” or at https://wine makermag.com/technique/dirt-dont-lie-the-impact-ofsoil-on-vineyards-and-wine
5. Actually, most vines absorb water and nutrients from deep in the soil profile and do not compete directly with weeds. Weeds can compete for irrigation water that is applied sparingly, as it does not reach the appropriate depth for the vines’ root system. Weeds are competitive with young vines, though, and should never be allowed to grow into the canopy.
6. An irrigation system is as easy or as expensive as you want to make it. If you can get by with using a hose and applying the water by hand, all the power to you! The
only reason to drop serious money on an irrigation system is convenience and an increase in fruit and wine quality.
7. If your vines stay viable and green throughout the growing season without supplemental irrigation, consider yourself blessed! Don’t install and pay for something you don’t need.
8. Rainwater is far superior to ground or municipal water for irrigation. Municipal water often contains chlorine or fluoride byproducts (often from steel, uranium, and aluminum manufacturing), which are not needed for healthy growth and can actually be harmful to the vines. You may need to have your water tested by an agricultural lab to make sure it is usable for vineyard irrigation.
9. Not true! If you are using drip line and drip emitters, spread them out so the vines have to spread out their roots to find water. You do not want the vines to make a single root ball at the base of the trunk and become dependent and lazy on the drip emitters. If the vine has equidistant drip emitters on either side, it will spread its root system out.
10. Don’t do it! The FIRST thing to be installed in a vineyard project is the layout and irrigation. Make sure the irrigation is fully functional before putting in trellising and vines. Remember that at least half of a good irrigation system is underground, and you may have to trench across the rows.
Stay tuned for the October-November 2023 issue where I will be delving into the various irrigation systems and strategies you can employ to manage your vines.
NORCAL BREWING SOLUTIONS
THE WINE SMITH
6800 A Moffett Rd. (US 98) Mobile 36618
(251) 645-5554
e-mail: winesmith@bellsouth.net
www.thewinesmith.biz
Home Winemaking and Brewing Supplies.
THE BEVERAGE PEOPLE
1800 Empire Industrial Ct., Ste. A Santa Rosa 95403 (707) 544-2520
www.thebeveragepeople.com
Fast Shipping, Great Service, Cheesemaking & Brewing too.
BREHM VINEYARDS®
www.brehmvineyards.com
grapes@brehmvineyards.com
Phone: (510) 527.3675
Fresh grape pick-up in Petaluma, CA
Frozen grapes in Richmond, CA
Ultra-premium grapes for home winemakers for over 40 years! Sold at harvest or shipped frozen across N. America year-round. Over 30 varieties from Carneros, Napa, Sonoma, Washington and Oregon.
DELTA PACKING CO. OF LODI, INC.
6021 E. Kettleman Lane
Lodi 95240
(209) 334-1023
fax: (209) 334-0811
bcostamagna@deltapacking.com
www.grapesofgold.com
We offer premium California wine grapes & juice. Please call for a supplier near you.
MOREBEER! & MOREWINE!
995 Detroit Ave., Unit G Concord 94518
(925) 771-7107
fax: (925) 671-4978
srconcord@moreflavor.com
www.morewinemaking.com/
showrooms
Absolutely Everything! for Wine-Making
MOREBEER! & MOREWINE!
991 N. San Antonio Rd. Los Altos 94022 (650) 949-BREW (2739) srlosaltos@moreflavor.com www.morewinemaking.com/
showrooms
Absolutely Everything! for Wine-Making
MOREBEER! & MOREWINE!
1506 Columbia Ave. #12 Riverside 92507 (951) 779-9971
fax: (951) 779-9972
srriverside@moreflavor.com www.morewinemaking.com/
showrooms
Absolutely Everything! for Wine-Making
MOREBEER! & MOREWINE!
2315 Verna Court San Leandro 94577 (510) 351-3517
srsanleandro@moreflavor.com www.morewinemaking.com/
showrooms
Absolutely Everything! for Wine-Making
8865 Airport Rd., Ste. H Redding 96002 (530) 243-BEER (2337) or (530)-221-WINE (9463) www.norcalbrewingsolutions.com
Full line of wine, beer, & distilling supplies, hardware, and ingredients. Manufacturers of lees filters, punchdown tools, and custom solutions.
VALLEYVINTNER, LLC (925) 217-0058 or (866) 812 WINE (9463) Toll Free info@valleyvintner.com
www.valleyvintner.com
75+ years wine making expertise!
Owned & Operated by winemakers serving the winemaking community. “The Vine, The Time, The Wine”
LIL’ OLE’ WINEMAKER 516 Main Street Grand Junction 81501 (970) 242-3754
Serving Colorado & Utah winemakers since 1978
BREW & WINE HOBBY
Featuring Winexpert & RJ Spagnols kits. Area’s widest selection of wine kits, beer making supplies & equipment
12 Cedar St. East Hartford 06108 (860) 528-0592 or 1-800-352-4238 www.brew-wine.com
Specializing in world-wide juice varietals.
MUSTO WINE GRAPE CO., LLC
101 Reserve Road Hartford 06114
1-877-812-1137
sales@juicegrape.com www.juicegrape.com
www.winemakinginstructions.com
MWG services home winemakers, wineries, breweries, cideries, distilleries, and homebrew shops. We provide access to the best grapes, juices, equipment, supplies, and knowledge available. Let us help you make your next wine your favorite wine.
PARDO WINE GRAPES
3314 N. Perry Ave. Tampa 33603 (813) 340-3052
vince@pardowinegrapes.com
www.pardowinegrapes.com
Distributors of quality California (fall) and Chilean (spring) wine grapes and fresh juice to Florida winemakers for over 80 years.
GREAT FERMENTATIONS
INDIANAPOLIS
5127 East 65th St. Indianapolis 46220 (317) 257-WINE (9463)
or toll-free
1-888-463-2739
info@greatfermentations.com
www.greatfermentations.com
QUALITY WINE AND ALE SUPPLY/ HOMEBREWIT.COM
5127 E. 65th St. Indianapolis 46220 Phone: (574) 295-9975
customerservice@homebrewit.com
Online: www.Homebrewit.com
Quality wine making supplies for beginners AND experts. Bottles, Corks, Shrinks, Chemicals, and Professional Equipment. Largest selection of Winexpert Kits. Fast Shipping. Expert Advice.
BLUFF STREET BREW HAUS
372 Bluff Street
Dubuque (563) 582-5420
e-mail: jerry@bluffbrewhaus.com
www.bluffbrewhaus.com
Complete line of wine & beermaking supplies. In operation since 2006.
BACCHUS & BARLEYCORN, LTD.
6633 Nieman Road
Shawnee 66203 (913) 962-2501
www.bacchus-barleycorn.com
Your one stop supply shop for home wine, cider, mead, beer and cheese makers for over 30 years.
WINEMAKERS & BEERMAKERS SUPPLY
9475 Westport Rd. Louisville 40241 (502) 425-1692
www.winebeersupply.com
Impeccable line of wine & beer making supplies. Superior grade of juice from Winexpert. Quality malt from Briess & Muntons. Family owned store since 1972.
THE FLYING BARREL
1781 North Market St. Frederick (301) 663-4491 fax: (301) 663-6195
www.flyingbarrel.com
Maryland’s 1st Wine-On-Premise & large selection of homewine supplies! Wine judge on staff!
MARYLAND HOMEBREW
6770 Oak Hall Lane, #108 Columbia 21045
1-888-BREWNOW
www.mdhb.com
We carry the VinoSuperiore frozen Italian must along with Winexpert Kits. Everything you need to make your own wine & cheese. Visit us in-person or online. We ship everywhere
BEER AND WINE HOBBY, INC.
85 Andover St.
Danvers 01923
1-800-523-5423
e-mail: bwhinfo@beer-wine.com
website: www.beer-wine.com
Brew on YOUR Premise™
For the most discriminating wine & beer hobbyist.
THE WITCHES BREW INC.
12 Maple Ave.
Foxborough 02035 (508) 543-0433

steve@thewitchesbrew.com
www.thewitchesbrew.com
You’ve Got the Notion, We’ve Got the Potion
MACOMB VINTNER SUPPLY
44443 Phoenix Dr. Sterling Heights (248) 495-0801
www.macombvintnersupply.com
Purveyor of grapes and grape juices for the winemaker. L’uva Bella, Mosto Bella & Chilean Bello Brands, and Extra-Virgin Olive Oil.
MORGAN VINEYARD
15775 40th Avenue
Coopersville 49404 (616) 648-3025
morgangrapes@gmail.com
MorganVineyard.com
Supplier of high quality wine grapes conveniently located in West Michigan.
SICILIANO’S MARKET
2840 Lake Michigan Dr. N.W. Grand Rapids 49504 (616) 453-9674
fax: (616) 453-9687
e-mail: sici1@sbcglobal.net
www.sicilianosmkt.com
Largest Wine Making inventory in West Michigan. Now selling beer and winemaking supplies on-line.
TAYLOR RIDGE VINEYARDS
3843 105th Ave.
Allegan 49010 (269) 521-4047
bctaylor@btc-bci.com
www.taylorridgevineyard.com
18 Varieties of Wine Grapes and Juices. Vinifera, New York State, Minnesota and French hybrids. Providing wine grapes and juices for over 30 years.
HOME BREWERY
1967 West Boat St. Ozark
1-800-321-BREW (2739) brewery@homebrewery.com
www.homebrewery.com
Since 1984, providing excellent Service, Equipment and Ingredients. Beer, Wine, Mead, Soda and Cheese
FULKERSON WINERY & JUICE PLANT
5576 State Route 14 Dundee 14837
(607) 243-7883
fax: (607) 243-8337
www.fulkersonwinery.com
Fresh Finger Lakes grape juice available during harvest. Large selection of home winemaking supplies. Visit our website to browse and order supplies. Open year round 10-5, extended seasonal hours. Find us on Facebook and follow us on Twitter @fulkersonwinery.
MAIN STREET WINES & SUPPLIES
249 Main St.
Arcade 14009
(585) 492-2739
fax: (585) 492-2777
mainstwines@yahoo.com
Plenty of wine kits available to make your own wine. Full line of winemaking supplies and accessories for your convenience. Tue-Fri 10-6; Sat 10-3 or by appt. Like us on Facebook.
NIAGARA TRADITION
HOMEBREWING SUPPLIES
1296 Sheridan Drive Buffalo 14217 (800) 283-4418 or (716) 877-8767
www.nthomebrew.com
We feature a complete line of supplies for making wine, beer, mead, cider and cheese.
PANTANO’S WINE GRAPES & HOMEBREW
249 Rte 32 S. New Paltz 12561 (845) 255-5201 or (845) 706-5152 (cell) pantanowineandbeer@yahoo.com
www.pantanosbeerwine.com
Find Us On Facebook. Your source for wine & beer making supplies and equipment. Grapes and Juice from California, Italy & Chile in season, wine kits and all juice pails (6 gal) year round. Classes available. We now carry Distilling Products and Stills.
TEN THOUSAND VINES WINERY
8 South Buffalo St. Hamburg 14075 (716) 646-9979
mike@TenThousandVines.com
www.TenThousandVines.com
Wine supplies, juice and advice.
WALKER’S WINE JUICE
2860 N.Y. Route 39 – Since 1955 Forestville (716) 679-1292
www.walkerswinejuice.com
Over 50 varieties of “Hot-Pack”
Grape, Fruit and Berry Juice, Requiring No Refrigeration, shipped by UPS all year. Supplying over 800 wineries in 37 states!
WATERLOO CONTAINER CO.
2311 N.Y. Route 414
Waterloo 13165 (315) 539-3922
contactus@waterloocontainer.com
www.waterloocontainer.com
Supplier of wine bottles, corks, and closures to all sizes of winemakers.
ALTERNATIVE BEVERAGE (BELMONT)
1500 River D., Suite 104
Belmont 28012
Advice Line: (704) 825-8400
Order Line: 1-800-365-2739
www.ebrew.com
44 years serving all home winemakers & brewers’ needs! Come visit for a real Homebrew Super Store experience!
ALTERNATIVE BEVERAGE (CHARLOTTE)
3911 South Blvd.
Charlotte 28209
Advice Line: (704) 825-8400
Order Line: 1-800-365-2739
www.ebrew.com
44 years serving all home winemakers & brewers’ needs! Visit our stores to learn how we can help you make the best wine you can make.
ALTERNATIVE BEVERAGE (CORNELIUS)
19725 Oak St.
Cornelius 28031
Voice Line: (704) 527-2337
Fax Line: (704) 522-6427
www.ebrew.com
44 years serving all home winemakers & brewers’ needs! Visit our stores to learn how we can help you make the best wine you can make.
AMERICAN BREWMASTER
3021-5 Stony Brook Dr. Raleigh 27604 (919) 850-0095
Text: (984) 251-3030
www.americanbrewmaster.com
Wine Kits, Wine Ingredients and additives, corks and bottles since 1983! Wow. 1983!
CAROLINA WINE SUPPLY
329 W. Maple St. Yadkinville 27055
(336) 677-6831
fax: (336) 677-1048
www.carolinawinesupply.com
Home Winemaking Supplies & Support.
THE GRAPE AND GRANARY
915 Home Ave. Akron 44310 (330) 633-7223

www.grapeandgranary.com
Concentrates, Fresh juice, Wine on Premise.
LABEL PEELERS BEER & WINE MAKING SUPPLIES, INC.
211 Cherry St. Kent 44240 (330) 678-6400
info@labelpeelers.com
www.labelpeelers.com
Specializing in winemaking/ homebrew supplies & equipment. Free monthly classes.
Hours: Mon-Sun 10am-7pm
HIGH GRAVITY 6808 S. Memorial Drive Tulsa 74133
(918) 461-2605
e-mail: store@highgravitybrew.com
www.highgravitybrew.com
Join our Frequent Fermenters Club!
F.H. STEINBART CO. 234 SE 12th Ave. Portland 97214
(503) 232-8793
fax: (503) 238-1649
e-mail: info@fhsteinbart.com
www.fhsteinbart.com
Brewing and Wine making supplies since 1918!
HOME FERMENTER
1011 Valley River Way, Ste. 107 Eugene 97401 (541) 485-6238
www.homefermenter.com
Providing equipment, supplies and advice to winemakers and homebrewers for over 40 years.
BOOTLEGGERS BREW SHOP, LLC
917 Pleasant Valley Blvd. Altoona 16602
(814) 931-9962
http://bootleggersbrewshop.com
bootleggersbrewshop@gmail.com
Find us on Facebook! Central PA’s
LARGEST homebrew supplies store! We carry seasonal cold pressed wine juices from around the world. Special orders welcome!
NITTANY VALLEY TRUE VALUE
1169 Nittany Valley Drive
Bellefonte
(814) 383-2809 f
ax: (814) 383-4884
Supplies - Equipment - Classes. Fresh grapes & juice in season.
PRESQUE ISLE WINE CELLARS
9440 W. Main Rd. (US Rte. 20) North East 16428 (800) 488-7492
www.piwine.com
Your one stop shop! Complete service since 1964, helping you make great wines. We specialize in small winery and amateur wine supplies and equipment. Check out our website www.piwine.com or stop by and see us. Fresh grapes and juice at harvest.
SCOTZIN BROTHERS
65 N. Fifth St.
Lemoyne 17043 (717) 737-0483 or 800-791-1464
www.scotzinbros.com
email: shop@scotzinbros.com
WINE and Beer MAKERS PARADISE!
BADER BEER & WINE SUPPLY
711 Grand Blvd. Vancouver, WA 98661 1-800-596-3610
Sign up for our free e-newsletter @ Baderbrewing.com
BREHM VINEYARDS®
www.brehmvineyards.com
grapes@brehmvineyards.com
Phone: (510) 527-3675
Fresh grape pick-up in Underwood, WA
Frozen grapes in Portland, OR & Scranton, PA
Ultra-premium grapes for home winemakers for over 40 years! Sold at harvest or shipped frozen across N. America year-round. Visit our vineyard 1 hour east of Portland in a National Scenic Area.
JON’S HOMEBREW AND WINE SUPPLY
1430 E. Main Ave., #1430C
Puyallup 98372 (253) 286-7607
jon@jonshomebrew.com
jonshomebrew.com
Puyallup’s home for Home Beer and Winemaking supplies!
THE CELLAR BREW SHOP
465 N. Washburn St. Oshkosh 54904 (920) 517-1601
www.thecellarhomebrew.com
cellarbrewshop@outlook.com
Beer & Wine ingredients and equipment. Extensive inventory at Competitive prices, bulk discounts. Great service and free advice from experienced staff.
HOUSE OF HOMEBREW
410 Dousman St. Green Bay (920) 435-1007
staff@houseofhomebrew.com
www.houseofhomebrew.com
Beer, Wine, Cider, Mead, Soda, Coffee, Tea, Cheese Making.
WINE & HOP SHOP
1919 Monroe St. Madison 53711 (608) 257-0099
www.wineandhop.com
wineandhop@gmail.com
Madison, WI’s locally owned homebrewing and winemaking headquarters for over 50 years. Fast, affordable shipping to anywhere. Use promo code WineMaker at checkout for discounts. Free expert advice too!
BREW FOR LESS 10774 - 95th Street
Edmonton T5H 2C9 (708) 422-0488
brewforless.com
info@brewforless.com
Edmonton’s Largest Wine & Beer Making Supply Store
GRAPES TO GLASS 5308 -17th Ave. SW Calgary T3E 6S6 (403) 243-5907
www.grapestoglass.com
Calgary’s largest selection of brewing, winemaking & distilling supplies. On-line shopping available with delivery via Canada Post.
BOSAGRAPE WINERY & BREW SUPPLIES 6908 Palm Ave.
Burnaby V5J 4M3 (604) 473-WINE
fax: (604) 433-2810
info@bosagrape.com
www.bosagrape.com
Ingredients, equipment, labware & supplies for brew & winemaking. Still Spirits, Hanna, Stavin Oak, Brehm Vineyards, Mosti juices, Brewcraft, Marchisio, Accuvin, Chemetrics, Vintner’s Harvest, Lalvin, Buon Vino, Vintage Shop.
It was 2003, and I asked my wife, Paola, to pick out a kit for me at the homebrew shop near Boston, Massachusetts. I figured if I made beers she was interested in, she would be more accepting of my new homebrew hobby.
“I found it,” she said, holding up a box. Looking at it, I told her, “Riesling is not a beer.”
“But you can make it with the same equipment you already have and this is what I want.”
Taking it home, it was surprisingly easy to make. It was drinkable and it got me thinking, could I make better wine? Thus began a journey down the slippery slope well known to fellow hobbyists; to make better wine from quality concentrate kits, whole juice kits, fresh juice in season, and finally whole grapes, and then better quality grapes. Our wines got better with each step.
In 2008 we moved to Finland for my work, and in the back of my head I thought, “this is an opportunity to get good Italian grapes.” But it was not to be — there is no infrastructure to support home winemakers in Finland, so obtaining grapes or even good-quality kits was just not possible. Wanting to continue the hobby, I looked to see what I could get and in Finland that meant berries. The local berries were extraordinary . . . but how to work with them?
That began a new project, and after only a few years Paola realized the fruit wines we were making in Finland were better than the wines we made in the U.S. and the key was the quality of the fruit. She also realized no one was making wines like us locally and, looking to go back to work, she decided that starting a winery was an opportunity. I would make the wine in the evenings and weekend (while continuing my day job as an engineer) and she would sell the wines. In 2014 we founded Ainoa Winery (translation: Ainoa = unique; pro-
nunciation: “I know a winery”).
What we didn’t understand before starting though was that many people in Finland looked down on berry wines. It was almost impossible to get people to even taste our wines, and after a year we were ready to give up. But a friend from work told us to get an independent evaluation of the wines first. So we sent two wines to the East Meets West Wine Competition in Sonoma County, California, and our blueberry wine became the first Finnish wine to win a gold medal in an international competition (cloudberry wine got a silver). We realized that our wine was good . . . we just had to communicate better.
Over the next year, we worked on our brand, our packaging, and our message. Our wines were subsequently accepted into the alcohol monopoly shops (state-owned liquor stores).
In 2017 we sent samples to the Vinalies Internationales, the premier tasting of the Oenologues de France and one of the most prestigious wine competitions in the world. Vinalies had never previously awarded a fruit wine, yet our raspberry wine received a gold medal, a Vinalies Trophy (their highest honor), and was rated the 11th best overall of the 3,500+ wines from 45 countries that year. The Oenologues have since awarded 7 more gold medals to fruit wines — all of them to Ainoa.

Restaurants in Finland realized we had something special, sales picked up, and recognition followed. In 2018 we were honored for our contribution to advancing Finnish cuisine, and in 2019 we were awarded the Embla Nordic Food Artisan trophy for creating worldclass wine using native Nordic ingredients. By 2020 Ainoa was successful enough that I switched from being an engineer to a professional winemaker.
Looking back 20 years, my strategy worked. These days Paola fully supports my homebrewing winemaking.
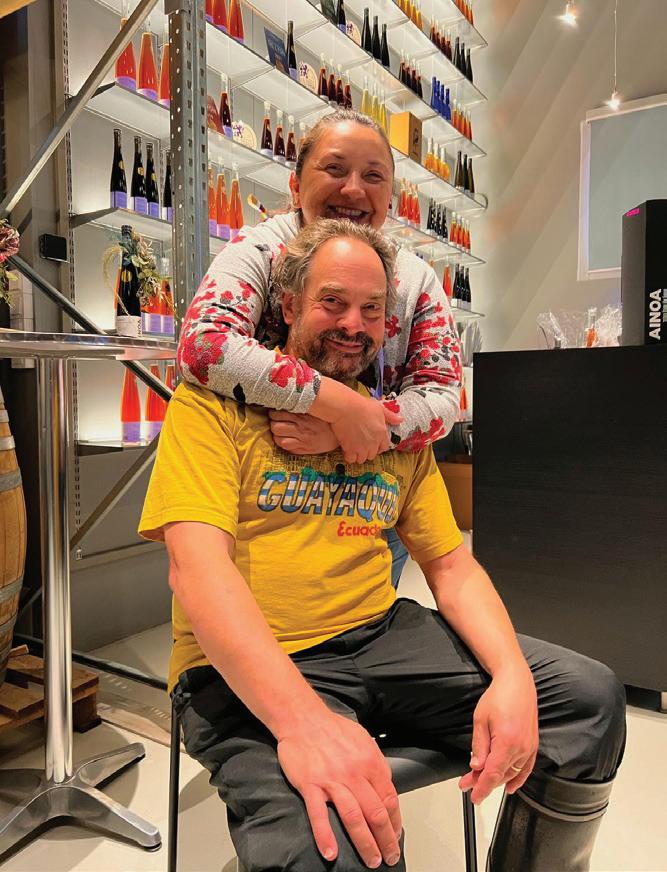
Wanting to continue the hobby, I looked to see what I could get and in Finland that meant berries.Photo courtesy of David Cohen
NO water has been removed from our 100% Grape Must therefore, no water needs to be added. Shelf stable, no refrigeration required! Available year-round. 100% GRAPE MUST


