Home Appliance Hack-and-IoT Guidebook (Extract)

Page 1

books
Home Appliance Hack-and-IoT Guidebook Affordable solutions with the ESP8266 and 3D printing
Hans Henrik Skovgaard
Home Appliance Hack-and-IoT Guidebook Affordable solutions with the ESP8266 and 3D printing ●
Henrik Skovgaard
Hans

● This is an Elektor Publication. Elektor is the media brand of Elektor International Media B.V.

PO Box 11, NL-6114-ZG Susteren, The Netherlands Phone: +31 46 4389444

● All rights reserved. No part of this book may be reproduced in any material form, including photocopying, or storing in any medium by electronic means and whether or not transiently or incidentally to some other use of this publication, without the written permission of the copyright holder except in accordance with the provisions of the Copyright Designs and Patents Act 1988 or under the terms of a licence issued by the Copyright Licencing Agency Ltd., 90 Tottenham Court Road, London, England W1P 9HE. Applications for the copyright holder's permission to reproduce any part of the publication should be addressed to the publishers.

● Declaration

The Author and Publisher have used their best efforts in ensuring the correctness of the information contained in this book. They do not assume, and hereby disclaim, any liability to any party for any loss or damage caused by errors or omissions in this book, whether such errors or omissions result from negligence, accident, or any other cause.

All the programs given in the book are Copyright of the Author and Elektor International Media. These programs may only be used for educational purposes. Written permission from the Author or Elektor must be obtained before any of these programs can be used for commercial purposes.

● British Library Cataloguing in Publication Data

A catalogue record for this book is available from the British Library

● ISBN 978-3-89576-536-0 Print ISBN 978-3-89576-537-7 eBook

● © Copyright 2022: Elektor International Media B.V. Editor: Jan Buiting, MA Prepress Production: D-Vision, Julian van den Berg

Elektor is part of EIM, the world's leading source of essential technical information and electronics products for pro engineers, electronics designers, and the companies seeking to engage them. Each day, our international team develops and delivers high-quality content - via a variety of media channels (including magazines, video, digital media, and social media) in several languages - relating to electronics design and DIY electronics. www.elektormagazine.com

● 4

Contents

Chapter 1 • Introduction ............................................. 15

1.1. Why this book? ............................................... 15

1.2. Who is this book for? 15 1.3. How to use this book ........................................... 16 1.4. The organization of the book ...................................... 17 1.4.1. Chapter 2: Components ........................................ 17 1.4.2. Chapter 3: Arduino IDE installation ................................ 17 1.4.3. Chapter 4: emoncms Installation 18 1.4.4. Chapter 5: MQTT (mosquitto) Installation on a Raspberry Pi ............... 18 1.4.5. Chapter 6: OpenSCAD 18 1.4.6. Chapter 7: ESP8266 Security .................................... 18 1.4.7. Chapter 8: ESP8266 Watchdogs .................................. 18 1.4.8. Chapter 9: ESP8266 Over The Air – Update/Programming (OTA) 18 1.4.9. Chapter 10: ESP8266 WiFi Antenna ................................ 18 1.4.10. Chapter 11: ESP8266 Housing 19 1.4.11. Chapter 12: VPN Gateway ...................................... 19 1.4.12. Chapter 13: Software/Firmware design............................. 19 1.4.13. Chapter 14: IKEA Hack ........................................ 19 1.4.14. Chapter 15: Door Lock Monitor .................................. 19 1.4.15. Chapter 16: Energy Sensor 19 1.4.16. Chapter 17: Refrigerator Control ................................. 19 1.4.17. Chapter 18: Greenhouse Thermostat 20 1.4.18. Chapter 19: 230-VAC Relay Control ............................... 20 1.4.19. Chapter 20: Standalone Temperature Sensor ........................ 20 1.4.20. Chapter 21: Temperature, Pressure, and Humidity Sensor 20 1.4.21. Chapter 22: IKEA Trådfri Controller ............................... 20 1.4.22. Chapter 23: Troubleshooting 20 1.4.23. Chapter 24: PCB Layout ....................................... 20 1.5. Abbreviations ................................................. 20 1.6. References ................................................... 21

Contents ● 5

1.7. Feedback .................................................... 21

Chapter 2 • Components ............................................. 22
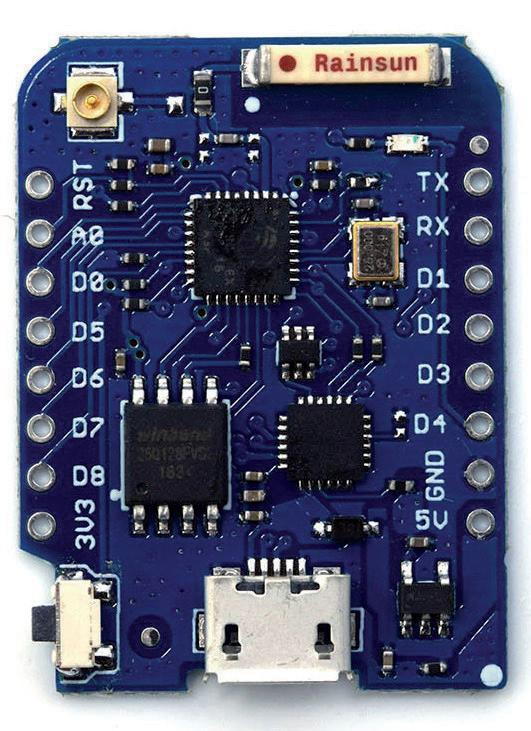
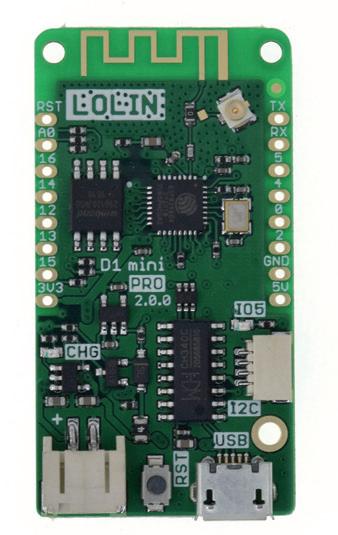
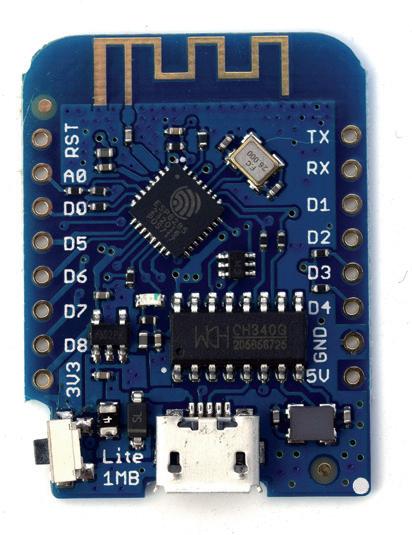
2.1. ESP8266 22

2.1.1. Wemos/Lolin, general notes ..................................... 23 2.1.2. Sleep Mode 24

2.2. Raspberry Pi ................................................. 25 2.2.1. Raspberry Pi configuration ...................................... 25

2.3. Neopixel Jewel 7............................................... 31 2.4. IKEA Grönö lamp .............................................. 32 2.5. SSR 33 2.6. Maxim DS18B20 ............................................... 34

2.7. QRE1113 (Analog) 34 2.8. Silabs MGM210L ............................................... 35 2.9. I/O devices .................................................. 36 2.9.1. SHT30 Shield ............................................... 36 2.9.2. HP303B Shield............................................... 37

Chapter 3 • Arduino IDE Installation .................................... 38

3.1. Standard Arduino IDE install ...................................... 38 3.2. ESP8266 support 38 3.3. SPI Flash File (SPIFFS) system install ................................ 41 3.4. Alternatives to the SPI Flash File ................................... 45 3.5. Additional libraries 46

Chapter 4 • emoncms Installation ...................................... 47

4.1 Update and upgrade the Raspberry Pi 48 4.2. Install dependencies ............................................ 49 4.2.1. MariaDB & apache ............................................ 49 4.2.2. phpMyAdmin ................................................ 51 4.2.3. PECL ..................................................... 54 4.3. emoncms code 58 4.3.1. Configure emoncms ........................................... 59 4.4. emoncms moduless 65 4.4.1. Dashboard ................................................. 65

Home Appliance Hack-and-IoT Guidebook ● 6

4.4.2. Graph ..................................................... 67

4.4.3. Apps ..................................................... 69

4.5. Documentation 70

Chapter 5 • MQTT (mosquitto) Installation on a Raspberry Pi ................ 74

5.1. Installation of the Mosquitto broker 76

5.2. Installation of the Mosquitto client (RPI) .............................. 80

5.3. Verification of the Mosquitto installation .............................. 81

5.4. Installation of the Mosquitto client (Windows PC) ........................ 83

Chapter 6 • OpenSCAD ............................................... 86

Chapter 7 • ESP8266 Security ......................................... 88

7.1. VPN ....................................................... 88

Chapter 8 • ESP8266 Watchdogs ....................................... 89

8.1. Watchdogs in general ........................................... 89 8.2. Loop watchdog ................................................ 89 8.2.1.Boot reason ................................................. 93

Chapter 9 • ESP8266 Over The Air – Update/Programming (OTA) ............. 96

9.1. web browser OTA 96 9.1.1. Configure the Arduino IDE ...................................... 97 9.1.2. Prepare already working software for OTA update. 97 9.1.3. OTA update examples .......................................... 98 9.1.3.1. Firmware build ............................................. 99 9.1.3.2. Firmware update 100 9.1.3.3. Filesystem build ........................................... 104 9.1.3.4. Filesystem update 106 9.1.3.5. OTA update with password protection ............................ 107 9.1.4. CLI OTA .................................................. 108

Chapter 10 • ESP8266 WiFi Antenna ................................... 110

10.1. Dimensions for external antennas ................................. 111

10.2. Ready-made antennas 113

10.3. Salvaged antennas ........................................... 113 10.4. DIY antenna 116 10.5. DIY Yagi antenna (2.4 GHz) ..................................... 119

Contents ● 7

10.5.1. Mechanics ................................................ 122 10.6. Antenna measurements ........................................ 126 10.7. Further studying 127

Chapter 11 • ESP8266 Housing ....................................... 128

11.1. LOLIN D1 mini standard housing 128 11.2. LOLIN D1 mini pro-standard housing ............................... 129 11.3. LOLIN D1 mini door-lock housing ................................. 131 11.4. LOLIN D1 mini refrigerator control housing .......................... 132 11.5. LOLIN D1 mini energy sensor housing .............................. 133 11.6. LOLIN D1 mini IKEA Trådfri controller housing 133

Chapter 12 • VPN Gateway .......................................... 137

12.1. Firewall configuration 138 12.2. Raspberry Pi configuration ..................................... 140 12.2.1. Basic configuration .......................................... 140 12.2.2. OpenVPN installation ........................................ 143 12.2.3. OpenVPN configuration ...................................... 145 12.2.3.1. OpenVPN Authorization file 145 12.2.3.2. Start at boot time ......................................... 146 12.2.3.3. Configuration of the VPN gateway (fun with IP tables!) 147 12.3. Use of the VPN gateway ....................................... 151 12.3.1. Improvements ............................................. 151

Chapter 13 • Software/firmware Design ................................ 152

13.1. Use of EEPROM .............................................. 153 13.2. Utility functions 153 13.2.1. Installation of the utility functions ............................... 153 13.2.2. formatBytes() ............................................. 155 13.2.3. printFloat() .............................................. 155 13.2.4 isNumeric() ............................................... 155 13.2.5. errorState(int state) 156 13.2.6. keypressWait() ............................................ 156 13.2.7. CACHE_RAM_ATTR lwdtcb() 156 13.2.8. lwdtFeedInit() ............................................. 156

Home Appliance Hack-and-IoT Guidebook ● 8

13.2.9. lwdtFeed() ............................................... 156 13.2.10. getBootDevice() 157 13.2.11. startWiFi() ............................................... 157 13.2.12. showWiFiStatus() .......................................... 157 13.2.13. doWifiConnect() 158 13.2.14. MQTT_connect()........................................... 159

Chapter 14 • IKEA Hack ............................................. 160

14.1. Schematic ................................................. 160 14.2. Mechanical assembly .......................................... 160 14.2.1. Grönö lamp .............................................. 161 14.2.2. ESP8266 housing ........................................... 165 14.3. Software 166 14.3.1. Additional libraries .......................................... 166 14.3.2. Features 167 14.3.3. Design .................................................. 167 14.3.3.1. web interface ............................................ 167 14.3.4. Wemos firmware 170 14.3.4.1. setup() ................................................ 170 14.3.4.2. loop() 171 14.3.5. HTTP POST requests ......................................... 171 14.3.5.1. The HTTP POST request code in general .......................... 172 14.3.5.2. HTTP POST request commands ................................ 172 14.3.6. Implementation of the illumination............................... 174 14.3.6.1. Rainbow 174 14.3.6.2. Rainbowcycle ............................................ 175 14.3.6.3. Static 175 14.3.6.3. Fade .................................................. 176 14.4. Operation ................................................. 178 14.4.1. Daily use................................................. 178 14.4.1.1. Power-up ............................................... 178 14.4.2. Configuration 178

Chapter 15 • Door Lock Monitor ....................................... 179

Contents ● 9

15.1. Schematic ................................................. 179 15.2. Mechanical assembly .......................................... 180 15.3. Software 184 15.3.1. Emoncms wemos firmware .................................... 184 15.3.1.1. setup() 184 15.3.1.2. loop() ................................................. 185 15.3.2. Emoncms dashboard ........................................ 186 15.3.3. MQTT wemos firmware ....................................... 193 15.3.3.1. MQTT client publisher ...................................... 195 15.3.3.2. MQTT client subscriber 197 15.3.4. MQTT broker . . . . . . . . . . . . . . . . . . . . . . . . . . . . . . . . . . . . . . . . . . . . . . 199

Chapter 16 • Energy Sensor

.......................................... 200

16.1. Schematic ................................................. 201 16.2. Mechanical assembly .......................................... 203 16.3. Software .................................................. 204 16.3.1. Wemos firmware ........................................... 204 16.3.1.1. setup() 204 16.3.1.2. loop() ................................................. 206 16.3.1.3. Functions 206 16.4. Operation ................................................. 208 16.5. Dashboard ................................................. 209

Chapter 17 • Refrigerator Control

..................................... 224

17.1. Schematic ................................................. 226 17.1.1. SSR 228 17.1.2. DS18B20 ................................................ 228 17.2. Mechanical assembly .......................................... 231 17.2.1. No modifications to the refrigerator at all .......................... 231 17.2.2. Modifying the refrigerator ..................................... 232 17.3. Software 240 17.3.1. Additional libraries .......................................... 240 17.3.2. Wemos firmware 240 17.3.2.1 setup() ................................................. 240

Home Appliance Hack-and-IoT Guidebook ● 10

17.3.2.2. loop() ................................................. 242 17.3.3. Temperature regulation ...................................... 242 17.3.4. Watchdog functionality 244 17.3.5. web interface ............................................. 244 17.3.5.1. Set temperature and hysteresis 245 17.3.5.2. Open temperature logger .................................... 245 17.3.5.3. Save configuration ........................................ 247 17.3.6. SPI Flash File System ....................................... 247 17.3.7. Compile ................................................. 247 17.4. Operation 248 17.5. Dashboard ................................................. 248

Chapter 18 • Greenhouse Thermostat .................................. 260

18.1. Schematic ................................................. 264 18.1.1. SSR .................................................... 265 18.1.2. DS18B20 ................................................ 265 18.2. Mechanical assembly .......................................... 266 18.3. Software 270 18.3.1. Additional libraries .......................................... 270 18.3.2. Wemos firmware 271 18.3.2.1. setup() ................................................ 272 18.3.2.2. loop() ................................................. 272 18.3.3. Temperature regulation 272 18.3.4. Watchdog functionality ....................................... 274 18.3.5. web interface 274 18.3.5.1 Set temperature and hysteresis ................................ 275 18.3.5.2 Open temperature logger .................................... 276 18.3.5.3. Save configuration ........................................ 277 18.3.6. SPI Flash File System ....................................... 277 18.3.7. Compile 278 18.4. Operation ................................................. 278 18.5. Dashboard 278

Chapter 19 • 230-VAC Relay Control ................................... 292

Contents ● 11

19.1. Software .................................................. 292 19.1.1. Wemos firmware ........................................... 292 19.1.1.1.setup() 292 19.1.1.2. loop() ................................................. 292 19.1.2. Web interface 293 19.2. Hardware .................................................. 294 19.2.1. SSR .................................................... 294 19.2.2.1. Housing ................................................ 294 19.2.2. Relay ................................................... 294 19.2.2.1 Housing 295 19.2.3. Relay Shield .............................................. 295 19.2.3.1. Housing 296 19.2.4. Alternative 230-VAC relay On/Off construction ...................... 297

Chapter 20 • Standalone Temperature Sensor............................ 299 20.1. Housing ................................................... 300 20.2. Software .................................................. 301 20.2.1. Additional libraries 301 20.2.2. OTA-Enabled Software ....................................... 302 20.2.2.1. Wemos firmware 302 20.2.2.2. Dashboard .............................................. 303 20.2.3. Sleep-mode enabled software .................................. 304 20.2.3.1. Hardware sleep-mode differences and setup 304 20.2.3.2. Wemos firmware .......................................... 306 20.2.3.3. Dashboard 308

Chapter 21 • Temperature, Pressure, and Humidity Sensor ................. 309 21.1. Schematic ................................................. 309 21.2. Software .................................................. 310 21.2.1. Additional libraries .......................................... 311 21.2.1.1. HP303B 311 21.2.1.2. SHT3x ................................................ 311 21.2.2. Firmware 312 21.2.2.1. setup() ................................................ 312

Home Appliance Hack-and-IoT Guidebook ● 12

21.2.2.2. loop() ................................................. 312 21.2.3. Web interface ............................................. 313 21.3. Dashboard 314

Chapter 22 • IKEA Trådfri Controller ................................... 318

22.1. Description of the concept 318 22.2. Getting to the IKEA trådfri modules ............................... 321 22.3. Schematic ................................................. 328 22.4. Mechanical assembly .......................................... 330 22.4.1. I2C Address jumpers ........................................ 331 22.4.2. Outside connectors 331 22.4.3. ZigBee power jumpers ....................................... 332 22.4.4. LED series resistors 332 22.4.5. ZigBee modules ............................................ 332 22.4.6. Miscellaneous ............................................. 334 22.5. Software .................................................. 335 22.5.1. Wemos firmware ........................................... 335 22.5.1.1. "Test-and-debug" setup() 335 22.5.1.2. "Test-and-debug" loop() ..................................... 336 22.5.1.3. Controller setup() 336 22.5.1.4. Controller loop() .......................................... 338 22.5.2. web interface ............................................. 338 22.5.3. Additional libraries 339 22.6. Operation ................................................. 340 22.6.1. Configuration of the controller (adding the ZigBee modules) 340 22.6.1.1. Adding ZigBee module with remote ............................. 341 22.6.1.2. Adding ZigBee module without remote........................... 345 22.6.2. Daily use of the IKEA Trådfri controller ............................ 347

Chapter 23 • Troubleshooting ........................................ 348

23.1. Hardware Issues 348 23.1.1. DS18B20 ................................................ 348 23.1.2. Red / Green LED 349 23.1.3. Compressor ............................................... 349

Contents ● 13

23.1.4. USB cables ............................................... 349 23.2. Network issues .............................................. 350 23.3. Wemos firmware 351 23.3.1. Reset ................................................... 351 23.4. emoncms 351 23.4.1. Graph installation........................................... 352 23.4.2. Input / Feeds.............................................. 352 23.5. IKEA ZigBee modules ......................................... 352 23.5.1. Software upload............................................ 352 23.5.2. Adding ZigBee modules. 352 23.5.3. Testing the IKEA Trådfri controller ............................... 353 23.5.4. Interrupts 353

Chapter 24 • PCB Layout ............................................ 354 24.1. Door lock monitor PCB . . . . . . . . . . . . . . . . . . . . . . . . . . . . . . . . . . . . . . . . 354 24.2. Energy sensor .............................................. 357 24.3. Refrigerator regulator ......................................... 360 24.3.1. Regulator PCB 360 24.3.2. DS18B20 PCB ............................................. 362 24.4. Greenhouse thermostat 363 24.5. IKEA Trådfri controller ........................................ 363

Chapter 25 • Software Listing ........................................ 366 25.1. HTTP POST request utility programs 366 25.1.1. PHP .................................................... 366 25.1.2. c-code 368 25.1.3. python .................................................. 371 25.2. Loop watchdog timer .......................................... 372 25.2.1. Located in hhsUtility.h/cpp .................................... 373 25.2.2. To be added in setup(): ...................................... 374 25.2.3. To be added in loop(): 375

Index ........................................................... 376

Home Appliance Hack-and-IoT Guidebook ● 14

Chapter 1 • Introduction

Welcome to the Home Appliance Hack-and-IoT Guidebook.

Disclaimer

The projects and builds I am about to describe in this book have been assessed as thoroughly as possible. I have not personally damaged any of my equipment (or hurt myself), but I am sure it's possible. In addition, the technology described herein is purely for fun and should not be used for medical, mission-critical, or safety-critical applications in any circumstances.

Neither I nor the Publisher accept any responsibility for damages of any kind due to your actions taken after reading this book.

Having said this, let's continue.

1.1.

Why this book?

Like many others, when I first laid my eyes on the ESP8266, it immediately captured my imagination, not unlike when the Raspberry Pi came along.

Before the arrival of the ESP8266, I completed many Arduino projects, some with Internet connections. It was therefore obvious to me that I should have a go with ESP8266.

Some of the projects and findings are described in this book. I hope you will enjoy working with ESP8266 as much as I did.

1.2. Who is this book for?

To use this book, I expect some basic skills and awareness from you:

• You have some experience with PC software. That is, you are familiar with operating a Windows PC and know how to navigate a file system, edit a file, and install/configure software.

• You have experience in surfing the Internet. You need to be able to locate and download the files mentioned in the book. After downloading, you should be able to find and install the downloaded files.

• You know how to assemble a PCB. Since many of the constructions need additional hardware compared to the ESP8266 (Wemos/LOLIN boards), you will need to be able to assemble the required circuit boards. They are not complicated and I have avoided using SMD components.

• You have some basic mechanical skills. Most of the constructions need to be incorporated into present mechanical constructions but some may need mechanical changes (e.g., the IKEA Lamp Hack).

● 15

You will also need to disassemble some constructions but this should be relatively straightforward as with the IKEA Trådfri controller.

Please be careful!

1.3.

How to use this book

Even though this book is about the ESP8266, you may need to install and configure an embedded Linux system (e.g., a Raspberry Pi)

Some basic skills are required to do this. Everything will be described in detail, or through links to additional information on the internet.

When configuring Linux, you will see specific commands listed like this:

pi@raspberrypi: $ cd /var/www/emoncms/Modules

pi@raspberrypi: $ git clone https://github.com/emoncms/app.git

Commands are printed in bold characters.

The last command is listed on two lines but should be entered as one long command like "git clone https://github.com/emoncms/app.git"

Throughout the book, there will be parts that will be highlighted as shown below.

Warning:

This is what a warning will look like. This is where you, your surroundings, or equipment may be damaged if not overseen with care and attention: Don't worry there will not be many of these.

Note:

This is what a note looks like. Be sure to pay attention to notes.

Comment:

This is where I may "side-track" occasionally and give additional information for further reading on the subject.

Files of interest will be shown like this: /opt/lamp/htdocs

Home Appliance Hack-and-IoT Guidebook ● 16

Finally, I will show program file listings in boxes like this:

#include <stdio.h> main() { printf("hello world\n"); }

I encourage you to read the section describing the construction you want to build in advance and follow links if available. This should give you an idea about what lies ahead.

I also encourage you to make notes about what you are doing just in case you need to do it all over again. This is especially important when you need to make a larger software installation — I speak from experience.

1.4. The organization of the book

To avoid reading the entire book to discover what's covered, there is a very short description of each Chapter.

1.4.1. Chapter 2: Components

This book is mainly about the Espressif ESP8266 microcontroller. I have chosen the Wemos/ LOLIN D1 mini pro, but you will most likely be able to use other variants.

Since the ESP8266 and Raspberry Pi complement each other quite well, there will also be design ideas that incorporate the Raspberry Pi.

In this chapter, the following components are briefly described:

• Adafruit Neopixel Jewel 7 • Raspberry Pi • Grönö lamp • SSR • Maxim DS18B20 • QRE1113 (Analog) • Silabs MGM210L or similar • SHT30 Shield • HP303B Shield

1.4.2.

Chapter 3: Arduino IDE installation

This chapter will guide you through the installation of the Arduino IDE. To compile software for ESP8266, you will need to install additional libraries.

If you are familiar with the Arduino IDE, there shouldn't be any surprises.

Chapter 1 • Introduction ● 17

1.4.3. Chapter 4: emoncms

Installation

I have chosen to use emoncms for logging and visualization.

This chapter describes how to install emoncms on a Raspberry Pi, but it is not a requirement that the installation is on a Raspberry Pi. At the time of writing, my emoncms runs on a larger Linux PC.

To make emoncms work, additional software packages will have to be installed, but all will be described here.

If you don't want a local installation of emoncms, there is the option of the cloud at: https://emoncms.org

1.4.4. Chapter 5: MQTT (mosquitto) Installation on a Raspberry Pi

The installation will cover the basic MQTT broker but also a publisher and subscriber client.

If in favor of it, a Windows MQTT client will be installed as well. https://guide.openenergymonitor.org/technical/mqtt/

1.4.5. Chapter 6: OpenSCAD

I have used OpenSCAD for my housing designs. A brief introduction will be provided.

1.4.6. Chapter 7: ESP8266 Security

A short walkthrough of why I, so far, have not secured my ESP8266 devices.

1.4.7. Chapter 8: ESP8266 Watchdogs

A description of the various watchdog types available within ESP8266.

These watchdogs can be included in your designs or left out. It is up to you how critical your system is.

If used, they may also help you debug constant reboot scenarios.

1.4.8. Chapter 9: ESP8266 Over The Air – Update/Programming (OTA)

A description of how to make OTA via a web browser. Two other methods will briefly be described.

1.4.9. Chapter 10: ESP8266 WiFi Antenna

A walkthrough of the external WiFi antenna possibilities within the Wemos design. A description of a remarkably simple DIY antenna and a more sophisticated Yagi antenna will be provided.

Home Appliance Hack-and-IoT Guidebook ● 18

1.4.10. Chapter 11: ESP8266

Housing

Most of the constructions in this book will be accomplished using a simple housing designed using the OpenSCAD program.

The designs will be described so you may change them according to your specific needs.

1.4.11. Chapter 12: VPN Gateway

The setup of a small Raspberry Pi VPN gateway will be given. It is a standard setup so it can be used for other purposes as well.

My home firewall is based on pfsense so the configuration of OpenVPN will be part of the description.

1.4.12. Chapter 13:

Software/Firmware design

This Chapter describes how I structured the ESP8266 Arduino design. It is here merely for you to understand what is going on. It is up to you to follow or redesign it.

1.4.13. Chapter 14:

IKEA Hack

It's called an "IKEA Hack" because a Neopixel Jewel 7 is placed inside a Grönö lamp and controlled by an ESP8266. It is a cheap and easy solution for a project housing. Other lamps can also be modified.

A web interface to control the lamp is also shown.

1.4.14. Chapter 15: Door Lock Monitor

With the help of a QRE1113 and ESP8266, it is possible to monitor the status of a door lock – or indeed any other moving object 1 mm away from the QRE1113.

The status of the door lock is stored in a central location, so the information can be used for surveillance.

The status can be shown at "emoncms" or via the MQTT server.

1.4.15. Chapter 16:

Energy Sensor

This design is hooked up to an S0 interface on a power consumption meter. Since the S0 interface outputs a specific amount of pulses per kWh, it is possible to measure the power consumption of your household.

Data will be gathered at a central server, which in this case is a Raspberry Pi.

1.4.16. Chapter 17: Refrigerator

Control

This chapter will describe a small control device that can keep a modified refrigerator at a constant temperature of between 4 oC and the ambient temperature.

It includes a small web interface and log functionality.

Chapter 1 • Introduction ● 19

1.4.17. Chapter 18: Greenhouse Thermostat

Based on the Refrigerator control, a greenhouse thermostat is described. This design will include two temperature sensors, so the outside temperature can be measured as well as the inside temperature – for comparison.

Like the refrigerator control, it includes a small web interface and log functionality.

1.4.18. Chapter 19: 230-VAC Relay Control

This is a spinoff of the refrigerator/greenhouse control together with an ordinary relay design; you will be able to turn 230-VAC equipment on and off.

1.4.19. Chapter 20: Standalone Temperature Sensor

This is also a spinoff of the refrigerator/greenhouse control. In both cases a temperature sensor is the key component, so why not make it a standalone construction which can be used in multiple cases?

1.4.20. Chapter 21: Temperature, Pressure, and Humidity Sensor

This construction uses the SHT30 and the HP303B shields to make a combined measurement of the temperature, barometric pressure, and humidity.

1.4.21. Chapter 22: IKEA Trådfri Controller

Using this construction, devices can be turned on or off using the IKEA home smart app.

A description of how to get hold of the ZigBee MGM210L device from Silabs will also be given.

1.4.22. Chapter 23: Troubleshooting

Includes my findings during the development of the constructions and the writing of this book. Most likely it will not solve all of your problems.

1.4.23. Chapter 24: PCB Layout

For most constructions mentioned in this book, a small PCB has been put together to make them easier to build.

The PCB layout will be shown here and the Gerber files will be available for download on Elektor's support and resources page for this book.

The PCBs should fit into the provided housings if available.

1.5. Abbreviations

In this book, I am using selected abbreviations, some of which may not be well known. Below is a list with additional explanations.

Home Appliance Hack-and-IoT Guidebook ● 20

Abbreviation Description

RPi Raspberry Pi

DIY

Do-It-Yourself (occasionally with good results)

PCB Printed Circuit Board

GCC GNU Compiler Collection

LED Light Emitting Diode

RGB Red, Green, Blue

cURL

A computer software project providing a library and command-line tool for transferring data using various protocols.

GIT A distributed revision control system developed by Linus Torvalds

RTS Real-Time Clock.

VPN Virtual Private Network. It routes all of your internet activity through a secure, encrypted connection,

DTIM Delivery Traffic Indication Message.

Table 1-1: Abbreviations.

1.6. References

I would not have been able to author this book without the Internet. If you know where to look, you can find answers to almost every question.

Since many of my findings are the result of other people's demanding work, I also want to give them credit and mention their work throughout the book where appropriate.

You will also find testimonials in my code either to the borrowed code or to where I got help to be able to proceed.

There will also be code or ideas which I simply have forgotten where I picked it up – this is not intentional.

For your convenience, there is a file together with the web software containing the links in this book (it is, after all, easier to cut and paste instead of just pasting).

All links have been verified at the time of writing but I cannot promise they will be available when you actually need them. Instead, try and search the Internet for the last part of the URL. Sometimes you may find the documentation elsewhere.

1.7. Feedback

As I value any feedback on what I can do to improve, I encourage you to send me comments, improvements, or any calls for help.

I will try and answer as soon as possible – nomally within one week. Please e-mail me at support@hask.dk

Chapter 1 • Introduction ● 21

Chapter 2 • Components

This chapter briefly describes each of the components or boards used in this book.

There will be a brief description only. If more information is required, you should look into data sheets for each component or board.

Please note that component descriptions are based on available information at the time of writing. Things change rapidly in this business, so some of the descriptions may be obsolete or subject to improvement at the time you read this book.

I have tried to build the constructions in a way that allows upgrading to the latest version.

2.1. ESP8266

When I started using the ESP8266-based Wemos family of development boards, I kicked off with the Wemos D1 mini Pro as shown in Figure 2-1. Today, the family has been enlarged and you need to determine your requirement before you continue.

Figure 2-1: Wemos D1 mini Pro (ver 1.0).

Home Appliance Hack-and-IoT Guidebook ● 22
shows the di
D1 mini Pro D1 mini D1 mini Lite Operating Voltage 3.3V 3.3V 3.3V Digital I/O Pins 11 11 11 Analog Input Pins 1 (3.2V max.) 1
max.) 1
Clock Speed 80/160 MHz 80/160
80/160
Flash 16
4
1
Size 48*25.4 mm 34.2*25.6
34.2*25.6
Weight 4.5 g 3 g 5 g Antenna Internal X X X External X
The following table
fferences.
(3.2V
(3.2V max.)
MHz
MHz
MBytes
MBytes
MBytes
mm
mm
Chapter 2 • Components
Table 2-1: Wemos differences.

They all share the same pin layout.

The main decision is to determine the size of your program, as you will be able to use the internal antenna in most cases.

If you want to power your construction with a Lithium battery, you can use a built-in LiPo charging circuit (500 mA max) in the D1 mini Pro version.

The battery option should be combined with the sleep functionality mentioned in section 2.1.2.

2.1.1. Wemos/Lolin, general notes

As mentioned above, the controller boards chosen for the projects in this book are based on the Wemos family of development boards.

Although arguably "Arduino clones", these boards

• come cheap (approx. US$ 5.00)

• are small (see above table)

• comprise WiFi

• comprise a Lithium battery interface (D1 mini pro)

Making them perfect as IoT controllers – but that's another story.

Figure 2-2:

Lolin D1 mini Pro, D1 mini and D1 mini Lite.

Throughout this book, you can use an ordinary Arduino with or without a WiFi shield (if you don't like the Wemos controller).

Note The software has not been tested on an ordinary Arduino. It should, however, be possible to make it run with modifications.

Chapter 2 • Components ● 23

The latest versions of the D1 boards can be found here: https://www.wemos.cc/en/latest/d1/index.html

2.1.2.

Sleep Mode

During the description of the projects in this book, it should be noted that most are not optimized for Sleep Mode.

In this document: https://fwww.espressif.com/sites/default/files/documentation/9b-esp8266-low_ power_solutions_en.pdf

The following can be found regarding Sleep Mode:

The ESP8266 series chip provides three configurable sleep modes. I also provide some low-power solutions related to these sleep modes. Users can choose and configure the sleep mode as required.

The 3 sleep modes are: • Modem-sleep • Light-sleep • Deep-sleep

The differences between Sleep Modes can be seen in the below table: Item Modem-sleep Light-sleep Deep-sleep Wi-Fi OFF OFF OFF System clock ON OFF OFF RTC ON ON ON CPU ON Pending OFF Substrate 15 mA 0.4 mA ~ 20 µA

DTIM = 1 16.2 mA 1.8 mADTIM = 3 15.4 mA 0.9 mADTIM = 10 15.2 mA 0.55 mA -

Table 2-2: ESP8266 Sleep Mode differences.

As evident from the table, power savings are achievable if the right Sleep Mode is selected and the software is designed for it. This is important if you power your device using a battery.

In each case, you should carefully investigate what fits your needs and how to bring the ESP8266 into Sleep Mode, and equally important, how to bring the ESP8266 out of Sleep Mode.

Home Appliance Hack-and-IoT Guidebook ● 24
Average current

Index

230-VAC Relay control Alternative 297 230-VAC Relay control 292

A

Abbreviations 20 Additional libraries HP303B 311 SHT3x 311 Arduino IDE ESP8266 support 38 Installation 17, 38

B back-emf-suppression 295 Barometric pressure sensor 20, 309 C contact bounce 321

D

Door lock monitor 179 DS18B20 228 34, 299, 348

E

EEPROM 153 emoncms 18, 47, 58 Configure 59 Dashboard 65

PHPFINA 251, 282

PHPTIMESERIES 252, 283 Toolbox 72

ESP8266 22

ESP8266 External antenna 111 DIY antenna 116

Ready made antennas 113 Salvaged antennas 113 Yagi 119

ESP8266 filesystem uploader 42 ESP8266 housing 19

F Feedback 21 firewalls 48

G

getPage() 278 Google Charts 247

H

HP303B Shield 37 Humidity sensor 20, 309 hysteresis 224 Hysteresis regulation 224

I

IKEA Grönö 32 IKEA Trådfri controller 20 Schematic 328 L Lamp control 293

M Maxim 34 MGM210L 35, 322 Microsoft Store 38 Mosquitto 18, 74 broker 76 client 80, 83 mosquitto.conf 79 Verification 81 MQTT 74 MQTT.fx 83 MQTT broker 199 MQTT client publisher 195 MQTT client subscriber 197

N

Neopixel Jewel 7 31

O

optocoupler 202 Organisation of the book 17 Over The Air update 18 P PCB DS18B20 362

Home Appliance Hack-and-IoT Guidebook ● 376

Energy sensor 357 IKEA Trådfri controller 363 Refrigirator regulator 360, 363 PHPFINA 1 88 PHPTIMESERIES 188 PuTTY 29

Q QRE1113 34

R

Raspberry Pi Update and upgrade 48 Raspberry Pi;apache 49 Raspberry Pi;MariaDB 49 Raspberry Pi;PECL 54 Raspberry Pi;phpmyadmin 51 Raspbian Stretch 78 References 21 Refrigerator control 224 RSSI 119

S SD-card 47 SHT30 Shield 36 Sleep-mode 304 Software doWifiConnect 158 errorState 156 formatBytes 155 general design 19, 152 HTTP POST 366 isNumeric 155 keypressWait 156 printFloat 155 showWiFiStatus 157 SPIFFS 41 SSH client 29 SSID 75 SSR 228 33, 294

T

Temperature regulation 272 Temperature sensor standalone 20, 299

Troubleshooting 348 Hardware Issues 348 Network issues 350 Wemos firmware 351 U utf8 60 V VPN gateway 19 Use of the VPN gateway 151 W Warning 224, 297 Wemos Relay Shield 295 Sleep Mode 24 Win32DiskImager 48

Contents ● 377

booksbooks

Home Appliance

Hack-and-IoT Guidebook

Affordable solutions with the ESP8266 and 3D printing

If you are looking for a small yet powerful IoT device, you are likely to come across the ESP8266 and compatible products on the market today. One of these, the Wemos/Lolin D1 Mini Pro board strikes a remarkable balance between cost and performance. A small and very a ordable prototype board, the D1 Mini Pro stands out with its WiFi functionality and a 16-Mbytes flash memory for easy creation of a flash file system. In addition, there are su icient input and output pins (only one analog input though) to support PWM, I2C, and One-Wire systems to mention but a few. The book describes the operation, modding, construction, and programming of home appliances including a colorful smart home accessory, a refrigerator/greenhouse controller, an AC powerline monitor, a door lock monitor, and an IKEA Trådfri controller.

As a benefit, all firmware developed for these DIY, “IoT-ized” devices can be updated over-the-air (OTA).

For most of the designs in the book, a small printed circuit board (PCB) and an enclosure are presented so readers can have a finished and attractive-looking product. Readers having – or with access to! – a 3D printer can “print” the suggested enclosures at home or in a shop.

Some of the constructions benefit from a Raspberry Pi configured as a gateway or cms server. This is also described in detail with all the necessary configuring.

You don’t need to be an expert but the prerequisites to successful replication of the projects include basic skills with PC software including the ability to surf the Internet. In terms of hardware, you should be comfortable with soldering and generally assembling the PCBs presented in the book.

All custom software written for the IoT devices, the PCB layouts, and 3D print files described in the book are available for free downloading from the books section of Elektor Store website, www.elektor.com/books –simply search for the book title.

Hans Henrik Skovgaard has over 25 years of management experience in the mobile phone industry and holds an MSc. in Electronic Engineering. He has authored four top-selling books on electronics design and embedded software.

Elektor International Media BV www.elektor.com

Issuu converts static files into: digital portfolios, online yearbooks, online catalogs, digital photo albums and more. Sign up and create your flipbook.