4 minute read
02 Speed of Sound through a Solid


Speed of Sound
02 Speed of Sound through a Solid
Read
Sound is a vibration that travels through an elastic substance. The stiffness of the material will affect the attenuation of the sound and the speed at which it travels through the material. Sound travels much faster in a solid than in air. Reference sources will give a value of 333.1 to 331.6 m/s at 0ºC for the speed of sound in air. In this experiment you arrange a pair of microphones to receive a sound from a point source.
To get the best values:
1. Have at least 1 m between the Stethoscope sensors. 2. Measure the distance between the sensors as accurately as possible. 3. Use the fastest recording time possible. 4. Use a trigger. 5. Make sure the stethoscope is lying flat on the solid. 6. Use something like a pencil or ball point pen to make the noise, you shouldn’t need to use a large force to make a sound the sensors can detect. If the noise is too large you may end up with a pattern containing a large quantity of confusing, irrelevant data.
By placing the 2 sensors in line on a bench you can record the time taken for the sound to reach sensor one and then pass onto sensor 2. Arrange the apparatus so that the point where you will create the noise is first, then the sensor 1 and then sensor 2.
Stethoscope 2 (connect to input 2) 1 m
Stethoscope 1 (connect to input 1) Make sound here
Direction of sound
To help with the math try to get a separation of “sensible” units e.g. 1.0 m, 1.2 m, 1.5 m, etc. Try to avoid distances like 1.25 m, 1.98 m if possible. You must measure the distance between the sensors to the nearest mm.
What you need
1. An EASYSENSE logger capable of fast logging 2. 2 x Smart Q Stethoscope sensors set to the Sound range 3. 2 x Long sensor cables 4. 1 x measuring tape 5. 2 x small masses, modelling clay or masking tape.
Speed of Sound
What you need to do
1. Remove the diaphragm from the Stethoscope sensors and place them in a safe place. 2. Place the Stethoscope sensors onto the bench with the bell / microphone facing down onto the bench top (as in diagram).
Make sure that the sensor connected to input 1 has space between it and the edge of the bench. You will tap on the bench in this space to make the sound.
The sensor should stay in place, if the wire connecting to the sensor is making the sensor lift off the table, or move around, place a small mass on the sensor to hold it in place. Alternatively you could use masking tape or modelling clay to secure the sensor in place. 3. Measure the distance (in metres) between the two sensors. Make sure you measure between the same points on the sensors (e.g. centre to centre or front edge to front edge). Make a note of the distance 4. Start the EASYSENSE software and select Graph from the Home page. 5. Use the table below to set up the recording parameters. 6. Select Start. 7. When ready, make a noise on the bench top by striking it with an object, something metal gives a sharper sound. There is no need to strike the bench with a large force; a slight tap may be all that is required. 8. If the sound was of the correct intensity logging will be triggered and you will see 2 traces. The red trace is the sound recorded by the Stethoscope sensor closest to the noise and the blue trace for the Stethoscope sensor furthest from the noise source. 9. You should notice the peaks on the red trace appear before the peaks on the blue trace. You need to measure the distance between the first red peaks and the first blue peaks, using the Interval tool (see below for details).
Set up of the software
The following set up is based upon a separation of 1 m using a wood bench surface.
Recording mode Length of recording Intersample time Trigger event Pre trigger
Graph 50 ms 50us When sound above sensor 1 rises 100 mV 25%
Set the length & intersample time to the shortest available. Logger type and number of sensors may lead to a variation in choices.
Speed of Sound
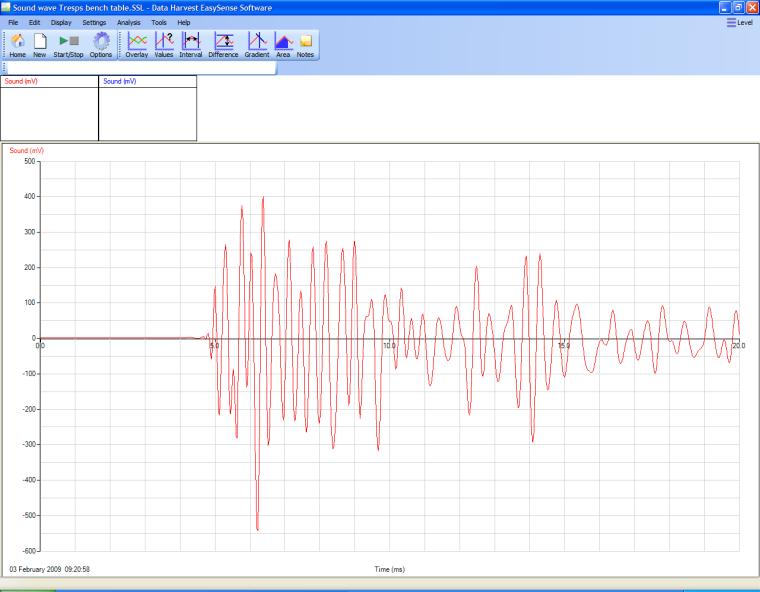
Sample result and Analysis
Sensors placed on a school work bench topped with Trespa
Use the Interval tool to find the time difference between the sound reaching sensor 1 and sensor 2. Interval = 0.70 ms Separation between sensors = 1.0 m. Speed of sound in the Trespa = 1.0 / 0.0007 = 1428 m/s
Extension
Repeat the work but use different materials. Note: If testing glass be very careful to only tap the glass and do not use a heavy object with a point, this will only concentrate the force and increase the chance of shattering the glass. Tapping on the glass with pencil or ball point should give enough sound. Use masking tape (a low tack tape) to hold the Stethoscope to the glass, this prevents the glass from being marked after the work is completed. If you are using shaped materials, e.g. iron tube, aluminium extrusions, try to get the microphone over the largest area of material possible. When using concrete (flooring) use extension leads to increase the separation of the sensors and check the area being used to make sure there are no joins in concrete between the sound source and or the sensors.