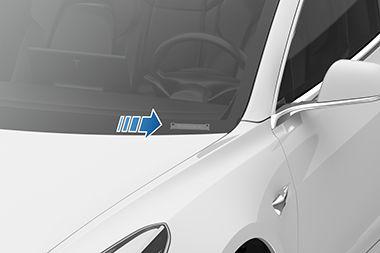
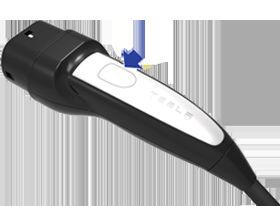
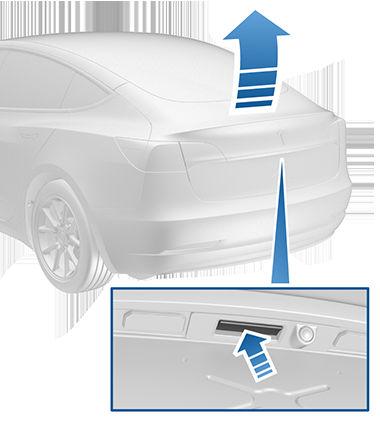
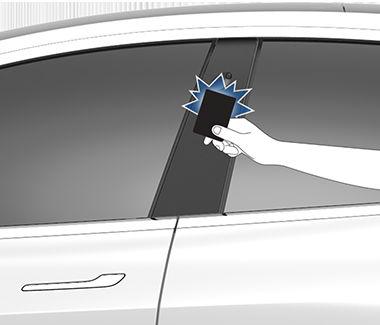
Charging Instructions Opening the Charge Port The charge port is located on the left side of Model 3, behind a door that is part of the rear tail light assembly. Park Model 3 to ensure that the charge cable easily reaches the charge port. With Model 3 unlocked (or an authenticated phone is within range) and in Park, press and release the button on the Tesla charge cable to open the charge port door. NOTE: The following image is provided for demonstration purposes only. Depending on market region, your charge port may be slightly different.
NOTE: The Tesla "T" lights up white when you open the charge port door. If you do not insert a charge cable into the charge port within a few minutes after opening the charge port door, the charge port door closes. If this happens, use the touchscreen to open the charge port door again.
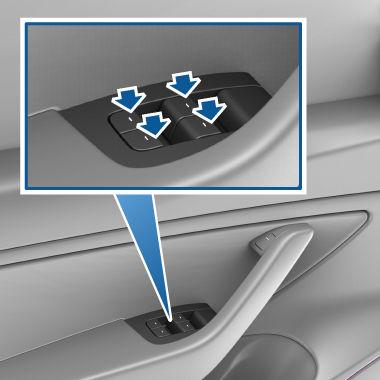
You can also open the charge port door using any of these methods: • On the touchscreen, use the app launcher to open the Charging app, then touch Open Charge Port. • On the car status on the touchscreen, touch the charging icon. • On the "Cards" area on the touchscreen, touch the charging icon, then press Open Charge Port. • Press the bottom of the charge port door when Model 3 is unlocked or an authenticated phone is nearby. • On the key fob accessory (sold separately), hold down the rear trunk button for 1-2 seconds. NOTE: The following image is provided for demonstration purposes only. Depending on market region, your charge port may be slightly different.
NOTE: In extremely cold weather or icy conditions, it is possible that your charge port latch may freeze in place. Some vehicles are equipped with a charge port inlet heater that turns on when you turn on the rear defrost in cold weather conditions. You can also thaw ice on the charge port latch by enabling preconditioning using the mobile app. To prevent this from occuring, use the Schedule settings, available on both the charging and climate control screens, to set a departure time and enable preconditioning (see Scheduled Charging and Scheduled Departure on page 167). CAUTION: Do not try to force the charge port door open.
Plugging In If desired, use the touchscreen to change the charge limit and the charging current (see Charging Status and Settings on page 166). To charge at a public charging station, plug the appropriate adapter into the vehicle's charging port, and then connect the station's charging connector to the adapter. The most commonly used adapter(s) for each market region are provided. Depending on the charging equipment you are using, you may need to start and stop charging using a control on the charging equipment. If you are using the Mobile Connector, plug it into the power outlet before plugging it into Model 3. Align the connector to the charge port and insert fully. When the connector is properly inserted, charging begins automatically after Model 3: • Engages a latch that holds the connector in place;
164
MODEL 3 Owner's Manual