relax, we got you covered...


relax, we got you covered...


At CANNA Research, we are continuously testing our products in order to make improvements. In May 2024, RHIZOTONIC will be getting an upgrade! When using the improved product you will experience increased effectiveness and tank stability. The shelf life has doubled from one to two years and you no longer need to worry about raised pH levels in your tank when applying the product. For growers, who were using RHIZOTONIC before, rest assured you will not need to change the way you use it and you can still expect exceptional results from your plants.


Some of the best advice I ever received was about the food I eat. I was once involved in a local co-op that grouped some pretty incredible, thought-provoking people, one of whom convinced me that the best thing I could do for my health, my future children’s health, and that of the planet was prioritising organic local food. I planned to grow or forage as much food and medicine as possible and grow those plants using organic inputs without toxic pesticides. My outdoor gardens have been 100% organic for the past 30 years. My indoor gardens are a mix of organics and synthetics.
Garden Culture is lucky to have many contributors who intimately know the subject. In “Botanical Brews - Let the Plants be thy Fertility,” Av Singh shares his relationship with compost teas and stinky ferments and how he inadvertently learned the value of these brews from his father. Av is a plant scientist, but he shows us that this is not a hard thing to do and, in most cases, costs little to nothing to make. Av shares his recipe in “Tea Made SIMPLE” to help you get started.
Almost 50 years after square-foot gardening was introduced, Catherine Sherriffs writes about how this growing method remains relevant. All you need is a couple of square feet and some top-notch soil to grow organic food right outside your door, no matter where you live.
SPECIAL THANKS TO:
Adam Clarke, Alex Field, Anne Gibson, Av Singh, Catherine Sherriffs, Colin Bell, Dustan McLean, Everest Fernandez, Haley Nagasaki, Jennifer Cole, Martyna Krol, Regi Oneton, Xavi Kief, and the crew at Riviera Horticulture.
PRESIDENT
Eric Coulombe eric@gardenculturemagazine.com +1-514-233-1539
VICE PRESIDENT
Celia Sayers celia@gardenculturemagazine.com +1-514-754-1539
EXECUTIVE EDITOR
Catherine Sherriffs cat@gardenculturemagazine.com
DESIGN
Job Hugenholtz job@gardenculturemagazine.com

INTEGRATED SALES & BUSINESS DEVELOPMENT Haley Nagasaki Haley@gardenculturemagazine.com +1 (604) 401-7209
DIGITAL & SOCIAL MARKETING social@gardenculturemagazine.com
ADVERTISING ads@gardenculturemagazine.com
PUBLISHER
325 Media INC
44 Hyde Rd., Mille-Isles QC, Canada J0R 1A0 GardenCultureMagazine.com
ISSN 2562-3540 (Print) · ISSN 2562-3559 (Online)
Garden Culture is published six times a year, both in print and online.

@GardenCulture @GardenCulture

@GardenCultureMagazine @Garden_Culture

DISTRIBUTION PARTNERS
• Creation Wholesale
• One Love Inc
© 325 Media
• Highlight Horticultur e
• HydroGarden
All rights reserved. No part of this publication may be reproduced, stored in a retrieval system or transmitted in any form or by any means, electronic, electrostatic, magnetic tape, mechanical, photocopying or otherwise, without prior permission in writing from 325 Media Inc.

If you’re ever looking for relatable and witty growing advice, flip through the magazine to an article by Regi Oneton. Humorous writing isn’t easy for everyone, but Regi will make you laugh out loud. He’s a super artistic guy and loves to paint and create music. His artwork hangs in the offices of Burton and Vans Canada, and you can hear some of his music on YouTube’s CHANNEL ONETON. As the Dirty Old Gardener, Regi pretends to be really angry about various plant problems, but we promise he’s a big teddy bear. Sorry, Regi, the secret’s out.
Why so angry? My complete lack of patience for anything is coming through, which is an odd deficiency for a gardener. My writing has gotten me kicked out of bars and ended romances, so I am not surprised how I come off on the page. I promise you, 99% of the time, I’m taking a nap or sitting by the fire with the dogs. What you read are tiny emotional explosions I have been scribbling down since I was a little bean sprout. My lady friend is reading over my shoulder and telling me to tell you, the reader, that I might have anger issues while driving. She followed it up with “and while walking or sitting.”
Have you always wanted to grow gardens?
I have memories of snapping peas with my grandmother. A bowl of something was always coming in from the garden, making me want to grow food and provide for myself. Later in life, I became interested in growing indoors year-long, as I live in a colder climate. This, coupled with leaving the condo life for something a little more rural, made me into a lean, mean, growing machine.
What is your favourite plant to grow? My favourite plant to grow is the one that provides for me. I don’t care if it’s a tomato or Brussels sprouts. If the harvest is bountiful and the plant is an impressive specimen, it’s a pleasant experience. If the plant wasn’t bitching and moaning all goddamn year for water and nutrients and classical music, I am over the moon with joy.
What do you like to do in your free time?
When I’m not scribbling down thoughts with angry undertones, you can find me doing a commissioned painting for a client or flexing the visual art muscle. Over the past two years, I have spent a lot of time in the studio writing music for a few projects. I still make content for my YouTube channel that teaches people how to grow and avoid the pitfalls. It also houses some of my music projects as well. Just search CHANNEL ONETON, and you will be sure to find me. Feel free to ask questions in the comments.
What kind of music do you listen to? After three hours of picking out snare drums, I am generally not in the mood to listen to anyone else’s creations. My ears get exhausted, and I resort to talk radio. When I was young, I had a Kurt Cobain obsession; his songs

are how I learned to play. Now, I make a genre of music called drum and bass. It’s not exactly Pop music, so I won’t take it personally if you don’t enjoy it.
If you could only eat one thing for the rest of your life, what would it be? If it’s a single ingredient, it’s cured meats. If you could guarantee I wouldn’t trigger a heart attack with a diet of Prosciutto, that’s my choice. If it’s a dish, I choose fresh pasta with sauce from the garden. It’s enough to make an Italian boy weep just thinking about it. If I need to choose one thing from the garden to eat for life, I would take any berry in any form. I want to go the Prosciutto route.
Favourite cocktail or mocktail? As my Dry January spills into February and March, questions like this get me salivating because I sure do love a cocktail. I will get a dirty Martini with three olives if I feel fancy. This is generally when out for dinner with a bartender nearby to pump them out every 15 minutes. When lounging around pontificating angrily, my inner Scotsman likes to settle down with a glass filled to the top with ice and then topped up with 3-4 oz of whiskey. If you ask for a seltzer, you’ll get kicked out of the house. You’re an adult; drink like one. 3
Are you interested in writing for Garden Culture Magazine?
We’d love to hear from you! Send us an email introducing yourself with a sample of your work editor@gardenculturemagazine.com


and
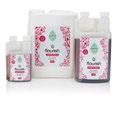
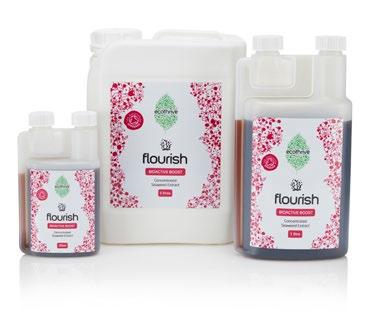
USABLE IN ORGANIC FARMING
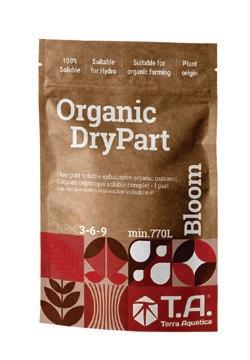
flourish is a premium seaweed extract packed with bioactive compounds and phytohormones to reduce stress and improve plant growth.
flourish is extracted without chemicals; our unique process uses high pressure at a low temperature to harvest the highest quality bioactive compounds. It’s further filtered to remove the residual solids to provide a stable, completely soluble seaweed extract with a low pH that will remain stable in a reservoir for weeks.
flourish is certified for organic cultivation, suitable for use in soil, coco, and hydroponic systems, and ideal for foliar applications. Boost the productivity of your crop with flourish.
Visit ecothrive.co.uk and follow @ecothrive for more info.

You won’t believe what a huge difference such a small dose makes
Cali Touch is the ultimate natural supercharger for flowering plants. Powered by triacontanol, this cutting-edge formula triggers a cascade of growth responses, helping plants develop stronger structures, produce more flowers, and unlock their full genetic potential.
Cali Touch ensures even and consistent uptake thanks to its stable carrier, while its ultra-fine filtration prevents clogging and maximises absorption.The advanced coating technology works at a molecular level, delivering the active ingredients efficiently for optimal plant performance. Just 2ml per litre, applied once a week for seven weeks, is enough to see significant results.
Exclusively available from Highlight Horticulture.

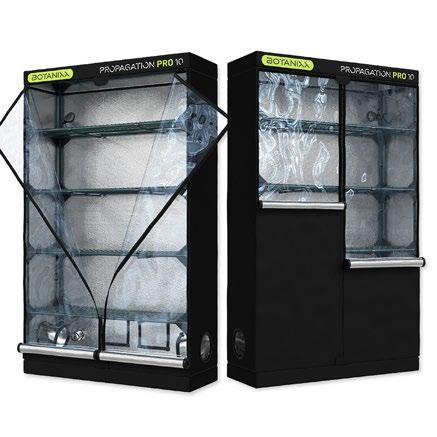
Take your propagation game to the next level with the BOTANIXX Propagation PRO 10 – a powerhouse tent designed for high-yield cloning and seedling success. Built to accommodate up to 1,040 cuttings, this 120 x 40 x 200cm grow tent is engineered for maximum efficiency, durability, and performance.
BOTANIXX propagation PRO 10 offers:
• Superior Light Reflection – 97% mylar interior for optimal light distribution.
• Heavy-Duty Fabric – Ultra-strong Nylon 600D for lasting durability.
• Precision Engineered – Lightproof zippers and double-lined Velcro window doors.
• Advanced Ventilation & Access – Dual front doors, air inlets, extraction socks, and power management solutions.
• Rugged Frame – Powder-coated steel for superior support.
Ask for it at your local store. Distributed by Creation Wholesale.

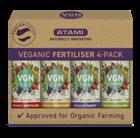
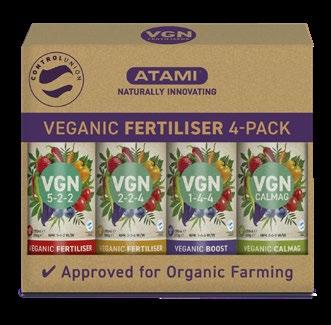
VGN—Veganic Fertilisers nourish your plants for healthier crops, fragrant flowers, and tasty fruit! Try the range with the convenient 4-pack containing four certified organic fertilisers for the whole plant cycle in a 250ml format.
• VGN 5-2-2: Grow healthy green plants with a little extra nitrogen.
• VGN 2-2-4: Extra potassium for stronger, more vigorous growth.
• VGN 1-4-4-4: Provides additional phosphorus and potassium for outstanding flowering.
• VGN CalMag:To strengthen cell walls and support cell production and photosynthesis.
Combine according to your needs, and visit ATAMI.com to learn more about Atami’s new range of vegan products!
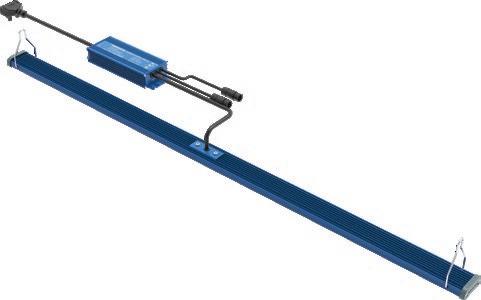
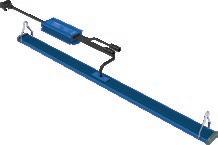
The DAYLIGHT 100W LED (3rd GEN Controllable) enhances the success of its predecessor with advanced control features for greater flexibility. Designed for medium to large grow spaces, it delivers 280 µmol/s at 2.8 µmol/J efficiency, ensuring high-performance, energy-efficient lighting.
With manual dimming from Off to 100% and remote control via the DAYLIGHT Lighting Controller, growers can fine-tune light output for any stage. Its IP65 waterproofing and durable aluminium build make it ideal for demanding environments. Multiple units can be linked for scalable setups, while its slimline design makes it perfect for side lighting. Providing fullspectrum lighting to support plant growth from start to finish.
Exclusively available from Highlight Horticulture. Visit GrowWithDaylight.co.uk to find the right lights for your grow.
30 Years of Grower-Trusted Performance Now in the UK
30 Years of Grower-Trusted Performance Now in the UK
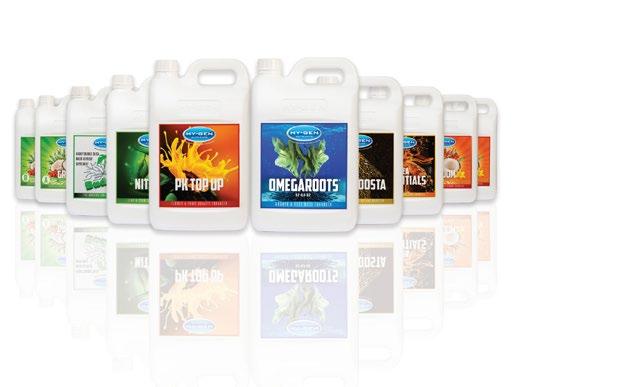
HY-GEN® has been Australia’s best-kept secret, powering elite growers with cutting-edge plant nutrition for more vigorous plants, bolder flavors, and heavier yields. Now, the UK can experience the science behind terpene-rich, high-performance growing.
30 Years of Grower-Trusted Performance Now in the UK
HY-GEN® has been Australia’s best-kept secret, powering elite growers with cutting-edge plant nutrition for more vigorous plants, bolder flavors, and heavier yields. Now, the UK can experience the science behind terpene-rich, high-performance growing.
HY-GEN® has been Australia’s best-kept secret, powering elite growers with cutting-edge plant nutrition for more vigorous plants, bolder flavors, and heavier yields. Now, the UK can experience the science behind terpene-rich, high-performance growing.
The secret is out.

The secret is out.
HY-GEN® has been Australia’s best-kept secret, powering elite growers with cutting-edge plant nutrition for more vigorous plants, bolder flavors, and heavier yields. Now, the UK can experience the science behind terpene-rich, high-performance growing.
The secret is out.
Now available in stores.
The secret is out. Now available in stores. Fuel the grow. Unlock the flavor.

Now available in stores.
Now available in stores.

The Can Lite XL range is designed for high-performance air filtration, combining durability, efficiency, and ease of installation. Using the trusted packed bed design and high-quality virgin-activated Australian CKG 48 carbon, these filters deliver superior air purification while maintaining excellent airflow.
Fuel the grow. Unlock the flavor.
Visit hy-gennutrients.com/find-a-stockist-uk to find HY-GEN near you.
Fuel the grow. Unlock the flavor.
Fuel the grow. Unlock the flavor.
Visit hy-gennutrients.com/find-a-stockist-uk to find HY-GEN near you.
Visit hy-gennutrients.com/find-a-stockist-uk to find HY-GEN near you.
Visit hy-gennutrients.com/find-a-stockist-uk to find HY-GEN near you.
With a new 65mm carbon bed, the range provides enhanced filtration without added bulk. Airflow capacities start at 2500m³/ hr and reach 4500m³/hr, ensuring powerful performance in demanding environments. Despite their strength, Can Lite XL filters are compact at just 1 metre long (65cm for the 2500 model) and light enough to hang from standard 48kg hangers. Designed to last 18 months, they set the standard for clean air filtration.
Exclusively available from Highlight Horticulture.


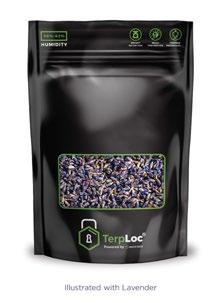
Grove Bags are constructed using proprietary TerpLoc™ Technology, merging six distinct film barrier layers to guarantee active humidity control and protection of your organic material.
Grove Bags have been designed so that moisture constantly flows in and out of the bags, keeping everything at the optimum level.This will keep your organic matter fresher for longer and allow you to package food and herbs sooner than competing brands.
TerpLoc™ is the first of its kind, a genuinely passive atmospheric packaging solution that perfectly cures dry herbs, food, and nuts. Ask for it at a stockist near you.
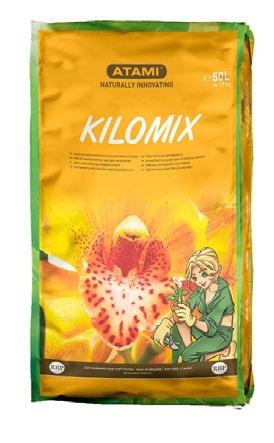
Atami Kilomix is the perfect foundation for healthy plant growth, packed with essential nutrients to support long-term development. Enriched with Atami Worm Delight, lime, guano, and a carefully balanced mix of organic fertilisers, it ensures a steady supply of vital elements, significantly reducing the risk of deficiencies. Professionally formulated, this nutrient-rich substrate provides sustained nourishment, allowing plants to flourish in an optimal growing environment. With Atami Kilomix, your plants benefit from a consistently rich and well-structured medium, promoting strong roots and vigorous growth. Give them the best start with this superior blend!
300x300x200cm (10’x10’x6’6’’)
Equipped with two main front doors, one front access door, and two rear access doors. With 22 port options in four sizes, six micro-mesh passive filters, and one night vision window, the BudBox Pro Titan 3 is adaptable to all growing needs. It is built to last with 25mm powder-coated tempered steel poles and 1mm thick walls. It has practical metal push/click connectors and six roof hanging bars with silicone pads. With the main door clips, clear floor area, double cuff vents, 20% oversized vents for acoustic ducting, and double-stitched seams, PRO White Titan 3 has every detail to maximise your growing space. PRO White offers up to 106% MORE PAR reflectivity than Mylar.
Award-winning grow tents. Grow PRO. Grow BudBox PRO.
Visit BudBoxGrowTents.com to find the right model for you.

performance.

Ask for it at your favourite store.Visit ATAMI.com for more info.

The fixture includes a remote dimmer for precise control, while IP65 waterproofing guarantees durability. Use it for propagation or as supplemental lighting alongside DAYLIGHT LED fixtures. Fully compatible with the DAYLIGHT Lighting Controller, the 60W LED offers versatility, reliability, and the power to boost plant growth in any setup.
Exclusively available from Highlight Horticulture. Check out GrowWithDaylight.co.uk for more details.


#gardenculturemagazine
#confessionsofaukhydrostore #gardenculturemagazine #confessionsofaukhydrostore
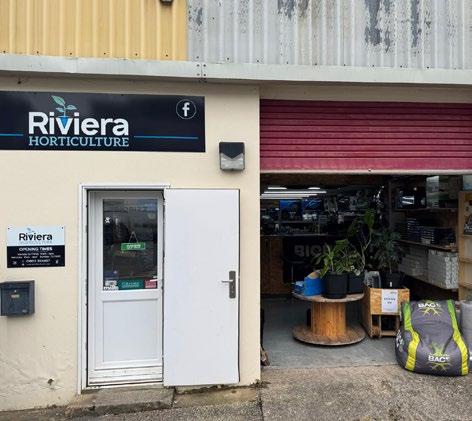

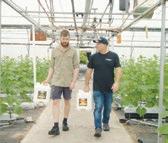
Riviera Horticulture is Torbay’s one-stop shop for the best hydroponic equipment and nutrients at competitive prices. Paul joined Garden Culture Magazine in the confession booth to talk about how the store has survived industry challenges over the last few years, his heroes, and his passion for plants and music.
How long have you been in business, and how did you get started?
We have been here since May 2020; the shop had been here for a long time and was owned by a mate, so we took it over when he wanted out for personal reasons. We spent most of the summer (during the COVID lockdown period) renovating and tidying the place, but we’ve been open since day one.
The last few years have been tough for many hydro shops. What have you done to make it through the challenging days?

There have been some slow and quiet times over the past five years. Fortunately, I do enjoy my own company (lol!). Some of the quiet days have been spent keeping up to date with what is happening in the industry, looking at new products, new trends, etc. And I have a little Pioneer DJ controller under the counter to keep me occupied for days.
Who are your heroes inside and outside the industry?
My hero outside of the industry is Sir Michael Eavis. He throws the greatest party on Earth for five days every year, he gives millions to charity, and the music and contemporary performing arts scene in the UK has benefited massively since he opened up his home at Worthy Farm in Somerset for Glastonbury Festival in 1970. What a guy!
Inside our industry, my heroes are the small hobby growers who shop with us daily despite the rising product and energy costs and the obstacles in the way of growing the crops they love. We wouldn’t be here without their passion for growing, so hats off to all you guys and girls!
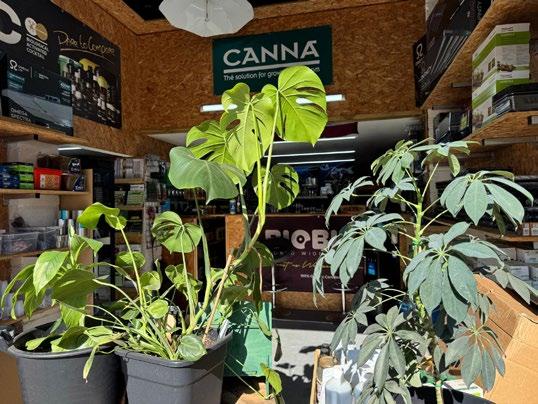
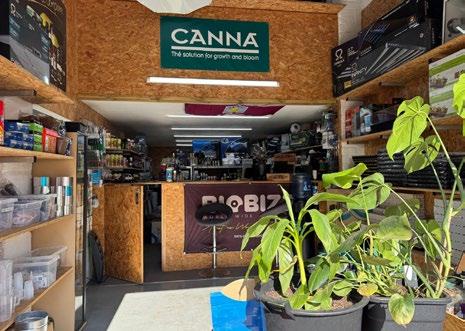
What are some of your favourite products?
Figure 1
We don’t stock a massive range of products in store, but some of our favourite products would be Grove Bags, which work exactly as they should. I think we were the first shop in the UK to sell them. We brought them over from the United States, and they’ve been a great seller for us in-store and online. Autopot would be another excellent product for us; most customers use Autopots. They are an excellent choice for almost every situation. Athena’s blended line of nutrients is another favourite; it has quickly become one of our best sellers and a product I love.
What is the most common question you get in the shop?
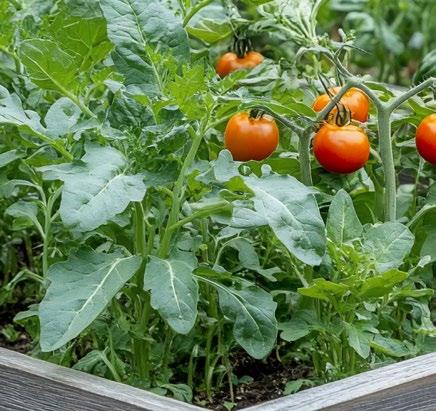
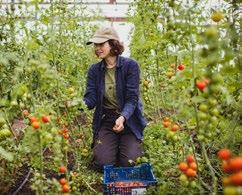
The most frequent question we get asked here is if we are interested in trying some of the awesome produce our customers are growing; tomatoes are a favourite of mine.
Most of our customers are regulars and know they’ll get 100% honesty from us. I need them all to succeed, and I’ll do my best to make that happen. We don’t sell any products in the store that we don’t love.
Tell us a joke.
What’s brown and sticky? A stick!
Mineral or organic?
It all depends on why you’re growing. If you need to turn crops over fast, then it’s mineral; if it’s more of a labour of love, you have plenty of time and want to be more hands-on, then organics is an option. I think it’s harder to get everything perfect with organics. Therefore, it’s probably not a good choice for a novice. Mineral is my choice right now, but it hasn’t always been, and I’m sure it won’t be forever.
What is the first advice you would give to a new grower?
Concentrate on getting the environment perfect and on grow room cleanliness. I can’t stress enough how important it is always to keep everything as clean as possible.
Who are your favourite bands, and what would we hear if we came into your store?
I could talk all day about this; music is our passion. Tunes are always on in-store. You might hear anything from Bob Marley and Kendrick Lamar to Fontaines DC. Electronic music is the priority; DJs like Sasha and Digweed, Lee Burridge, Keinemusik, and Four Tet might be playing here. If you’re lucky, I might even be having a mix myself, lol!
What are some of your other hobbies besides work and growing?
Again, music is an integral part of my life, so outside of work, we spend six days on Worthy Farm at Glastonbury Festival; almost a week spent enjoying the world’s best bands and musicians, the best raves, great food, and people. I spend six months of the year getting excited for it, and then the other six months recovering from it. 3
Want to be the next Hydro Store to ‘confess’?
Take a picture of this edition of Garden Culture Magazine in your shop, post to Instagram and tag @gardenculturemagazine. OR Send your info to social@gardenculturemagazine.com
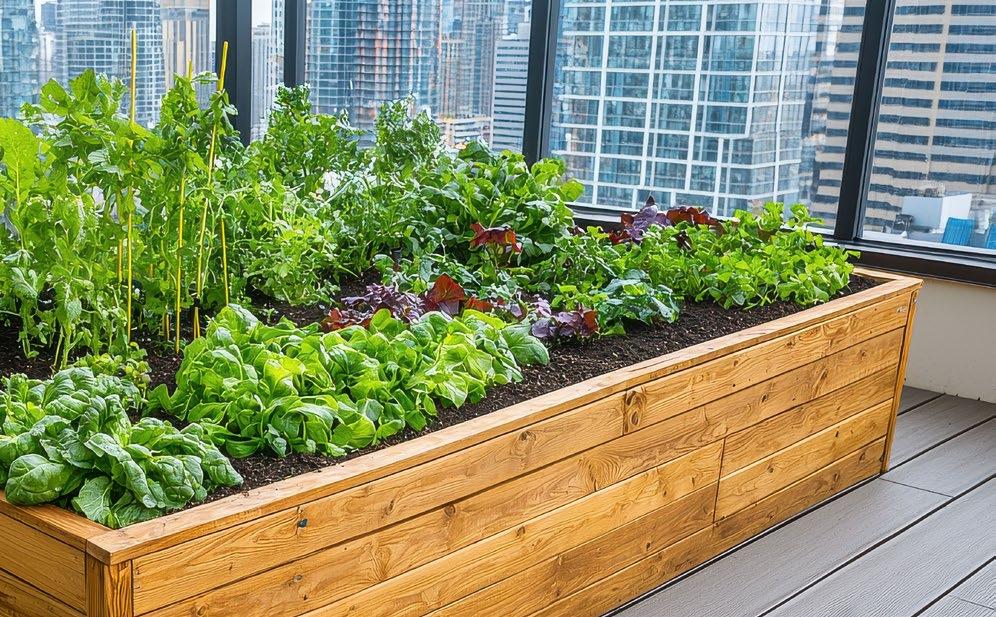
It works no matter where you are. People from rooftops in Egypt to rainforests in Costa Rica


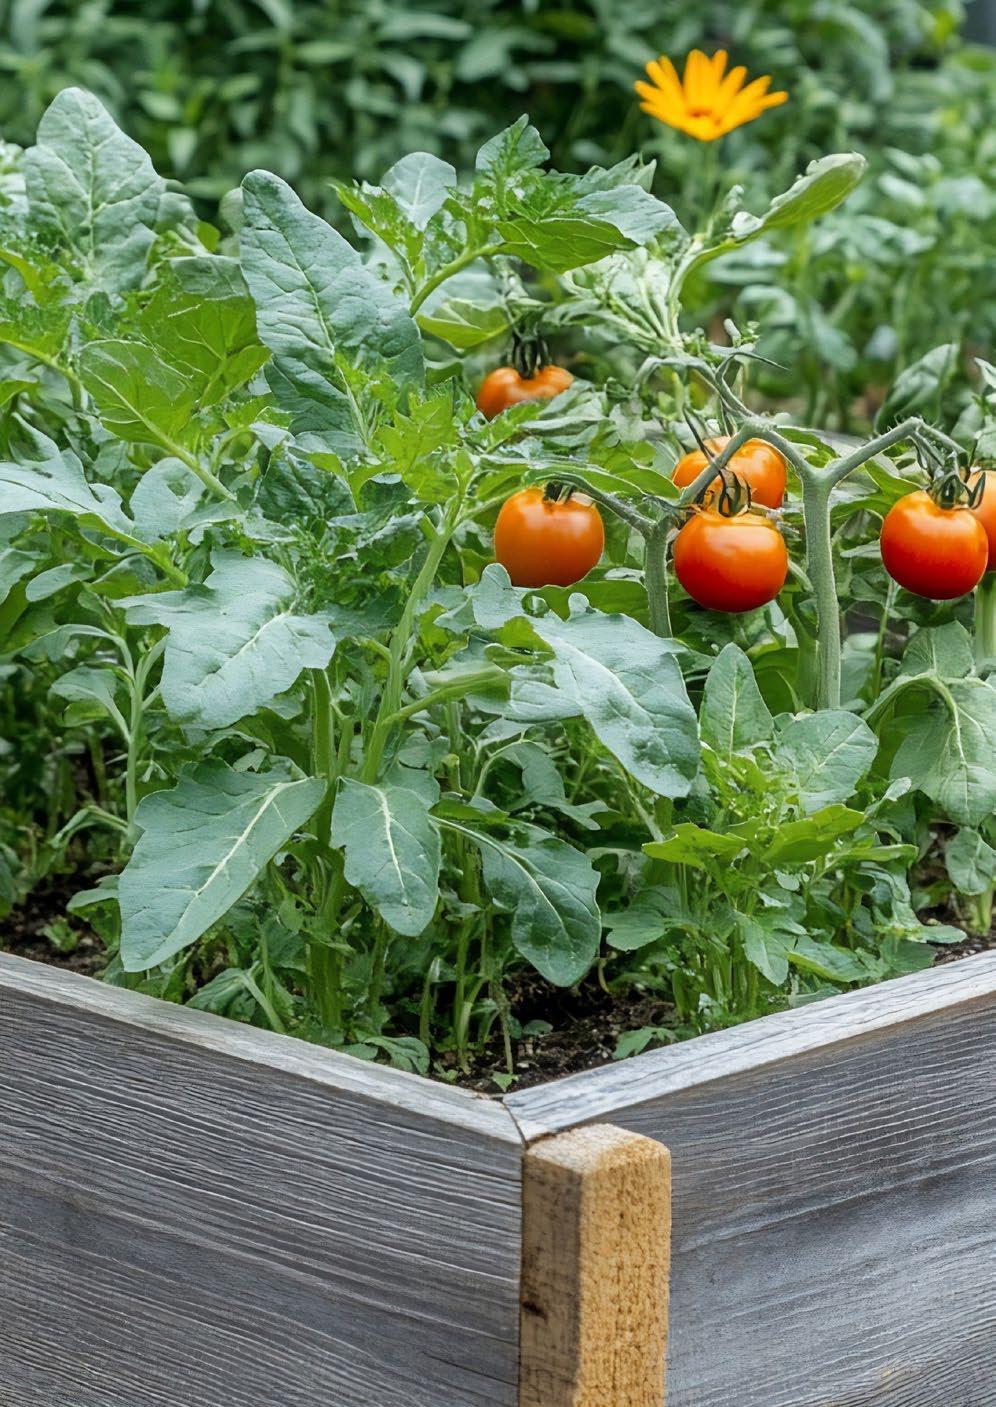
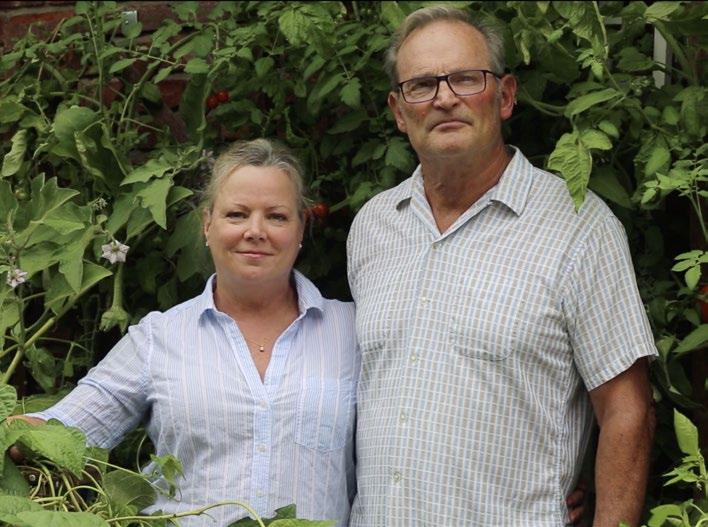
I’m in the first of back-to-back snowstorms wreaking havoc across eastern Canada when Steve and Laura Bartholomew via video chat to talk about square-foot gardening (SFG). all laugh, albeit nervously, as I turn my camera toward the window to show them the blowing snow outside. My outdoor gardening days seem out of reach, but a girl can dream, right? Steve and Laura try to lift my spirits, assuring me I can start growing earlier with a square-foot garden. More on that later. By the time the second storm wraps up a few days later, 80cm (30 inches) of snow has fallen, a record for the Montreal area, and I have more than a few square feet of shovelling to do.
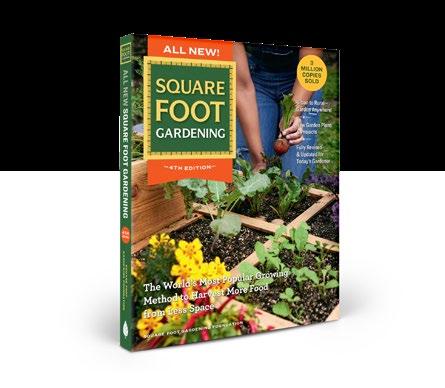
The World’s Most Popular Growing Method
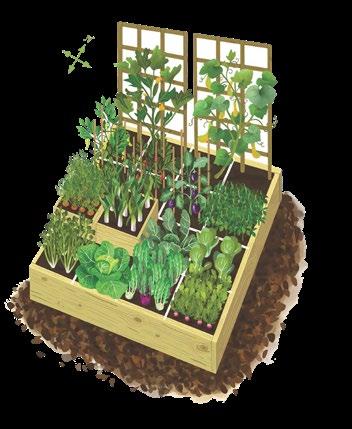
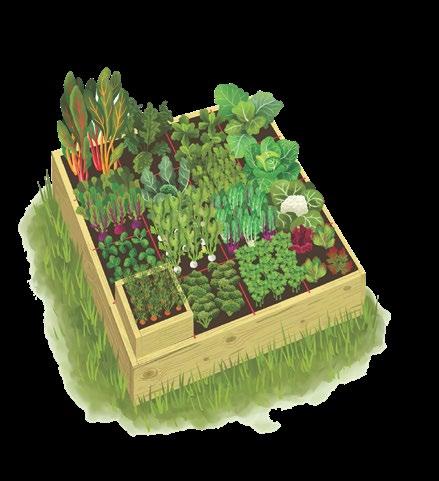
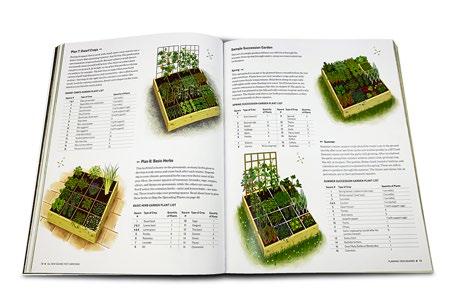
Steve and Laura are behind the 4 th edition of Square Foot Gardening: The World’s Most Popular Growing Method to Harvest More Food in Less Space. This updated book contains everything there is to know about SFG, new garden plans and projects, a quick reference plant spacing guide, and answers to some of the most common questions the Square Foot Gardening Foundation has received over the years. The couple reflects on this decades-old growing method with fresh eyes for the modern grower, focusing on being flexible and making your garden your own while obeying the original principles of SFG.
• Plant in squares
• Plant densely
• Be sparing with seeds
• Rotate crops
• Grow vertically

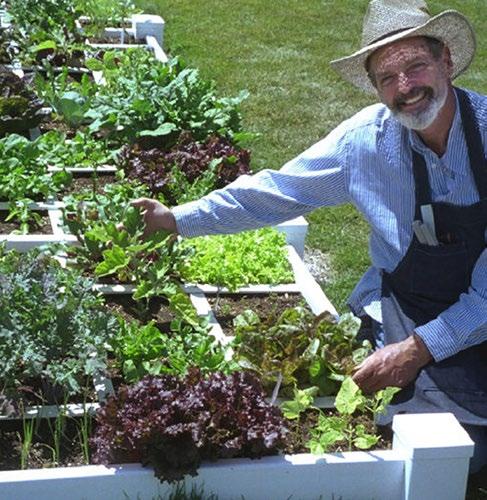
He wanted efficiency, less waste, and more crops to harvest in a shorter period. He also wanted a system that could be used anywhere, from home patios and balconies to schools, community centres, and beyond.
Looking to the Victory Gardens of World War II for inspiration, Mel created 4x4 raised beds only 6-8 inches deep with 1-foot grid squares. He focused on planting, spacing, weed control, and, most importantly, nurturing the soil. Gardeners of all experience levels quickly embraced the SFG method for its simplicity, adaptability, and results. Fast-forward almost 50 years to the era of climate change, and this growing method remains incredibly relevant as we look to grow more food for an increasing population while conserving precious natural resources.
• Use Mel’s Mix
• Grow shallow
• Don’t use fertiliser
• Grow where most convenient
• Maintain narrow aisles
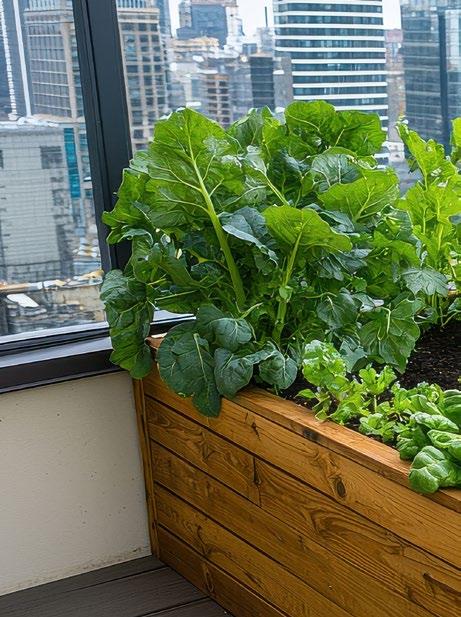
“We wanted to show that there’s great diversity in squarefoot gardening, and it’s not just a tried and true one-step principle that you must follow,” Steve explains. “By doing that, we’ve talked to people worldwide who have had tremendous success in any environment. It works no matter where you are. People from rooftops in Egypt to rainforests in Costa Rica.”
I’m already feeling better about all of this snow.
Steve’s father, Mel Bartholomew, introduced the world to SFG in 1976 as an alternative to what he viewed as wasteful ways of growing food. A retired engineer, he didn’t understand why gardeners and farmers grew crops in rows and noticed that many were exhausted and giving up by mid-summer. Mel was discouraged by the wasted seeds, time, and resources and knew there had to be a better way to grow.
“He was almost fanatical about not wasting anything, whether it’s your energy, water, or space. Food waste drove him crazy. He was ahead of his time, I think,” Steve says of his father. “You get the results, and you’re not wasting water, you’re not wasting space, you have more control over what you’re doing, and generally, it works out much better.”
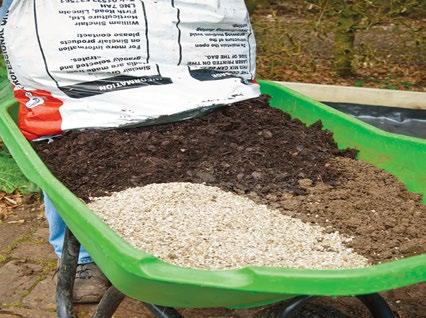
The SFG method is about more than planting in squares. It involves planting densely, using seeds wisely, rotating crops to naturally protect against pests and diseases, and using vertical garden structures to save space. Above all else, it’s about the soil. Mel’s Mix is the gold standard of SFG, allowing the method to be completely organic and non-wasteful. Although reasonably straightforward to make with one-third each of peat moss, coarse vermiculite, and blended compost, Laura admits it’s the most asked-about topic at the Square Foot Gardening Foundation.
“The Mel’s Mix always seems to be kind of a mystery and why we’re so adamant about making [it] properly and spending that money, the upfront cost,” she says. “I think we answer that in many ways in this book in the sense that we explain the science behind the Mel’s Mix.”
As the SFG method approaches its 50 years, this technique is anything but over the hill.
Unlike a typical bagged garden soil, Mel’s Mix is specially formulated to boost plant health and productivity. It doesn’t require tilling, and the compost offers all the nutrients crops need, so additional fertilisers are unnecessary. The coarse vermiculite boosts aeration and drainage capabilities, while the peat moss component improves soil friability and lightens the mix. Laura says eco-savvy gardeners often ask the Square Foot Gardening Foundation for alternatives to peat moss, and they’ve found that coconut coir is an excellent substitute. They’re constantly testing new ingredients to see what they can improve upon. A couple of years ago, they tested rice hulls instead of vermiculite and found the mix clogged; peppers didn’t grow as well as in Mel’s Mix. They’ve found that all you need to do between harvests is top up with some compost. Yes, the initial output may be costly, especially if you don’t make compost at home, but Steve and Laura promise it’s worth it.

“My grandmother had a saying: let’s not be penny-wise and pound-foolish, and that’s easier said than done,” Laura says. “If you’re making the Mel’s Mix according to the original recipe, with added compost each time you plant, the mix alone can last you seven, maybe ten years. So you’ve got to amortise that cost.”
There are other ways gardeners can come under budget; this growing method was never meant to break the bank. Steve used to go to his local organic juice bar and ask for the leftover fruit pulp and peels for composting. People can ask supermarkets for any veggie and fruit scraps, too. Big box stores sometimes offer wood cuttings for free, and pallets can be collected from the side of the road and used to build compost bins.
Steve’s father, Mel Bartholomew, introduced the world to SFG in 1976 as an alternative to what he viewed as wasteful ways of growing food
“There are ways to cut corners on making beds and composting,” Laura says. “But when it comes to the Mel’s Mix, I say that’s where you should never skimp.”
With SFG beds only six to eight inches deep, there’s no need for a ton of soil, which will help cut costs and allow the mix to warm sooner; therefore, your crops mature faster. Despite being so shallow, you can grow many different crops in the SFG bed, including bigger ones.
“People are like, ‘You can’t grow 12 tomatoes in six inches of Mel’s Mix’, but we do it all the time,” Laura explains. “We can start a bit earlier because it’s more shallow. We water less because it’s more shallow. And the roots are growing sideways because all the nutrients a plant needs are within the first six to eight inches of depth.”
SFG beds are highly customisable and can suit any space or physical need. The book features many ideas, from basic 4x4 boxes on the ground to upcycled, elevated options for gardeners who don’t want to be bending over all the time.
There’s an option for a two-foot wide and eight-foot-long bed with a trellis in the back for climbing veggies. There are instructions for salsa and herb gardens or edible perennial beds. Whatever you choose, the couple recommends always keeping the garden in a close spot where you can monitor it and walk your harvest a few steps to the kitchen.
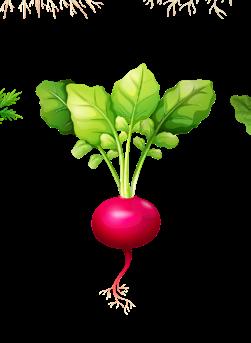
“We encourage people to start small. You don’t want a row of 300 radishes that are all going to become harvestable at the same time,” says Steve. “So, if you have a 4x4 bed, which is a perfect size for a beginner gardener that feeds enough vegetables for one person all year, you plant one square of 16 radishes, and then maybe two weeks later, you plant another square of 16 radishes, and you have fresh produce on a cycle that you can absorb, eat, and not throw out.”
As the SFG method approaches its 50 years, this technique is anything but over the hill. It makes growing organic food close to home accessible for all, no matter their age or location. As our planet looks for solutions to the current climate crisis, we have a forward-thinking approach that has stood the test of time already available to us. If you pick up a copy of the book or visit squarefootgardening.org, you can get up and running in a weekend. What’s not to love about that? 3
BIO Catherine is a Canadian award-winning journalist who worked as a reporter and news anchor in Montreal’s radio and television scene for 10 years. A graduate of Concordia University, she left the hustle and bustle of the business after starting a family. Now, she’s the editor and a writer for Garden Culture Magazine while also enjoying being a mom to her three young kids. Her interests include great food, gardening, fitness, animals, and anything outdoors.

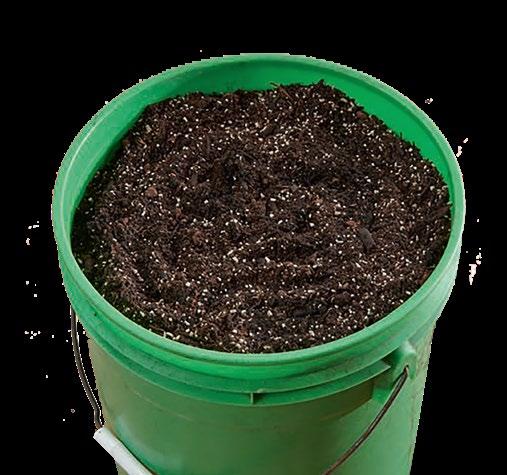
Mel’s Mix is a crucial component of Square Foot Gardening, one that has helped this growing method stand the test of time. The medium results from years of experimentation and combines ideal plant nutrition and soil friability. There is no need for extra fertilisers, inputs, or soil tests. All of the work is already done! The best part is that you don’t need a lot of Mel’s Mix to help your garden grow.
“One of the miraculous things about square foot gardening is that you only need about six to eight inches of this Mel’s Mix because the root systems go sideways,” Laura Batholomew says. “You don’t need to fill your beds deep with it.”
The Square Foot Gardening Foundation has never bagged Mel’s Mix, and Laura and Steve say that’s because compost quality varies from region to region. Luckily, it’s easy and convenient to make!
• One part top-quality compost
• One part peat moss
• One part coarse vermiculite
Before getting started, determine the amount of Mel’s Mix you’ll need to fill your SFG bed.
Calculate the volume of the box in cubic feet
• Box length x box width x box depth = box volume
Calculate the volume of materials needed in cubic feet
• Box volume divided by 3 = cubic feet of each ingredient
*For example, your calculation for a traditional 6-inch SFG box will be 8/3 = 2.66 cubic feet per ingredient.
Calculate the number of 5-gallon buckets needed for measuring
Each 5-gallon bucket holds 0.668 cubic feet of material. Use this formula to find the number of buckets you’ll need for each in gredient:
• Cubic feet needed / cubic feet of measuring scoop = number of 5-gallon buckets needed
*For example, a 6-inch SFG box formula is 2.66 / 0.668 = 3.98 5-gallon buckets of each ingredient.
Be sure to release all ingredients from their bags and bales and aerate them before measuring. When the recipe for Mel’s Mix is followed and combined with the other essential components of square-foot gardening, harvests will be abundant, and maintenance will be minimal.
“There are some days after I’ve worked on the garden for two hours for the entire week in the height of the growing season,

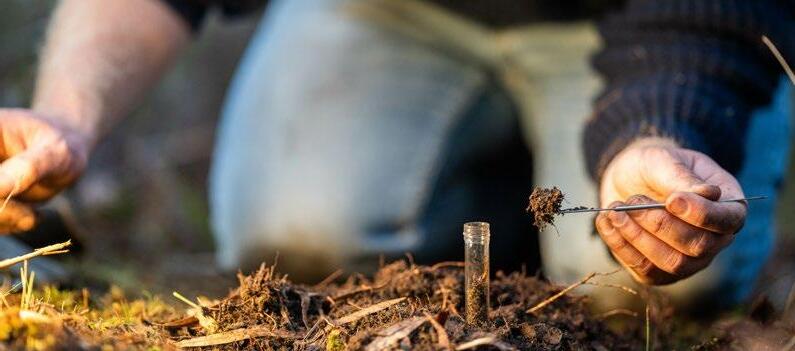
“Should I be testing my soil, and if so, how often do I do it?”

If you’re an indoor grower who uses soil in your gardens, you may be wondering, “Should I be testing my soil, and if so, how often do I do it? ” Well, you’re right to ask those questions, so let’s take a deep dive into why testing organic soil is crucial for indoor growing and how to amend it effectively if necessary.
Why test organic soil for indoor growing?
There are several reasons why testing is essential. The balance of macronutrients and micronutrients is crucial. Because your plants rely entirely on the soil you provide for their nutrient needs, a test is like a nutritional analysis of the soil - a window into what and how you’re feeding them - which gives insights into any imbalances in the nutrients or pH within the soil composition. We know that macronutrients nitrogen (N), phosphorus (P), and potassium (K) are essential for plant growth, and having the proper balance ensures robust plant growth and overall health. What tends to get overlooked is that micronutrients need to be balanced with macronutrients to ensure optimal growth. These micronutrients include iron, zinc, manganese and others which are needed in smaller amounts but still play a critical role in the successful cultivation of a crop.
Testing is used to help avoid several issues which can arise when growing in soil, especially indoors. Let’s look at the issues that can be avoided with proper and consistent testing:
Deficiencies -stunted growth, yellowing leaves, or other symptoms can indicate a lack of specific nutrients.
Excesses - too much of a nutrient can be just as harmful as not enough. This can lead to toxicity and nutrient lock-out.
pH imbalance - pH measures how acidic or alkaline your soil is. Most indoor plants thrive in a slightly acidic to neutral range (6.0-7.0). An incorrect pH can hinder nutrient uptake, even if the nutrients are present because the plant cannot absorb them due to the pH being off. Extreme pH issues can also cause issues in the root zone, leaving the roots damaged and more vulnerable to disease.

Testing is used to help avoid several issues which can arise when growing in soil , especially indoors
Contaminants are also a considerable issue testing can reveal to the grower. Heavy metals can be present in some soil sources and harm the plants and anyone consuming the plants grown in contaminated soil. These heavy metals include lead, arsenic and mercury, among others. An important thing to remember is if a crop is intended for extraction, any heavy metals present in the plant biomass will be amplified in the final test numbers of the extracted product. This is why you must test our soil , especially if extraction is the intended final output.
Pesticide residue is also detected through testing. Some growers source their soil from an outdoor source which may have had pesticides applied to it. Some of these pesticides can harm plant growth and be harmful to humans if passed on through the plant and any products produced from the plant.
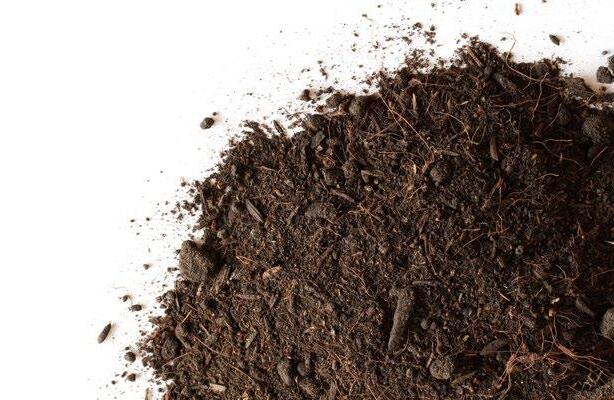
Adding organic matter is the cornerstone of soil health.
Make sure to observe your plants and take notes. Your plants will tell you if something is wrong. Yellowing leaves, stunted growth, or other symptoms can indicate deficiencies, pH imbalance or other problems like toxicity
So, what’s the best way to amend your organic soil for future crops? Let’s look at a few ways to ensure a successful crop is produced:
Adding organic matter is the cornerstone of soil health. Organic matter improves the soil structure by creating air pockets for roots to breathe and preventing compaction. It also helps with moisture drainage which helps the roots breathe while preventing root rot. The addition of organic matter also helps the soil hold onto nutrients, which makes them available to the plants over time. Microbial health is improved as organic matter feeds beneficial microbes that help with nutrient cycling and disease suppression. Examples of organic matter include compost (a mix of decomposed organic materials like food scraps, leaves and yard waste).
Many outdoor gardeners will amend with aged manure that’s been composted to reduce nitrogen and odour or worm castings (earthworm excrement that’s rich in beneficial microbes). If you want to add these to your indoor gardens, you must be cautious not to allow microbial contamination of the plants being grown or the facility as a whole. A crop can fail because of microbial contamination caused by using these to amend soil indoors.
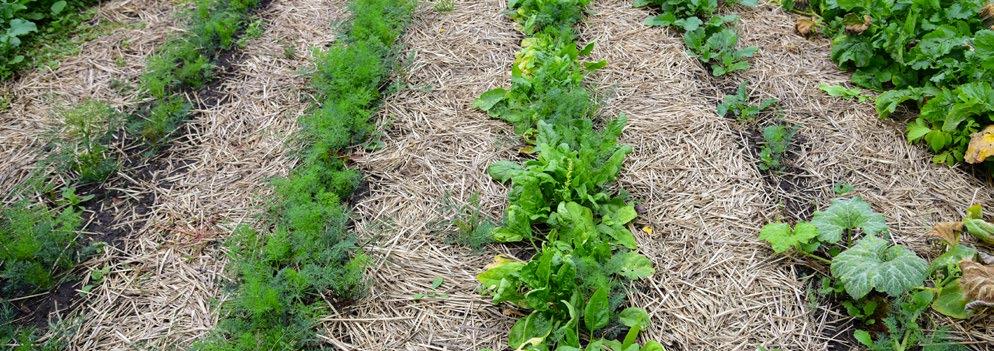
Cover crops grown specifically to improve soil health get tilled into the soil between crops, which adds organic matter. Some cover crops are used to help fix nitrogen issues by converting atmospheric nitrogen into a form plants can use; some of these include legumes and crimson clover. Cover crops help prevent soil erosion by keeping it from being washed away during watering or blown away from drying out and having fans blowing it around the grow space. Another benefit of cover crops is they suppress any weeds (usually brought in by bringing in soil from outdoors) by outcompeting them; this reduces the need for the use of herbicides.
Rotating your soil is also incredibly beneficial if it can be achieved. At one of the facilities I work with, we have ‘new’ soil waiting for each crop. That specific soil has been tested and amended as needed in preparation for planting a new crop. We amend by taking the used soil and adding what has been removed by the previous crop, either by top-dressing each pot or bed or by mixing large totes of soil and the required amendments. Rotating the soil helps prevent pest and disease buildup and improves soil fertility because the depletion of nutrients has been prevented by making sure the tested and amended soil has everything needed for the incoming crop.
Avoid tilling once the crop is planted. Some growers do a top rake till around the plants with the belief that doing so introduces oxygen to the root zone when, in fact, it disrupts the soil’s natural structure and kills beneficial organisms. Some operations cover the soil with layers of organic matter to suppress unwanted weeds and add nutrients.
The biggest thing to remember is to test and amend your soil between each crop - you do not want your soil to become depleted or have imbalances resulting in poor plant health and lower yield. Consider your plants’ needs; different plants and cultivars have different nutrient and pH requirements - tailor your amendments to the specific plants you are growing.
Make sure to observe your plants and take notes. Your plants will tell you if something is wrong. Yellowing leaves, stunted growth, or other symptoms can indicate deficiencies, pH imbalance or other problems like toxicity.
By testing your soil regularly and amending it properly, you can create a healthy and productive environment for your indoor plants. Better in = better out. It’s that simple. Treat your soil and plants with respect and love; they’ll provide everything you need.
Happy Growing! 3
BIO With 30 years of cultivation experience, Dustan has dedicated a good portion of his life to medicinal plants. He was a founding partner and Head of Cultivation/Master Grower for Parkland Flower Inc. He is now the Head of Cultivation and Master Grower for Big League Cultivation in Alberta, Canada. He provides incredible genetics to Canadian producers and selected flower and concentrates for the international market. He is also a cultivation consultant with Chief Grow Officer Consulting. He is currently working on several projects, including developing a cultivar to help with opioid addiction and a drought-resistant variety.
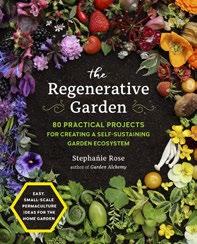
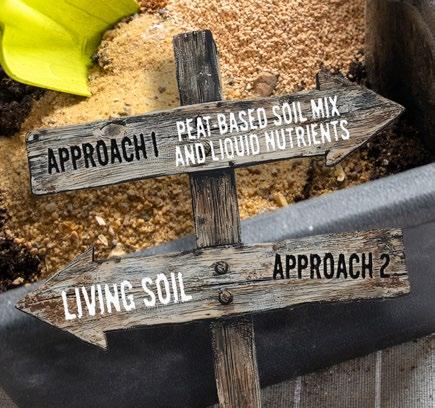
Regenerative agriculture has gained new and significant popularity in recent years, and for good reasons. This thrilling approach aims to produce nutritious food while healing the planet by restoring soil health and capturing atmospheric carbon. The promise of regenerative agriculture allows us to reimagine row crops as fields buzzing with life, where clever farmers use wildly holistic approaches to boost biodiversity. Is it true could this revolutionary approach convert depleted soil into supercharged sponges of life?
The fact is that regenerative agriculture is extremely difficult to implement in real-world applications.
Beyond the surrealistic imagery, studies have convincingly shown that regenerative agriculture practices can increase crop yields by 20% while reducing nefarious greenhouse gas emissions. One would think that regenerative agriculture represents a clear win for farmers. However, this is not the case, as some farmers strongly believe that regenerative agriculture is NOT PRACTICAL for their operations. The fact is that regenerative agriculture is extremely difficult to implement in real-world applications. For this reason, more than 90% of all commercial agriculture still relies heavily on conventional synthetic fertilisers and pesticides.
Which practice is better?
Regenerative agriculture systems represent a holistic, biologically active approach that restores and enhances soil systems. Regenerative agriculture relies heavily on using living organisms (e.g., microbes, fungi, plants) to cycle nutrients and improve soil structure, which fosters biodiversity and long-term sustainability. Regenerative farming aims to sequester carbon, enhancing soil fertility while eliminating conventional synthetic fertiliser inputs. While synthetic management often degrades soil over time, regenerative systems replenish soil organic carbon, enabling an acre to hold 25,000 more gallons of water in as few as three to ten years after converting.
However, many farmers find regenerative agriculture impractical because they cannot wait three to ten years for results. Switching a farm from conventional methods to regenerative agriculture is challenging and involves many operational and economic obstacles. Lastly, regenerative agriculture requires more time and knowledge to implement effectively and is less predictable than conventional synthetic systems in the short term. No wonder regenerative agriculture is not a more widespread practice!
Conversely, conventional synthetic programmes are relatively simple and ideal for control and predictability. They
efficiently deliver precise inputs tailored to the plant’s needs while remaining free of contaminants or microbes. This approach (absent of living biological materials) certainly reduces variables, which is optimal for controlled environmental conditions.
Which practice is better who’s to say? There are clear trade-offs between conventional synthetic programmes and regenerative agriculture. Comparing the two would be like comparing the difference between chugging energy drinks daily versus eating balanced meals. One provides a temporary jolt, and the other offers long-term nourishment. The practices represent different objectives: Synthetic leans toward goals focused on quantity and immediacy; Regenerative leans toward goals focused on enhancement and quality.
The table below outlines some key differences between synthetic and regenerative practices:
Approach Reductionist Systemic Application Short Term Long Term
Sustainability Degradative Enhancement
Complexity Low High Difficulty Level Simple Difficult
Bridging the gap between these two vastly different management practices may allow farmers to maximise the strengths of both approaches: synthetic’s immediate nutrient availability to maximise yields, paired with regenerative’s improved soil health, nutrient diversity, and plant quality enhancements. Like integrated pest management (IPM) approaches, this hybrid approach, often called “integrated nutrient management” (INM) or “smart agriculture,” leverages these two management practices with tools like precision technologies, microbial inoculations, and organic amendments to achieve high yields and quality enhancements.

The promise of regenerative agriculture allows us to reimagine row crops as fields buzzing with life, where clever farmers use wildly holistic approaches to boost biodiversity

Although conventional and regenerative agriculture management programmes take vastly different approaches, synergies may be worth exploring using the strengths of the two practices
Here are 5 Strategies that farmers can quickly implement as part of an integrated nutrient management programme:
Using soil and environmental sensors and variable-rate applicators to target synthetic inputs only where needed, paired with regenerative practices, is a non-negotiable imperative to optimise and maximise growing conditions. Precision-informed environmental and fertigation control allows for optimising plant growth conditions. In outdoor applications, precision fertigation limits synthetic overuse, preserving soil structure and function and preventing waste. The old saying goes, “You can manage what you can measure, so measure what matters.”
Adding beneficial microbial inoculants to synthetic-fertilised fields mimics regenerative microbial activity. Microbes enhance nutrient efficiency, which allows the plant to absorb more nutrients from the fertigation naturally and can eliminate the risk of nutrient lockout in the event of shifts in pH levels or when salts and other nutrients accumulate. Applying synthetics and organic inputs early in the growing season is highly effective. This allows farmers to taper off synthetic applications later in the growing season as microbes take over to support plants.
Using synthetic fertiliser doses alongside organic inputs to meet immediate crop needs while feeding soil microbes. This strategy provides the plant with a quick N-P-K pulse, which organics incorporated with microbial inoculants will naturally stimulate and maximise plant growth and development (via nutrient cycling, enzyme production and biochemical signaling) continuously throughout the plant growth cycle. This strategy can cut future fertiliser needs by 1—20% in outdoor growing applications in as few as three years.
Synthetic stress occurs in soil and soilless media. This unwanted effect can be buffered using biochar and microbiology by mixing biochar and adding microbial inoculants into synthetic systems. This strategy mitigates high salinity and pH swings. Biochar absorbs excess positive ions and reduces toxicity by up to 30%. At the same time, microbes can mitigate toxicity by absorbing excess ions and processing synthetic residues.
In outdoor and living soil bed applications, planting cover crops (e.g., clover) between cash crops while using minimal synthetic N can kickstart soil fertility. This works because cover crops build soil (carbon) and feed microbes. Once the soil microbes reach critical mass, they support the nutrient cycling for plant uptake. Applying low-dose synthetics early corrects for any deficiencies. This strategy has been proven to match synthetic yields and boost plant nutrition and forage quality while reducing farmers’ input costs in outdoor settings.
Note: Cover crop implementation is less common for indoor applications because cover crops can also function as a habitat or vector for pests, thus introducing unwanted uncertainties and risks.
Although conventional and regenerative agriculture management programmes take vastly different approaches, synergies may be worth exploring using the strengths of the two practices. While synthetic fertiliser is critical to deliver soluble nutrients to plants efficiently, bridging the gap with regenerative practices can offer natural quality enhancements. Developing a balanced cultivation programme requires mastering timing, tools, and teamwork. An integrated nutrient management system can utilise microbial inoculants to amplify the conventional synthetic efficiencies beyond raw input —boosting trace element and macronutrient availability, increasing secondary metabolite production (e.g., flavonoids), and enhancing fibre quality. Often, without soil microbes (biology) and organic carbon, these quality enhancements are suboptimal. I hope this article helps you bridge the gaps and explore the benefits of a quality-focused agriculture management programme for your operation.
Spoiler alert: Watch out for the next issue of Garden Culture, where we will bust the myth: How do microbes function in high synthetic fertiliser environments? This question arises frequently, and I am eager to explain ‘how it works’: The fundamentals of how different microbial groups regulate mechanisms to thrive (yes, thrive) in highly concentrated fertiliser solutions. 3
BIO Colin Bell is VP of US Business Development at MIIM Horticulture. He has worked as a PhD Research Scientist in Federal and Academic institutions for years. He builds businesses, develops products, and grows brands for indoor cultivation. Reach out: colin@miimhort.com


We are all feeling it. The cost of everything keeps going up, and it seems like there is no end in sight. From seeds and fertilisers to labour, increased input costs are cutting into already minuscule profit margins. But, as gardeners and farmers, is there something we are missing? We are often told “there are no free lunches”, which, in essence, is mostly true. Still, the foundational basis of agriculture relies largely upon free energy from the sun converted to free chemical energy by plants (ideally with an evolutionary relationship with soil microbes). Is there more that we can gain from what Nature is already providing us?
as gardeners and farmers, is there something we are missing?
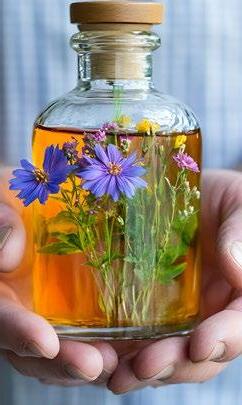
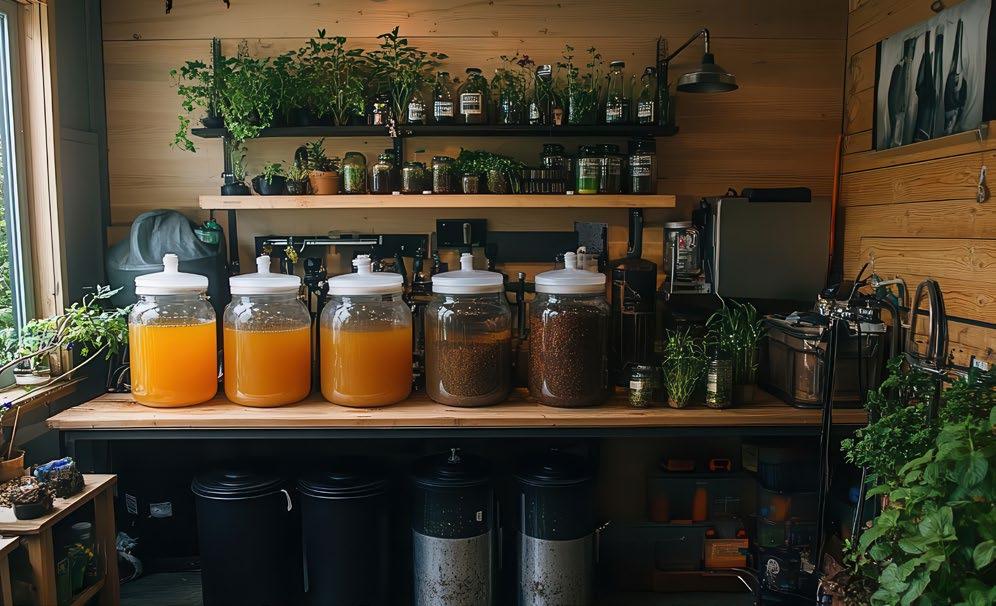
If we could visualise Nature in a time-lapse, we would see that plants are fertilising plants. Not in the traditional sense of spreading alfalfa or soybean meal or incorporating green manure or mulch, but rather in a microbial decomposition of plant material -- not overly fancy, just a gradual decay. Recognising this nutrient fertility cycle, enhancing plant breakdown through composting or fermentation makes sense. However, as a species, sapiens seem to make even the simplest things so complicated that we feel we need to be “experts” to do something natural.
A renaissance of regenerative agricultural practices, which have been the foundational methods of natural farming for centuries in Asia, piques the interest of a new generation of growers. Practices centred around creating farm fertility based on the fermentation of plant material are among the simplest and most effective solutions that can be readily implemented, irrespective of your gardening experience.
One of my earliest memories of gardening is coupled with feelings of embarrassment. As a first-generation Canadian, fitting in was the goal and drawing attention to yourself was to be avoided at all costs. That was not my father’s philosophy regarding the family garden; he was excited about growing the best vegetables for his family. So, creating a foul-smelling concoction to drench the backyard garden in suburbia never received a second thought. Using a plastic garbage can, we would throw in our kitchen scraps, mix in a cup of ground lentils or split peas and some jaggery (evaporated sugar cane juice) and fill it with water. A week or so later, out came the re-purposed Crisco (namebrand vegetable shortening) can, and every plant got a pungent dose. Let’s just say none of my friends were coming over for a game of tag, Red Rover, or hide-and-seek for a few days. The upshot was that we had the best garden in the neighbourhood.
Fast forward 50 years, and foul-smelling fermented plant elixirs are my primary inputs for soil health and plant nutrition for my garden. My interest in this fermented tea practice is based on its effectiveness, simplicity, and low cost (both in time and money). Still, a little of my passion comes from a need to decolonise my mind and challenge my perceptions of good and bad. In our “sanitised” world, we have been programmed to assume anything that has a “not-so-pleasant” odour may be “not-so-pleasant” for our plants.
Using fermented teas will rid you of those false notions and give you a whole new perspective on microbial diversity and the robustness and redundancy of that diversity in providing plants with nutrition.
For the same reasons we drink teas for our health, making a plant tea is primarily about steeping, allowing for the release of beneficial chemicals like antioxidants (like flavonoids), vitamins, amino acids, and elemental nutrients. The fermentation process is important because it helps transform nutrients into the form most readily used by plants. Microbes that thrive under lower oxygen environments like fermentation will help reduce (adding hydrogen) oxidised elements, putting them in a state where plant roots will allow them to enter.
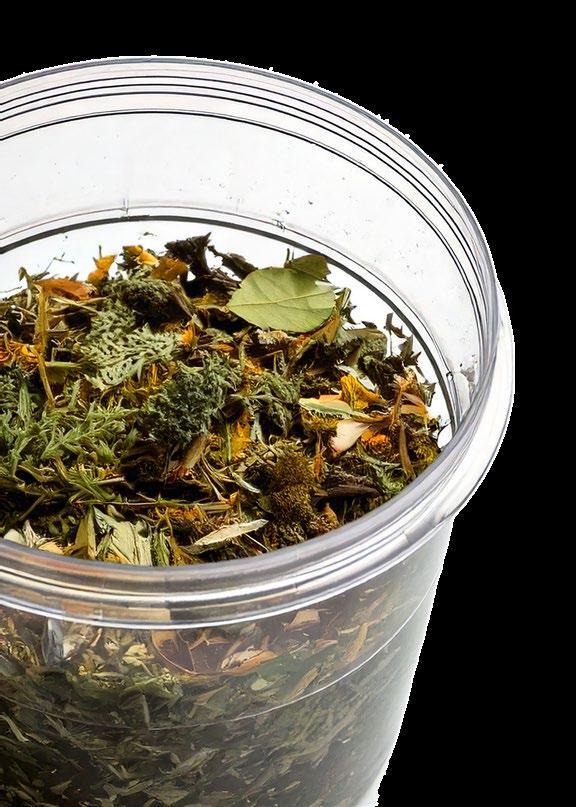
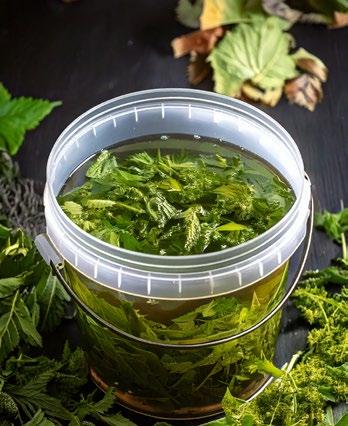
Making fermented tea is as simple as cutting biomass (leaves, roots) into smaller pieces to increase surface area, throwing it into a plastic tub, covering it with rainwater, placing an air-tight lid and waiting. Some practitioners will add leaf mould as a kickstart, while others will add rock powders or bone meal, which may help with the odour. Some may add molasses, but I prefer using products like humic acid, protein hydrolysates, kelp extract, and molasses in my compost extracts.
These botanical brews serve as both a soil conditioner and plant nutrition. In the first few days of fermentation, you will notice a more gelatinous texture in the water and some active bubbling as you stir the plant material. If you use the tea within the first 3 to 7 days, you will add a probiotic to the soil. At this stage, the tea is chock full of microbes like Lactobacillus spp. Bacillus spp. Actinomyces spp., and Saccharomyces spp. (yeasts). These microbes are largely responsible for making nutrients more readily available, and many of them make primary metabolites that are precursors to the many molecules we seek in our food or medicine.
Once the tea goes beyond 14 days, the fermenting microbes have decomposed much of the plant material and created a brew filled with amino acids, vitamins, organic acids, and soluble nutrients. Some practitioners will wait 20 to 30 days before use and will typically do a dilution rate of 1:10 (soil) to 1:30 (foliar).
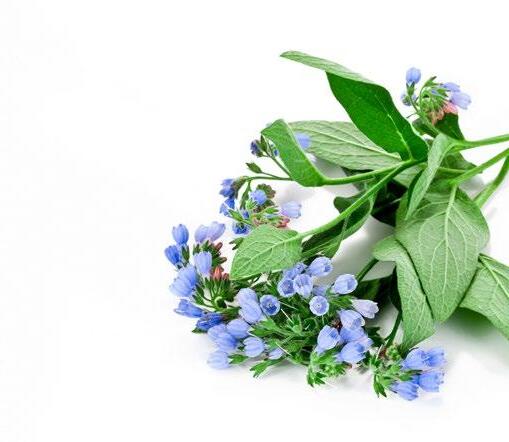
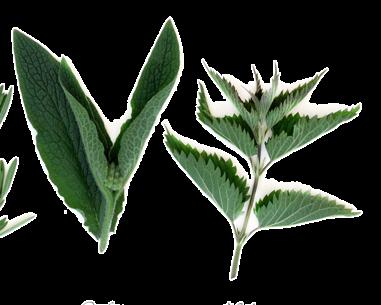
Comfrey
Practices centred around creating farm fertility based on the fermentation of plant material are among the simplest and most effective solutions that can be readily implemented, irrespective of your gardening experience
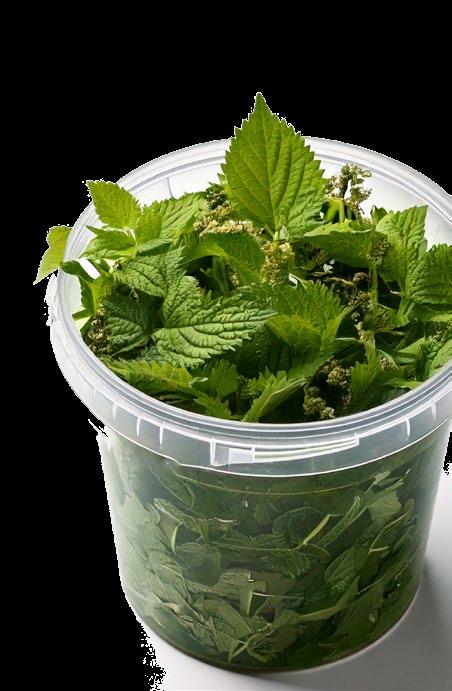
Bringing attention to the simplicity of this practice, understand that making these botanical brews can follow the natural plant succession of your climate. In my region, signs of spring include the arrival of the dandelion ( Taraxacum officinale), which is arguably one of the most readily available dynamic accumulators of both macronutrients (Ca, Mg, K) and trace elements (Fe, Zn, Cu, and Mn). However, many practitioners will design gardens or guilds to cultivate specific plants to make teas. One of the best and earliest plants for making nutrient teas is stinging nettle (Urtica dioica), which has significantly more of the same nutrients as the dandelion, along with more amino acids, Vitamin K, B vitamins and flavonoids. A fermented tea with dandelion greens (and roots) and stinging nettle is an excellent kickstart for vegetative growth. Willow (Salix spp.) shoots add a great source of the growth hormone IAA (indole acetic acid).
For most gardeners farming with biodiversity in mind, the eligible ingredients are ceaseless. Next in my garden pantry would be comfrey (Symphytum officinale), which will become the base of all of my future teas for the season because of its ability to grow so much biomass over the summer. Balanced and rich in NPK, Ca, and some Si, a comfrey fermented tea can almost be a one-and-done fertiliser. A comfrey tea, in combination with a stinging nettle, works exceptionally well on crops prone to Mg or Ca disorders like blossom end rot, cavity spot, bitter pit, or
The fermentation process is important because it helps transform nutrients into the form most readily used by plants

Horsetail
A fermented tea with dandelion greens and stinging nettle is an excellent kickstart for vegetative growth


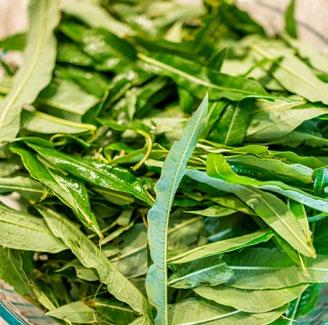
The comfrey fermentation makes Si bioavailable for plant uptake, but nothing compares to a fermented horsetail tea (Equisetum arvense). Horsetail is often the next ingredient to appear on the farm and has a relatively brief window for harvest, so it is best to collect as much as you may require for the season. Preparing horsetail tea involves bringing the tea to a boil and simmering for an hour before a 1 to 2-week fermentation. The end product has up to six months of shelf life and can be added to your future teas. Si is consumed by the plant as mono-silicic acid and is readily taken up by the roots of monocots and, more readily, by the leaves of dicots. A helpful tip when using fermented horsetail tea is to do a foliar application with some fulvic acid. Horsetail tea functions as a fungal deterrent for biodynamic farmers (BD508), as the Si acts as a physical barrier for pests and pathogens and triggers an immune response within the plant, much like a vaccination (i.e., Systemic Acquired Resistance).
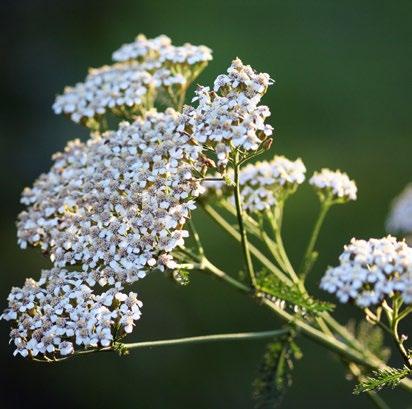
Understanding plant nutrient uptake allows designer fermented teas to help cater your fertility to a crop’s need. For example, teas with yarrow (Achillea millefolium) are high in K and are great for crops in bloom. German chamomile (Matricaria
this simple water extraction methodology of making fermented tea can be your gateway; it is simple, cost-effective, and works
chamomilla) is high in S and contains high sterol levels that help plants form secondary metabolites. The common weed purslane (Portulaca oleracea) contains omega-3 fatty acids and makes for a nice tea in early flower. At the same time, alfalfa (Medicago sativa) is high in N, K, Mg, and Ca but also has a plant growth regulator called triacontanol, which aids in plant productivity. More plant biodiversity simply translates to more opportunities to address nutrient imbalances.
The world of natural farming (e.g., Korean Natural Farming (KNF) or JADAM) can often be daunting when one hears of BD (biodynamic) preps, IMO (Indigenous Micro Organisms), or FPJ (Fermented Plant Juices). However, this simple water extraction methodology of making fermented tea can be your gateway; it is simple, cost-effective, and works. 3

The whole intention behind the article, ‘Botanical Brews’, was to provide a barrier-free entry into the world of fermentation for fertiliser. The ideal goal is for growers to try it. Plants referred to as dynamic accumulators are presented solely as ideal examples of potential ingredients in the tea. Comfrey and stinging nettle, for example, provide a robust array of nutrients, but lacking access to these is not an excuse not to try fermenting. You can also use grass clippings, weeds (preferably not with seed, nor any toxic plants like rhubarb or tobacco), and kitchen scraps.
Here’s a simple recipe that can be adapted to whatever size container you have, from pail to barrel.
Using a 5-gallon pail (18.9L), chop up your plant biomass (e.g., stinging nettle, comfrey, clover, yarrow, grass, dandelions, alfalfa, etc.) into 2 -4 inch pieces to help increase surface area. Fill the entire container and gently press to slightly compact the material.
Add 1 lb (500g) of leaf mould. You may also want to add 250g of bone meal and/or rock dust, such as basalt or glacial. These may help reduce some of the odour while adding some extra nutrients.
Step Three: Steep
Completely cover with rainwater (or dechlorinated water) and seal the bucket with an airtight lid. The material will float, so it is important to stir the ferment for the first few days until it has initiated decomposition. The water will get thicker as you stir over the first few days.
In a few days, the tea will have a foul-smelling odour and a gelatinous consistency. This state is ideal as an inoculant to increase beneficial microbes in your soil. Strain the liquid and dilute 1:10 with water. If desired, add 50 ml of humic acid and apply liberally around plants (125 ml/plant).
If you are more the set-it-and-forget-it type, circle back to your tea pail/ barrel after at least a couple of weeks and be ready to use it as a fertiliser. At a 1:30 dilution, there is little worry about nutrient burn, and you can also add biostimulants like fulvic/humic acid, kelp extract, and molasses. 3

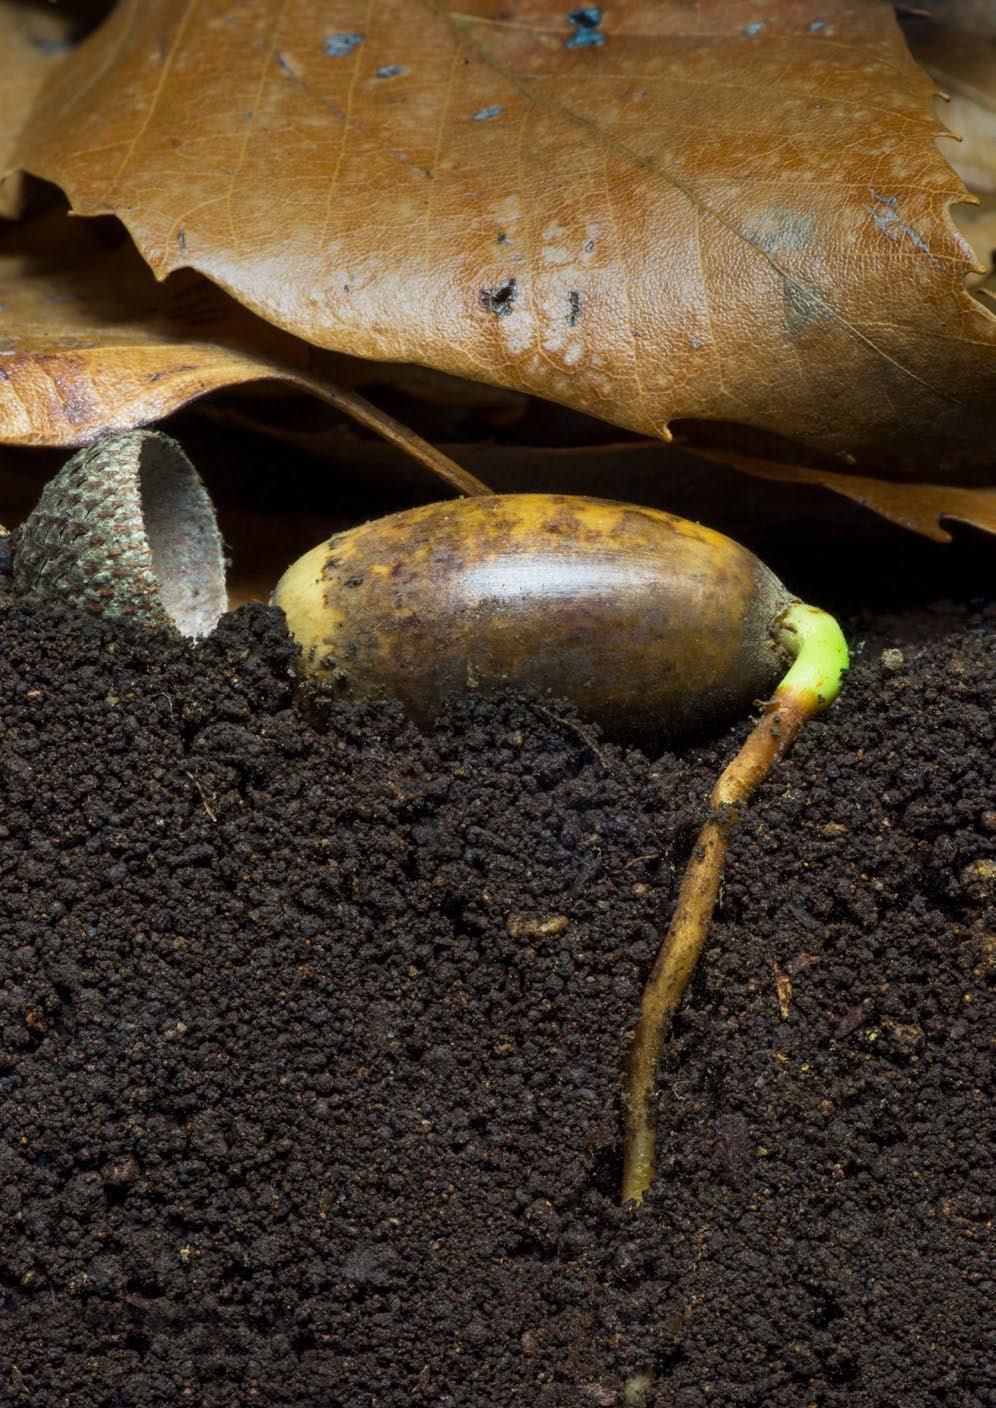
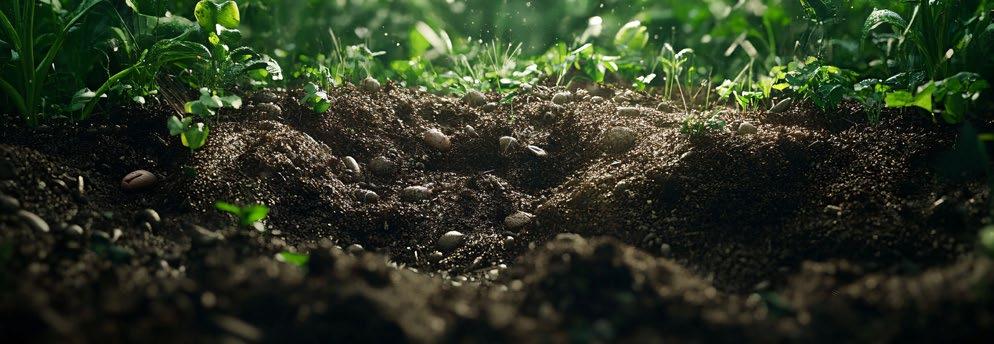
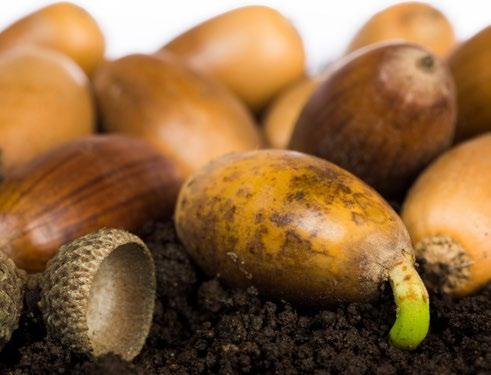
There’s arguably nothing more valuable than seeds
There’s arguably nothing more valuable than seeds.They ensure future generations of plants can grow unassisted by human hands. Living soil is key in banking and holding relative security reserves of genetics that will form critical parts of tomorrow’s ecosystems.
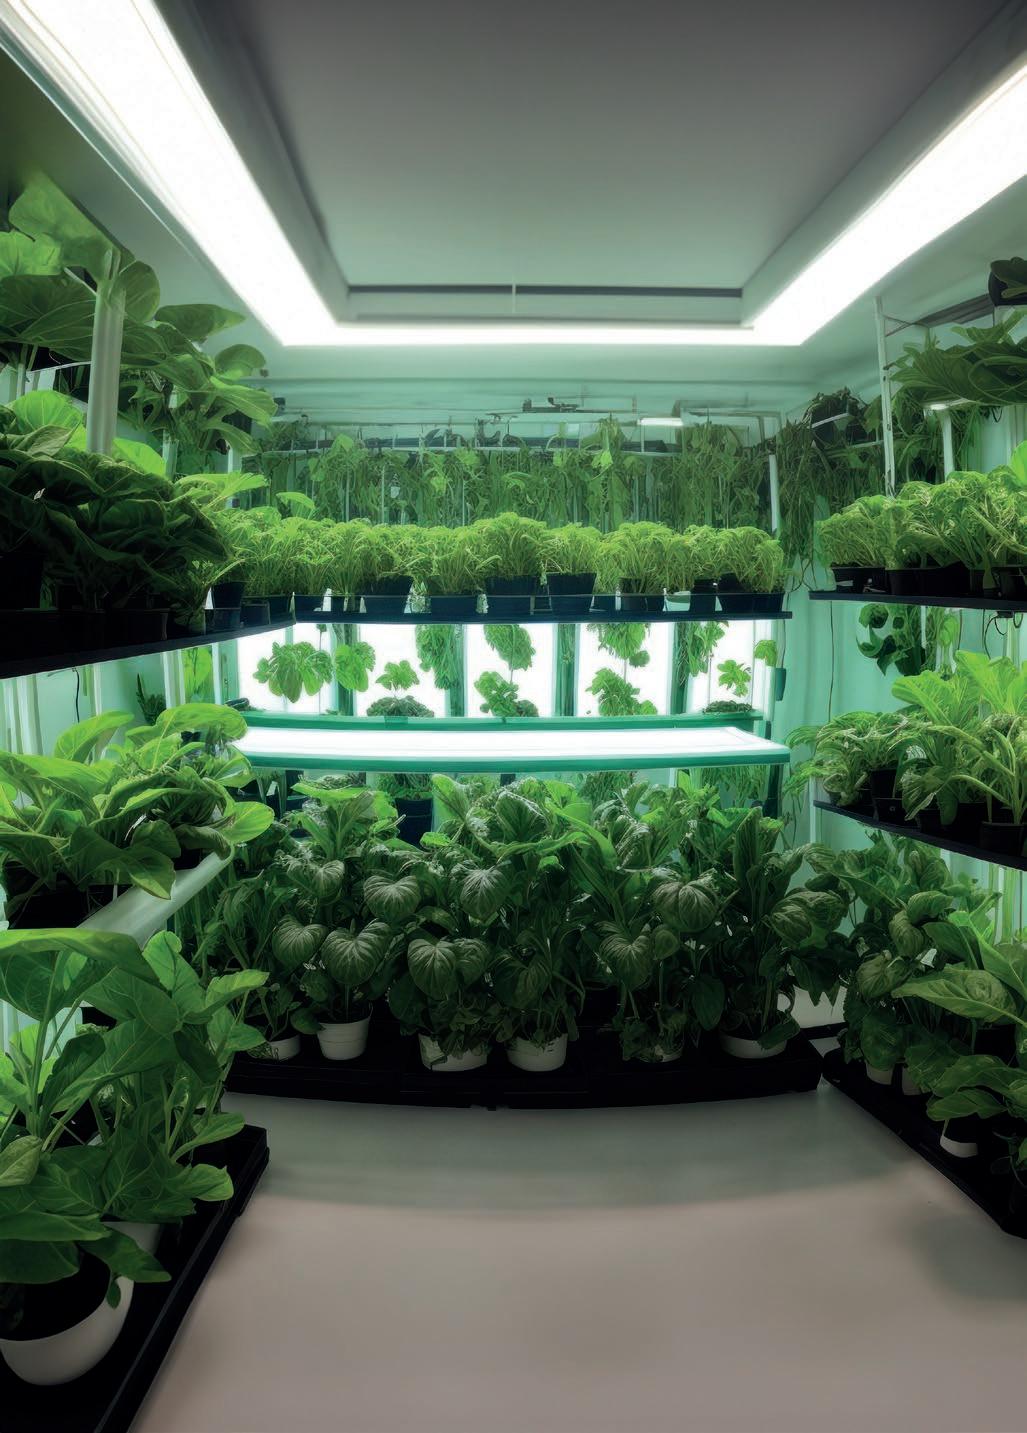
A living soil is more than dirt – it’s a vibrant, evolving community. While even seemingly barren mediums can be “activated” by the introduction of beneficial bacteria, fungi, and nematodes, for this discussion, living soil is one in which the web of life, from micro- to macro-organisms, assemble freely.
In an ideal setting, agricultural soils are alive in this way; techniques and conditions like solarisation, petrochemical treatments, excessive drought, and flooding have not depleted the land of its vitality. Crop plants are prioritised when cultivating in living soil, but their prosperity is credited to inter-species harmony. The goal of successful and renewable harvests is achieved by creating abundance for all.
The so-called “Doomsday” Svalbard Global Seed Vault is a prime example of a human-managed seed bank. It’s located in a remote part of the Arctic and can hold 2.25 billion seeds. It’s also politically neutral, highly scientific, and holds seeds as a crucial backup for the global food supply. Of course, seed and other genetics preservation projects exist worldwide, making up overlapping and interconnected resilience networks.
Yet nature has its seed banks, as each seed-producing species evolved to perpetuate itself. Season after season, germination and emergence allow plant population renewal, reproduction, and re-distribution of seeds, all with the aim that some will survive to form the next generation. Some seed banks are transient, meaning seeds have one shot at sprouting after they mature on the plants; they have neither the fortitude nor conditions to survive until subsequent ideal germinating windows. This is the case in managed gardens where the cultivated species are not naturally adapted to persist through seasons of sub-zero temperatures or the growing substrate is sterilised by heat (e.g. by solarisation or hot-composting), destroying lingering or stray seeds before re-planting.
By contrast, a persistent seed bank is one in which at least some seeds are saved beyond that first growing opportunity, remaining alive and awaiting the best conditions to spring into action. Such seed banks can be aerial (above ground). Cones preserve evergreen seeds high up in the trees until the dry heat of natural fires opens them. The cones drop to the torched forest floor, cleared and exposed to more sunlight, and find a welcoming environment to grow.
Living soil is more than dirt – it’s a vibrant, evolving community.
Persistent soil seed banks, on the other hand, contain seeds that are scattered to the earth at the end of their ‘parent’ plants’ reproductive cycle. Amazingly, viable seeds have been found in living soils up to 70 years after specimens of the species grew at the site. Even more incredibly, a sacred lotus seed preserved in a Holocene-era peat bed germinated and grew normally at the radiocarbon-dated age of 332 years!
Mechanics and Biology of the Living Soil Seed Bank
Seeds seem unlikely to be saved in conditions where one would expect them to try to grow and either thrive or die. If they remain, how do they escape the natural threats of decomposition, fluctuation of moisture and temperature, and hungry critters?
First, it’s a numbers game—the more seeds in the bank, the more likely some will still be there each time a “withdrawal” is requested. Plants that grow successfully in a given place with well-adapted genetics breed abundantly and deposit many seeds.
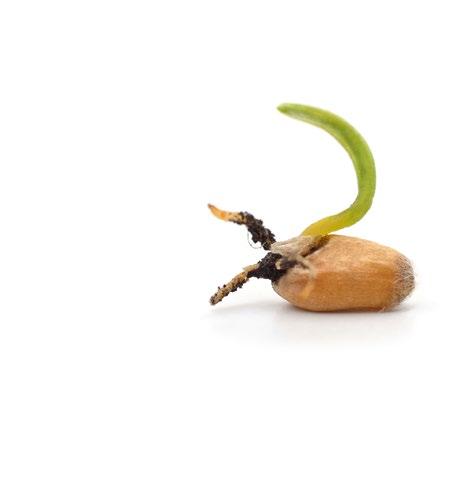
Seed size, shape, and other structural (“morphological”) characteristics of seeds help to keep them safe. Types with smooth, hard outer shells, resistant to pressure and water, and which are relatively small, tend to accumulate and remain viable. You can observe this by looking at domesticated varieties of plants. Seed crops bred for high human food value, like corn or rice, are noticeably plumper and have thinner protective casings than their wild relations.
Dormancy is another adaptation that keeps some seeds in a state of slumber until they are triggered by their preferred combination of temperature, light, and air quality – something they may only encounter when the soil is disturbed.
Biochemical factors, like compounds made by the plant and transferred to seed coatings, may defend against decomposing bacteria and fungi and deterring granivores.

The so-called “Doomsday” Svalbard Global Seed Vault is a prime example of a human-managed seed bank

Amazingly, viable seeds have been found in living soils up to 70 years after specimens of the species grew at the site
In addition to non-living causes of relocation like wind and rain, some invertebrates (e.g. dung beetles, ants) and digging animals move seeds from where they are most vulnerable to relative safety, farther beneath the surface. Earthworms, in particular, are essential in managing soil seed banks. Many types of seeds survive being eaten by earthworms. As worms travel through the soil according to warming temperatures, they carry buried seeds from where they are safe but too deep to grow to a happy place for germination. Their castings and other exudates enrich the immediate zone where the seed is repositioned, favouring successful growth.
Earthworms, in particular, are essential in managing soil seed banks. Many types of seeds survive being eaten by earthworms
Depending on your approach to growing, the ongoing presence of viable seeds in your soil may feel like a safety net or a persistent pain.
When first formed, seeds themselves are alive. They contain reserves of resources for their future growth, which were assembled, packaged, and released back to nature. These include their genetics and other fundamental building blocks of life (i.e. nutrients) sought after by organisms in the shared environment. Even if some of the seeds in a living soil environment don’t grow to full capacity, they contribute to the baseline value of the soil.
The result of staggered seed deposition and re-emergence is that not all plants growing in a given season are descendants of the same breeding populations. This means the yearly renewal of local species may be more genetically diverse or adapted to a niche microclimate. In the case of biennial plants, the regrowth of seeds from different generations in alternate years ensures an ongoing presence of companion plants, like those attractive to pollinators and species that eat plant-destructive bugs.
Some beneficial microbes are even ‘banked’ along with seeds as part of their survival strategy. Inheritance of such microbes by young plants and the proliferation of their species in a shared rhizosphere can restock the population of bacteria and fungi that play nicely with thriving crops.
Despite the many attractions of living soil, there are a few things about living soil seed banks that can be a bane to growers. Since not all seeds are deposited with intent, the incursion of weeds and the spread of invasive species can be an issue. Even “volunteers” from past sowings may be considered an annoyance in a rotation that doesn’t fit the cultivation schedule. They can raise the demand for labour if they take up space or create undesirable shade. They may also support a pest the grower is attempting to eradicate by eliminating certain plant species from a plot. There is also a concern that seeds of GMOs or other unselected genetics could persist in the soil and breed with intentionally planted “pure” populations, interfering with seed development programmes.
“I can not believe what a huge difference such a small dose makes”


Cali Touch is like a natural supercharger for plants, especially the flowering plants that we love. Think of triacontanol as a key that unlocks the plant’s full potential. Once it interacts with the plant, it activates a cascade of responses. Imagine giving your plants a tiny, magic boost that helps them grow stronger, produce more flowers, and become more potent.
Its stable carrier ensures consistent uptake, ultra-fine filtration enhances purity, and a proprietary thickening agent provides molecular-level coating for maximum absorption...
...this is what Cali Touch does
APPLICATION RATES:
For best results introduce Cali Touch to your plants a week before the flowering stage and cut off usage 10 days before harvest.
2ml/100L (0.2ml/10L) Add to your feeding regiment once weekly in drain to waste systems (potted plants).
2ml/100L (0.2ml/10L) Add with every reservoir change.
Recognised as “biodiversity reservoirs,” living soil (and aerial) seed banks are crucial to ecosystemic health
There are numerous ways to influence the living soil seed bank to sync up with your cultivation objectives:
• Rather than dead-heading all of the blooms and clearing all remaining vegetation at the season’s end, renew desirable seed stock by allowing some plants, especially in mixed-use beds, borders and untamed areas, to decompose in place.
• Reduce deposits of unwanted seeds (“weeds”) through natural mechanisms like mulching and surface cutting before seed set.
• Out-compete resource rivals with green manures or new transplants when space becomes available in a desirable location.
• Minimising soil compaction and replenishing in proportion to what you remove provides safe conditions for supporting microbial and other earth-dwelling species.
• If you’re collecting many high-value flowers and fruits, regularly reintroduce healthy amounts of well-balanced organic material.
• Letting non-harvest-targeted plants root, even if only to be chopped and dropped, maintains the soil structure and keeps photosynthesis-dependent partner microbes fed.
Recognised as “biodiversity reservoirs,” living soil (and aerial) seed banks are crucial to ecosystemic health. Where seed banks are transient, or species have long reproductive cycles, unique varieties are especially vulnerable to extreme events like volcanic eruptions, fires, deforestation, floods and tsunamis, and rapid climate changes. The sometimes tiny number of seeds produced by rare wild species must be banked safely—not just by human conservationists removing and hoarding them but as part of an interconnected strategy for defending the well-being of a bioregion.
BIO Xavi Kief is a writer, (re)searcher, and lifelong learner with their hands in the dirt and imagination traversing the universe. Seeking always to deepen and integrate their connection with the living planet and its diverse inhabitants, Xavi finds joy by infusing their practical and playful approach to cultivation with a healthy dose of science. They grow food and medicine for their family and community on the northeast coast of Turtle Island. Instagram: @xavi_kief
In the post-industrial era, agricultural scientists began to acknowledge how, on a global scale, reliable seed production and preservation would be a vital part of preventing mass starvation in times of disaster and conflict and through the changes of centuries.
Self-sufficiency and reduction of costs through seed saving is a fact of life for traditional cultivators. In the post-industrial era, agricultural scientists began to acknowledge how, on a global scale, reliable seed production and preservation would be a vital part of preventing mass starvation in times of disaster and conflict and through the changes of centuries.
Stewarding and protecting seeds banked in living soil and renewing previously depleted soil so it may serve as a seed bank are acts of accountability toward all. 3
BY HALEY NAGASAKI
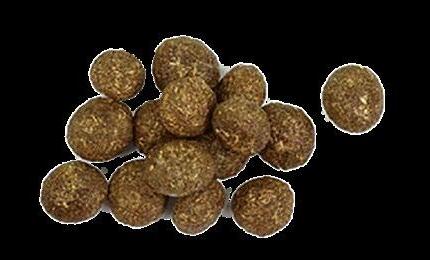
TComposted manure is the organic grower’s best gardening tool, and rabbit droppings are likely the most available manure.
he difference between kitchen scrap compost and manure is that manure, as organic matter in the garden, mainly when produced on-site, represents a system of plants and animals coexisting as nature intended. The nutrient content for plants can’t be beat. Compost is a closed loop in the kitchen, while manure turns the house into a homestead.
Most manure needs to be composted, mainly to reduce pathogens in the pile’s high heat. Composting also helps with nutrient availability. “Hot” manure, such as chicken or pig droppings, is too high in nitrogen and will burn your plants. Fortunately, hot manures compost rapidly; do not apply them raw.
Horse and cow dung are borderline hot manures; they’re more like cool manures. They also require composting to kill weeds and pathogens like E. coli, which can pass through the digestion of ungulates unscathed.
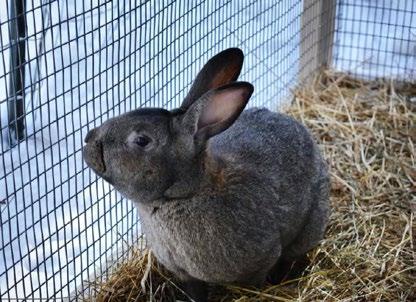
“Cold” manures are pelleted waste from goats and sheep and, of particular interest, rabbits. Goat and sheep droppings should still be aged due to the nitrogen content; however, rabbit poo, coming in at about 2-3% nitrogen, can be applied to the garden without composting!

Breeding rabbits on the homestead has surged in popularity for several reasons. For omnivores, lapin serves as a reliable food source. They reproduce, well, like rabbits, and they are relatively low maintenance. They are hardy to a variety of different weather conditions, you can repurpose their fur, and their poop is gold in the garden! ‘Bugs’ is easy to keep, and his poop doesn’t need composting. Work it into the soil to reduce odours and reduce fly pressure. Or mix it with water and apply it as a liquid fertiliser.
Understanding that bunnies make house pets can make some of this seem unsavoury. But not knowing where your food comes from is worse. Lapin or not, you could have a couple of same-sex bunnies for their manure. Due to their versatility, it is a no-brainer garden amendment, especially if balancing an array of inputs seems too complex. This helps you keep your garden clean and free from chemicals.
Rabbits are the low-hanging fruit of the animal husbandry world because they require no more space than a hutch and hay/greens for their feasting. A small backyard will do, or get creative. Grow a tower garden in your flat and share your hydroponic greens with your new fluffy friends!
Kelci Stene Says
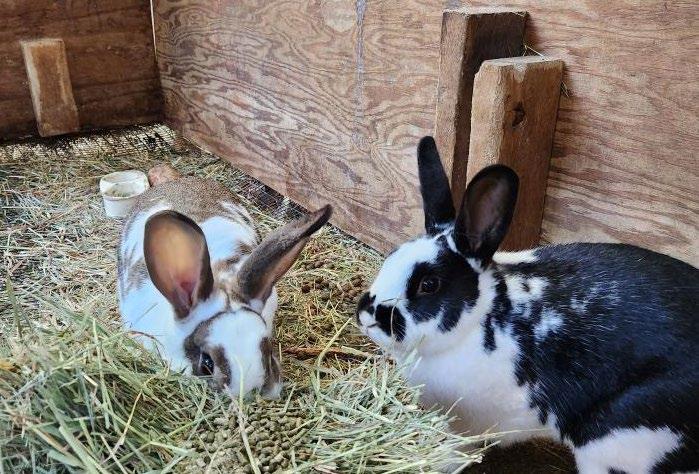
My friend Kelci Stene has a homestead on Gabriola Island, British Columbia, with her husband, young daughter, and many pets and animals, including ducks, chickens, and rabbits. They forage, trade, catch, grow, and raise their food. It’s all local, bountiful, nourishing, and healing!
Kelci speaks of gardens growing the lushest greens she’s ever seen off nothing more than sunshine, soil and bunny crap. But she does much more than talk if you’ve seen her garden. As a full-time moth er and homesteader, her home is her work, and her life is her art.
She’s shared tips about housing rabbits for manure and meat, including using a wire floor for the hutch and hay for the bulk of their nutrition. She noticed she was los ing hay through the flooring and created a hay feeder on one side of the hutch, where the rabbits pull hay through a chicken-wire-type enclosure, ensuring a consistent flow of food without waste.
Rabbits, like alpacas and llamas, tend to poop in the same place, making it easier to collect their droppings. With a wooden hutch raised off the ground and grate or wire flooring, figure out which corner the latrine is in and stick a litter box underneath!
“There’s a few different ways to use the green manure,” Kelci explains. “You can sprinkle it on top of your crops or anywhere you want to fertilise your soil. The little round pellet poops act as a slow release fertiliser. You can also work it into the soil, or when you’re transplanting vegetables like squash, put a bunch in the hole and mix it in, then plant!”
I’m not saying you should eat your pet bunnies, though you may need to if global affairs continue the way they are (*nervous laughter*). Try working rabbit waste into the topsoil of your 3-5-gallon garden pots growing on the balcony, by the window or in the yard.
If you’re a young person who’s taken to the notion of pets as children and plants as pets, you’re surely looking for ways to expand the fam! Get some rabbits and maybe a few hundred red wiggler worms to join in on the fun of compost, soil, and regenerative gardening. 3
BIOHaley Nagasaki is a legacy journalist and former B2B magazine editor in Canada. Now a strategist for Garden Culture Magazine, she drives content and business development, advocating for small-scale organic farming and global community-building initiatives. Connect with her on Instagram @haley.nagasaki


BY
it
Humidity control is one of the biggest problems in a grow room, whether too much or not enough. Moisture drives plant transpiration, creating a vapour pressure differential from the air to the plant. Plants will not grow correctly without the proper water content in a space.
Before discussing how dehumidifiers work, we must understand relative humidity (RH). RH is a function of the amount of water held in a given air volume. That specific moisture content changes based on temperature, which is why it is called relative humidity and not specific humidity. To define the exact amount of moisture in the air, we need to explain it in a way that is independent of temperature and not relative. For this, we use what is called the “dew point”. The dew point is when the RH reaches 100%, and water starts to fall out of the air. At 100% RH, the air (in a gas state) cannot hold more water between its gas molecules, so it falls out of the air. We always have a specific water content in the air volume at a given dew point.
As a mini experiment, and to be clear, it isn’t perfect, take a clear, sealed jar and put a small RH/temperature sensor with a display on it. Let that jar sit at room temperature and check out the RH. Then, after it’s settled, add 5-10 drops of water to the jar and close the lid. Leave the jar at the same temperature and watch the RH rise. When your RH has settled/stabilised, start heating the jar with a hair dryer. The RH will drop even though water

hasn’t been removed from the jar. Now, stick the same jar in the freezer and wait an hour. A significant spike in RH will occur, and perhaps fog will be present in the jar. Once the jar is sealed, the specific moisture content never changes. However, the RH does. This essential lesson demonstrates how RH and specific humidity are similar yet very different.
From this explanation of RH, we can start looking at the different technologies for dehumidification in a growing facility. In most cases, a grow room needs simple dehumidification, based on what we call ‘cool/reheat.’ This means we use a refrigerant to cool a coiling coil below the dew point of the air to condense the moisture. We then heat the air and successfully remove moisture from the space. The moisture condensed on the coiling coil goes to drain and is no longer in the space. The dehumidifier turns on and off to accomplish the goal of maintaining the correct humidity in the space.
We have an issue with conventional dehumidifiers in the industry because they do not do a good job of capacity control. The problem with capacity control is not having
Plants will not grow correctly without the proper water content in a space

swings in RH (both high and low) in a growing facility. If the dehumidifier is too large, when it turns on, it only runs a few minutes and then shuts off after drastically over-drying the space. The opposite is true when the dehumidifier is too small; it never turns off and doesn’t remove enough moisture from the space. What would happen if we had a new dehumidifier style capable of handling large and small dehumidification loads without buying multiple dehumidifiers? If this were the case, the average grower would be in a much more manageable situation for dehumidification control and spend less time and money solving issues. This next generation of dehumidifiers will take the industry by storm, and whichever vendor is willing to think outside the box will change how we grow. The technology is available for this new line of products, and I think at least one vendor is already going down this path. If successful, they will be the next best technology to help indoor growing environments stay stable.
Stay tuned for another article on what happens when a dehumidifier manufacturer gives you a demo unit and tells you to modify it as you please; this should be interesting. 3
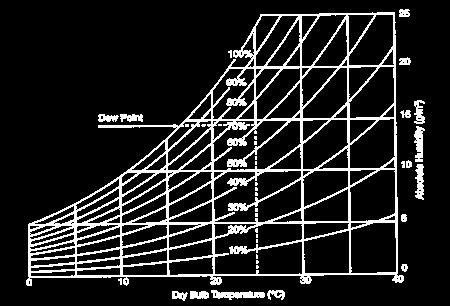
BIOAdam has provided planning and design services for cultivation and processing facilities over the last seven years with Stratus. His projects involve outdoor cultivation, indoor cultivation, drying, processing, extraction, storage, bottling and packaging, and more. Living on a hobby farm, Adam loves all plants, including flowers, vegetables, and microgreens, but is most passionate about hemp and is in awe of the fast-growing plant and all of the benefits it offers to humans and the environment alike.

when you poke and prod, most consumers—and new growers, for that matter—don’t fully grasp what the word “organic” really means
With more and more people catching the bug of growing plants indoors, interest in “organic” cultivation techniques has never been higher. However, when you poke and prod, most consumers—and new growers, for that matter—don’t fully grasp what the word “organic” really means. For many, often those most fond of using the term, it’s just a catch-all, fuzzy-feeling notion of “natural,” “pesticide-free,” and “no nasty chemicals.”
Fair enough. We don’t all have degrees in soil science. But there are very different ways to grow “organically.”
Organic cultivation means growing in a way that nurtures the soil (or growing medium) and supports biological life rather than relying on mineral-based inputs. But even within organic indoor gardening, there are (at least) two distinct schools of thought. Let’s explore how these two approaches work, what sets them apart, and which might suit your growing style best.
For many indoor growers, bottled organic nutrients offer a comforting sense of control —allowing precise feeding adjustments as plants progress through their life cycle. After all, nutrient demands change as plants grow, and fine-tuning what they receive at each stage can be a major advantage.
Peat-based “soil” mixes are encapsulated here in double quotes because they are not traditional soils like most conceive of them. It’s best to think of these products simply as well-aerated potting mixes made from peat (or sometimes coco coir), mixed with perlite for drainage and a small amount of organic compost and amendments for some beneficial biology and boost, respectively.
There are many options when it comes to Peat-Based mixes. Some popular brands that I have tried in my gardens include:
• Biobizz LightMix cuttings.
• FoxFarm Ocean Forest from additional feeding.
• Roots Organics Original blend with organic amendments.
• Pro-Mix MP Organik mycorrhizae to support root health.
• Royal Gold Tupur coco mix ideal for frequent feeding cycles.
Since these mixes contain minimal long-term nutrition, growers typically supplement with liquid organic feeds within a few weeks.
Most growers using these mixes opt for 2.5- to 4-gallon (10–15L) pots, which provide:
• Enough root space for strong growth.
• Good balance between water retention and drainage.
• Flexibility for frequent feeding without over-saturating the medium.
Larger containers can work, but these potting mixes are not designed to support a long-term ecosystem, meaning bigger pots don’t necessarily improve plant health like with living soil. Many growers also customise their blends, such as mixing Biobizz Coco Mix with LightMix to fine-tune moisture retention while maintaining drainage.
We don’t all have degrees in soil science. But there are very different
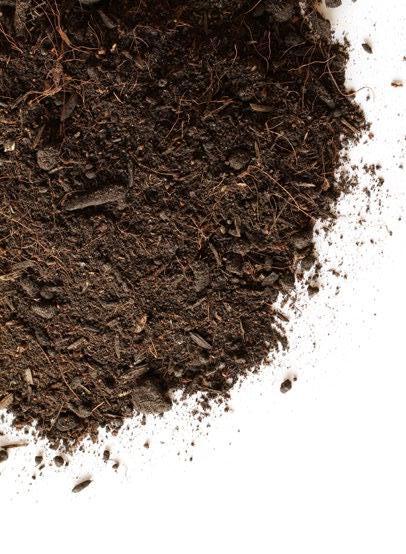
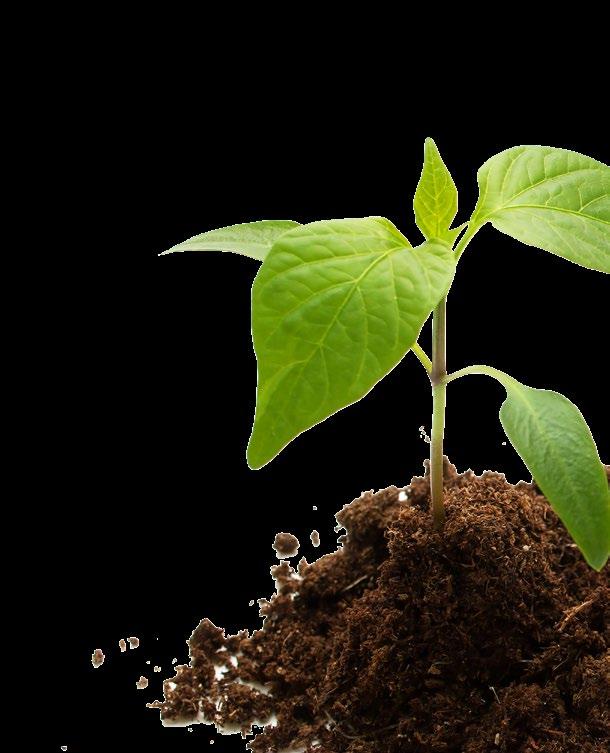
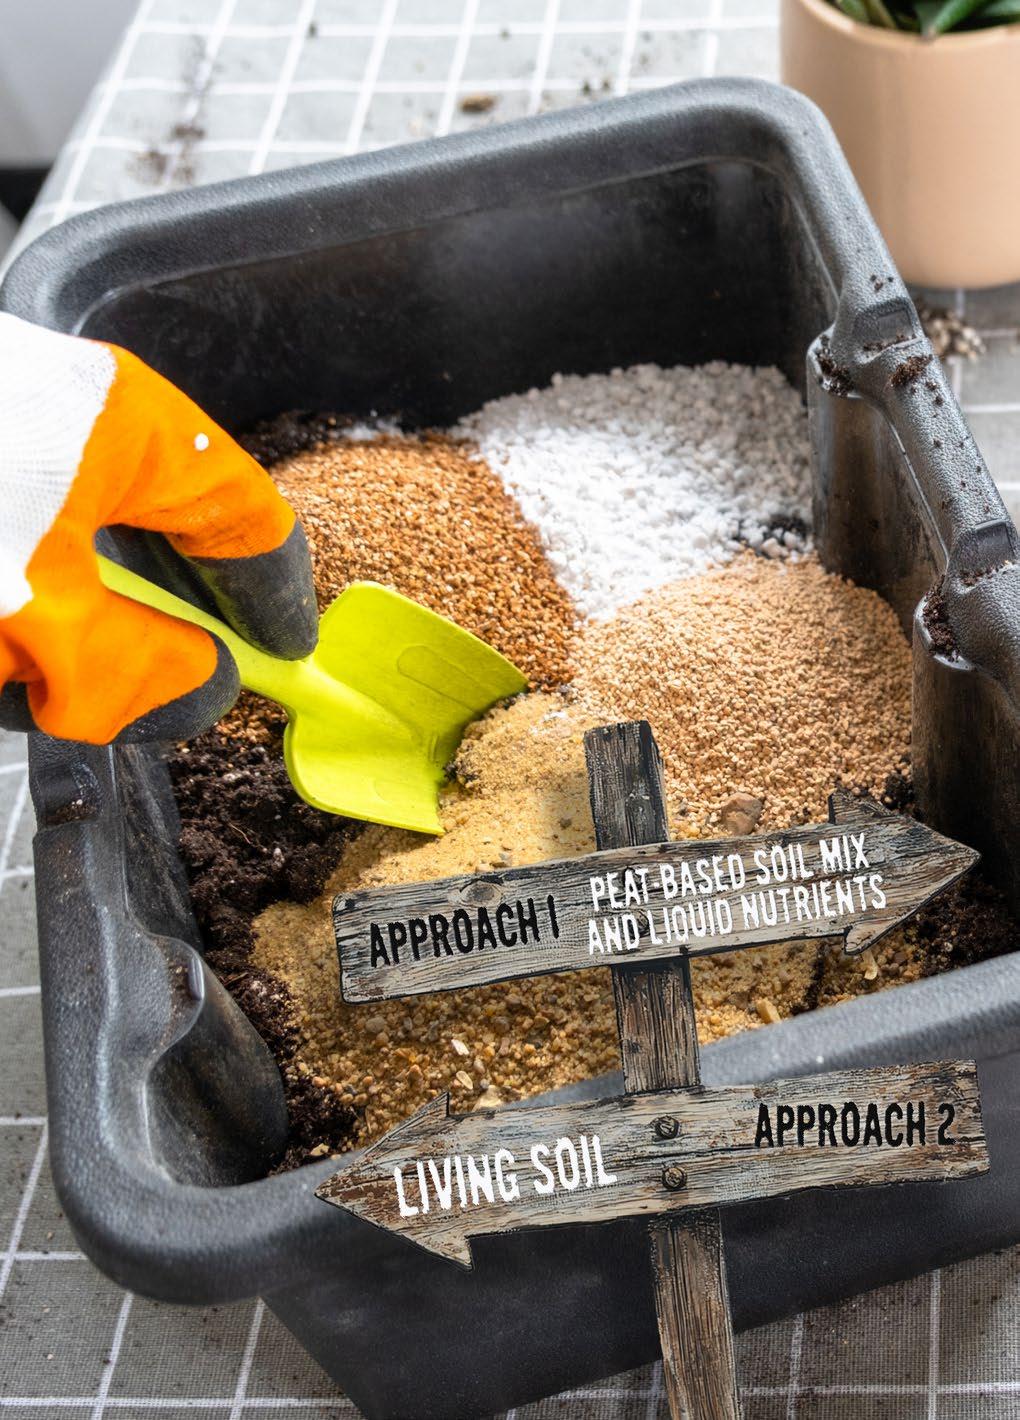
Some seasoned growers experiment with fermented plant extracts, which provide additional micronutrients and natural growth hormones
Living soil takes a different approach, focusing on feeding the soil, not the plant
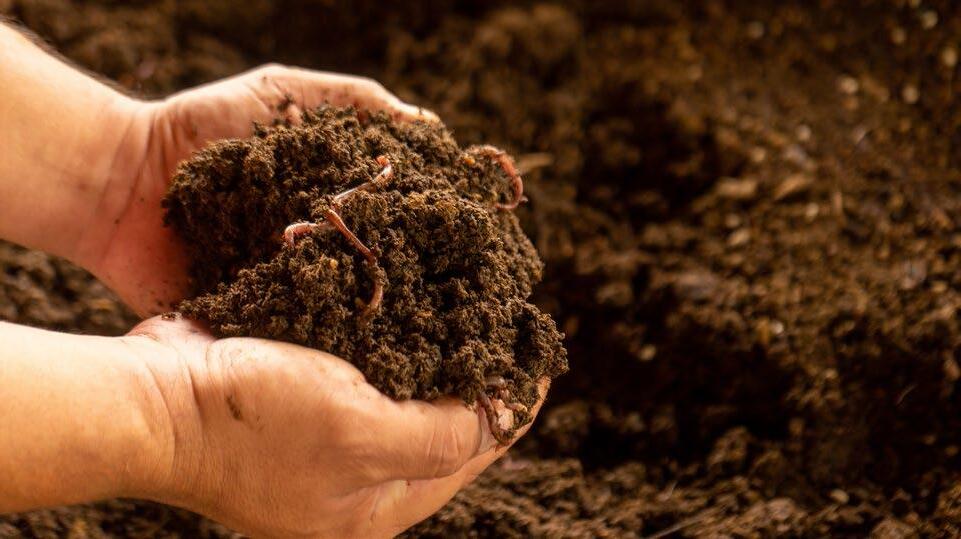
With light soils, organic feeding is done primarily through liquid organic nutrients. While these allow for precision, they require careful management, as overfeeding can cause nutrient swings and boom/bust cycles in soil biology. Many growers start with a light feeding schedule and adjust reactively as plants mature.
There are many widely available organic nutrients. Choose one that will support microbial activity and nutrient cycling. Fish hydrolysates are high in amino acids, ideal for vegetative growth.
pH Considerations: Peat-based “soil” mixes don’t always buffer pH as effectively as richer organic media, meaning growers may need to monitor and adjust pH (typically aiming for 6.2–6.5) to maintain nutrient availability.
While liquid nutrients are convenient, they present serious challenges for automated watering systems. Many organic liquid feeds contain particulates that can clog drippers. Some brands offer “dripper-safe” formulas, but regular system flushing and enzyme-based cleaners help prevent buildup.
Organic growers should always look for ways to tactically enhance microbial activity and nutrient uptake. Many growers add organic supplements such as:
• Humic/Fulvic Acids – Well-known to boost nutrient absorption and improve soil structure.
• Molasses – Feeds beneficial microbes.
• Instant Microbial Teas – Just mix up and go. Easier than brewing!
Some seasoned growers experiment with fermented plant extracts, which provide additional micronutrients and natural growth hormones.
Living soil takes a different approach, focusing on feeding the soil, not the plant. Instead of delivering nutrients directly via liquids, the soil is designed to support a thriving microbial ecosystem that naturally cycles nutrients without frequent external inputs.
What’s in a
A well-made living soil mix contains:
• Compost & Worm Castings – The foundation of soil microbial life.
• Slow-Release Nutrients – Rock dust, bone, and kelp meal provide long-term fertility.
• Biochar – An incredible ingredient—it improves nutrient retention and microbial activity.
• Fungal & Bacterial Inoculants – Mycorrhizal fungi and beneficial bacteria are key promoters of root health and nutrient exchange.
Unlike peat-based mixes, living soil improves over time (as long as it is properly maintained and amended)—meaning it can be reused for multiple grows.
Pot Size Consideration: Living soil is typically used in larger containers (15+ gallons or more—many US living soil growers use 30-gallon containers) to maintain a stable microbial environment. Many advanced growers use beds designed specifically for living soil (e.g., Grassroots Fabric Beds) to create a self-sustaining ecosystem.
Unlike peat-based mixes, living soil improves over time (as long as it is properly maintained and amended)—meaning it can be reused for multiple grows
If you want fast growth and more control, a peat-based “soil” mix with liquid nutrients is the way to go. Living soil might be your best bet if you prefer low-maintenance growing and soil reusability.

What truly sets living soil growers apart is their goal of creating a long-term nutrient cycling system, typically using dry amendments. Key players include:
• Mycorrhizal Fungi – Extends root networks and improves nutrient absorption.
• Beneficial Bacteria – Aids decomposition and suppresses pathogens.
• Protozoa & Nematodes – Contribute to nutrient cycling by breaking down organic matter.
To maintain soil life, most living soil growers avoid tilling and instead top-dress with high-quality compost mixed with organic amendments to replenish nutrients.
Whichever path you choose, the key is to understand your soil, experiment and refine your techniques
Some living soil companies market themselves around the “just add water” claim. True, if the container or bed size is large enough—and the living soil is rich enough—growers might not need to add any nutrition for the entire life cycle. However, most living soil growers apply tactical top dressings.
Which Method is Right for You?
Factor
Initial Cost
Long-Term Cost
Labour
Nutrient Control
Automation-Friendly?
Peat-Based “Soil” + Liquid Nutrients
Lower
Higher (ongoing nutrients)
More frequent feeding
High
Challenging for drippers
Living Soil
Higher
Lower (self-sustaining)
Less maintenance over time
Lower, but naturally buffered Drippers unnecessary
It’s possible to automate living soil beds using wicking systems, but it’s advisable to add a little more aeration throughout the mix in the form of perlite or pumice if you go this way.
If you want fast growth and more control, a peat-based “soil” mix with liquid nutrients is the way to go. Living soil might be your best bet if you prefer low-maintenance growing and soil
Some growers even blend both approaches—starting with a peat-based blend for propagation before transitioning to soil system. Whichever path you choose, the key is to your soil, experiment and refine your techniques. 3
All·Mix® Peat Free provides growers with the most natural environment possible for plants to flourish throughout the year. Its heavily pre-fertilized content ensures all the best qualities found in a rich outdoor soil.
Light·Mix® Peat Free is designed to give growers maximum control of their grow cycles. It gets the vital micro activity going as the water works with the soil, producing organic catalysts that rapidly develop root structures.


Staying cool during the dog days of summer is as easy as strategically growing the right plants.

The World Meteorological Organisation reports that 2024 was the hottest year on record, at 1.55°C above pre-industrial temperatures
Oh, baby – it’s getting hot out there! The World Meteorological Organisation reports that 2024 was the hottest year on record, at 1.55°C above pre-industrial temperatures [1]. That’s hotter than the 2015 Paris Climate Agreement’s goal of limiting the temperature increase to 1.5 °C above pre-industrial levels [2]. The extreme heat results in uncomfortable summers with dry land and scarce water. Finding relief and staying cool feels impossible, but not for the savvy gardener.
A cooling garden uses the power of plants and Mother Nature to beat the heat
I love spending time in my garden, but when the dog days of summer hit, baking under the hot sun is unappealing for me and my plant babies. So, I always aim to maximise my garden’s cooling potential to avoid the stifling heat. Every growing space filters light and wind and captures moisture subtly, creating microclimates orientated to the garden’s unique location and the plants it houses.
For example, trees and shrubs affect airflow and allow cool breezes on hot days. Hard surfaces such as paths or driveways radiate heat, which groundcovers can mitigate. A cooling garden uses the power of plants and Mother Nature to beat the heat.
A tree behaves like an air conditioner and helps reduce temperatures in the immediate area surrounding its root systems. This process is called transpiration [3] Water that enters plants through the roots goes through a metabolic process and is released as vapour through tiny pores in the leaves called stomata. The moisture finally evaporates into the atmosphere. One tree creates a minimal cooling effect, but planting a clump of trees or shrubs creates a cool oasis.
In Montreal, Canada, researchers have discovered that streets lined with trees experience a lower ground-level temperature and contribute to cooler temperatures 20 storeys high [4] ! That’s on a city street - imagine the difference a tree can make in your garden to keep things chill.
Different trees reduce temperatures at various rates. Tall trees with a dense canopy, such as Oak, Maple or Elm, are great for cooling. These trees have expansive root systems that can gather water from deeper in the soil for a more robust transpiration effect.
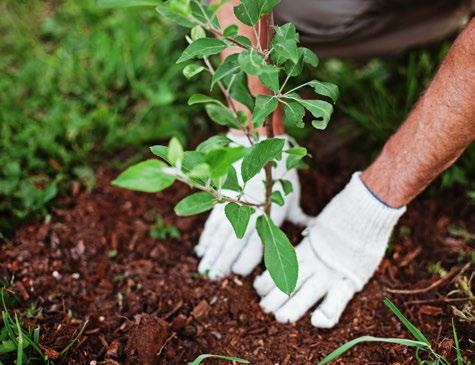
Trees with broad leaves transpire water better than evergreens with needle-like leaves [5] . But don’t dismiss smaller trees such as magnolias, lilacs, Pacific dogwoods, and flowering fruit trees such as peach, plum, apple, and pear. These trees will create a cooling effect and work overtime by providing food sources for pollinators.
Trees, shrubs and bushes also capture and filter the wind. Plant these in the garden opposite a stone wall, fence, garage, or house. The breeze will rustle through the leaves, creating a wind tunnel to cool the garden space and help circulate moisture.
Trees take time to establish; vines do not. Like trees, vines stave off the heat and release cooling moisture. Annual vines such as Thunbergia (aka Black-eyed Susan Vine) or Ipomoea (morning glory) multiply during the summer, reaching their maturity just as the heat peaks in mid-summer. Other perennial vines such as honeysuckle, climbing hydrangea or clematis come back year after year. You can train vines to climb trellises or lattices and cover pergolas and arbours. Imagine a beautiful arbored tunnel with grape vines hanging from it. Not only do they produce fruit, but their large leaves create a shade umbrella from the hot sun.
Planting edible vines like scarlet runner beans can add functionality. Besides feeding humans, these vines provide nectar for hummingbirds and other pollinators and an enormous ecological service to the garden space.

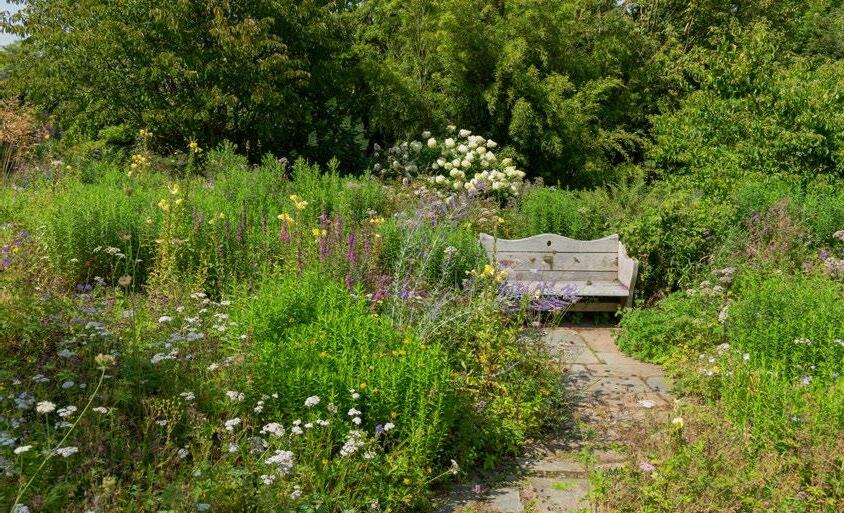
Every growing space filters light and wind and captures moisture subtly, creating microclimates orientated to the garden’s unique location and the plants it houses.”
Tall grasses make an attractive garden border and create air movement on hot days. A group of Bluestem nestled against a fence looks gorgeous with its blue-grey foliage. The grasses swaying with the breeze bring a showstopping element to any garden space. Some shrubs facilitate more airflow than others and are great additions to the garden for pollinators. For example, Buddleia (AKA Butterfly Bush) can grow between three and six feet tall and wide. As the name suggests, it is popular with butterflies.
Remember, keeping areas of your garden open to facilitate airflow and the breeze not only cools your garden but dissuades flying insect pests like mosquitoes. Fungal infections, such as powdery mildew, thrive in moist conditions and can be made worse if the plant’s leaves never have an opportunity to dry off from dew, rain or even daily watering [6]. It’s essential to follow planting directions and avoid overcrowding your space.
Paved driveways and patios radiate heat. Edible ground covers, such as hostas, planted as borders along a driveway’s edge or surrounding a patio will help cool things down. Believe it or not, the temperature above groundcover vegetation can be up to 10°C cooler than over a paved surface [6]. Planting creeping thyme or moss between the cracks of a paved walkway offsets the heat it radiates.
Vegetation cools, so buildings have incorporated green roofs and living walls into concrete-dense (and heat-inducing) cities. Using the same techniques, you can cool the garden and yourself, too! 3
Believe it or not, the temperature above groundcover vegetation can be up to 10°C cooler than over a paved surface
1. Confirmed: 2024 was the hottest year on record, says UN weather agency | UN News (news.un.org/en/ story/2025/01/1158891)
2. The Paris Agreement | UNFCCC (unfccc.int/processand-meetings/the-paris-agreement)
3. EVAPORATION AND EVAPOTRANSPIRATION (observationalhydrology.com/ evaporation-evapotranspiration)
4. The effects of street tree planting on Urban Heat Island mitigation in Montreal - ScienceDirect (doi. org/10.1016/j.scs.2016.04.013)
5. How Trees Reduce Temperature, Cool the Air & Block the Heat (treeremovalnearmehouston.com/ how-trees-reduce-temperature)
6. Powdery mildew in the flower garden | UMN Extension (extension.umn.edu/plant-diseases/ powdery-mildew-flower-garden)
7. Landscaping – Sustainability (sustainability.williams.edu/ green-building-basics/landscaping-2)


> Dual channel - Full spectrum / UV and FR
> 8 bar system
> Ideal over a 1.5 x 1.5m area
> Built in 2 channel dimmer and timer
> 25% - 50% - 75% - 100% power
> Enhanced flowering with added red light
> Uniform light coverage
> Energy efficient, low heat output
> No fans or moving parts, silent running
> Easy one person set up
> 30’000 hour lifespan
> 3m power lead, plug and play
> Control multiple units with link cables


Spectral Graph


Efficiency: 2.8 μmol/J @ 230 V AC
PPF (Photosynthetic Photon Flux): 2290 μmol/s
Diodes: White: SAMSUNG Red: San’an
Diode Qty: 3200 White | 200 Red | 64 Far Red | 32 UV
LED Bars: 8
Dimensions: 1100 x 1110 x 94 mm
Light Distribution: 120°
Footprint: 1.5 x 1.5m
Dimming: Dimmer (on board) OFF-25-50-75-100%
Timing: Full Spectrum and UV+FR
Light Spectrum: Full Spectrum
CCT (Correlated Colour Temperature): 3337 K
Input Power: 860W @ 230V AC
Input Voltage: 220-240V AC 50/60 Hz
Power Factor: 0.98
Net Weight: 12.3Kg
Lifetime: 30’000 hours
Environmental and Safety
IP Rating: IP65
Warranty: 2 years
Certifications: CE, UKCA, EMC, LVD

Anne Gibson explores why regenerative gardeners should remember to work hedging and fedging into their outdoor growing plans

We have many hedges on our property. Some were here when we arrived, and others we’ve planted over the last three years. They are all different and provide several beneficial functions. If you haven’t considered fedges or hedges in your garden, dig into ways to include them in your design.
Depending on your location, many edible plants are suitable for fedges
Traditional hedges are multiple small trees or shrubs with a dense growing habit planted in a row. They are pruned for tight growth horizontally and vertically.
Technically, a ‘fedge’ is a living fence made initially from supple willow branches. They’re woven to crisscross each other into a decorative screen that grows into a seasonal green hedge. You can expand this concept to perennial species. Fedges can also be edible or flowering, opening up the possibilities to far more species and benefits.
Tiered fedges are food hedges with multiple species. Taller species are supported by low-growing beneficial plants such as culinary and medicinal herbs or flowering shrubs. Comfrey is an ideal perennial support species for fruit trees as it’s a dynamic accumulator of nutrients. I use the leaves to make a diluted liquid fertiliser to feed other plants.
Depending on your location, many edible plants are suitable for fedges. These are a few of my favourites:
Feijoa or Pineapple guava (Feijoa sellowiana syn Acca sellowiana): Gorgeous pink sweet edible flowers and delicious fruits.
Dwarf olive (Olea europaea): Grows into a dense fedge with edible leaves for tea, medicine and olives.
Bamboo: Some species (such as Bambusa oldhamii and Gigantochloa atter) produce edible shoots that are boiled to make them safe to eat. Bamboo is fast-growing and makes an ideal screen with food potential.
Queensland Arrowroot (Canna edulis): Arrowroot forms dense clumps to 2m, doubling as a windbreak and privacy screen. Other uses include edible tubers, ‘chop and drop’ mulch, and stunning cut flowers.
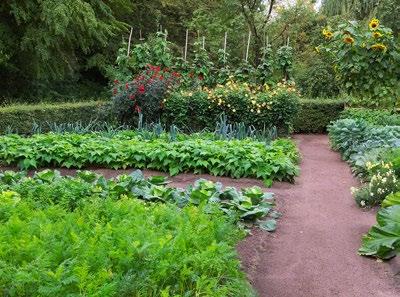
Rosemary (Salvia rosmarinus): This fragrant perennial flowering culinary and medicinal herb is well suited to prune into a low compact fedge. When in bloom, rosemary attracts beneficial insects that aid pollination and pest management.
Blueberries (Vaccinium sp): These attractive perennial evergreen berry shrubs need two or more varieties for optimum pollination.
Cumquats (Fortunella spp.): These citrus plants have a dense growth habit with attractive small orange fruit used primarily for marmalade.
Lemon myrtle (Backhousia citriodora): This Australian bush tucker shrub makes an incredibly fragrant fedge. We grew 300 on our flower farm, and they are a brilliant windbreak. Lemon myrtle is also a culinary and medicinal plant used in cooking and herbal tea.
Dwarf bay tree (Laurus nobilis): This aromatic evergreen culinary herb has fluffy little yellow flowers in spring. It’s a hardy but slow-growing small fedge suited to borders.
Tea plant (Camellia sinensis): A few years ago, I visited a local tea farm and fell in love with this evergreen species for a kitchen garden. Clip the leaf buds, leaves, and stems regularly to make tea.
Coffee trees (Coffea arabica and C. robusta): Ideal for serious coffee drinkers in a warm climate. They have glossy dark green leaves, white flowers and red ripe berries.
Lilly Pilly (Syzygium spp.): This is the most popular native hedging plant in Australia and has edible fruit.
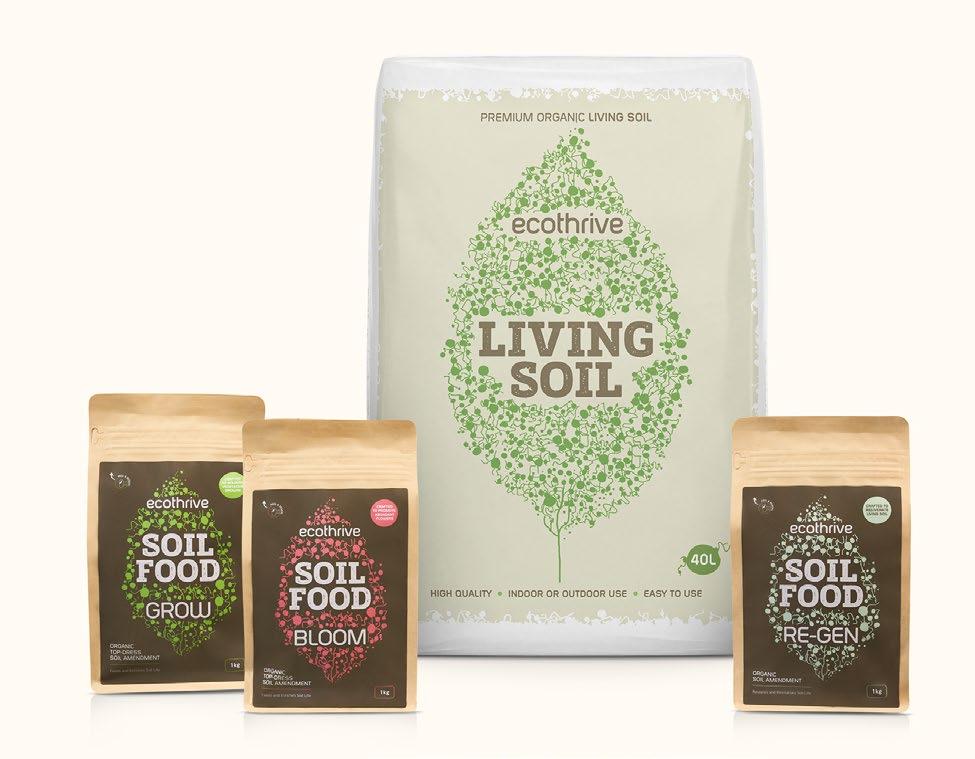

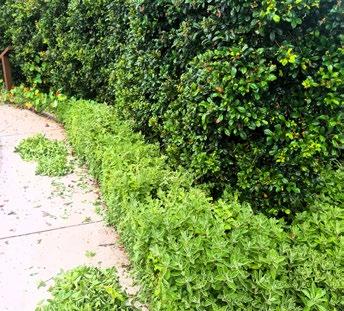
Our Lilly pilly fedge with dogbane low growing hedge as a groundcover
Many of our previous properties have had hedges. However, I never fully appreciated their value until I moved to our corner block on a hill, exposed to winds, storms and passing neighbours. These are some of the ways we benefit from these incredible assets!
1. Privacy screens and living fences. Hedges are ideal for screening out nosy neighbours, reducing exposure to the street, or enhancing visual amenities.
2. Windbreak. We live on a high hill and sometimes experience strong wind gusts and windy days. Without the protection provided by our hedges, many plants would dry out faster (particularly in hot drying winds). They provide protected microclimates on each side of our property. During stormy weather, these hedges have sheltered plants from potential destructive damage.
We planted a lilly pilly privacy hedge two and a half years ago in our front garden. We wanted an ‘instant hedge’, so we chose a psyllid-resistant variety and mature plants in larger pots to give them a head start. As we had an excavator on site doing other work, we dug out a trench and filled it with compost and nutrients before planting to prepare the soil for faster growth. We added a thick layer of forest mulch to encourage a microbial community. We gave them a good start in life with regular watering, seasonal fertilising and seaweed applications and tip pruning to shape. The hedge is fully mature and around 2m (5-6 feet) high. It’s added value to the property, and I can hang my washing in privacy! We also enjoy the fruits and insect-eating birds that nest in the dense foliage, helping with pest management. I’ve also planted a low-growing ground cover, Dogbane (Plectranthus caninus syn Coleus caninus), as a neat weed suppressant edging. Its purple flowers and the silvery grey foliage contrast nicely with the dark green lilly pilly leaves and fluffy yellow flowers.
There are so many options to choose from. We have highly perfumed Jasmine and Wisteria (purple and white flowers) perennial climbing vines. Other species include Hibiscus, fringe flowers (Loropetalum) with colourful foliage and flowers, Gardenia species, Radamachera Summerscent with highly perfumed blooms all year, Yesterday Today Tomorrow (Brunfelsia), and Photinia with red-tinged foliage. The flowers attract nectar-feeding birds and insects, increasing the biodiversity in our garden.
Many flowering natives are also suitable for hedging. They provide habitat and a food source for wildlife, such as various species of Westringia (native rosemary), Banksia, Grevillea, and Callistemon.

3. Shade. Living in a subtropical climate, I’ve come to value the shade provided by many of our hedges at different times during the day. They provide relief from the scorching summer sun in the afternoons for many plants and enable me to work outdoors in the shade.
4. Hide unappealing features. Our five water tanks hold a valuable resource. Without our palm tree hedge screening, they would be visible from the house and other areas. Hedges are ideal for disguising utility zones and unattractive but necessary structures.
5. Multifunctional design element. Fedges and hedges are ideal to surround and protect a kitchen garden, divide a space to create an outdoor ‘room’, provide structure and interest to an otherwise bland yard, add formality, create beneficial microclimates, or soften and enhance a boundary fence.
6. Visual harmony. Repeated plantings unify a space and are pleasing to the eye.
7. Build soil health . The pruned branches and leaves from hedging maintenance are ideal for mulching. [see image of dogbane and Lilly pillies with prunings on the path]. Many of my hedges are self-mulching. I chop and drop the organic material directly underneath, building a thick carpet of nutrient-rich compost and leaf mould. Between pruning maintenance, this dense material breaks down and feeds the plants in the hedge without fertilisers or other inputs like mulch.
8. Ecosystem services . Hedges and fedges provide habitat, nesting sites, food and leaf litter for various birds, lizards, soil microorganisms, insects and arthropods. These, in turn, build the biodiversity and resilience of our gardens.
9. Save money, lower the environmental impact and cool your garden. Living fences are economical, aesthetic alternatives to expensive traditional fencing options. They also help cool spaces.
10. Security barrier. Hedges form a living fence that can provide a thick, impenetrable security screen for humans and animals.


Hedges with diverse plant species are more resilient, as single-variety plantings can be prone to pest attack or disease. A more biodiverse planting mimics natural ecosystems and can provide a pleasing aesthetic

Hedges with diverse plant species are more resilient, as single-variety plantings can be prone to pest attack or disease. A more biodiverse planting mimics natural ecosystems and can provide a pleasing aesthetic.
• Plant what grows well in your climate.
• If your neighbours or community gardens are willing to provide cuttings when trimming their hedges, you may be able to propagate plants in spring or summer for free.
• Prepare the soil well. Regular nutrition and mulch will protect the soil and provide a habitat for microorganisms that help feed your plants.
• Prune regularly to help establish your hedge shape. I tipprune new shoots to encourage more lateral growth and remove the leader on the top of the plant.
• If you want a more established hedge faster, plant closer together or buy more advanced-sized pots.
• To get a nice straight line, use a string line before digging holes and planting your potted shrubs. Peg it from one end to the other down the centre of the space where you want your hedge. Measure the distance to decide the spacing so the plants will be evenly distributed. I mark the soil where I plan to dig holes.
I hope that sharing the many benefits of hedging plants encourages you to use them in your garden. 3
References: daleysfruit.com.au/Bamboo-Edible.htm
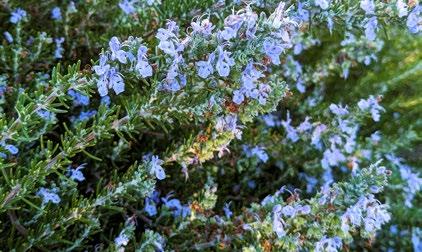
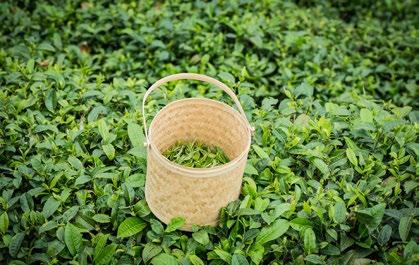

Anne Gibson, The Micro Gardener, is an author, speaker and urban garden community educator on the Sunshine Coast, in Queensland, Australia. Anne is passionate about inspiring people to improve health and wellbeing, by growing nutrient-dense food gardens in creative containers and small spaces. Anne regularly presents workshops, speaks at sustainable living events, coaches private clients and teaches community education classes about organic gardening and ways to live sustainably. She has authored several eBooks and gardening guides. Anne shares organic gardening tips and tutorials to save time, money and energy on her popular website - TheMicroGardener.com


magic as it gets. With basic tools, this article will show you how to replicate the which you can use to grow a lifetime supply with the same flavour, potency, and
resilience as the original. Unlike plants, fungi don’t rely on seeds. Every part of a mushroom is made of mycelium, capable of growing independently when given the right conditions. That means a tiny piece of any mushroom can become the sterile, nutrient-rich environment—typically agar plates or sugar-water solutions.
mushroom with the well-formed mush-
Supermarket mushrooms are a reliable choice since they’ve been cultivated for consistency. If you’re foraging, pick a mushroom that’s clean, fresh, and large enough to tear open—this allows you to access uncontaminated tissue from the inside.
Before you start cloning, you’ll need to decide where your mushroom tissue will grow. The two main options are:
• Agar Plates (Petri Dishes): A nutrient-rich jelly poured into Petri dishes. These are useful because you can see what’s growing, including any unwanted contaminants. They require more effort but allow you to ensure clean, healthy mycelium before expanding.
• Liquid Culture (LC): A sterile sugar-water solution in jars, usually with modified lids for easy syringe extraction. LC is fast and easy to work with, making it a great way to inoculate grains and substrates quickly. However, contamination is more challenging to detect.
Experienced growers often start with agar to verify cleanliness before moving to liquid culture. This extra step can prevent entire grows from being lost to hidden contamination. Agar plates and LC can be prepared at home using a pressure cooker or bought online from mycology suppliers.
For Taking a Sample:
• A sterile workspace
• A sharp scalpel or razor blade
• A lighter for sterilising the blade
• 70% isopropyl alcohol and paper towels for cleaning the workspace and equipment
• Agar plates (pre-made or DIY) OR
• A sterile sugar-water solution to create a liquid culture (LC)
For Incubation:
• A warm, dark area with a consistent temperature of 20–25°C (68–77°F)
If you’re planning to grow mushrooms from your cloned culture, you’ll also need sterile grain, a suitable growing medium, and the right conditions for each stage of development.
Sterility is everything in mushroom cloning. Even a tiny amount of contamination can ruin your culture, so preparation is key.
• Wipe down your workspace with 70% isopropyl alcohol
• Set up your still-air-box or laminar flow hood to create a controlled, sterile space
• Flame-sterilise your scalpel or razor blade until it glows redhot
• Wipe the outside of your agar plates or liquid culture jars with alcohol before bringing them into your sterile zone
Some people wear gloves and a mask when doing sterile work –I’ve found that scrubbing my hands and avoiding heavy breathing does the trick.
1. Clean the outside of the mushroom with isopropyl alcohol before placing it in your sterile workspace.
2. Tear the mushroom in half along its length to expose the clean tissue inside. Avoid cutting it open, as the blade can drag contaminants from the surface.
3. Using your sterilised scalpel, cut a small piece of tissue from the centre of the stem or cap.
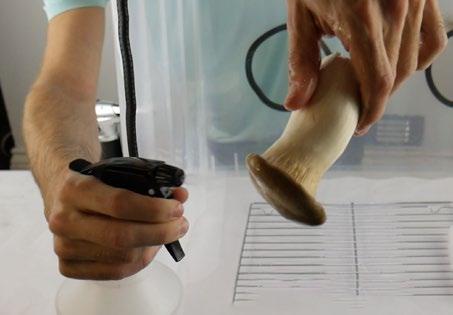
Cleaning a supermarket-bought King Oyster mushroom before cloning Flame sterilising my scalpel blade
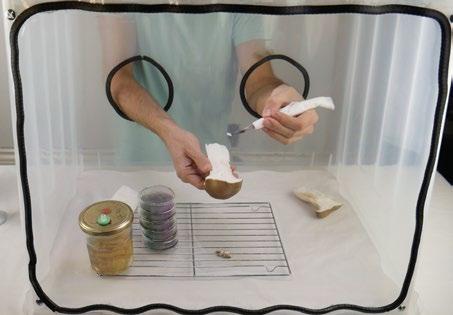


Taking a tissue sample from the middle of the mushroom Transferring a tissue sample onto an Agar petri dish

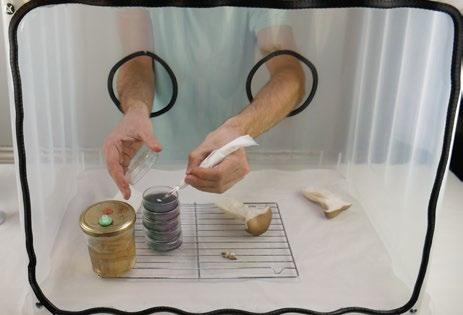
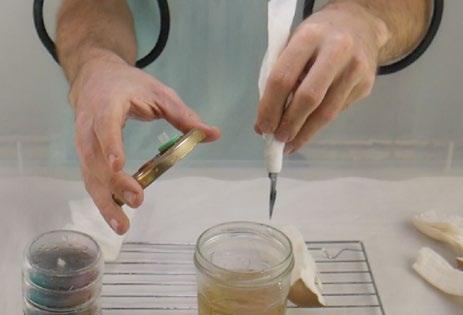
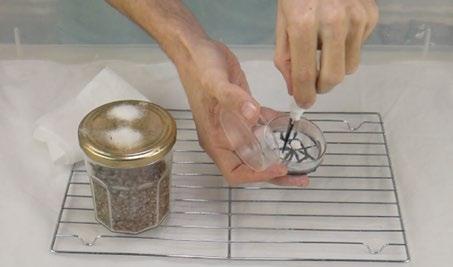
Cutting up colonised agar before adding it to a jar of sterile grain
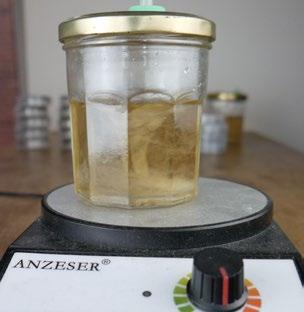
9 10
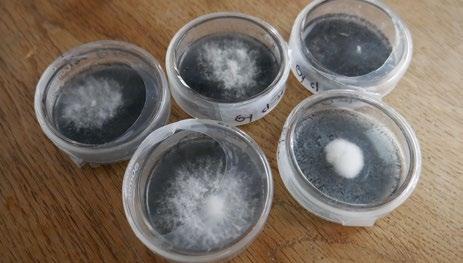
Oyster Mushroom clones colonising in a warm, dark place

A magnetic spinner to break up mycelium - optional

A ready-to-use liquid culture from a King Oyster clone
1. Briefly lift the lid of your Petri dish and place the tissue sample in the centre, pressing it gently into the agar.
2. Seal the dish with Parafilm or micropore tape to prevent contamination.
3. Label the dish with the date and mushroom species.
4. Place the dish in your warm, dark place. Within a few days, you should see mycelium (the fungal “roots”) spreading from the tissue. When your dish is mostly white, it is ready to use.
1. Carefully open your sterile jar and drop the mushroom tissue inside.
2. Replace the lid immediately and label the jar with the date and mushroom species.
3. Store the jar in your warm, dark area, and shake it up daily (or use a magnetic stirrer if you have one). Within two weeks, a jellyfish-like cloud of mycelium should appear, spreading throughout the liquid.
11

Drawing out liquid culture using a sterile syringe
• If using liquid culture, draw some of the mycelium-rich solution into a sterile syringe and inject it into a grain bag or jar. Shake to spread the mycelium.
Once the grain is fully colonised, transfer it to a bulk substrate like straw, wood chips, or a commercial mushroom-growing medium.
While cloning allows you to replicate strong genetics, mushrooms experience senescence—a gradual decline in vigour after many generations. To keep your cultures healthy long-term, it’s best to:
• Keep a mother culture of the original clone and take samples from that rather than from each new generation. This is sometimes called a ‘master slant’.
• Occasionally grow mushrooms from spores to introduce fresh genetics and prevent degradation.
With good practices, you can maintain high-quality, productive cultures for years.
If you’d like more help growing cultures and training mushroom genetics, check out Alex’s online course, ‘Home Mushroom Laboratory’ (rebrand.ly/1g0ngym) 3 7 8
Once your culture is fully colonised with healthy mycelium, it’s time to transfer it to a growing medium. This process, called spawning, allows the mycelium to spread and prepare for fruiting.
• If using agar plates, chop up the mycelium-covered agar with a sterile blade and drop the pieces into a jar, bag, or jar of sterilised grain. Shake well to distribute the culture.
Alex loves empowering people to grow their own food and medicine. He has taught over 6,000 students worldwide to cultivate mushrooms at home. Stay tuned for more specific guides from Alex in future issues of Garden Culture Magazine. Follow on Instagram: @fungi_tribe 3


Approved for Organic Farming by Control Union
Nutrients direct available for plant
Rich in micronutrients
Easily degradable in nature
Supports a circular economy


VGN, where sustainability meets innovation. These veganic fertilisers are the result of transforming plant waste into solutions for your plants. All VGN products are certified for organic farming by the Control Union. With VGN fertilisers you nourish your plants while supporting beneficial micro-organisms. A healthy soil life is the foundation for healthy plants!


arth Day celebrates its 55 th anniversary on April 22, 2025, and this year’s theme encourages us to think about how we power our homes, businesses, and communities and discover sustainable alternatives.
“Our Power, Our Planet” EARTHDAY.ORG (EDO), the global organiser of Earth Day, is inviting its one billion supporters in 192 countries to learn about renewable energy and explore making cleaner choices for their families. EDO’s goal is to triple the global generation of clean electricity by 2030. That might seem intimidating, but it shouldn’t be. EDO’s grassroots perspective highlights how we already possess what we need to create clean, cheap, and unlimited energy for the world. We just have to harness it properly.
Many nations are already leading the way (49, to be exact!) and generate more than half of their electricity from renewable sources, including Canada, Switzerland, Austria, New Zealand, Brazil, Norway, Sweden, and Denmark!
Iceland generates 99.99% of its electricity from renewable sources!
Finding renewable energy sources for your home isn’t as pricey as you might think
What is Renewable Energy?
Clean energy comes from renewable sources that don’t produce greenhouse gases, such as the sun and wind. Other examples include hydroelectric, geothermal, and tidal energy.
“For years, we have been fed the lie that only fossil fuels can power the planet; that is not true,” said Denis Hayes, the Board Chair Emeritus of EARTHDAY.ORG. “By the 2030’s, the largest source of electricity generation on the planet will be solar power.”
The United States already has a head start! Last year, the country experienced a solar revolution and set a record for the most sunpower ever produced, thanks to the efforts of California, Texas, Florida, North Carolina, Nevada and Arizona. This incredible feat has helped make the cheapest electricity in history.
Expect more of those nifty solar panels decorating rooftops or stilts pointing towards the sun over the next few years! It’s the way of the future.


Moving away from fossil fuels carries the potential for significant health benefits worldwide. Here are a few highlights:
• Experts have linked the burning of fossil fuels to heart attacks, strokes, various cancers, asthma, and other respiratory issues. The World Health Organisation says switching to cleaner energy sources will reduce those health issues and healthcare costs.
• The Intergovernmental Panel on Climate Change says reduced greenhouse gas emissions will mitigate the effects of climate change, such as flooding, drought, heat waves, and the spread of infectious diseases.
• Renewable energy might also improve mental health! The Centers for Disease Control and Prevention points to reduced stress and anxiety associated with pollution and climate change.
Tapping into renewable energy sources will do wonders for the environment and human health, and EDO also touts it as an economic revolution. Making the switch will drive innovation and create millions of job opportunities around the globe.
“This presents an enormous opportunity for entrepreneurs, industries, and those seeking well-paying careers,” says Tom Cosgrove, Chief Creative and Content Officer, EDO.
According to EDO, the renewable energy sector is expected to create 14 million new jobs worldwide. Last year, the global industry was worth $1.21 trillion and is projected to grow over 17% annually over the next five years.
Finding renewable energy sources for your home isn’t as pricey as you might think. For example, EDO says the cost of making solar panels has plummeted over the last ten years, making them the cheapest form of electricity. Between 2010 and 2020, solar module prices fell by up to 93%. Many corporations and individuals are now fully or partially powering their spaces with solar panels. With this option more affordable, more of us will hopefully follow suit.
“We need people power to support the big switch to renewable energy,” said Kathleen Rogers, President of EDO. “We encourage everyone to talk to your local mayor, boss, neighbours, community leaders, and local and national legislators to explore and champion switching to renewables.” 3
There are many ways you can get involved in Earth Day 2025. Visit earthday.org/earth-day-2025 to find out how and use #RenewableEnergyNow on social media!

Each year, April 15 (Leonardo da Vinci’s birthday) is recognised as “World Art Day”. The theme for 2025 is “A Garden of Expression: Cultivating Community Through Art”.
We grow as part of human and inter-species networks. We do farm work in teams and tend to gardens in shared or public spaces. Even solo gardeners find themselves in a community with other growers, often online, while picking up supplies, at local and regional workshops, and attending or participating in exhibitions, fairs, and competitions.
In the spirit of World Art Day, consider how your connection with the natural world is influenced by the aesthetics of what you cultivate; appreciate how not everything in the garden blooms simultaneously or with the same showiness. You may notice a mix of “loud” and “quiet” colours and scents throughout a growing season. Some species are subtle, expressing themselves with interesting textures. Some grow into living sculptures as they stretch and bend. There is a song in the rustling of leaves; plants dance in response to air currents through a scene.
The styles and movements of art are so diverse that there is something for everyone. What shapes and sounds make their impression on you? If you were to be inspired, how might you use different art forms to translate the feelings and sensations of your grow?

In the spirit of World Art Day, consider how your connection with the natural world is influenced by the aesthetics of what you cultivate; appreciate how not everything in the garden blooms simultaneously or with the same showiness
There’s no reason for World Art Day to take you far out of your comfort zone. Everyone is invited to make art letting go of the judgment that it has to be “good” is key! Grant yourself and others this safe space to be expressive. Consider offering access to your space or part of your harvest to enable others in their creativity. Your plants and fungi could be celebrated in any number of forms. Extending this mutual exchange publicly through a special event or sharing pictures or video content can spread the experience to a


When growing itself is your art, there are plenty of ways to translate that experience in collaboration with others. Culinary artists (e.g. chefs, chocolatiers, food stylists) are a go-to group capable of creating using selections from your garden. You can invite them straight to the source for inspiration!

Similarly, live or dried arrangements of blooms and sprigs are another, perhaps obvious, way to bridge art garden. Pressed flowers and leaves make attractive keepsakes of a season of growth, and the care taken to preserve these items can transform them into lasting archives of unique ge-

When growing itself is your art, there are plenty of ways to translate that experience in collaboration with others

Textile workers, weavers, and multimedia artists will likely find something useful in your garden. Shapes and patterns made by leaves can make for visually compelling prints. Lots of the “nonfood” elements of a garden or local wilds can be the source of pigments for dyeing fabrics or yarns (see also “Five Forageable Fungi for Artists”).
Perfumery and scent-making is a field (pardon the pun) that relies heavily on botanicals. Natural product artisans, like soap-makers, may jump at the chance to experiment with the colours, textures, and scents in your garden patch.
Unfortunately, the art-making culture is rife with environmentally questionable products, if not outright toxic. World Art Day is a chance to highlight natural, often freely foraged, materials that can be used to make beautiful art.
Taking even a small action to cultivate community through art is an opportunity to connect with others whose curiosities, interests, and values intersect with your own. It can also be a way of discovering commonality where none seems to exist. When that harmony is hard to find, return to the “garden of expression” metaphor. Don’t forget that not all art may be “for you,” nor is every plant (or gardener) in every garden going to suit your taste. We live in a complicated world with many flavours and variations in our palettes. Simply observing and being grateful for the people around you and how they practice their art is a fantastic way to connect. Whether a person is an artist in an ‘obvious’ way (they’re a painter!) or less so (they take the time to garnish a salad with edible flowers!), noticing and acknowledging how their self-expression adds vibrance to the community is a powerful act.

For many of us, what we grow in our gardens has been subject to censorship figuratively and literally. In art, we find evidence to prove the existence and value of what might be marginalised, even criminalised, today. We also use art to work through difficulty and release emotion.
Creations by folks who lived before us survive to transmit wisdom and fuel our spirits through challenging times. Where would we be without the botanical drawings, carvings, paintings, pottery, stories, and songs created by our ancestors? With that in mind, think beyond April 15 this year; use World Art Day as a leaping-off point to make lasting connections and contribute your legacy.


Wild spaces are filled with mushrooms considered inedible (for humans) but have qualities that make them attractive to artists. Here’s a handful that are relatively common and safe to work with.
Inky Caps (Coprinus atramentaria)
When harvested caps are left to deliquesce (a fancy word for “melt into black goo”) in a jar, these fungi can be used to paint or do calligraphy. Word to the wise: while still wet, the stench of this ink may be overpowering for some artists. After leaving the solids to break down for a day, use cheesecloth or a fine mesh strainer to separate any remaining fibres from the ink. Transfer it to a container with a tight lid and consider working in a breezy space while using this rich black-brown substance straight-up or diluted as a watercolour-style medium.
Dyer’s Polypore (Phaeolus schweinitzii)
Found near the base of decaying pines and other softwoods, this brown and yellow, velvety-fuzzy and multi-layered polypore contains a rich array of compounds. When extracted into solutions with various acids and bases, the same mushroom can produce a range of colours in the greengold part of the spectrum.
Green Elfcup (Chlorociboria aeruginosa, aka Green Stain)
Named for the tiny cups it makes to release spores, this species transforms its wooden host into a gem-like turquoise. To folks with full-colour vision, green-stained branches stand out brightly on the forest floor, ready to be incorporated into jewellery or as a vibrant inlay in a larger piece of woodwork. The decaying nature of the fungus means the material itself is often soft: it may need to be lacquered or treated for projects you wish to withstand the test of time.
Birch Polypore (Fomitopsis betulinus)
Easy to spot and usually found in abundance, the birch polypore is a good beginner’s choice for making paper*. It will result in a whitish bond you can draw or write on, use for making cards, or in other papercrafts. Once you’ve got the hang of it, you can experiment with various fungi to get different colours and textures.
Artist’s Conk (Ganoderma applanatum)
The all-in-one solution is named for its characteristic darkening where a design is scratched onto its cream-coloured, pore-bearing surface. Sturdy and well-shaped for display, these perennial shelf mushrooms provide a natural “canvas” that needs a handy stick to capture an image.
While seeking these, peek at the undersides of other mushrooms you spot. Plenty of species have interesting pore and gill designs that make cool stamps when used with nontoxic paints or pressed into clay. If you discover dyeing, paper-making, or working with fungi-influenced wood is your jam, there are plenty more than those on this short list which will work to keep you busy and inspired. 3
*Learn how to do it here: rebrand.ly/xwlpcv0


Enhanced Durability Optimised Rootzone Health Efficient Drainage & Aeration Great Value, Washable & Reusable
Dirt Bag Grey is the perfect solution for growers seeking versatility and efficiency.
These round, fabric non-woven breathable plant pots continue the tradition of promoting healthier air-pruned efficient root systems.


Manufactured to be system-compatible using 100% recycled plastic for maximised plant growth. Available in all popular sizes.


When it comes to organic, regenerative, living soil, there has been a conga line of better-versed and knowledgeable contributors than I. Do you need ten ways to balance your soil PH? Search the magazine’s website and wait for the avalanche of info to be launched in your direction. Do you need 101 ways to launch an assault on a garden pest of any size and valour? Search it and thank me later.That being said, this is “Notes from a Dirty Old Gardener,” so allow me to drag this publication into the literary gutter for a moment where I thrive.
Do you want healthy soil? First things first: If it doesn’t stink, you need to re-think. If the stank ain’t flowing, the plants aren’t growing. If it isn’t permeating, we aren’t germinating. You get the picture; much like James Brown, we need some funk to survive. From the sludge at the bottom of your compost bin to the dookie from a furry friend, it will all help the soil stay rich like a suburban housewife. You ever drive through the country and have a sheep’s ass hit you square in the face? They aren’t spraying that poop smoothie around for the simple pleasure of it. That sweet slurry keeps crops growing in the same spot year in and year out. It’s a fact of life that nutrient-rich matter smells like gym class. Why? That’s a question for one of our more “sciency” writers.

“But Uncle Regi, does it always have to be so stinky?” Many products and household remedies have a pleasant odour or no smell. Again, head to our bloody website and stumble on some of the most well-curated articles to answer your questions. Leave your guessing to your neighbours. Scratch that, tell them about us, too. I have heard tales of people using everything from coffee grounds to molasses and even their own urine. What kind of sick individual would use his… I mean, “their” own urine to enrich the soil? You guessed it, Uncle Regi. While biomatter is typically stinky, bone meal has a relatively neutral smell and is widely employed to keep the dirt chugging along. Worm castings have that pleasant hamster cage smell. That blue nitrogen supplement you see in everyone’s arsenal has zero smell, which surprises me because it looks like you can use it to wake up a UFC fighter. Keeping soil balanced is an art and a science; be sure to tread carefully, respect dosages, and keep your eyes peeled for things you may cause by overdoing, such as excessive leaf growth, leggy stems, and late flowering. Your leaves may start clawing and go brown. So chill with the piss-to-water ratio; take it from me.
You don’t have to dig too deep (forgive the pun) to learn that I am a massive fan of mycelium and mushrooms. I like to sit back with a portobello burger and enjoy the landscape. Even if you are not a fan, you have to bow down and show some respect because if you see mushrooms growing on your property, garden, or grow bag, it’s a sure-fire indicator that you have some healthy and robust soil. What now? Like any great painting nearing an end, just stop touching it, or you will ruin everything. You have a pleasant little ecosystem cooking there. Do what my better half tells me: “Just sit back and thank your lucky stars you got so damn lucky.” The better half is also trying to convince me to buy a farm, so keep your eyes peeled for articles about me ballsdeep in debt trying to correct the garden layout. I’ll be checking the soil before buying; if the real estate agent catches me taking a piss outside, I’ll say I’m just ‘regenerating’. I’ll ask follow-up questions about where the mushrooms are usually located. A little piece of friendly advice: don’t eat wild mushrooms all willynilly. About 90% are OK to consume, but the other 10% will put you in the hospital faster than a chainsaw accident. Buy a book, ask a neighbour, and be cautious. Liability averted.
Keeping soil balanced is an art and a science; be sure to tread carefully, respect dosages, and keep your eyes peeled for things you may cause by overdoing, such as excessive leaf growth, leggy stems, and late flowering
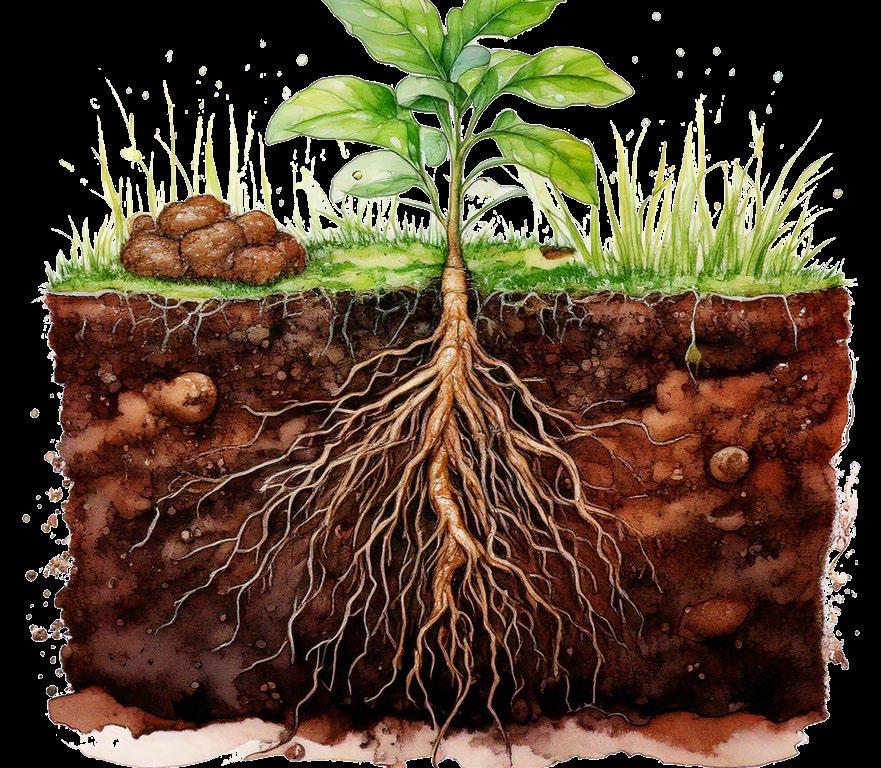
Sometimes, it’s not about what you add or take away from the soil but what you need to do to it. A densely compacted soil will not be optimum for accepting and absorbing anything. Get your boots on and aerate that soil; toss, flip, and reverse it. If your spot looks like a dried-out desert, it will produce like one. If you aren’t retaining moisture, plant shade trees to modify things. Try and find balance. Sometimes, I just go out there and talk to the dirt. The neighbours have asked that I only talk to my own dirt.
This whole concept of organic, regenerative, living soil means returning what you take out when necessary. Land that experiences a diminishing return will eventually go baron. If you don’t start tossing some shit around like an angry chimpanzee once and a while, you won’t be eating very well. That last sentence is senseless without the rest of the article as context. I need a raise. I sound like a hippy sometimes, but healthy soil is circular. Death brings life, poop brings flowers, and like any relationship, if all you do is take, you are going to wear everything out. I am not saying you need to pee on your partner, you silly goose, unless
that’s your thing (in which case, do it in the garden). Two birds, one fetish and/or stone. You can have a rigid yearly regimen of soil enrichment, or you can be the kind to throw food scraps in the garden. Every little bit helps, and your soil will say thank you. Sometimes with a bounty and sometimes with just enough fruit to not make you feel like a failure in the garden.
Gotta Go!
Alright, my little bean sprouts, me and my better half are off to crap in the snow. We are investing not only in property but also in the soil’s future health. We hold hands and squat face to face, stare into each other’s eyes and let the fertiliser flow in a cascade of brown love. Annnnnnnnnnnnnd I’m fired. Happy gardening. 3
Editor’s Note: Garden Culture Magazine does not endorse pooping in the garden. Ever.
BIO Regi Oneton is a multi-disciplinary artist and daytime executive. He’s been a member of Socan since his first album release at the age of 20, and is a self-taught audio engineer and self-proclaimed studio rat. Regi is a late-blooming street artist and painter whose works can be found hanging in the offices of Burton and Vans Canada. Long-time contributor to the Under Pressure Graffiti Festival and lover of the Arts. As the years plow forward, he has added botanical enthusiast/plant father to his litany of passions. His interests include writing and spending too much time looking at his phone.

Everest Fernandez explores how ancient techniques are turning deserts into forests.

Using centuries-old techniques called Half-Moons and Zai Pits, communities restore barren landscapes and reassert their food security
For those of you who may have slipped into a mindset of “inexorable environmental doom,” I offer a tonic for your soul—the people of the Sahel. As creeping desertification threatens their livelihoods, they have embraced a quiet revolution and are proving that humble solutions can be found to even the most daunting challenges.
Using centuries-old techniques called Half-Moons and Zai Pits, communities restore barren landscapes and reassert their food security. These approaches are neither flashy nor expensive—just practical, effective and rooted in the understanding that hard work and ancient wisdom may hold the key to overcoming their challenges. The Niger Food Forest Mega-Project exemplifies this pragmatic optimism, showing that with the right tools, the earth is far from “doomed”—it’s full of possibilities.
This is not a story of quick fixes or technological leaps but a tale of rediscovery. By dusting off ancient techniques, modern practitioners are solving challenges that, ironically, have already been faced—and overcome—by the Sahel’s ancestors for centuries.
The Half-Moon technique evolved as a solution to erratic rainfall and parched soils. Crescent-shaped depressions were dug meticulously along contours to capture rainwater before it escaped as runoff on the sun-baked, impermeable ground. Similarly, Zai Pits—small, densely packed planting holes—emerged to capture and concentrate fertility in otherwise barren landscapes.
These methods are an enduring testament to human ingenuity. Yet, like many traditional practices, they were nearly lost in the wave of industrialised agriculture. Rediscovered by local farmers and development experts during the 1980s droughts, these techniques have since been refined, merging with modern soil science to yield extraordinary results.
The beauty of the Half-Moon technique lies in its simplicity. Shaped to mimic natural flow patterns, these structures arrest rainwater that would otherwise wash away any topsoil. But this isn’t merely about holding water—it’s about using it efficiently.
Half-Moons slow water movement across sloped land, encouraging it to percolate into the soil profile. This increases moisture at depths where plant roots thrive, not just at the surface where evaporation robs it away. By contouring the land, practitioners align these crescents to channel rainfall precisely where needed, preventing erosion and creating reservoirs of fertility.
Half-Moons also trigger ecological regeneration. Rain brings life to dormant seeds in the soil bank. Native grasses, once dismissed as weeds, emerge, anchoring the soil and contributing organic matter that feeds microbial life below. Over time, these zones support shrubs and trees, stabilising the ecosystem further.
At first glance, Zai Pits might seem underwhelming—hand-dug holes, each filled with a mix of organic matter and manure. But their impact reveals a deeper understanding of soil ecology.
Zai Pits address a fundamental problem in degraded soils—infertility. Concentrating nutrients in a confined space allows plants to establish themselves in an otherwise hostile environment.
There’s another player at work here: termites. Often regarded as pests, termites are integral to the success of Zai Pits. The organic material in each pit attracts these tireless engineers, who burrow deep, aerating the soil and increasing its permeability. Their activity ensures rainwater infiltrates rather than running off, while their tunnels transport organic matter deeper, enriching subsoil layers.
Over time, Zai Pits restore fertility and create self-sustaining pockets of productivity. With careful management, they evolve from isolated planting sites into expansive cultivated zones.


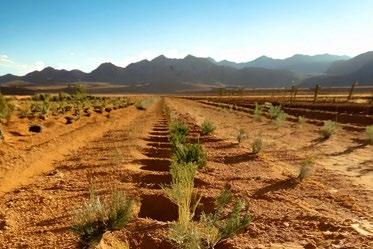
For gardeners and growers attuned to soil science, the efficacy of Half-Moons and Zai Pits stems from principles you know well: water conservation, soil health and ecosystem interactions. What makes these methods unique is their adaptability to extreme environments.
Sahelian soils are particularly prone to compaction and nutrient depletion, exacerbated by sparse vegetation and erratic rainfall. These techniques counteract such issues by focusing on water retention at the soil surface and creating conduits for deeper infiltration, ensuring that every drop of rain serves a purpose. This is critical in a region where annual rainfall often falls short of 400 millimetres.
Both techniques leverage ecological partnerships. In Half-Moons, native vegetation plays a pivotal role, while Zai Pits rely on soil organisms. These approaches reduce reliance on synthetic fertilisers, promoting a natural balance between plants, microbes and the broader environment.
The impact of these techniques extends beyond the immediate planting zone. Half-Moons and Zai Pits shape microclimates, increasing humidity and lowering temperatures.
Tree planting within Half-Moons creates shade, which slows evaporation, cools the soil and protects seedlings. Over time, these trees become windbreaks, safeguarding crops from harsh Sahelian winds.
The Niger Food Forest Mega-Project has seen extraordinary results: once-dead landscapes now support plant and animal life. Pollinators have returned. Birds nest in the restored trees. Once cracked and lifeless, the land now feeds families and secures futures.

These principles aren’t limited to Niger. The Great Green Wall Initiative, stretching across Senegal, Chad, Ethiopia and beyond, has adopted similar techniques, tailoring them to local conditions.
However, challenges remain. Land tenure disputes, funding gaps and labour-intensive processes slow progress. But where communities take ownership, supported by long-term investment, the results speak for themselves.
This is proof that practical, low-cost solutions exist. They don’t require vast financial aid or technological breakthroughs—just commitment, knowledge and a willingness to work with the land, not against it.
The resilience of Sahelian communities offers a powerful counterpoint to climate despair. These farmers don’t wait for solutions; they dig them—one Half-Moon, one Zai Pit at a time.
For growers anywhere, the lesson is clear: nature responds to patience and partnership. The Niger Food Forest Mega-Project proves what’s possible when human ingenuity and ecological wisdom align.
The answers, as the Sahel shows, are already there. The only question is: Are we willing to dig in? 3
Everest Fernandez is a well-respected industry educator, veteran hydroponic grower and grow light enthusiast, based in France. He works primarily as a marketing and cultivation consultant and was the founding editor of Urban Garden Magazine in the UK, US and Canada. He also writes and researches for the popular hobby horticulturalist YouTube channel, Just4Growers.


Growers create life and nurture their tiny ‘babies’ to their full potential. Holly Eastlake has taken this creative power a step further.
When not tending her allotment, she’s helping deliver human babies at the nearby NHS hospital. This is a story of hope and an invitation to celebrate life.
Holly’s love for horticulture was grafted by her gardening-enthusiast parents and grandparents, who cherished the outdoors. As her passion bloomed, she surrounded herself with plants, even in shared rental accommodations. This evolved into cultivating a patch in her parents’ garden before her determination culminated in acquiring an allotment in 2019 - just in time for the challenges that would arrive the following spring.
It’s no secret that midwifery, despite its joys, demands physical and mental energy. Shift patterns, long hours, emotionally charged situations, and staffing shortages come with the territory - but adding the pandemic transformed her vocation into something unrecognisable. Holly still struggles to articulate those experiences. Like many gardeners who find therapy in their plots, her allotment became a literal “life raft”. Between shifts, she would escape to her plot, feeling the dirt under her nails and the sun warming her skin. It helped her process the hospital experiences and the isolation that would be lonely if it wasn’t for the magical power of life at the lot.
“Sowing seeds, believing in a future and having something to put my mind to helped me through the pandemic,” she says.
Documenting her allotment journey on social media has brought joy and connected her with like-minded people, both online and at her growing site. Gardening doesn’t require perfection, but it’s a process where we’re ultimately in Mother Nature’s hands, much like at a delivery ward. Holly wishes to show that gardening is accessible to everyone, regardless of how busy life gets. On her Instagram profile,
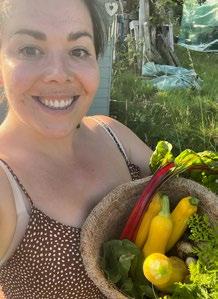
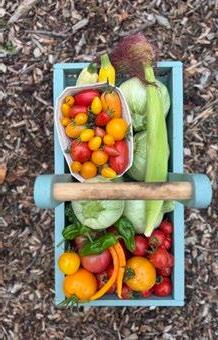

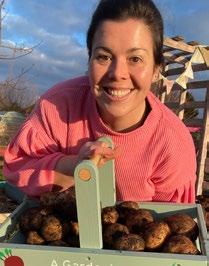
she’s posted her experiences with various squashes, Pati pans, and red raspberries, which magically turn into a homemade drizzle cake. The key to joy is just to get going, no matter where you start.
“You don’t need a garden, allotment, fancy equipment or lots of spare time to grow your own,” Holly says. “In a small repurposed pot on a windowsill, we can all bring the joy of gardening to our homes and enjoy the rewards it provides.”
agardeningmidwife

OPTIMISED FOR LED SPECTRUM MAXIMISE UPTAKE ENHANCE POTENCY
VBX, a nutrient developed to compliment the LED spectrum. Combining the power of multiple bottles in one complete powder for optimum results.
Would you like to be featured as one of our local growers? If you’ve got a garden, grow room, or farm and have a story to share, contact us at: growers@gardenculturemagazine.com

Thanks to farmers ‘ protests, food security and production in the UK are in the spotlight.
Among the loudest voices for policy change and support for horticulture is Jo Poulton, a grower whose dream is thriving national production.
Jo’s growing journey spans the United Kingdom. Her training began with Newton Rigg and Growing Well in Cumbria, opening her eyes to horticulture’s therapeutic benefits and community connections. That same year, she joined the Farm Start training programme at Plot North Lancashire, filling her week with round-the-clock vegetable production. Next came the wonderful experience of learning from women running Vista Veg in Eden Valley (now called Home Grown Here), where they delivered up to 200 veg bags weekly to the local households. This experience taught Jo the intricacies of planting an asparagus crown and pruning an apple tree and the deep wisdom of women who work the land.
Jo finds brassicas fascinating. Sturdy stems emerge from tiny seeds, a testament to their incredible resilience.
“Plants just want to grow, and it’s our job to make the best conditions for them,” she says.
This philosophy extends to growers and food producers— passionate, skilled people who often struggle financially. She launched a basic income for farmers campaign, lobbying the government for guaranteed regular cash payments to help the farming sector survive.
All future turbulent events, whether climate or economic, will connect to land and food production capabilities. Jo wants farmers to survive, just as she wants every seed to thrive, creating strong connections between farmers and communities. She introduced me to the National Food Service, which provides income for agricultural workers while helping procurement systems utilise local, regenerative produce for institutions like schools and prisons. Simply put, it’s about growing and farming with stability.
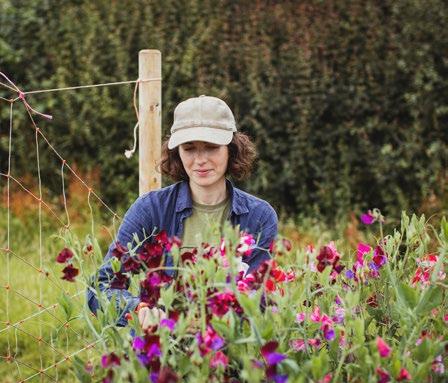
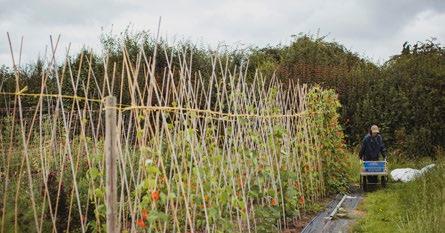
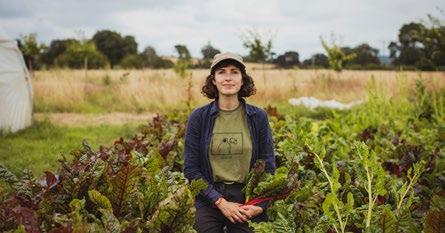
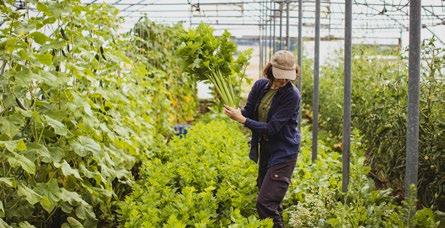
“If we want to be food secure, farmers, growers and producers must be financially secure. We need visionary, radical policies ensuring people aren’t just surviving but thriving.”
grow_jogrow
Regenerative agriculture isn’t only for large acreages and countryside homesteads. Urban farmers and gardeners can be just as influential in the regenerative movement. Whether growing indoors, on a small patio, or with a community organisation, implementing regenerative gardening techniques is extremely rewarding. Urban gardening boosts food security by bringing nutritious produce closer to people. It helps reduce the heat island effect and removes carbon from the air. Avoiding pesticides and other chemicals is crucial, but regenerative growing is about so much more. Here are 5 Cool Ways to Practice Regenerative Growing in Cities

While we’re on the subject of trees, we’ve got to talk about tiny forests, also known as micro-forests or little forests. In recent editions, Garden Culture has featured this trend because who doesn’t love regenerating ugly urban spaces? These forests consist of native trees and shrubs planted densely together following the Miyawaki method. Small-scale plantings are proven to reach climax forest status within ten years, decades sooner than traditional forests. Fine-tuned site preparation helps improve soil health, and the forest sequesters carbon, reduces the urban heat island effect and offers opportunities for communities to gather and enjoy time in nature. Several organisations offer grants or opportunities to get involved in mini-forest plantings. So, if you see a deserted concrete parking lot or under-used corner of a city park, get the ball rolling and propose regenerating the space with a Miyawaki forest!
Many city dwellers assume their small space means they’re forever stuck buying tired-looking fruit from a supermarket, but that’s fake news. You can grow a fruit tree in a container as long as it is grafted onto dwarfing rootstock. Sally Morgan and Kim Stoddart, authors of The Climate Change Garden, admit that dwarf trees don’t live as long as bigger ones. But they produce fruit more quickly. Cherry, pear, plum, peach, nectarine, apricot, fig, and lemon trees all do well in containers on dwarf rootstocks. Stephanie Rose of Garden Therapy says growing espalier trees is another excellent option for smaller spaces. This method involves vertically training trees, shrubs, and groundcovers to create edible, living walls. Many espalier trees have four to six varieties grafted onto the branches to help with cross-pollination and better fruit production. Growing fruit in cities increases bio-diversity and food security, two cornerstones of regenerative agriculture. Bonus points for planting several different kinds of trees for diversity!

Can concrete jungles actually be the place where dreams are made? If your dreams include maximising plant growth and regenerative techniques, then yes! Regenerative gardening is about more than building soil. In her book The Regenerative Garden, Stephanie Rose says it’s also about becoming familiar with unique microclimates and capturing, storing, and using naturally-produced energy. If there’s one thing cities have, it’s thermal mass. The first step is identifying structures that hold heat, like brick walls, concrete sidewalks, or fountains. Next, select some heat-loving plants and place them close by so they can take advantage of the warmth radiating from these structures. For example, thermal mass can make it possible for those living in cooler climates to grow citrus trees or Mediterranean gardens. Use recycled materials like bricks or stones to build herb spirals; these gardens last forever, save space in small yards, and give you a jumpstart on the growing season thanks to the extra heat they offer. Never underestimate the power of thermal mass in the garden!
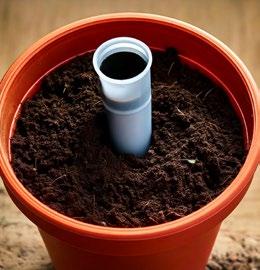
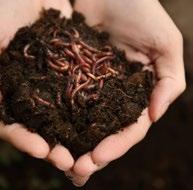
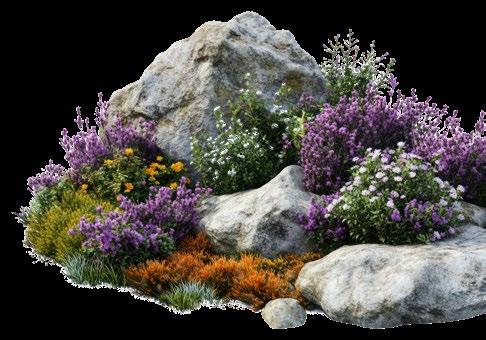
Worm hotels are perfect for small spaces and produce the most beautiful black gold a plant could ever need. This easy DIY project involves digging a vermicompost bin into a raised bed or container garden. If you place a hotel in a pot, find some 6- to 8-inch PVC pipe about 18 inches long with a cap. Drill drainage holes in the bottom of the pipe, dig a hole in the soil about 15 inches deep and backfill around it. Add a couple of scoops of carbon sources, like dried leaves or shredded paper, and then some finished compost. Water everything down and add about 200 composting worms to the tunnel.Throw fruit and veggie scraps into the hotel and cover them with extra carbon so the worms can do their work.These hotels are easy enough to make, and you can add them to several containers or spots in your garden. The more the worms eat, the faster they reproduce. Once the hotel posts a no vacancy sign, divide the population, start a new bin, or share with your friends and neighbours.That’s the regenerative way!
Regenerative agriculture is all about using healthy soil and plants to heal the planet; the more people that grow, the better off we will be. Seed-sharing libraries are an excellent way to encourage others to take up gardening. These tiny wooden houses can be on your front lawn or in community spaces. They can include native seeds and seedlings, cuttings, gardening materials, tips and resources for other gardeners. If placed outdoors, ensure the seed library is waterproof and offers protection from the elements so the donations inside aren’t destroyed. Most importantly, Stephanie Rose recommends managing the box and engaging with community members so people feel connected and encouraged to share seeds from their gardens. 3
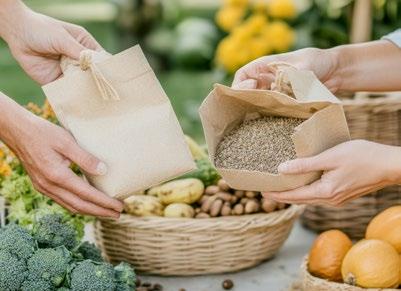
We recommend Stephanie Rose’s The Regenerative Garden to anyone looking for easy projects to implement in their growing spaces. The Climate Change Garden, by Sally Morgan and Kim Stoddart, is also excellent for gardeners looking to make a difference!