relax, we got you covered propagation, growth, bloom, ripen...


Voted Most Sold Nutrient, Most Sold Substrate and Most Sold Supplement in the 2024 Garden Culture Survey


relax, we got you covered propagation, growth, bloom, ripen...
Voted Most Sold Nutrient, Most Sold Substrate and Most Sold Supplement in the 2024 Garden Culture Survey


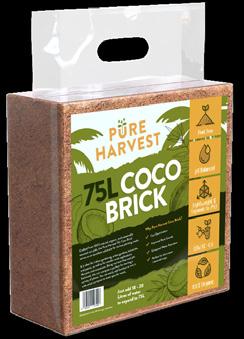

Crafted from 100% natural, organic, and sustainably sourced coir pith, the Pure Harvest 75L Coco Brick serves as an excellent substrate for various planting needs.
Fast Germination
Improved Root Growth
Enhanced Water Retention
Perfect for short term / seasonal crops
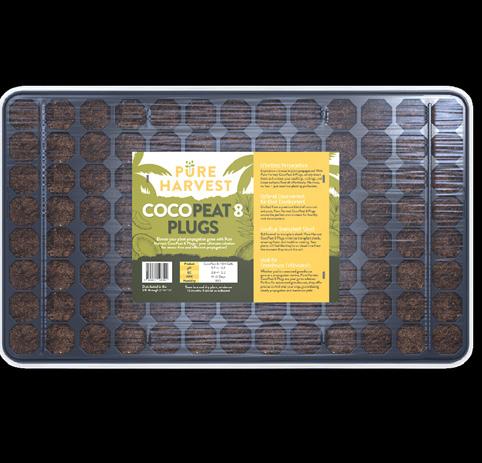
Elevate your plant propagation game with Pure Harvest CocoPeat 8 Plugs - your ultimate solution for stress-free and efficient propagation!
Effortless Propagation
Optimal Environment for Root Development
Goodbye Transplant Shock
Ideal for Greenhouse Enthusiasts


Iam fascinated by water. After graduating from university, I started a small company that sold water filters, among other things. I dove deep into the topic, learning everything I could about it. As it turns out, the rabbit hole is deep, and water is both an amazingly complicated and simple substance. Like lighting, environment, media, and plant nutrients, it is a subject worth investigating.
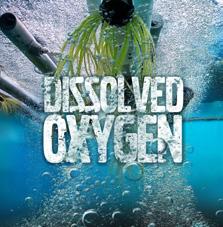
From water filtration to techniques for watering plants, the subject of water and your garden is vast. In this edition, we explore many aspects of this seemingly simple task. Everest Fernandez has contributed three articles: “Stone Wool: Expert Tips and Tricks,” “Testing RunOff,” and “Dissolved Oxygen: The Invisible Bottleneck Of Your Grow?”.

Xavi Kief explores a controversial subject in “Going to the Poles: Can Magnets Improve Irrigation Water?”, and Keaton Haines offers advice on conscious gardening to protect our water sources.
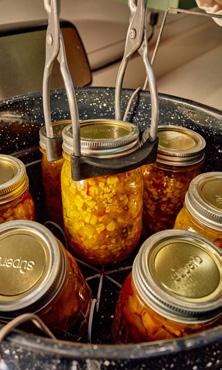
For all you mushroom enthusiasts, we have a few articles to help you get started. Mushroom growing and foraging are hot now because they are delicious and have many health benefits! Finally, it’s harvest season, and Catherine Sherriffs writes about preserving food for the colder months ahead and the canning comeback. Look for the recipe for canning spiced apple rings; perfect for the autumn!
Water is a crucial element in all life. Understanding how to deliver it to plants in the perfect amounts and intervals can significantly impact the yield and quality of your cherished plants. A great start is having your water tested!
Happy growing!

SPECIAL THANKS TO:
Alex Field, Anne Gibson, Catherine Sheriffs, Eric Coulombe, Everest Fernandez, Jennifer Cole, Jesse Singer, Keaton Haines, Martyna Krol, Xavi Kief, and Dr Blooms.
PRESIDENT
Eric Coulombe eric@gardenculturemagazine.com +1-514-233-1539
EXECUTIVE EDITOR
Celia Sayers celia@gardenculturemagazine.com +1-514-754-1539
EDITOR
Catherine Sherriffs cat@gardenculturemagazine.com
DESIGN
Job Hugenholtz job@gardenculturemagazine.com


DIGITAL & SOCIAL MARKETING social@gardenculturemagazine.com
ADVERTISING ads@gardenculturemagazine.com
PUBLISHER
325 Media INC
44 Hyde Rd., Mille-Isles QC, Canada J0R 1A0 GardenCultureMagazine.com
ISSN 2562-3540 (Print) ISSN 2562-3559 (Online)
Garden Culture is published six times a year, both in print and online.


DISTRIBUTION PARTNERS
• Creation Wholesale
• One Love Inc
• Highlight Horticultur e
© 325 Media
All rights reserved. No part of this publication may be reproduced, stored in a retrieval system or transmitted in any form or by any means, electronic, electrostatic, magnetic tape, mechanical, photocopying or otherwise, without prior permission in writing from 325 Media Inc.
Keaton Haines is a skilled writer who enjoys empowering gardeners with tips and tricks for growing clean and thriving gardens. In this edition, he examines how even the smallest actions in our gardens can affect our environment and offers advice on how to mitigate those risks, especially when it comes to watering. What sparked Keaton’s passion for clean water? Let’s find out!
You were raised with an emphasis on the importance of clean water. Can you tell us more about that?
It’s funny to look back on, actually. My earliest water quality memory is from 4 years old, when my parents told me I wasn’t allowed to drink out of the hose with the neighbour’s kids. It only continued from there. In the house I grew up in, we installed two major water filtration methods: a reverse osmosis system beneath one of the sinks for drinking water and a giant point-of-entry whole-home carbon block water filtration system. This second one was a beast– it also included a pH-decreasing ion exchange element that would soften the water. If you were unbothered by whatever was in the pipes, you could drink water from the shower and the sink with little worries. We wanted a closer filtration method for our regular drinking, and that’s where the reverse osmosis system came in.
When the RO system started having recurring expensive problems, we started taking biweekly trips to the Water Wellness store in the Salt Lake Valley. They ran massive steam distillation and RO stations, and we had about 15 five-gallon jugs that we would fill up– you could feel their weight in the trunk on the drive back. I was in charge of making sure the lids didn’t come loose on the drive, and once we arrived home, we’d have to lug them one by one up the garage staircase, through the hallway, and down the basement staircase into the unfinished back room.
I despised the entire process then but was also an angsty teenager who thought I knew everything. And besides, I needed the cardio.
Nowadays, I’m in an apartment with little space. As much as I would love to install a fancy system, I highly doubt my landlord would go for it. I like to keep a 5-gallon jug of distilled water when I can, just for old times’ sake, but we also have an activated carbon filter attached to the sink for good measure. I’ve been researching other effective filtration methods for renting situations… maybe another article topic? :)
What made you decide to launch a writing career?
Growing up, I was a voracious reader; I always had a book at the dinner table and on family outings, which spurred my love for writing. In middle school, my interest in English flourished under phenomenal teachers– I was lucky.
My parents run a marketing firm, so when I entered high school, I started assisting them with writing projects for clients (in addition to whatever jobs I was working at the time). I have a full-time position at a marketing and branding agency and still help my folks with projects. The thing is, I spend a lot of time writing about other people’s interests; plants, gardening, and water quality are topics I enjoy, so it’s a breath of fresh air to make time for myself when researching and writing for Garden Culture.
What’s your favourite plant to grow?
We don’t have much space in our apartment, and we also have an orange cat who loves to chew on things that could potentially kill her, so my planting is relegated to a small table in my bedroom. I have quite the cactus and succulent collection; a few are a decade old, so they’ve been with me for almost half my life!
Eventually, I’d love to start a little herb garden when my partner and I upsize. I cook often and enjoy making cocktails, mocktails, and homemade syrups, so it’s a no-brainer.
My earliest water quality memory is from 4 years old, when my parents told me I wasn’t allowed to drink out of the hose with the neighbour’s kids. It only continued from there.

Other than water, what’s your favourite drink?
Probably tea, iced or hot. All variations, too, but oolong and jasmine in particular.
What are some of your favourite podcasts?
• Stuff You Should Know: What it says on the tin– facts about anything and everything
• The Agency Rocket Show: I may be biased because I was in an episode, BUT it’s a font of knowledge for creative business owners!
• Old Gods of Appalachia: A fictional horror anthology podcast, perfect for the upcoming spooky season!
I also listen to many video essays on YouTube. It doesn’t matter what the topic is; I love to learn. 3
Eventually, I’d love to start a little herb garden when my partner and I upsize.

Are you interested in writing for Garden Culture Magazine?
We’d love to hear from you! Send us an email introducing yourself with a sample of your work editor@gardenculturemagazine.com
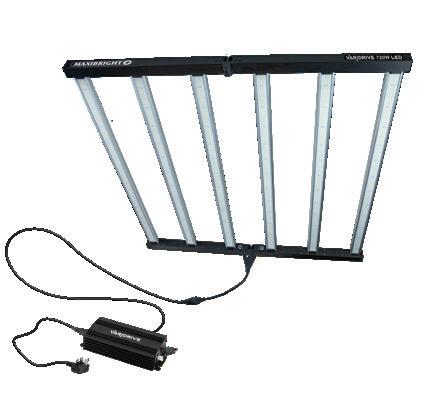
The Maxibright Varidrive 720W LED is a foldable LED fixture with an impressive total output of 1870 μmol/s of full-spectrum light, delivered uniformly over a 1.5 x 1.5m area via an array of high-quality LED diodes. Additional red light makes this fixture perfect for flowering and vegetative stages of growth. Powered by the Maxibright Varidrive 600W variable power pack, you can dim the LED and mount your power pack directly to the LED unit or connect remotely to help regulate temperatures in your grow room.
Manufactured and distributed exclusively by Highlight Horticulture. Contact your local grow store for more details.


Discover the magic of Flowa·Bloom, the ultimate flowering fertiliser crafted by Juju Royal Julian Marley, powered by Biobizz. Specially designed to meet the high demands of short-cycle plants, Flowa·Bloom ensures your plants thrive during the flowering stage.This potent formula is rich in easily absorbable phosphorus, natural proteins, and a high concentration of sugars, promoting robust development and enhancing the genetic potential of your plants. With the addition of humic acids, your plants will experience exuberant blooming like never before. Suitable for use in any growing media, Flowa·Bloom guarantees a lively, nutrient-rich environment from start to finish, culminating in a truly exceptional harvest. Flowa·Bloom works harmoniously with your plants’ natural rhythms, ensuring consistent growth. Pair it with Grow·Soldier to boost nitrogen levels and enhance flowering performance for even better results.
Check out Rastorganic.com for more information.
This is the ultimate plug for propagating seeds, cuttings, and tissue cultures. It is easy to use, environmentally friendly and promotes fast and robust rooting.
Each tray contains 104 plugs and fits perfectly in a large propagator. It provides essential nutrients for the first two weeks of propagation. With a stable pH of 5.7 (±0.2) and an EC of 0.8 (±0.2), your plants are set for success.
It is versatile, sustainable, and ready-to-use, offering a fantastic alternative to Rockwool-based products. Plus, it’s almost entirely organic and 100% compostable.
Experience the convenience and effectiveness of Pure Harvest CocoPeat 8 Plugs and watch your plants thrive like never before!
Give @CreationWholesale a follow for more great products for your garden.
The 860W MaxiLED Pro DUAL 2290 lighting fixture from Maxibright is a dual-channel solution. It offers customisable full-spectrum lighting, including UV and Far Red spectrums, tailored to all stages of plant growth. Engineered for convenience and efficiency, the MaxiLED DUAL 2290 features a built-in dimmer, dual timers, and a sleek, sturdy design that integrates seamlessly into any grow space.
Its silent operation and easy installation make it ideal for enhancing your growing setup. Thanks to its energy-efficient design, you can benefit from a cooler environment and reduced energy costs without compromising on light quality. Built to last, the MaxiLED DUAL 2290 promises dependable performance and vigorous plant development.
Manufactured and distributed exclusively by Highlight Horticulture. Contact your local grow store for more details.


Improves flowering, resistance, soil, and yields without using a PK fertiliser, enhancer, booster, or enzymes. Green Sensation helps develop stronger cell walls and more organic material. It contains active ingredients in the soil around your plant’s roots and ensures the sap flow gets the proper nutrients. The powerful mixing ratio (1:1000) makes it very economical. There are no hormones, animal-derived residues, GMOs, or other substances that may have a harmful effect. Green Sensation produces the highest yield in every growing situation.
Check out Plagron.com to find a stockist near you.
The MIGHTY TITAN 6 from BudBox is a true monster grow tent! Measuring 600x300x220cm, this beast has 12 port options in four different sizes and is equipped with eight doors, a stack of roof bars, hanging straps, night vision windows, screened passive vents, and so much more. From the UK’s #1 – BudBox – with all the options you need and the quality and reputation to back it up.

Level up your propagation game with Maxibright’s T5 LED lighting fixtures, where old-school reliability meets new-school efficiency. Designed for both compact and larger grow spaces, these fixtures are available in four sizes.They emit a precise 6500K colour temperature, perfect for seedlings and vegetative growth and as a supplementary blue light source.
It’s not just about doing the same job; it’s about doing it better. These fixtures match the traditional fixtures and boast significant energy efficiency, proving that the transition to LED is simple and smart. Witness first-hand how LEDs enhance quality and boost your plants’ start in life.
If you’re after reliability and the latest in efficiency, it’s time to consider an update. Look at how far LED technology has advanced with Maxibright lighting solutions and why so many now trust T5 LEDs for better quality small plants and seedlings.
Manufactured and distributed exclusively by Highlight Horticulture. Contact your local grow store for more details.

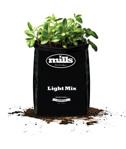
Mills Light Mix is a moderately fertilised (NPK 14-16-18) high-quality potting soil. Perfect for seedlings, cuttings and young plants. This superb peat-based blended substrate contains sphagnum, perlite and specially selected mosses to ensure rapid root development. Combine this substrate with the Mills Nutrients range for the perfect combination to ensure maximum growth, enhancing natural flavours, yield and aroma. A wonderfully airy potting mix that is ideal for home and commercial applications.
Visit GrowWithMills.co.uk for the full range.

Product Details
> 680W Power
> Single channel - Full spectrum
> 6 bar system
> Ideal over a 1.5 x 1.5m area
> Built in dimmer
> 25% - 50% - 75% - 100% power
> Enhanced flowering with added red light
> Uniform light coverage
> Energy efficient, low heat output
> No fans or moving parts, silent running
> Easy one person set up
> 30’000 hour lifespan
> 3m power lead, plug and play
> Control multiple units with link cables

Spectral Graph
Technical Specifications
Product Code: 48418
Efficiency: 2.8 μmol/J @ 230 V AC
PPF (Photosynthetic Photon Flux): 1900 μmol/s
Diodes: White: SAMSUNG Red: San’an
Diode Quantity: 2880 White | 192 Red
LED Bars: 6
Dimensions: 1140 x 1100 x 69mm
Light Distribution: 120°
Footprint: 1.5 x 1.5m
Dimming: Dimmer (on board) OFF-25-50-75-100%
Light Spectrum: Full Spectrum
CCT (Correlated Colour Temperature): 3253K
Input Power: 680W @ 230 V AC
Input Voltage: 220-240V AC 50/60 Hz
Power Factor: 0.98
Net Weight: 9.55kg
Lifetime: 30’000 hours
Environmental and Safety
IP Rating: IP65
Warranty: 2 years
Certifications: CE, UKCA, EMC, LVD
Say hello to the new ATAMI line:
VGN products result from transforming plant waste into solutions for your plants. With these fertilisers, you nourish the plants while supporting beneficial soil micro-organisms. Also, VGN products are certified for organic farming by Control Union.
Discover the entire line:
• VGN 5-2-2: Nitrogen for greener, healthier plants.
• VGN 2-2-4: Potassium for stronger, more robust plants.
• VGN 1-4-4: Phosphorus & Potassium for rich flowering.
• VGN CALMAG:VEGANIC calcium & magnesium supplement.
Combine and adapt them to the needs of your plants.
Find the VGN line in your nearest store.Visit Atami.com/vgn to learn more.
The Underdawg Under Canopy LED is designed to provide essential light to the lower parts of the canopy. The energy-efficient LEDs deliver a predominantly 660nm red spectrum, improving plant health and uniformity from the bottom to the top of the plant. Plants can absorb up to 25% of the available light from the underside of the leaf, leading to an increase in yield.
Traditional overhead lighting often leaves the lower parts of plants in the shade, resulting in uneven growth and reduced yields. The Underdawg Under-Canopy LED is the perfect solution, delivering light to those hard-to-reach areas beneath the canopy.
This LED comes complete with three different stands, power lead, and everything you need to grow.
Choose the Underdawg 120w Under Canopy LED to light up your crop!

The DAYLIGHT 200W PRO from Maxibright is perfect for those looking for a powerful yet incredibly compact LED. A direct upgrade from the original unit, the PRO features an impressive total output of 500 μmol/s and a fixture efficiency of 2.5 μmol/J. The 200W PRO boasts a range of features, including a remote dimmer, IP65 rating (meaning the environment in your grow room poses less threat to the lifespan), and DAYLIGHT Lighting Controller compatibility, giving you even more control over your grow room environment.
Designed to cover a 0.8m x 0.8m perfectly, coupled with the ability to dim the unit’s full spectrum light output, makes the DAYLIGHT 200W PRO a highly applicable unit from propagation through to flowering.
With no fans or moving parts, silent operation, and little heat output, this machine will help you get the most out of the smallest of growing areas.
Visit GrowWithDaylight.co.uk for more information.

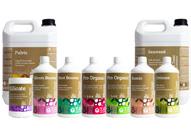
Terra Aquatica is delighted to announce a major update to its organic products! The team at TA has revamped the organic labels (except for Pro boosters and micro-organisms) to help them stand out from the mineral range. They are the same great products with a new look reflecting their natural, organic content.
Check out TerraAquatica.com for information on the full range.

Product Details
> 1000W Power
> Single channel - Full spectrum
> 10 bar system
> Ideal over a 1.5 x 1.5m area
> Built in dimmer
> 25% - 50% - 75% - 100% power
> Enhanced flowering with added red light
> Uniform light coverage
> Energy efficient, low heat output
> No fans or moving parts, silent running
> Easy one person set up
> 30’000 hour lifespan
> 3m power lead, plug and play
> Control multiple units with link cables
Spectral Graph
Technical Specifications
Product Code: 48891
Efficiency: 2.8 μmol/J @ 230 V AC
PPF (Photosynthetic Photon Flux): 2800 μmol/s
Diodes: White: SAMSUNG Red: San’an
Diode Quantity: 4800 White | 240 Red
LED Bars: 10
Dimensions: 1140 x 1185 x 69 mm
Light Distribution: 120°
Footprint: 1.5 x 1.5m
Dimming: Dimmer (on board) OFF-25-50-75-100%
Light Spectrum: Full Spectrum
CCT (Correlated Colour Temperature): 3418 K
Input Power: 1000W @ 230 V AC
Input Voltage: 220-240V AC 50/60 Hz
Power Factor: 0.98
Net Weight: 14.5kg
Lifetime: 30’000 hours
Environmental and Safety
IP Rating: IP65
Warranty: 2 years
Certifications: CE, UKCA, EMC, LVD
up-to-date

Our blog is where we bring you more than we can cover in our print issues; timely news, growing tips, and great ideas. Hundreds of growing articles are waiting for you.


> Dual channel - Full spectrum / UV and FR
> 8 bar system
> Ideal over a 1.5 x 1.5m area
> Built in 2 channel dimmer and timer
> 25% - 50% - 75% - 100% power
> Enhanced flowering with added red light
> Uniform light coverage
> Energy efficient, low heat output
> No fans or moving parts, silent running
> Easy one person set up
> 30’000 hour lifespan
> 3m power lead, plug and play
> Control multiple units with link cables
Spectral Graph
Efficiency: 2.8 μmol/J @ 230 V AC
PPF (Photosynthetic Photon Flux): 2290 μmol/s
Diodes: White: SAMSUNG Red: San’an
Diode Qty: 3200 White | 200 Red | 64 Far Red | 32 UV
LED Bars: 8
Dimensions: 1100 x 1110 x 94 mm
Light Distribution: 120°
Footprint: 1.5 x 1.5m
Dimming: Dimmer (on board) OFF-25-50-75-100%
Timing: Full Spectrum and UV+FR
Light Spectrum: Full Spectrum
CCT (Correlated Colour Temperature): 3337 K
Input Power: 860W @ 230V AC
Input Voltage: 220-240V AC 50/60 Hz
Power Factor: 0.98
Net Weight: 12.3Kg
Lifetime: 30’000 hours
Environmental and Safety
IP Rating: IP65
Warranty: 2 years
Certifications: CE, UKCA, EMC, LVD


#gardenculturemagazine
#gardenculturemagazine
#confessionsofaukhydrostore
#confessionsofaukhydrostore
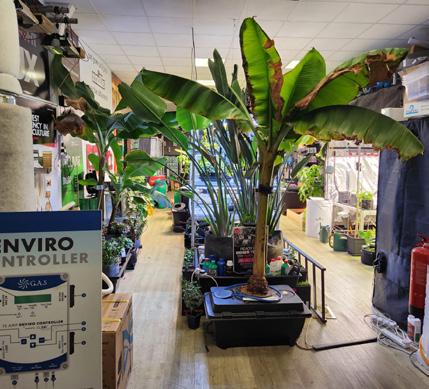
We’re in the confession booth again, and this time Dr Blooms is sharing industry secrets! The hydroponic specialist is one of the UK’s leading suppliers of grow kits, nutrients, and all the latest technology to help you along your growing journey. Read on to find out more about what makes Dr Blooms tick and some of the strangest things spotted in the shop.
What is Dr Blooms best known for?
Dr Blooms is recognised for providing expert advice and educational resources on hydroponics, helping beginners and experienced gardeners optimise their indoor and commercial setups.
You have developed some unique products; what are they, and why did you design them?
We have developed several innovative products under the brand Custom Hydro.
The first is a very clever little venturi designed to fit on most water pumps. Its purpose is to replace air stones and air pumps. The second product we have brought to market is custom-built hydroponic tables explicitly designed for the customer’s needs.
What are some of your favourite products?
Find out more about what makes Dr Blooms tick and some of the strangest things spotted in the shop.
One of our favourite products over the last few years is Psycho Myco. This incredible product is made in the UK. We ran some trials in our showroom against a few other brands, and it won hands down. Nokotech LED lighting has also kept me excited with its innovative products. What amazed me about these guys was that we asked them to custom-build some lights for a huge vertical farm, and six weeks later, we had a prototype in our hands!
Figure 1
How important is your location to your success?
Our location has been great for our success! When we chose this industrial estate 15 years ago, we wanted to ensure we were easily accessible from a main motorway. We are also only 10 minutes from Stansted Airport.
What has been the industry’s most significant change in the past ten years?
Technology has been the biggest change. Automation is moving quickly, and growers can now control their setups remotely.
Looking back, what are the major milestones in Dr Bloom’s evolution?

What advice would you give someone planning to open a new hydro shop?
Do it in Thailand or Spain; they need shops, and the UK is too saturated.
What is the most common question you hear in the shop? Is there anything else I can use to make my flowers bigger?
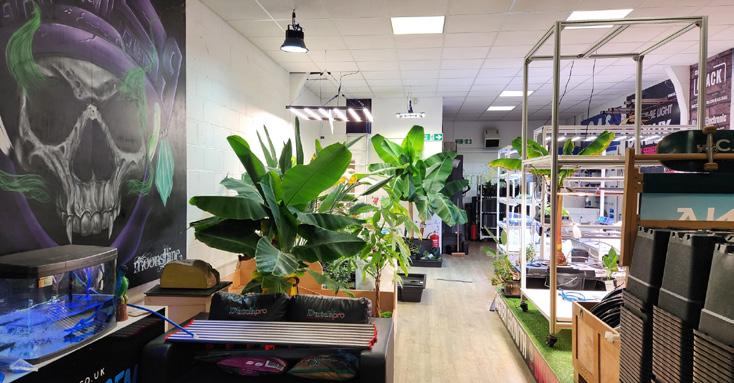
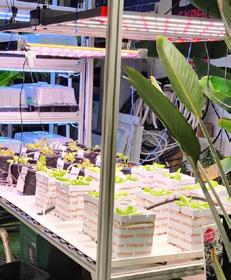
Do you grow plants in the store?
We grow many plants in the showroom using different types of methods. Customers can come in and see systems working with plants growing! We also have many of the latest technology on display that people can play around with before buying. We love to try new products before we offer them to our customers.
What are you most proud of?
Working with some of the biggest vertical farms in the UK and bringing our own products to market.
What is the craziest thing you have witnessed in your shop?
There are too many that we shouldn’t mention, but one was seeing a customer eat four of the hottest chillies in exchange for some free BioBizz. He held it down well until he left the shop. Later, he was found lying down in his friend’s car, drinking engine water! 3
Want to be the next Hydro Store to ‘confess’?
First, we have made it past three years, which is always make or break for many companies. Second, we have been operating for 15 years and working with some of the biggest vertical farms in the UK.
Take a picture of this edition of Garden Culture Magazine in your shop, post to Instagram and tag @gardenculturemagazine. OR Send your info to social@gardenculturemagazine.com
Everest Fernandez introduces the often-overlooked topic of testing runoff solution when growing in soilless substrates.
As someone who’s not shy about sharing his past mistakes on these pages (mercifully limited to indoor gardening), this oversight was huge.
Confession time: During my first decade as a soilless gardener, I grew thousands of plants in stone wool, coco coir, and perlite without ever considering testing the runoff. Yes, you read that right. As someone who’s not shy about sharing his past mistakes on these pages (mercifully limited to indoor gardening), this oversight was huge. I’m ready to explain why testing your nutrient leachate is crucial for soilless growing. So, if you’re new to hydroponics or don’t know what runoff is, this one’s for you!
So, what exactly is runoff? It’s the excess nutrient solution that drains out of your pots, blocks, or slabs after watering. While some hydro setups naturally minimise or eliminate runoff (like passive wicking systems), irrigating your plants so runoff emerges from your soilless media is vital in top-fed systems with coco coir or stone wool.
Here’s my rule of thumb: Aim for 25-30% of your daily nutrient solution to come out as runoff. This practice helps prevent salt buildup in the root zone, which can otherwise wreak havoc on nutrient balance and stress your plants. Think of runoff like clearing the screen of an “Etch a Sketch”—it’s a fresh start.
Growing in soilless media is a different ballgame compared to soil-based container gardening. In pots filled with soilless substrates, the grower provides all the nutrients through the feeding solution. The growing medium primarily offers physical support, water retention, and nutrient storage. This makes it super important to keep tabs on the nutrient environment—and that’s where runoff testing comes into play. Compare this with soilbased potting mixes, where growers aim to minimise runoff to avoid flushing away valuable nutrients.
Neglecting to create runoff when growing in soilless mixes (essentially, under-watering) can lead to nasty consequences like salt buildup, which results in nutrient toxicity. The symptoms— burnt leaf tips, stunted growth, and reduced yields—stem from the selective absorption of nutrients like nitrate, potassium, and phosphorus, while others like sodium, chloride, and magnesium accumulate. Over time, this imbalance stresses your plants and hinders their ability to take up water and nutrients.
Aim for 25-30% of your daily nutrient solution to come out as runoff
Nutrient management should always be considered within the context of your environmental conditions. High air temperatures, low humidity, and intense lighting significantly affect plant health and nutrient uptake, impacting runoff pH and EC.
• High Air Temperatures: Elevated temperatures accelerate plant metabolism and increase transpiration, leading to rapid salt accumulation in the root zone and higher runoff EC. In extreme cases, high temperatures can cause nutrient imbalances or deficiencies when roots struggle to meet increased demand.
• Low Humidity: Low humidity levels create a high vapour pressure deficit, forcing plants to transpire more rapidly. This leads to higher nutrient concentrations in the root zone, as water evaporates faster than nutrients are absorbed. If increasing humidity isn’t an option, lowering the feed solution concentration is the next best step.
• Intense LED Lighting: High-intensity lighting, especially in LED grow rooms, can markedly increase the demand for water and nutrients, causing issues similar to those caused by high temperatures and low humidity. Photoinhibition or light stress can accumulate unused nutrients in the root zone, impacting runoff EC and pH. Use a dimmer to incrementally adjust light intensity to help mitigate these issues.


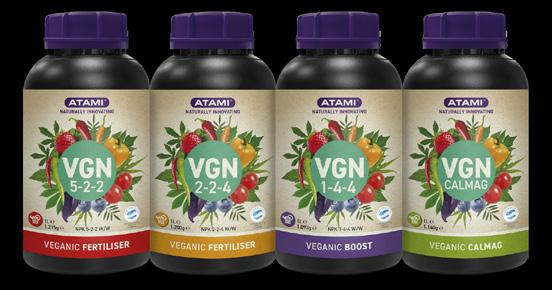
Approved for Organic Farming by Control Union
Nutrients direct available for plant
Rich in micronutrients
Easily degradable in nature
Supports a circular economy


VGN, where sustainability meets innovation. These veganic fertilisers are the result of transforming plant waste into solutions for your plants. All VGN products are certified for organic farming by the Control Union. With VGN fertilisers you nourish your plants while supporting beneficial micro-organisms. A healthy soil life is the foundation for healthy plants!


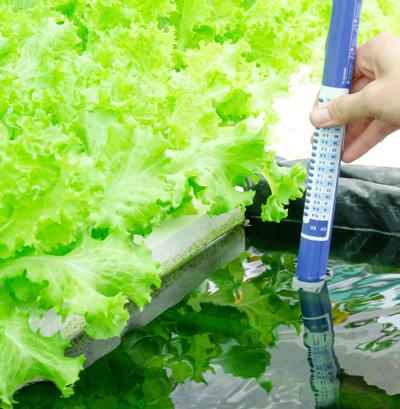
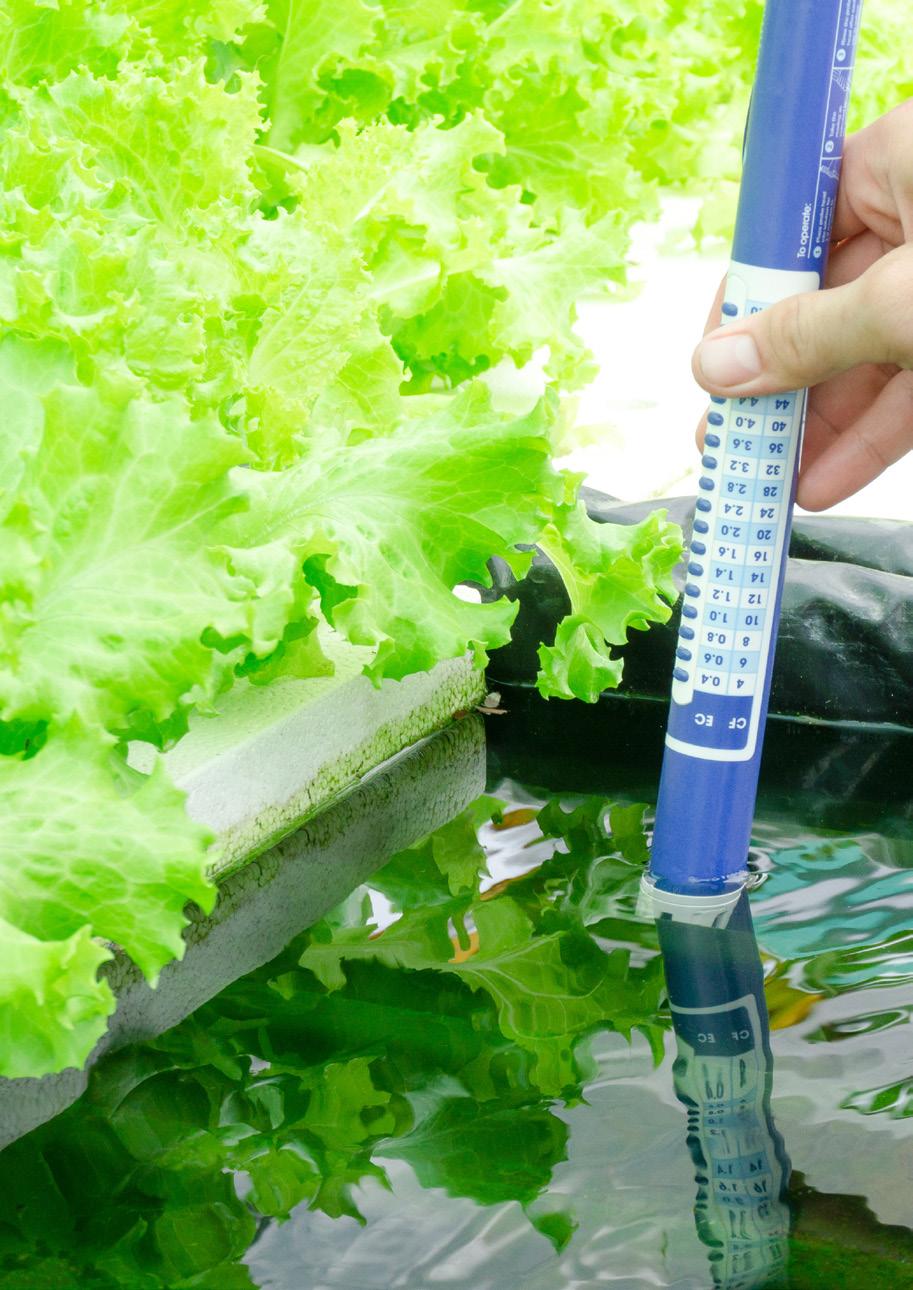
Testing runoff is straightforward. Measure two things: electrical conductivity (EC) (or Total Dissolved Solids (TDS)) and pH
Organic additives like compost teas and hydroponic supplements can significantly influence the pH stability of your nutrient solution and runoff.
• Compost Teas: Rich in organic acids, compost teas can lower the pH of the nutrient solution, leading to a drop in runoff pH. Additionally, the microbial activity they stimulate can alter nutrient dynamics in the root zone, sometimes causing unexpected pH fluctuations.
• Other Organic Additives: Products like humic and fulvic acids, liquid seaweed, and fish emulsions improve nutrient uptake and plant resilience. However, these additives can also affect pH stability, as humic and fulvic acids can chelate nutrients, potentially leading to fluctuations in pH and EC.
Several factors contribute to pH stability in a nutrient solution:
• Buffering Capacity: The presence of bicarbonates, carbonates, and other buffering agents helps maintain pH stability by neutralising acids or bases that might otherwise cause fluctuations.
• Nutrient Composition: The types and ratios of nutrients play a crucial role. Nitrate-based nitrogen raises pH, while ammonium-based nitrogen lowers it. Professional hydroponic nutrient blends often balance these opposing effects to stabilise pH.
• Water Quality: High alkalinity or mineral content in water can cause pH instability. Using reverse osmosis (RO) water or pre-treating water can help create a more stable pH environment.
Testing runoff is straightforward. Measure two things: electrical conductivity (EC) (or Total Dissolved Solids (TDS)) and pH. Start by collecting about 150 ml of runoff after watering. Compare the runoff EC / TDS to your input nutrient solution. If the runoff is more than 20-25% higher, it indicates salt buildup. This can result from under-watering, poor drainage, or over-fertilisation. Gradually reduce the nutrient solution strength until the runoff stabilises, and consider more frequent or longer irrigation events to generate more runoff.
When mixing a remedial feed solution, consider symmetry. For example, if your input solution has an EC of 2.0 mS and your runoff is 2.5 mS, aim to decrease your feed strength incrementally to 1.5–1.9 mS until the runoff returns to your target of 2.0 mS. Conversely, if your runoff EC is lower than your input (though less common), it could indicate rapid nutrient uptake or nutrient retention by the medium. This sometimes happens when plants take up EC-contributing ions like nitrate, potassium, or calcium. Consider reducing irrigation frequency or slightly increasing nutrient strength—but make changes gradually.
A rise in pH could indicate your medium is releasing basic cations, leading to alkalinity. A decrease in pH might signal acidification from nitrate uptake or acidic residues in the root zone. To maintain balance, adjust the pH of your feed solution in the opposite direction of the shift observed in the runoff.
Also, keep an eye on your plants! Pathogens like Pythium (root rot) or Phytophthora can quickly damage the root system, disrupting normal nutrient and water uptake and leading to unexpected pH changes. Compromised roots may fail to absorb acidic nutrients like ammonium efficiently, causing pH to rise. However, to confuse matters, dying roots might release acidic compounds into the medium as they decompose, lowering pH!
High EC in the runoff could mean your plants struggle with salt buildup from over-fertilising or poor drainage. Low EC might suggest your plants are underfed or that you’re not allowing sufficient dry-back with overly-frequent feedings.
When’s the Best Time to Collect Runoff?
Timing is critical when collecting runoff. Collecting it as soon as it appears provides a snapshot of the root zone’s condition, especially after an overnight dry-back period. However, waiting until runoff has flowed for a minute gives a more comprehensive sample, reflecting the entire root zone, including accumulated salts or nutrient deposits.
Try collecting a composite sample over the entire irrigation cycle for consistent data. This method averages out variations within the root zone, making it helpful in identifying long-term trends. However, be cautious, as this approach can mask localised nutrient imbalances.
Once you’ve got your EC and pH readings, it’s time to put on your detective hat. High EC in the runoff could mean your plants struggle with salt buildup from over-fertilising or poor drainage. Low EC might suggest your plants are underfed or that you’re not allowing sufficient dry-back with overly-frequent feedings.
pH fluctuations can indicate issues with your water source, growing medium, or nutrient solution. The goal is to keep your root zone happy and stable, with a pH typically between 5.5 and 6.5 for most soilless systems. Regularly testing your runoff and making informed tweaks based on your findings will help prevent nutrient lockout, reduce plant stress, and optimise growth and yield.
Looking at some hobby indoor grows online, it’s clear I’m not the only one who’s neglected runoff testing. It’s not just an optional extra—it’s a must for anyone serious about mastering soilless growing. You’ll gain valuable insights into what’s happening in your root zone and be able to make the necessary adjustments to keep your plants thriving.
Once runoff testing becomes a daily habit, it will become second nature. You’ll sidestep the pitfalls of salt buildup, nutrient imbalances, and pH fluctuations before they become visible in the aerial parts of your plants. Remember, consistency is vital—the more regular your testing and tweaks are, the happier and more productive your plants will be. 3
Everest Fernandez is a well-respected industry educator, veteran hydroponic grower and grow light enthusiast, based in France. He works primarily as a marketing and cultivation consultant and was the founding editor of Urban Garden Magazine in the UK, US and Canada. He also writes and researches for the popular hobby horticulturalist YouTube channel, Just4Growers.


Available in 4 Sizes:
2ft (2 tube) 2ft (4 Tube) 4ft (4 Tube) 4ft (8 Tube)


Energy e cient LED lighting for propagation, supplementary and aquarium applications
Low heat output
50’000 hours lifespan
Colour Temperature: 6500K
Ideal for seedlings, vegetating plants & supplementary blue lighting
Low running costs, up to 50% more e cient than T5 fluorescent tubes
Superior light quality for enhanced plant growth
Highly reflective aluminium reflector
2 x hanging points (horizontal or vertical)
3.1m power cable
Spare T5 LED tubes also available


Two primary reasons stone wool (aka Rockwool) is popular with commercial growers are productivity and consistency. Without this duo front and centre, commercial growers don’t stay in business for long! Stone wool cultivators consistently achieve higher yields because of stone wool’s unique physical characteristics— but there’s also some additional stone wool-specific know-how required to realise all the benefits.
The porous ‘super-material’ created by spinning molten stone wool fibres allows stone wool cubes, blocks, and slabs to hold an incredible volume of nutrient solution while still providing excellent aeration—even when fully saturated. This unique feature makes stone wool stand out from other growing mediums. The fibres are arranged to ensure nutrients are evenly spread throughout the material, making it easy for roots to access moisture without much effort.
Because stone wool has a low cation exchange capacity (CEC), it doesn’t hold onto nutrients tightly, so they are readily available for plants to absorb. This leads to efficient nutrient uptake and less
Stone wool can quickly rehydrate after drying out, helping growers maintain optimal moisture levels.
Stone wool can quickly rehydrate after drying out, helping growers maintain optimal moisture levels. These combined properties support strong root growth, improve nutrient uptake, and produce healthier plants with minimal water and nutrient waste.
Here, we’ll explore tips and tricks to help seasoned growers and enthusiastic amateurs get the most out of their stone wool
Before using stone wool, it’s crucial to ensure it’s properly saturated and drained. This step helps achieve uniform water content and prevents issues like water channelling. Thoroughly saturate the stone wool blocks with a nutrient solution matching the one you’ll use during early plant growth. Allow the blocks to drain thoroughly for at least 15–30 minutes before use to ensure they are evenly moist but not waterlogged.
Precision irrigation is critical to maximising the benefits of stone wool. That means shot-sized irrigations, typically every 30 to 60 minutes, during the lights-on period. Unlike soil, stone wool requires more controlled watering to maintain ideal moisture levels and prevent water channelling.

Implement a multi-phase irrigation strategy:
• Phase 1 (P1): Start with frequent, small irrigations to build up water content without causing excessive runoff.
• Phase 2 (P2): Adjust irrigation frequency based on plant growth and environmental conditions to maintain steady moisture levels.
• Phase 3 (P3): Allow a dry-down period before lights off to encourage root aeration and prevent pathogen growth.
Drip irrigation is highly recommended for stone wool. This method allows precise control over water and nutrient delivery, ensuring each plant receives the right amount. Use pressure-compensated drippers to ensure uniform water distribution. To ensure even saturation, place two drip emitters per stone wool block, positioned at opposite ends.
Maintaining stable electrical conductivity (EC) and pH levels is vital for nutrient uptake. Stone wool’s inert nature means it won’t buffer nutrients, so regular monitoring is crucial. Invest in reliable EC and pH meters and check your levels daily. Commercial growers can push their plants in stone wool with higher EC nutrient solution.
Crop steering involves manipulating environmental factors to promote vegetative or generative growth. Stone wool’s responsive nature makes it the ideal platform for experimenting with these techniques.
• Vegetative Steering: Apply more frequent, smaller irrigations with lower EC to promote leaf and stem growth.
• Generative Steering: Reduce irrigation frequency, increase EC slightly, and allow for more significant dry-back periods to encourage flowering and fruiting.
Some growers mistakenly believe that stone wool isn’t compatible with beneficial microbial products. The
diametric opposite is true!
Water channelling can lead to uneven water distribution, dry spots, and root health problems. Proper irrigation techniques and substrate management can mitigate this issue.
Perform regular weight checks on your stone wool blocks to ensure even water distribution. Adjust your irrigation strategy or reposition your drippers if you notice significant weight differences.
Some novice stone wool growers make the mistake of transplanting seedlings and cuttings too early. Don’t get overexcited when white fuzzy roots pop out of the propagation cubes in record time! It’s best to wait a few more days until roots are prolifically coming out of the cubes before making the move.
Hold fire until you see a robust root system emerging from the stone wool cubes before transplanting. During these crucial extra days, keep a close eye on moisture levels to ensure the cubes remain adequately moist without being waterlogged.
Some growers mistakenly believe that stone wool isn’t compatible with beneficial microbial products. The diametric opposite is true! Incorporating microbial and beneficial biology products improves root health and pushes nutrient uptake even further! Early inoculation and regular re-inoculation with beneficial microbes is highly recommended. 3
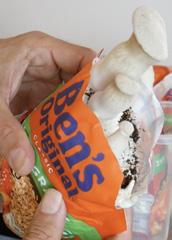
Growing mushrooms can seem like a very serious business – all high-tech kit and complicated procedures. Fortunately, many mushrooms – like the delicious oyster, the fancy nootropic lion’s mane and other therapeutic species – will grow happily on pre-cooked microwaveable rice. Let me show you how to use this supermarket staple to produce a range of mushrooms straight from the bag – in as little as five weeks from start to finish. Introducing “Ben’s Tek!”
(This technique was created by a man who calls himself ‘90 Second Mycology’. I humbly thank him for making mushroom growing more accessible to the world.)
In “Ben’s Tek,” bags of pre-cooked rice become the ‘soil’ for a fungus to grow in. Mycelium will grow through the rice, and then we can produce a small crop of mushrooms straight from the bag. For bigger yields, mix the rice with other ‘soils’ or substrates in larger containers, where it can act as mushroom ‘seeds’. In this article, we will focus on growing straight from rice bags.
When growing at home, mushrooms need a sterile space to start their lives and a warm, moist, and highly nutritious environment to thrive.
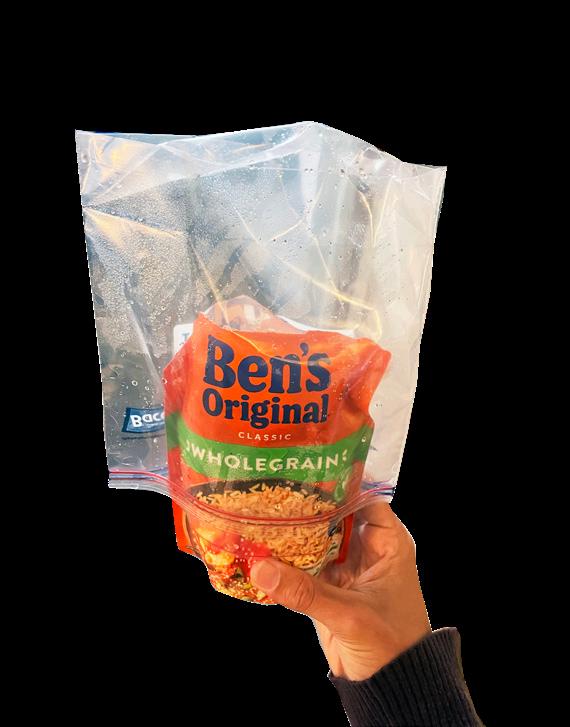
Microwaveable rice is already sterile, so your mycelium will have no competition when colonising its new empire (if we can protect our bags from mould invasion!). The rice also has a good texture and moisture content for fungi to thrive.
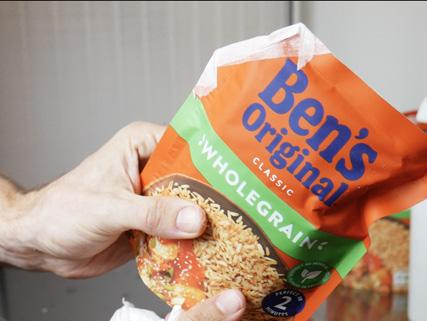
It’s essential to use brown (or ‘wholegrain’) rice, which prevents it from disintegrating into mush. The technique is commonly called ‘Ben’s Tek’ after the famous ready meals company (formerly ‘Uncle Bens’), but other packs work too. Cheaper ‘own brand’ packets can be even better for growing mushrooms than fancy ones. Just make sure your bags have some clear space (usually on the bottom) so you can see what’s happening inside.

In “Ben’s Tek,” bags of pre-cooked rice become the ‘soil’ for a fungus to grow in
The Underground Phase:
• A ‘spore syringe’ or ‘liquid culture syringe’ for the type of mushroom you want to grow. This is where the original mushroom genetics come from. A quick Google search will find you plenty to choose from.
• A clean place to inject your rice. This can be a clean bathroom floor, a purpose built Still-Air-Box or a laminar flow unit (see “How to Make a Home Mushroom Laboratory” in this issue for more on keeping clean!).
• Alcohol wipes or spray (70% isopropyl alcohol works best).
• Clean scissors.
• “Micropore” tape (breathable medical tape).
• A dark, warm place for ‘colonisation’.
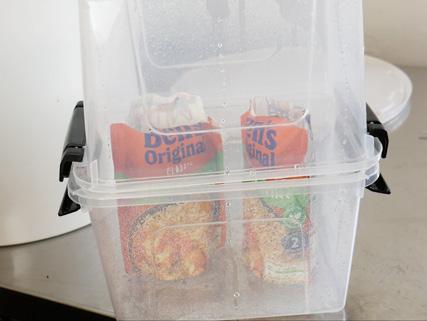
The Overground Phase
• Two lunchboxes to contain the bags while mushrooms are growing – or a plastic bag to act as a ‘fruiting chamber.’
• A little coconut coir and a kettle if you are growing top-fruiting mushrooms.
• A spray gun of water to keep the mushrooms humid.

the delicious oyster, the fancy nootropic lion’s mane and other therapeutic species – will grow happily on pre-cooked microwaveable rice

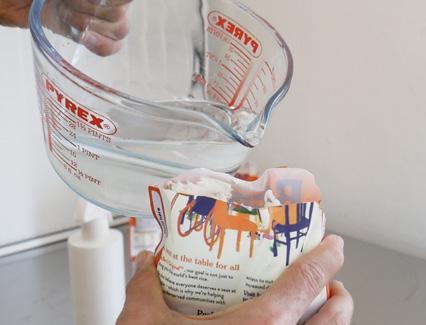


Inoculating and ‘Colonising’ your Rice Packets
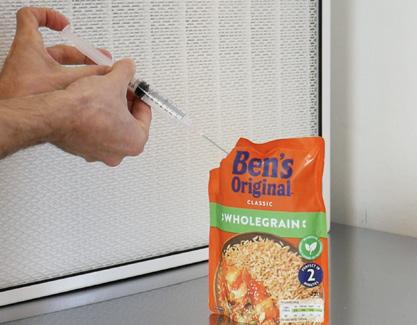
1. Gather your rice bags and spore or liquid culture syringe. Put them in your Still-Air-Box or other clean space. Remember that the cleaner you are here, the more successful you are likely to be.
2. Clean your bags, scissors, and hands/wrists with alcohol, and gently chop the top corner off each rice bag. Uncap your syringe and inject 0.5 ml of spore/culture solution into the hole in each bag. If your needle touches anything, hold it in a
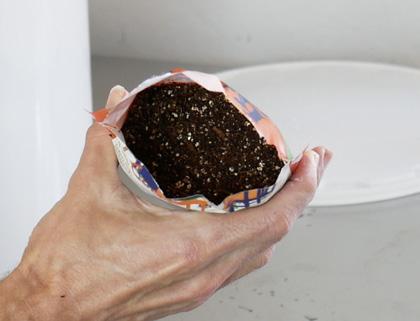
1. After a week or two, you will notice some white mycelium beginning to grow in your bags. Check the bottom of the bag or wherever you can see clearly inside.
2. If you see any colours other than white—or if you see sludgy rice—you are growing mould or bacteria. Remove that bag from the others and throw it away so the contamination doesn’t spread to other bags.
3. When you see white in the bottom of your bags, massage them gently to break up clumps and redistribute the mycelium. Be careful not to touch the micropore tape with the rice or your fingers while you do this! Massage your bags again a week or so later when you see a thicker layer of mycelium starting to form.
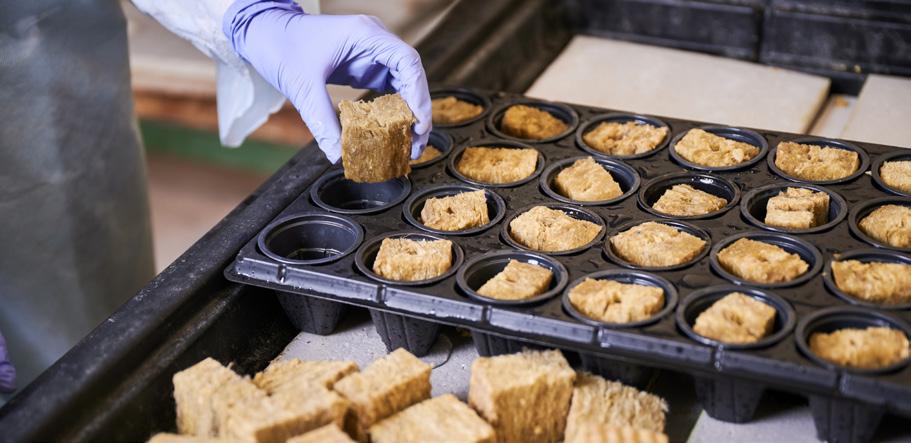
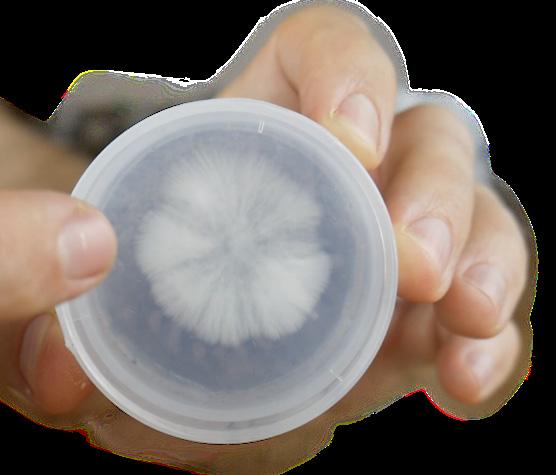
After three to five weeks (depending on your temperatures and other conditions), your bags should be fully colonised— solid white blocks of rice!
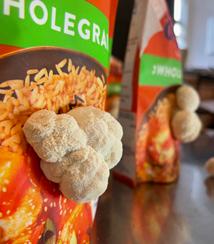
Fruiting from the bag – ‘Top-fruiting’ mushrooms (like king oyster, chestnut or other therapeutic
Pour boiling water over a little coconut coir to hydrate and pasteurise it. When cool, gently squeeze out the excess wa-
Tear off the top of the rice bag and fill it with tap water. Leave it for a few hours to rehydrate the rice, and then drain. Massage the top layer of rice through the bag to make a flat surface for growing mushrooms.
Add a thin layer of pasteurised coconut coir to the top of the bag and flatten it gently out. Wipe the inside of the top of the bag to keep things clean.
OR… Fruiting from the bag – ‘Side-fruiting’ mushrooms (like regular oyster and lion’s mane)
Cut an ‘X’ shape, a few inches long, on the side of each colonised bag. Make sure to use a clean blade. Put the whole bag in a bowl of water to soak for a few hours.


Symbiosis between fungi (myco-) and plant roots (-rhiza)
Assists 90% of plant species
Exists for 400 million years, known for 150 years, extensive research over 50 years
Effectively extends (10-100X) plant root system
Obligate mycotroph plants, require mycorrhizae to grow optimally
Rarely found in commercial growing media


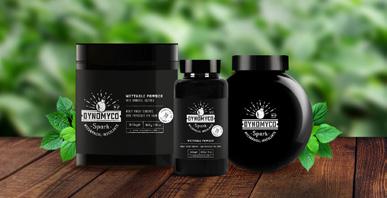
a unique blend of mycorrhizae, Mycorrhizae Helper Bacteria (MHB), and biostimulants - supports plants throughout the entire growth cycle. With mycorrhizae underpinning your rhizosphere, beneficial bacteria availing nutrients for your plants, and bio-stimulants enhancing growth, DYNOMYCO Spark gives your plants a head start with ongoing benefits.
HIGH CONCENTRATION = FASTER INOCULATION AND POTENCY
3600 endomycorrhizal propagules/g
Beneficial bacteria including Mycorrhizae Helper Bacteria (MHB)
Growth enhancers & biostimulants

THE DYNOMYCO® DIFFERENCE

BEST OF BREED
World's leader in Mycorrhizal production
Decades of R&D

DYNOMYCO Spark's unique wettable powder formula is easy to use. It is designed for use as a drench or in irrigation systems with a filter size greater than 250μm (less than 60 mesh).
A mushroom feast!

King oysters fruiting from the top of the bag
1. Create a humid environment for your bag. Place another (clear) bag on top of it or put it inside a lunchbox ‘dome’. This will be your makeshift ‘fruiting chamber’—you can make a purpose-built one later if you catch the growing bug!
2. Spray the inside of your ‘fruiting chamber’ a few times daily with your water gun on a fine mist setting. When you do this, waft your bags with a book to bring fresh air into the growing environment.
3. Pretty soon, you’ll see baby mushrooms appear. Keep wafting and spraying until they’re ready to harvest (the mushroom caps will start breaking away from their stems when it’s time to pick).
1. For most mushrooms, grabbing and twisting them gently will work well to pick them with minimal damage to the surface of the bags.
2. If you need to cut your mushrooms (like if you are growing lion’s mane), cut as close as possible to the bag or soil surface.
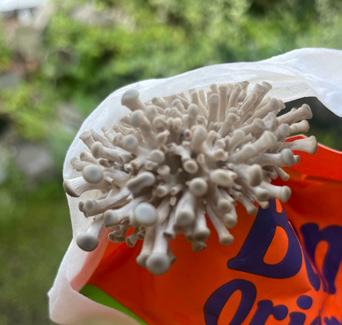
Impatient oysters bursting out of the inoculation hole
1. Fill your bags with water again – or soak them in a bucket of water for a few hours. Drain.
2. Put your bags back into ‘fruiting’ conditions. You should get another ‘flush’ or two of mushrooms over the coming weeks!
Using this method, I have successfully cultivated blue oyster, king oyster, lion’s mane, and chestnut mushrooms. Other medicinal varieties can also work well. I am sure more is possible, so get creative and see what you can grow! 3
They’re getting a lot of attention now – among foodies, health seekers and ecologists alike – and this is
Stay tuned for more specific guides from Alex in future issues of Garden Culture Magazine. You can download your free Healing Mushrooms Grow Guide from Alex’s website and check out his latest growing course at fungitribe.com Follow on Instagram: @fungi_tribe 3
For more on growing edible mushrooms at home, check out Alex’s online course ‘Growing Mushrooms for Business and Pleasure’: udemy.com/share/103MHe

BY ALEX FIELD

This is real-life magic, and you can do it all with a basic kit inside your home
Working with mushroom mycelium is where sci-fi becomes a reality—cloning mutant mushrooms, growing spores in fractal patterns on Petri dishes, and training mushroom genetics for new varieties that have never existed. This is real-life magic, and you can do it all with a basic kit inside your home.
“With up to 10,000 spores in a cubic metre of air, many people grow more mould than mushrooms
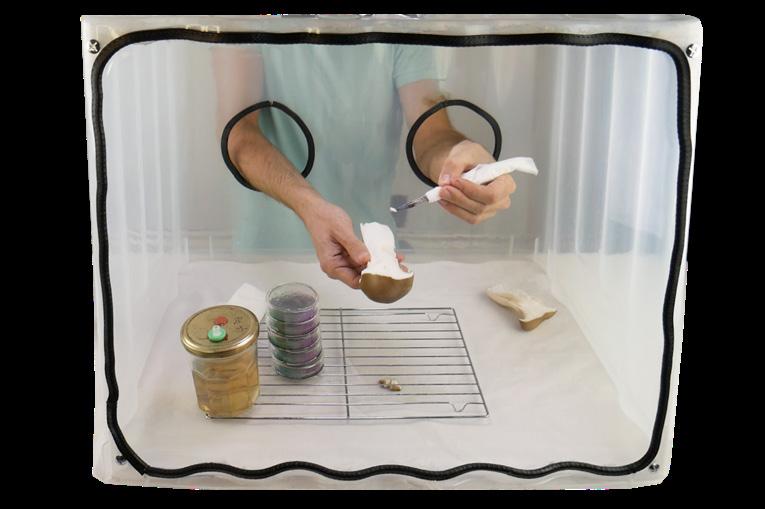
Whether you’re looking to breed the perfect strain of mushroom – or get your grow on without contamination – Rule Number One for mycology is to have a clean workplace. Here are two options for doing sterile lab work at home.
With up to 10,000 spores in a cubic metre of air, many people grow more mould than mushrooms. This low-tech approach uses water vapour to ground particles in the air. This can create a clean enough environment for inoculation and other jobs that don’t involve lots of open-air exposure.
1. Clean your bathroom well.

Making a Still-Air-Box
2. Have (or run) a hot shower with the window and door closed. Let the room get steamy.
3. Turn off the shower, leave the room, and shut the door.
4. Come back in an hour later when the water vapour has landed. Ensure your hands and arms are clean and move slowly to avoid unnecessary air currents.
5. Now you can do your work!
This breathtakingly simple method allows for some proper geeking out. By obstructing airflow, particles inside the box are grounded, creating a sterile space. I have done open-air work with Petri dishes, clones, and spores inside one of these with a very high success rate.
Note: Avoid the temptation to stick gloves on the inside of your box – unless your unit is airtight. Moving in and out with gloves on can create air suction elsewhere and create a storm inside your box. It’s much better to make holes slightly bigger than your arms, as in this method.
1. Take a plastic box that’s big enough to move your arms around and contain whatever you will be working with. Around 110 litres is a good size. You will need a taller tub if you’ll be working with big bags of grain or substrate.
2. Take the lid off and turn the tub upside down. Put it on your table or wherever you will be doing your work, and mark with a pen where your arms will comfortably fit.
3. Take a 4-inch hole saw (bigger if you’ve got wide arms) and gently drill arm holes in the side of your tub. Go slow here and put your drill on reverse to prevent the tub from cracking. If you don’t have access to a hole saw, you can use a very hot, wide tin can to melt holes (not pleasant or advised!).
4. Clean off any loose bits of plastic, and you’re good to go!
When I do lab work with a Still-Air-Box, I lay a shower curtain on my work surface, spraying and wiping everything with 70% isopropyl alcohol (including my clean arms and hands). I like to put an over-grill tray on the tabletop so that I’m not disturbing any grounded particles when I pick things up and put them down. Then, I put my upturned Still-Air-Box on top, clean my arms and hands well, and get to work!
Get a Laminar Flow Unit
It took me years of serious mycology to get one of these. They’re not cheap and take up a lot of space, but they’re excellent for the hardcore mycologist.
Laminar flow units contain high-quality HEPA filters and push a steady stream of clean air over your work surface. This means guaranteed sterility for open-air lab work. I can leave Petri dishes and test tubes open in front of mine, and if my kit (and my hands) are clean, no baddies are getting close.
Stuck for Choice?
My advice? Start with a Still-Air-Box. They’re easy and cheap to make and incredibly effective. If you catch the bug and decide to go pro one day, you can consider an upgrade. 3

BIO Alex, the founder of Fungi Tribe, loves empowering people to grow their own food and medicine. He has taught over 6,000 students worldwide to cultivate mushrooms at home. For more information visit fungitribe.com or follow Alex on Instagram at instagram.com/fungi_tribe

You’ve probably heard of the butterfly effect—the concept that even the smallest actions can create ripples, leading to much larger consequences.That applies to your garden, too.While it’s easy to focus on the square footage of your planter boxes, the choices you make out there can affect the wider environment, especially when it comes to water quality.
Pollution prevention gardening is all about those smart, sustainable choices that keep our water clean, so let’s dig into your garden routine and find how you can make a big splash in protecting our water sources.
We’ll start by covering some of the basics of soil displacement:
Soil Runoff
It may not look like it, but your garden has the potential to wreak some serious havoc downstream if you’re not careful. When intense rainfall hits, it doesn’t just mess with your soil structure; it can also wash away that precious soil, along with any nutrients or pesticides it’s carrying. When accumulated, these materials directly affect local ecosystems.
Slowing down and managing runoff, allowing water to soak into the soil, is crucial to reducing potential damage from pollutants.
• Hard surfaces like concrete are the ultimate runoff culprits. Instead, opt for gravel, porous concrete, or mulch to give that water somewhere to go.
• Got sprinklers? Make sure they’re not watering your driveway; it’s not thirsty. Adjust your watering schedule, aiming for the cool hours between 10 PM and 6 AM.
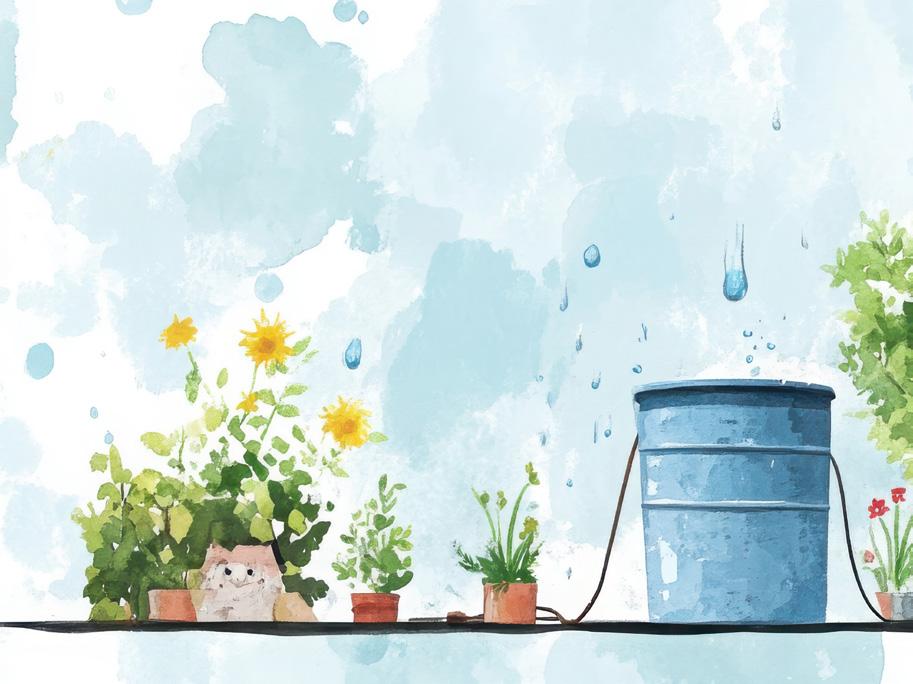
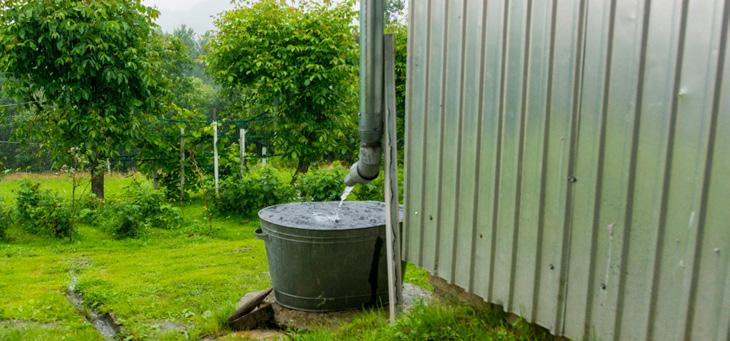
• Set up rainwater collection on hard surfaces. Two birds, one stone: rainwater is prevented from washing down your concrete, and you get water to reuse in your garden, on your car, or lawn.
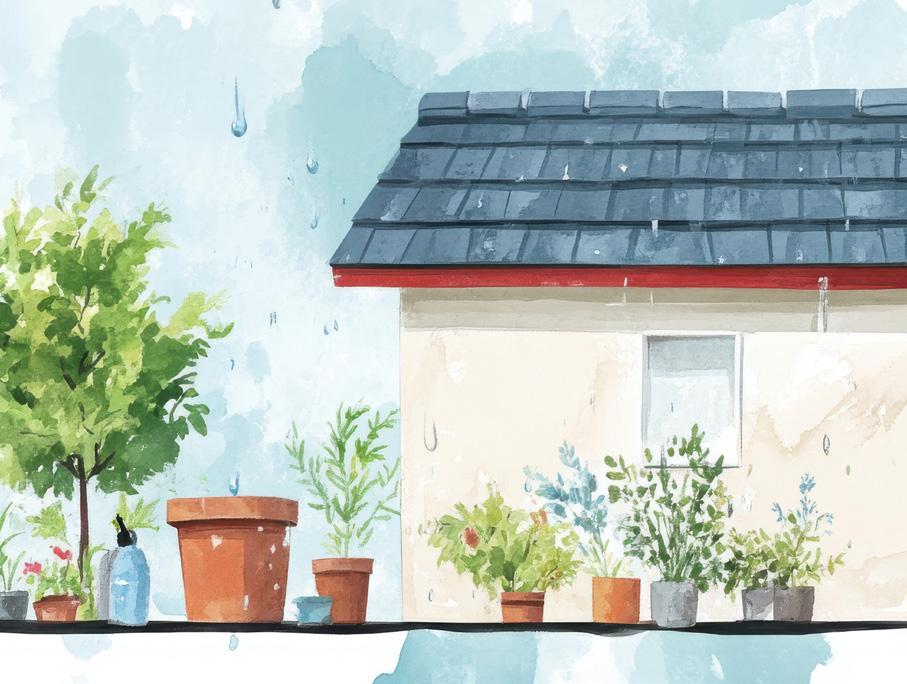
• Direct roof runoff to grassy areas, mulched beds, or a rain garden of native plants, shrubs, and trees that allow water to soak into the ground.
• Healthy lawns aren’t just for show—they’re great at soaking up runoff, trapping sediments, and keeping chemicals out of our water.
You’ve probably heard of the butterfly effect—the concept that even the smallest actions can create ripples, leading to much larger consequences
Landscape features like swales and berms can help slow and redirect water, especially on properties near streams or ponds. Creating buffer strips of woodland and grass near water bodies is also highly effective in filtering pollutants and providing habitat for wildlife.
Soil erosion occurs when valuable topsoil is displaced by water or wind, polluting waterways with sediment and nutrients. This sediment clouds the water, stresses aquatic life, and accumulates in stream beds, destroying habitats and reducing water depth. Signs of soil erosion may include exposed tree roots, soil splashes on buildings, small gullies forming, stream channels widening, and sediment piling up in low spots or on the pavement.
Erosion Defense Tactics:
• Stabilise slopes with vegetation.
• Avoid over-tilling; use mulch or cover your crops instead.
• Maintain ground cover, create water diversions, and leave vegetative buffers around your property to keep that soil where it belongs.
Now that we know how our soil can become displaced through runoff and erosion, let’s discuss what it carries and why it can harm the wider environment.
Fertiliser: Friend or Foe?
Fertilisers, whether synthetic or organic, provide essential nutrients for plant growth– but you know what they say about too much of a good thing. According to the U.S. Environmental Protection Agency (EPA), excess fertiliser in a body of water can cause eutrophication.
In this case, that means an excess growth of algae that deprives an aquatic ecosystem of sunlight and oxygen, killing off animals and underwater plant life.
So what are the main nutrients in fertiliser, what do they do for our gardens, and why are they so dangerous when allowed to run rampant?
• Nitrogen (N): Crucial for plant growth but prone to leaching and runoff, especially in its quick-release form. Nitrogen creates algae blooms and can easily be lost through runoff or erosion.
• Phosphorus (P): Essential for root development and flowering, phosphorus is less mobile than nitrogen but creates algae blooms if attached to eroded soil particles carried into waterways.
• Potassium (K): Enhances plant drought resistance and disease resilience. While it can leach into the soil, potassium isn’t usually the troublemaking type.
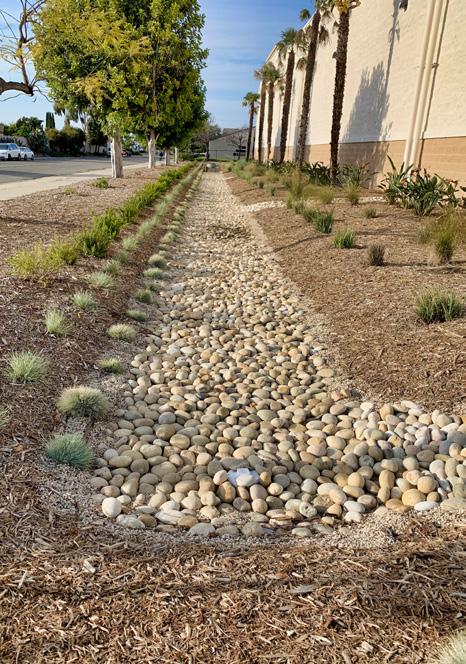
Water harvesting landscape to catch store and re-use storm water.
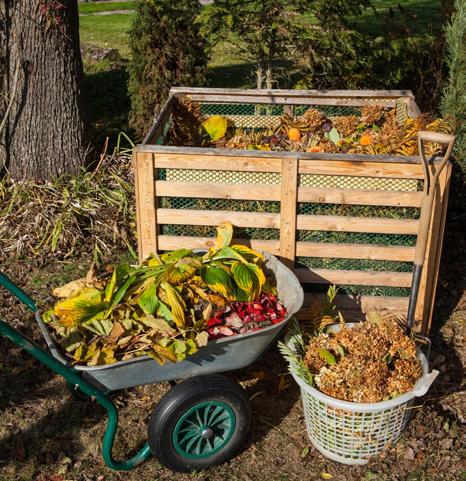
Composting yard waste is an excellent way to recycle organic material.
Nutrient Know-How
Careless or excessive use of lawn and garden fertiliser can contribute significantly to nitrogen and phosphorus pollution in our streams, rivers, lakes, and coastal waters.
Want to minimise the environmental impact of your fertilisers? Keep these tips from the EPA in mind:
Before applying fertiliser:
• Conduct soil tests to determine nutrient needs.
• Calibrate fertiliser spreaders.
• Maintain grass borders around vegetable gardens.
Choosing the right fertiliser:
• Opt for slow-release fertilisers to cut back on nutrient leaching.
• Use iron supplements to green up lawns instead of extra nitrogen.
Timing of fertiliser application:
• Apply two-thirds of the nitrogen just before plants enter a growth phase.
• On sandy soils, make split, light applications of nitrogen.
How much to apply:
• Limit nitrogen applications to no more than 1 pound per 1,000 square feet per session.
Application methods:
• Use a drop spreader to avoid spreading fertiliser onto hard surfaces.
• Incorporate fertiliser into the soil where possible and water lightly afterwards.
Prevent fertiliser runoff:
• Avoid applying fertilisers to hard surfaces or near natural drainage areas.
• Sweep up and reuse any fertiliser that falls on non-soil areas.
• Don’t apply if wind or rain are in the forecast.
• Monitor your watering practices to avoid irrigation runoff and adjust as needed.
Slowing
down and
managing runoff, allowing water to soak into the soil, is crucial to reducing potential damage from
pollutants

Every smart choice you make in your own backyard has the power to ripple out and affect our broader waterways, from local streams and rivers to the oceans beyond
Like fertiliser, less is more… and none may be best regarding pesticides. According to the U.S. Geological Survey (USGS), “pesticides can reach water-bearing aquifers below ground from applications onto crop fields, seepage of contaminated surface water, accidental spills and leaks, improper disposal, and even through injection waste material into wells.”
If you must use them, read the labels and follow directions to avoid improper use and potential pollution. Only apply chemicals when it’s not windy and at least 48 hours before a rainstorm.
Minimising or eliminating your usage entirely keeps the environment and your family safe.
Perhaps even more important than correct pesticide application is proper disposal. Improper disposal of unused pesticides, such as flushing them down sinks or dumping them outdoors, can seriously contaminate groundwater and surface water and impair waste treatment systems.
The Texas A&M University Horticulture Department recommends cleaning equipment thoroughly, disposing of any leftover mixtures according to label instructions, and triplerinsing empty containers before appropriately disposing.
Yard waste, including grass clippings, leaves, compost, and manure, can contribute to nutrient pollution in rivers, lakes, and streams when carried by stormwater into street gutters and ditches. Since stormwater runoff isn’t treated, it can directly introduce pollutants into water bodies, especially increasing phosphorus levels. To prevent this, avoid directing clippings into streets or ditches and promptly remove them from hard surfaces.
• Instead of bagging clippings, leave them on the lawn to decompose naturally, reducing the need for additional fertiliser by up to 30%. (Pro tip: A mulching mower can help produce smaller clippings that integrate more easily into the turf.)
• Composting yard waste is an excellent way to recycle organic material. Use compost in planting beds or designate a natural area for disposing of larger organic debris like fallen leaves and branches.
• Pet waste isn’t fertiliser. It’s not compost. And you don’t want it in your water. Dispose of it properly by flushing, burying, or trashing it.
In past issues, I’ve covered how to keep your garden healthy by safeguarding the water that nourishes it. But let’s not forget that the water in your garden is just one drop in the vast cycle that sustains life on Earth. Every smart choice you make in your own backyard has the power to ripple out and affect our broader waterways, from local streams and rivers to the oceans beyond.
The truth is, the water cycle doesn’t stop at your garden gate. It connects our communities, our ecosystems, and our planet. By adopting sustainable practices and being mindful of how we interact with our environment, we contribute to a healthier, more resilient world.
So, as you continue to nurture your garden, remember that you’re also playing a vital role in the larger effort to protect our precious water resources. The more we do to care for our waterways, the better off we’ll all be—plants, people, and planet alike. 3
The truth is, the water cycle doesn’t stop at your garden gate. It connects our communities, our ecosystems, and our planet
BIO Raised with an emphasis on the importance of clean water, Keaton Haines brings a unique blend of expertise to the world of gardening through his copywriting background. A keen eye for detail and passion for verdant landscapes drive him to explore water challenges and solutions in the grow industry. With water quality concerns on the rise, Keaton is committed to empowering gardeners with the knowledge to foster clean and contaminant-free gardens. When he’s not writing, Keaton can be found lifting weights, hiking outdoors, or cultivating his cactus collection — all while listening to new classes and podcasts.
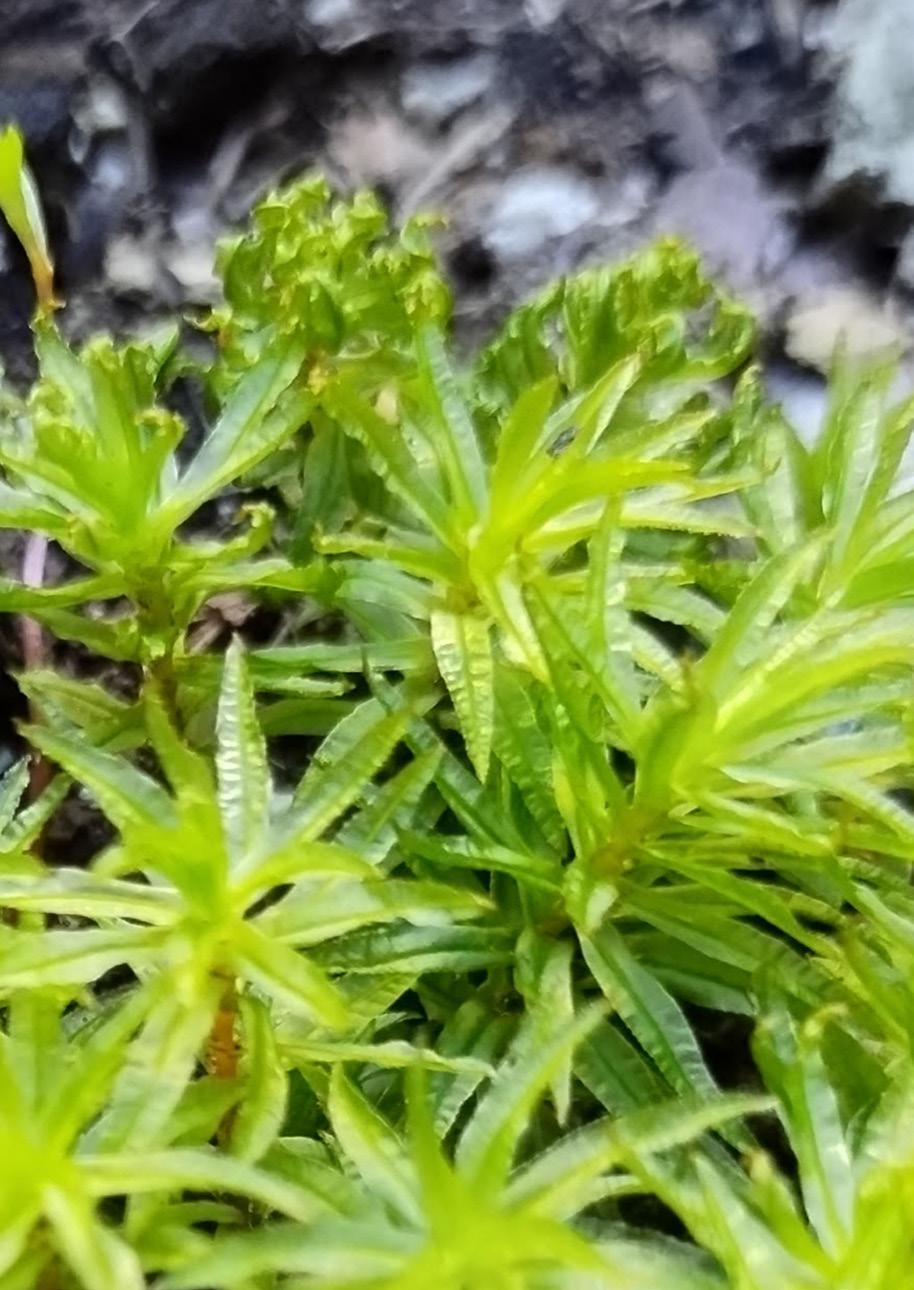
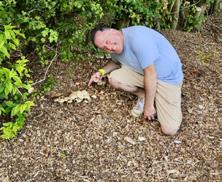
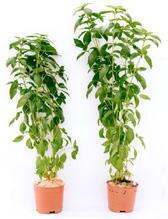
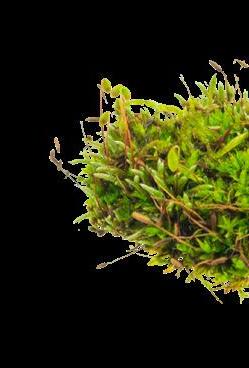
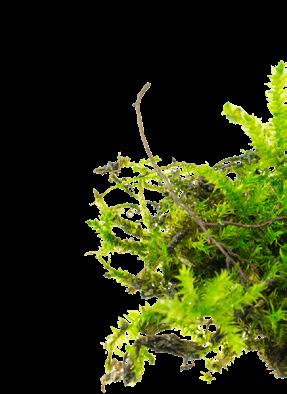
Moss is an ancient plant providing modern-day ecological services.
There are over 12,000 moss species, and a few have found homes in Melanie Semlacher’s garden [1]
“I absolutely love moss. I find it magical, and the many varieties of mosses have such great beauty,” she says. “I can never understand why people want to get rid of it.”
Before we understood that lawns were more than grass, gardeners discouraged moss. They applied lime in the spring to change the soil’s pH balance and deter moss from growing [2]. Now, moss is recognised for its ecological service to the garden and as one of the oldest plants on Earth.
Before we understood that lawns were more than grass, gardeners discouraged moss
Researchers at the University of Connecticut have traced moss’s family tree back over 400 million years. According to scientists, early mosses were crucial in forming soils by breaking down rock surfaces and creating a habitat for other plants and microorganisms [3]
Moss has many unique characteristics. Without roots, the plant sucks in needed nutrients and water through its leaves. Made up of individual plants clumped together in colonies, the spongy mat we associate with moss comprises dead layers of organic material. As the tiny leaves of each plant die, they fall to the ground along with the decaying stems of the plant. These layers create the spongy surface from which moss grows.
Moss doesn’t rely on pollinators to propagate; it reproduces through fragmentation. One part of the plant breaks off to form a new plant, explaining how moss grew millions of years ago before bees and other pollinators evolved [4]
One of the enigmas of mosses is the misconception that they only thrive in shady and damp conditions. Many varieties are drought tolerant. Moss is found everywhere, from deserts to alpine meadows, rainforests, caves, and even on the edges of glaciers. Its adaptability and resilience have scientists speculating that some Antarctica varieties may survive on Mars in addition to our gardens.
A paper published in Innovation describes how researchers replicated the Mars environment to see if moss would grow, and it did [5]
“I think another reason I love moss is that we inherently recognise that it is ancient and part of an evolved and complex ecosystem,” Semlacher says.
With feet firmly planted on planet Earth, for now, mosses prove they are the stars of biodiversity in the garden.

“Moss acts as a tiny ecosystem for small insects, “says Sheri Friesen, a Chilliwack, B.C. gardener and another moss ad vocate.
In Ontario, spotted turtles spend winters sheltering under sphagnum moss. The moss acts like a blanket, keeping the animal warm and snug until spring [6] .
Mosses are excellent at binding soil, which helps control erosion. Their dense mats protect soil surfaces and absorb water, reducing runoff and soil loss. By acting as mulch, they warm up or cool down the soil, helping to reduce humidity in the garden, which can cause fungal diseases like powdery mildew [7]
Remember, mosses absorb nutrients through their leaves and grab impurities from the atmosphere, making them excellent carbon sinks. In urban environments where air pollution is a concern, having a moss garden is a natural air purifier. This has made mosses popular for living roofs and walls in cities.
Because of their drought tolerance, mosses make an excellent replacement for grass lawns. Once established, moss requires little water. As primitive plants, mosses have learned to grow in low-nutrient environments so they don’t need synthetic fertilisers, which add greenhouse gases to the atmosphere [8]


Because of their drought tolerance, mosses make an excellent replacement for grass lawns. Once established, moss requires little water


Finding moss for the garden can be challenging. Big box gar den centres often don’t sell moss as a plant. Small nurseries may carry some varieties, but it is possible to harvest your own.

thrives in partial sun to shade.
• American tree moss: resembling a miniature pine tree, it’s happiest in moist soil and shade.
• Common fern moss: a perfect alternative lawn cover that turns golden in the fall.
“I will gather the moss I use for my garden from the river trail close to my home, and I’ll also carefully lift out some moss from certain parts of my lawn and transplant it to other areas that I’d like,” Friesen says.
The best time to harvest or transplant moss is early spring or fall when rain has moistened the ground, giving the plant a head start on reproduction. But be careful. Different types of moss have adapted to various environments and won’t take well to change. For example, moss harvested from the deep woods will not grow well in an open area.
“I remove a little carpet of moss with a dirt underlay and transplant it,” Semlacher says. “That’s how I know and keep some of the original conditions that allowed it to grow.”
Once you have your moss, lay it on a smooth surface free of leaves and other garden debris. This can be an arrangement of rocks or tree branches designed to create a miniature moss garden or between pavers or stones in a rockery. Place small pieces of the moss at regular intervals over the desired surface. This method is a natural way to transplant and establish moss. Although it will look spotty initially, as long as you water regularly, the moss will start to fill in within a few months [9][10][11] .
“I use moss around my spring pots. It adds a bit of whimsey and helps retain moisture,” Friesen says. 3
• Feather moss: appreciates deep shade and is ideal for between pavers or on stones.
Footnotes
1. 7 interesting things about moss | Kew (kew.org/read-and-watch/moss)
2. Does Lime Kill Moss? | How To Get Rid of Moss In Your Lawn (bakerlime.com)
3. New Evidence Shows the Evolving Nature of Moss - UConn Today (today.uconn.edu/2019/04/mosses-dynamic-built-to-last)
4. Moss Propagation - Science World (scienceworld.ca/resource/ moss-propagation)
5. The extremotolerant desert moss Syntrichia caninervis is a promising pioneer plant for colonizing extraterrestrial environments: The Innovation (rebrand.ly/16b527)
6. 7 interesting things about moss | Kew (kew.org/read-and-watch/moss)
7. Moss Gardens and all Their Benefits - Native Wildflowers Nursery (nativewildflowers.net)
8. Unveiling The Truth: Does Moss Really Need Fertilizer To Thrive? | ShunCy (rebrand.ly/29a1f4)
9. 7 Tips for Growing Your Own Moss Garden (thespruce.com)
10. How I Grow Moss in My Garden and Why You Should Consider it Too (treehugger.com)
11. Growing Moss: How To Grow Moss In The Garden | Gardening Know How (gardeningknowhow.com)
12. The 10 Most Popular Moss Types (And 1 Lichen) For Gardens (mossandstonegardens.com)
Additional resources
• What Is Moss? - Everything you need to know about moss (allabout-moss.com)
• How to grow moss: the greenest groundcover for shade gardens (homesandgardens.com)
• What To Know About Moss Gardens (familyhandyman.com)
BIO Jennifer Cole is a writer and garden enthusiast with a bachelor’s degree focused on history from Simon Fraser University, and a freelance writing career spanning two and half decades. Jennifer lives in Vancouver British Columbia. Her by-lines have regularly appeared in the opinion section of the Toronto Star and her portfolio includes articles in various newspapers, magazines, and websites across Canada. When not writing her own blog or visiting local garden centres, you can find her puttering, planting, and nourishing her own urban garden oasis.


Substrates

I stopped planting for the first time in years. It was a time for deep reflection to rethink my strategies and mitigate these issues


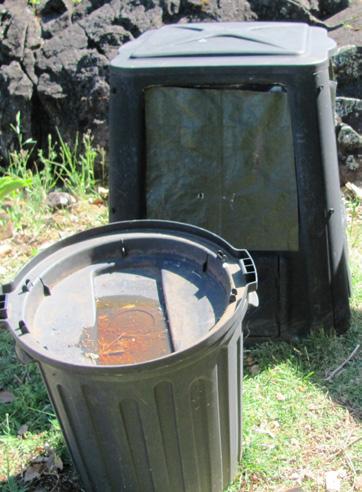
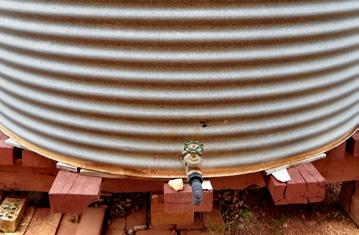
Over the past couple of months, there has been virtually no rain. Despite a wet summer, the soil moisture reservoir has dwindled. After the joy of experiencing overflowing water tanks, robust, healthy plant growth and luxury levels of soil moisture, watering has again become a high priority.
Last year, we endured many long months of drought. The view of our garden was so sad. The grass was crisp or died; brown was the new green. The lush green valley below is again on the turn. It’s been a dry winter. Just as plants burst into bud and new growth in early spring, they desperately need water to thrive. Since we are on tank water, every drop is precious and used intentionally. Once again, I’m watching the water trucks delivering this much-needed resource to many gardeners relying on rainwater rather than town supply.
During the drought, we lost two mature mandarin trees. It was heartbreaking. I learned hard lessons from taking tree survival for granted. Even the perennials and many established trees hung on for dear life. I assumed they were resilient enough to withstand the harsh conditions with limited water and heavy mulch. It pained me to realise I needed to shift my thinking and strategies, or I could lose more trees.
As they say, ‘no pain, no gain’! I realised that my plants were experiencing the harmful effects of multiple abiotic stresses. Fires were everywhere. Cloudy conditions and heavy smoke reduce
Our growing media is one of the factors determining how water infiltrates and is stored in soil pores
photosynthesis, resulting in poor sugar development due to lack of sunlight. Many plants became weakened. The ongoing drought contributed to low soil moisture levels. High-temperature stress causes an increase in transpiration and damage to plant cells. Heatwaves went on for days. The conditions were hot, dry and windy. Strong winds have an impact on moisture loss through leaf stomata. Wind stress can cause higher transpiration and plant dehydration. While we have some windbreaks for crop protection, other garden zones are still exposed to gusty winds as we are high on a hill. These abiotic stresses are often precursors to biotic stresses like pests, pathogens and weed competition. A domino effect! So, I stopped planting for the first time in years. It was a time for deep reflection to rethink my strategies and mitigate these issues.
With challenging climate abnormalities in so many locations, gardeners need a variety of techniques in their toolkits to help plants survive and thrive. I’m optimising plant health by working on the soil’s moisture-holding capacity, supplementing nutrition, and using diverse irrigation methods.

Soils and potting mixes are like giant sponges. Our growing media is one of the factors determining how water infiltrates and is stored in soil pores. Garden soils are diverse, with combinations of clay, loam and sand with different moisture-holding capacities. I have a predominance of clay soil that tends to hold moisture well so long as it’s covered with mulch. Adding bentonite clay can improve water retention in very sandy soils. It can also help improve water absorption on water-repellent soils. As a bonus, bentonite clay provides soluble plant nutrients like calcium, magnesium and po -
I also grow many plants in containers using homemade potting mix. Most commercial potting mixes are based on pine bark, which quickly becomes hydrophobic. To avoid this, I include coir peat, compost, vermiculite, and worm castings . These ingredients retain water and help buffer plant stress.

Foliar spraying is an easy way to manage nutrient deficiencies in plants with drought-related water stress
I also add organic matter like mulch, aged manures and kitchen scraps to enhance soil structure. These inputs add bioavailable nutrients and increase the soil’s moisture-holding capacity.
Rehydrated coir peat or coconut fibre is hydrophilic and re-wets easily. Some forms of coir can hold water up to 8-9 times its dry weight, making it a valuable input for retaining soil moisture.
Vermiculite can absorb 3-4 times its weight in water due to a strong capillary action. The particles hold water, gradually discharging moisture. Due to its durability, I can justify the investment.
The worm farms I use provide a rich source of vermicast that helps regulate soil moisture and lessen drought-induced plant stress. Worm castings store 2-3 times more moisture than their weight and help water infiltrate through the potting mix and soil.
Likewise, compost is another input that holds moisture like a sponge, buffering abiotic stresses. As a result, my container-grown plants survive a lot longer between watering.
I also add organic matter like mulch, aged manures and kitchen scraps to enhance soil structure. These inputs add bioavailable nutrients and increase the soil’s moisture-holding capacity.
While plants have many adaptive defence systems to survive changing environmental conditions, they can use a helping hand.

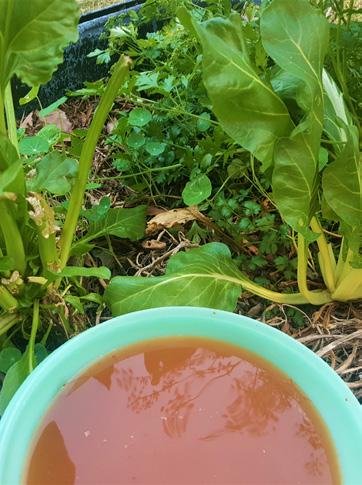
I give my food crops priority with more regular applications of water enriched with nutrients. I make the watering count! I also use every opportunity to liquid fertilise.
Soil drenching is one technique I use for potted plants. I add liquid nutrients like seaweed, fish emulsion or vermicast leachate to a large tub, then submerge the pots to rehydrate them until bubbles appear. My indoor plants have a weekly ‘day spa’ treatment; the outdoor container plants get one monthly. Soil drenching rehydrates potting mix with trace elements that slowly release between treatments. The plants perk up considerably as a result.
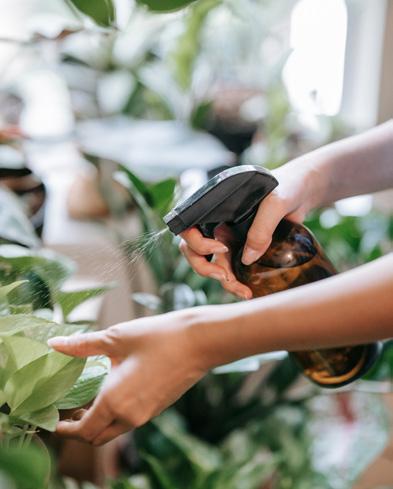
Foliar spraying is an easy way to manage nutrient deficiencies in plants with drought-related water stress. It’s also a protective strategy in hot weather. This efficient nutrient delivery technique replenishes macro and micronutrients via the leaf stomata. I spray early in the morning and find foliar nutrition helps minimise the negative impacts of drought stress, like lower yields and poor growth.
Liquid fertilisers, vermicast and compost teas are also in my toolkit. I vary the soluble nutrition I apply to plants depending on what they need or what I have available. Biostimulants like

OPTIMISED FOR LED SPECTRUM MAXIMISE UPTAKE ENHANCE POTENCY
VBX, a nutrient developed to compliment the LED spectrum. Combining the power of multiple bottles in one complete powder for optimum results.

Fertigation or irrigating with fertiliser is an opportunity for many gardeners. Nutrients can be added to rainwater collected in tanks, barrels and buckets.
seaweed, aloe vera and fish emulsion help enhance plant defences and mitigate water stress. The kelp and fish products are available in powdered or liquid forms and are easy to apply to the root zone or via foliar sprays. I make liquid aloe vera plant extracts and use them similarly.
Aerated teas made from worm castings and compost also provide plants with water, nutrients, and biology to build plant health. Some of my favourite liquid plant extract fertilisers are made from stinging nettles and comfrey. The leaves are rich in minerals, and although they can be stinky after soaking in water, plants respond quickly to the bioavailable nutrients.
Fertigation or irrigating with fertiliser is an opportunity for many gardeners. Nutrients can be added to rainwater collected in tanks, barrels and buckets. One of my clients installed a mini 1000L water tank for her suburban garden. She connected the irrigation pipe so she could use the tap system to selectively water the garden beds as needed. I suggested Su use this dedicated tank to liquid fertilise simultaneously. All she had to do was add
liquid seaweed and other biostimulants to the tank water. This saved Su time and effort in mixing liquid fertilisers in watering cans. She was thrilled to have her tank perform double duty. We also fertigate several garden zones with 40-gallon tubs with taps. I add the nutrients to the rainwater and use watering cans to apply to the soil. Another benefit is that these fertilisers are not contaminated with chlorine, fluoride, or other town water chemicals.
Waste not, want not! Lastly, cooking water, spent flower vase water, fish tanks, ponds, bird baths, and pet water bowls are examples of nutrient-enriched water sources. Watering plants with ‘waste’ water is a way to add bioavailable minerals into the soil. We use buckets to capture shower or bath water and apply this to perennials in rotation as needed. These free liquid resources enhance sustainable gardening while building plant health.
By following various watering techniques to retain moisture and enhance plant nutrition, our plants will be healthier, more tolerant to stresses and likely to thrive rather than just survive. 3
Anne Gibson, The Micro Gardener, is an author, speaker and urban garden community educator on the Sunshine Coast, in Queensland, Australia. Anne is passionate about inspiring people to improve health and wellbeing, by growing nutrient-dense food gardens in creative containers and small spaces. Anne regularly presents workshops, speaks at sustainable living events, coaches private clients and teaches community education classes about organic gardening and ways to live sustainably. She has authored several eBooks and gardening guides. Anne shares organic gardening tips and tutorials to save time, money and energy on her popular website - TheMicroGardener.com

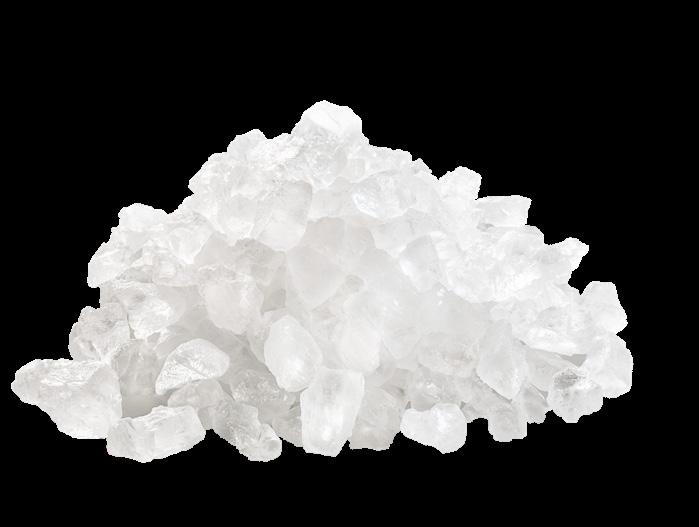

Amelt, National Oceanic and Atmospheric Administration (NOAA) scientists predict that sea levels along the East Coast of North America will rise a foot by 2050 [1]
It’s already happening. In New Jersey, John Zander’s 1,300-acre family farm, Cohansey Meadows, sits on a peninsula that juts out into the saltwater of Delaware Bay [2]. Once or twice a year, a high tide or storm surge pushes ocean water deep onto the farm. It eventually recedes, but the salt from the water remains.
“The farm has been in my family since the 1990s,” Zander says. “We farm corn, soybeans and traditional hay.”
As time progressed, Zander watched cordgrass and other perennial grasses typical of saltwater marshes encroach upon productive crop areas. He estimates that one area of approximately 25 acres has seen its perimeter shrink up to three meters.
Too much salt in the soil causes osmotic stress. It dries the roots, rendering them unable to absorb water or nutrients. Farmers like Zander are looking for solutions and coming up with inventive ideas. Combined with ongoing research projects, this paves the way for a “salty” but productive future.
Once or twice a year, a high tide or storm surge pushes ocean water deep onto the farm. It eventually recedes, but the
salt from the water remains
Sea levels are rising, and farmers and researchers are finding “salty” solutions.
The salty situation at Cohansey Meadows has inspired Zander.
“The farm’s history talks about salt hay harvests as far back as the 1600s,” he explains.
Salt hay is a colloquial term for different types of grasses growing naturally in saltwater marshes along the Atlantic Seaboard, including New Jersey’s Delaware Bay.
Historically, these grasses have been used as animal fodder, but other uses have included packing material and even mulch for berry and flower growers.
One of the drawbacks of salt hay and why it is no longer popular is its penchant for growing in marshy areas.
“You need a good freeze to get equipment into the marsh to harvest the hay,” Zander says.
Harvesting the hay by hand can be exhausting and muddy work. Thanks to a warming planet, the last hard freeze Zander remembers in the area was in 2018.
His solution has been to transplant plugs of the grasses from the wetlands on his property to higher and drier land. Growing the plugs this way makes harvesting using tractors and combines easier. As far as Zander is aware, Cohansey Mead-
We may eventually use saline water sources such as brackish groundwater or seawater for irrigation in freshwater-scarce regions

ows is the only farm in the U.S. that grows the plugs naturally in open fields as a commercial crop outside of their traditional marshy habitat.
Zander sees multiple uses for the hay. Cattle love salt, so it can be used as livestock feed. More importantly, if farmers re-seed the perimeters of fields with these coastal grasses, they can act as a buffer, blocking saltwater intrusion onto productive land. Their dense root systems suck in the seawater, which helps distil it from spreading. This border will be imperative in keeping coastal farmland productive despite the inevitable rise in sea level.
Scientists worldwide are also looking for solutions to combat a salty future. At Clemson University in South Carolina, researchers believe some crops, such as mustard greens, cucumbers, and tomatoes, can also be grown sustainably in saline water. To test this hypothesis, they are experimenting with growing these edibles hydroponically [3]
“The vast majority of vegetable crops are completely interchangeable between conventional soil farming and soilless hydroponic systems, “says W. Patrick Wechter, director of the Coastal Research and Education Centre at Clemson. “Once a variety that does well in a salt-based hydroponic system is developed, it is not a huge leap to use that variety in a breeding programme to fairly quickly develop a line that can be more suited to soil farming.”
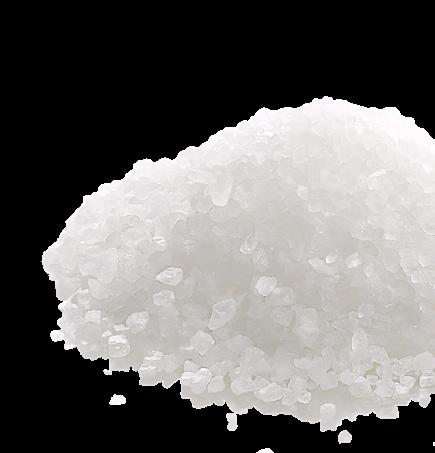
They will be entirely adaptable for organic growing systems because they develop these salt-tolerant varieties through standard breeding procedures, not genetic modification.
The United Nations Food and Agriculture Organisation says that as the population increases, the world’s food supply will need to increase by 60% by 2050. But there is only enough fresh water on Earth for a 10% increase [4]. Although 71% of the Earth’s surface is covered in water, 96.5% is salt water.
We may eventually use saline water sources such as brackish groundwater or seawater for irrigation in freshwater-scarce regions. It will matter that crops grown in these regions can tolerate the salt the water deposits into the soil.
In the future, will tomatoes and cucumbers taste salty?
“Whether the fruits or greens will become saltier is yet to be determined as there are numerous mechanisms that may be used by a plant to either take up or filter out the salt,” Wechter says.
Time will tell, but your days of reaching for extra salt might be over. 3
Footnotes:
1. U.S. coastline to see up to a foot of sea level rise by 2050 | National Oceanic and Atmospheric Administration (noaa.gov) rebrand.ly/2ca06c
2. HOME | Cohansey Meadows cohanseymeadows.com
3. Clemson awarded USDA grant to study saline-water irrigation to grow salt-tolerant crops | Clemson News rebrand.ly/m1v2m2f
4. How Much Water is There on Earth? | U.S. Geological Survey usgs.gov

Everest Fernandez invites us to reconsider dissolved oxygen in our modern grow rooms.
With the advent of LED grow lights and the accompanying trend of running our rooms at higher air temperatures, indoor growers arguably need to pay more attention than ever to dissolved oxygen (DO) levels in irrigation water and nutrient solutions.
Before we explore the details, consider your growing practices. How many of these statements apply to you?
1. You cultivate fast-growing, warm-season plants.
2. Your setup includes high-intensity LED grow lights.
3. Your nutrient reservoir is located within your grow room.
4. You incorporate beneficial biological products (e.g., mycorrhizae, bacteria).
5. Your growing medium is relatively restrictive (soil, peat, coco coir, or stone wool).
6. You operate a recirculating hydroponic system.
7. You maintain high nutrient concentrations in your solution.
The more points that resonate with you, the more critical dissolved oxygen becomes for your garden’s success. Even if you only checked one box, understanding DO is vital for optimising plant health.
So, what exactly is dissolved oxygen? Simply put, it’s the amount of free oxygen molecules dispersed in your water or nutrient solution. It’s not the oxygen in H2O molecules or the tiny bubbles from your air stone, but rather, separate O2 that has mixed into the liquid at a molecular level. Imagine sugar dissolving in coffee - it’s present but invisible to the naked eye.
DO forms the foundation of root health, supporting overall plant vitality. Adequate DO levels enable efficient aerobic respiration, the process by which roots convert nutrients into energy for growth.
In hydroponic systems or container growing, where roots are confined, maintaining high DO helps prevent root suffocation, stunted growth, and increased susceptibility to diseases like root rot.
Let’s reconsider those initial seven statements and examine how different growing conditions impact DO levels and why they matter:
1. Fast-growing, warm-season plants: These crops have higher metabolic rates, demanding more oxygen for respiration. As they develop quickly, their need for oxygen in the root zone intensifies.
2. High-intensity LED grow lights: These powerful lights boost photosynthesis, increasing metabolic activity. This heightened plant activity raises oxygen demand in the root zone, necessitating higher DO levels.
3. In-room nutrient reservoirs: When your reservoir rubs shoulders with your plants, it’s subject to the same elevated temperatures. Warmer water holds less oxygen, increasing the risk of DO depletion, especially in LED-lit environments.
So, what exactly is dissolved oxygen? Simply put, it’s the amount of free oxygen molecules dispersed in your water or nutrient solution
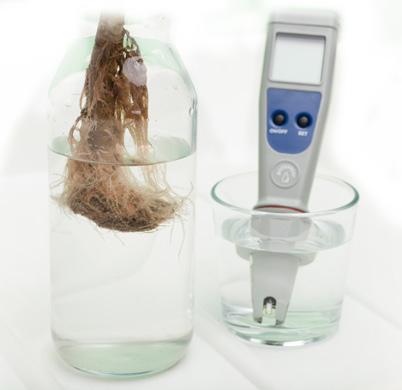
4. Beneficial biological products: While microbes like mycorrhizae and bacteria enhance nutrient uptake, they also consume some of the available dissolved oxygen. High DO levels are crucial to prevent oxygen deficiency in the root zone.
5. Restrictive growing media: Media with smaller pore spaces, such as peat or coco coir, can limit air exchange and oxygen diffusion. Even professional media like stone wool, designed for water retention and aeration, benefit from high DO levels in the nutrient solution.
6. Recirculating hydroponic systems: These setups can accumulate organic matter and microbial activity over time, both of which increase oxygen consumption. Regular monitoring and maintenance of DO levels are necessary to avoid oxygen depletion.
7. High nutrient concentrations: Concentrated nutrient solutions can increase osmotic potential, potentially reducing oxygen availability to the roots. Maintaining optimal DO levels becomes even more critical under these conditions.

For fast-growing, warm-season plants, aim for DO levels between 6.0 to 8.0 mg/L in your nutrient solution. Understand that the DO saturation point decreases as temperature increases. For instance, water at 18°C (64.4°F) has a DO saturation point of 9.45 mg/L, but this drops to 7.58 mg/L at 30°C (86.0°F). Generally, lower temperatures closer to 18°C are better for maintaining higher DO levels, especially in hydroponic systems.
1. Aerate your nutrient solution: Place an air stone connected to an air pump at the bottom of your nutrient reservoir. This continuously infuses air (containing 20% oxygen) into the water. Constantly running the pump is more effective than intermittent aeration, especially in warm environments or systems with large root masses.
2. Chill your nutrient solution: Since warmer water holds less oxygen, aim to keep your nutrient solution between 18°C and 22°C (64°F to 72°F). If an aquarium chiller isn’t feasible, consider relocating your reservoir to a cooler area to prevent temperature-induced oxygen depletion.
3. Optimise water movement: Use a small water pump to periodically circulate your nutrient solution. Good circulation prevents stagnant areas where oxygen might be depleted and ensures even distribution throughout the system. Be aware that constant pump operation can generate heat, so monitor temperatures closely.
4. Employ advanced oxygenation techniques: Electrolysis or nanobubbles can infuse water with pure oxygen, significantly enhancing DO levels.
Products containing hydrogen peroxide (H2O2), like OxyBlast and OxyPlus, can add free oxygen to the nutrient solution. Use these carefully to avoid harming beneficial microbes or plant roots.
Venturi injectors can be integrated with nutrient dosing systems to oxygenate the solution before it reaches the plants.
5. Choose high-drainage growing media: Well-aerated media such as a 50/50 mix of coco and perlite or expanded clay balls require more frequent irrigation, which can be automated. This ensures that plant roots have continuous access to oxygen-rich solution.
6. Implement a regular maintenance schedule: Consistently clean and maintain all aeration and circulation equipment. Clogged air stones or dirty pumps can reduce the efficiency of oxygenation efforts, leading to lower DO levels.
The cost of handheld DO meters varies widely based on features, durability, and precision. For most hydroponic applications, the Hanna HI-9147-04 with a galvanic probe is an excellent choice, though it comes with a price tag upwards of $750. If you’re looking for a more budget-friendly option, consider the Milwaukee MW600, which retails around $150. 3


You do it a few times every day, so why not go about it as sustainably as possible? We’re talking about eating! Our food system is broken; generally, how we grow, distribute goods, and eat have fallen out of line with what Mother Nature intended. Conventional agriculture depletes the soil and strips it of nutrients, resulting in food lacking essential minerals and vitamins. We’ve accepted this model because it’s easy, and in a fast-paced world where we have mouths to feed and bills to pay, convenience is appreciated. But our health and the planet are suffering.
Feeling overwhelmed and anxious about agriculture’s impact on the environment and human health is natural, but don’t let anyone tell you nothing can be done . Many organisations, small-scale farmers, and individuals make a difference every day—at least three times a day! The Slow Food movement is revolutionising how we grow, buy, prepare, and preserve food. Slow Food is about reconnecting what we eat with nature, and you can join the movement at home in several different ways. Whether it’s growing a garden, eating seasonally, making better use of leftovers, or preserving your harvests, you can be the change . All you need to do is slow down.
The following information comes from a Regeneration Toolkit put together by slowfood.com . The toolkit contains tips on how we can Eat , Learn , and Act to help restore our ecosystems, communities, and health. This edition of our Eco-Optimism feature explores the Eat and Learn sections.
You do it a few times every day, so why not go about it as sustainably as possible?
Building meals around seasonal foods makes a positive impact in many ways. Seasonal goods have a lower environmental burden because they require fewer growing resources. They’re also more affordable because they’re more abundant, and they’re fresher and more nutritious because they’re produced locally and don’t carry many food miles. Eating with the seasons might seem simple, but it’s powerful, benefiting your health, wallet, the environment, and local farmers.
Eat a wide range of foods, mostly plants. You don’t have to stop eating meat, but when you eat it, purchase it from a local farm that ethically raises animals in a pasture. You’ll taste the difference, we promise! Experiment with different fruits, vegetables, and grains; make your plate as biodiverse and colourful as possible to support small-scale farmers and a resilient food system.
Eat more legumes! This sustainable crop doesn’t require many resources and enriches the soil as it grows. Legumes are rich in antioxidants and complex fibres, are a good source of protein, and are low in cholesterol. Including them in your diet can help prevent heart disease and diabetes. They’re affordable, store well, and are essential to global food security. Examples of legumes include lentils, peas, beans, and chickpeas.

Eating with the seasons might seem simple, but it’s powerful, benefiting your health, wallet, the environment, and local farmers.

Ensure none of your precious harvest goes to waste, and consider pickling or canning so you can enjoy homegrown or seasonal foods year-round
There’s nothing slower (or more rewarding) than growing your own food! Whether you have a sunny windowsill, balcony, small plot of land, or community space, food gardens increase access to fresh and nutritious produce. You control what goes into it and will develop a deeper connection with nature and an appreciation of how much effort it takes to grow healthy food.
If you’re keen to learn and want to be blown away, educate yourself on the functions of the gut and how a healthy one affects the entire body. Our intestines contain a microbiota that absorbs the microorganisms from our food. If the food lacks nutrients, the microbiota isn’t properly fed, which can result in gastrointestinal issues, leading to weight gain and problems with the metabolism. The gut can even affect mental health! Want to keep your microbiota happy? Eat plenty of fruits, vegetables, and foods high in fibre.
Hack Your Health: The Secrets of Your Gut is an excellent documentary to watch if you want to learn more about gut health.

When selecting products from a grocery store, take the time to read and understand the food labels. Where did the food item come from? Is it local, or has it travelled the seven seas? Check out the ingredient list; do you know what it means? Generally, the shorter the list, the better. Check the sugar, sodium, fat, protein, and fibre levels. Many store-bought foods can contain too much of a bad thing. Educate yourself on what your body needs, and read the labels carefully!
Where does your food come from? Do the farmers have a safe working environment, and are they fairly compensated? The concept of ‘fair trade’ is just as important as knowing how your food was grown. The best way to get the story behind both factors is to meet the farmer. Go to local markets and talk to the people who grew the food. Find out how and why they do it. Knowing your farmer gives you peace of mind and helps boost the local food economy.
A third of all food produced worldwide goes to waste, yet there are so many hungry people. We can be part of the solution by purchasing less at once and ensuring all leftovers are eaten. Get creative with leftover food and turn it into a delicious new meal. Ensure none of your precious harvest goes to waste, and consider pickling or canning so you can enjoy homegrown or seasonal foods year-round. Use veggie scraps to make a delicious broth for soups, and put anything else you can’t use directly into the compost.
Download Slow Food’s complete Regeneration Toolkit more fantastic resources at slowfood.org 3


Are you getting enough protein? As many of us reduce our meat consumption, here’s a list of five healthy plant-based proteins you can grow cheaply at home next growing season!
rotein! We all know we need it - and multiple studies have shown that most of us aren’t eating enough. But we also know that while meat is a good source of protein, reducing our meat consumption is essential for our health and the planet. So, the question is - can you get protein from plants? Yes, you definitely can. Which ones are easy to grow yourself? Well, I’m glad you asked.
Besides being, as the classic playground song informs us, a musical fruit, beans are also a great source of protein. One cup of black beans will provide a nice 15g hit of protein, and they are also super versatile in their use in a whole host of recipes. They are also pretty no-fuss and easy to grow at home in your garden. Know that black bean seeds do best when the earth is warm, so be patient and don’t plant them too early in the season. Wait until after your region’s last frost date. Also, the plants will generally lose when it comes to black bean plants vs weeds. So, make weeding a priority.
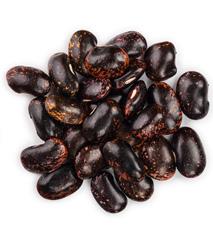
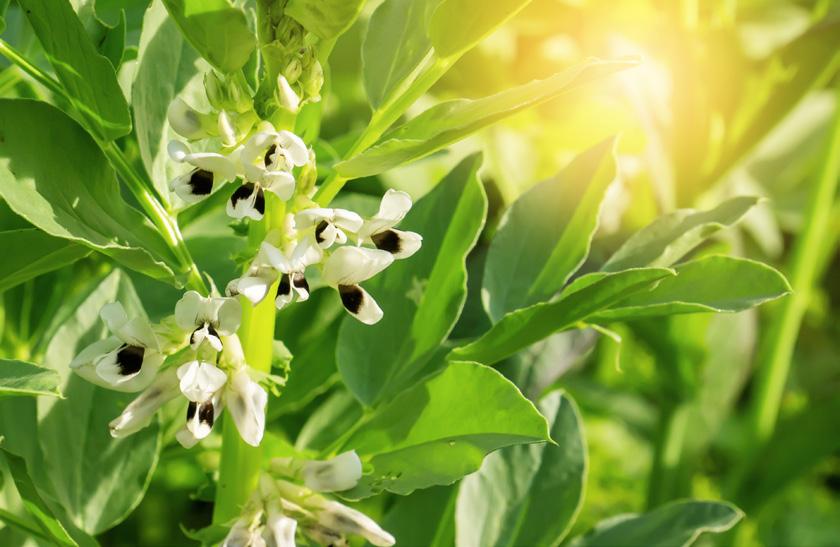

At almost 18g of protein per cup of boiled lentils, these legumes are another great option to incorporate into your diet. You might not have considered growing lentils in your garden before, but you definitely should. There are a few things to remember, but they are a relatively easy crop to grow. They can thrive in a variety of soils, and they grow quickly. The plants are relatively small, though, so it’s recommended to plant a bunch of them to get a solid yield of lentils for the family.
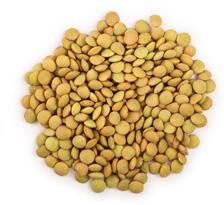
So, the question is - can you get protein from plants? Yes, you definitely can!

Ya, this one surprised me, too. I’m not sure why, but I never considered quinoa something a home gardener could grow. Well, it turns out we can - as long as we live in a region with cool nights and day temps that aren’t regularly topping 32°C. The hardest part about growing quinoa is harvesting the seeds, isolating them, and cleaning them properly to remove the saponins (which, if consumed in large quantities, can be toxic). But do all that, and you’ve got yourself a little over 8 grams of protein per cooked cup.
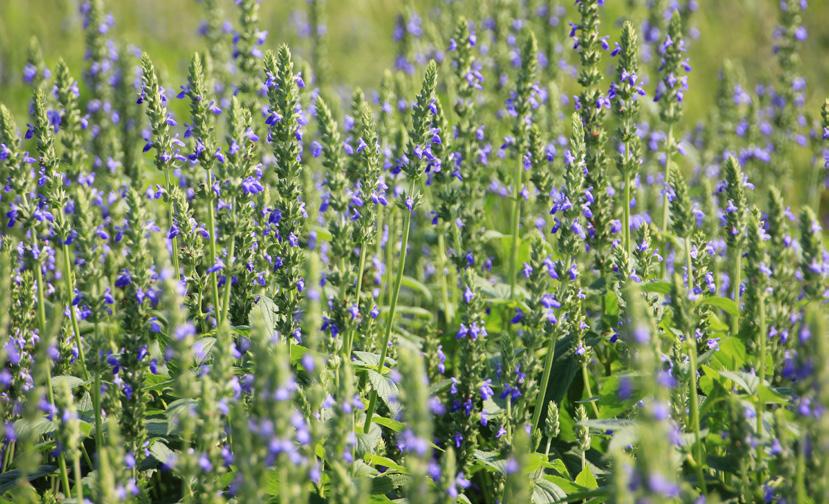
Talk about easy. Growing chia is so easy that millions of people have grown pets out of them since the 80s. However, while the seeds used for Chia Pets are real chia seeds, they aren’t handled with high food-grade standards, so I wouldn’t recommend eating the fur of your Chia pet dog. But I recommend eating chiathis superfood has numerous nutritional benefits and almost 5 grams of protein per ounce. And yes, you can even grow a chia plant from chia seeds you buy at the grocery store.
Bottlebrush
I recommend eating chia - this superfood has numerous nutritional benefits and almost 5 grams of protein per ounce.

The 10-year-old version of ourselves could probably think of only a few things worse than growing our own Brussels sprouts. However, as adults who have mastered the art of roasting veggies in the oven, many of us have come to quite like and appreciate these little balls of green goodness (and if you aren’t off meat completely, roasting them with some bacon is the kind of thing that (when done well) might change your life). They are also an excellent addition to your garden real estate as they do well in those cold winter months when many other garden residents will be down for the count.
GrowMax Water RO systems excel in the growing industry.
They produce pure water, ranging from 500 to 3000L/day. Features like pressure gauges, flow restrictors and automatic shut-off valves ensure long-term performance. These systems remove up to 99% of contaminants, including salts, heavy metals, chlorine, herbicides, pesticides and volatile organic compounds.


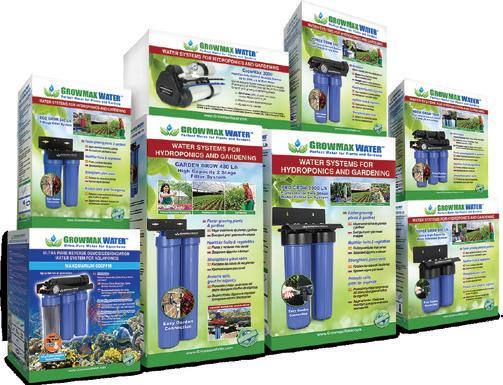
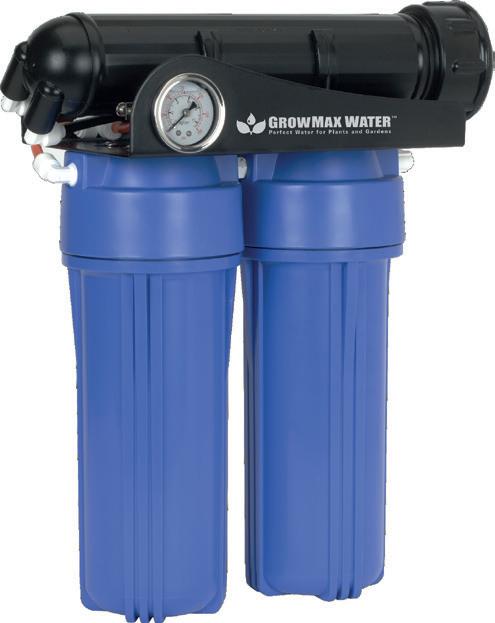

Up to 568L a
Three -stage RO system designed and engineered specifically for indoor Hydroponic growers and outdoor growing. Eliminate up to 95% of salts and heavy metals and up to 99.9% of chlorine.


My canning journey began not too long ago on a slow Sunday morning. After harvesting a generous Italian tomato crop in my garden and supplementing it with another 20 pounds purchased at my local farmer’s market, I blanched, peeled, and quartered them, eventually adding them to a stock pot with diced onions, peppers, garlic, and spices. After letting the sauce simmer for four to five hours, I filled quart-sized Mason jars and placed them in a water bath to preserve them for the cold months and busy nights ahead. By the end of the next day, my pantry shelves were lined with vibrant red jars that looked comforting and delicious. I was proud of myself for making the most of some fresh, seasonal produce for my family, and I was hooked.
The following week, I pulled more ripe tomatoes from my vines and returned to the farmer’s market for 20 pounds each of Roma and San Marzano tomatoes. Back in my kitchen, I made another batch of pasta sauce and one for pizza, adding more sealed jars to my pantry. It goes without saying that I need a break from peeling tomatoes at this point, but I know my canning adventures have only just begun.
I need a break from peeling tomatoes at this point, but I know my canning adventures have only just begun
I caught the canning bug after reading Preserving with a Purpose: Next-Generation Canning Recipes & Kitchen Wisdom by Sarah Thrush, creator of @peeliesnpetals. Unlike me, Thrush has a long history of canning to preserve food; it’s in her blood. She considers herself a third-generation canner because her first memories are of canning with her grandmothers, although she has family recipes dating back to the 1800s, some of which are shared in her book. Surprisingly, writing a book about canning is never something Thrush set out to do. When she and I chatted via video at the end of the summer, she admitted the book happened by accident.
Like many others, Thrush joined TikTok during the pandemic to connect with people and quickly made ‘friends’ with other homesteaders. While saying goodbye in the comment section of a live one day, she mentioned she had apples that needed to be canned. The interest was immediate; many asked if she could show them how.
“I had 15,000 people watching me live canning apple juice,” she says. “I was completely shocked and overwhelmed, and it kind of just snowballed from there.”
It had never occurred to her that people didn’t know how to preserve food this way. Thrush started making simple tutorial videos on safely preserving fruits, vegetables, and meat via pressure canning. She gained almost a million followers in her first year and over a million in the second. It wasn’t long before they were begging for a book.
“It was very organic,” she explains. “There was an obvious need, and I was more than happy to teach people how to do what I’ve been doing my whole life.”
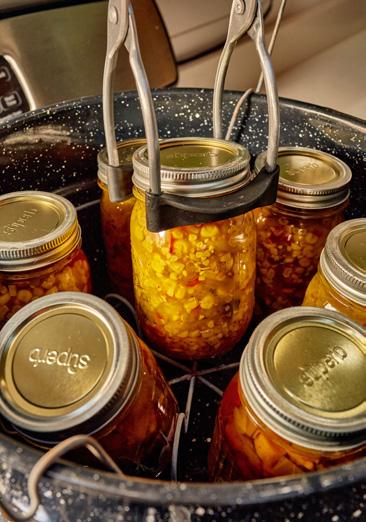
Thrush’s book opens with a heartfelt and vulnerable introduction. In it, she talks about growing up in a micro-community called ‘the Region’ on the border of Indiana and Illinois. She describes the Region as an American melting pot of ethnic diversity with harsh winters and short growing seasons. She heard stories of Victory Gardens and understood the importance of stretching food resources, learning to make something from nothing, and using canning to preserve harvests.
“I grew up in a long line of poor people. We had never been rich, so to speak, but we always had what we needed to survive,” she tells me. “I grew up with two grandmothers who had survived the Great Depression. One of my grandmothers told a story about how she and her sisters would sit outside and eat dirt because there wasn’t any food. So I grew up with a waste not, want not mindset.”
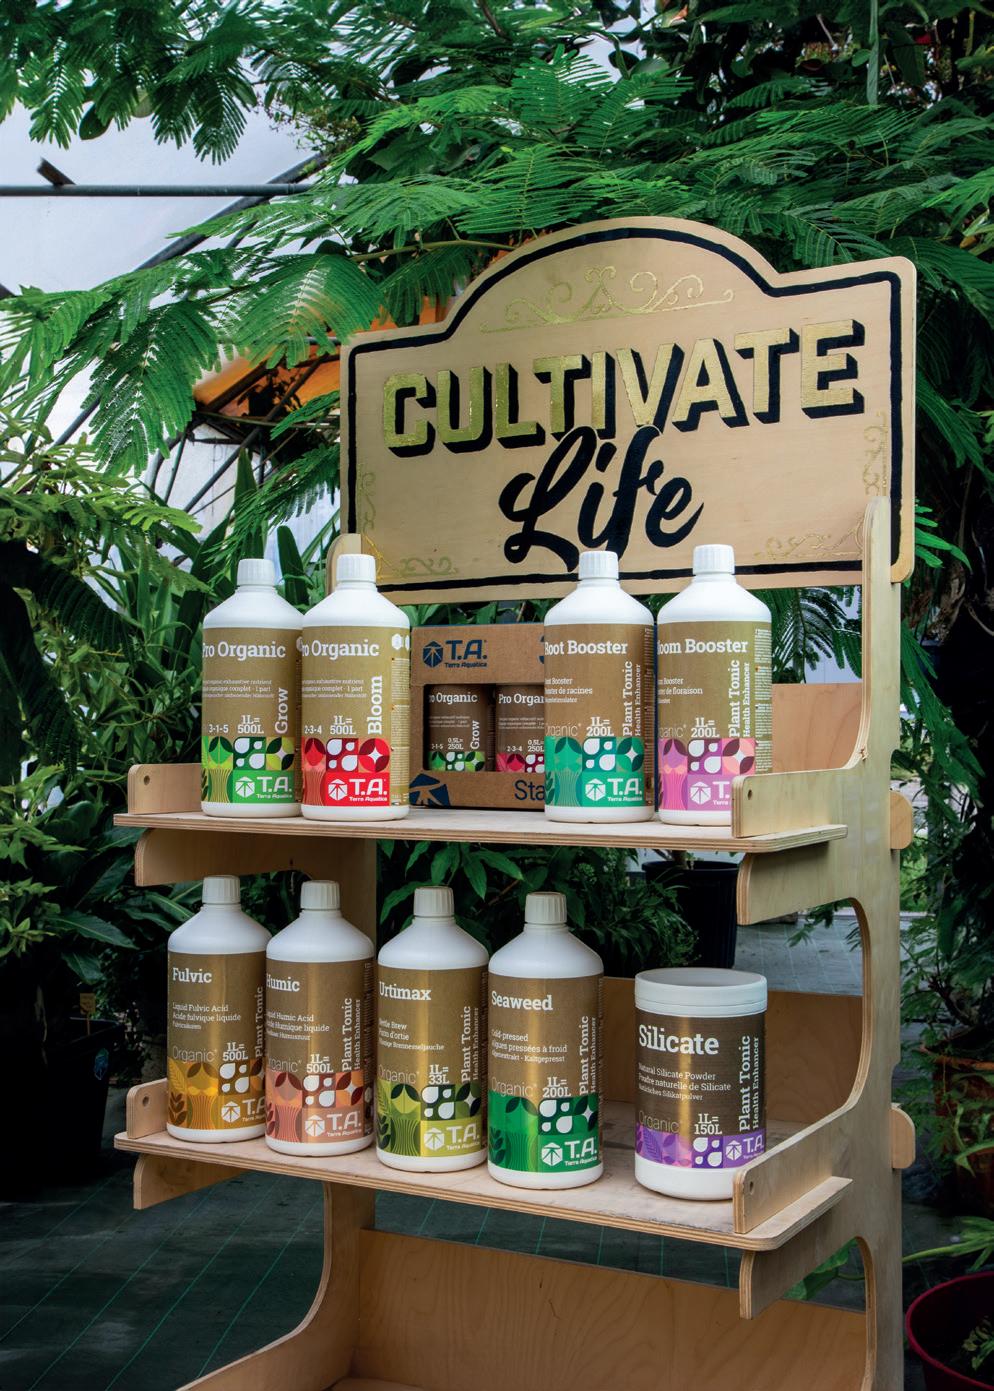


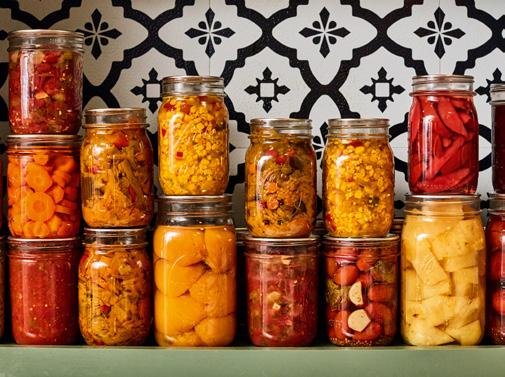
Thrush has a long history of canning to preserve food; it’s in her blood.
That mindset made Thrush incredibly resilient. When she and her children later struggled with food insecurity, she fell back on the education she had received as a girl about food preservation. She began growing food again and canning it to keep her family well-fed. Thrush eventually lost her home and turned to new solutions like community gardens. She wrote Preserving with a Purpose to help people maintain their food security through challenging times, whether financial or caused by weather events or changes in the political climate. After all, she believes food security is a fundamental human right, yet too many people go hungry.
The USDA recommends pressure canning as the only method for safely canning low-acid foods such as vegetables, meat, poultry, fish, and seafood
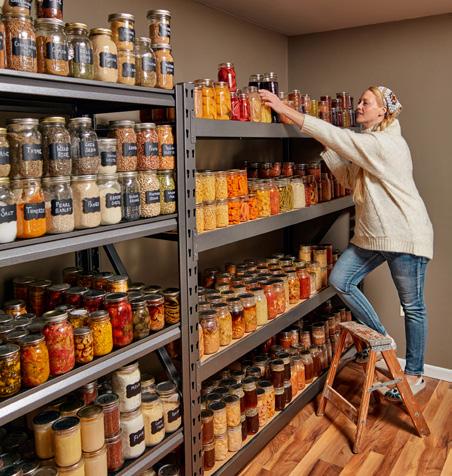
“I wanted to bring canning into the now –into the modern and show people that you can do this, and it doesn’t have to be jams, jellies, and pickles,” she says of her book.
“Of course, there are jams, jellies, and pickles in there, so if that’s your thing, they’re there too.”
The USDA recommends pressure canning as the only method for safely canning low-acid foods such as vegetables, meat, poultry, fish, and seafood. Tomatoes and apples, for example, are high-acid and can be canned via pressure canning or in a simple water bath.
“Canning is on the rise again as the cost of food continues to rise, as people are starting to wake up from what I call their grocery store comas,” she explains. “Where does our food come from? What is in my food? Who put that food there? There are all these questions. People are starting to look at their food and say, ‘Hey, I’m disconnected from my food and my food source, and I want to be connected to that again.’”
Thrush’s book features dozens of beloved recipes (some are family heirlooms) that extend far beyond the classic jams and jellies. Think DIY Teriyaki Sauce, Cowboy Salsa, Bourbon Chicken, Corned Beef Hash, Pork Carnitas Meal-in-a-Jar, soups of all kinds, and more. The recipes aren’t fancy or expensive; they’re simple, delicious, nutritious, and, where Thrush is concerned, often sentimental.
“My great, great, great grandmother’s pickles are in there,” she says. “That recipe is the very last recipe of the book because it is so special to me. Every time that jar is opened, and I taste it, it reminds me of my childhood and being in the kitchen with my grandmothers.”
Preserving with a Purpose also includes chapters on planning your pantry and how much food you’ll need for your family, meal plans, and mastering the canning fundamentals. Thrush breaks down the science behind and the difference between water baths and pressure canning, discusses the equipment and supplies needed, and offers solutions to frequently encountered canning issues. It’s a book that suits beginners and long-time canners alike.
“If you start with water bath canning, you’ll already have 90% of what you need in your kitchen,” Thrush explains. “You need a large stock pot, some jars, and the lids will be your expense. When you get into pressure canning, you’re more involved with equipment. But those things pay for themselves quickly.”
Thrush says a pressure canner should be a one-time investment, with many families eventually passing them down from generation to generation. They range in price from a couple hundred dollars and up, depending on the make and model. However, Thrush, who has anywhere between 800 and 1,000 jars of home-canned food on her shelves after every harvest season, estimates significant savings on her grocery bills.
“We save, on average, $10,000 to $12,000 a year on groceries,” she says. “And that number keeps growing as the price of groceries rises.”
Of course, we won’t all save as much money at the supermarket. But any amount of food you can preserve from your garden, no matter its size, is a step in the right direction. If you don’t have much space, Thrush recommends renting an allotment or participating in a community garden where the rewards can be very similar. She also suggests being smart about the foods you grow and planning canning recipes around the seasonal foods you can buy affordably (and at peak nutrition) from local farmers.
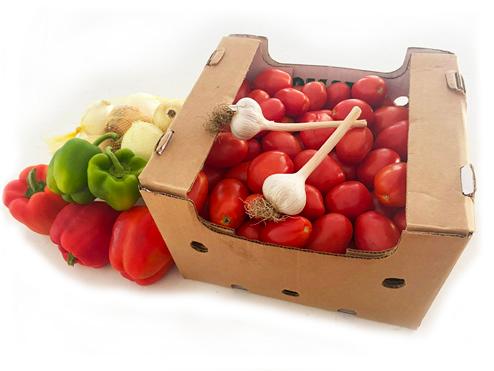
“When you start making your food work for you, you start making money,” she explains. “I don’t grow any corn, garlic, or potatoes. Why? In my community, I have three farmers who do that. So I purchase from them. I won’t waste my land space doing that when I know I can get it in bulk from them. That frees up my space to do the more expensive things at home.”
If you’re new to canning, Thrush suggests starting small and simple, like with a couple of jars of fruits or fruit juices. Some people (ahem!) might go a little overboard and buy 60 pounds of Italian tomatoes at the farmer’s market their first time, but you don’t have to go to that extreme.
Canning can be done in quiet solitude in your kitchen or with your friends and family. Either way, you’re slowing things down and preserving seasonal, nutritious food, and you know exactly how it’s been prepared. Plus, seeing lines of jars on your pantry shelves brings an enormous amount of pride and, initially, some awe.
“I no longer have that awe and shock this late in my canning life,” Thrush laughs. “I’m so blind to it because it is just how we eat. But there is a real sense of accomplishment when you see all those jars on your shelf; it doesn’t matter if it’s four jars or 400 [...] There is an excellent mental health boost when canning your food because it gives you a sense of purpose and it gives you a sense of accomplishment.”
Thrush encourages everyone to discover their purpose for canning food and use that as a driving force. Mine is capitalising on seasonal, affordable produce that is more expensive or difficult to find during cold Canadian winters. It’s about ensuring I have healthy, homemade options on those busy school nights when my kids have activities. It’s about cosiness, comfort, and slow food. As I move forward on my canning journey, I’ll take a much-needed break from tomatoes for the season. Next up? Applesauce and soups. 3


There is an excellent mental health boost when canning your food because it gives you a sense of purpose and it gives you a sense of accomplishment

Catherine is a Canadian award-winning journalist who worked as a reporter and news anchor in Montreal’s radio and television scene for 10 years.A graduate of Concordia University, she left the hustle and bustle of the business after starting a family. Now, she’s the editor and a writer for Garden Culture Magazine while also enjoying being a mom to her three young kids. Her interests include great food, gardening, fitness, animals, and anything outdoors.
with a Purpose: Next-Generation Canning
&
be purchased online and at all major bookstores. Sample one of the recipes on the next page!


There’s a certain charm in preserving age-old family recipes that have been passed down through generations. For me, spiced apple rings hold a special place in my heart, since I inherited the recipe from my mother and grandmother. This delightful dish was a fixture at our family gatherings, especially during the holiday season.
• 8 cups (1.9 L) water
• Splash of lemon juice or
• 1 tablespoon (19 g) citric acid
• Approximately 20 large, firm apples
• 3/4 cup (150 g) sugar
• 13/4 cups (280 g) cinnamon Red Hots
• candies
• 4 cups (944 ml) water
• 31/2 teaspoons (7 g) whole cloves

1. To a large bowl, add 4 cups (1.9 L) of water and the lemon juice or citric acid.


2. Begin peeling, coring, and slicing the apples into 1/2-inch (1.25-cm) thick rings. The apples should resemble a flattened doughnut shape. A small melon baller makes easy work of coring whole apples. To prevent browning, drop the apple rings in the lemon juice/citric acid water as you work through them.
3. Heat sugar, Red Hots, and the remaining 4 cups (944 ml) of water in a saucepan to make cinnamon syrup.
4. Stir often with a metal spoon until the sugar and cinnamon candy are completely melted. Bring to a boil for 2 minutes.
5. Drain the apple rings and add to the syrup mixture. Toss gently to coat. Turn off heat and let apple syrup mixture sit for 15 minutes.
6. Place canning jars in a canning pot filled with water and bring it to a simmer (180°F/82°C) to heat the jars.
1. Retrieve hot jars from canner.
2. Add 1/2 teaspoon whole cloves to the bottom of each jar.

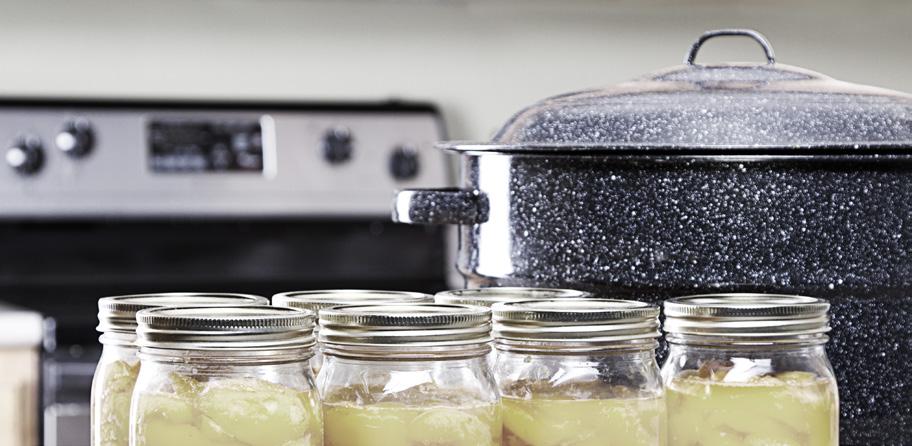
3. Place a canning funnel on top of a jar and, using a slotted spoon, stack apple rings vertically into jars, leaving 1/2-inch (1.25-cm) headspace. The apple rings will be soft; do the best you can, it doesn’t have to be perfect.
4. Ladle remaining hot syrup over apple rings, leaving 1/2-inch (1.25-cm) headspace.
5. Use a bubble remover tool to remove air bubbles and adjust headspace if necessary. If you don’t have any spare syrup, add water to achieve correct headspace.
6. Wipe the jar rim with a clean, damp towel or a vinegar-dampened towel to remove any residue.
7. Place the lid on top of the jar and secure with a band, screwing it on until finger light.
8. Place the filled jars back into the canning pot using a canning rack. Ensure the jars are covered with at least 1 inch (2.5 cm) of water.
9. Bring the water to a boil and, once boiling, start timer: for pints, 15 minutes; for quarts, 20 minutes.
10. Adjust processing times for your altitude as needed.

When you’re into mycology, there’s a good chance you’re really into mycology. Not everyone who enjoys mushrooms becomes obsessed with how they connect widely and wildly with nearly any aspect of our lives. However, for many of us, the fun(gi) never stops.
Positive examples of human relationships with fungi include basic sustenance to gustatory triumph, support and promotion of physical, mental, and emotional well-being, and spiritual or extranormal experiences. You could choose to focus on how the potency of mushrooms allows some to be dangerous in all of the same areas, but a grounded, balanced, and hopeful mindset is more productive. Respect for their potential and humility in our relationships with them can guide us to rich and impactful experiences!
It’s certainly not lost on “mushroom people” that mycelium, as a network of interconnectivity, sharing, and a sense that the sums are more significant than the parts, is a solid metaphor for the power of community. Trust-building through shared experiences is neurochemically rewarding, and organising opportunities for folks to find delight and satisfaction together is a gift you also receive.
If going out into nature to find mushrooms is your cup of tea, or if you’ve got access to land where you cultivate and/or wildcraft mushrooms, why not invite some people to enjoy a day out with you? Here are some tips I’ve put together based on my experiences.

If going out into nature to find mushrooms is your cup of tea, or if you’ve got access to land where you cultivate and/or wildcraft mushrooms, why not invite some people to enjoy a day out with you?
Choose an accessible and safe place to meet and be familiar with the conditions of where you’ll walk. Ensure someone knows where you are, who you’re with, and when you’re expected to return.
Decide how you will select your companions for the trip. Are they friends and family? Is it an open, public event or one arranged in collaboration with a community organisation?
If you’re artsy, you might make a poster or other design with the main details: what you’re doing, who’s welcome, when it’ll be happening, where , and why you hope people will join you.
There’s no need to advertise the location specifics publicly; instead, ask people to RSVP to receive the details. It’s best to know how many people you expect to attend and be able to cancel if personal or weather-related reasons for postponement or cancellation arise.
A few common questions I have found people would like answered before they commit include:
• Are there any costs involved (e.g. parking, park entrance fees)
• Are children and/or dogs welcome to attend?
• What should I bring with me?
• How strenuous is the terrain? What is the expected pace, distance, and timeframe for the outing?
In your invitation to participate, be clear about the point and parameters of the excursion. Build trust by being honest about your experience and knowledge about mushrooms. Don’t try to sound authoritative beyond your comfort level; allow your curiosity and passion to shine through.

Before the meeting, request attendees review a drafted community agreement. This agreement can include expectations of mutual respect, recognising that each participant is to be valued and accepted as they are. It can be explicit that each person will come with their own prior experiences with mushrooms and make clear everyone is responsible for keeping the event fun and safe.
This agreement can also be practical, asking party members to take only photographs (or drawings) and memories when they leave. This removes the expectation that the walk will focus on foraging and instead be centred around mushroom appreciation.
It’s a good idea to wear a high-visibility vest or similarly bright attire and bring a whistle. This way, your walking companions can return to following your lead while their attention is divided between absorbing the natural setting and seeking mushrooms to observe.
At the set meeting time, welcome the group and thank them for coming! It’s already a success if you’re not the only one standing alone in a parking lot. I have found that asking participants to form a circle rather than standing in front of a loose pack is best for making everyone feel included and equal. Review the community agreement and ask folks to reconfirm their intent to have a fun time. It might seem a little juvenile, but proposing a buddy system can be a good check against anyone feeling left out or wandering away.
Ask people to introduce themselves and give a one-sentence summary about their interest in mushrooms. Open the floor to anyone wishing to share concerns they may have about the activity itself. They might disclose accessibility challenges, personal boundaries around space and touch, or well-meaning “help” from others. Demonstrate, with prior warning, the sound of the whistle.
I always like to scope out the trail before bringing others out with me or use a place I’m very familiar with for beginner-level walks. Coming prepared with a short list of expected species to keep an eye out for is very handy, as is having a few “fun facts” or mushroom-related anecdotes in mind to set the vibe.
Hopefully, folks are stoked to see any kind of mushroom and try to discover more about it. Why do you think it is located where you found it? What’s unique about this mushroom? Are there many, or does it stand alone?
Although people want to learn which mushrooms they can eat, there’s a lot of responsibility in providing definitive answers. When you don’t know how much detail someone will take and retain from the information you share, it can be better to keep people accountable for their actions. Select locally relevant species identification guides and help folks develop their myco-vocabulary with real-world subjects. If you do find specimens of choice edibles, encourage people to use their senses to observe and become physically familiar with them. Creating that memory for personal reference is valuable in itself.

Hopefully, folks are stoked to see any kind of mushroom and try to discover more about it. Why do you think it is located where you found it? What’s unique about this mushroom? Are there many, or does it stand alone?
As you make your way along the chosen route, remember that you have placed yourself in a position of trust and example-setting. Be free with your enthusiasm for mycology, mushrooms, and other marvels of nature you’re witnessing. Model care and regard for the conservation of the space.
Offer an email sign-up list or other means of communicating about future fungi experiences (like a hosted server or group) that all will share. Be clear about the level of moderation you’re willing/able to provide, and remind people that they are placing trust in one another not to abuse the disclosure of contact details.
An expression of gratitude for accompanying you on the mushroom walk is always appreciated. This doesn’t have to cost you anything other than your time. It could be as simple as a sincere “Thanks for coming” at the end of the outing, a follow-up email with a photograph from the day and maybe some links to your favourite mushroom-related resources. If you feel really fancy, design a digital participation certificate that people can post to their social media or even print off for their wall at home or scrapbook.
Keep your ambition proportional to your abilities. Mushrooms are everywhere! There’s no need to venture far into the wilderness to find plenty of fungal life just waiting to be noticed.
It’s good to prepare for the unexpected whenever you’re in nature. If you don’t have any first-aid training, ask a qualified friend to join you. Be clear on how you will handle any medical emergencies that could arise. Are you sure that cell phones will have signals if you need to contact emergency services?
If you have fun with the group and enjoy your role as organiser, other activities are similarly friendly to all levels of mycological expertise. You could arrange a meet-up for a meal prepared by a qualified cook with safe food handling training using fungi acquired through credible sources. A fungi-focused art-making get-together or topical movie screening are also good options for the ‘indoor cats’ among us. Both are good choices for times of year when it is less opportune to observe wild-growing mushrooms.
Rather than trying to masquerade as the ultimate expert in all things myco, invite yourself to develop new wisdom as a consequence of communion with others. Although the concept of “set and setting” may be most familiar in the paradigm of psychedelics, consider that they may also apply to any scenario in which folks may learn about new things and discover how this knowledge transforms them, perhaps even affecting their worldview. Cultivate a setting that supports you and your companions. Maybe you’ll inspire others, and next time, someone else will put out the call! 3

Conservation and effective use of irrigation water is a central concern for every grower.
Many researchers are still interested in examining the possibilities of using magnetic fields to change the character of water used to grow plants
Conservation and effective use of irrigation water is a central concern for every grower. Whether for cost or access, it’s well worth considering anything we can do to better use the water provided to our crops. Loss of surface water to evaporation at higher global temperatures and increased soil salinity are significant challenges to food production worldwide. Dry earth does not support the diverse web of life that cycles and maintains a healthy layer of soil for growing.
Beneficial microscopic lifeforms, including various bacteria, fungi, and nematodes, help build and maintain the water-holding capacity of soil and unstructured substrates like peat— and coir-based mixes. Their contributions to plant health and yields are invaluable and multi-dimensional.
Applying physical controls, like simple magnets, to use less water and achieve the same or improved results would complement this biological aspect of water management in the garden.
Proponents of magnetic water technologies assert that water is physically reorganised into smaller molecular clusters through exposure to strong magnetic fields
In the past, any promised benefit of so-called “hexagonal” or “structured” water was largely written off as pseudoscience, a marketing ploy, or something too “woo-woo” to be taken seriously. Yet science marches forward. Many researchers are still interested in examining the possibilities of using magnetic fields to change the character of water used to grow plants. Is there truth to these hopeful claims about altering irrigation water with magnets?
Proponents of magnetic water technologies assert that water is physically reorganised into smaller molecular clusters through exposure to strong magnetic fields. The theory is that these smaller, more orderly groups of H20 can better be absorbed into cells, whether plant or microorganism.
Proponents of this technology also argue that magnetically-treated water is better at holding other molecules in solution. They suggest this makes elemental nutrients more available for uptake in nutrient cycling.
On a farm or home garden scale, using less water to grow healthy plants and maintain (or improve) produce quality could improve efficiencies elsewhere. It could mean reducing the amount of money spent on electricity to pump well water, lower water
bills where civic water is metered, less wear and tear on irrigation machinery, and, in cases of hand-spraying, reduced demand for physical labour.
As a species, we have a history of being curious about magnets. Various uses of magnetism are found throughout human record, as it is a naturally occurring phenomenon that affects all life on Earth. Our modern understanding of how plants orient themselves to grow upright comes from experiments done using strong magnets to artificially simulate the direction of “down” (“magnetotropism”).
Tropism: A growth response prompted by directional stimulation. For example, how shelf mushrooms grow parallel to the ground, even after a tree has fallen (gravitropism), or how plants turn and twist toward available
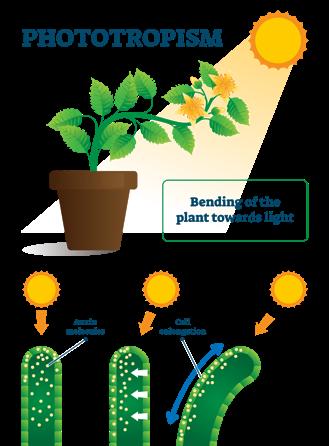
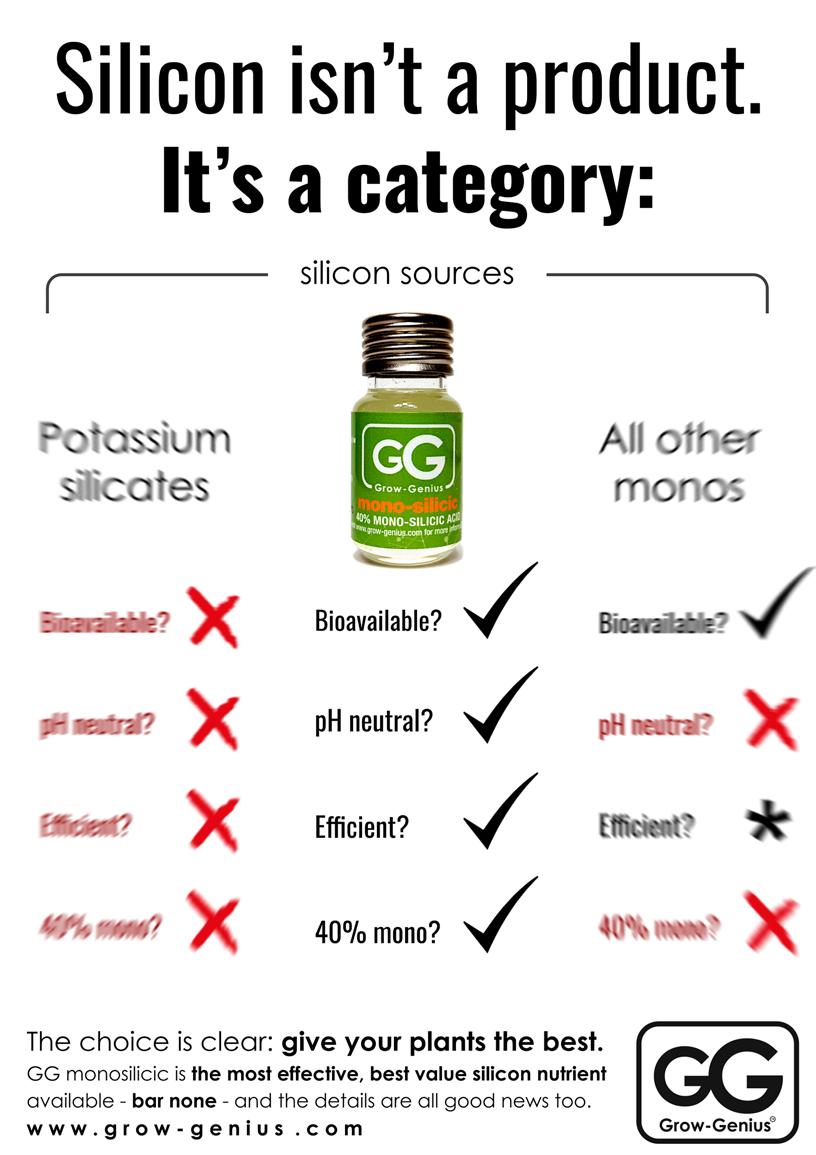
Seed germination and new tissue growth were improved when the seeds and the water used to start them were magnetised
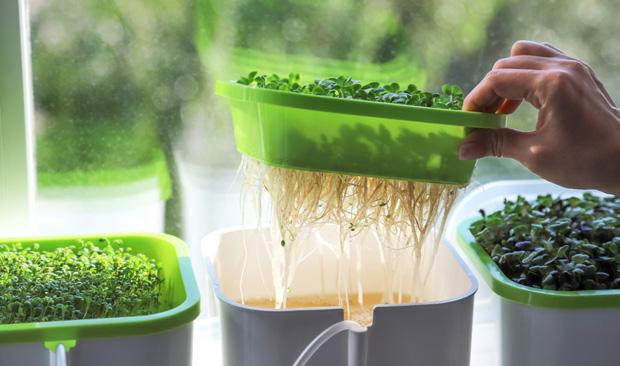
So we know that even as seeds, plants respond to the felt effects of a magnetic field. Yet pure magnetised water itself does not carry the property of magnetism.
When studying strawberries, apricots, peaches,
and grapes, production quantities and qualities were found to be better using magnetised irrigation water
Researchers have developed many ways to test and measure whether magnetised water results in better crop yields when directly compared to non-magnetised water. Due to the wide variety in experimental design, it is difficult to determine which growth characteristics were influenced by treating the water.
A 2022 review of studies conducted across many field crops, including sunflowers, eggplants, tomatoes, potatoes, wheat, corn, chickpeas, and others, summarised the results of many recent trials. Many promising outcomes were observed when using magnetised water.
Seed germination and new tissue growth were improved when the seeds and the water used to start them were magnetised. Generally, a better start to life improves yields by providing the plant with quickly established roots and a sturdier immune system, including a more populous supportive diversity in the rhizobiome.
When studying strawberries, apricots, peaches, and grapes, production quantities and qualities were found to be better using magnetised irrigation water. Eggplants grown with magnetically-treated water were longer, wider, and individually heavier than those in the controlled group. They also demonstrated higher levels of Vitamin C, organic acids, and mineral content.
Using magnetised water led to higher protein in both of these crops. Chickpeas’ leaves and seeds also contained more nitrogen, phosphorus, calcium, and potassium. At the same time, plants were generally longer and stacked up more mass during the growing season.
Several important factors are believed to be behind these incredible results. Soil structure, nutrient accessibility and use efficiency, and water availability throughout the growing cycle are critical for maintaining the health of a singular crop and the land on which each season’s production depends.
Improvements to soil structure, which provides the architecture for all of the activities of life within it, have been observed.
In 2020, a team based in Tunisia examined the effect of treating irrigation water with magnets on soil porosity, a measurement of the space between soil particles. The trials found that magnetic treatment of the irrigation water had a “strong” effect on soil porosity, improving it at the macro and micro levels.
Improved macroporosity is associated with better drainage when water is abundant, allowing deeper penetration and preventing oversaturation, compaction, and salt accumulation. Greater microporosity is related to the soil’s ability to hold moisture where needed, the free movement of microbes, and root growth.
The proliferation of microbes, especially beneficial bacteria associated with nutrient cycling, appears to be linked to magnetic irrigation water treatment. Whether more microbial activity is the cause of the porosity improvement or a result of it is not known.
Soil pH, a factor in the availability of many nutrients, was lower after magnetised water irrigation. Calcium carbonate and gypsum were made more soluble and readily available to plants.
Better photosynthesis, measured by higher levels of plant pigments, is also noted. Not only were the green parts of plants greener, but the carotenoids we associate with brightly coloured, more nutritious produce were present in higher quantities. The magnetic treatment appears to help plants more effectively convert light energy!

Under irrigation with magnetically treated water, enzymatic activity and secondary metabolite production are also improved. Secondary metabolites are chemicals a plant makes to survive in its environment. These include many of the compounds we consider medicinal.
The magnetic treatment appears to help plants more effectively convert light energy!
In a study on fusarium wilt in tomatoes, magnetic treatment showed remarkable promise for mitigating the fungus’s negative effects. Under observation, fusarium cultures were severely inhibited by the application of magnetised water, and plants intentionally infected with fusarium produced more tomatoes with the increasing exposure of their irrigation water to magnetic fields. Similar findings were noted in an experiment on reducing harm to cucumbers by Pythium aphanidermatum, a fungus linked with damping off.
Developing and making appropriate technologies available at scale is a hurdle yet to be fully overcome. With the now-established body of evidence supporting magnetism in agricultural irrigation, attention must now turn to funding and engineering research on water remediation for food production.
It’s all well and good when there’s enough fresh water. Unfortunately, that scenario is becoming increasingly rare in many regions. Magnetising water encourages the coupling of more water molecules in a given volume with soil particles, keeping it where it has been applied for longer. As discussed, the greater ease of water’s bond with desired minerals in the soil makes nutrient
uptake easier. This also helps flush excess salts, preventing them from building up.
Crop scientists have been especially interested in understanding whether or not exposing salinated, even brackish, water to magnetic fields can make it usable for growing plants. Some preliminary evidence suggests this could be the case, but researchers are adamant that more extensive testing is needed.
Hopefully, proponents of safe magnetic field generation will succeed in partnering with the rest of the invested life (the local humans, non-human animals, and microbes) to rejuvenate, restore, and conserve agricultural lands. 3
References
• Alattar, E., Radwan, E., & Elwasife, K. (2022). Improvement in growth of plants under the effect of magnetised water. AIMS Biophysics, 9(4), 346–387. doi.org/10.3934/biophy.2022029
• Bogatin, J., Bondarenko, N. Ph., Gak, E. Z., Rokhinson, E. E., & Ananyev, I. P. (1999). Magnetic Treatment of Irrigation Water: Experimental Results and Application Conditions. Environmental Science & Technology, 33(8), 1280–1285. doi.org/10.1021/es980172k
• Chibowski, E., & Szcześ, A. (2018). Magnetic water treatment–A review of the latest approaches. Chemosphere, 203, 54–67. doi.org/10.1016/j. chemosphere.2018.03.160
• Dobránszki, Judit. (2023). From mystery to reality: Magnetised water to tackle the challenges of climate change and for cleaner agricultural production. Journal of Cleaner Production, 425, 139077–139077. doi. org/10.1016/j.jclepro.2023.139077
• Hatem, M., et al (2020). The Effect of Magnetically Treated Water Against Fusarium Wilt Disease in Tomato Caused by the Fungus Fusarium oxysporum and its Effect on Production Under Fertilised Farming Conditions. Plant Archives Volume 20 No. 1, 2020 pp. 533-536. rebrand. ly/76e3b6
Xavi Kief is a writer, researcher, and lifelong learner with their hands in the dirt and their imagination traversing the universe. Seeking always to deepen and integrate their connection with the living planet and its diverse inhabitants, Xavi finds joy by infusing their practical and playful approach to cultivation with a healthy dose of science.They grow food and medicine for their family and community on their NorthEast Coast homestead.


HIGH CONCENTRATION = FASTER INOCULATION AND POTENCY
3600 endomycorrhizal propagules/g
Beneficial bacteria including Mycorrhizae Helper Bacteria (MHB)
Growth enhancers & biostimulants


If you want to boost your regenerative gardening skills and conserve water, look no further than the wicking bed! Find out what it is, why you need it, and how to build it in this blog from GCMag.co
Ready to level up your regenerative gardening game? Enter the wicking bed! As Stephanie Rose, author of The Regenerative Garden, puts it, a wicking bed is like having a massive selfwatering container right in your garden. No wonder these beds are a hit among eco-gardeners looking for sustainable ways to grow plants.
A wicking bed doesn’t look any different from any in-ground garden or raised bed. What makes it unique is what’s happening below the surface. This type of garden features a reservoir that captures and holds water runoff throughout the growing season, so you don’t have to worry about thirsty plants.
Picture this: make the reservoir base with an impermeable barrier. You’ll need drainage pipes to allow water to flow and gravel to store the water and act as a base for the soil. Place some landscape fabric on the gravel, then the soil and plants.
That’s a wicking bed!
Did somebody say less watering with a hose? Plants drink water from the reservoir as needed throughout their growth cycles and become stronger and sturdier. There’s less water waste because there’s less evaporation when the garden gets H20 below the surface. In the era of climate change, any step we take toward preserving and protecting our natural resources matters!
Rose recommends directing overflow spouts toward your wicking bed so you can fill them with rainwater (or manually with a hose). She says it’s best to fill it once a week in the summer and every two to three weeks in the spring and fall, less if it rains a lot where you live.
You can find a comprehensive list of materials and directions in The Regenerative Garden and 79 other sustainable garden projects. This has quickly become one of my favourite books, and I encourage you to grab a copy!
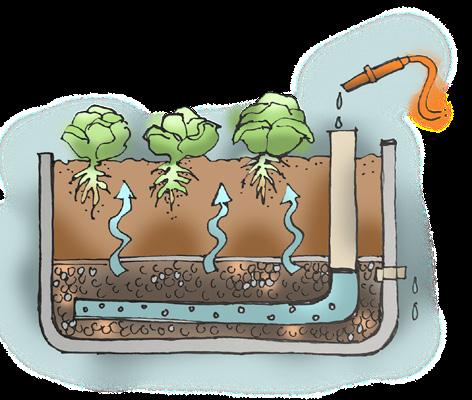
• 12 cedar fence posts
• ⅜ - x 10” galvanised steel spike nails
• Pond liner measured for the size of the garden bed plus 12” extra on all sides
• Staple gun and staples
• Weeping tile
• ¾” gravel (“clear” gravel only!)
• Dishwasher drain tube (fill tube)
• Landscape fabric
1. Remove all weeds from the garden site and level the ground.
2. Cut the cedar posts to length and notch the ends by cutting half the depth of each post as deep as the width of the connecting post. Place the two notched side posts directly on the ground, notch side up.
3. Set two end posts across the ends of the beds, with the notches facing down on the notches of the side posts. Ensure the four base posts sit flush on the ground to form a square or rectangle.
4. Nail spikes into the corners of the posts to keep them in place. Add more layers until you reach the desired bed height, nailing the posts in place as you go.
5. Install the pond liner at the bottom of the bed by placing it on the ground and letting it reach about 10” up the sides. Secure temporarily with staples until the gravel holds it down.
6. Place coils of weeping tile in the bottom. The tile will help the water move through the reservoir.
7. Connect a fill tube to the weeping tile. The fill tube makes things much easier once the soil enters the bed.
8. Add the gravel. The spaces between will fill with water, which will move upwards by capillary action.
9. Cover the gravel with landscape fabric to keep the soil out of the reservoir. Now add at least 12” of soil and get planting! 3


Despite growing vegetables for decades, Miles Torrent humbly calls himself a novice grower and describes his social media approach as ‘to entertain rather than educate.’ His allotment went through a radical transformation over five years. It started as an overgrown patch of grass with a few plants interspersed amongst weeds, an old shed, and a tiny apple tree. Today, Miles is the proud owner of two greenhouses, a composting system, and mycelium-inoculated wood chip paths dividing growing areas.
What he grows on his patch sustains his passion for experimenting with food, drinks, pickles, mushrooms, and spicy things. He proudly says his allotment is his favourite place and spends as much time there as possible, growing chillies, peppers, and other crops like rocket and salads. Of course, there is space for cool crops like glass gem corn, okra, or heritage tomato varieties.
Miles says he started growing without background knowledge but quickly became obsessed with soil health, worms, and microorganisms. His allotment became no-dig, and while at first tricky with the amount of compost needed, now he gets enough with help from ‘Big Bertha,’ his friendly rotary composter that eats up his vegetable scraps, egg shells, and grass cuttings.
Focusing on soil health naturally led him to become obsessed with mushrooms, experimenting with spores, liquid cultures, agar, and cloning. While the growing season is ending, the mushroom foraging season starts and presents fascinating specimens throughout the autumn months.
At home, Miles turns his crops into chilli sauces and fermented probiotics, with some hot sauces lined up for retail sale soon. He also loves making sparkly and flavourful apple cider. He sounds like a guy you want to have as a good friend (who throws many dinner parties, of course).
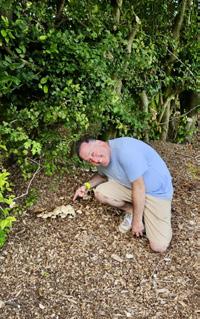


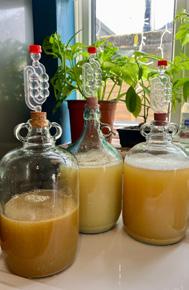
Miles loves being a part of the community of people who are into growing and preserving. There are people on the ground at the allotment sharing harvests and growing tips, but a vast online community also connects over social media and nerds out on all things plants and fungi. I had the pleasure of chatting with Miles at the ‘All Things Fungi Festival,’ and it was fantastic to connect in person with other energetic and inspirational nerds.
@Mileshky

Would you like to be featured as one of our local growers? If you’ve got a garden, grow room, or farm and have a story to share, contact us at: growers@gardenculturemagazine.com
Across the golden fields of the Oxfordshire countryside lies a truly hidden gem—Gorse Farm, a regenerative farm and self-service farm shop run by Matthew and Martina Eyre-Brook, a husband-and-wife team.

The duo of a German-born vet and an ex-military officer with farming roots are proving to be a well-oiled machine to run an active third-generation family farm, with its main focus being its herd of beef cattle known as The Oxford Reds. They love living on the farm with and near their livestock. Martina says they dedicate their lives to ensuring the cows are happy and healthy. Their customers love that the animals live a stress-free life in one spot. The farm plants a mix of herbs, legumes, and grasses; Gorse Farm leys don’t require any artificial fertiliser or chemicals, only rain and sunshine.
Happy cattle make regenerative farming much more enjoyable, as reflected in the delicious, nutritious, sustainable prime beef the Eyre-Brooks sell in their farm shop. The beginning of the farm shop came from the lockdown and the necessity for quality local produce. At first, Martina converted an old wardrobe into an egg-selling shed, which became so popular they started selling honey. After a relatively strong February storm in 2022, the couple upgraded the wardrobe into a wooden shed with a 14-litre milk dispenser. The milk dispenser was a great success, and Martina constantly ran back and forth to refill the milk! They have since upgraded to a proper automated milk vending machine that holds 100 litres and makes milkshakes too! With more space available, they added a chilled vending machine for bottles, butter, yoghurts, farm-fresh honey, and a self-service freezer for their ‘The Oxford Reds’ beef. With the support of other local business ladies, Gorse Farm Goodies offers a range of honeybased soaps and pure beeswax candles.


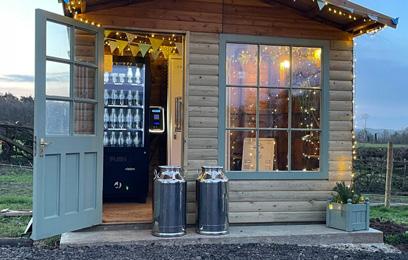
In 2022, Matt’s love for dahlias resulted in adapting a little strip of land to accommodate a variety of cultivars, which eventually became a wildly successful ‘pick your own’ scheme to the joy of surrounding neighbours.
In addition to the local food and products, Martina shares beautiful and wholesome content on social media, including one unique story about an owl—you must go and see it on Instagram.
gorsefarmgoodies.co.uk
Gorse Farm Goodies
Gorse_farm_goodies


Also available in ebooks
mamapublishing.com | cannascope.com
Watering the garden is one of the most basic tasks growers have, yet it’s also one of the most complex. We hope you’ve gained a wealth of knowledge from this edition regarding water and how to best offer it to your plants. In the era of climate change, this precious natural resource is a concern for us all, so we’d like to cap things off by suggesting 5 Cool Ways To Make The Most Of Your Water. These recommendations benefit us, our gardens, and the planet.
Drip irrigation involves using a series of hoses and tubes strategically placed at the base of plants throughout container gardens, raised beds, or in the ground. The gardener attaches a hose bib or sprinkler valve, and multiple plants simultaneously receive water. Some growers shy away from drip irrigation because the concept may initially seem overwhelming. But in reality, this method is easy to install, saves time and water, and offers several other benefits to plants. Drip irrigation allows water to slowly seep down to the roots where crops need it the most. As a result, it minimises the risk of diseases like powdery mildew and blight and reduces evaporation, quenching the garden’s thirst for longer. Hand watering takes a lot of time, but with drip irrigation, you only have to turn the water on and let the hoses handle the rest.You can purchase readyto-go kits and set a timer for automated garden watering! Now, that’s what we call smart gardening.
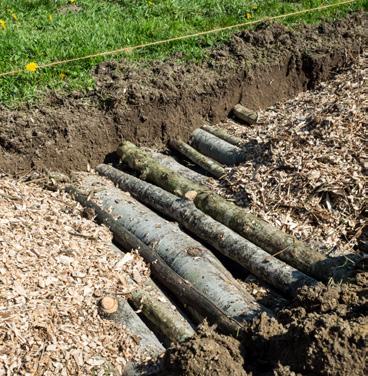
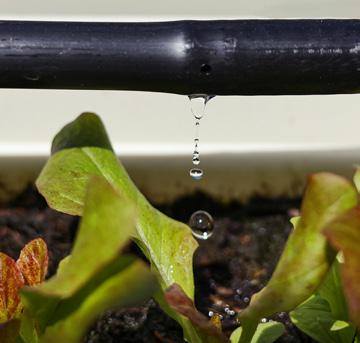
We can’t emphasise enough how efficient hugelkultur beds and containers are for the eco-friendly and water-conscious gardener. Building this type of garden involves layering slow-to-decompose materials at the bottom of the bed or container, like rotting logs, woody stems and branches, egg shells, and fruit pits. Top these materials with leaf mould, compost, and manure, and get planting! If you use rotted logs, you’ll notice how well they retain moisture, slowly released to plant roots. Trust us; we’ve tried building garden beds this way and loved the results, with Garden Culture’s editor noticing she didn’t have to water her crops even on the hottest days! If you’re not interested in building a hugelkultur bed, consider simply placing decomposing wood at the bottom of your beds or containers for water retention (and to reduce the amount of soil you’ll need!).
Sometimes, when it rains, it pours, so why not make the best of a storm and capture water for later use in your gardens? Capturing water can be as simple as putting buckets and wheelbarrows on the lawn before the rain starts. Others use rain barrels with a capacity of about 50 gallons to collect and store rainwater. Install the barrel near a downspout; if using the water for edible crops, a metal roof is ideal, as many roofing materials contain petroleum. A wicking bed is another option that requires some preparation but pays off in the long run. This type of garden features a reservoir that captures and holds water runoff throughout the growing season. Make the reservoir base with an impermeable barrier. Drainage pipes allow the water to flow, and gravel stores the water. Plants drink water from the reservoir as needed, resulting in less evaporation and water waste.

Good watering practices will help you be more efficient and reduce water waste. For example, water the garden only early in the morning or late when the sun sets. Getting your timing right will allow the water to soak into the soil rather than evaporate with the day’s heat. Another good rule of thumb is to water for longer, less often. With a deep soaking, you’ll notice the water pools at the plant’s base and then slowly disappears into the soil. If you do a quick watering, the roots will likely never feel the moisture, which will be quickly absorbed by the soil at the surface. Finally, never underestimate the importance of mulch. Placing compost, fallen leaves, or straw around the base of your plants (but not touching!) will protect the soil from erosion, nutrient leaching, and water evaporation. A quick tip: water before applying mulch to keep the moisture in the ground longer. 3
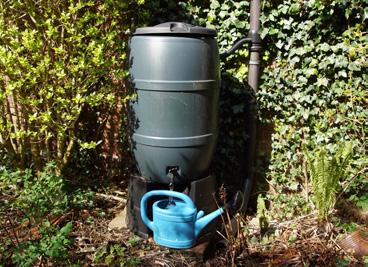
Our ancestors were clever and had a waste not, want not mentality; in the era of climate change, we need to adopt that mindset again. With experts predicting water will become more expensive or difficult to access, looking to our past for smart water-saving techniques is necessary. Many farmers in dry parts bury water ollas or unglazed clay pots because they are porous and water can pass freely through them. All you have to do is dig a hole in the garden for the pot, fill it with water about once a week, and cover it with a clay saucer or another pot to act as a lid. Ensure the lid sits at the soil surface so you can fill it with water. Place ollas 3 to 5 feet apart, depending on the crop type you’re growing. Ollas will offer plants extra water during dry spells and increase the time between watering.They’re an excellent option for containers as well. For large containers, use a 6-8-inch olla. In a garden bed, consider burying several 8-12-inch ollas.
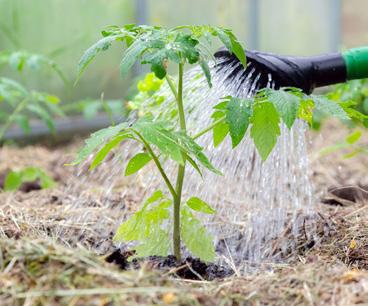

Source:
• The Climate Change Garden: Down To Earth Advice for Growing a Resilient Garden by Sally Morgan and Kim Stoddart.
• Organic Gardening for Everyone by Calikim
• The Regenerative Garden: 80 Practical Projects for Creating a Self-sustaining Garden Ecosystem by Stephanie Rose