2 minute read
2.2. Installation of Emulators
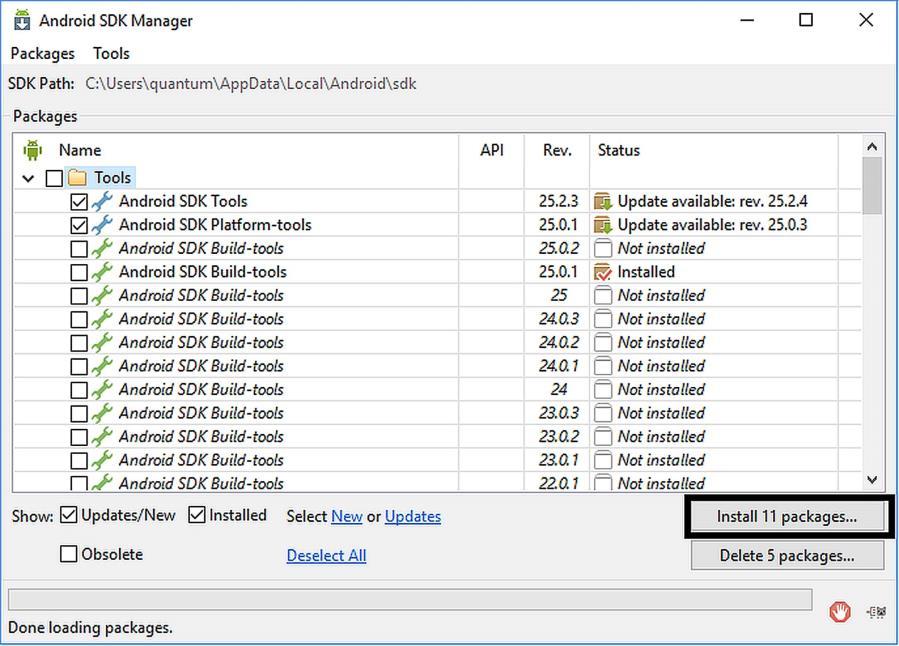
Please open the standalone SDK Manager by clicking the link indicated in Figure 2.4. In the standalone SDK Manager, click on the “Install … packages” as shown below:
Figure 2.5. Standalone SDK Manager
Advertisement
After you install the packages, you‟ll have the latest SDK and be ready to develop apps. However, before our test drive app one more step is needed: setting up the emulators.
2.2. Installation of Emulators
Emulators are software that mimics the behaviour of real devices. When we develop an app, we obviously won‟t have all the possible devices (Android phones, tablets, etc.) available at hand. Because of this, we run the apps on emulators for testing on various devices. Emulators are also called as “Android Virtual Devices (AVDs)” in Android Studio. When Android Studio is first installed, there is no default AVD. We need to create one before testing our apps. For this, select Tools Android AVD Manager as shown in Figure 2.6.
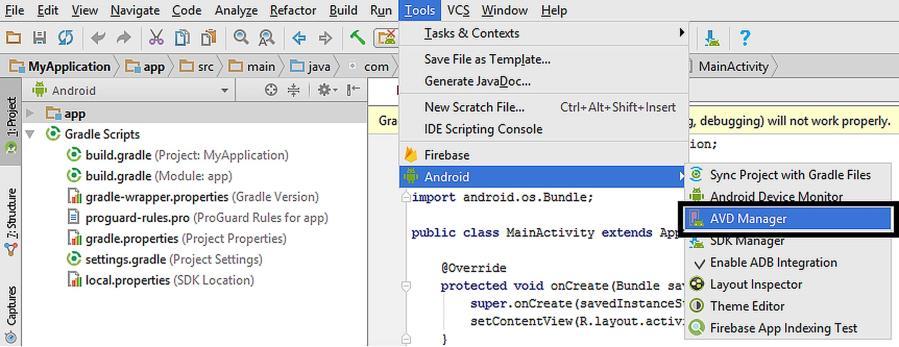
Figure 2.6 Launching the AVD Manager
When AVD Manager appears, there won‟t be any AVDs created or installed. Please click on the + Create a Virtual Device button as shown below:
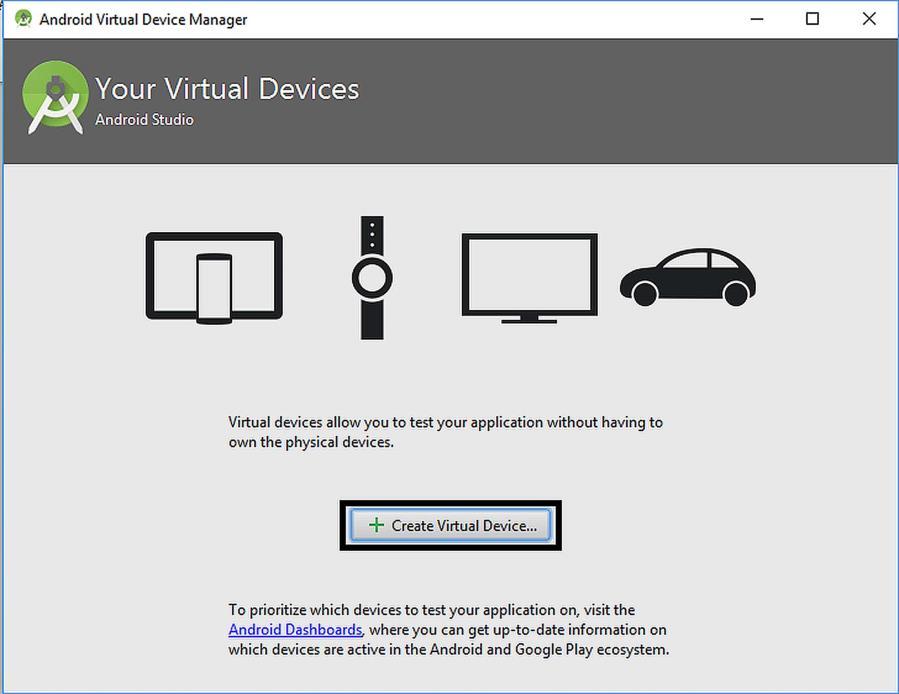
Figure 2.7. Creating a new AVD
AVD Manager will show a detailed window as in Figure 2.8. You can select various devices with different screen sizes and other hardware
properties. You can select device groups from the left pane as TV, Phone, etc. Phone group is the default selection. In this group, Nexus 5 is also selected by default. When you click “Next”, you‟ll be presented by choices for the Android version of the AVD as shown in Figure 2.9.
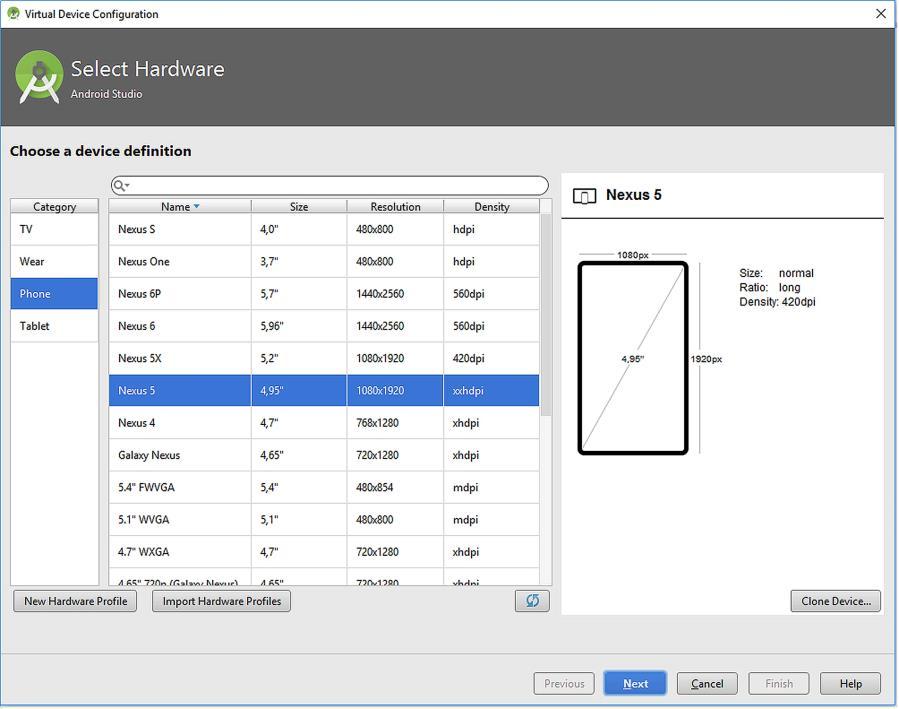
Figure 2.8. Creating a new AVD – selecting the device
The recommended targets start from Android 5.1. We can Android 7.0 with Goole APIs (Nougat) as shown in the figure. Then, please click “Next” and give a name you like to the AVD. I didn‟t change the defaults in the next screen as shown in Figure 2.10. After clicking “Finish”, the AVD is created and shown in the AVD Manager as in Figure 2.11. You can now try your Android apps on this AVD, which will accurately mimic the behaviour of a real Nexus 5 phone.
We can run the AVD by clicking the “Play” button shown inside the square in Figure 2.11. The virtual device will appear as in Figure 2.12 which you can use like a real Nexus 5 phone.
After installing both the development environment and the emulator, we‟re now ready to develop our test drive app, Hello World, in the next chapter.
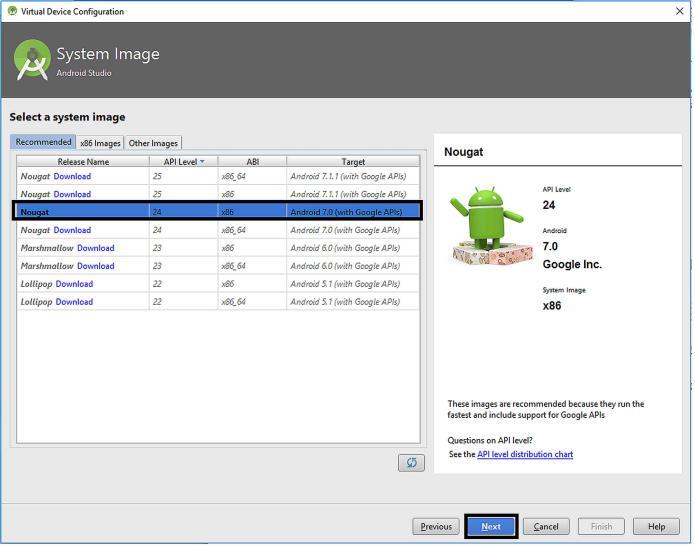
Figure 2.9. Selecting the Android version of the AVD
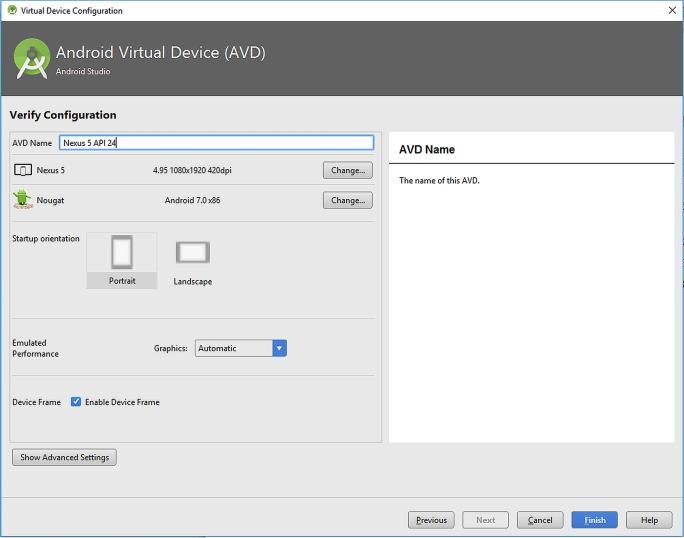
Figure 2.10. Final settings of the AVD
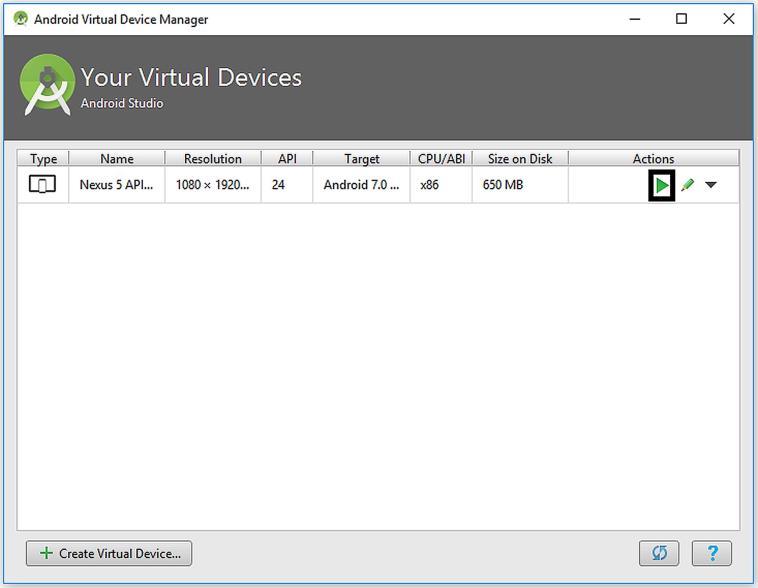
Figure 2.11. Newly created AVD shown in the AVD Manager
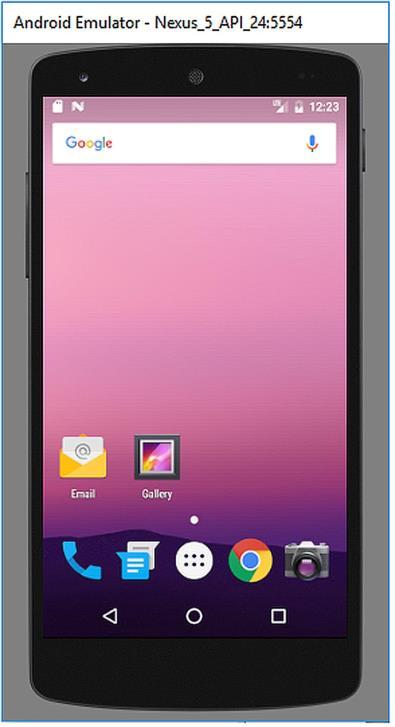
Figure 2.12. Nexus 5 emulator window


