4 minute read
3.6. Building the Project and Running on an Emulator


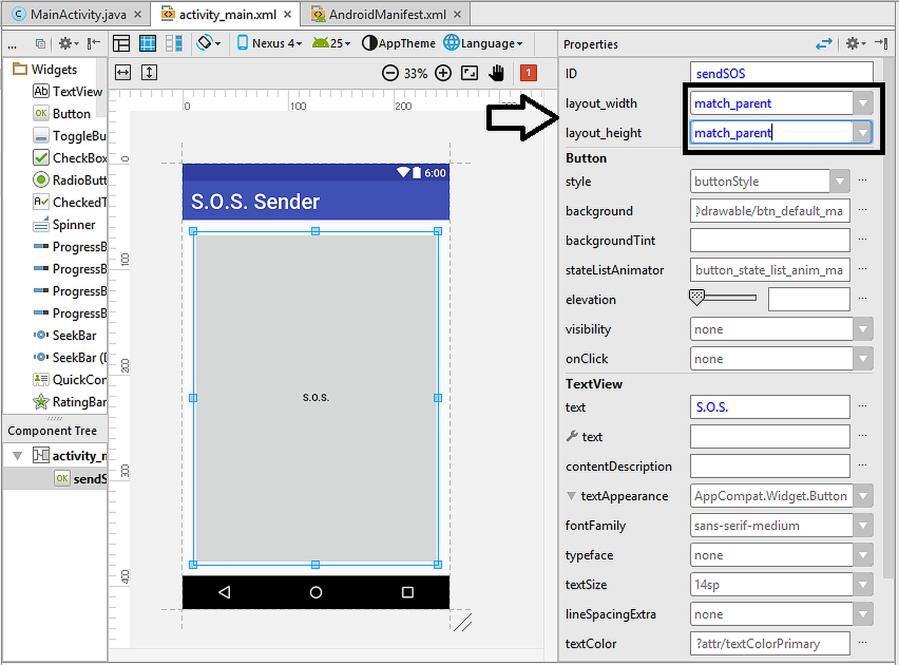
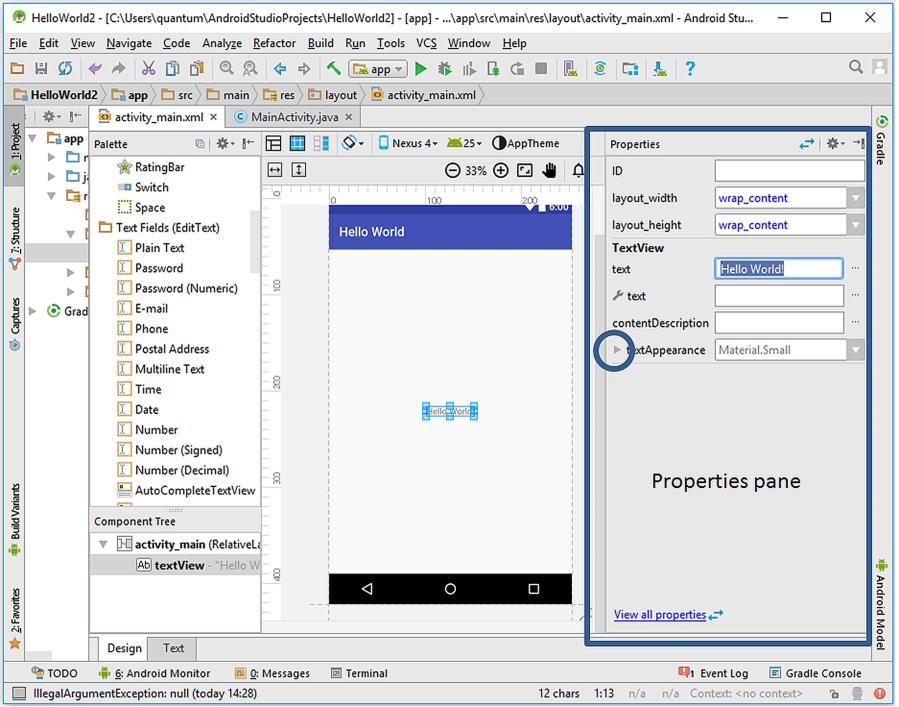
Figure 3.12. The Properties pane
The editable properties of the TextView component are shown inside the rectangle in Figure 3.13. In order to display the “Hello World” text in a better way, I changed its text size to 24sp (sp = scale–independent pixels) and its style to bold by clicking the B button in the textStyle section.
Advertisement
We have now completed setting up the user interface. Since we don‟t want our first app to do something interactive, we don‟t need to write single line of code for now. Of course we‟ll do a lot of coding in the upcoming projects but we don‟t need any coding here.
3.6. Building the Project and Running on an Emulator
Our first Android app is now ready to be run on an emulator. This is easy in Android Studio. We have set up a Nexus 5 emulator in the previous chapter therefore the only things we need to do are i) building the project, ii) selecting the emulator and then, iii) run our app on the emulator.

Figure 3.13. The editable properties of the TextView
In order to build and run the project, please click the “Run” button as indicated by the arrow in Figure 3.13. The emulator and device selection dialog shown in Figure 3.14 will appear. Since we have created a Nexus 5 emulator before, it is automatically selected as shown inside the rectangle. If we had connected a real Android device via USB cable to the computer, it would also show up in this dialog. However, since there is no real device connected for now, the dialog gives a warning at the top shown inside the ellipse in the figure. Please click “Next” and then the emulator will boot like a real device. It takes some time depending on your computer speed to completely start the emulator (something like 20 secs).
When the emulator starts running, you‟ll see a Nexus 5 screen as shown in Figure 3.15. You can use it like a real device (apart from calling and SMS features of course), and you can also use the controls on the right bar for changing general properties of the emulator if you want to.
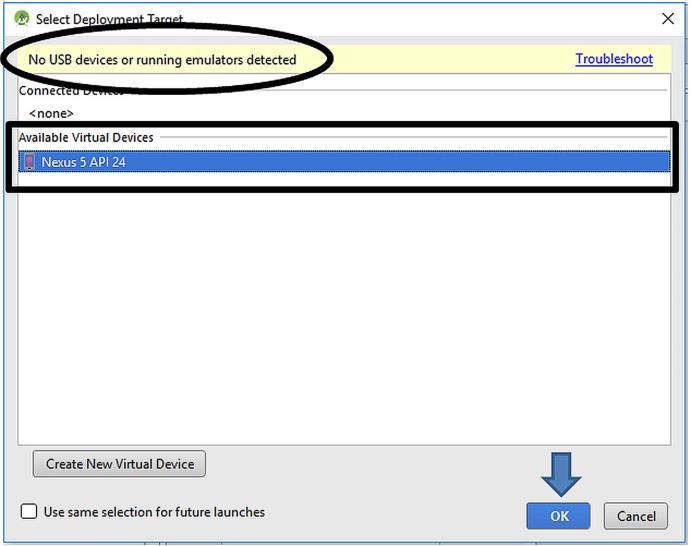
Figure 3.14. Selecting the target for running our first app
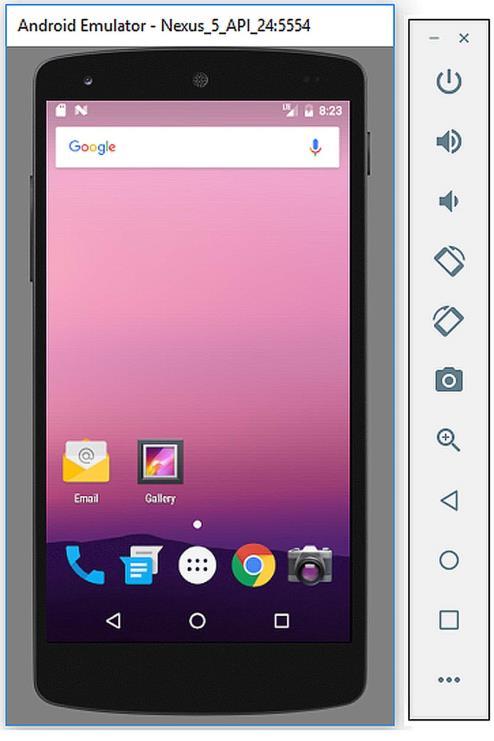
Figure 3.15. The Nexus 5 emulator
The emulator started but we cannot see our app running on it. Don‟t panic! If we check the main Android Studio window, we can see that it has given a warning as shown below:

Figure 3.16. Instant Run warning
Android Studio asks us if we want to utilize a component called Instant Run. Instant Run is a system introduced in Android Studio 2.0 and it shortens the Code Build Run cycle. When we use Instant Run, Android Studio pushes code updates to the emulator without the need of building a new executable. Therefore, viewing the effects of the changes of the code can be seen on the emulator in a shorter time. In summary, Instant Run is a good thing so let‟s install it by clicking the “Install and Continue” button shown in Figure 3.16. Android Studio will download the required files in a short time, and then we need to install these updates by the usual next-next procedure. After the tiny installation, Android Studio will build our project as indicated inside the rectangle in Figure 3.17.
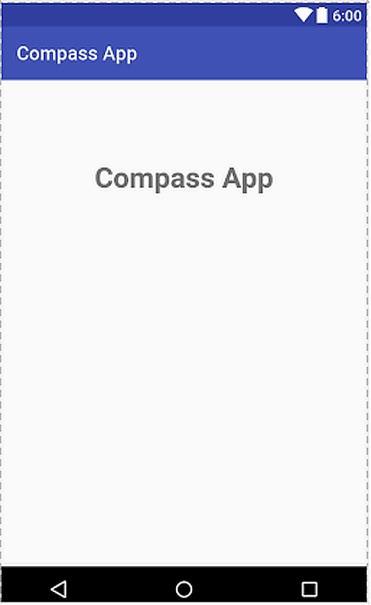
After the building process, the emulator will run our first app as in Figure 3.18. If you see the emulator screen shown in this figure, congratulations. You’ve successfully created your first Android app.
We can make any change in our app, and then press the “Re-Run” button indicated by the arrow in Figure 3.19. The emulator will install the updated app for emulating.
As you can see from your very first project, Android Studio offers vast number of possibilities and a user–friendly interface for transforming your ideas into Android apps.
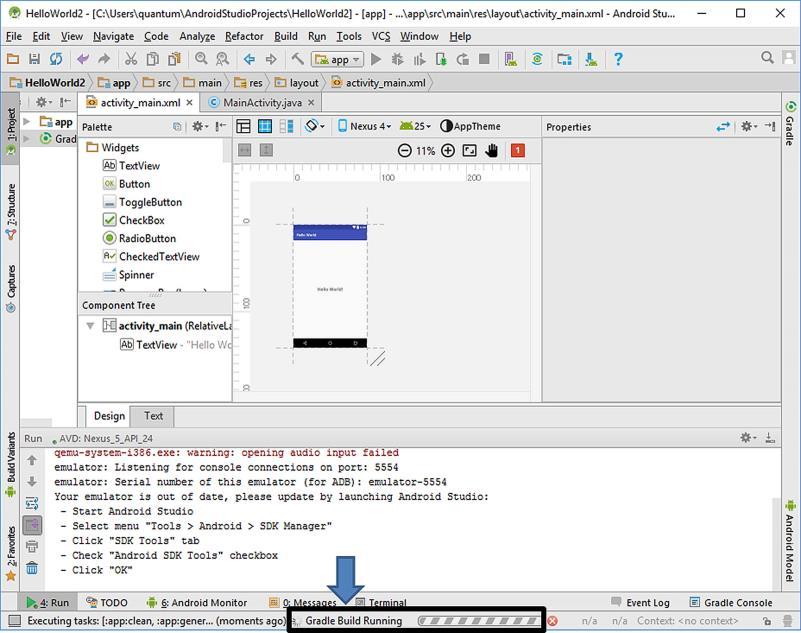
Figure 3.17. Android Studio in the process of building our project

Figure 3.18. Emulator running our “Hello World” app

Figure 3.19. The “Re-Run” button in Android Studio
I changed the text to “Hello Android!” from the TextView properties pane (shown in Figure 3.12) and pressed the Re-Run button. Android Studio built the project again and the updated app is displayed on the emulator screen as below:

Figure 3.20. The emulator running the updated app
You can stop the emulator running the app using the square red “Stop” button which is just at the right of the “Re-Run” button. When you stop the app, the emulator will not shut down completely and wait for the next run.