3 minute read
3.2. Creating a New Android Studio Project
8. Publishing the app on Google Play (optional).
3.2. Creating a New Android Studio Project
Advertisement
When we run Android Studio for the first time, we are presented by the dialog shown in Figure 3.1 where several options are available: i) Start a new Android Project, ii) Open an existing project, iii) Check out a project from a version control website (like GitHub), iv) Import a project created in a different development environment (like Eclipse) or v) Import an Android code sample (where code samples are downloaded from version control websites). We‟ll develop our first Android project therefore please select the first option shown by the arrow in Figure 3.1.
Figure 3.1. Creating a new Android Studio project for our first app
After selecting to create a new project, a dialog box for entering the project settings will appear as in Figure 3.2. In the first textbox (shown by “1” in the figure), we are required to enter the project name, which will also be the name of the app. I entered “Hello World” but you can enter another name as you wish. The company domain is given in the next textbox shown by “2”. This is a string similar to a web address that is used to distinguish among developers in the Google Play market. You can use any unique domain here. If you won‟t upload your app to Google Play (as in this example where we‟re just developing for learning the
basics), you can use any domain you like. I used the one shown in the figure. And then, we need to select the location on the computer to save the project files (shown by “3”). You can select any place you like to save your project files.
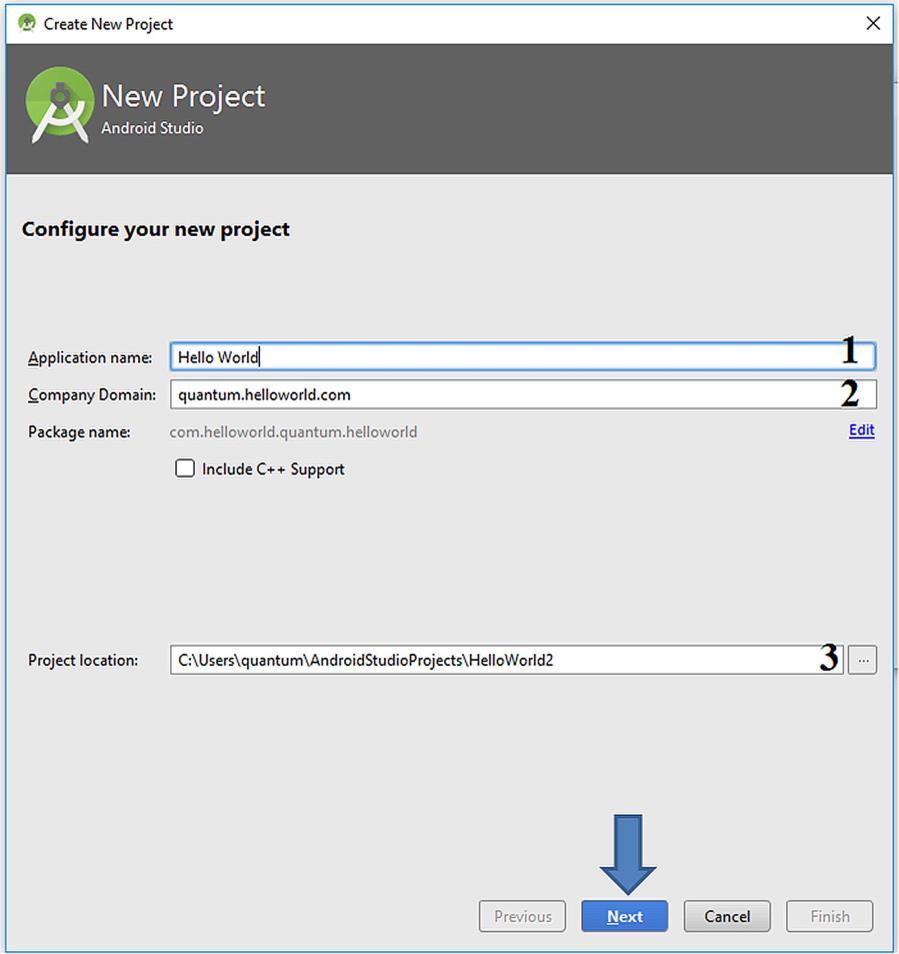
Figure 3.2. New project settings
After clicking “Next”, the Target Android Devices window shown in Figure 3.3 will appear. I selected the Phone and Tablet checkbox and then set the Minimum SDK as API 15 – Android 4.0.3. This means that the app we‟ll develop will be able to run on devices having Android version 4.0.3 or higher. After selecting the target, please click “Next”.

Figure 3.3. Selecting target devices
The template of the user interface is selected in the following dialog. As you can see from Figure 3.4, there are several templates including a login activity, maps activity, etc. However, since our aim is just writing a text on the screen, it is OK to select the Empty Activity as shown in Figure 3.4. So, what does an activity mean? Activities can be defined as screens shown to the user with user interfaces. Therefore, we have to include an activity to have an app because as you know Android apps are visual programs that have one or more user interfaces.
After selecting the default activity, Android Studio asks us to give names to the activity and the related layout file as shown in Figure 3.5. Since we will have a single activity in this app, it is perfectly OK to leave their names as defaults. When we click “Finish”, Android Studio will create the project files and folders automatically (this make take a while) and then the IDE will appear as in Figure 3.6.
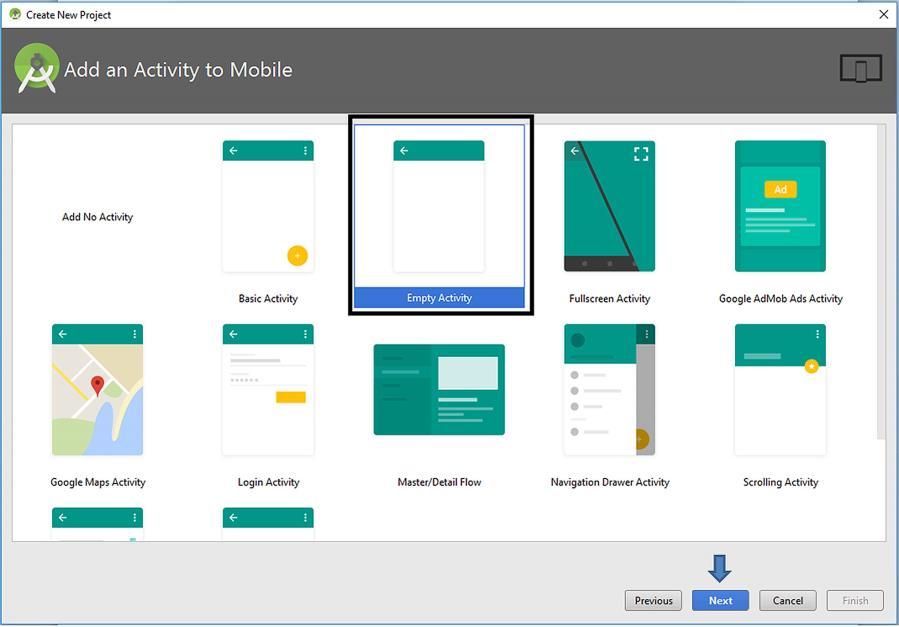
Figure 3.4. Adding an activity template to the app
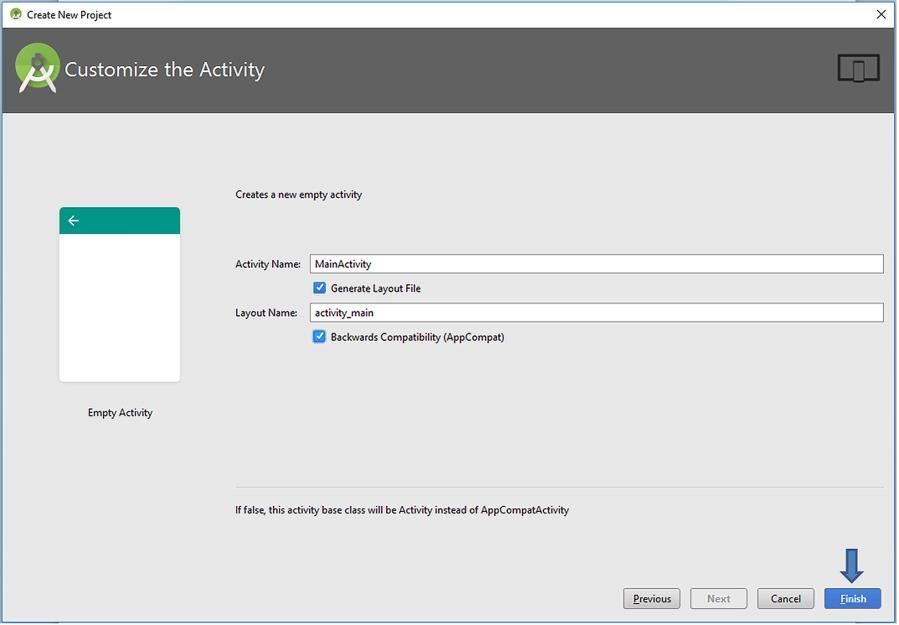
Figure 3.5. Customizing the newly added activity


