
4 minute read
After Effects Radar Screen

from _feb-mar2008
by Hiba Dweib

Radar Screen
In this after effects tutorial we are trying to create a scanning intrusion Radar Screen which you see in many action movies. The effect is quite simple to create but I will try to make it little hard. Just Kidding, I will try to do some extra things through expressions which will help in your other projects and not limited to one project.
Advertisement
So before starting I searched in the google for some images and edited them in Photoshop to make fit for this project. Please have a look at some images which I collected for this tutorial.
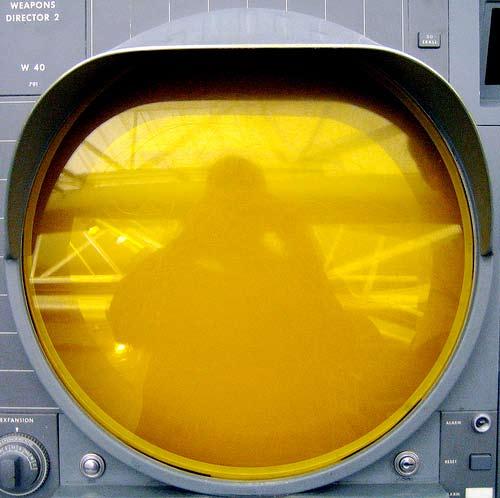

For the water reflection you seen on the screen. I used the image in the right and reduce the opacity to 15%. As the screen is not flat so I go into the Liquify and use th Bloat Tool.
Step 1: I created new project in the After Effects 7 Pro and import the PSD source file with all the layers. Drag them on the composition and scale it. So, nothing to explain here.
Step 2: Now I created a new Solid Layer (Ctrl +Y) just the double size of the composition, named Lime Green and choose a bright green color.
Step 3: I applied an Effect >Transition > Radial Wipe on the Solid Layer and choose the following settings. Infact in the following settings we need to touch only 3 things i.e Transition complete, Start Angle and Feather to give soft edges. If you are thinking that why the solid layer is not going outside the radar screen then the secret is I created a circular mask on this solid layer.


Without Feather With Feather

Step 4: Enable the 3D Layer switch for the Solid Layer, which gives you the Orientation option. And on every second increase the orientation value on Z Axis to give a rotation.
0s - 0 1s - 80 2s – 160 3s – 240 4s – 300 5s – 359
Step 5: Now your radar screen scanning will rotate but after 5sec that will stop but now think of two conditions. First, you need an animation of 10 sec and not 5 sec. Secondly, you don’t know how long you require and want to make an automatic loop.
a) So, In first condition, select all the key frames of that layer. Press Alt button on your PC keyboard and drag the last keyframe till 10 sec, that’s it nothing else to do. You will see all the keyframes adjusted accordingly.
b) In second condition, press Alt and click on the stopwatch near Orientation and enter the following expression.

loop_out (type = “cycle”, num_keyframes = 0) Now your radar scanning animation is looping the whole timeline.
Step 6: Duplicate the solid layer “Lime Green” and create a new solid layer “Red” for showing intrusion. Keep the size of layer very small, create a circular mask and feather it. You can also create a small spot using brush.
Step 7: Animate the position of the intrusion layer if you like. Drag this layer in between the two previous Lime Green Solid layer.
Step 8: Change the Track Matte to Alpha, so now only when radar screen goes over that area then only intrusion will be visible otherwise not. But in some movies I seen a intrusion shown as fade in fade out manner. In that case you don’t need an Alpha track matte but need to write a expression in the intrusion layer for Opacity, that will be driven by orientation of “Lime Layer”.

The expression is (thisComp.layer(“Lime Green”).transform.orientation[2] / 3.6 ) * -1 + 100
In above expression [2] is for Z axis because 0 is for X and 1 for Y axis. Then divided by 3.6 because opacity of any layer can’t go above 100. But then problem comes the visibility working in an invert way so multiply with -1 so now all values is negative and nothing visible. Add 100 or any value to bring same number of opacity. I know it’s quite difficult to understand like this but also very difficult to explain, but if you try the above expression then understand in a minute. Not a big deal.
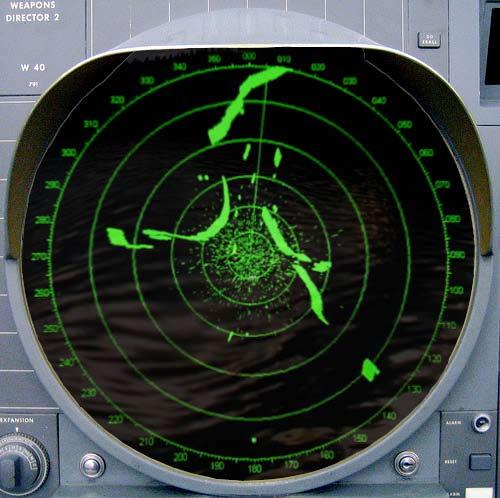
Step 9: Now your radar screen is ready and you can check the intrusions. If your radar screen is quite old and don’t have flat screen then you can apply Effect > Distort >Bulge on an adjustment layer. Hope you like this small but knowledgeable tutorial. Thanks for reading.


Suzane Smith
suz.smith@hotmail.com


