5 minute read
STEP-BY-STEP HANDBOOK


BUILDING DRY-STACK STONE LANDSCAPE WALLS
By Carter Swift
The term “dry-stack” refers to a stone wall that appears to have been constructed without
using mortar. A dry-stack landscape wall can integrate natural materials into the design of your outdoor living space. Although mortar can be used during construction of a dry-stack wall, it is hidden near the rear or interior of the wall, so only the natural rock is visible.
The popularity of the dry-stack method is due in part to its versatility. A dry-stack wall can be integrated into a retaining wall system, used as a low-profile landscape border, or built as a freestanding wall.
When used as a retaining wall, a dry-stack wall will have maximum strength if it slopes in two directions. This means the face of the wall must batter (lean backward) into the slope it retains, usually about 1/2 to 1 inch per foot. The top course should also pitch slightly toward the slope with the outward edge of the rim as the high point.
Note: For building sites that have steep slopes, consult a soil engineer or landscape professional to help design a plan to handle drainage and mitigate erosion. Some local building codes require soil engineers to approve plans for retaining walls above 4 feet tall.
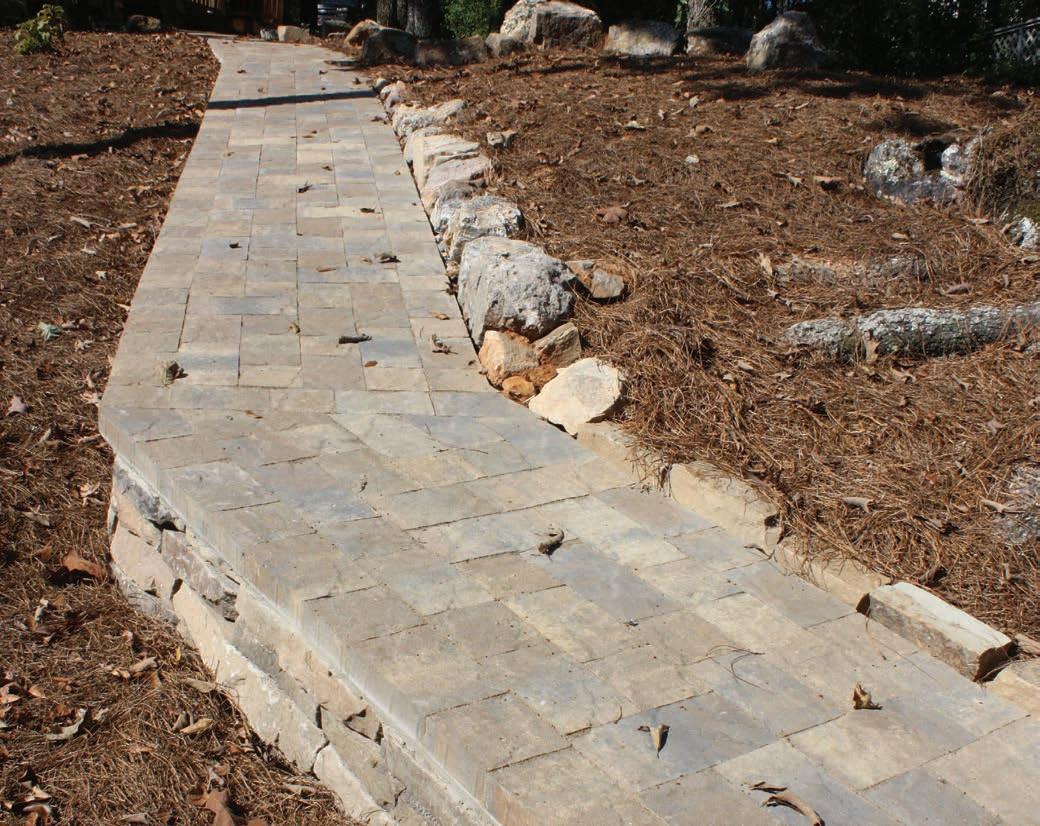
Dry-stack stone can be used to border sidewalks, installed as decorative landscape edging, or even used for retaining walls.
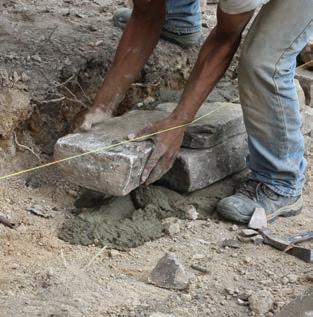
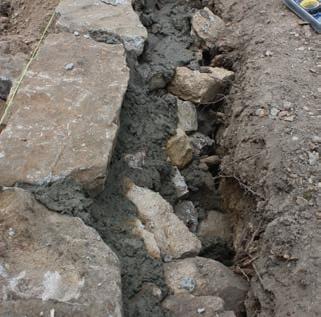
[STEP 1] Start with a 3-4” mortar bed.
[STEP 3] For the following courses, place the mortar along the back of the stones.
[STEP 2] Place the largest stones on the bottom course.
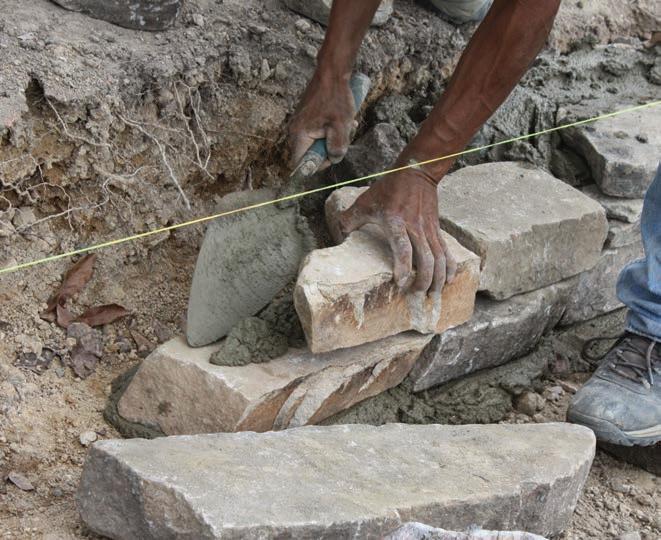
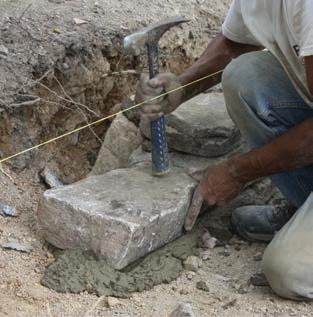
[STEP 4] Try to stagger the joints between courses. [STEP 5] Use a brick hammer to shape the stones as needed.
First step in constructing a dry-stack retaining wall is to excavate the ground in the rough shape you want the wall. Dig into the face of the slope at the same angle that the wall will batter. Another option is to construct the retaining wall at the bottom of the slope and then fill behind it with gravel and soil. In some cases, site and soil conditions require a combination of both methods, but in both cases, you should leave room behind the wall to add drainage gravel.
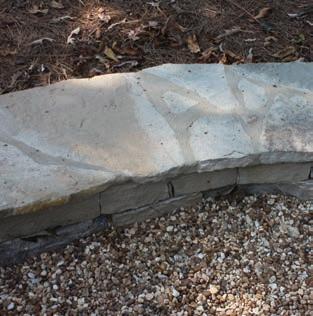
The wall shown was made of several stone courses, the top of which was covered with the final layer of surface pavers. That final course of pavers was mortared onto the border wall and served as the capstone. After the wall was constructed, the bottom two wall courses were buried beneath a berm of compacted earth to help hold it in place along the slope.
This short sidewalk border wall won’t retain much earth and water, but taller walls must support more weight and hydrostatic pressure that pushes outward against the wall. Therefore, taller walls require better drainage.
GIVE IT A BREAK
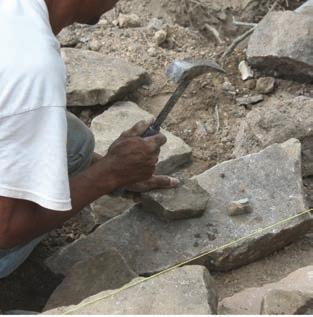
Working with natural stone means dealing with irregularly shaped building materials. You
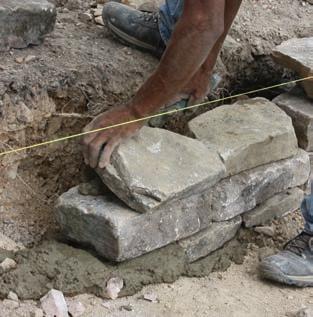
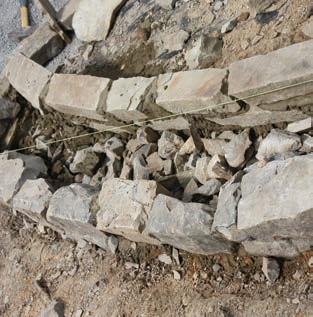
[STEP 6] Small rock fragments can be used to fill gaps and strengthen the wall.
[STEP 7] The wall will be backfilled with small stones and gravel.
need to envision the wall as a whole and the individual pieces required to assemble it. When those pieces are not readily available, you’ll need to break the stones into shape.
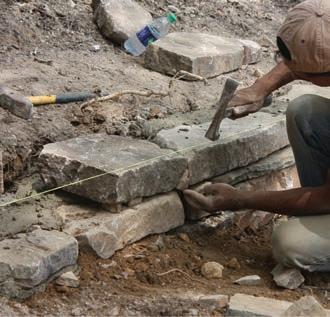
In some cases, you’ll need a brick hammer to chip away projections from a stone to give it a flat surface on which to stack the following course. Sometimes you’ll need to dig out a trench beneath the first course to fit a rock that has an uneven bottom surface. You’ll often need to split the length or width of a rock to fit your wall design. These cuts are made on-site as needed with simple hand tools (not powered blades) to maintain the natural cleft face of the rock.
The courses of stone are all laid in a 2- to 3-in. thick bed of masonry cement, applied along the rear edge of each course to keep the mortar hidden. The irregular shape of the stones leaves several gaps and voids in the wall. These voids should be filled with smaller rocks that are back-buttered with mortar and inserted to strengthen the wall and give it a more uniform appearance. The cut-off waste pieces are often used to fill these voids, but many of these gaps require pieces shaped with the brick hammer for a tight fit.

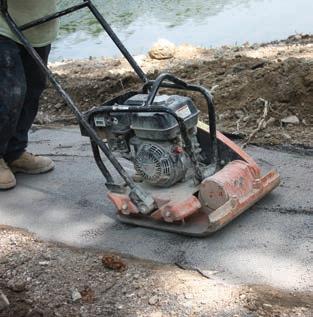
[STEP 8] Crushed rock is applied and compacted for the sidewalk. [STEP 9] The rock bed is leveled for the sidewalk pavers.

[STEP 10] Along the outer edge of the dry-stack wall, a row of pavers is mortared in place to serve as edging for the sidewalk.
[STEP 11] Freestanding dry-stack walls are built using two walls that lean against each other. [STEP 12] Add backfill between the two walls then cap them with mortared stone.
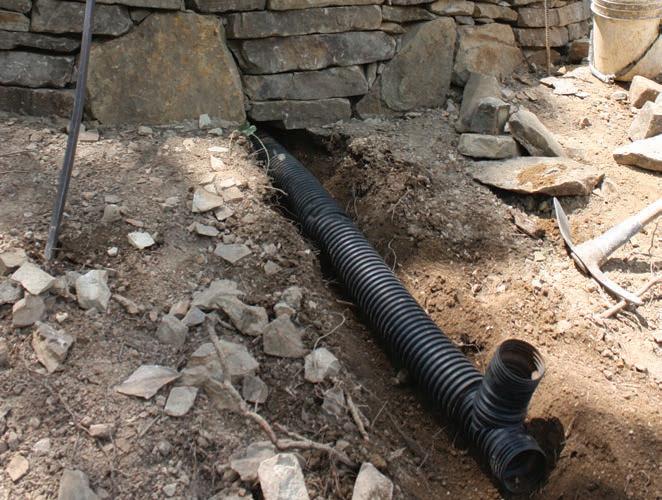
Stone walls that retain water should be built to allow for drainage. The drain pipe shown extends down from a dry-stack stone fire pit.
Freestanding Dry-stack Walls
A freestanding dry-stacked wall is constructed by building a double-sided sloped retaining wall where each side batters against the other, which presses the stones together and holds the wall upright.
Make sure to plan for drainage around your walls. Shown below is the outlet for a drainpipe that runs beneath the stones so water can exit without pushing against the wall.
H
Here’s the completed project: a flexible-base paver sidewalk supported on one side by a short dry-stack stone wall.