On the cover: Giant snow sculptures in Harbin, China captured on Jim's China PhotoTour. This page: Also in China, a wild snub-nosed monkey.
Aging isn't fun, but it's a lot better than the alternative. With that in mind, there comes a point when traveling the world gets to be too much for people. Our age catches up with us. The same is true for photographing nature and wildlife. Physical limitations get in our way -- carrying heavy equipment, suffering heat and cold, long hikes -- and at some point a nap seems more enticing than expending a lot of energy in pursuit of picture taking.
I'm convinced that having passions in life, like photography, does help keep us young, at least in spirit. And just because aging is progressing, that doesn't mean you have to stop shooting. There are beautiful photographs you can take at home if you put your thinking cap on. I've taken wonderful images right in my kitchen, for example.
Today, you can buy pretty much anything online, and that includes objects of nature. I've purchased exotic bird feathers, rocks and gems, live butterfly and moth cocoons, dried flowers and leaves, and tropical sea shells, all quite inexpensive, and all great macro subjects. By setting up a simple background and using the lighting of your choice, from flash to window light to outdoor shade, you can take awardwinning photographs without ever leaving home. Your passion for photography doesn't have to come to a screeching halt just because time is taking its toll.
In the March issue of Photo Insights, I'll show you examples of beautiful nature pictures I've taken at home. Challenge yourself to do this. It's fun.
Jim Zuckerman photos@jimzuckerman.com www.jimzuckerman.com
The
Challenge of
Midday Sunlight
Shooting in the harsh light of a clear sky during the middle of the day is an ever-present problem for photographers. You can’t make a picture taken at noon look like it was taken at sunrise or sunset, and you certainly can't transform harsh light into soft, diffused illumination. Photoshop can do magic, but it has limits. It can’t change the angle of the light nor can it change the shape and placement of shadows in a 2D image.
The biggest problem with midday light is contrast. Shadows tend to go too dark -- darker
than they appear to the eye -- and highlights become too light, often bordering on overexposure.
Original --one frame
At the very least, the overexposed highlights are distracting and visually annoying.
There are three ways to address this problem:
1) Wait for a another time of day when there is a cloud cover or you've got sunrise or sunset light. During the middle of the day, if the sky is partly cloudy, you can wait for a cloud to obscure the sun. The soft light makes a huge difference.
2) If there are no clouds at all, the next option is to process the RAW file like I did with the shot of the old car on the previous page. A screen capture of the Adobe Camera Raw dialog box shown at right (Lightroom has a different interface but it does the same thing) shows all the adjustments I made.
The first thing to notice is the highlights slider was moved all the way to the left, and the shadows slider was moved all the way to the right. This immediately toned down the highlights and opened the shadows to show more detail in the dark areas. At this point the exposure wasn't correct, so I used the exposure slider to address the problem. In addition, I added vibrance to make the colors pop as well as clarity which sharpens the midtones. These are the standard adjustments I use to deal with harsh contrast when working with a single picture.
3) If contrast is especially extreme, the best technique to use is HDR. I typically shoot 7 frames because this gives me a broad range of exposure values to work with. In other words, some of the frames are so overexposed that very dark shadows are lightened to show detail, and other frames are so underexposed that even very bright highlights are toned down enough to show good detail and texture.
Study the image at the top of the next page. I took
this image in Patagonia around 11am with harsh lighting. You can see how dark the shadows are. They have little to no detail. The peak of Mt. Fitzroy in the distance, on the other hand, is almost blown out . . . meaning it's so light that the detail and texture are close to being lost. This is an example of extreme contrast, and it's usually something photographers want to avoid.
The best way to lower the contrast to create more detail in the highlights and the shadows is to use HDR. In this case, I made 7 exposures, from very light to very dark. In Photoshop, I processed these shots and combined them such that the software extracts the best exposures from each frame and then assembles all that data into one perfect expo-
sure as shown below. The shadows are dark as they should be and as they appeared to my eyes, but they have discernable detail. Similarly, the distant peak has all the texture and detail it should have.
If you don't have a tripod with you, HDR is still quite doable. Use a wide angle lens and a fast frame rate, and Photoshop aligns all 7 images perfectly. §
The Macro Flash
A d v a n t a g e
Macro photography allows us to see and appreciate small subjects most people never pay attention to. There are inherent challenges, though, that photographers have to deal with in filling the frame with minute detail.
Depth of field
As the magnification increases, depth of field decreases. Out of focus backgrounds are at-
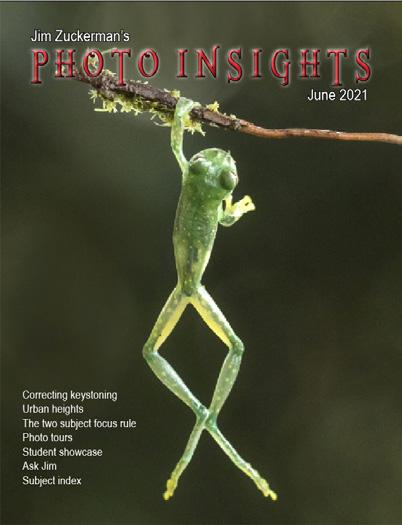
tractive behind subjects because they direct a viewer’s attention on the most important parts of the picture. But when the dof becomes so shallow that much of the subject itself is blurred, as in the picture below of the green tree frog, I feel that’s a problem. It seems to me the whole point of macro photography is to show intricate detail. If that detail is out of focus, what’s the point?
When extension tubes are used to increase magnification to 1:1 and beyond, the focus depth is so shallow that even at the smallest lens aperture
Iceland Drone Tour
August 24 - September 2, 2026y 1322024
like f/32, you still won’t be able to render most of the subject with tack sharp clarity.
Focus stacking is an option to create as much depth of field as needed, but that means the elements in the scene have to be perfectly still. There can’t be any wind at all.
Wind
Wind is the enemy of macro photographers. Small apertures are needed to gain as much depth of field as possible, and that means the shutter speed needed for a good exposure must be slow enough to compensate for the light loss from the smaller aperture. The slightest breeze, though, will cause pictures to be less than sharp. This defeats the whole purpose of what you are trying to accomplish.
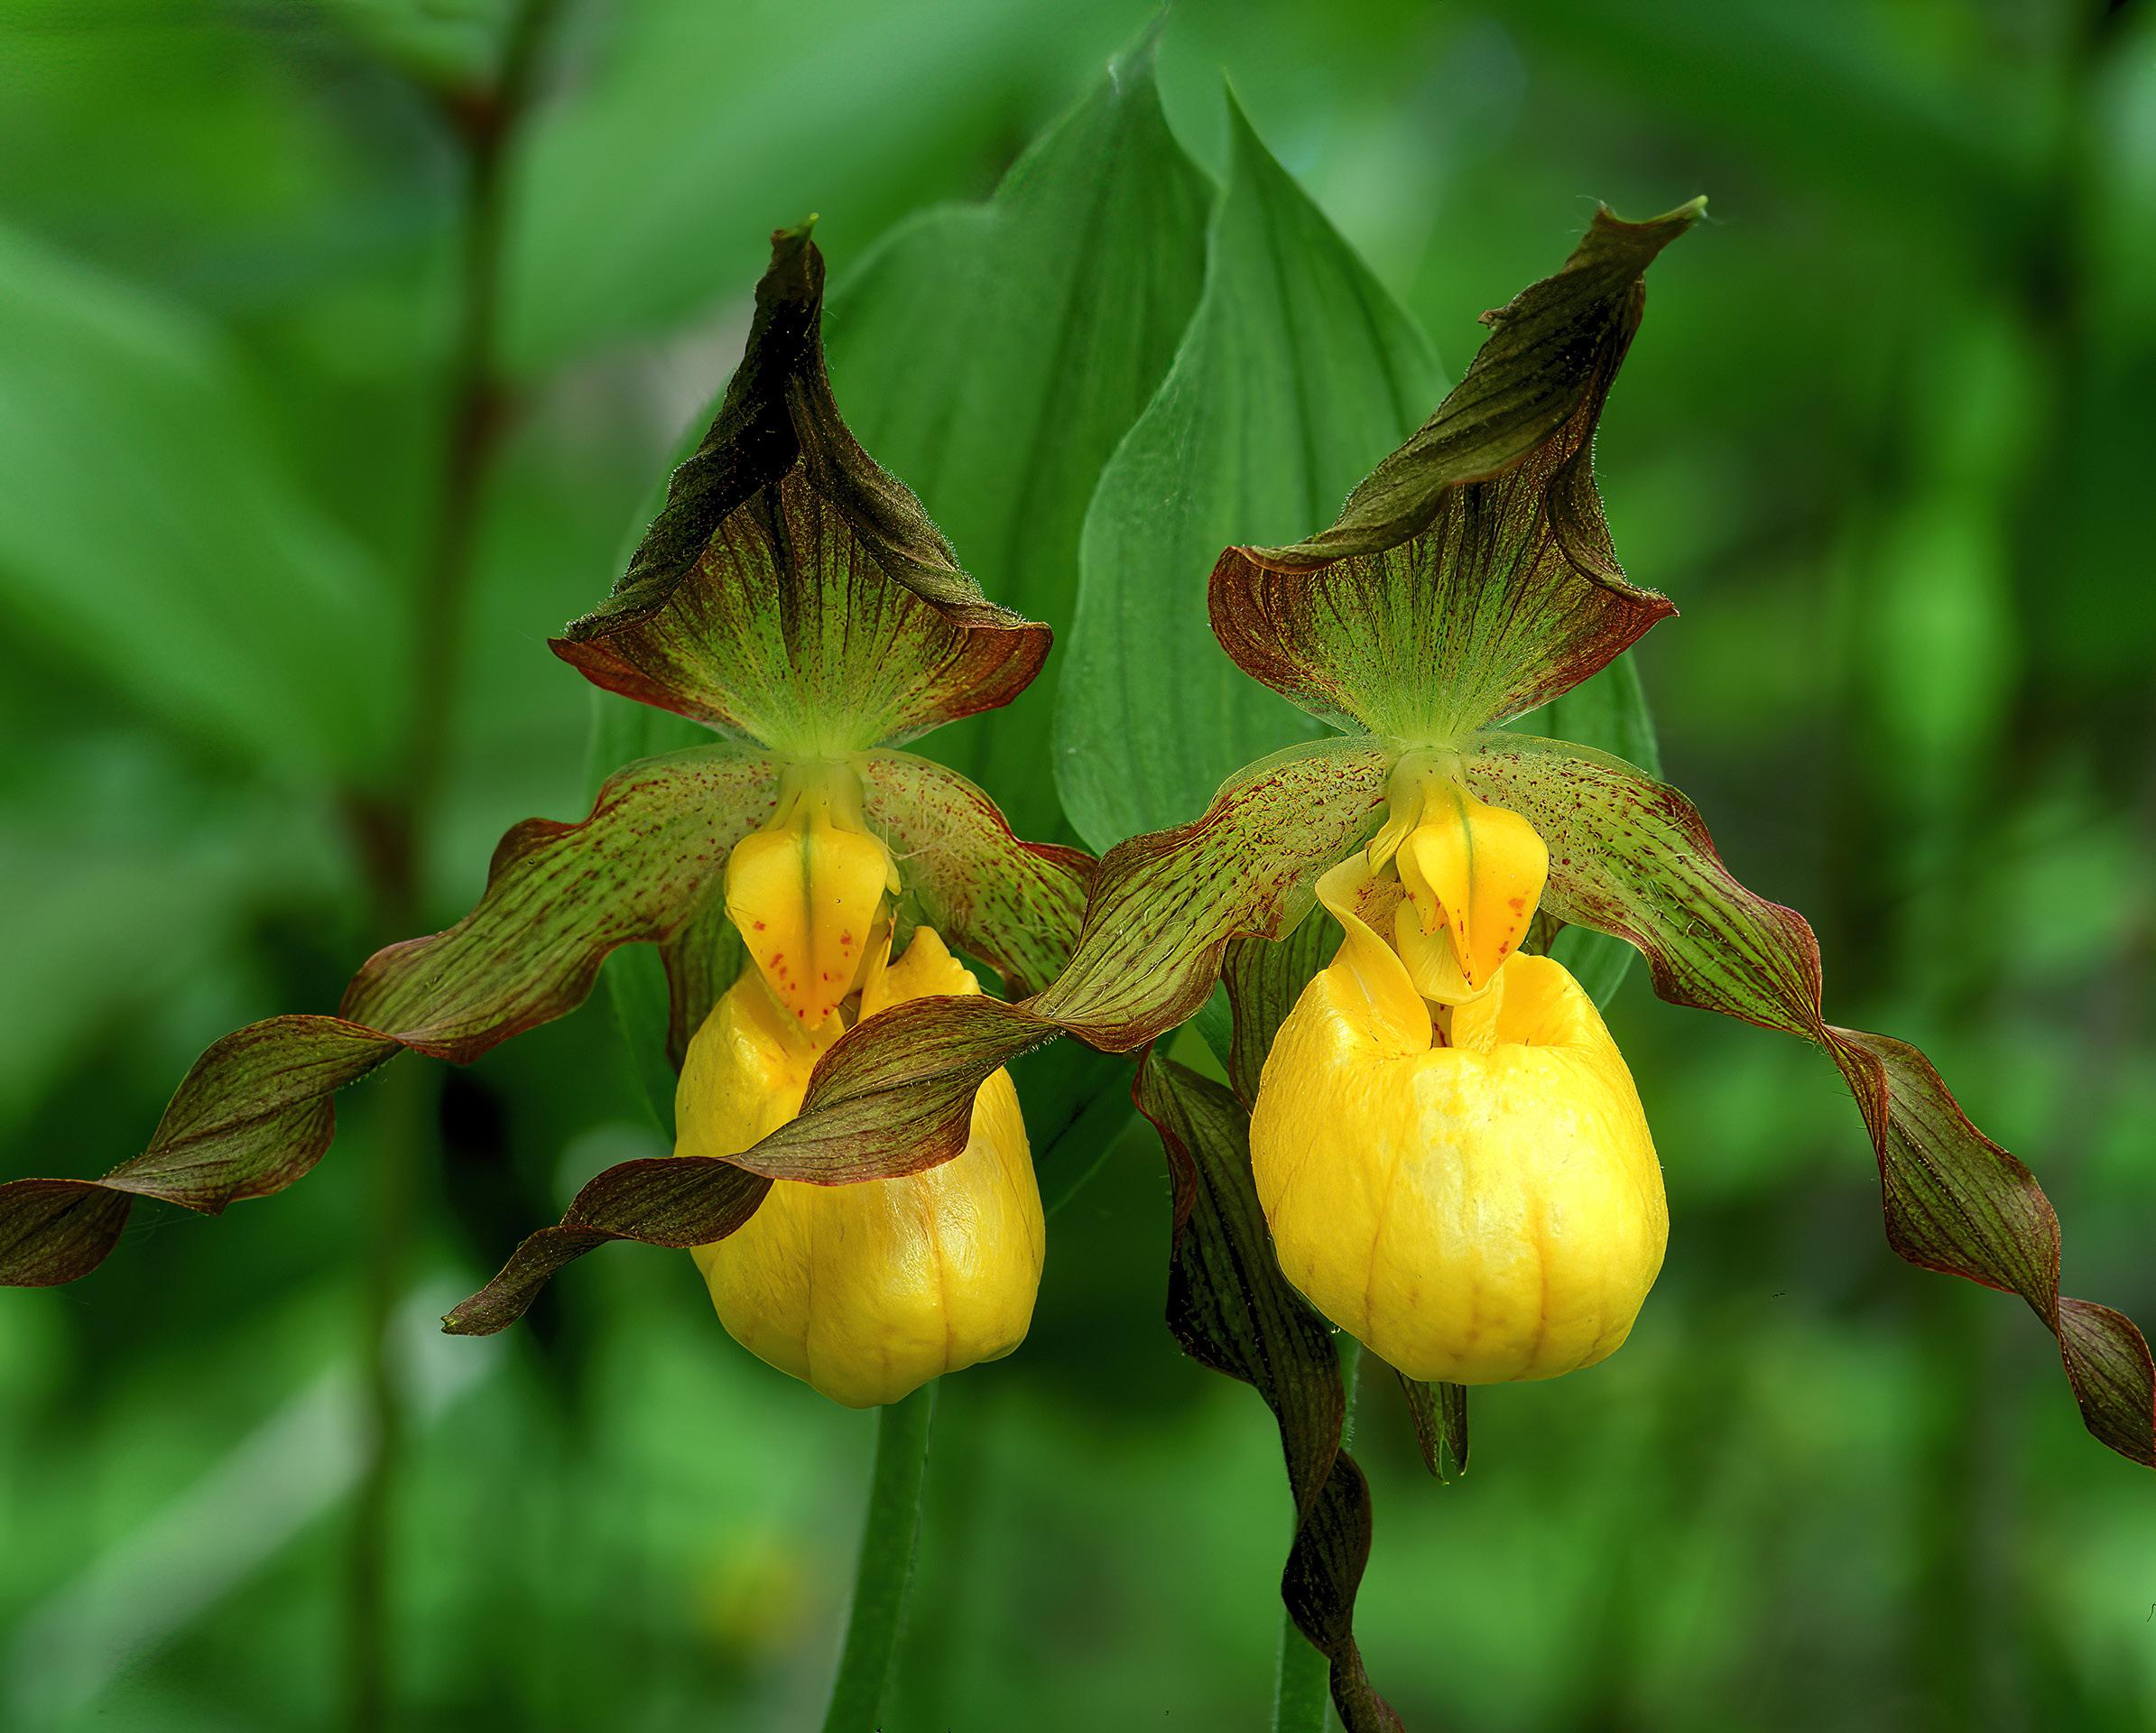
I took the shot below of two ladyslipper flowers on a forest floor in Michigan. The exposure time was one full second. The long shutter allowed me to shoot with a lens aperture of f/32. The small f/stop enabled me to make the entirety of the flowers tack sharp. I never could have taken a sharp picture like this if there had been even the smallest hint of wind.
ISO
In order to prevent blurred images when there is any kind of movement, you have to raise the ISO. This is a problem when you are trying to show fine detail; the increased noise degrades picture quality. Software programs used in post-processing to mitigate noise and increase sharpness, like Topaz DeNoise AI and Topaz Sharpen AI, are excellent, but ultimately a low
Macro flash
Using a flash for macro photography addresses these problems. The brief flash duration (which is the actual length of time the light in the flash is on during the exposure) freezes movement. A typical flash duration is between 1/500th and 1/1000th of a second. Not only does this eliminate the issue of blur due to long shutter speeds, but if you don’t have a tripod, you can hand hold the camera and not worry about sharpness.
In addition, when doing macro photography, the working distance from the camera to the subject is usually just a few inches. At this range, the excessive amount of light from the flash allows you to use the lowest ISO possible and, at the same time, use f/f22 or f/32 for as much depth of field as you can have without focus stacking.
Soft and diffused lighting is my preference for macro work, and that’s why I prefer to use a ring flash, below left. The other option is a twin flash setup, below right, in which two small flash units are positioned on either side of the lens. The twin flashes
allow you to create a light ratio where one side of the subject receives more light than the other. This is a useful tool, but I still prefer to use a ring flash which provides softer light. Diffused light makes every subject look good. The closer a light source is to a subject, the more diffused it becomes, and with a working distance of 4 or 5 inches, the light from the flash looks like the soft light from an overcast sky.
Black backgrounds
When flash is used on macro subjects, by definition, those subjects are close to the camera. The light emanates from the flash, bounces off the subject, and lets the ETTL flash metering system know that no more light is needed. The light falloff, then, means elements behind the subject are so underexposed they appeare muted or, if far enough away behind the subject, they will look black.
Sometimes a black background behind a macro subject is perfectly appropriate such as when we photograph nocturnal crea-
tures like the cecropia moth, right. There are times when you’ll want a black background for artistic purposes because black is so stark and non-distracting. It makes the subject stand out dramatically. In these instances, the light falloff that creates the black background is exactly what you want.
In other scenarios, however, you’ll want to include what looks like a natural environment. The caterpillar above is an example. However, given the light falloff which occurs with every light source, including flash units, how can you create a natural look when backgrounds more than a few inches behind the subjectt will become so underexposed?
The answer is to make a matte print of out of focus foliage in the 13x19 or 16x20 inch size.
Switzerland Photo Tour
Jan. 21 - Feb. 3, 2025
Mount the print to a piece of foam core so it lays flat (or tape it to a piece of carboard), and when photographing the small subject, place the print about 12 inches behind it. Even when using f/32, the print image remains out of focus while the subject is completely sharp. There is still light falloff, but the print is close enough to the light source that it is illuminated enough to see the detail in the image. You can vary the exposure on the print by adjusting its position behind the subject. Move it further from the flash by a few inches to reduce the exposure on it, or if you feel it's too dark, move it closer to the subject and the flash. For the picture of the Eastern common bumblebee below, I positioned the print of out of focus foliage 10 inches from the insect.
Using this technique, it's important to make sure the print you use is matte and not glossy. In addition, I angle the mounted print at an oblique angle to the lens-subject axis to make sure the camera doesn't see any reflections off the the print from the flash. Also, don't use canvas as the print material because it's quite possible the texture of the canvas itself will show up in the background.
Plan on making at least 3 or 4 prints of out of focus foliage so you'll have a few backgrounds from which to choose. You don't want all the backgrounds in your macro images looking the same. §
Exotic Birds of Colombia
Sept. 23 to Oct. 3, 2026
Pantanal Photo Tour, Brazil
Jaguars in the wild, birds in flight, caiman, otters and more
Dec. 1 - 9, 2025
Photography Quiz
1. As the focal length increases, a faster shutter is required to get a sharp picture?
a. True
b. False
2. Which f/stop has more bokeh?
a. F/9
b. F/6.3
c. F/2.8
d. F/1.4
3. Which of the following causes the worst damage to a camera:
a. Rain drops
b. Salt water
c. Blowing sand
d. High humidity
4. The complementary color to red is:
a. Purple
b. Magenta
c. Blue
d. Cyan
5. The best exposure mode when shooting lightning is:
a. Shutter priority
b. Aperture priority
c. Program mode
d. Manual mode
6. The focal length that approximates what we see with our eyes is:
a. 50mm
b. 85mm
c. 135mm
d. 35mm
e. None of the above
7. Sometimes unwanted dark vignetting will occur in an image. The likely cause of this is:
a. A wide angle lens was used in conjunction with two filters and a small aperture
b. A lens aperture smaller than f/32 was used
c. A lens shade was used along with a small aperture
8. Color infra-red film produced wild, psychedelic colors. When used with an orange filter, the sky would become what color?
a. Magenta
b. Orange
c. Mint green
d. Cobalt blue
9. Which of the following image making processes do not involve a camera?
a. Gum bichromate
b. Photogram
c. Selenium toning
10. Drones are so stable now they can take pictures from aloft in the dark.
a. True
b False
UPCOMING PHOTO WORKSHOPS
TEXAS BIRD WORKSHOP
Shooting from a blind, you'll get frame-filling shots of many species of birds in flight including red cardinals, crested caracara, green jays, greater kiskadees, and painted buntings. Jim shares with you the best camera settings for ultra sharp images. Based in south Texas.
May 14 - 17, 2025
FROG & REPTILE WORKSHOP in Kansas City
This is an exciting macro workshop in which you will be able to photograph about 40 species of colorful dart frogs and exotic reptiles. Held in a hotel conference room, Jim sets up natural backgrounds for outstanding photos. The photo at left shows a Jackson chameleon with the background replaced in Photoshop.
June 14 - 15, 2025
Carnival in Venice
Photograph amazing costumes in a Medieval environment. We shoot inside a 16th century palace, in an iconic gondola, in a stunning bedroom with traditional Venetian decor, and at other great locations. The photography as well as the experience is phenomenal.
February 23 - March 1, 2025
Abandoned in Georgia
April 21 - 27, 2025
What's Wrong with this Picture?
Lindhurst Mansion in Tarrytown, New York, is a 19th century architectural masterpiece, and it's hard to take a bad picture of it. There is really nothing wrong with this image except it was taken in mid-morning when the lighting was harsh and contrasty. When you travel, it's just not posible to have ideal lighting in every location. Besides, sometimes you want low angled sunlight, and other times diffused light is best. To coordinate ideal lighting with an itinerary is impossible, and it basically comes down to luck. Sometimes planning is part of the equation, but usually you simply have to deal with the weather on a daily basis.
Photography is an art form and, as such, photographers can and should use all the tools we have at our disposal to enhance, embellish, and even transform
our images to make them what we want, not necessarily how they appear in reality. There are some people who only want to photograph what they see, and that's fine. I don't play by those rules. I want the most impressive and most artistic interpretation of any subject I capture.
So, to dramatize this mansion in Photoshop I first gave it a sepia look using Image > adjustments > black and white, and this was followed by adding yellow and red using Image > adjustments > color balance. I then darkened it for mood with Image > adjustments > levels.
Next, I chose a stormy sky and replaced the original blue sky for maximum drama using Edit > Sky Replacement. I'll explain how I created the streaks of light in an article in the March issue of Photo Insights. §
On Safari: Kenya
March 22 - 31, 2026
SHORT AND SWEET
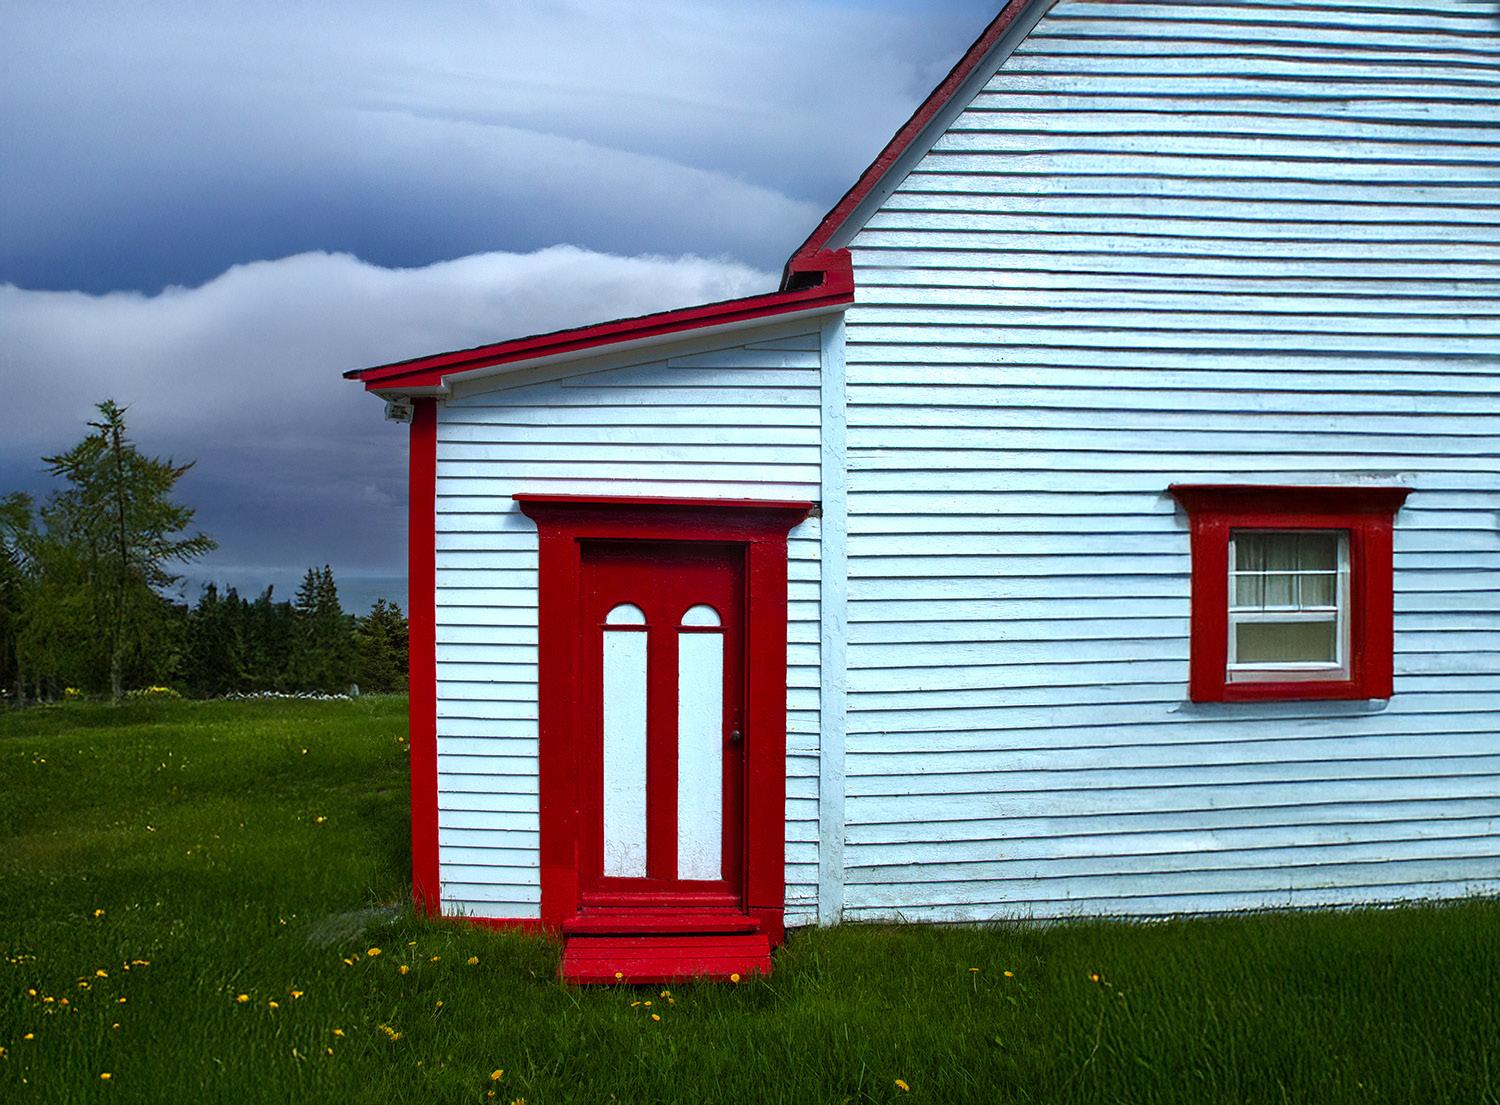
1. Simplicity often makes striking images. Simple, graphic lines are the foundation of art and composition. This is a seaside home in The Cribbies, a photogenic area in Newfoundland, Canada. Telephoto lenses are the ideal tools to seek out and isolate design elements in any scene.
3. In black and white photography, it's all about contrast and detail in the highlights and shadows. In ACR and Lightroom, the one slider that really makes b & w images pop is 'clarity'. It's much better than simply using the 'contrast' slider. This is Belle Helene plantation in Louisiana pre-restoration.
2. When you have two subjects in a composition, virtually without exception both must be sharp. That means you have to use at least f/8 to garner the kind of depth of field needed. I prefer to err on the side of enough depth of field, so I took this with f/16. What you don't want is one subject 'almost' sharp.
4. I'm finding that many of my favorite AI images are the result of blending photographs together. Often completely unrelated images -- like a leopard and an abstract fractal design -- when combined produce beautiful, intriguing, and artistic images. The online software I'm using, Midjourney, is incredible. §
Vietnam Photo Tour
October 13 - 23, 2025
ASK JIM
Every month, Jim answers a question from his online students, from people who participate in his tours and workshops, or from subscribers to this magazine. If you have a question you’d like Jim to answer, please drop him a note at photos@jimzuckerman.com.
Q: Jim . . . What percentage of the time are you using a tripod now? We have the ability to shoot with high ISO settings, and it seems like tripods have become almost irrelevant. Bob Martinez, Santa Fe, New Mexico.
A: For photography at twilight and night and when shooting with techniques like focus stacking, painting with light, and slow shutter speeds with moving water, a tripod is still essential. But for most of my work I now hand hold the camera. When I shot medium format (6x7cm transparencies), I virtually always used a tripod. With my Canon R5, I'd say I use a tripod about 5% of the time. As you said, we can raise the ISO so high now and that enables us to use hand-holdable shutter speeds in so many scenarios. §
Painting with light in the Palouse
Partial List of Photography Tours
2024 - 2026
CARNIVAL in VENICE
Feb/Mar 2025 INDONESIA Aug 2025
Sept 2025
PANTANAL
Dec 2025
ICELAND DRONE TOUR
Aug/Sept 2026
ABANDONED in GEORGIA Apr 2025
Oct 2025
SCOTLAND'S PAST May 2026
EXOTIC COLOMBIA BIRDS Sept/Oct 2026
Oct/Nov 2025
THE GREAT SPAIN ECLIPSE Aug 2026
ARMENIA & GEORGIA Oct/Nov 2026
Armenia & Georgia
October 26 - November 8, 2026
Student Showcase
Each month, Jim features one student who took beautiful and inspiring images on one or more of his photography tours or workshops. It’s really fascinating how photographers see and compose such different images even though we may go to the same places. Everyone takes great photographs on Jim’s trips.
Shehla Khan, Chicago, Illinois Patagonia photo tour, Venice photo workshop, and the Balkans photo tour.