The fact that you receive this eMagazine means you are a very lucky person. Lucky because you love photography, and photography is one of the most enriching pursuits I know. It is like a continuing education course that lasts a lifetime, leading you down paths you'd never venture into except with your camera, and it's endlessly rewarding because of the beauty you love to capture. How sad for people who don't share our passion.
Because of my lifelong pursuit of striking images, I often find myself in the most unlikely of places -- a tribal village in Ethiopia, the top of a dune in Namibia, an ice cave in Iceland, in an infinity pool on the 57th floor of a Singapore hotel, in a prison-turned-museum in Cambodia, at an eagle festival in Mongolia, in a foggy swamp in Louisiana, and so many more. I never would have experienced these places and captured so much beauty had it not been for my camera . . . and my realization that life is short and that we need to make the most of it before we can't.
So many times when I show my pictures to people, I can feel they are envious of my life experiences and disappointed in themselves for not living life as fully as they might have. I'm so glad I've circumvented that pitfall, and when I look back on my life I'm content in the realization that I've been blessed by a love of photography that, apparently, has no end.
I would assume you feel the same way.
Jim Zuckerman
photos@jimzuckerman.com
www.jimzuckerman.com
Nature Online
There is a wealth of photographic subject matter to be found online. The dreary months of winter makes it seem like it's not worth taking out your camera until Spring. I wish to say nothing is further from the truth.
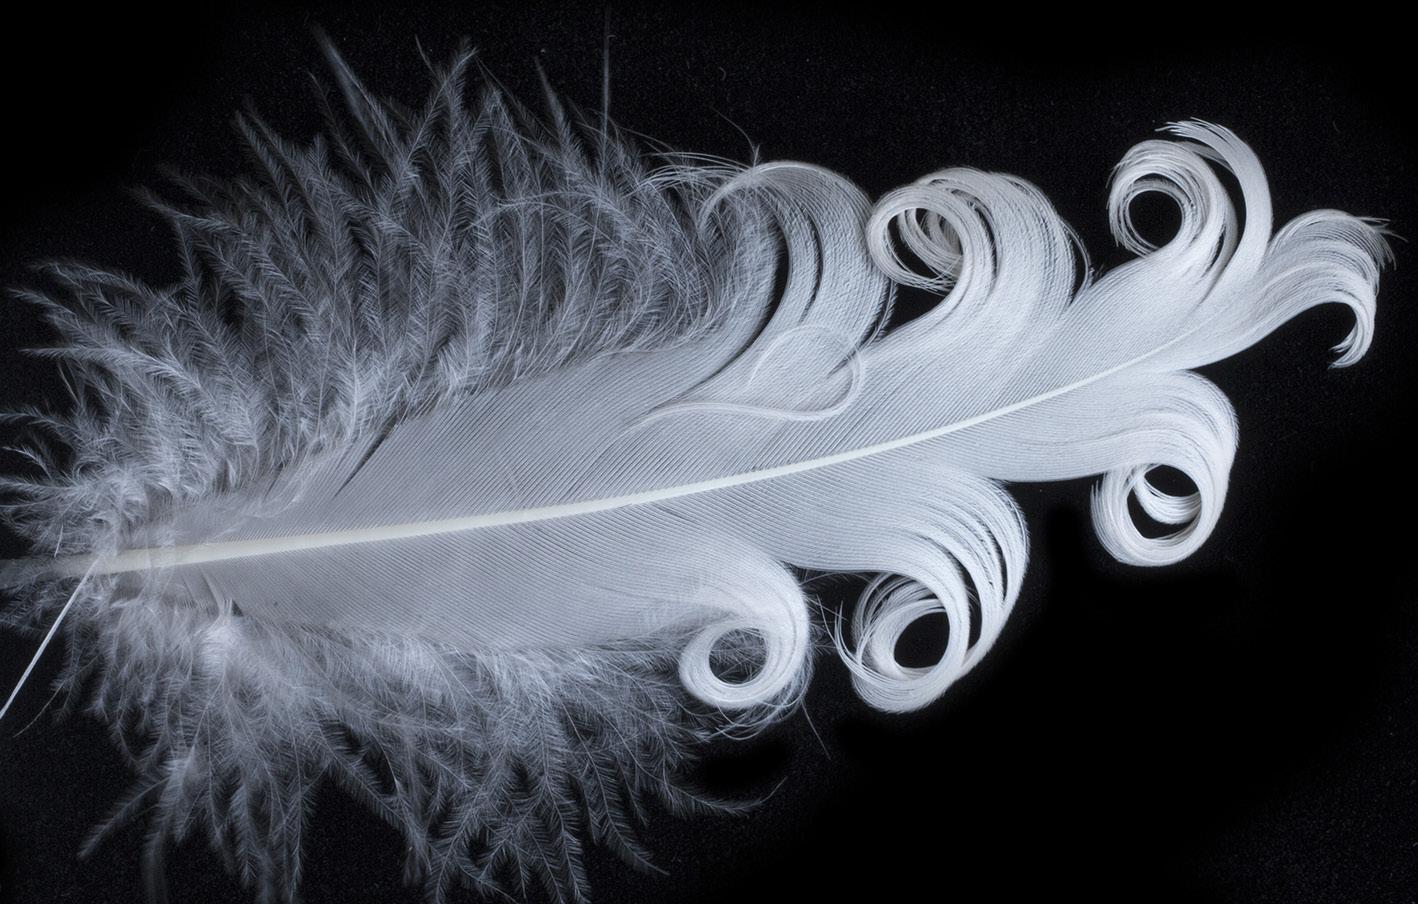
People all over the U.S. and the world sell inexpensive nature items that make great subjects to photograph. These include exotic and colorful bird feathers, sea shells, gems and minerals, animal bones, fossils, dried insects or insects embedded in acrylic, leaf skeletons, petrified
wood, live butterfly and moth eggs, lepidoptera cocoons, dried butterfly wings, and dried
flowers. By searching on Google, Amazon, eBay, Etsy, and other sites you can find an amazing variety of fantastic nature subjects just waiting for a creative photographer to produce striking images. And, the best part is, most of these subjects are less than $10.
For example, I searched on Amazon for 'bird feathers' and the top portion of the first page that turned up is shown below. And this is only the tip of the iceberg. There are so many different kinds of feathers to choose from. By laying out the feathers in artistic arrangements, you can create many wonderful designs.
Interested in beautiful and intricate patterns
in nature? Macro photographers love shooting beautiful natural designs. One of the most compelling subjects in this genre is leaf skeletons. Large-leaf magnolia trees, for example, decay in such a way that the vein structure remains intact longer than the rest of the leaf. In addition, people can artificially create leaf skeletons producing perfectly formed designs that are truly works of art, shown at left. Packages of these leaves can be purchased for just a few dollars online.
On the next page you can see a beautiful mineral I set up against a piece of black velvet, and at the bottom I used strong backlighting to illuminate a striking seashell.
Lighting
One of the keys to good macro photography is lighting. Since none of these subjects are moving, you have time to deliberate and to experiment with the direction of light until you like what you see. My favorite types of illumination are: Backlighting, sidelighting, and diffused light.
Backlighting
Backlight is by far the most dramatic. For translucent or semi-translucent subjects, a strong light in the background intensifies color, creates bold contrast, and in the case of the seashell below, adds rim lighting to opacque portions of the shell. Note that some subjects appear to be so dense that backlighting doesn't make sense. However, by placing a brilliant light -- like an electronic flash -- a couple of inches directly behind the subject and then adjusting the exposure, you'll see color, texture, and design that was previously unnoticed.
Sidelighting
Light coming from the side, whether it is window light, a flash, a photoflood, or a softbox, creates texture and dimension. It's a very effective way of emphasizing the artistry of any subject. I used side light when photographing
the black quartz at the top of the next page.
Diffused light
With pretty much any subject, you can never go wrong with diffused light. Even at midday, you can usually find shade to photograph an object. At times, I've even used my own shadow to photograph macro subjects such as wildflowers. Soft lighting compliments any subject because there is a minimum of contrast and
unwanted shadows. It is also the easiest type of light to expose for.
Solid black
In my opinion, the most visually effective background behind macro subjects is black. I use a piece of back velvet for this because the fabric absorbs light so the texture of the fabric itself doesn't show in the picture. A subject always stands out boldly and dramatically against black.
Alternative backgrounds
Thinking outside the box, there are a number of other backgrounds that will enhance and embellish nature subjects. For example, I bought a replica skull of the extinct sabre tooth cat. It looked good against black, but I wanted to suggest I'd found it (while hiking in the Arctic, of course) in a frozen stream bed. So, I placed the skull in a
large Tupperware container full of water and then placed this in my freezer. A few hours later, I removed the block of ice and poured hot water on it to simulate natural cracking. I then took it outside while it was snowing and photographed it in the diffused light of an overcast sky.
Part of the fun of photographing nature subjects is being creative with your technique. §
Rays of light
When I visited the 12th century Ogrodzieniec Castle ruins in Poland, the sky was white due to a thick overcast. I replaced the boring sky with clouds, but then I added the light rays to dramatize the picture. I think those streaks of light make all the difference.
There are several ways to create light rays in Photoshop. The method I'm going to demonstrate here is the easiest.
1. Open a blank image in Photoshop, File > open, and make it solid black. To do this,
choose Select > all, and then Edit > fill. In the dialog box choose 'black'.
2. Put 'white' in the foreground box at the bottom of the tools palette, and choose the brush tool.
3. Using the bracket keys, adjust the size of the brush so it places a fairly small white dot in the black Photoshop document. Place several dots and adjust the opacity of the brush so the dots have varying densities.
4. Add larger dots and then, again using the bracket keys to enlarge the brush, add even larger dots especially away from the starting point. See the image on page 10. As you can see, I made the
Iceland Drone Tour
August 24 - September 2, 2026
overall pattern of dots diagonally in the frame. This will correspond to the angle of the light rays in the final composite image.
5. Choose Filter > Blur > Radial blur. In the dialog box shown at right, choose 100% for the amount, and under Blur Method select 'zoom'. For the quality, you can choose either 'good' or 'best'. It doesn't really matter.
The graphic in the lower right portion of the dialog box allows you to move the point from which the light rays emanate to non-central sections of the image.
Once you click OK, the white dots start to blur. To get the desired effect in which the dots become streaks, you'll have to re-apply Filter > Blur > Radial blur several times. To make the
image at the top of the next page, I applied the filter command 10 times.
If the streaks appear dark, which they probably will, use Image > adjustments > levels to lighten them. In the dialog box, simply move
the right hand slider to the left until you are happy with the results.
6. Now copy the streaked image to the clipboard using Select > all and then Edit > copy.
7. Open the image where the streaks are to be aded. Choose Edit > paste, and the clipboard image is pasted over the underlying background image.
8. In the layers palette, access the drop down submenu by clicking the 'normal' button. These are the blend modes. Choose 'screen', and you will see the black disappear with only the light rays showing.
At this point, you can adjust the opacity of the rays, the brightness, and the color. In this way,
you can emphasize or de-emphasize the intensity of the rays. For the landscape on the next page, I lowered the opacity of the rays to make them more subtle. You can also move them around the frame using the move tool. The rays of light can be stretched as well by using Edit > Transform > Scale so they extend further across the background image. With Edit > Transform > Rotate, you can rotate them around a central point.
If the edge of the light rays ends abruptly over the background image, simply make a layer mask (Layer > Layer Mask > Reveal all). Then choose the brush tool, and with the foreground/ background color boxes at the bottom of the tool palette showing black to white, respectively, brush away the unwanted edge. §
Switzerland Photo Tour
Sept. 23 - Oct. 2, 2025
Shooting from a Helicopter
At some point in the future, you may find yourself photographing from a helicopter. Aerial perspectives can be stunning. Personally, I hate flying in helicopters because in my opinion they really have no business flying. The darn things don't even have wings!
Nevertheless, on many occasions, I swallowed my fear and paid lots of money to get shots impossible to take from the ground. The rewards have been incredible ... like the erupting volcano in Iceland, below.
The challenge we photographers face when shooting from a helicopter is taking tack sharp
pictures. There are several factors to take into consideration. The vibration of the aircraft is significant, most likely you're shooting with a telephoto lens which magnifies movement, and if you have to shoot through a window or the front windshield, reflections in the glass degrade image quality. Furthermore, if you're photographing something moving, like a waterfall or spewing lava, this compounds the challenge.
To freeze all of this movement, a fast shutter speed is essential. I choose 1/2000th of a second. As you can see in the picture below and in the shot of Devil's Throat in Iguazu Falls, Argentina, on page 16, everything is tack sharp.
Exotic Birds of Colombia
Sept. 23 to Oct. 3, 2026
If the light is low and you have to shoot with 1/1600 or 1/1250, you can probably get away with these slower speeds. However, I like to err on the side of sharpness, hence my super fast shutter.
When determining the exposure, keep in mind that depth of field is not relevant when shooting from a plane. Everything is at infinity, so if you choose the largest aperture on the lens, this helps you shoot at 1/2000th of a second with a reasonably low ISO.
If possible, ask the pilot if you can remove a door or, at the very least, shoot out of an open window. Sometimes they charge extra for removing a door, but it makes all the difference in terms of the highest quality images. Plus, you'll have tremendous compositional flexibility. You won't be constrained to shooting at
one particular angle.
If you do have to shoot through glass or Plexiglas, use a soft rubber lens hood and place it up against the window. This eliminates any kind of reflections you'll see from the interior of the chopper. If you don't do this, the unwanted reflections will be seen as an out of focus haze superimposed over the landscapes or cityscapes below. §
Pantanal Photo Tour, Brazil
Jaguars in the wild, birds in flight, caiman, otters and more
Dec. 1 - 9, 2025
Photography Quiz
1. To photograph a running animal where the subject is sharp and the background is blurred:
a. Is possible with a fast shutter speed
b. Is possible with a slow shutter speed
c. Isn't possible with a single exposure
2. Noise is most pronounced in the:
a. Highlights
b. Shadows
3. Shooting a front-lit landscape at sunset in which the foreground is prominent, the biggest challenge is:
a. Exposure
b. Composition
c. Framing
d. Eliminating your shadow
4. Subtractive colors are designated as CMYK. What does the 'C' stand for?
a. Color
b. Cyan
c. Complementary
d. Chromogenic
5. A typical 1.4x teleconverter causes how much light loss?
a. One f/stop
b. Two f/stops
c Three f/stops
d. No light loss occurs
6. A range finder camera is like an SLR in that the photographer is looking through the lens.
a. True
b. False
7. On a histogram, "spiking on the right" refers to:
a. Overexposing the highlights
b. Shadows that become black with no detail
c. The exposure shows an even distribution of highlights and shadows
d. The picture is underexposed
8. When shooting through glass, you'll get the sharpest images when the lens axis is:
a. Perpendicular to the plane of the glass
b. Oblique to the plane of the glass
9. In black and white film photography, which filters darken the sky?
a. Blue and red
b. Green and yellow
c. Red and yellow
d. Orange and blue
10. With a long exposure, you can make a night scene look like day.
a. True
b False
CORRECTION: On last month's quiz, there was an error. #10 should have been A instead of C. Thanks to several of you who pointed that out to me.
UPCOMING PHOTO WORKSHOPS
TEXAS BIRDS WORKSHOP
Shooting from a blind, you'll get frame-filling shots of many species of birds in flight including red cardinals, crested caracara, green jays, greater kiskadees, and painted buntings. Jim shares with you the best camera settings for ultra sharp images. Based in south Texas.
May 14 - 17, 2025
FROG & REPTILE WORKSHOP in Kansas City
This is an exciting macro workshop in which you will be able to photograph about 40 species of colorful dart frogs and exotic reptiles. Held in a hotel conference room, Jim sets up natural backgrounds for outstanding photos. The photo at left shows a Jackson chameleon with the background replaced in Photoshop.
June 14 - 15, 2025
CARNIVAL in VENICE
Photograph amazing costumes in a Medieval environment. We shoot inside a 16th century palace, in an iconic gondola, in a stunning bedroom with traditional Venetian decor, and at other great locations. The photography as well as the experience is phenomenal.
February 7 - 13, 2026
Abandoned in Georgia
April 21 - 27, 2025
What's Wrong with this Picture?
Biackgrounds can make or break a picture. If they are busy, distracting, overexposed, or draw a viewer's eye away from the subject in some other way, the picture isn't successful.
In this portrait of a girl from the Surma tribe in Ethiopia, the white sky seen in the upper right corner of the frame is distracting. Our eye always goes to the lightest part of a picture first, and it returns again and again to that bright element. The sky is not the subject, and our attention is diverted from the girl to an uninteresting part of the image. To make a better picture, this needs to be fixed.
You can see on the next page not only has the white sky been replaced, all
other light areas of the background that are not part of the subject have been eliminated. I did this with the clone tool in Photoshop. It's important that none of the cloned elements have an identical counterpart elsewhere in the frame, so I make small modifications -- also with the clone tool -- to prevent that problem.
Note also in the original shot there was a large, light colored object on the ground to the right (our right) of the girl. I don't remember what that was, but it's quite distracting once you notice it. In a middle toned or dark image, any light background element that's not part of the subject is distracting. In a high key picture with very light tones, anything dark in the background that's not part of the subject is distracting.
The reason this image has an unusual perspective is because I used a 16-35mm lens positioned very close to the girl. Wide angle lenses are not usually used for portraiture, but they create a unique look. §
On Safari: Kenya
March 22 - 31, 2026
SHORT AND SWEET
1. Shooting objects that move at night is a challenge. The strategy is to shoot wide open, and the ISO has to be raised until your shutter speed is fast enough to produce sharp pictures. If too much noise occurs due to the high ISO, use Topaz DeNoise AI to eliminate it. I feel lthis software is essential for any photographer.
3. According to the Rule of Thirds (it's actually a 'suggestion' rather than a 'rule'), a subject looks good when placed on the intersection of a vertical and horizontal third in the frame. Here, the Chinese boat in Hong Kong was composed at the intersection of the left vertical third and the lower horizontal third.
2. The only way to show a bird in flight with its environment in sharp focus is to combine two photographs. Since long lenses are used to capture the birds, the background will always be blurred. Putting together a composite of the bird and a landscape shows what we see with our eyes.
4. I often exaggerate color for dramatic and artistic effect. This is a staircase in the Naitonal Cathedral in Washington DC, and using Image > adjustments > hue/ saturation, I moved the saturation slider to the right to enhance the mixed lighting image. Photography doesn't have to capture what we see all the time. §
Vietnam Photo Tour
October 13 - 23, 2025
ASK JIM
Every month, Jim answers a question from his online students, from people who participate in his tours and workshops, or from subscribers to this magazine. If you have a question you’d like Jim to answer, please drop him a note at photos@jimzuckerman.com.
Q: Jim . . . What filters do you consider essential to carry with you when traveling? I used to carry so many filters with me, but now I find that I'm hardly using any of them. Sandy Moore, Coeur d'Alene, Idaho .
A:I used to carry a lot of filters, too, Sandy. With Photoshop's ability to tweak images in post-processing, I now only carry two filters -- both variable neutral density filters -- specifically to shoot moving water with a long shutter speed. I carry one to fit my wide angle lens and one to fit a medium telephoto. §
Partial List of Photography Tours
2025 - 2026
Apr 2025
Oct 2025
Sept/Oct 2026
Armenia & Georgia
October 26 - November 8, 2026
STUDENT SHOWCASE
Each month, Jim features one student who took beautiful and inspiring images on one or more of his photography tours or workshops. It’s really fascinating how photographers see and compose such different images even though we may go to the same places. Everyone takes great photographs on Jim’s trips.
Robert Dominis, Seattle, Washington: Carnival in Venice workshop, Great grey owls workshop, Texas birds workshp, and Frogs & reptiles workshop.
Milky Way, Shooting the Minimizing dust on the sensor Nov. ‘21
Optical infinity
Subject index for past Photo Insight issues
Mirrors
Mirror images
Model shoot
Jun. ‘16
Jan. ‘19
May ‘23
Jan. ‘17
Moon glow Oct. ‘16
Mosaics
Jun. ‘17
Mundane to Ideal Nov. ‘19
Museum photography Mar. ‘13
Natural Light Portraits Aug. ‘21
Negative space Jan. ‘16
Neon edges on black Aug. ‘14
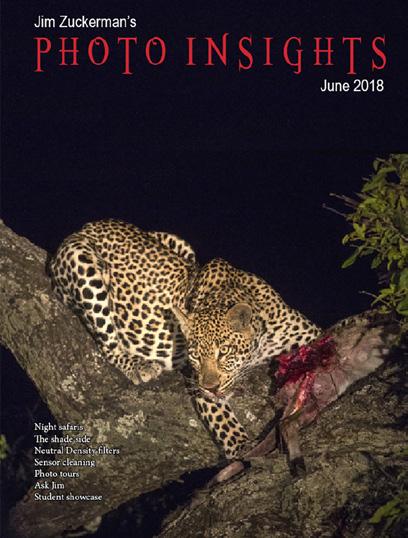
Neutral Density filters Jun. ‘18
New depth of field preview Mar. ‘24
New shooting style Mar. ‘24
Neutral Density filters and water Mar. ‘22
Night photography Feb. ‘14
Night Safaris Jun. ‘18
Night to Twilight Dec. ‘17
Noise reduction Feb. ‘17
Off-camera flash Jan. ‘24
Oil and water May ‘20
Online Nature Mar. '25
Organization of photos Mar. ‘18
Out of focus foregrounds Jan. ‘20
Paint abstracts May ‘13
Paint abstracts Aug. ‘21
Painting with light Sep. ‘15
Pan-blurs Sep. '24
Panning motion Dec. ‘16
Pano-Mirrors with a twist Jan. ‘18
Parades Sep. ‘13
Parallelism Nov. ‘19
Parallelism and DOF Feb. ‘21
Perspective, Super Exaggeration of Dec. ‘21
Photo shsaring Apr. ‘23
Photo terms Nov. ‘22
Photographing Christmas Dec. ‘23
Photography to Art Dec. ‘17
Photography solutions Jan. ‘18
Photoshop, content Aware Nov. ‘12
Photoshop, sketch technique Apr. ‘13
Photoshop, replace background Apr. ‘13
Photoshop, actions palette Dec. ‘13
Photoshop, layer masks Feb. ‘13
Photoshop, the clone tool May ‘13
Photoshop, soft foliage Oct. ‘13
Photoshop, mixer brush tool Sept. ‘14
Photoshop, b & w with color Jun. ‘14
Photoshop, drop shadows Jul. ‘14
Photoshop, creating texture Feb. ‘14
Photoshop, face mirrors Feb. ‘14
Photoshop, liquify Mar. ‘14
Photoshop, face mirrors Aug. ‘14
Photoshop, digital spotlight Sep. ‘14
Photoshop, enlarge eyes Nov. ‘14
Photoshop, darken the periphery Dec. ‘14
Photoshop, mirror images Dec. ‘14
Photoshop, beam of light Apr. ‘15
Photoshop, polar coordinates Mar. ‘15
Photoshop, chrome May ‘15
Photoshop, actions palette Nov. ‘15
Photoshop, cut and paste Nov. ‘15
Photoshop, geometrics Oct. ‘15
Photoshop, plugins Oct. ‘15
Photoshop, multiple selections Apr. ‘16
Photoshop, sharpening Apr. ‘16
Photoshop, Flood plugin Apr. ‘16
Photoshop, Desaturation Aug. ‘16
Photoshop, making a composite Aug. ‘16
Photoshop new tool May ‘20
Photoshop, place one element behind Aug. ‘18
Photoshop, the pen tool Feb. ‘16
Photoshop, canvas size Jan. ‘16
Photoshop, using the earth Jun. ‘16
Photoshop, define patterns May ‘16
Photoshop, paste into Nov. ‘16
Photoshop, b & w with color Feb. ‘17
Photoshop, open a closed door Apr. ‘17
Photoshop, palettes May ‘17
Photoshop, My favorite plugins Jan. ‘20
Portrait options Jan. ‘19
Portrait techniques Nov. ‘15
Portraits Mar. ‘13
Portraits, mixed lighting Aug. ‘14
Portrait Professional Nov. ‘19
Portraits, Lens choice Sept/Oct. ‘19
Portraits, side lighting Sep. ‘17
Portraits, window light Mar. ‘15
Portraits, outdoors May ‘17
Post-processing checklist Dec. ‘13
Post-processing: Contrast Aug. ’17
Practicing graphic design, Part I Dec. ‘22
Practicing graphic design, Park II Jan. ‘23
Practicing graphic design, Part III Feb. ‘23
Pre-capturing technology May ‘23
Predictive Focus Sep. ‘18
Problem/solution Apr. ‘17
Problem Solving in Photoshop May ‘22
Problem with cruises Jan. ‘18
Protecting extremeities from the cold Dec. ‘22
Protecting highlights Dec. ‘12
Puppies Jan. ‘15
Puppy photography Feb. ’18
Rays of Light Mar. '25
Reflections Feb. ‘13
Reshaping faces Oct. ‘22
Restoring old photos Jun ‘20
Ring flash, advantages Jul. ‘21
Ring flash versatility Oct. ‘21
Rule of Odds May ‘22
S-curves Aug. '24
Safari May ‘13
Safari strategies Jul. ‘15
Seeing as the lens does Nov. ‘14
Seeking Cool Snow Photos Jan. ‘21
Selective filtering Mar. ‘18
Selective focus Jun. ‘15
Self-critiques Jul. ‘13
Self-critiques Oct. ‘13
Self-critiques Nov. ‘20
Sensor cleaning Jun. ‘18
Subject index for past Photo Insight issues
Sepia and dark contrast Jun. ‘15
Sepia, Traditional look of
Shade May ‘14
Shady side Jun. ‘18
Shadows define the shot Dec. ‘23
Shadows, Paying Attention to Mar. ‘18
Sharp, 6 reasons why photos are not Apr. ‘24
Sharpness problems Mar. ‘14
Shooting in Inclement Weather Nov. ‘22
Shooting thru glass May ‘24
Shooting through textured glass May ‘23
Shooting through wire mesh Sept. ‘14
Shooting into the light Jun ‘20
Side lighting Jan. ‘24
Silhouettes Jun. ‘13
Silhouettes, How to make Apr. ‘22
Silhouettes, Exposing for Sept/Oct. ‘19
Silvered landscapes Mar. ‘20
Sketch, How to Make Jun ‘19
Skies make or break a picture Aug. ‘21
Sky replacement Nov. ‘20
Sky replacement strategies Aug. ‘22
Snow exposure Nov ‘17
Snow exposure Nov. ‘19
Soap abstracts Aug. ‘23
Soft light Jan. ‘13
Smart phone photography May ‘19
Stained glass Mar. ‘17
Star photography and noise Jan. ‘18
Stock photography Sep. ‘14
Sunrise & sunset Jan. ‘19
Symmetry Aug. '24
Tamron 150-600mm Apr. ‘14
Ten reasons photos are not sharp Jan. ‘19
Texture, Adding Mar ‘19
Texture Mapping in 3D Jul. ‘21
Too much lens Jul. ‘24
Topaz AI Gigapixel Mar ‘19
Topaz glow Jan. ‘15
Topaz glow Sep. ‘17
Topaz Impression Sep. ‘15
Topaz Remask 5 Oct. ‘17
Topaz Simplify 4 Dec. ‘12
Topaz simplify 4 Jun. ‘14
Topaz Studio Apr. ‘18
Total solar eclipse, How to shoot Mar. ‘24
Translucency & backlighting Nov. ‘18
Travel photography Feb. ‘ 13
Travel portraits Mar. ‘14
Travel tips Apr. ‘14
Travel photographer’s guide Jun. ‘17
Tripods, not allowed Jun. ‘24
Tweaking exposure on the fly Apr. ‘23
Twilight photography in the rain Apr. ‘19
Twilight, Creating Oct. ‘23
Tripods Mar. ‘18
Two subject sharp rule May ‘14
Two subject focus rule Jan. ‘20
Two subject focus rule Jun. ‘21
Quiz answers
1. c 2. b 3. d 4. b 5. a 6. b 7. a 8. a 9. c 10. a Your score 90% - 100%: You could have been a pro 80% - 89%: Your glasses probably need a new prescription 70% - 79%: Just don’t quit your day job < 70%: You should really be using an iPhone