3 minute read
The Basics of Three-Point Perspective
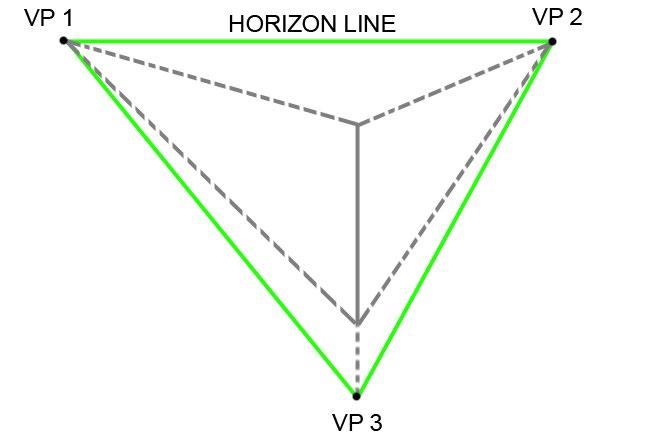
©2007 Paul Heaston One-point perspective and two-point perspective are excellent methods for drawing when you are looking out toward the horizon line. But what if you are looking toward the ground or up into the sky? These are situations when the rules of one-point and two-point perspective begin to break down and distortions starts to happen. But there is a solution! Three-point perspective gives you the ability to make far more dynamic drawings. Here is a useful tutorial to help you understand the basics of three-point perspective. The biggest difference in three-point perspective is that there are three vanishing points (VPs). Two are along the horizon, just like two-point, but the third VP is located either above the horizon (at the zenith) or below the horizon (the nadir), depending on the area you intend to draw. Remember that in basic one-point perspective, lines are either vertical, horizontal or recede toward the VP. In two-point, lines are either horizontal or recede toward one of the two VPs. In three-point perspective all lines recede toward one of the three VPs. The three VPs make up a triangle, with the viewer’s center of vision roughly in the middle. Try this technique to start making basic three-point perspective drawings. Step 1 To draw a simple shape in three-point perspective, start just as you would in two-point perspective, with a HL and two VPs as close to the edge of your page as possible. Only this time, rather than in the middle, place the HL close to the top of your page if the viewer will be looking down, or the bottom of your page if the viewer will be looking up. Then, as far from the horizon as possible, place a third VP. It can fall anywhere between the horizon VPs, though closer to the middle is better for our purposes. Then, draw lines connecting the three VPs.

Advertisement
Note: This triangle is very important. In order to avoid distortion, you must try to keep your drawing within this triangle. Anything outside the triangle won’t look right, but everything inside should appear normal. The two shapes below are the same box drawn inside and outside the triangle.
Step 2 To begin, draw a line anywhere you’d like within the triangle toward VP3. It doesn’t have to be vertical. You can make this line any length as well. It can end before it reaches VP3 so long as it will end up there if extended.


Step 3 Draw lines from both ends of this line toward both of the horizon VPs, just as you would in a two-point perspective drawing.
Step 4 To determine where your shape ends in space, draw lines from VP3 through both sets of lines receding toward the two horizon VPs.
Step 5 Draw lines from the back corners toward the opposite horizon VPs and you’ve completed a simple shape in three-point perspective. You can erase any construction lines as needed.


From there, it’s easy to explore making more complicated shapes, so long as you remember that all lines should recede toward one of the three VPs.
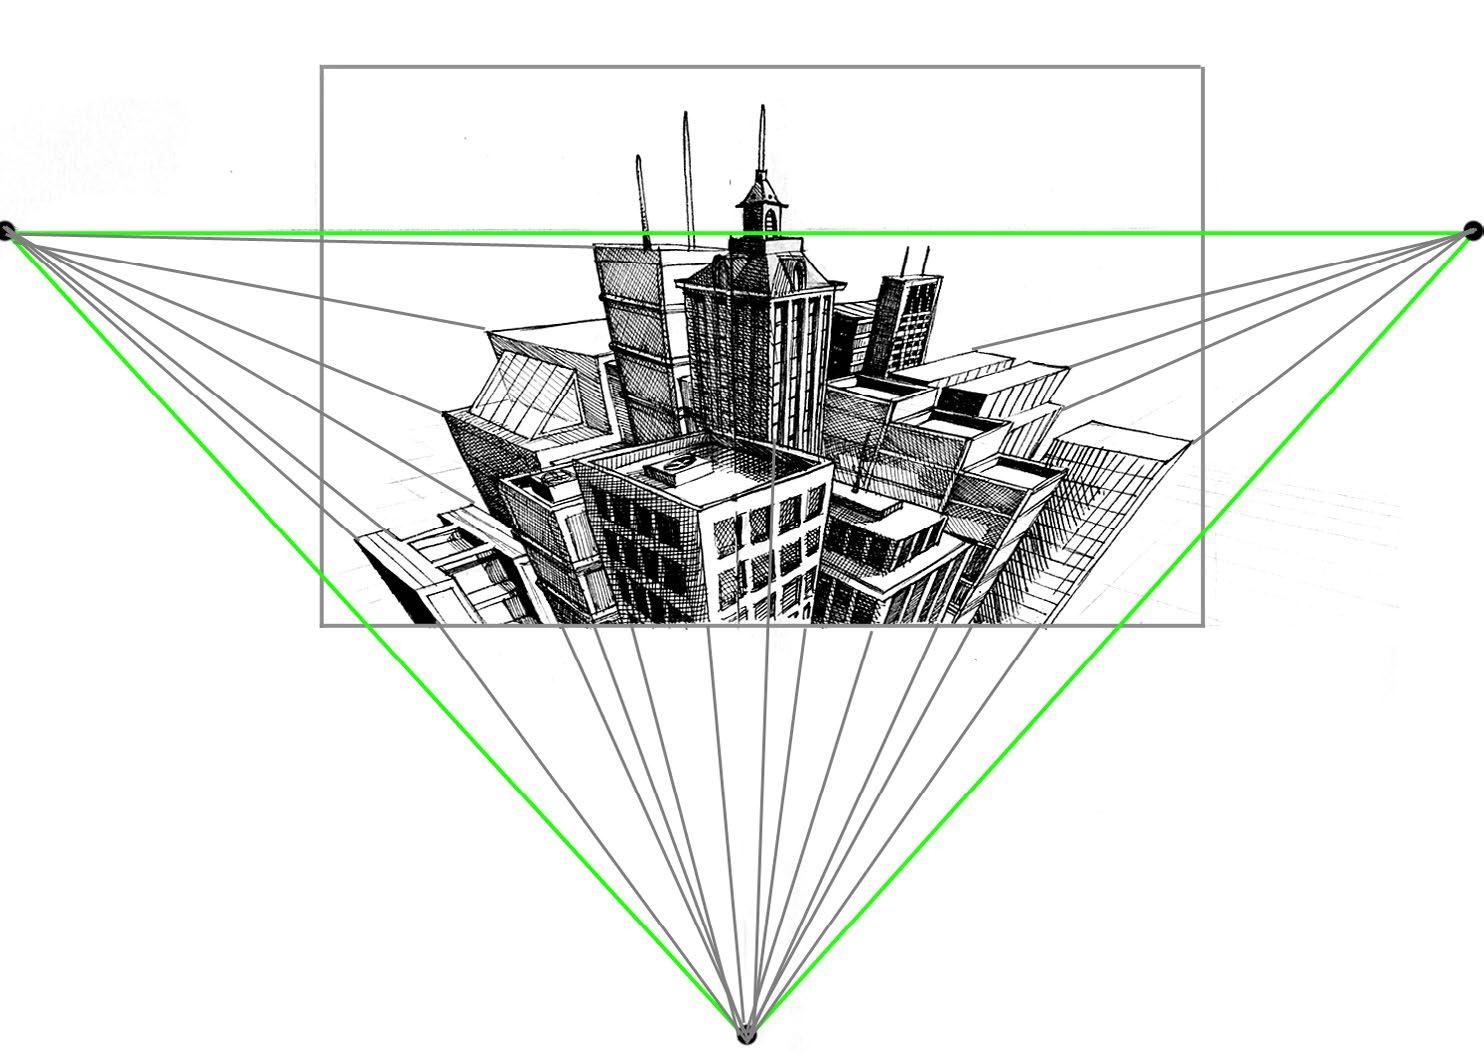
Tip: By constructing your vanishing points outside your picture plane, you can easily avoid the problem of accidentally drawing outside the triangle. There are a few ways to do this: • You can tape down your paper to keep it stationary, then place pieces of tape on your work surface outside of your paper to locate your VPs. • Or you can keep your VPs on the page, place a rectangle within the triangle and only draw within that rectangle. Later, you can crop your image to the size of this smaller rectangle.


