4 minute read
Drawing Ellipses in Perspective

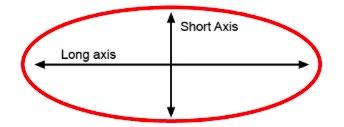
Any artist can tell you how tricky it is to draw ellipses in perspective. The top of the flower pot, the lid on a jar, the base of the barn silo — whether it’s a still life or a landscape, you’re bound to encounter the challenge of depicting a foreshortened circle, or ellipse, in just about any drawing or painting. Most of us try to “eyeball it” in the hopes that it’ll be good enough, but there’s an easier and more correct way of getting it just right. So what is an ellipse? In geometry, it’s a closed curve, like a circle, but with a long axis and a short axis — an oval. In terms of perspective drawing, an ellipse is what we see when we view a circle from its edge, rather than from directly overhead.
When drawing an ellipse in perspective, there are two common mistakes often made. One is to draw a football shape where the outside edges taper almost to points, and the other is to draw two parallel lines connected with curves at each end.
Advertisement

In order to avoid these problems, it helps to think “outside the ellipse.” If you can draw a square in perspective, it’s easy to turn it into an ellipse following these steps. Most of the ellipses we encounter are at the top and bottom of cylinder shapes, like glasses, flower pots, barrels and buckets, etc. If you think of the cylinder as being within a box, drawing the top and bottom ellipses becomes much easier. Step 1 Draw a box in one-point or two-point perspective that is big enough to contain your cylinder. The top and bottom planes of the box will be the location of your ellipses.
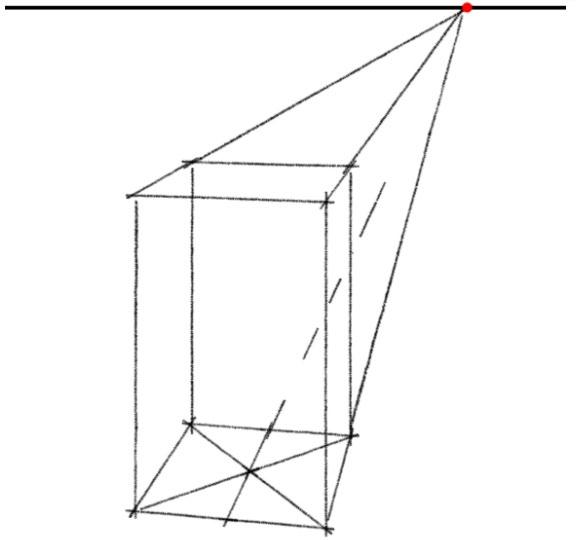
Step 2 We’ll start with the bottom square plane. Using a straightedge, draw diagonal lines connecting each corner to create an “x.”.
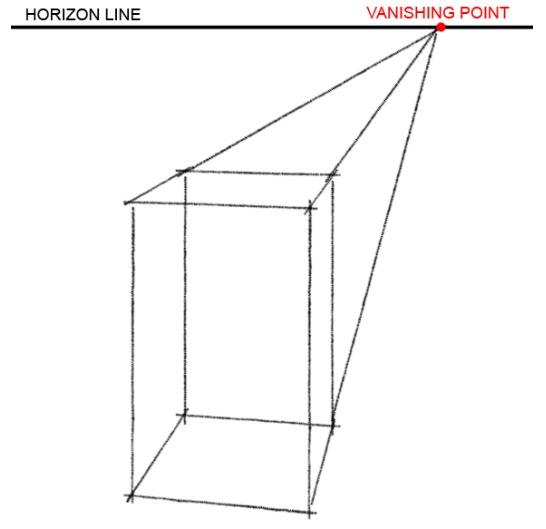
Step 3 Draw a line from the VP through the center of the “x” all the way to the outside edge of the square.
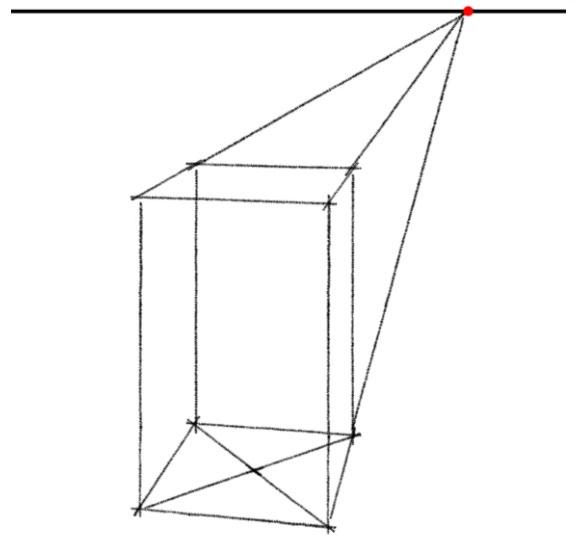
Step 4 Draw another line through the “x” that is parallel to the front and back edges of the square. In one-point perspective, this line will be horizontal, and in two-point perspective, it will recede toward your second VP. Now you have a cross shape that perfectly divides your square into four smaller squares in perspective. Note: It is important that you do Step 3 first, or you will not have found the true center of the square in perspective. This is one you can’t eyeball.
Step 5 Erase the diagonal lines from your initial “x.”

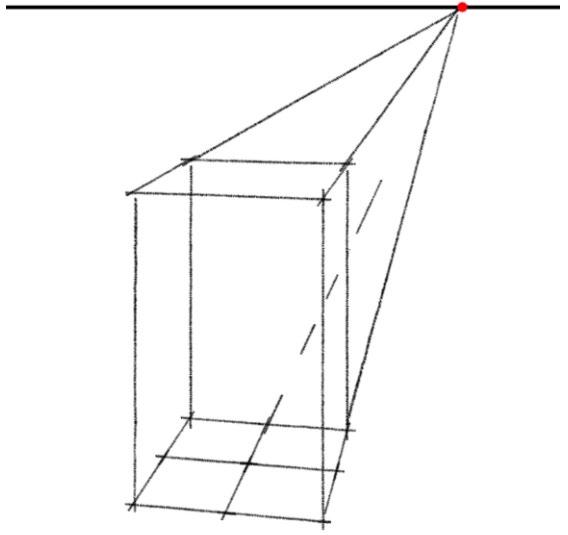
Step 6 Carefully draw your ellipse in four segments, connecting each point where the cross meets the edges of the square. This takes some practice, but be patient. It will definitely look better than if you freehand it.
Step 7 Repeat Steps 1-6 for the top square of your box.
Step 8 Erase your perspective lines and the vertical lines in your box, being careful not to erase your ellipses!
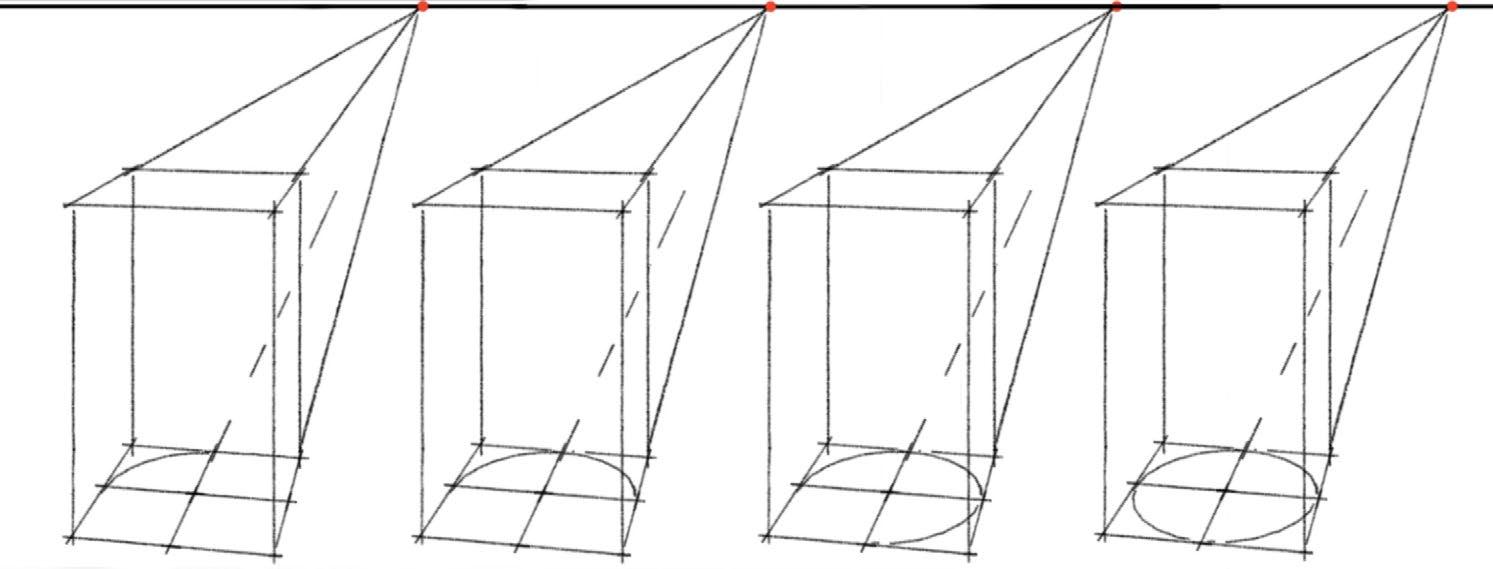
Step 9 Using a straightedge, draw vertical lines between the right- and leftmost edges of your ellipses. DON’T simply connect the points where the cross meets the edges of the ellipse, as these aren’t necessarily the outermost edges.
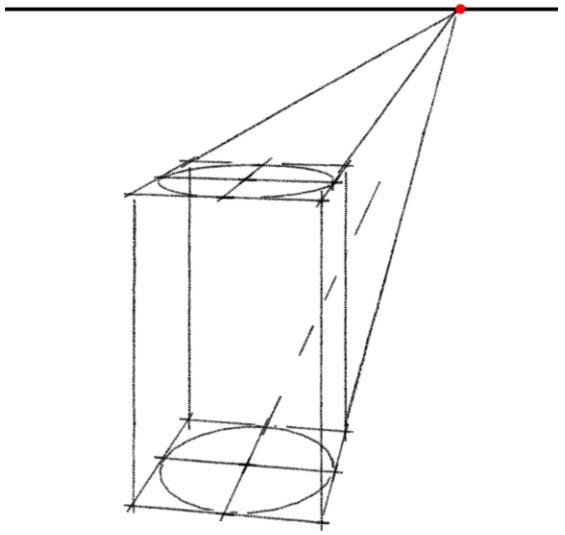
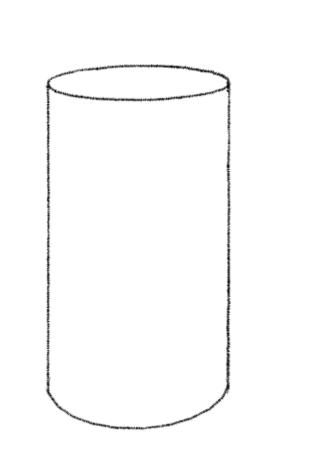
Step 10 Now you can erase the crosses on both ellipses and the rear curved edge on the bottom ellipse. Congratulations! You’ve just drawn two perfect ellipses in perspective to make a cylinder, which you can use in still lifes, landscapes, architectural drawings — you name it. And these steps even work if the ellipse or cylinder is on its edge or on a wall (clocks, mirrors, windows and more)!


This is truly just the beginning! Enjoy more in-depth, step-by-step guidance from expert artists on the drawing techniques you love most with Craftsy’s growing selection of online drawing classes.
If you’d like to master drawing realistic, riveting landscapes, sign up for Perspective in Landscape Drawing with expert instructor Patrick Connors today! Or, if you’d like to dive deeper into the art drawing perspective, check out The Art & Science of Perspective, taught by celebrated architectural illustrator Jeff DiCicco. You’ll learn how to draw depictions of depth so convincing, you feel as though you could step inside. Subscribe to the Craftsy drawing blog today to have more drawing inspiration, tips and tutorials delivered directly to your inbox.
Get better at what you love to do.


