3 minute read
Two-Point Perspective: Understanding Space
TWO-POINT PERSPECTIVE
Understanding Space
Advertisement
Understanding perspective is fundamental to depicting space in a drawing. Whether you’re working on a landscape or a still life, knowing the rules of two-point perspective in particular can be the difference between drawing a believable, realistic space and creating a space that just doesn’t work. Here are some useful guidelines and tips to help you understand and master drawing in two-point perspective.
©2009 Paul Heaston
Vanishing points
As we discussed earlier, in linear or graphical perspective, a vanishing point (or VP) is where any set of parallel lines appears to meet on the horizon line. In a one-point perspective drawing, a good rule of thumb is that sets of parallel lines must either be horizontal, vertical or meet at the VP. While we know that parallel lines don’t actually meet in reality, they get so far away that the distance between them is no longer visible to the naked eye, as in the two rails of a railroad track.

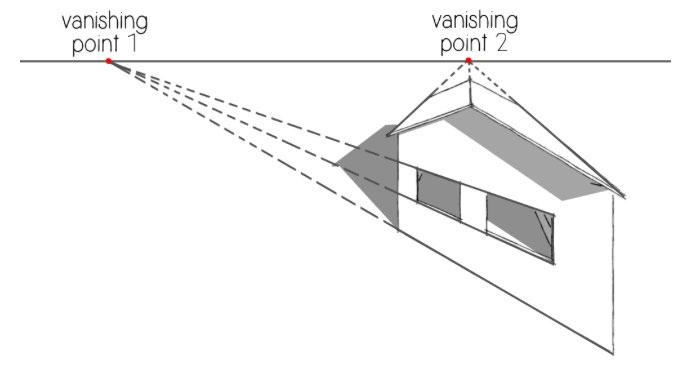
One-point perspective works well for situations like the above, where the viewer is oriented directly in front of a set of parallel lines like railroad tracks or a long hallway. But what if you want to show the viewer something from an angle? Two-point perspective uses two vanishing points set well apart on the horizon line. The rule of thumb here is sets of parallel lines must be either vertical or recede toward one of the two VPs. The exception would be sloped or curved surfaces, such as the roof in the example to the left. Let’s go through some simple steps to draw basic shapes in two-point perspective.

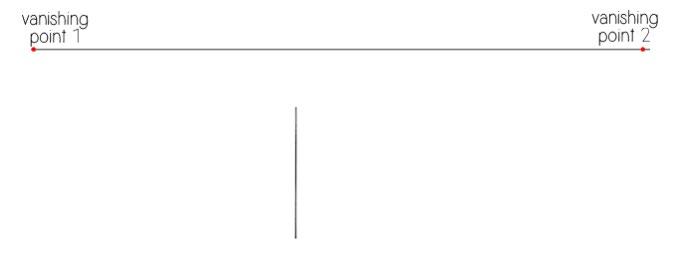
Step 1 Draw your horizon line (HL) with a straight edge. You can place it anywhere on the page, keeping in mind the HL always is the same as the viewer’s eye level. That means that anything above the HL is taller than the viewer, and anything below the HL is shorter than the viewer. Step 2 Establish your two vanishing points on the HL. Make them as far apart on the page as possible. You can even place one or both VPs off the page, so long as they are still on the horizon. If you place them too close together, and the object you are drawing isn’t completely between them, it can lead to a very distorted image like below.
Step 3 Draw a vertical line anywhere you’d like between the two VPs. For the best view of both faces, establish your line closer to the middle than to either VP. This line will be the closest vertical edge of your object.
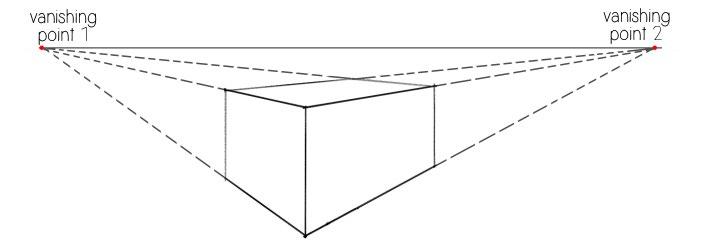
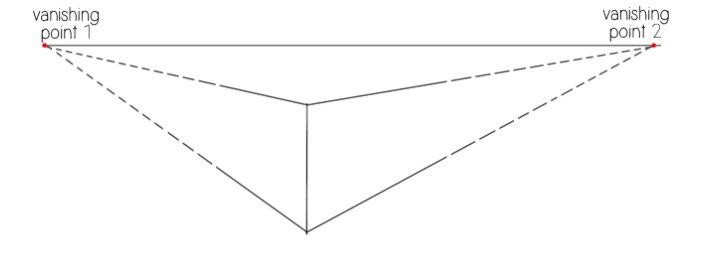
Step 4 From this line, draw lines receding from the top and bottom ends to both VPs.
Step 5 Establish where each face will end in space by drawing vertical lines connecting the two sets of receding lines. Since this is a made-up object, you can determine this arbitrarily.
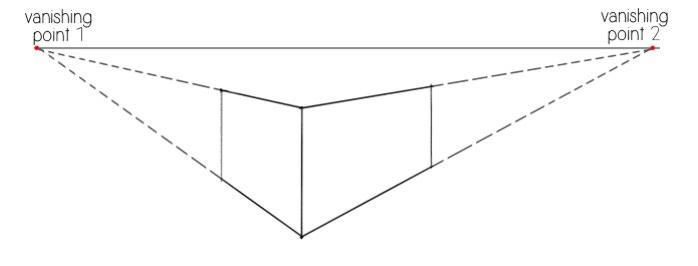
Step 6 From the tops of the back vertical edges, draw lines to the opposite vanishing points. Where they cross establishes the back corner of your object.
These are the basics of two-point perspective. From here you can add doors, windows, steps, etc. Tip: A peaked roof can be added easily. First, find the center of any two walls on opposite sides by drawing an “X” in them from corner to corner. From the center of one X, draw a vertical line as high as you’d like the peak to go. Then draw a line toward the opposite VP. Where this passes over the center of the opposite X, draw another vertical line. This is the end point of the roof’s peak. Connect each end of the peak to the top four corners of the initial box and you’ve drawn a perfectly peaked roof.
