CONTEXT ANALYSIS Archi-Quad
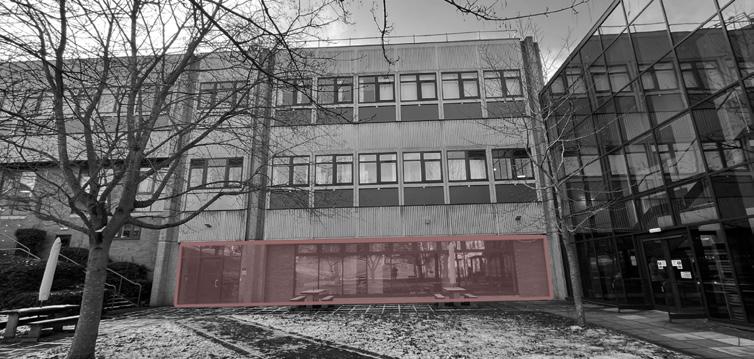
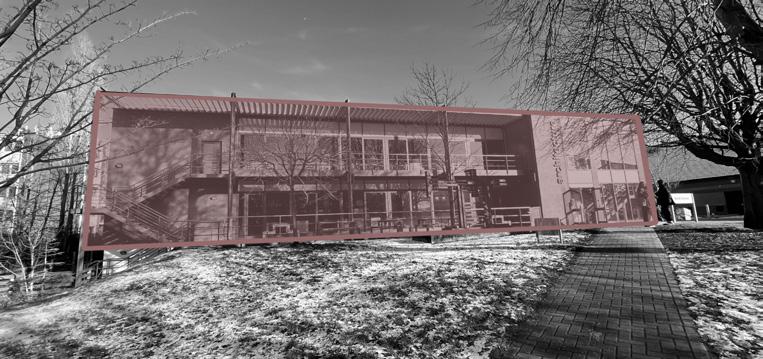
Site Images:


Stakeholders:
By creating a stakeholder diagram, it helped me to determine the key users of the Archi-quad space based on their level of interest.
From the diagram, it is apparent that rhe students and teachers are the main target audiences for the parametric design.

Identifying Key Users:
1st, 2nd, 4th year and Masters Architecture Students from:
- KGB
- Hewson Studio

- M-Studio
Students
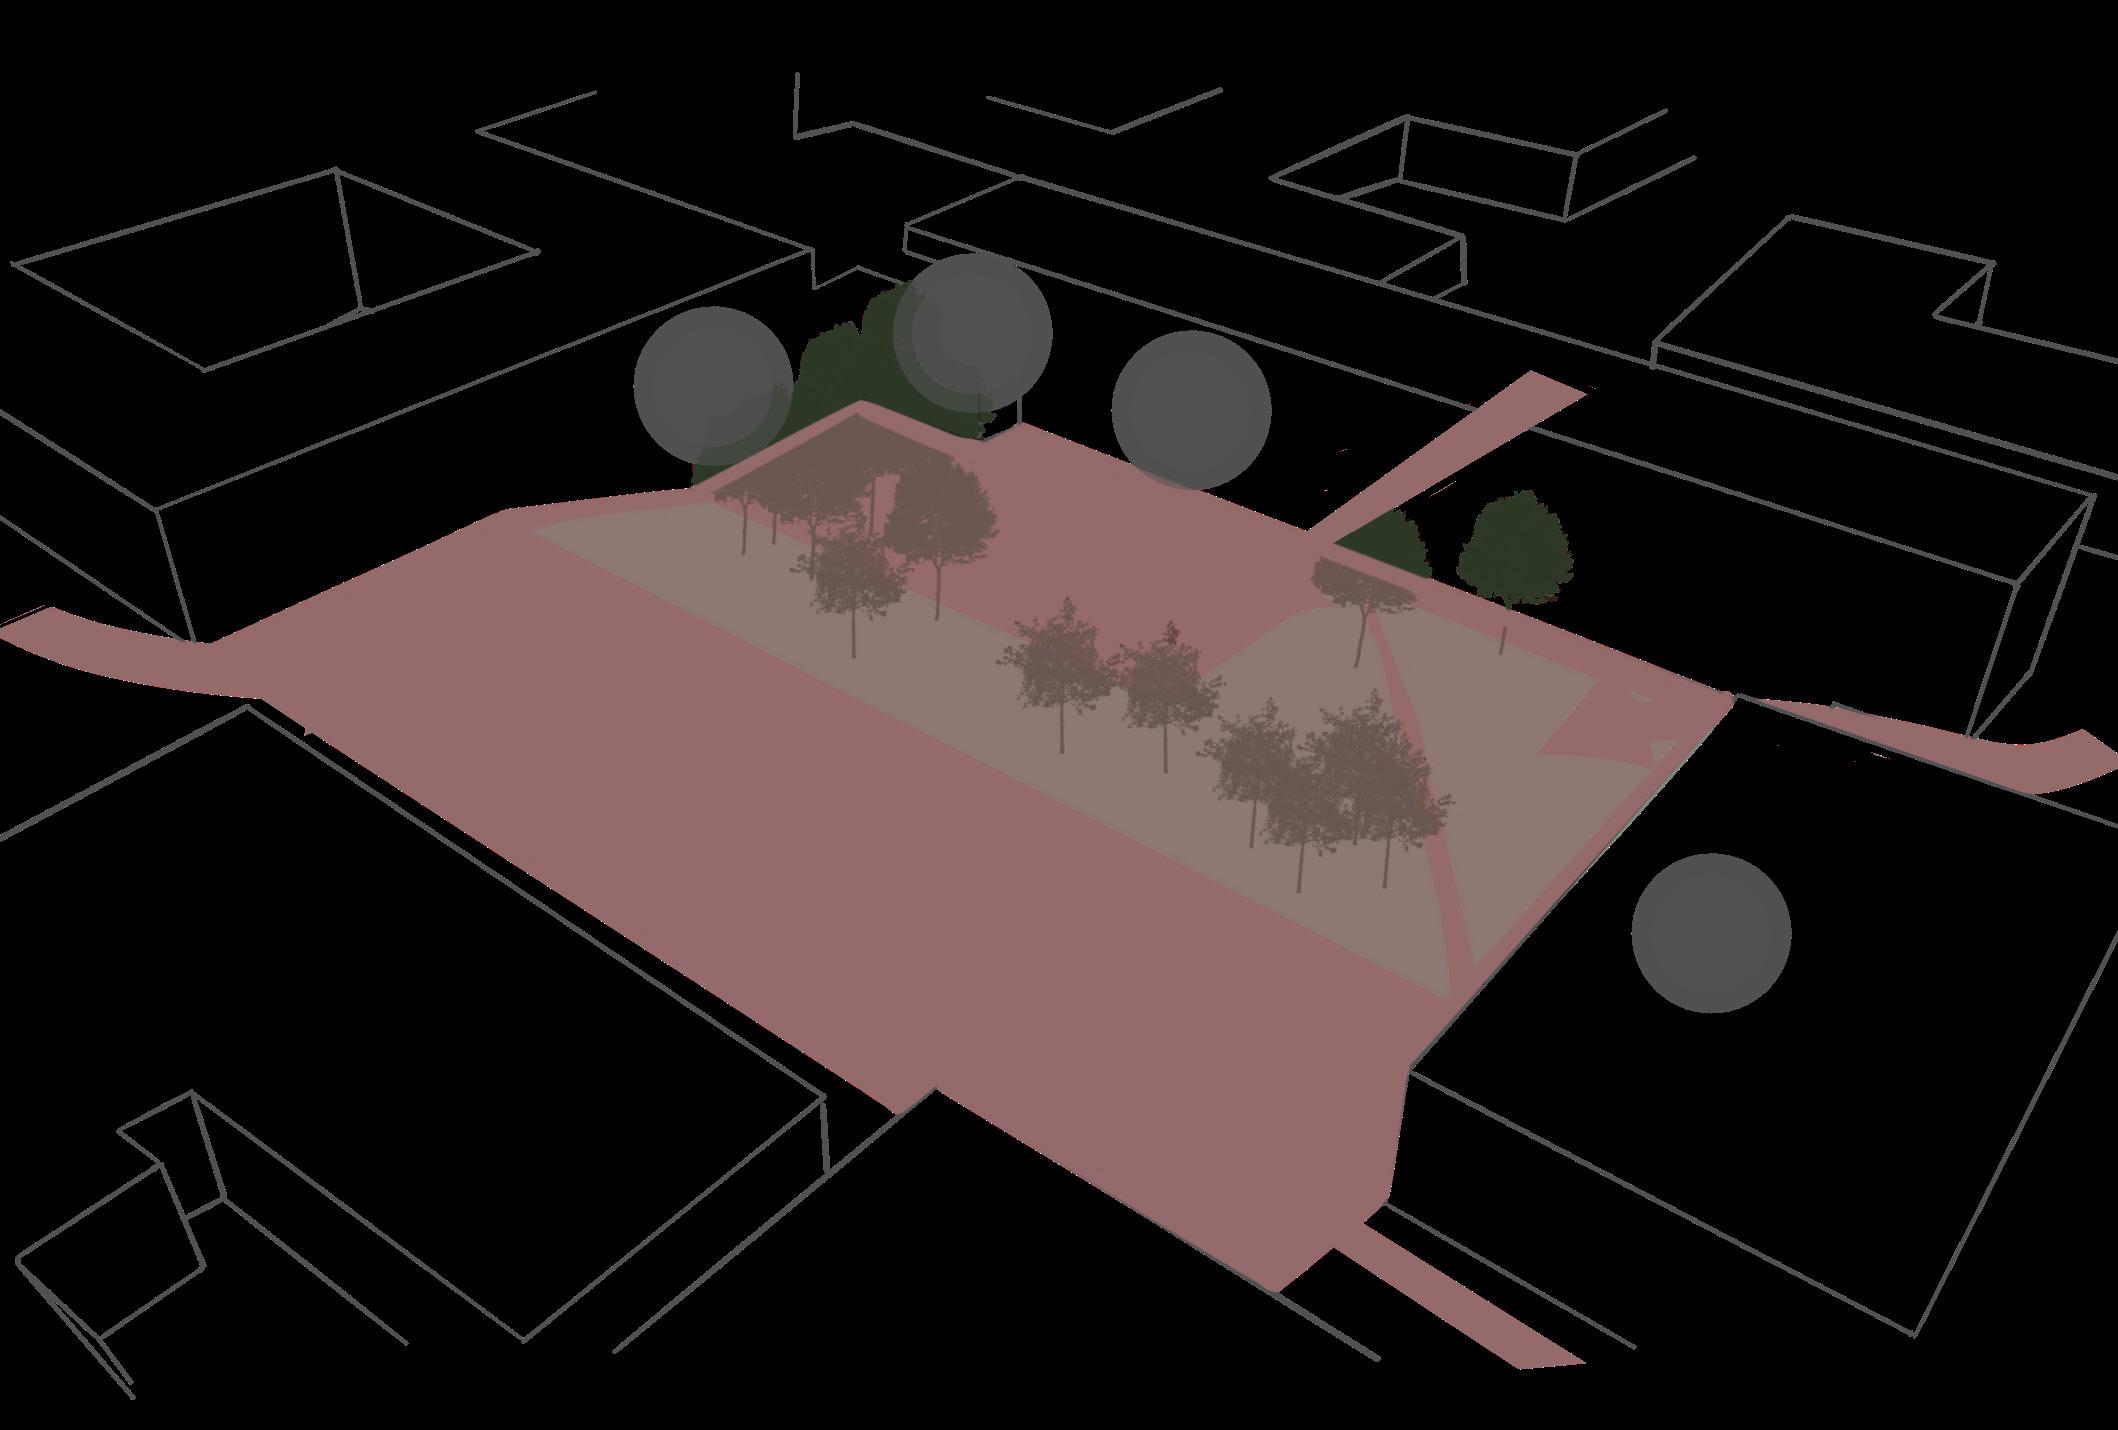
Context Study:
The Archi-Quad is a relatievly hidden area which consists of an outdoor picnic area with benches and open space for socialising during work breaks as well as a car-park. Though it is a small area, the space revieves a fair amount of activity, especially by architecture students which move between buildings such as the KGB and Hewson Studio.
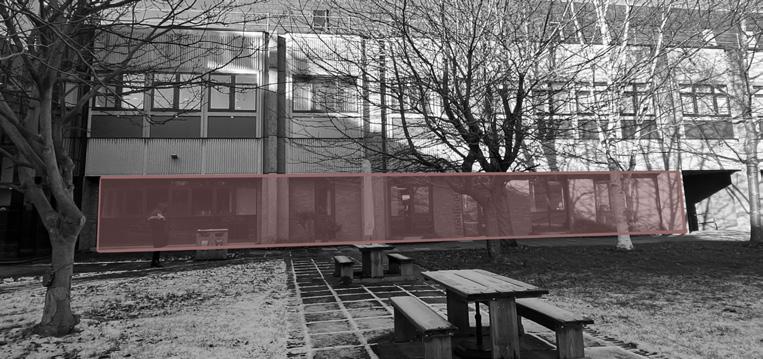
The site recieves most of its sunlight during midday from the south and winds from the southwest.
Key: Access Points of Interest Daylight Wind Direction
Level of Interest
ABCE Students
Students
Teachers/ Lecturers
Guests
Public
Most least
F127452
 David Davies Cafe Hewson Studio
M-Studio
David Davies Cafe Hewson Studio
M-Studio
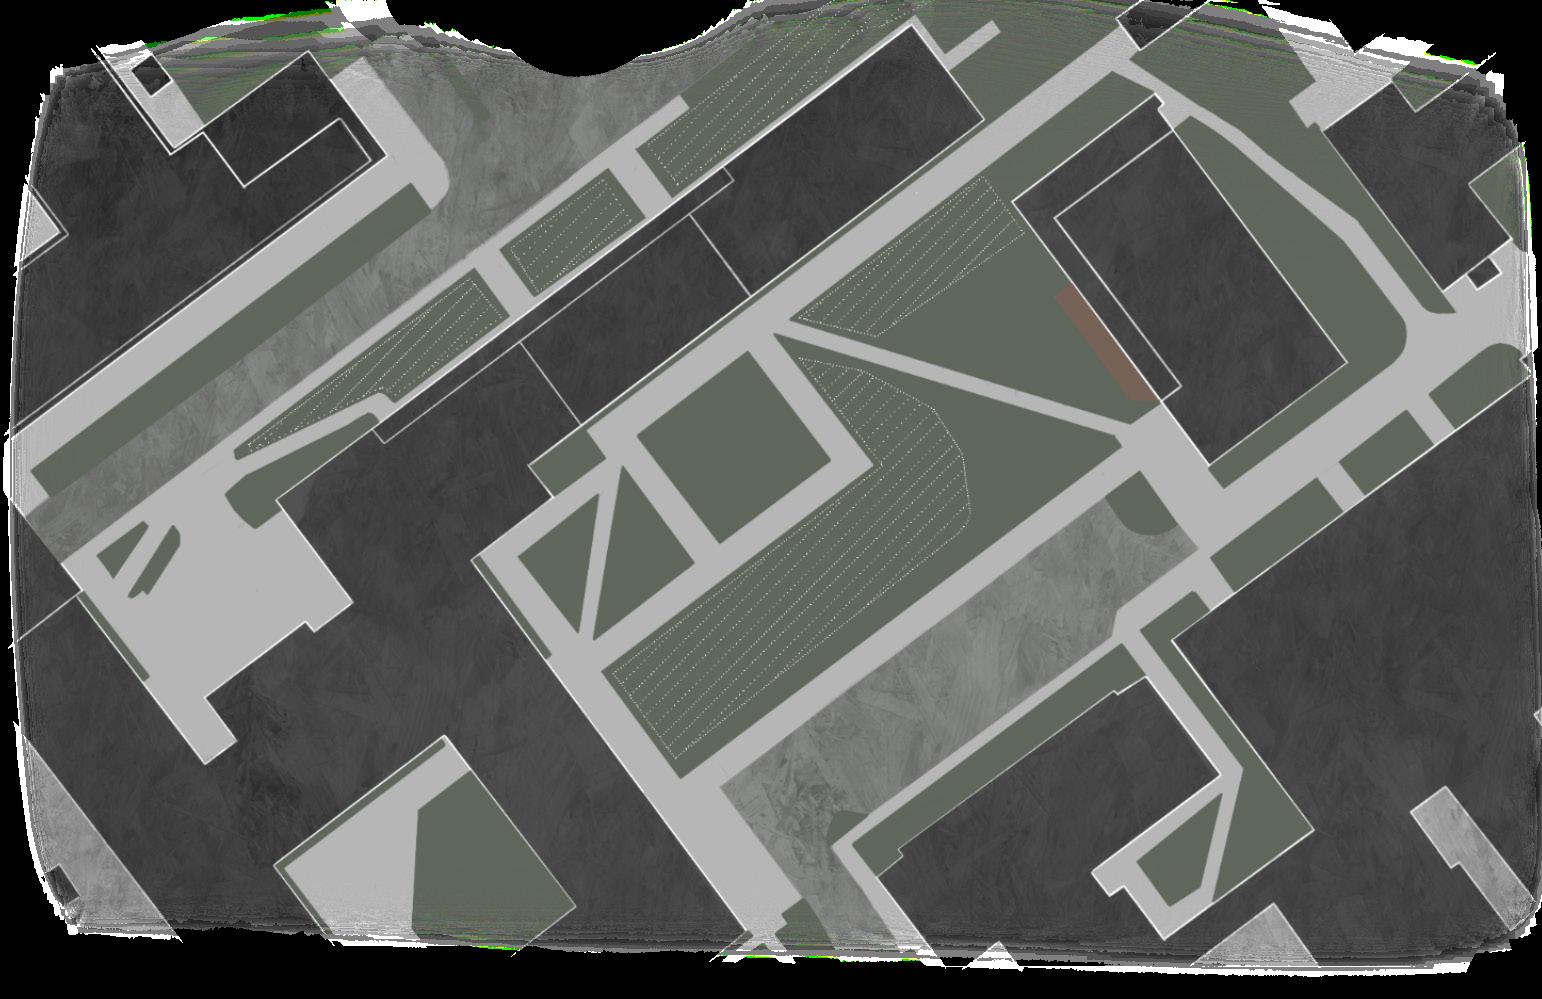
Archi-Quad 0 50m 25
Keith Green Building
The Site:
1:600
M-Studio
Hewson Studio
M-Studio
DESIGN CONCEPT


(Primary Form) Flyover Concept:


The pandemic had seen many people including students struggle from working in solitude, missing out on in-person interactions which has had its effects on mental health. the post-pandemic period has proven how vital such interactions are in supporting the people around us. Focusing on this idea of support - I wanted to emphasise these interactions where students support one another in their studies by designing a space where they can seek advice from students of other cohorts In order to help each other succeed.
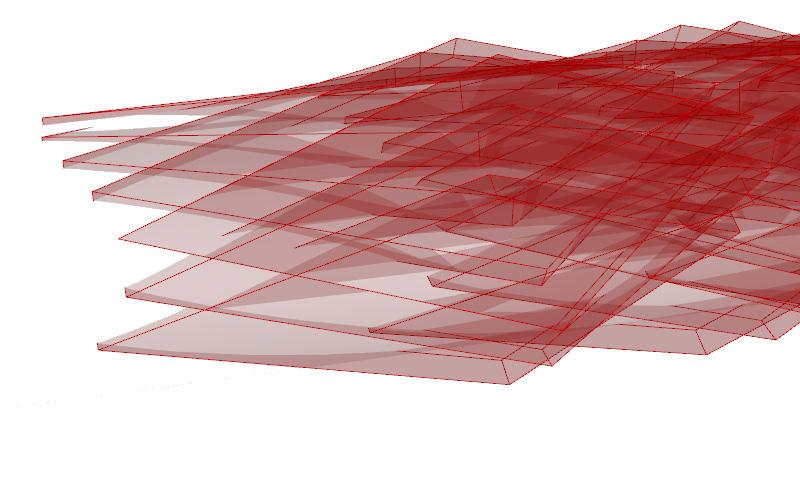
(Parametric) Canopy Concept:


POSSIBILITIES -
The proposed design would be a space to also raise attension to other forms of life that thave been affected by the pandemic and global warming, an example of this being the bird. Looking into this, I found that the bird is also symbolic of the infinite possibilites, for which the users pf the space (students) have. Thus, the parametric structure of the canopy is inspired by the layered feathers of a bird. the structure eventually forms itself into a ‘birds-nest’ design used as the shared space at the center of the structure.

Design Development:
(Inspired by a birds- nest) the center-point space acts as a co-creation and colaboration space where students from different years and cohorts can meet to seek advice or to discuss/express their ideas, as well as being a space for leisure.
Additionally, the space acts as a higher point of observation over the pavilion projects which would be exhibited below.
F127452
(Hewson Studio) (M Studio) (KGB)
1) Studios Come Together 2) Interconnect
3) Follow (Form Circle) 4) Paths Formed
-
1) Feathers 2) Overlapping 3) Network 4) Extending Network 5) Curving Network
SUPPORT
PARAMETRIC

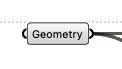
Grasshopper Encoding Process
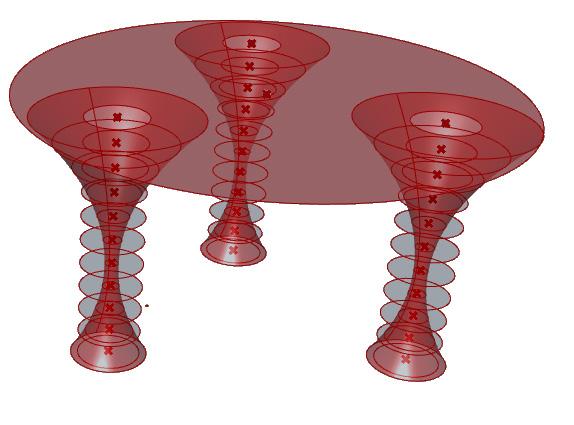
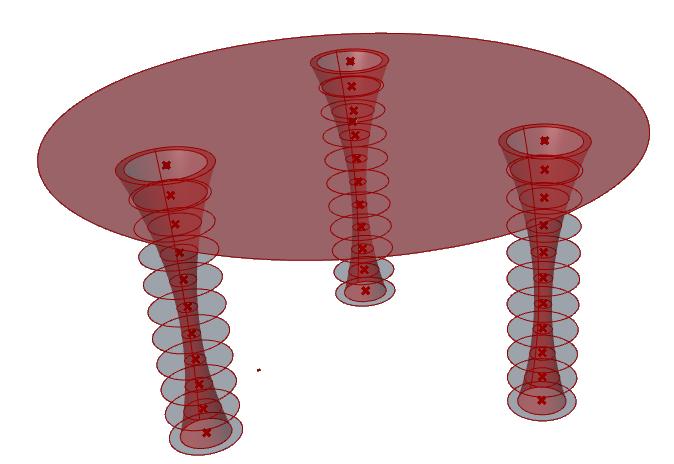
Parametric Flyover Supporting Pillars:
Stage 1 - Circular Base Surface:
Creating circular surface (base of the ‘hub’) with distributed points across surface that will be the location of the pillars.
Stage 2 - Circular Projections from Base to Ground:
From each distributed point on base surface, a radius is created, forming circles along the y-axis, which are projected down from the surface to the ground.
This will determine the height, and greatest value for thickness of the proposed pillars.
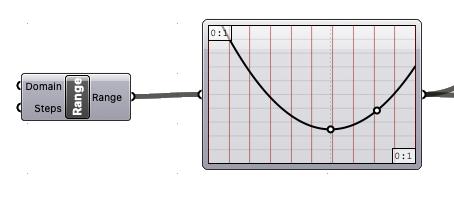
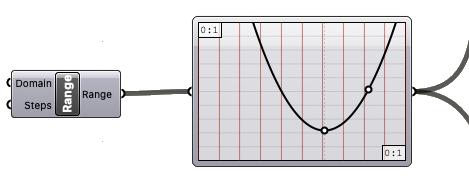
Stage 3 - Range in Radius:


Using the range and graph tools, a variation in radius along the height of the pillar is created to form a concave section to the pillar (is its thickest at the ground and base of the above surface).

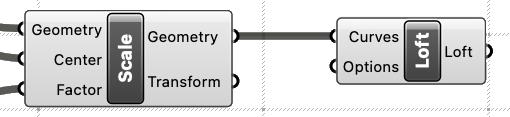
Stage 4 - Fill Surface:
Lastly, the circles along the height of the pillar are connected by the loft tool which creates a final surface from the lines.
Final Outcome:
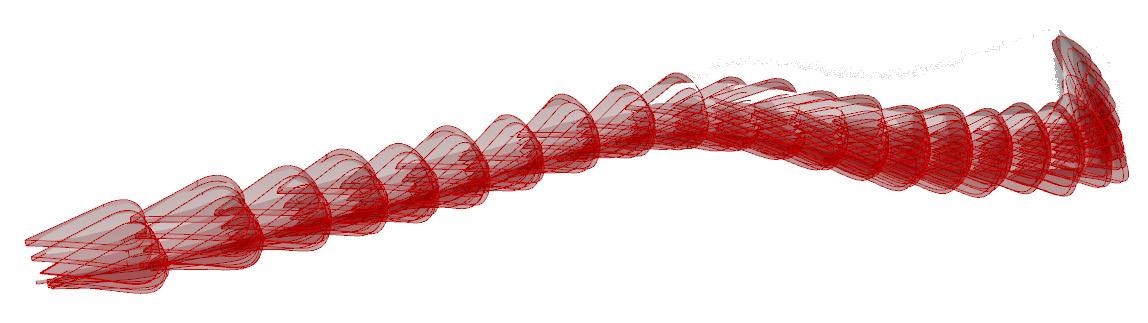
The outcome of this process is three concave pillars reaching from the ground up to the base of the central ‘hub’, to provide support to the structure.

F127452
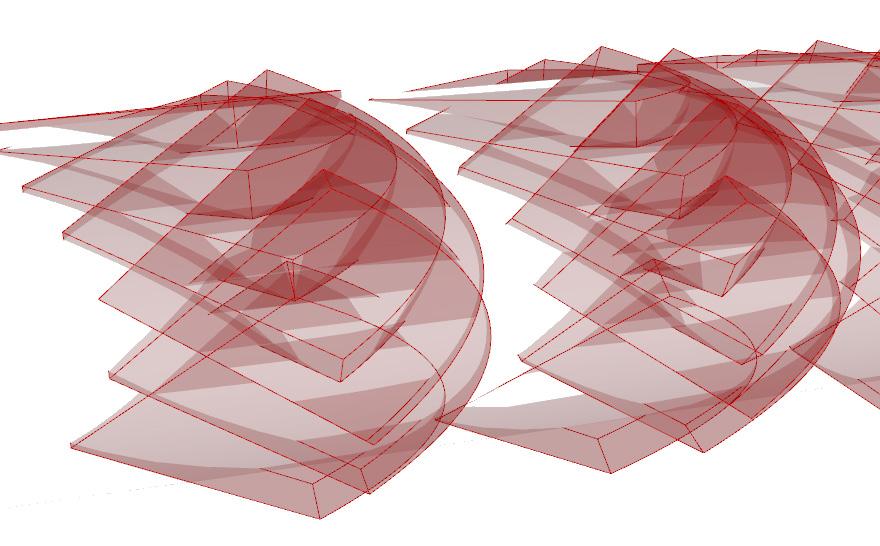
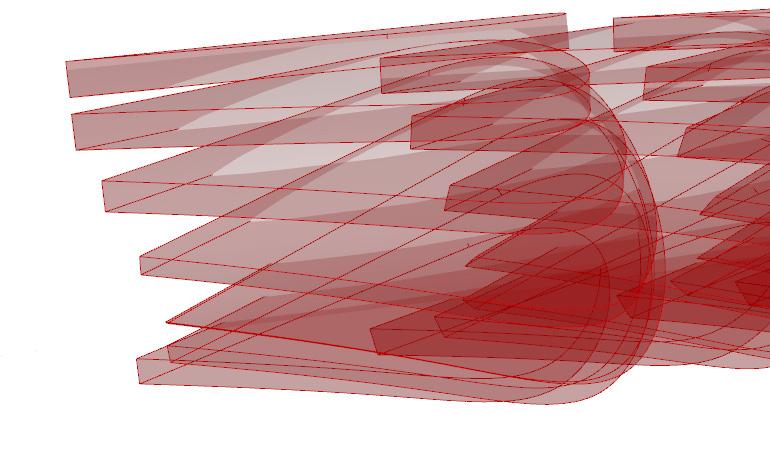
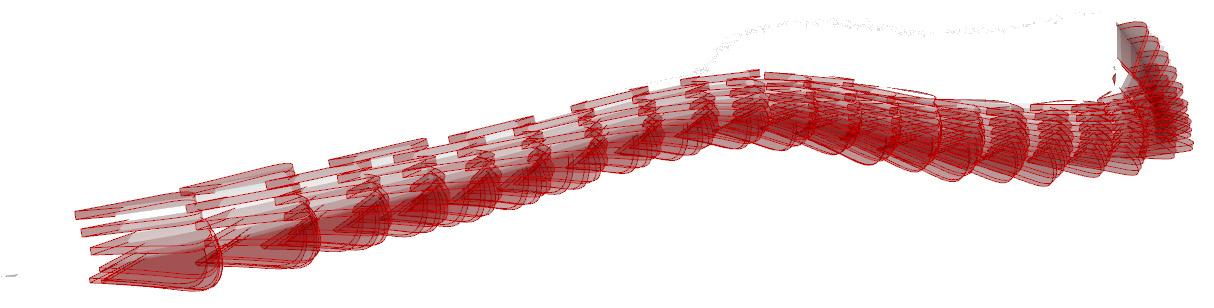
PARAMETRIC Grasshopper Encoding Process Continued


Parametric Canopy “Feathers”:
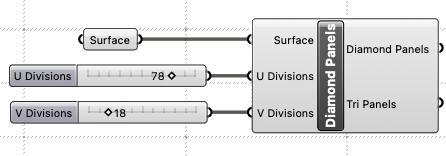
Stage 1 - Diamond Panels Along Surface:
Using the diamond panels tool, a diamond lattice framework is appled to the surface of the main structural for of the canopy. The U and V divisions can be adjusted to increase/decrease the number of overlapping lines.

Stage 2 - Center-Points:
The surface closest point tool is used to generate the ‘center points’ of the feather geometries, which will be of even distribution along the diamond lattice.
Stage 3 - Setting ‘Feather’ Geometry:
The model of the ‘feather’ shape is then set as a geometry on grasshopper to later be applied to the surface of the canopy.

Stage 4 - Applying ‘Feathers’ Along Surface:
The orientation and placement of the fethers is applied to the surface of the canopy along the centerpoints that were created earlier in the process.
Stage 5 - Adjusting ‘Feather’ Geometry Along Surface:
Lastly, The scale tool can be used to adjust the size of the ‘feathers’ and the rotate 3D and radians tools allow the feathers to alternate their angle to the surface.


F127452
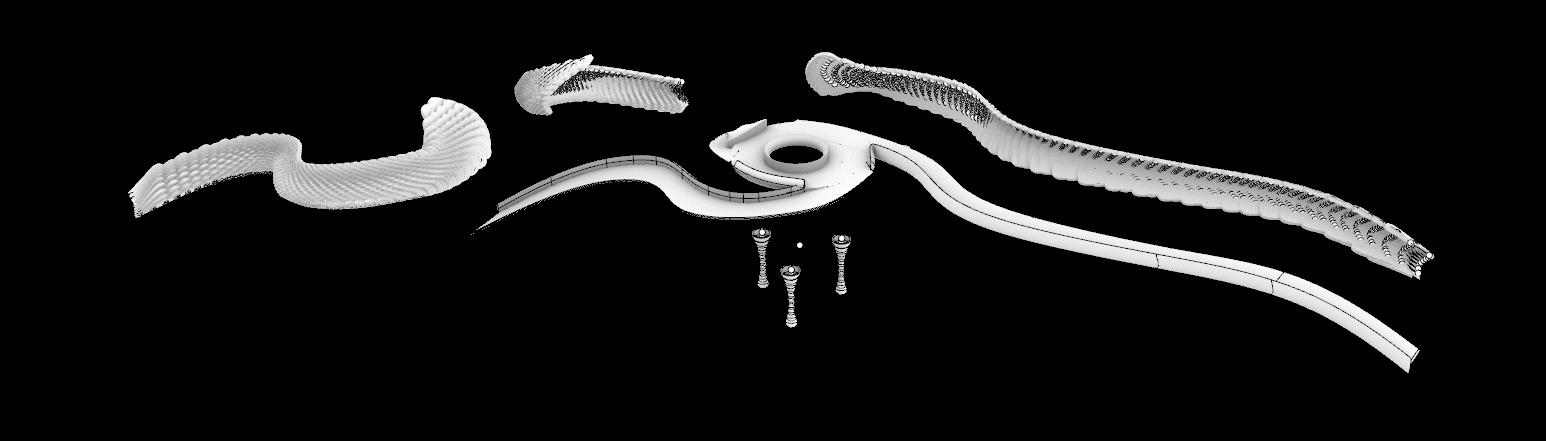
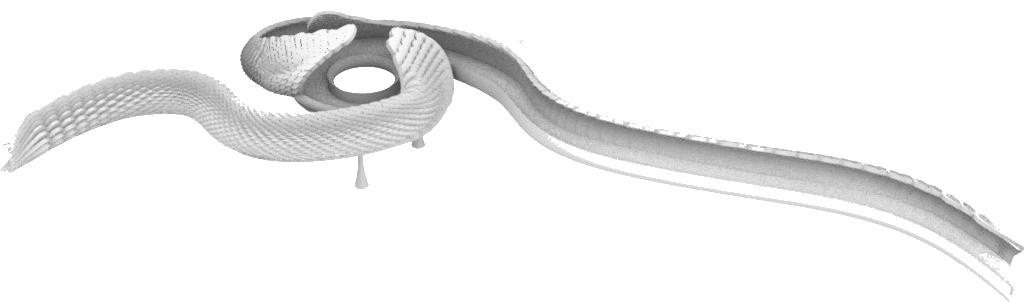
RHINO MODEL Final Design
The prmary form with the structural pillars and canopy is finalised.


There are 3 structural pillars at the base of the central “hub’ space for support. The central hub at the mid-point of the structure has a circular cut out at its center to provide light to the space below as well as opening up to a view of pavilion projects that can be exhibited below. 3 walkways stem off from the mid-point, each directed towards the 3 different studios, which also function as ramps. The design is finished off with a, open canopy which is runs along each walkway before reaching the other walkways.


F127452 Birds-eye Top-View Perspective 2 Perspective 3 Perspective 1
PARAMETRIC DESIGN VARIATIONS
Variation 1 - Feather Dilation:


This first variation shows how the parametric geometric ‘feathers’ of the canopy can be altered by changing their angularity using the radians tool and changing the value. The greater the value, the angle of the invidual ‘feathers’ increase by rotating along an axis at the length of the structure. This variation could be used to alter the amount of light that enters the space by creating openings.

Before:
Variation 2 - Feather Shape:
Before:
After:
After:
This variation shows the creative alterations that can be made to the parmetric design of the canopy. Using the geometry tool and rhino, you are able to select different geometries that can be used to replace the original ‘feather’ design, that is then replicated along the canopy. Below are 3 new variations that were drawn on rhino then applied through grasshopper to the canopy.
Original:
Variation 2:
Variation 3 - Pillar Radius:


This final variation looks at the support pillars of the structure below the central ‘hub’ space. By using the range and graph tools, the range in radius along the height of the pillar can be adjusted to range between being linear, more concave or convex which can affect the space below the hub and the structures stability.
Before:
Before:
After:
Variation 1:
Variation 3:
After:
F127452 Grasshopper
DIGITAL FABRICATION
Stages of Digital Fabrication:
1)
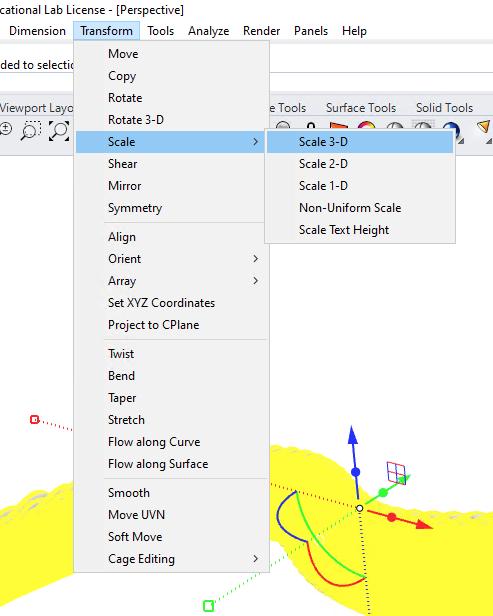
To begin with, I deconstructed the final model by separating the different elements of the model to be 3D printed individually.
The next stage was to rescale the individual elements so that they would be a small enough size to be 3D printed.
A realistic 3D printed model of this design would be at 1:100.
Before sending the individual elements to the 3D printer, the file type must be switched to a STL, so it can be compatible to be opened by Ultimaker Cura s3D printing software.
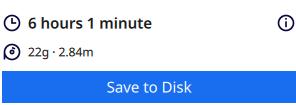
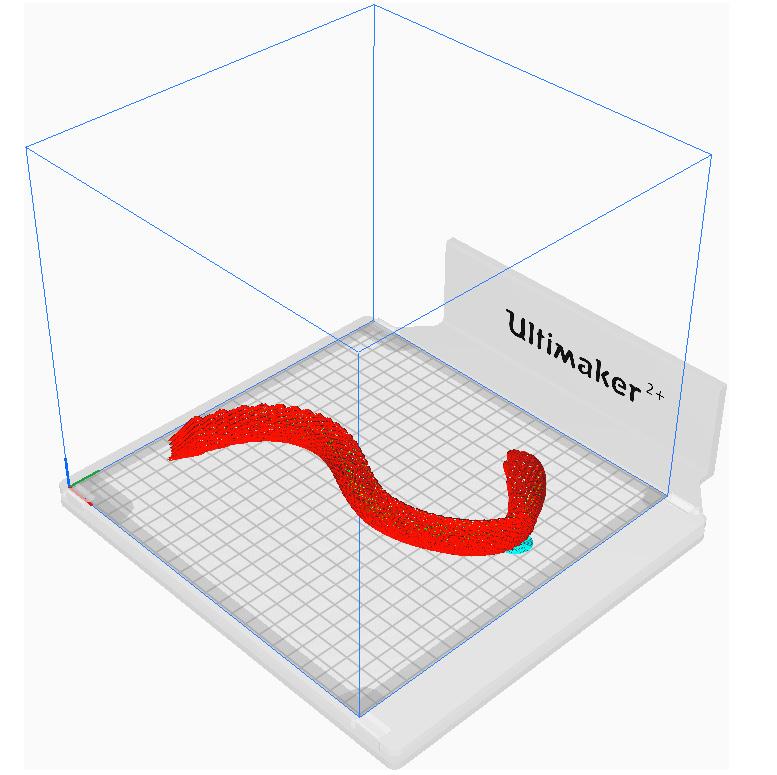
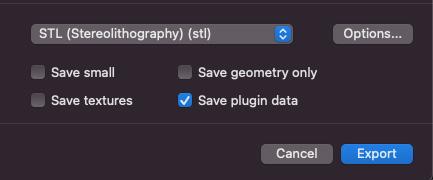
On the software Ultimaker Cura, the STL file can be opened up to preview its 3D printing process.
Once the model has appeared on the software, it is then Sliced.
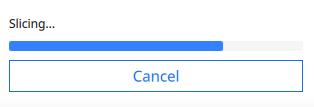
The printing time is the provided for the 3D model.
Then it is exported as a .gcode file to the 3D printer.

Once each of the elements have completed printing, they can be assembled together by hand using glue.
2) Re-scaling:
3) Converting File:
4) 3D Printing:
5) Assembling Model:
Deconstructing Model:
